The Best 10-Minute Easy Vegan Gravy Recipe: Rich, Gluten-Free & Delicious!
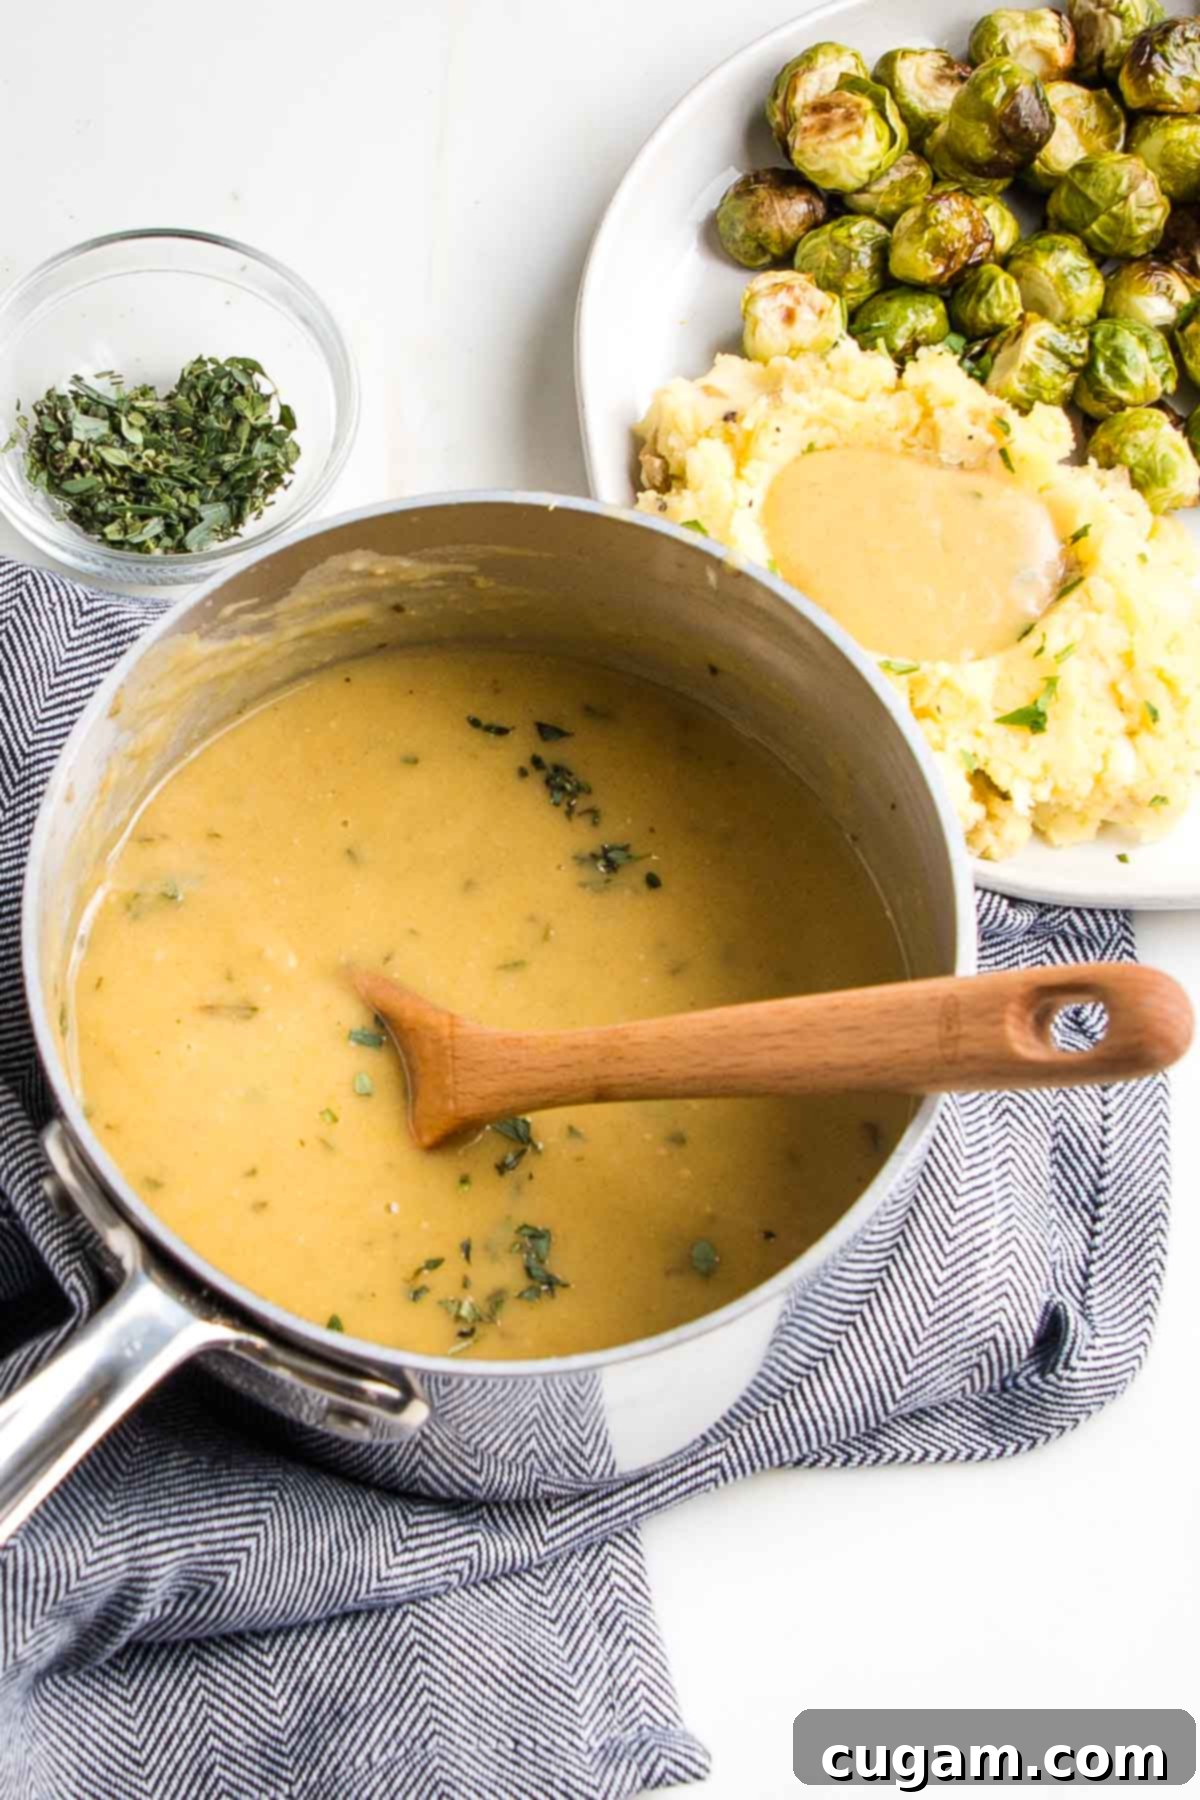
Get ready to elevate your meals with this incredibly delicious and **easy vegan gravy recipe**, ready in just **10 minutes**! You’re going to absolutely adore the vibrant golden hue and the deep, satisfying umami flavor of this gravy. It’s so good, it will undoubtedly become your new “go-to” sauce for every occasion. I’ve been perfecting and making this simple vegan gravy for years, and it consistently receives rave reviews—even from the most dedicated meat-eaters at my table.
[feast_advanced_jump_to]
Yes, this vegan and gluten-free gravy offers a healthier alternative to traditional Thanksgiving gravy, but without sacrificing any flavor. In fact, many (including every single guest who has ever had it!) tell me it’s quite simply **THE BEST GRAVY EVER!** It delivers all the rich taste and smooth texture you’d expect from a traditional turkey gravy, but it’s entirely plant-based and made without any animal products. This means it’s suitable for a wider range of dietary needs and preferences, making it a crowd-pleaser for everyone at your table.
Why confine such a spectacular gravy to just one holiday a year? I prepare this easy vegan gravy throughout the year, not just for holiday feasts. My husband absolutely loves it generously spooned over creamy vegan mashed potatoes, paired with savory vegan meatballs and fluffy homemade vegan dinner rolls (making an irresistible “biscuits and gravy” style meal). It’s also fantastic drizzled over perfectly roasted broccoli, or as a decadent addition to a whole roasted herb-rubbed cauliflower. The beauty of this recipe lies in its accessible ingredients, which are always readily available, ensuring consistently delicious results every time.
Don’t save something so incredibly delicious for just one day a year! This gravy is too good not to enjoy regularly, transforming everyday dishes into gourmet experiences.
Why You’ll Fall in Love with This Vegan Gravy Recipe

- Effortlessly Easy: Seriously, this recipe only requires about **10 minutes** of your time and just 9 simple ingredients (including salt and pepper). There’s no complicated technique or obscure ingredients involved, making it perfect for novice cooks and seasoned chefs alike.
- Incredibly Delicious: Prepare for a flavor explosion! This gravy is super tasty and appeals to almost everyone, regardless of their dietary preferences. Its rich, savory profile makes it versatile enough to complement a wide array of dishes, from vegetables to main courses.
- No Special Skills or Tools Needed: Forget about fancy kitchen gadgets. All you need is a small saucepan and a good whisk. This recipe is designed for maximum flavor with minimal fuss.
- Excellent for Meal Prep & Freezer Friendly: Planning for a big holiday like Thanksgiving? This gravy is your secret weapon! You can easily prepare it in advance and freeze it, saving you precious time and stress on the big day. It reheats beautifully, retaining its rich flavor and smooth consistency.
- No Turkey Required: Unlike traditional gravies that rely on turkey drippings, this vegan version can be made anytime, anywhere. You don’t need to wait for a turkey to roast in the oven to enjoy its comforting taste. Make it whenever it suits your schedule!
- Rich Umami Flavor: This gravy delivers a deeply satisfying umami punch that will keep you coming back for more. It’s the kind of complex flavor that makes you wonder if there’s a secret ingredient, but it’s just carefully balanced plant-based goodness.
- The Miso Difference: While many vegan gravy recipes use liquid aminos or soy sauce, I’ve found that a touch of miso paste provides an incredibly subtle, almost poultry-like flavor. This depth of flavor goes a long way in creating a truly authentic gravy experience, making it taste like it was made with real turkey broth, but without any animal products. It’s the secret weapon for that irresistible savory kick!
Essential Ingredients and Smart Substitutions for Your Vegan Gravy
Crafting the perfect vegan gravy starts with a few key ingredients. Here’s what you’ll need and some helpful notes on substitutions to ensure your gravy is always a success:
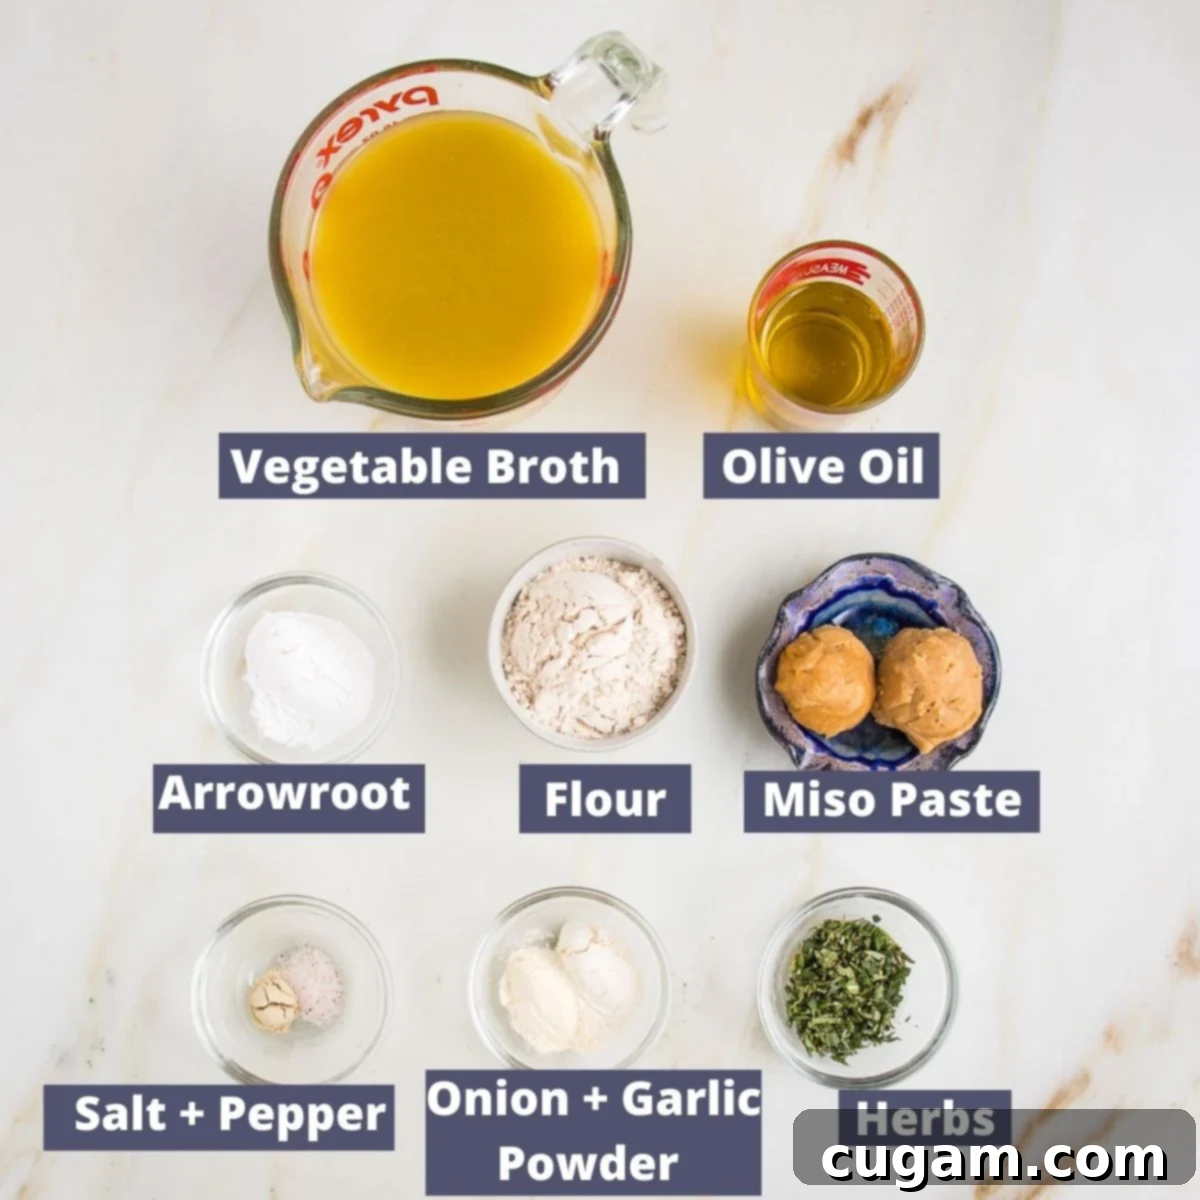
- Vegetable Broth: The foundation of our flavorful gravy! Making homemade vegan stock is always my top recommendation, as it allows you to control the sodium content and ingredients precisely. If time is a factor, opt for a high-quality store-bought vegetable broth. Look for brands with minimal added salt, no highly processed vegetable oils, and a rich, natural vegetable flavor. A good broth makes all the difference in the final taste.
- Olive Oil: While you can technically make this gravy using only vegetable broth for a fat-free version, I highly recommend including a small amount of olive oil. It significantly enhances the creaminess, richness, and overall texture of the gravy, giving it a more luxurious mouthfeel. You can use any neutral-flavored oil if olive oil isn’t preferred, like avocado oil.
- Flour: This recipe is incredibly versatile when it comes to flour. For a truly gluten-free gravy, I used King Arthur Measure for Measure Gluten-free Flour, which works perfectly. However, any all-purpose flour will work beautifully, including whole wheat flour, spelt flour, or even oat flour (which I’ve successfully tested). Feel free to use what you have on hand and what best suits your dietary needs. The key is to cook it down to remove the raw flour taste.
- Arrowroot Powder: Traditionally, gravies often use cornstarch as a thickener. My preference, however, is arrowroot powder. It’s derived from a root vegetable through a gentle extraction process that avoids high heat or harsh chemicals, and it’s naturally a non-GMO crop. Arrowroot is grain-free, generally easier to digest, and adds a lovely silky texture to the gravy. You can usually find it in most grocery stores in the baking or spice aisle, often near where flours are sold. It also contributes a bit of fiber. If you can’t find arrowroot, cornstarch can be used as a 1:1 substitute, but arrowroot yields a slightly clearer and glossier finish.
- Miso Paste: This is my not-so-secret ingredient for adding incredible depth of flavor and that elusive umami richness to vegan dishes that typically call for meat products. It’s absolutely superb in recipes like my vegan yellow split pea soup! I usually opt for a mellow light miso, as it offers a more subtle flavor that doesn’t overpower the other ingredients. If you avoid soy, don’t worry—you can easily find excellent miso pastes made from fermented rice or chickpeas, ensuring everyone can enjoy this fantastic gravy.
- Onion and Garlic Powder: These pantry staples provide a concentrated burst of savory flavor that’s essential for a rich gravy. **Crucially, make sure you use onion powder and garlic powder, not onion salt or garlic salt.** Using salted versions will significantly alter the seasoning, potentially making your gravy too salty. If you only have fresh garlic or onion, you can sauté a very small amount (finely minced) with the olive oil before adding the flour, but the powders provide a smoother texture and consistent flavor.
- Fresh Herbs: A blend of fresh herbs is vital for that authentic, aromatic gravy taste. My preferred combination includes parsley, sage, rosemary, and thyme, which together create a classic “poultry seasoning” flavor profile. If fresh herbs aren’t available, you can substitute with 1 teaspoon of dried mixed herbs or a high-quality poultry seasoning blend. Finely chop fresh herbs to ensure they integrate smoothly into the gravy. Growing these herbs in a sunny window or garden can provide a year-round supply for fresh, vibrant flavor.
Step-by-Step Guide: How to Make the Perfect Vegan Gravy
Creating this rich and flavorful vegan gravy is surprisingly simple. Follow these steps for a smooth, lump-free, and incredibly delicious result:
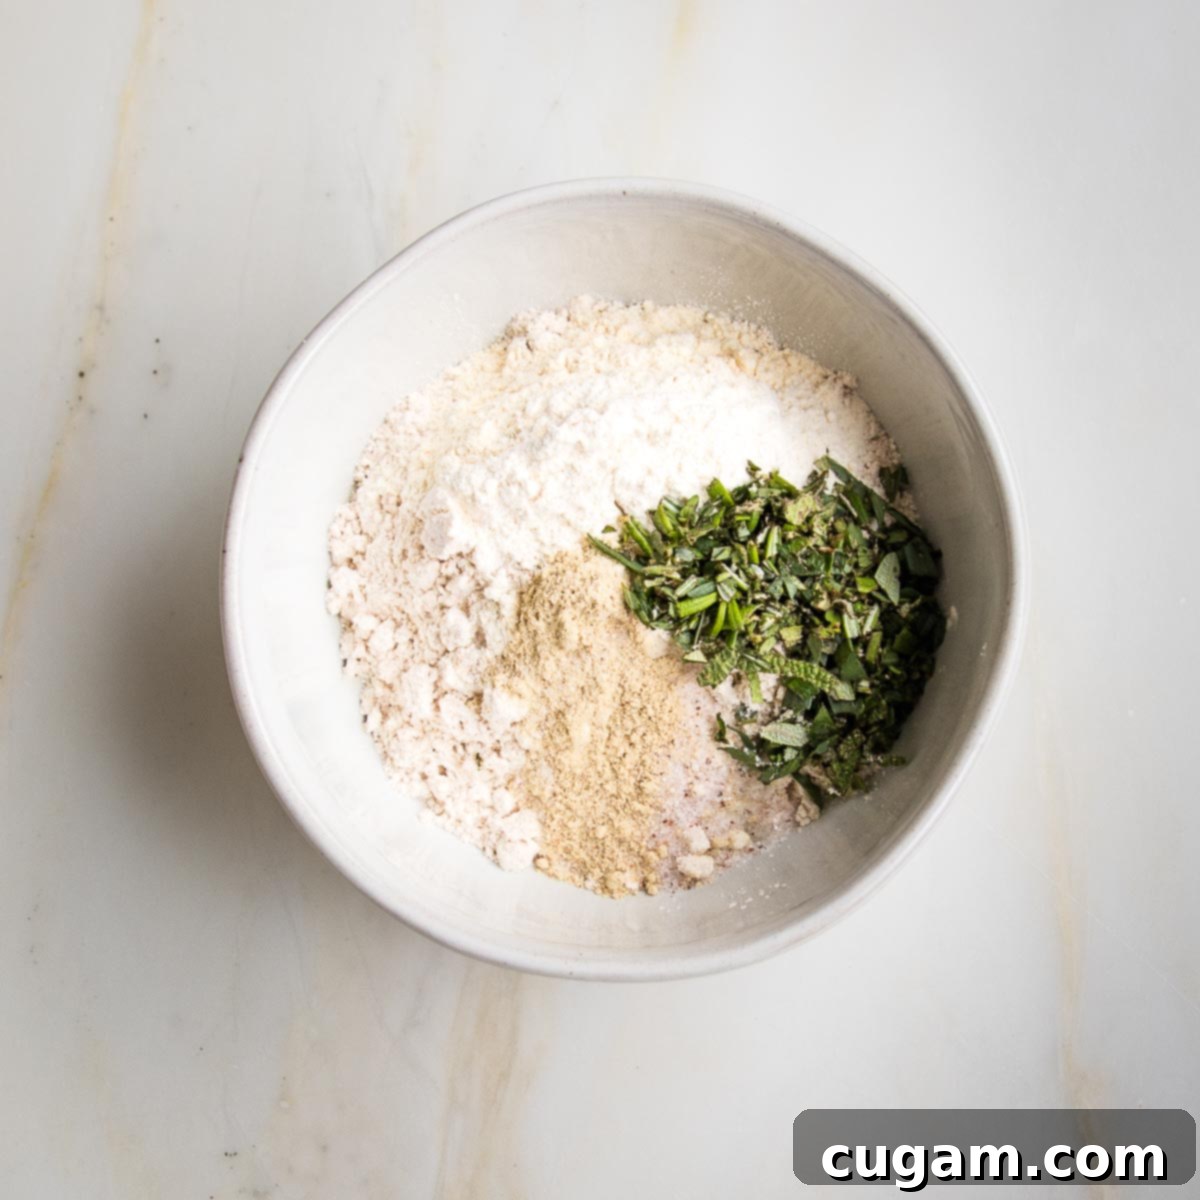
Step 1: Prepare Your Dry Ingredients. In a small bowl, combine your flour (gluten-free or all-purpose), onion powder, garlic powder, sea salt, white pepper, and the finely chopped fresh herbs. Whisk these dry ingredients together thoroughly. This ensures that all the flavorings are evenly distributed and prevents clumps when you add them to the oil.
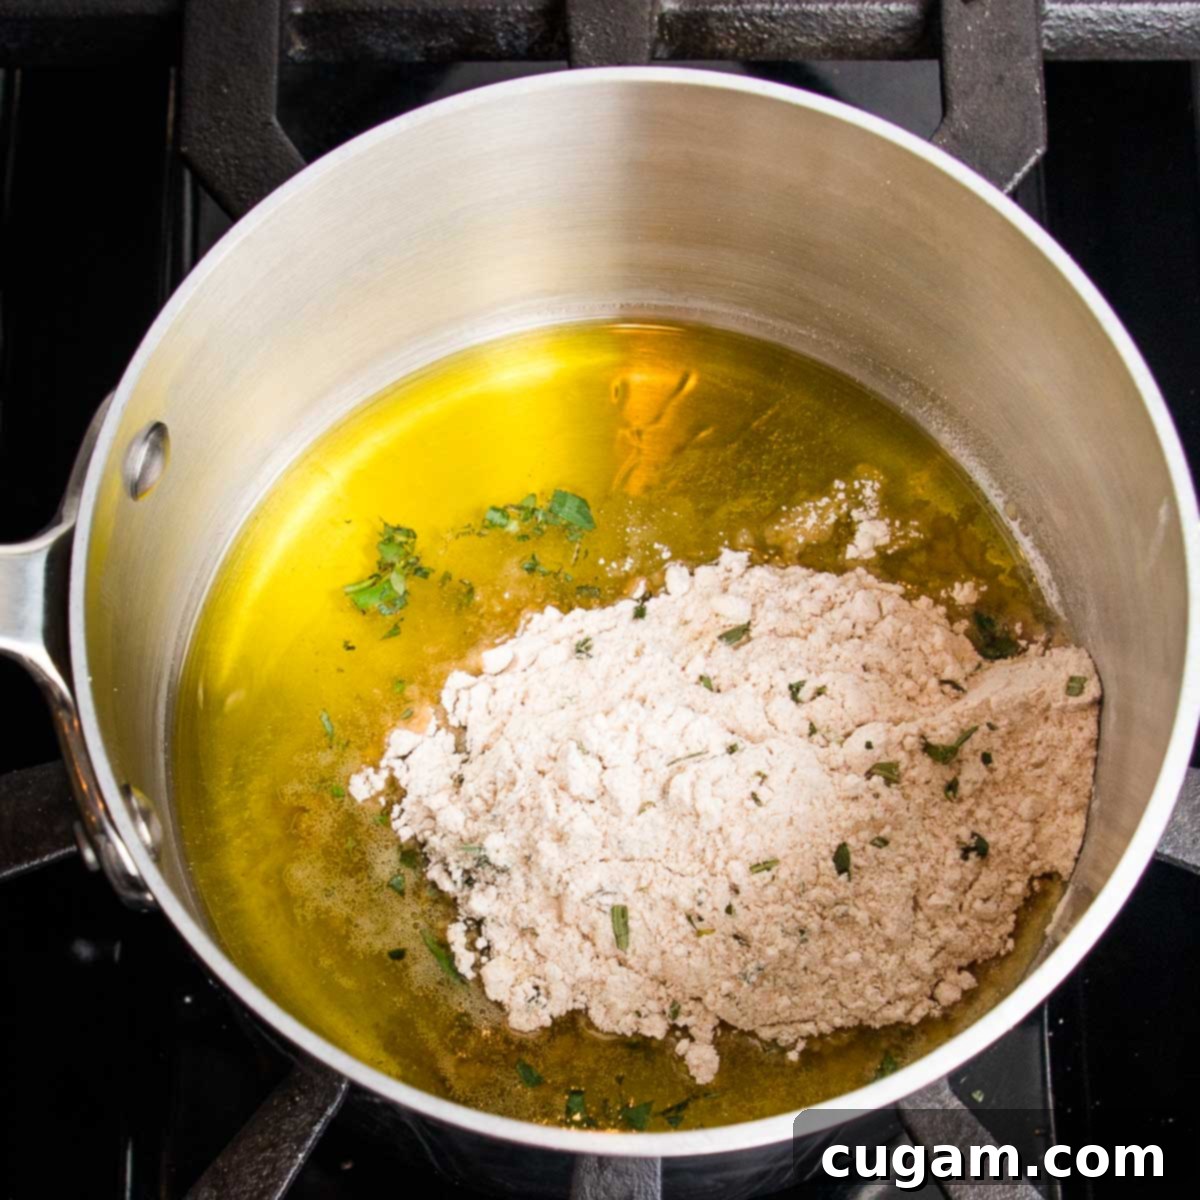
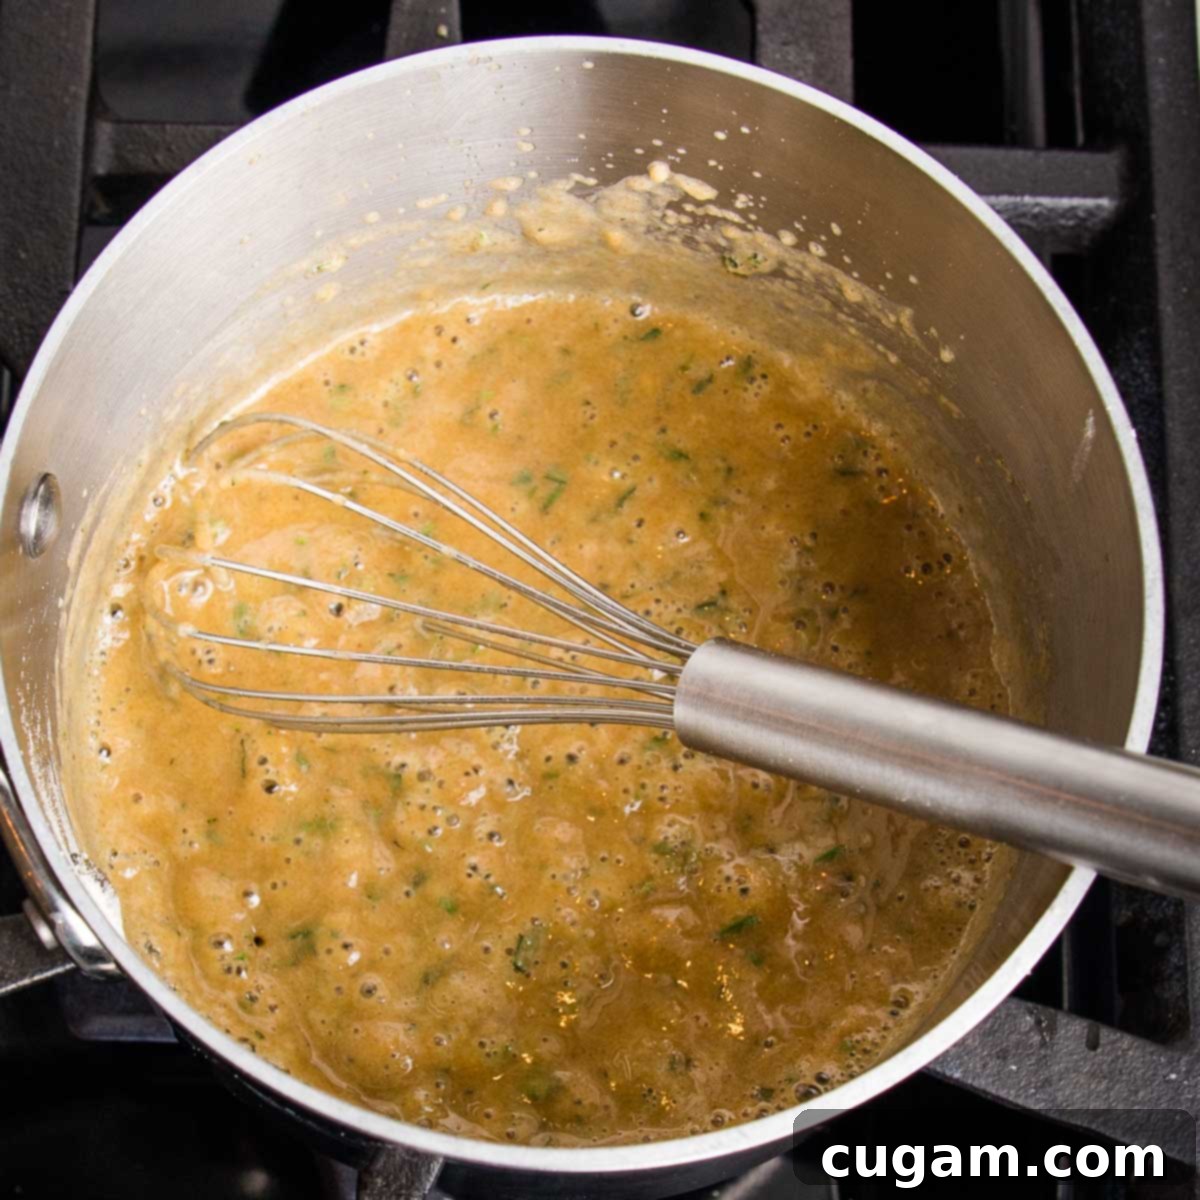
Step 2: Create the Roux. Heat the olive oil in a small saucepan over medium heat. Once shimmering (but not smoking), gradually whisk in your prepared flour mixture. Continue whisking constantly as the mixture transforms into a thick, golden paste—this is your roux! It’s crucial to keep whisking for 1-2 minutes to cook off the raw flour taste and develop a nutty aroma. This step is essential for both flavor and preventing a pasty texture in your final gravy.
What is a roux? A roux is a mixture of fat (like oil or butter) and flour cooked together, forming the base that thickens sauces and gravies. It’s fundamental for achieving a smooth consistency.
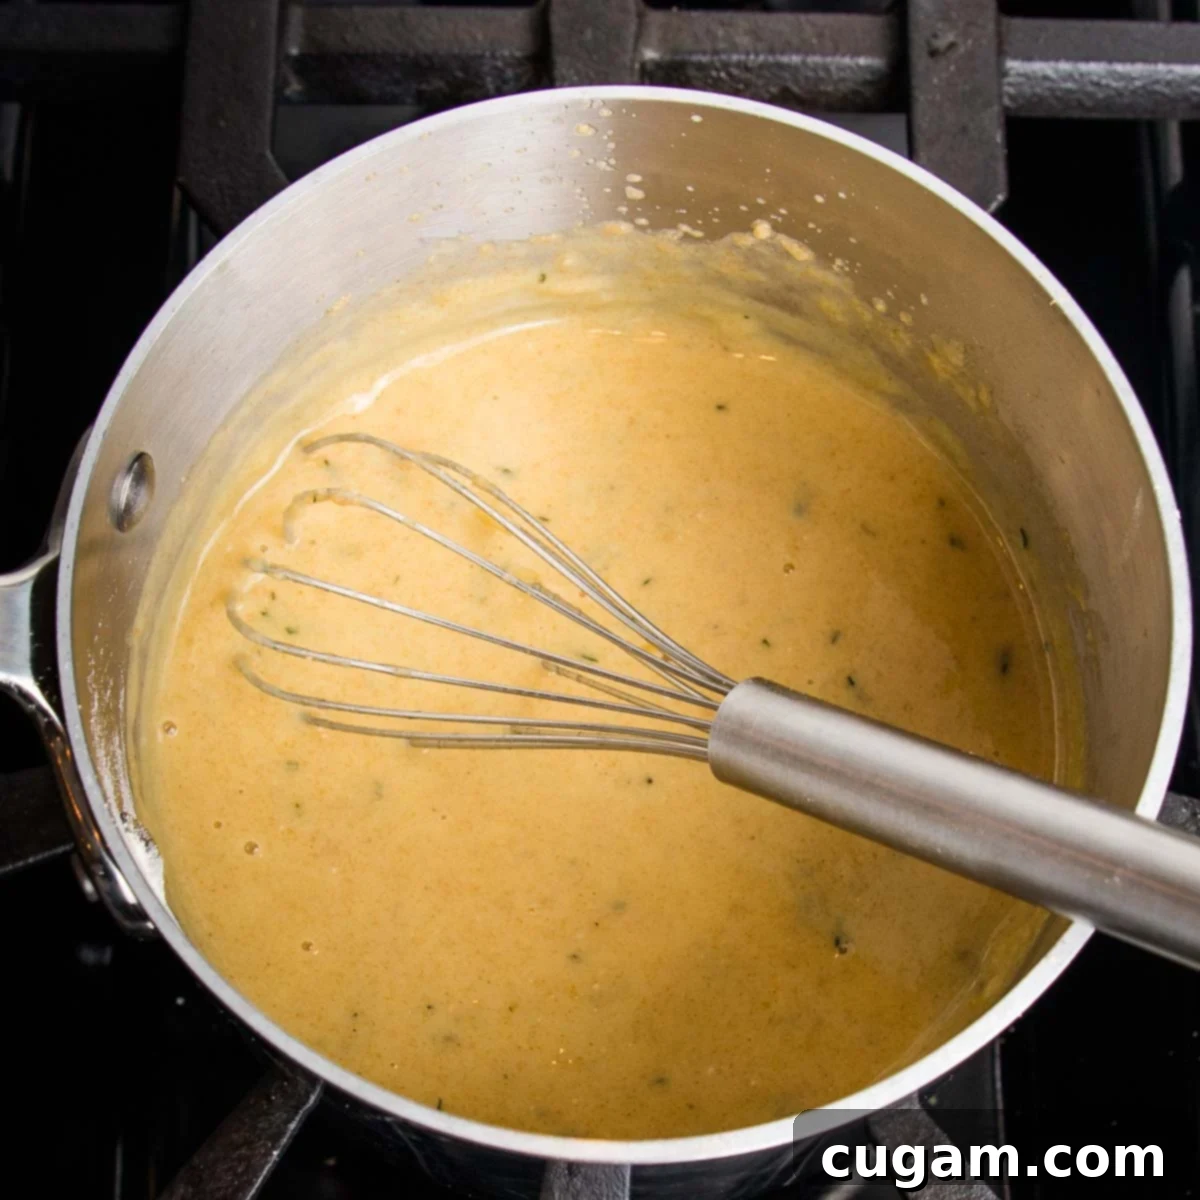
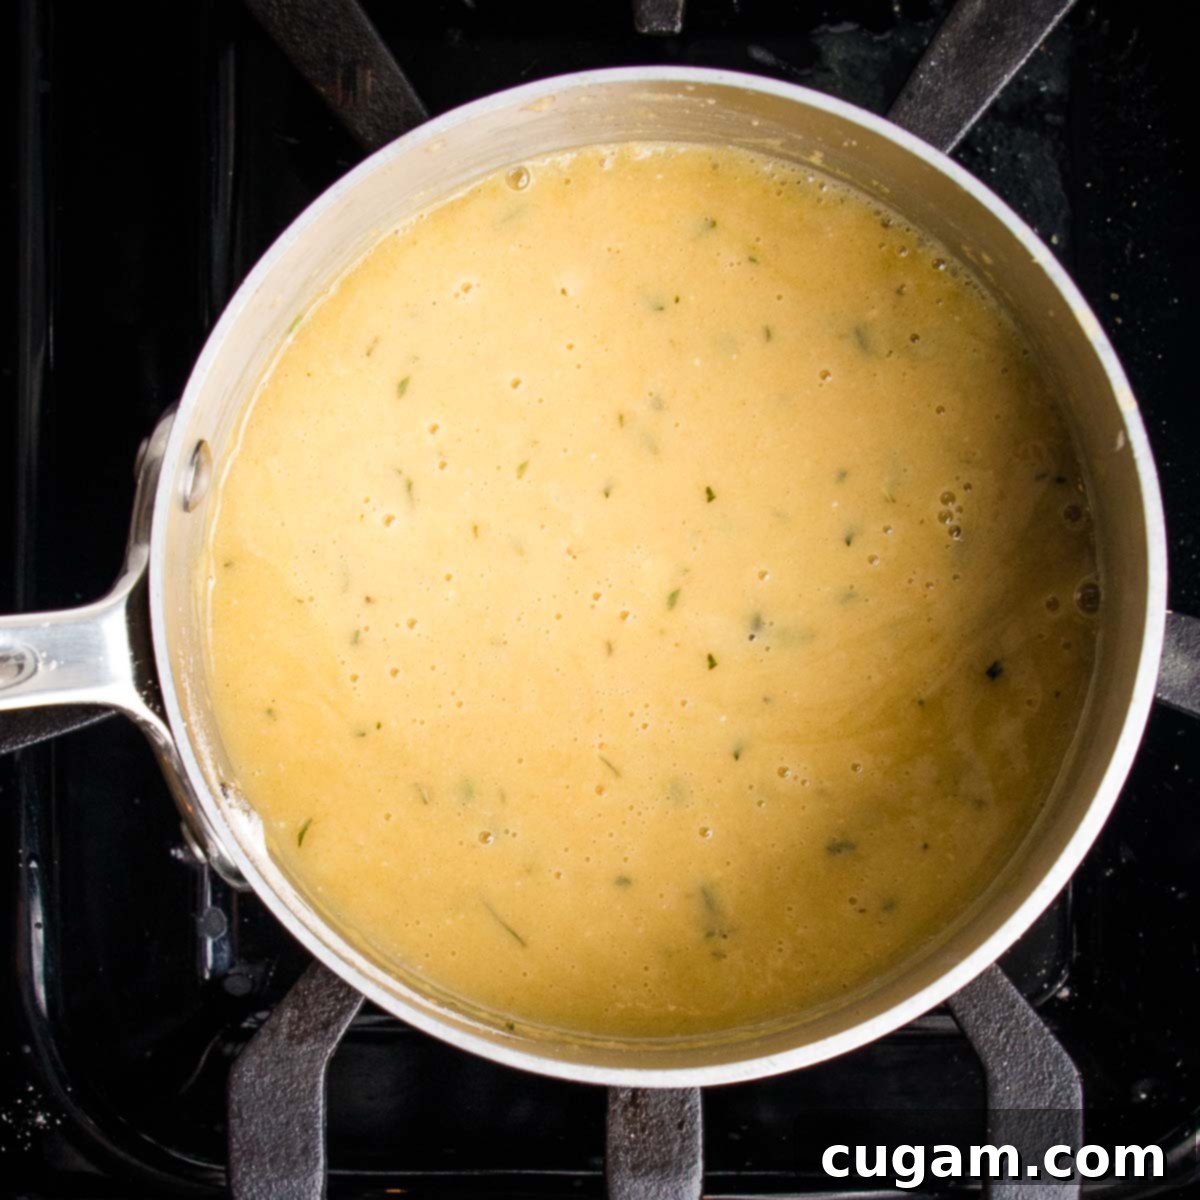
Step 3: Gradually Add Vegetable Broth. Reduce the heat to medium-low. Begin adding the vegetable broth, about ½ cup at a time, to the roux. After each addition, whisk continuously and vigorously until the liquid is fully incorporated and the gravy is smooth and lump-free. Patience here is key! Slowly adding the broth and constant whisking are your best defenses against lumps.
Step 4: Incorporate Miso and Arrowroot. As you approach the final ½ cup of vegetable broth, do not add it directly. Instead, in a separate small bowl or measuring cup, dilute the miso paste and arrowroot powder into that last ½ cup of broth. Whisk until the miso is fully dissolved and the arrowroot forms a smooth slurry. This pre-dilution is essential to prevent clumps of miso or arrowroot in your gravy. Do not skip this miso step; it’s what gives the gravy its incredible depth and savory umami.
Step 5: Thicken and Finish. Pour the miso-arrowroot mixture into the saucepan with the gravy. Continue to whisk for another 2 minutes over low heat. As it gently simmers, you will notice the gravy thickening beautifully. Once it reaches your desired consistency—smooth, golden, and glossy—remove it from the heat. Taste and adjust seasoning with additional salt or pepper if needed. Your perfect vegan gravy is now ready to serve!
Debra’s Expert Pro Tips for the Ultimate Vegan Gravy

- Generous Portions: A good rule of thumb is to plan for at least ⅓ cup of gravy per person, and then, trust me, add a few extra servings! This gravy is so delicious, everyone will want seconds (and thirds!).
- Everyday Indulgence: Don’t reserve this magnificent gravy solely for special occasions like Thanksgiving dinner. A fantastic, easy gravy recipe is a simple way to transform ordinary weeknight meals into something truly special and comforting.
- The Secret to Lump-Free Gravy: Consistent and continuous whisking is the absolute key to achieving a perfectly smooth, lump-free gravy. Pay extra attention during the initial roux creation, ensuring it’s silky, and then slowly add the stock, whisking until uniform consistency is achieved after each and every addition.
- Silky Smooth Finish: If you desire an exceptionally smooth gravy, consider using an immersion blender directly in the pot after it’s cooked. A few quick pulses will eliminate any tiny residual lumps, resulting in a velvety texture.
- Temperature Control: Always maintain the heat on medium-low as you whisk in the vegetable stock. If you find it difficult to keep the consistency uniform or notice it thickening too quickly, reduce the heat further to give yourself more time to whisk thoroughly.
- Slurry Power: Utilize the last addition of vegetable stock to create a smooth slurry with the arrowroot powder and to fully dissolve the miso paste. This crucial step prevents clumps of thickener and ensures the miso’s flavor is evenly distributed *before* it’s added to the main gravy mixture.
- Make Ahead Mastery: For holiday meals like Thanksgiving, save yourself the last-minute rush! You can prepare this gravy fresh while other dishes are in the oven and then simply keep it covered in the pot over very low heat to gently reheat before serving. Even better, make it a day or two in advance and store it in the refrigerator, or prepare it well ahead of time and freeze it.
- Double the Delight: This recipe is perfect for doubling! You’ll thank yourself later when you have extra on hand, as leftovers (and there will be leftovers, if you don’t make enough!) always taste best when generously smothered in this rich vegan gravy.
- Share the Love: Last year, I gifted jars of this healthy vegan gravy to friends who weren’t hosting Thanksgiving, and they reported it was the perfect sauce to elevate all their holiday leftovers. Remember, sharing delicious food is a wonderful way to show you care!

Meal Prep and Storage for Your Vegan Gravy
This easy vegan gravy is not only simple to make but also incredibly convenient for meal prep and storage, ensuring you can enjoy its deliciousness whenever a craving strikes.
- Serving Suggestions: Gravy is always best served hot! If you don’t have a traditional gravy boat, a small pitcher or a warm serving dish works perfectly. This versatile gravy pairs wonderfully with a myriad of dishes, including roasted or steamed vegetables, creamy mashed potatoes, fluffy vegan biscuits, rice, polenta, or even pasta.
- Prep Ahead: One of the best features of this recipe is its make-ahead potential. You can prepare the entire recipe, then simply turn off the heat, cover the pot, and let it sit on the stove for up to 2 hours if you plan to serve it soon. For longer storage, allow it to cool completely before refrigerating.
- Storage: Once the gravy has cooled to room temperature, transfer it to an airtight container. Wide-mouth mason jars are an excellent choice. Stored properly, the gravy will remain fresh and delicious in the refrigerator for up to a week.
- Freezing: For longer storage, this gravy freezes beautifully! It’s an extra bonus for holiday meal planning. Ensure the gravy is completely cooled before freezing. If using glass jars, remember to leave 1-2 inches of headspace to allow for expansion, preventing the glass from cracking. Alternatively, you can use silicone molds to freeze the gravy in convenient 1-cup portions. Once frozen solid, transfer these portions to freezer-safe zip-top bags. Frozen gravy can be placed directly into a pot on the stovetop for reheating. It will maintain its quality in the freezer for up to 3 months.
- Reheating: Reheat refrigerated or frozen gravy gently on the stovetop over low heat. It’s normal for the gravy to thicken considerably when refrigerated. As it heats up, it will gradually thin out to its original consistency. If, after heating, it’s still thicker than you prefer, simply whisk in 1-2 tablespoons of additional vegetable broth until your desired thickness is achieved. You can also smother your leftovers with gravy and then reheat everything together in the oven for a quick and satisfying meal.
More Healthy & Delicious Plant-Based Recipes for Your Holiday Table
Looking for more amazing vegan dishes to complete your holiday feast or add to your regular rotation? Explore these other healthy and flavorful plant-based recipes:
- The Best Vegan Dinner Rolls
- Gluten-free Cornbread Stuffing
- Easy Recipe for Green Beans with Almonds
- Cranberry Chia Jam Recipe (no refined sugar)
Did you know that commenting on and rating recipes is one of the best ways to support your favorite food bloggers? If you made this incredible easy vegan gravy, please consider leaving a five-star rating below and a comment sharing your experience! Also, we’d love to see your culinary creations on Instagram. Don’t forget to tag me @dkhealthcoach and use the hashtag #debraklein so I can admire your delicious results!
📖 Recipe

Vegan Gravy Recipe
Rate this Recipe
Pin Recipe
Equipment
-
Balloon whisk
-
Glass Measuring Cups
-
Measuring Cups and Spoons
-
3 quart pot
Ingredients
- ¼ cup olive oil
- ¼ cup + 1 Tablespoon flour*
- 1 Tablespoon fresh herbs*
- 1 teaspoon onion powder
- 1 teaspoon garlic powder
- ¼ teaspoon white pepper
- ¼ teaspoon sea salt
- 2 cups Vegetable Broth
- 2 Tablespoons light miso paste
- 1 Tablespoon arrowroot powder
Instructions
-
In a small bowl, stir together flour, fresh herbs, onion powder, garlic powder, pepper and sea salt.
-
MAKE A ROUX: Heat olive oil in a saucepan. Whisk in the flour mixture until a thick paste forms. Make sure there are no lumps and then let it cook for 1-2 minutes (over low heat) to remove the raw flour taste. It will be super pasty.
-
Slowly add veggie stock ½ cup at a time into roux, whisking for uniform consistency after each addition.
-
When you’re down to the last ½ cup stock, whisk the miso paste and 1 Tablespoon arrowroot powder to the ½ cup stock before adding into the saucepan of gravy. Continue to whisk until everything is well incorporated. Allow gravy to cook over low heat for another 2 minutes as it thickens.
-
Cool completely before storing in glass jar in the fridge for up to a week or freezer for 3 months*
-
Reheat gently on the stove. Gravy will thicken up in the fridge, and will thin out as it heats back up. Add additional broth, 1-2 Tablespoons at time, if needed to result in desired thickness. Whisk occasionally as gravy heats to prevent lumps.
Notes
Fresh herbs: If you don’t have fresh herbs, use 1 teaspoon dried herbs. It is easy to find a combination of potted rosemary, thyme and sage in the grocery stores just before Thanksgiving. You can grow them in a sunny window all year round.
Veggie broth: I used homemade vegetable broth without any added salt. If you use broth from a box, it will be already be salted. So, omit the salt from the recipe and taste for seasoning before adding any.
Freezing: Make sure gravy is completely cool before storing in glass jars. Or, pour cooled gravy intosilicone molds to later transfer to zip top, freezer grade bags. Gravy will expand a bit when frozen, so leave space in the jar, so it doesn’t crack.
Nutrition
Note
The nutrition calculations were done using online tools. To obtain the most accurate representation of the nutritional information in any given recipe, you should calculate the nutritional information with the actual ingredients you used. You are ultimately responsible for ensuring that any nutritional information is accurate, complete and useful.
