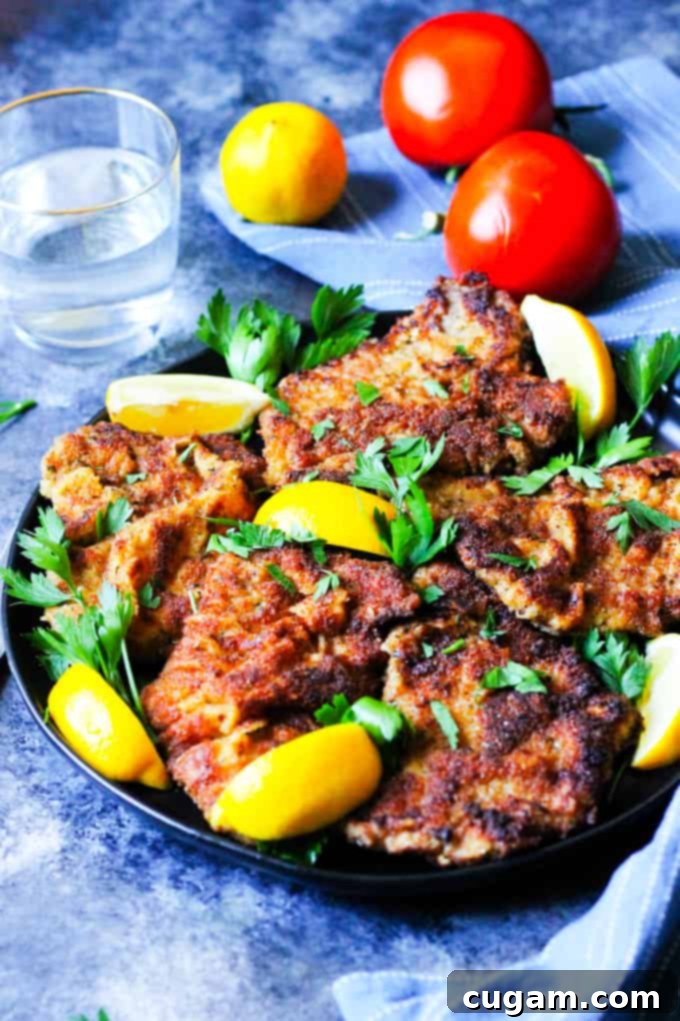
Authentic Veal Milanese: Crafting the Perfect Crispy Italian Cutlets
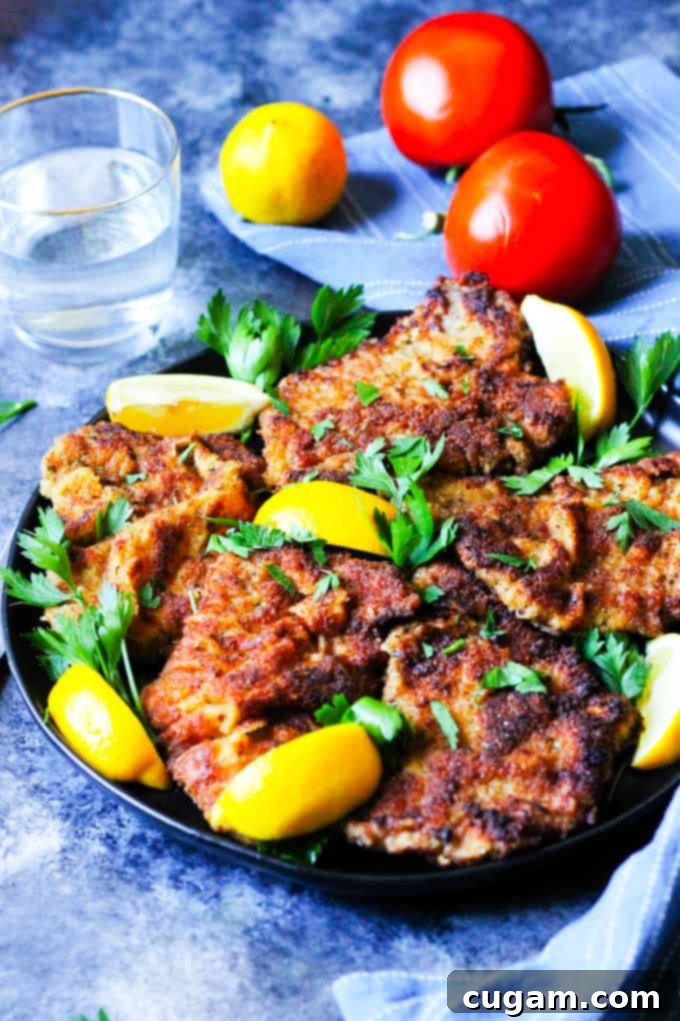
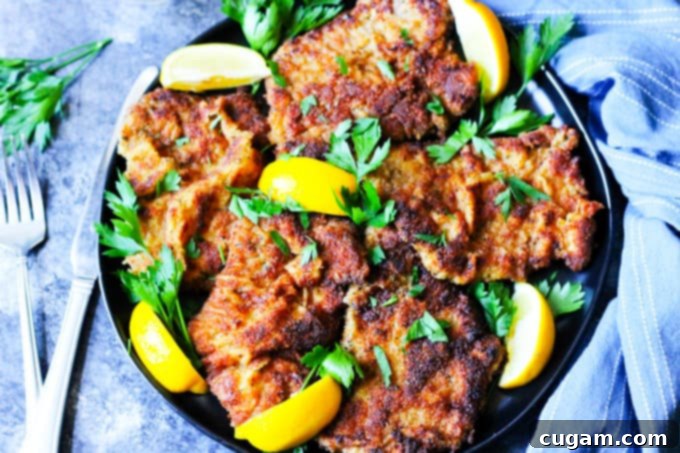
Veal Milanese, known in Italy as “Cotoletta alla Milanese,” is a true emblem of Lombard cuisine. This simple yet elegant dish features tender veal cutlets, expertly coated in a seasoned flour, egg, and breadcrumb mixture, then fried to a beautiful golden brown. While traditionally served with just a squeeze of fresh lemon, its versatility allows for an array of delightful accompaniments, from vibrant salads to hearty pasta dishes. Prepare to indulge in a classic that captures the heart of Italian culinary tradition.
There’s something uniquely satisfying about preparing and savoring Veal Milanese. I particularly enjoy serving these crispy veal cutlets with my favorite Roasted Fennel with Tomatoes. This combination creates a truly authentic Italian dining experience that is both simple and deeply flavorful.
This post may contain affiliate links. I get commissions for purchases made through the affiliate links. You can read my disclosure policy HERE.
What is Veal Milanese? Unveiling Milan’s Culinary Gem
At its core, Veal Milanese is an iconic Italian breaded veal cutlet, revered as one of Milan’s signature dishes. Its origins trace back to the 12th century, deeply rooted in the culinary traditions of Lombardy. The dish, locally known as Cotoletta alla Milanese, exemplifies the elegance of Italian comfort food, transforming humble ingredients into a masterpiece of texture and flavor.
The concept of breading and frying meat is not exclusive to Italy; Italian Veal Milanese shares striking similarities with Austrian Wiener Schnitzel. While historians often debate which dish came first or influenced the other, the fundamental technique of coating a thin cut of meat in flour, egg, and breadcrumbs before frying remains a shared culinary heritage. Rather than debating origins, it’s more enjoyable to appreciate the delicious results each tradition offers.
Historically, this cooking method was often applied to bone-in veal chops, known as cotolette, which offered a rich, deeply flavored experience. However, modern culinary practices often favor thin, boneless veal cutlets, or scaloppine, for their quicker cooking time and ease of preparation. This recipe embraces the thin-cut approach, making it accessible for home cooks while still delivering that quintessential crispy, golden-brown crust and tender, juicy veal interior.
Using thin veal cutlets simplifies the cooking process significantly, ensuring they cook through quickly and evenly. If you prefer the traditional bone-in veal chops, feel free to use them; however, remember to adjust your cooking time accordingly. Ensure the internal temperature of the veal reaches at least 145°F (63°C) for food safety, which might take longer for thicker cuts.
Why You’ll Adore This Veal Milanese Recipe
There are countless reasons why Veal Milanese has remained a beloved classic for centuries, and why this recipe will become a staple in your kitchen:
- Simple Elegance: Despite its gourmet appearance and exquisite taste, Veal Milanese is surprisingly straightforward to prepare, making it perfect for both weeknight dinners and special occasions.
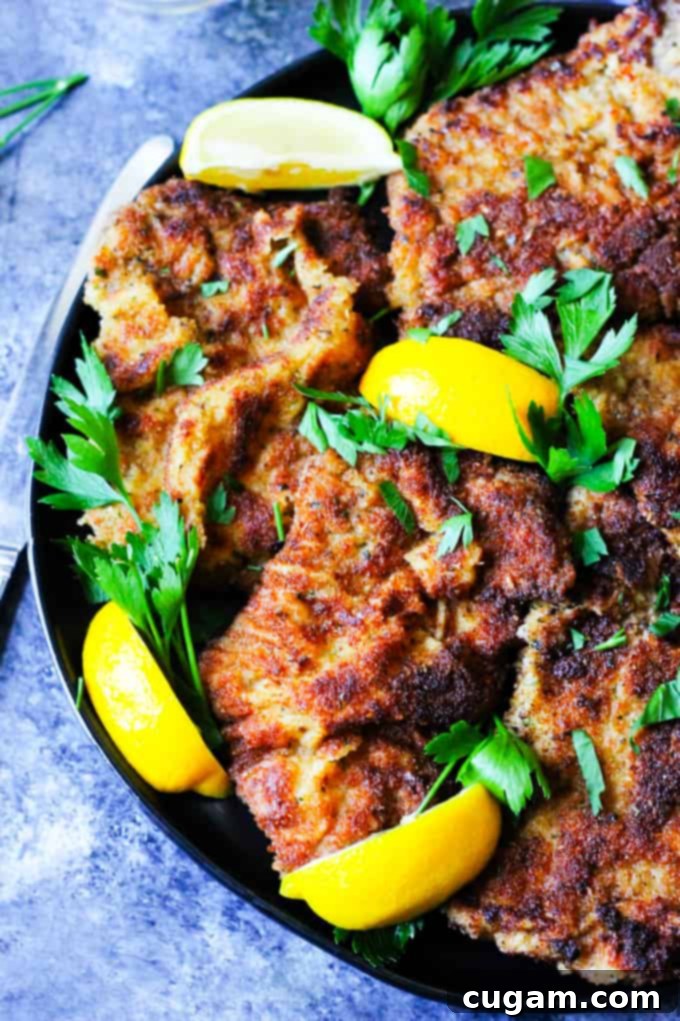
- Irresistible Texture: The hallmark of a great Milanese is its perfectly crisp, golden-brown exterior, which provides a delightful contrast to the incredibly tender and juicy veal inside.
- Versatility Personified: This dish serves as a fantastic canvas for various accompaniments. Whether you prefer a light salad, roasted vegetables, or a rich pasta, Veal Milanese adapts beautifully.
- Authentic Italian Flavors: Every bite transports you to the heart of Italy, celebrating the simplicity and quality of traditional ingredients.
- Quick to Prepare: With thin cutlets, the cooking time is minimal, making it an ideal choice when you want a delicious and impressive meal without spending hours in the kitchen.
- Family Favorite: Its appealing crunch and delicate flavor make it a hit with diners of all ages, even the pickiest eaters often find themselves asking for seconds!
Selecting the Finest Veal for Your Milanese
The quality of your veal is paramount to the success of your Veal Milanese. For this dish, we’re aiming for tenderness and a delicate flavor. Here’s what to look for and how to prepare it:
- Cut of Veal: The best cuts for Veal Milanese are typically veal loin or top round. These cuts are naturally tender and ideal for pounding thin. Look for veal that is pale pink in color, indicating a young, quality cut.
- Thickness: Ideally, your veal cutlets should be very thin, about ¼ inch (0.5 cm) thick. This ensures quick cooking and maximum crispiness in the final product. If your butcher can provide them already thinly sliced as “scaloppine,” that’s ideal.
- Pounding Technique: If your cutlets are thicker, you’ll need to pound them. Place each cutlet between two sheets of plastic wrap. Using the flat side of a meat mallet, gently but firmly pound the veal until it reaches the desired thinness. This not only thins the meat but also tenderizes it, ensuring an even cook and a delightful texture. Be careful not to tear the meat.
- Sourcing: Whenever possible, purchase fresh, high-quality veal from a reputable butcher. The freshness of the meat significantly impacts the final taste and texture of your Veal Milanese.
The Secret to a Perfectly Crispy Breading
Achieving that signature golden, crispy crust is crucial for authentic Veal Milanese. The three-stage breading process, when executed correctly, ensures excellent adhesion and a delightful crunch. Here’s how to master it:
- The Breading Station Setup: Prepare three shallow dishes or plates. One for flour, one for beaten eggs, and one for breadcrumbs. This organized setup streamlines the process and keeps your workspace tidy.
- Flour – The First Coat: Start by lightly dusting each seasoned veal cutlet in all-purpose flour. The flour creates a dry surface for the egg to adhere to. Shake off any excess flour gently; a thin, even coat is all you need.
- Egg Wash – The Binder: Next, dip the floured veal into the beaten eggs. Ensure the entire surface of the cutlet is thoroughly coated. The egg acts as a “glue” for the breadcrumbs. Let any excess egg drip off before moving to the next stage to avoid clumpy breading. You can lightly season the egg wash with a pinch of salt and pepper for extra flavor.
- Italian Breadcrumbs – The Crispy Finish: Finally, place the egg-coated veal into the breadcrumbs. Press the breadcrumbs firmly onto both sides of the cutlet, ensuring every part is covered. The pressure helps the breadcrumbs adhere well and creates a thicker, more uniform crust.
- Optional Enhancements: For an extra layer of flavor, consider mixing finely grated Parmesan cheese, fresh chopped parsley, or a pinch of garlic powder into your Italian breadcrumbs. This adds aromatic depth that complements the veal beautifully.
- Resting Period: After breading, it’s a good practice to let the cutlets rest for 5-10 minutes on a wire rack. This allows the breading to set, minimizing the chances of it falling off during frying.
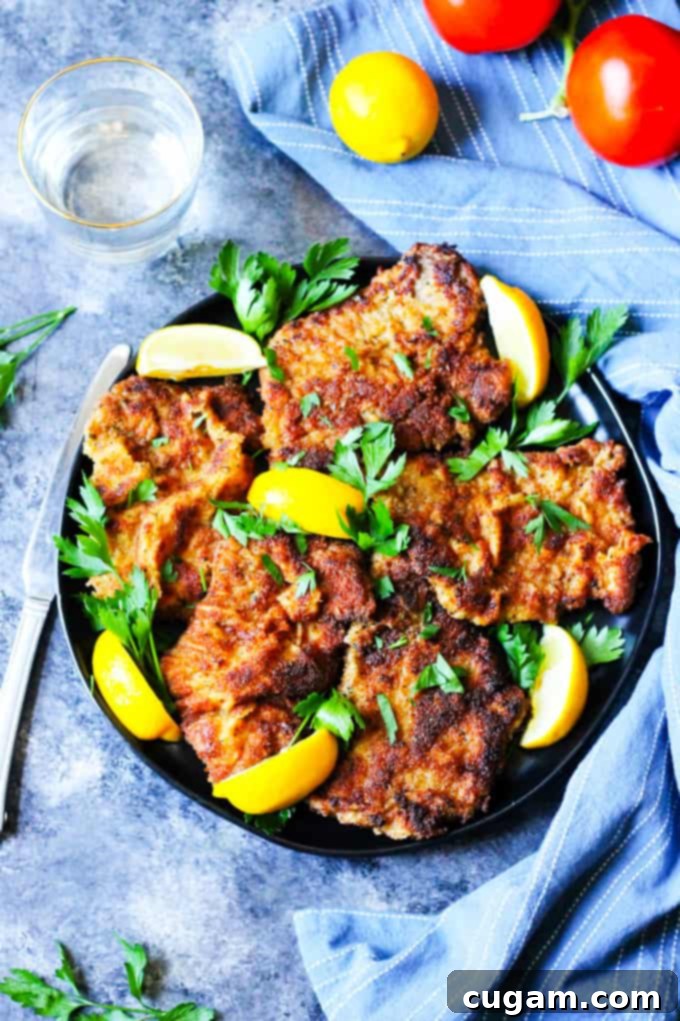
What to Serve Alongside Your Crispy Veal Milanese
Veal Milanese is wonderfully versatile, pairing beautifully with a wide array of side dishes. Here are some fantastic options to complement its rich flavor and crispy texture:
- Classic Lemon Wedges: An absolute essential! A generous squeeze of fresh lemon juice over the hot cutlets brightens the flavor, cuts through the richness of the fried veal, and adds a refreshing tang that is simply indispensable.
- Fresh Green Salad: A simple, crisp green salad provides a light and refreshing contrast. Think mixed greens with a zesty vinaigrette, or perhaps a peppery arugula salad. A good green salad like this one offers a palate cleanser.
- Arugula, Tomatoes, and Mozzarella: For a fresh and vibrant topping, arrange fresh arugula, sliced cherry tomatoes, and small pieces of fresh mozzarella over the fried cutlets. Drizzle with good quality olive oil and a splash of lemon juice for an exquisite, light meal.
- Panzanella Salad: If you’re looking for something more substantial, a rustic Panzanella salad, featuring crusty bread, fresh tomatoes, cucumbers, and basil, offers a wonderful textural and flavor contrast to the crispy veal. Try this delicious version.
- Roasted Fennel with Tomatoes: My personal favorite pairing! The incredible mix of Roasted Fennel with Tomatoes offers sweet, savory, and slightly anise-like notes that perfectly complement the delicate flavor of the veal. The tender roasted vegetables provide a softer texture against the crispy cutlet, making for a truly harmonious dish.
- Pasta Pairings: For those who love a hearty Italian meal, Veal Milanese pairs beautifully with a variety of pasta dishes:
- Spaghetti with Marinara Sauce: A classic, comforting choice that provides a tangy, savory counterpoint.
- Penne Alla Vodka: The creamy and rich vodka sauce, as seen in this recipe, adds a luxurious touch.
- Parmesan Orzo: A simple yet satisfying side, like Parmesan Spinach Orzo, is easy to prepare and delicious.
- Pesto Pasta: The fresh, herbaceous notes of a vibrant pesto pasta offer a different dimension of flavor.
Essential Ingredients for Authentic Veal Milanese
This classic Italian dish is a testament to the fact that extraordinary flavors can be created with a handful of simple, high-quality ingredients. Most of these you likely already have on hand:
- Veal Cutlets: (1 lb) The star of the show. Opt for thin-cut veal scaloppine for the best results, ensuring quick and even cooking. If using thicker cuts or bone-in chops, remember to adjust cooking times.
- All-Purpose Flour: (1 cup) Used for the initial dredge, it helps create a dry surface for the egg wash to adhere to.
- Beaten Eggs: (2 large) The essential binder for the breadcrumbs. Beat them well until the yolks and whites are fully combined.
- Italian Breadcrumbs: (1 cup) Key to the signature crispy texture and savory flavor. Using Italian-seasoned breadcrumbs adds an extra layer of herbs and spices.
- Salt & Pepper: To taste. Crucial for seasoning the veal cutlets directly before breading, enhancing their natural flavor. Freshly ground black pepper is always recommended.
- Clarified Butter or Cooking Oil: (1/2 cup) Traditionally, Veal Milanese is fried in clarified butter for its rich flavor and high smoke point. If clarified butter is unavailable or you prefer, a neutral cooking oil with a high smoke point, such as vegetable, canola, or grapeseed oil, works perfectly.
- Lemon Wedges: (1/2 lemon, quartered) Absolutely essential for serving, providing a bright, acidic counterpoint to the fried veal.
Step-by-Step Guide: How to Achieve Milanese Perfection
Creating perfect Veal Milanese is a straightforward process when you follow these steps. Precision in each stage ensures a crispy, flavorful result.
- Step 1: Prepare Your Breading Station. Set up three shallow dishes or plates. In the first, add your all-purpose flour. In the second, beat your eggs until thoroughly combined (a pinch of salt and pepper can be added here). In the third, spread out your Italian breadcrumbs. Having these ready makes the breading process smooth and efficient.
- Step 2: Season the Veal Cutlets. Lightly season both sides of your veal cutlets with salt and freshly ground black pepper. This step is crucial for infusing flavor directly into the meat before it’s breaded.
- Step 3: Bread All Your Cutlets. Begin by dredging each veal cutlet in the flour, shaking off any excess. Next, dip it into the beaten egg mixture, ensuring it’s fully coated, then allow any excess egg to drip away. Finally, press the cutlet firmly into the breadcrumbs on both sides, making sure every part is covered. Set the breaded cutlets aside on a clean plate or wire rack to allow the breading to adhere.
- Step 4: Preheat Oven to Keep Warm. Preheat your oven to a very low temperature, around 200°F (95°C). Place a wire rack over a baking sheet inside the oven. This setup will keep your cooked veal cutlets warm and crispy while you finish frying the remaining batches, preventing them from becoming soggy.
- Step 5: Heat Your Skillet. Place a heavy-bottomed skillet, preferably cast iron, over medium-high heat. Add the clarified butter or your chosen cooking oil. Allow it to heat up until shimmering and hot, typically around 375°F (190°C). You can test the temperature by dropping a small pinch of breadcrumbs into the oil; if it sizzles vigorously, it’s ready.
- Step 6: Fry in Batches. Carefully place 1-2 veal cutlets into the hot oil, ensuring you don’t overcrowd the pan. Overcrowding will lower the oil’s temperature, leading to less crispy, potentially soggy cutlets. Fry each side for about 3-4 minutes, or until golden brown and cooked through. The exact time will depend on the thickness of your cutlets.
- Step 7: Remove and Keep Warm. Once a cutlet is beautifully golden and cooked, remove it from the skillet and place it on the prepared wire rack in the warm oven. This allows any excess oil to drain off while keeping the cutlet hot and maintaining its crispness.
- Step 8: Serve Immediately. Once all your veal cutlets are fried, arrange them on a serving plate. Garnish generously with fresh lemon wedges, and serve hot with your preferred side dishes. Enjoy the perfect balance of crispy texture and tender, flavorful veal!
Tips for the Best Veal Milanese Every Time
To ensure your Veal Milanese turns out perfectly crispy and tender, keep these essential tips in mind:
- Pound to Even Thickness: This is critical for uniform cooking and ensuring every bite is tender. Aim for about ¼ inch thick.
- Season Liberally: Don’t just rely on the breadcrumbs for flavor. Season the veal itself with salt and pepper before breading.
- Optimal Breading Adhesion: After breading, let the cutlets rest for 5-10 minutes. This allows the egg and breadcrumbs to set, creating a more robust crust that stays on during frying.
- Don’t Overcrowd the Pan: Fry in batches. Overcrowding significantly lowers the oil temperature, leading to greasy, soggy cutlets rather than perfectly crisp ones.
- Use Fresh Ingredients: High-quality veal and fresh Italian breadcrumbs make a noticeable difference in flavor and texture. If possible, make your own breadcrumbs from day-old bread for superior crunch.
- Clarified Butter for Authentic Flavor: While oil works, clarified butter (ghee) offers a richer, nutty flavor and a higher smoke point, contributing to a truly authentic taste.
- Keep Cooked Cutlets Warm: Utilize a low oven with a wire rack to keep early batches warm and crisp while you finish frying the rest.
- Serve Immediately: Veal Milanese is best enjoyed fresh off the skillet when its crust is at its crispiest.
More Irresistible Italian Recipes to Explore:
- Veal Rollatini with Peppers, Cheese and Basil in Olive Tomato Sauce
- Pizzette with Garlic Shrimp and Roasted Pepper Pesto
- Pasta with Mussels in Spicy Tomato Sauce
- Pasta Alla Vodka with Spicy Sausage
- Tuscan Chicken and Potatoes

Veal Milanese
Print
Pin
Rate
Ingredients
- 1 lb Veal cutlets (thinly sliced)
- 1 cup All-purpose Flour
- 2 Large Eggs (beaten)
- 1 cup Italian Breadcrumbs
- Salt & Freshly Ground Black Pepper (to taste)
- 1/2 cup Clarified Butter or High Smoke Point Cooking Oil for frying
- 1/2 Lemon Quartered, for serving
Instructions
-
Prepare your breading station by setting up three shallow dishes: one with all-purpose flour, one with beaten eggs, and one with Italian breadcrumbs.
-
Season your veal cutlets generously on both sides with salt and freshly ground black pepper.
-
Bread each cutlet by first dredging in flour (shaking off excess), then dipping in the beaten egg, and finally pressing firmly into the breadcrumbs to ensure an even, complete coating. Set aside on a plate or wire rack.
-
Preheat your oven to a very low temperature of 200°F (95°C) and place a wire rack over a baking sheet inside. This will keep your cooked veal cutlets warm and crispy.
-
Preheat a cast-iron skillet (or other heavy-bottomed pan) over medium-high heat. Add the clarified butter or cooking oil and let it heat until shimmering, around 375°F (190°C).
-
Fry your veal cutlets in batches of 1-2 at a time for about 3-4 minutes per side, or until beautifully golden brown and cooked through. Avoid overcrowding the pan to maintain oil temperature and prevent soggy cutlets.
-
Remove cooked cutlets from the skillet and transfer them to the wire rack on the baking sheet in the warm oven to drain excess oil and stay crisp.
-
Once all veal cutlets are fried, arrange them on a serving plate with fresh lemon wedges and serve immediately.
Nutrition
Read about the author Edyta here or follow Eating European on social media: Facebook, Instagram, Pinterest, and Twitter.
