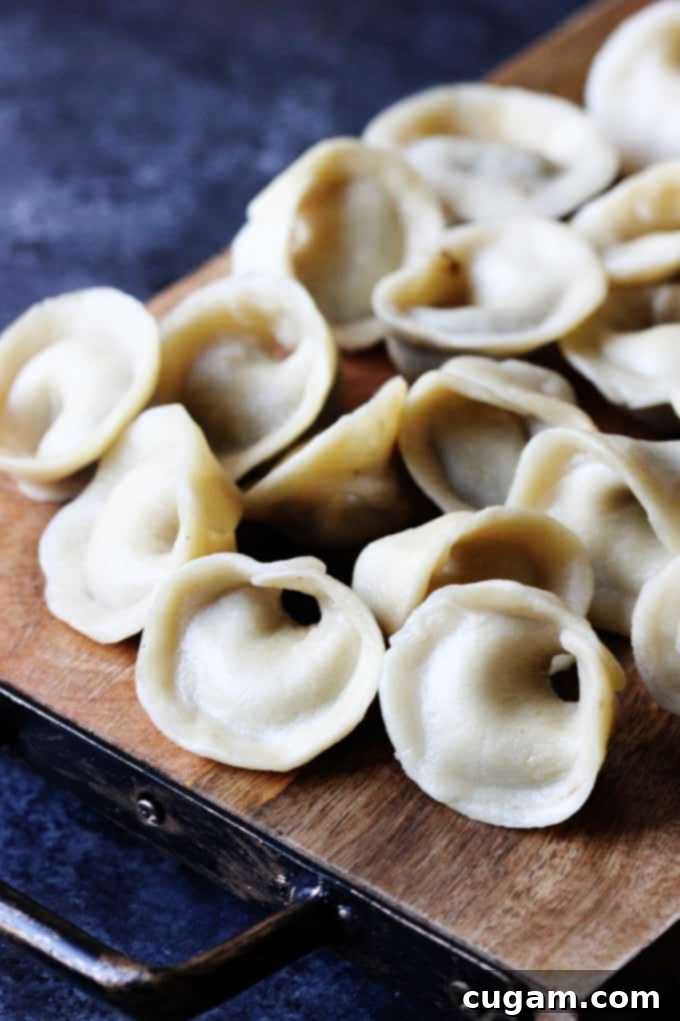
Traditional Polish Uszka (Mushroom Pierogi) for a Festive Christmas Eve Meal
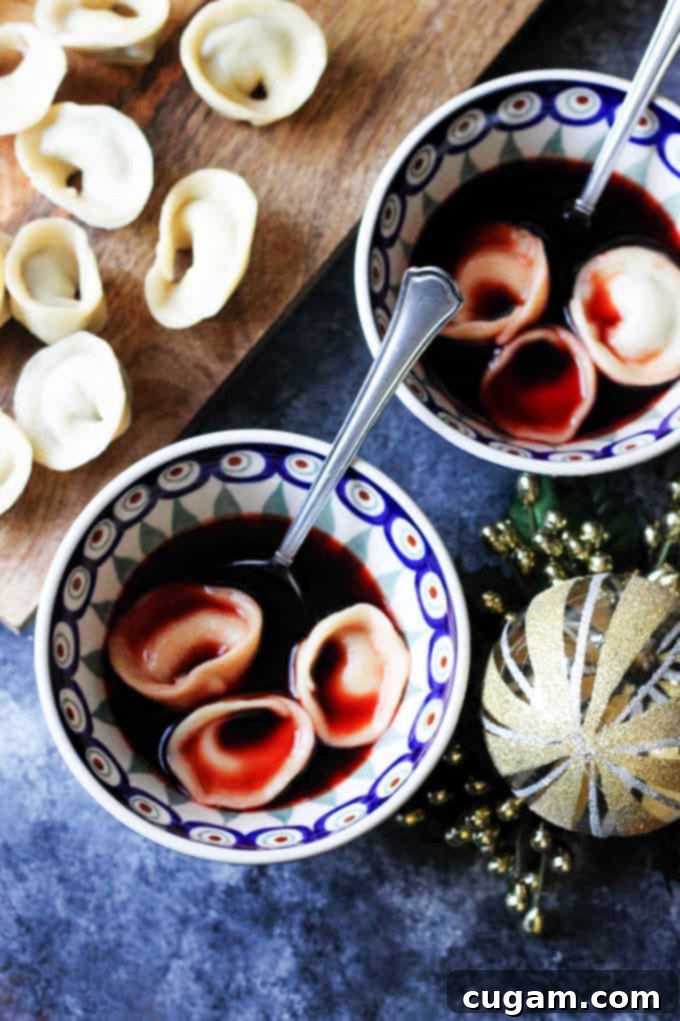
In Poland, these delicate Mushroom Pierogi, known as “Uszka” (meaning “little ears”), are a cherished tradition, especially when served in fragrant Borscht on Christmas Eve. Crafted from a rich blend of both dried and fresh mushrooms encased in a simple, tender dough of flour, water, milk, and butter, they are surprisingly beautiful and far easier to make than you might imagine. This recipe brings the heart of a Polish Christmas to your home.
This post may contain affiliate links. You can read my disclosure policy HERE.
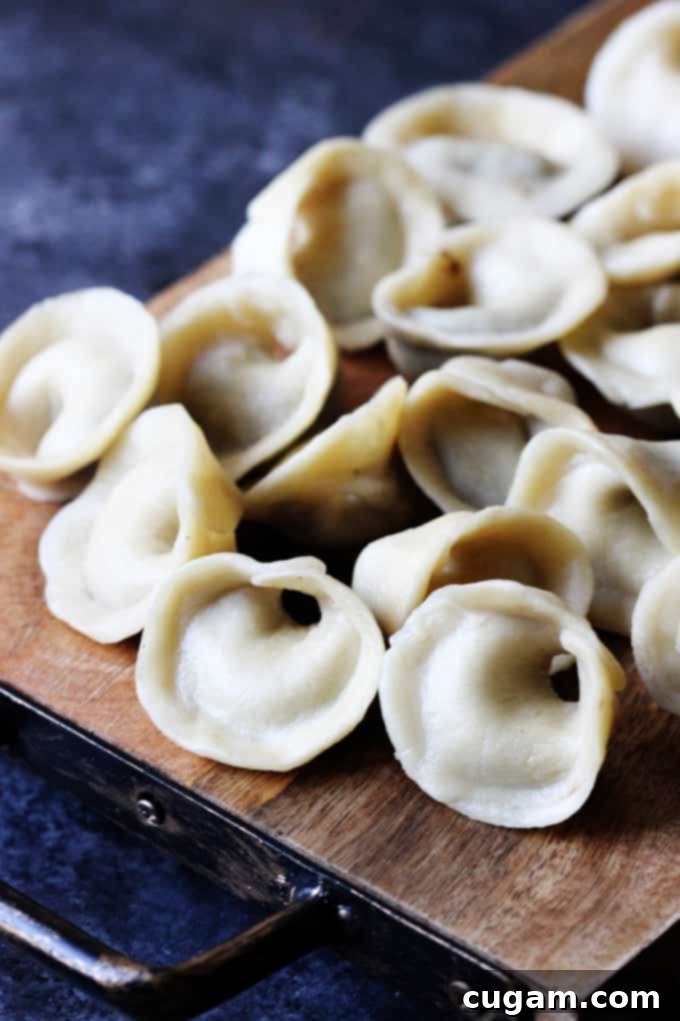
The Heart of Polish Christmas Eve: Uszka in Borscht
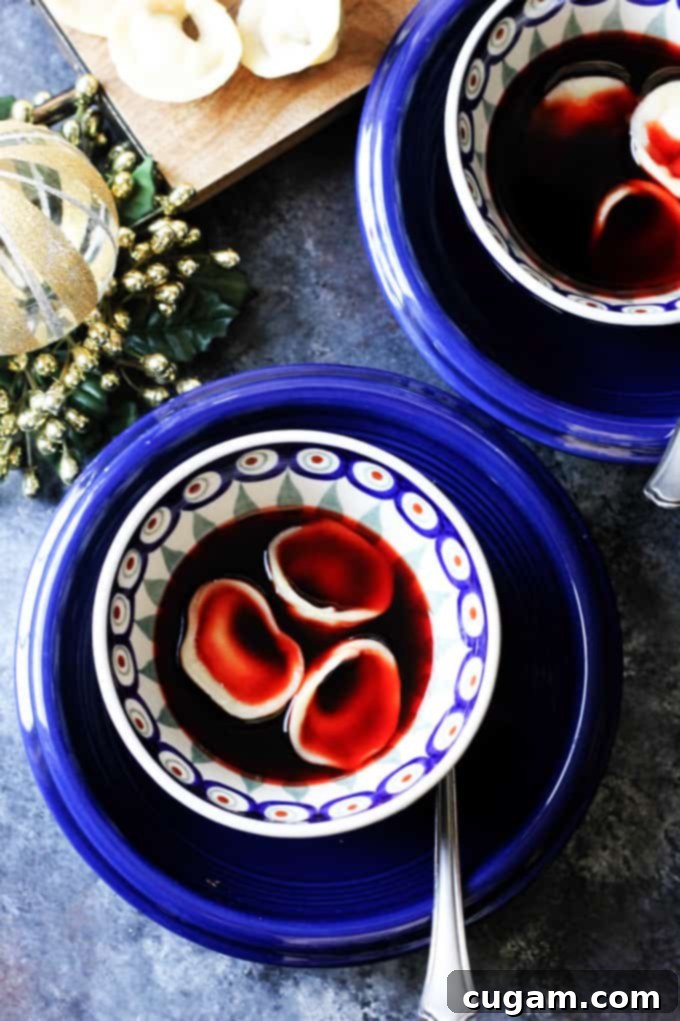
In Poland, the Christmas Eve dinner (Wigilia) is a time for beloved traditions, and amongst the twelve meatless dishes, Borscht with Uszka holds a particularly special place. It’s a classic soup that graces almost every Polish table for this most important family meal of the year. While a small number of households might opt for a creamy mushroom soup, even some of those will still include a side of delicate Uszka.
As a Pole, I deeply resonate with the tradition of serving Borscht alongside these exquisite mushroom pierogi. It’s a culinary ritual I proudly uphold for my family every year, bringing warmth, comfort, and a taste of heritage to our festive gathering. The deep, earthy flavors of the mushrooms pair incredibly well with the vibrant, sweet-and-sour notes of beet borscht. If you’ve ever been skeptical about this combination, I wholeheartedly encourage you to try my borscht recipe with these homemade Uszka; I am confident you’ll be utterly convinced of its magic. While the borscht is undoubtedly wonderful, the true star of this post, and often the Christmas Eve table, is the small but mighty Uszka – these ‘little ears’ are truly a culinary triumph.
Making Uszka from scratch allows you to control the quality of ingredients and infuse them with love, making them even more meaningful for your festive meal. The process, while seemingly intricate, is quite rewarding and simpler than it appears. The combination of rehydrated dried porcini mushrooms and fresh baby bellas creates a filling that is deeply flavorful and wonderfully textured, perfectly complementing the tender, thin dough.
Crafting These Delightful “Uszka”: A Step-by-Step Guide
Creating homemade Uszka is a labor of love that rewards you with an authentic taste of Polish tradition. The process is divided into preparing the rich mushroom filling and then creating the tender pierogi dough, followed by the careful assembly and cooking of these delicate dumplings.
Essential Ingredients for Mushroom Pierogi:
To embark on your Uszka-making journey, gather the following high-quality ingredients. The blend of dried and fresh mushrooms is key to achieving that profound umami flavor that makes this dish so special.
- Dry Porcini Mushrooms (for intense flavor depth);
- Fresh Baby Bella and/or White Mushrooms (for texture and fresh mushroom taste);
- Yellow onion (for aromatic foundation);
- Unsalted Butter (for sautéing and richness);
- All-purpose Flour (the base for our tender dough);
- Water (for hydrating dried mushrooms and dough);
- Milk (adds richness and tenderness to the dough);
- Salt and freshly ground Black Pepper (for seasoning).
The Flavorful Mushroom Filling:
The mushroom filling is the heart of Uszka, and achieving the right balance of texture and flavor is crucial. This recipe uses a two-pronged approach with both dried porcini and fresh mushrooms to maximize the umami.
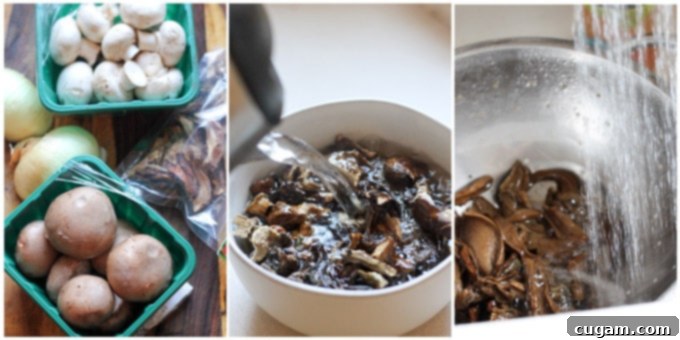
Step 1: Rehydrate and Clean Dry Porcini Mushrooms. Begin by placing your dry porcini mushrooms into a pot. Cover them generously with water and bring the mixture to a boil. Allow them to simmer gently for about an hour. This extended cooking time not only rehydrates the mushrooms but also extracts maximum flavor. Once cooked, use a slotted spoon to carefully remove the rehydrated mushrooms from the boiling water. Dried mushrooms, especially porcinis, can often harbor a lot of dirt and sand, making thorough cleaning a vital step. Most of the heavier impurities will sink to the bottom of the pot, but for extra precaution, transfer the mushrooms to a colander and rinse them really well under running water. Ensure all grit is removed, then set them aside, ready for the next step.
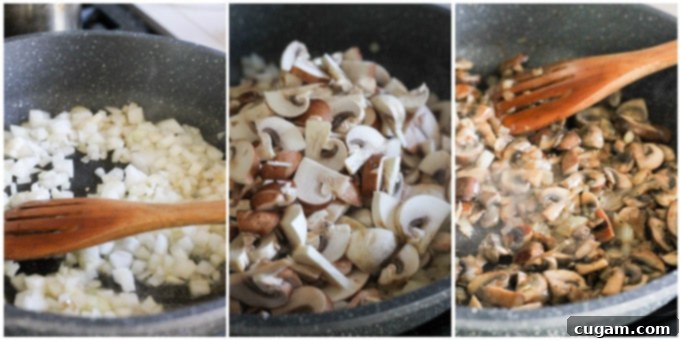
Step 2: Sauté Fresh Mushrooms and Onions. In a frying pan, melt a generous knob of unsalted butter over medium heat. Add the finely chopped yellow onions and cook them gently until they become beautifully translucent and fragrant, but not browned. In the meantime, thoroughly clean and thinly slice your fresh mushrooms (Baby Bella or white button mushrooms work wonderfully). Add these fresh mushrooms to the softened onions in the pan. Season with salt and freshly ground black pepper to taste. Continue to cook for approximately 15 minutes, or until the mushrooms are soft, have released their moisture, and are fully cooked through, developing a rich, savory aroma.
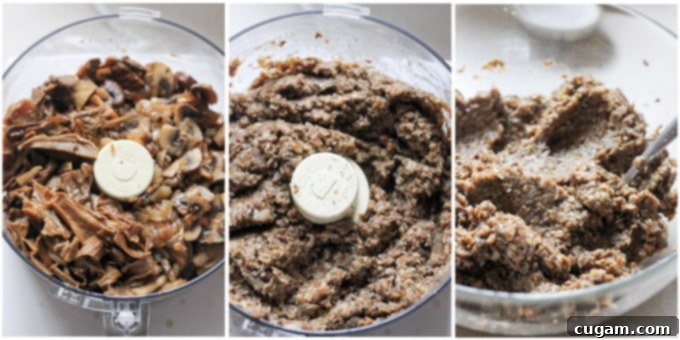
Step 3: Combine and Process the Mushroom Blend. Transfer both the cooked dry porcini mushrooms and the sautéed fresh mushrooms with onions into a food processor. Pulse the mixture a few times. After the initial pulses, take a moment to check the seasoning; adjust with more salt and pepper if needed to enhance the deep mushroom flavors. Pulse a few more times, being careful not to over-process the mushrooms. The goal is to have small, discernible pieces of mushroom in the filling, not a smooth paste. This texture is essential for an authentic Uszka experience. Once satisfied with the consistency and seasoning, set the filling aside to cool completely while you prepare the dough.
The Perfect Pierogi Dough:
A tender, elastic dough is paramount for Uszka. While a stand mixer makes the process incredibly easy and consistent, don’t be deterred if you don’t have one; you can certainly make this dough by hand. For a detailed guide on manual dough preparation, you can refer to my recipe for Sauerkraut and Mushroom Pierogi from Scratch. However, I must confess, receiving a beautiful stand-up mixer as a Christmas gift transformed my pierogi-making experience into an absolute breeze!
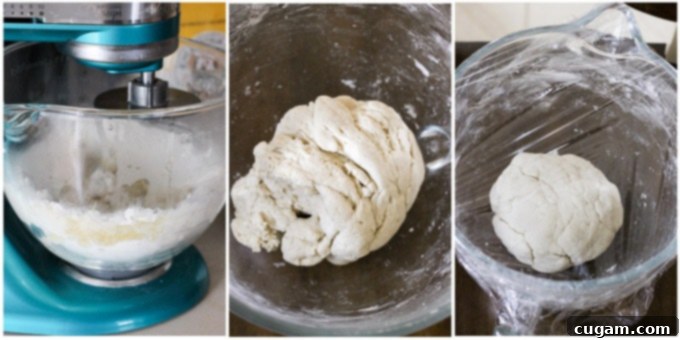
Step 1: Initial Mixing in a Stand Mixer. If using a stand mixer, attach the dough hook. Add the all-purpose flour into the mixing bowl. Pour in the melted butter and warm milk. Begin mixing on low speed, allowing the ingredients to just start coming together. The warmth of the milk and butter helps in developing a smooth dough.
Step 2: Gradually Add Warm Water. While the mixer is running on low, gradually add warm water, a little bit at a time. The general guideline for 3 cups of flour is approximately 1/2 cup of milk and about 3/4 cups of water. However, flour absorption can vary depending on humidity and brand, so always observe the dough. You may need to add a touch more water until the dough gathers into a cohesive ball. The final consistency should be elastic, smooth, and no longer sticky to the sides of the bowl. Knead for about 5-7 minutes in the mixer until well developed.
Step 3: Rest the Dough. Once the dough is perfectly kneaded, remove it from the mixer bowl. Lightly oil the bowl, return the dough, and cover the bowl tightly with plastic wrap. Let the dough rest at room temperature for at least 30 minutes. This resting period is crucial as it allows the gluten to relax, making the dough much easier to roll out thinly without it snapping back.
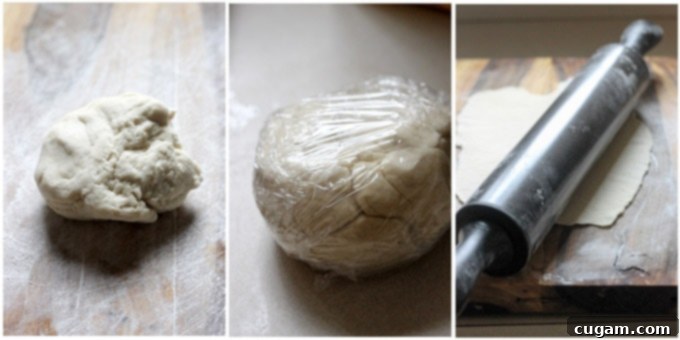
Step 4: Roll Out the Dough. Divide your rested dough into four manageable pieces. Lightly flour your working surface, taking care not to use too much flour, which can make the dough tough. Place one quarter of the dough on the floured surface, keeping the remaining pieces covered with plastic wrap to prevent them from drying out. Using a rolling pin, roll out the dough evenly until it is thin but not so thin that it becomes transparent or tears easily. Aim for a thickness of about 1-2 millimeters. This thinness is essential for delicate Uszka.
Assembling and Cooking Your Uszka:
This is where the ‘little ears’ take shape! Precision and gentle handling are key to creating beautiful, perfectly sealed Uszka.
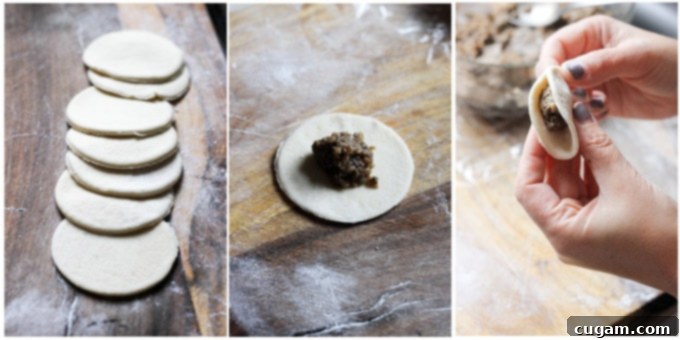
Step 1: Cut Out Dough Rounds. With your thinly rolled dough, use a small glass, approximately 1.5 inches in diameter (a shot glass works perfectly), to cut out numerous small, neat rounds. Gather the dough scraps, re-knead them gently, rest for 10 minutes, and re-roll to cut out more rounds, minimizing waste.
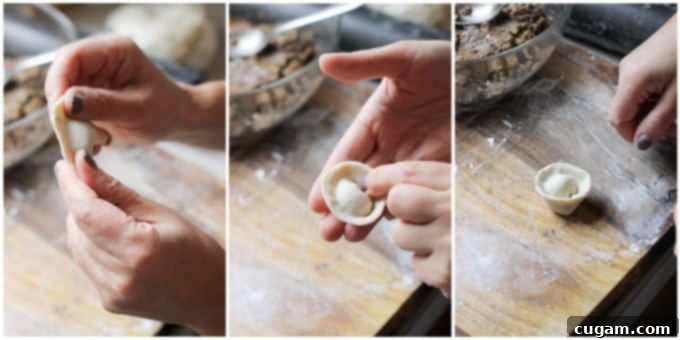
Step 2: Fill and Seal the Pierogi. Work with one dough circle at a time to prevent drying. Place about 1/2 teaspoon of the cooled mushroom filling in the very center of the circle. Lightly moisten one half of the dough circle’s edge with a little water (using your finger or a small brush). Fold the dough over to meet the other side, forming a half-moon shape. Press the edges together firmly to create a tight seal, ensuring no filling escapes during cooking. A good seal is crucial for the Uszka to hold their shape and flavor.
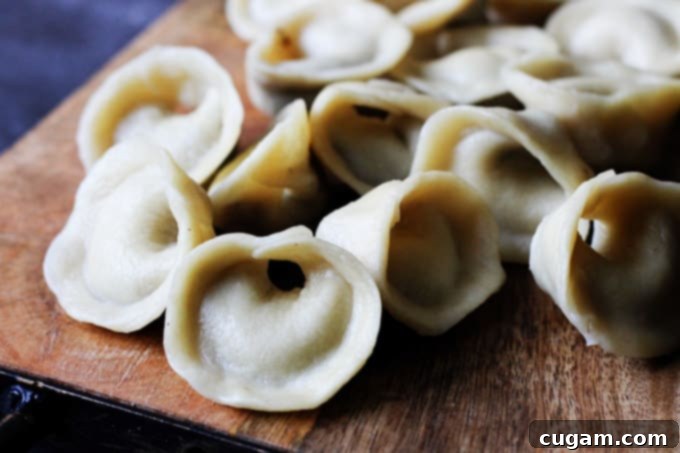
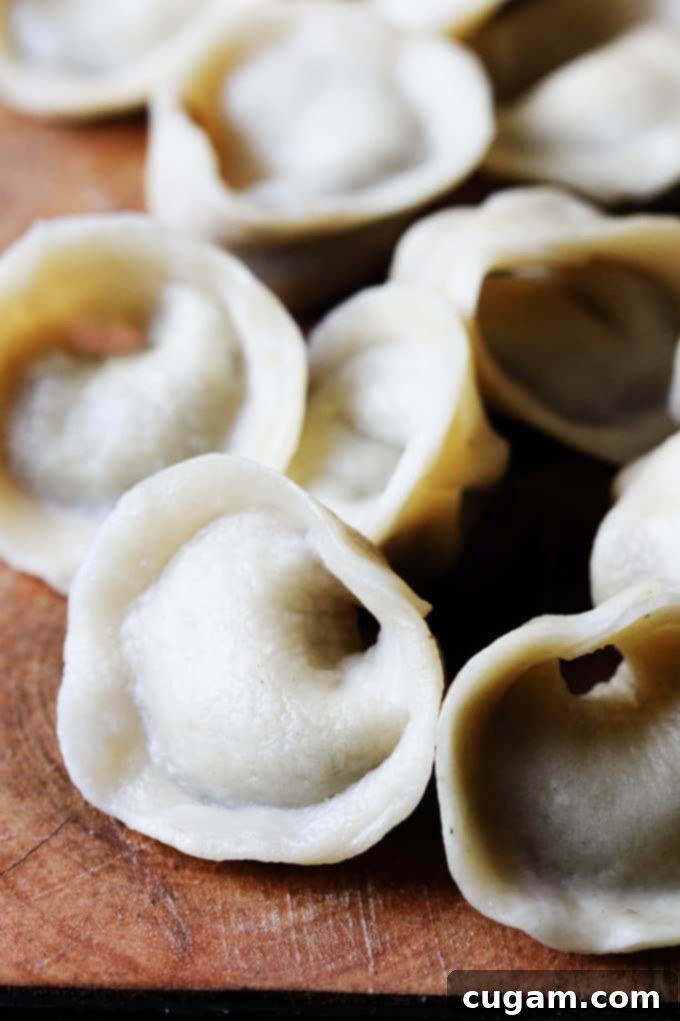
Step 3: Shape the “Ears”. This is the characteristic step that gives Uszka their name. Take the two opposite ends of your half-moon-shaped pierogi. Gently bring them together and press them firmly, creating a small, ear-like dumpling. This not only gives them their traditional appearance but also creates a more compact, satisfying dumpling.
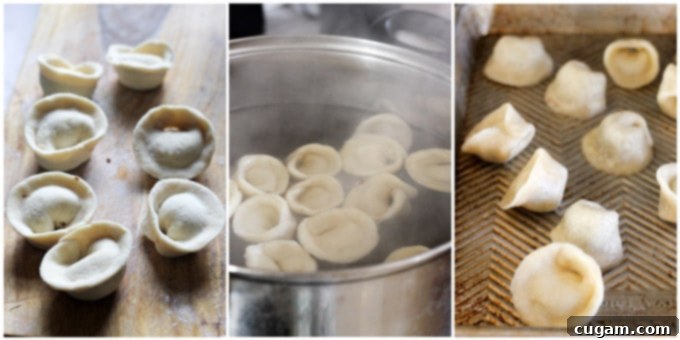
Step 4: Continue Assembling. Systematically repeat steps 1-3 with the remaining dough rounds and mushroom filling. As you assemble them, place the finished Uszka on a lightly floured surface or baking sheet, ensuring they do not touch each other. This prevents them from sticking together, which can be a common issue with fresh pasta.
Step 5: Boil the Uszka. Bring a large pot of generously salted water to a rolling boil. It’s important to add enough salt to season the dough. Carefully add no more than 10 Uszka at a time to the boiling water to avoid overcrowding the pot and dropping the water temperature too much. Overcrowding can lead to uneven cooking and sticking. Once the Uszka float to the surface, let them boil for about 2 minutes. They are delicate and cook quickly.
Step 6: Remove and Dry. Using a slotted spoon, gently remove the cooked Uszka from the boiling water. Transfer them to a dry surface, such as a large cutting board or a baking sheet lined with parchment paper, ensuring they are placed in a single layer and do not touch one another. This allows them to dry slightly and prevents sticking.
Step 7: Serve Immediately. If you are serving the Uszka right away, gently place them into individual bowls and generously ladle warm, traditional borscht over them. The combination is truly a match made in culinary heaven.
Clever Ways to Store Homemade Pierogi
Whether you’re making Uszka in advance for a special occasion or simply have leftovers, proper storage is key to maintaining their delicate texture and preventing them from sticking together. Here are two effective methods:
How to Freeze Uszka for Longer Storage:
Freezing Uszka is an excellent way to prepare them ahead of time, ensuring you have a stash of these delightful dumplings whenever a craving strikes or for your Christmas Eve feast. The trick to successful freezing is to make sure they are completely dry before bagging them.
- Ensure They Are Dry: After boiling, you’ll need to make sure that your Uszka are completely dry on all sides before freezing. Any residual moisture on the dough will cause them to stick together once frozen. When you first remove them from the boiling water and place them on a dry surface (like a cutting board or cookie sheet), let them sit there until the top surface is totally dry to the touch.
- Flip and Dry Other Side: Next, use a separate, dry board or cookie sheet and carefully flip the Uszka over onto their other side to allow the bottom to dry out completely. This two-stage drying process is essential.
- Flash Freeze Individually: Once they are thoroughly dried, arrange them on another clean cookie sheet, ensuring they do not touch one another. Place this cookie sheet directly into the freezer. This step is called “flash freezing” and prevents the Uszka from clumping together.
- Bag and Store: Once the pierogi are completely frozen solid (this usually takes a few hours), you can remove them from the sheet and transfer them into a freezer-safe Ziploc bag or airtight container. They can be stored for up to 2 months in the freezer without loss of quality.
- Reheating Frozen Uszka: When you’re ready to enjoy them, there’s no need to thaw! Place them straight from the freezer into a pot of rapidly boiling, salted water. Cook for about 5 minutes, or until they float to the surface and are heated through.
- Serve: Serve them piping hot in bowls with your favorite borscht or a drizzle of melted butter.
How to Store Uszka for a Few Days (Refrigeration):
If you plan to use your Uszka within the next few days and prefer not to freeze them, this method will keep them fresh and ready for cooking.
- Dry Thoroughly: Just like with freezing, ensure the Uszka are well-dried on both sides after boiling to prevent sticking.
- Coat with Butter: Melt some unsalted butter. Once the Uszka are dry, gently place them in a bowl and drizzle the melted butter over them. Carefully toss to ensure that all of them are lightly coated. This butter coating acts as a protective layer, preventing the dumplings from sticking to each other or drying out.
- Refrigerate: Cover the bowl tightly with plastic wrap or transfer them to an airtight container. Store them in the refrigerator for up to 3-4 days.
- Reheating Refrigerated Uszka: When ready to serve, simply place them into boiling water for just a minute or two to heat them through. They will be just as tender and delicious as freshly made.
- Serve: Once warm, serve them in bowls with borscht or any other desired accompaniment.
Essential Equipment for Making Uszka
Having the right tools can make the Uszka-making process smoother and more enjoyable. Here’s a list of equipment you’ll find useful:
- Frying Pan: For sautéing the fresh mushrooms and onions to create the aromatic filling.
- Cutting Board: A sturdy surface for chopping vegetables and for resting boiled pierogi.
- Set of Knives: Essential for precise chopping of onions and slicing mushrooms.
- Cookie Sheets: Useful for drying boiled Uszka and for flash-freezing them before bagging.
- Food Processor: A great help for combining and processing the cooked mushrooms into the perfect textured filling.
- Stand-up Mixer: Highly recommended for effortless and consistent pierogi dough kneading (with a dough hook attachment).
- Rolling Pin: Crucial for rolling out the dough thinly and evenly, achieving that desirable delicate Uszka texture.
- Glass Bowl: For mixing ingredients, resting dough, or coating Uszka in butter.
- Large Pot: Necessary for rehydrating dry mushrooms and, most importantly, for boiling the Uszka.
Explore Other Traditional Polish Recipes:
If you’ve enjoyed making Uszka, I invite you to delve deeper into the rich tapestry of Polish cuisine with these other traditional recipes:
- Bigos – Polish Hunter’s Stew: A hearty and flavorful cabbage and meat stew, perfect for cooler weather.
- Pierogi with Potatoes and Cheese: The beloved classic, a comforting and universally adored dumpling.
- Mizeria Polish Cucumber Salad: A refreshing and creamy cucumber salad, a staple side dish.
- Kapusta – Sauerkraut with Mushrooms: A flavorful and tangy side dish, often served during Wigilia.
- Cabbage and Kielbasa: A simple yet satisfying dish, combining two Polish favorites.
- Gołąbki – Skinny Stuffed Cabbage Rolls: Tender cabbage leaves filled with a savory mixture and simmered in a rich sauce.
- Creamy Mushroom Sauce: A versatile sauce that pairs wonderfully with many dishes, including other pierogi.
Mushroom Pierogi “Uszka”
Print
Pin
Rate
Ingredients
Mushroom Filling
- 1 oz Dry Porcini Mushrooms
- 16 oz Fresh Mushrooms Baby Bella and White Button, sliced
- 1 Sweet Onion medium size, chopped
- 2 tbsp Butter unsalted
- Salt and Pepper to taste
Pierogi Dough
- 3 cups All-purpose Flour
- 1/2 cup Milk warm
- 1 tbsp Butter unsalted, melted
- 3/4 cups Water warm or more if the dough needs it
- Pinch of salt
Instructions
Mushroom Filling
-
Place dry porcini mushrooms into a pot and cover with water. Bring to boil and cook mushrooms for about an hour. Once cooked, you need to use a slotted spoon and gently remove them from the boiling water. Dry mushrooms tend to be very dirty and have a lot of sand, so this is an important step. Most of dirt/sand will fall to the bottom of the pot, but you should also move the mushrooms into coriander and wash them really well under running water. Once cleaned, set them aside.
-
In a frying pan heat up some butter and add chopped onions. Cook until translucent. In the meantime, clean and slice your fresh mushrooms. Add mushrooms to the onions, season with salt and pepper, and cook for about 15 minutes until soft and fully cooked.
-
In a food processor, combine cooked dry mushrooms with sauteed fresh mushrooms and pulse a few times. Check for seasoning, and salt and pepper as needed. Pulse a few more times. Do not over process the mushrooms! You want to have little pieces of mushrooms in the filling, as opposed to a paste. Set aside.
Pierogi Dough
-
Attach a dough hook to your mixer. Add flour into the bowl. Add melted butter and warm milk, and then start mixing on low speed.
-
Start adding warm water a little bit at the time. For 3 cups of flour, you should use 1/2 cup of milk and approximately 3/4 cups of water. But sometimes the flour absorbs more moisture and you will need to add more water. In the end, your dough should be elastic and not sticky to the bowl.
-
Cover the bowl with plastic wrap and let rest for half hour.
-
Divide your dough into four pieces. Flour your working surface and place 1/4 of the dough on it. Cover the rest of the dough with plastic wrap. Using a rolling pin, roll out the dough until it’s thin but not see-through.
Assembling Pierogi
-
Using a 1.5 inch in diameter glass, (ie. a shot glass), cut out the rounds from the dough.
-
Working with one circle at the time, add 1/2 teaspoon of filling in the middle, wet one half of the circle and cover it to meet the other side of the circle. Stick the edges together.
-
Grab the opposite endings of the pierogi and stick them together to create an “ear” shape dumpling.
-
Continue with the rest of the dough and filling.
-
Bring a large pot of water to boil, salt it generously and add no more than 10 pierogi at the time. Boil for about 2 minutes once they come to the surface.
-
Remove pierogi to a dry surface (cutting board or cookie sheet) in a way that they don’t touch each other.
-
If serving immediately, place pierogi in bowls and cover with borscht.
Nutrition
Read more about the author Edyta here or follow Eating European on social media for more culinary inspirations: Facebook, Instagram, Pinterest, and Twitter.
