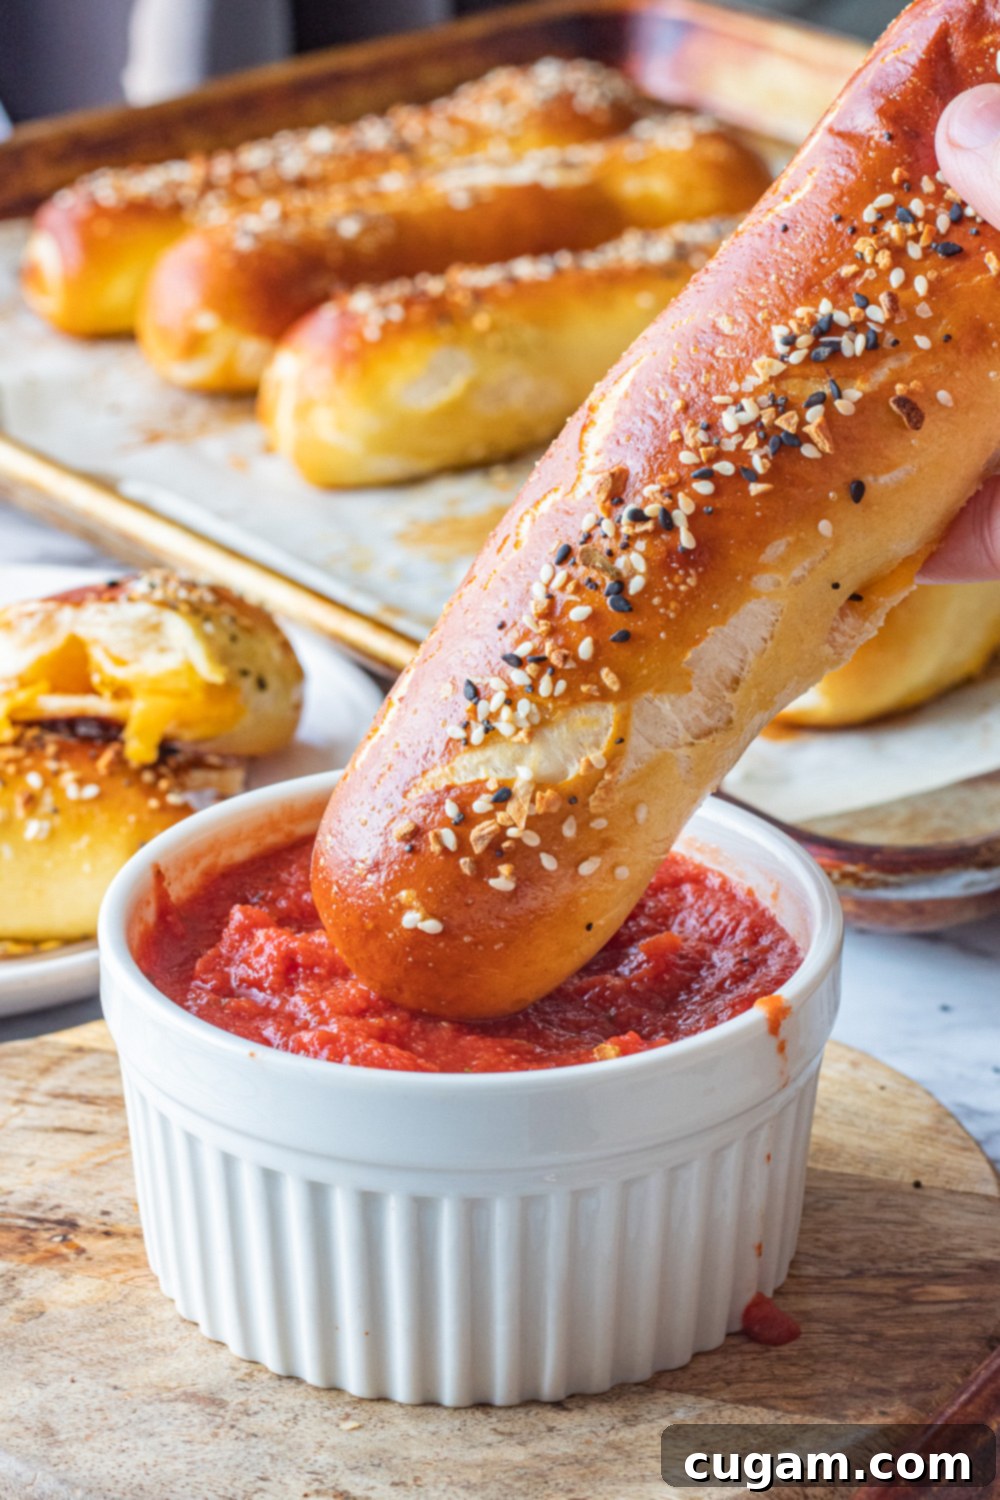
Homemade Cheesy Pretzel Sticks: Your Guide to Perfectly Stuffed Soft Pretzels
Are you a devoted cheese lover always on the hunt for your next savory obsession? Look no further! We have an irresistible treat for you: delicious, homemade Cheese Pretzel Sticks. These are not just any pretzels; they feature a soft, chewy homemade pretzel dough, generously stuffed with melty cheddar cheese, and crowned with crunchy, flavorful seasonings. They’re a true delight, pairing wonderfully with a zesty Red Pesto Sauce, your favorite marinara, or even a classic dijon mustard.
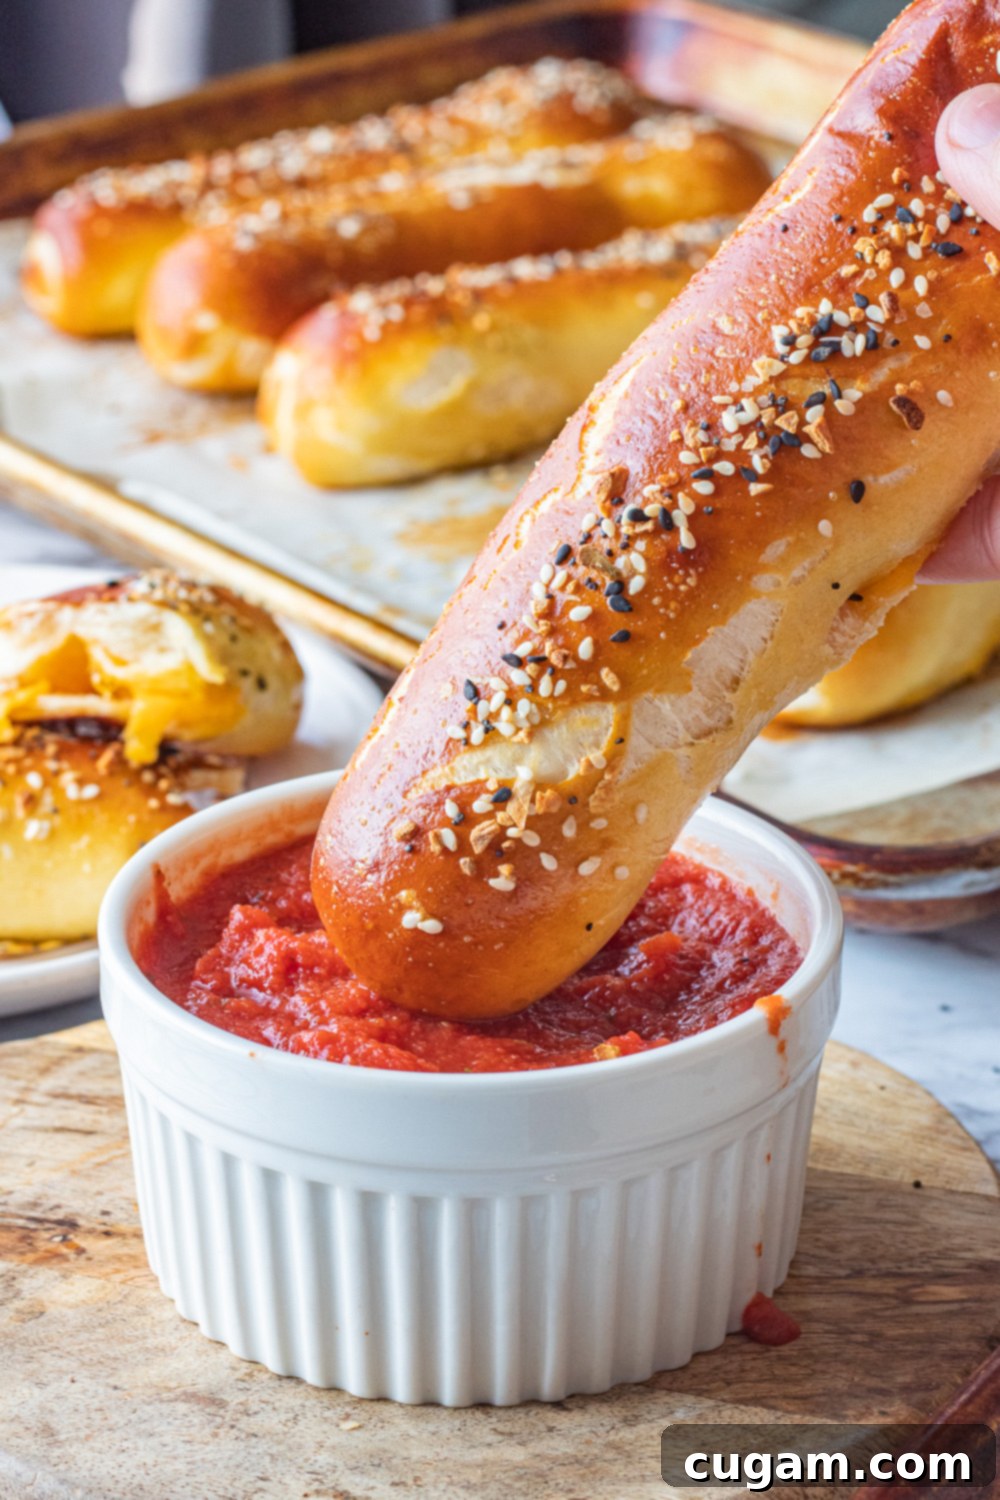
Crafting the Perfect Homemade Soft Pretzel Dough
The journey to these incredible cheese-stuffed pretzels begins with a tried-and-true soft pretzel dough recipe. This is a foundational recipe that I could practically make with my eyes closed, having perfected hundreds of batches over the years (and admittedly, eaten a significant portion of them!). Soft pretzels are a universal crowd-pleaser, ideal for a game-day appetizer, a cozy movie night snack, or a comforting treat on a rainy afternoon. These cheese pretzels take that classic appeal to the next level by introducing a gooey, cheesy center. Stuffing bread with cheese is a time-honored tradition, and I’m thrilled to share my secrets for achieving cheesy perfection with you.
The key to a truly exceptional soft pretzel lies in the quality of its dough and the careful attention to each step. We’ll be using a combination of active dry yeast and milk to create a dough that is not only rich in flavor but also remains wonderfully soft and fresh for longer. Let’s delve into the specifics of making this dough from scratch.
Starting Your Pretzel Dough: Yeast Activation and Ingredient Harmony
Making pretzels from scratch might sound intimidating, but it’s surprisingly straightforward. The process begins with activating the yeast, a crucial step for any yeasted bread. I use active dry yeast for this recipe, which can easily be substituted with instant yeast if that’s what you have on hand. For the liquid, I opt for milk to enrich the dough. This addition not only contributes to a richer flavor but also helps the pretzels maintain their freshness and soft texture for an extended period.
The best way to kickstart the yeast, often referred to as creating a “sponge,” is by combining your warm liquid (milk, in this case) and sugar first. The sugar acts as food for the yeast, helping it become active. Once these are mixed, add the yeast and let the mixture sit for about 5 minutes. You’ll know it’s ready when a foamy layer forms on the surface, indicating the yeast is alive and working its magic. It’s essential to use milk that is about 100-110°F (38-43°C). Any warmer, and you risk killing the yeast, which would prevent your dough from rising.
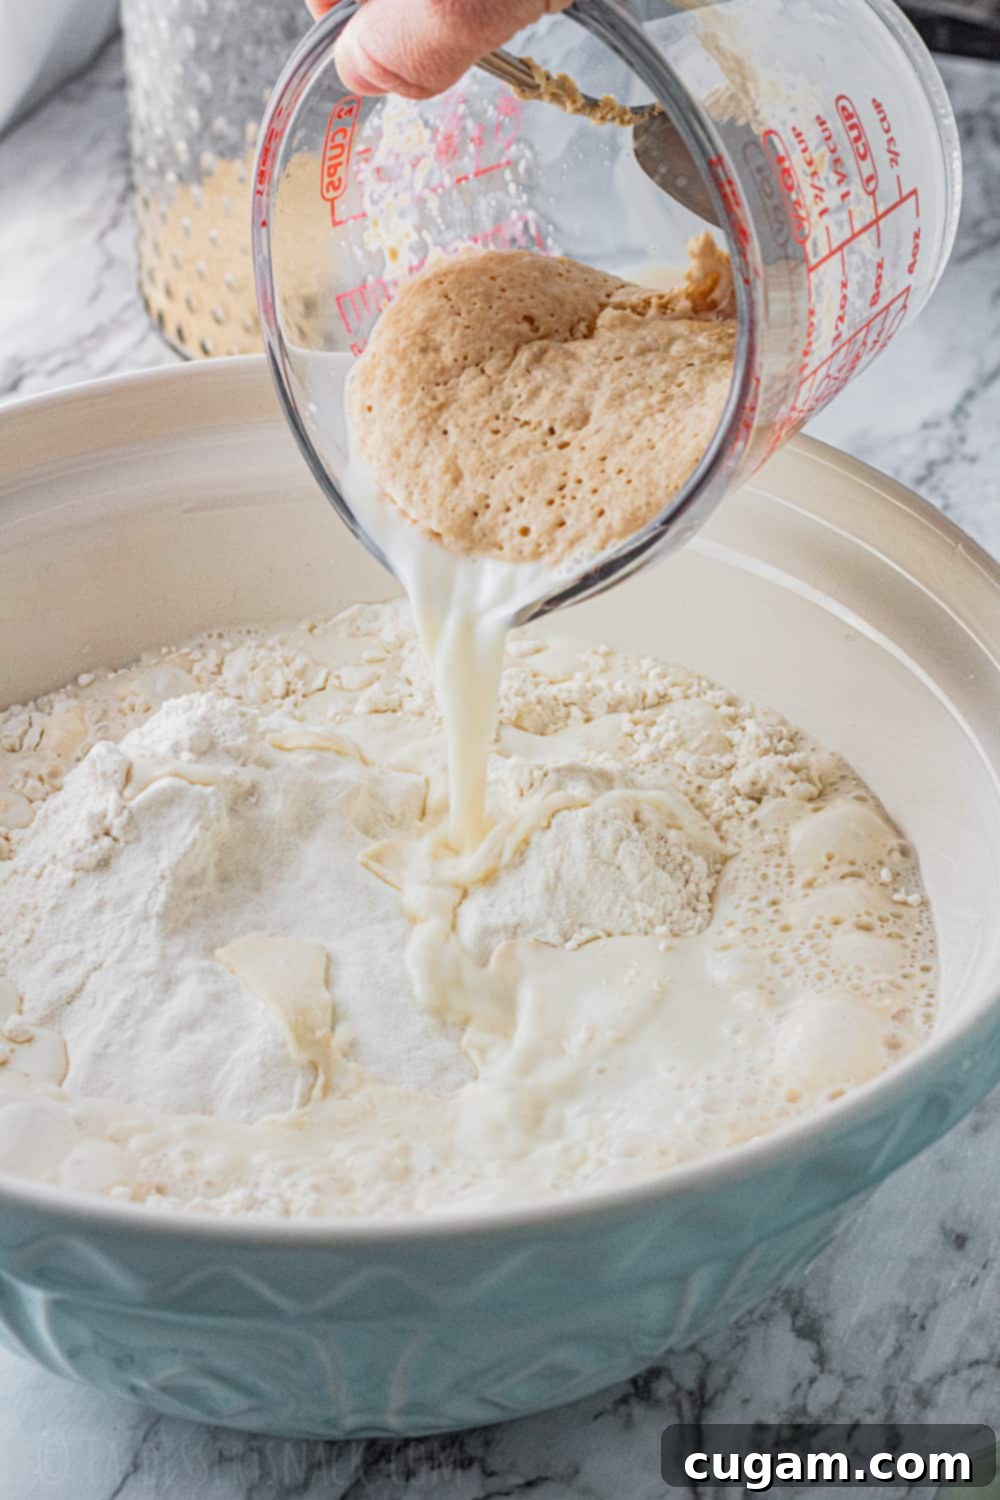
After the yeast mixture is foamy, combine it with the remaining pretzel dough ingredients, including flour, salt, and oil. The next critical step is kneading. Whether you choose to knead by hand or use a stand mixer equipped with a dough attachment, aim for about 5 to 8 minutes of kneading. The goal is to develop the gluten in the flour, which will result in a smooth, elastic, and supple dough. You’ll know it’s properly kneaded when it pulls away cleanly from the sides of the bowl and feels resilient to the touch. Once kneaded, cover the dough and allow it to rest and rise at room temperature (around 75°F or 24°C) for approximately 1 hour, or until it has visibly doubled in size. This rising period allows the flavors to develop and the dough to become light and airy.
The Art of Stuffing: Cheese Selection and Shaping Techniques
Now comes the truly exciting part: stuffing these delightful soft pretzels with cheese! To ensure consistent sizing and even baking, I recommend using a ⅓ cup measuring scoop to portion out 13-14 equal pieces of dough. A crucial tip here is to cover the unworked dough portions and work with one piece at a time. This prevents the dough from drying out prematurely, which can make it harder to roll and seal.
For the cheese, I highly recommend keeping cheddar cheese sticks or mozzarella cheese sticks on hand, as they are perfectly shaped for this recipe. If you’re slicing your own cheese, aim for about 14 sticks, each approximately ½ inch wide by 6-7 inches long, from 16 oz of cheddar cheese. To prevent the cheese from leaking out during baking, a common challenge with stuffed pretzels, here’s a pro tip: place your cheese sticks on a plate or small tray, ensuring they aren’t touching, then cover and freeze them for at least 30 minutes before stuffing. This quick chill helps the cheese maintain its form longer in the hot oven, giving the dough time to set around it. While I personally enjoy the crispy, slightly leaked cheesy bits that sometimes form, freezing is your best bet for a completely contained cheesy center.
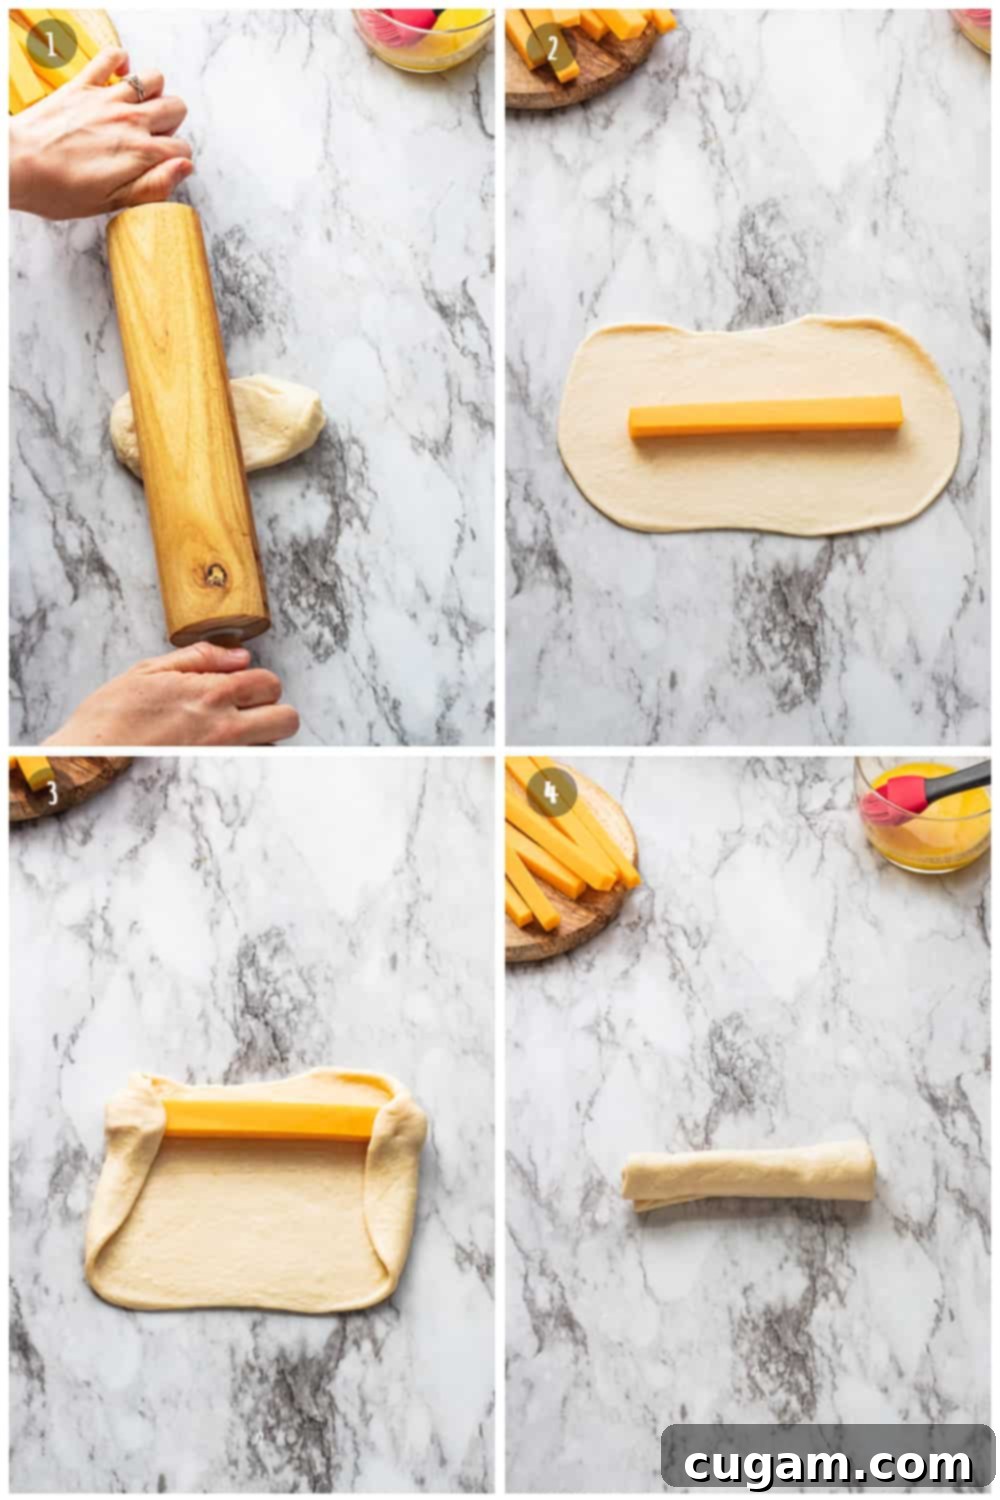
To shape, gently roll each dough portion into a rectangle, roughly 4 by 8 inches. Place a frozen cheese stick in the middle, towards the top edge of the rectangle. Carefully fold the short ends of the dough over the ends of the cheese stick to seal them. Then, roll the cheese stick up, “sleeping bag style,” into the dough rectangle. Gently pinch and roll the seam and ends a few times to ensure a tight seal. This careful sealing is essential to keep that delicious cheese inside!
The Secret to Soft Pretzel Perfection: The Baking Soda Bath
Do you have to boil pretzels before baking?
YES, absolutely! This step is non-negotiable for achieving the distinctive chewy, soft pretzel texture that we all know and love. While it might seem like an extra step, once you’ve done it a few times, it becomes incredibly easy and efficient. The short boil in a baking soda solution is what sets pretzels apart from other bread. The alkaline environment of the baking soda bath alters the surface of the dough, creating a gelatinized crust. This crust is what gives pretzels their unique deep brown color, characteristic flavor, and most importantly, that irresistible chewy exterior.
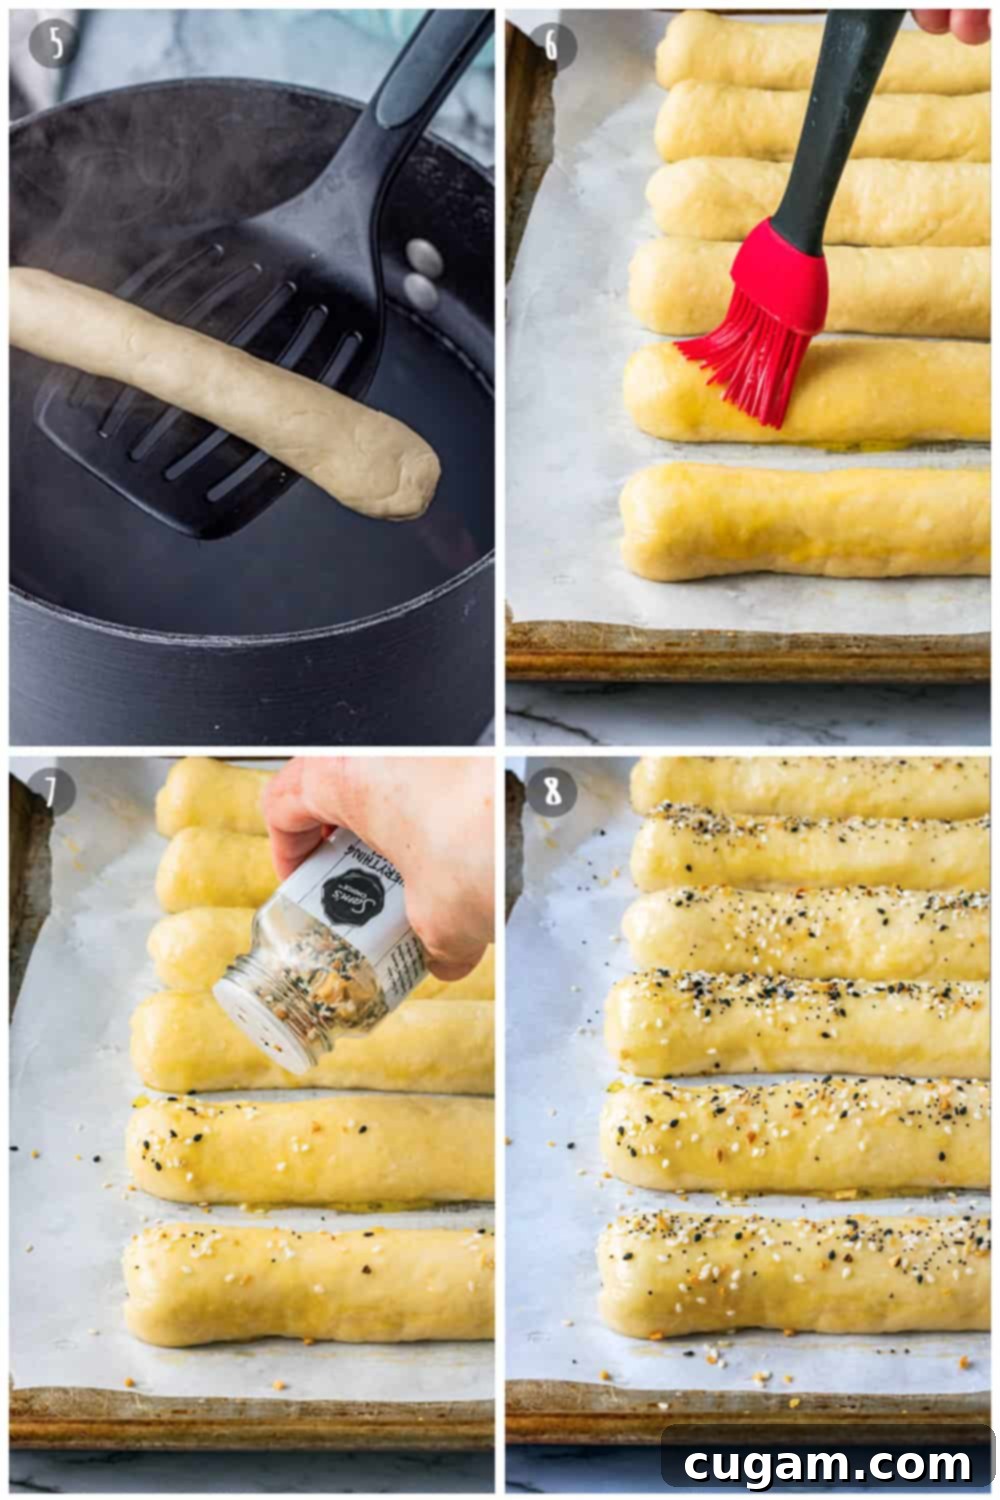
To prepare your baking soda bath, combine 10 cups of water with ½ cup of baking soda and 1 teaspoon of salt in a large pot and bring it to a slow boil. Gently lower each shaped pretzel into the simmering bath, one or two at a time depending on your pot size, and boil for a quick 20-30 seconds per side. Any longer, and your pretzels can develop a metallic taste. After boiling, carefully lift each pretzel out with a flat slotted spatula, allowing any excess water to drain for a few seconds above the pot. Immediately transfer them to a baking sheet lined with parchment paper. The parchment paper isn’t just for non-stick; it also helps absorb any remaining surface moisture, which contributes to a crispier crust. Make sure to space them out evenly to allow for proper air circulation.
Once your pretzels are boiled and on the baking sheets, brush them generously with a beaten egg. This egg wash is vital as it contributes to the beautiful, glossy, golden-brown color of the baked pretzels. For the final touch, sprinkle them with your choice of topping. My absolute favorite is Everything Bagel Seasoning, which adds an incredible crunch and burst of savory flavor. Alternatively, classic coarse salt flakes are always a winner. Pop them into a preheated oven at 450°F (230°C) for a mere 8-9 minutes. Watch them carefully; they should be perfectly golden brown and irresistible!
The Magic of Everything Bagel Seasoning
What is Everything Bagel Seasoning?
If you haven’t discovered the glory of Everything Bagel Seasoning yet, prepare to have your taste buds awakened! This popular blend is typically a savory mix of white and black sesame seeds, dried minced garlic, dried minced onion, poppy seeds, and flaky sea salt. It offers a fantastic combination of textures and aromas that perfectly complements the rich, cheesy, and chewy pretzel. You can find Everything Bagel Seasoning at most major grocery stores in the United States, or conveniently order it online. Of course, if you prefer, traditional coarse pretzel salt is always a classic choice, or even a sprinkle of parmesan cheese for an extra cheesy kick.

As mentioned earlier, for optimal results and to minimize cheese leakage during baking, always remember this: Pro Tip: Keep cheddar cheese sticks or mozzarella cheese sticks on hand, as they work perfectly for this recipe due to their convenient shape and size. If you’re cutting your own cheese from a block (16 oz cheddar cheese sliced into about 14 sticks, ½ inch wide by 6-7 inches long), be sure to place them on a plate or small tray so they aren’t touching, cover them, and freeze the cheese sticks to help prevent leakage. The colder the cheese is when it goes into the dough, the longer it will take to melt, giving the pretzel dough more time to bake and seal around it.
That said, a little bit of crispy, browned cheese that leaks out onto the baking sheet can be incredibly delicious! It creates those delightful “cheese wisps” that some people actively seek out. So, if a little leakage doesn’t bother you and you enjoy those crunchy edges, don’t stress too much. But if a perfectly contained cheesy center is your goal, freezing is your friend.
Serving and Storing Your Homemade Cheesy Pretzels
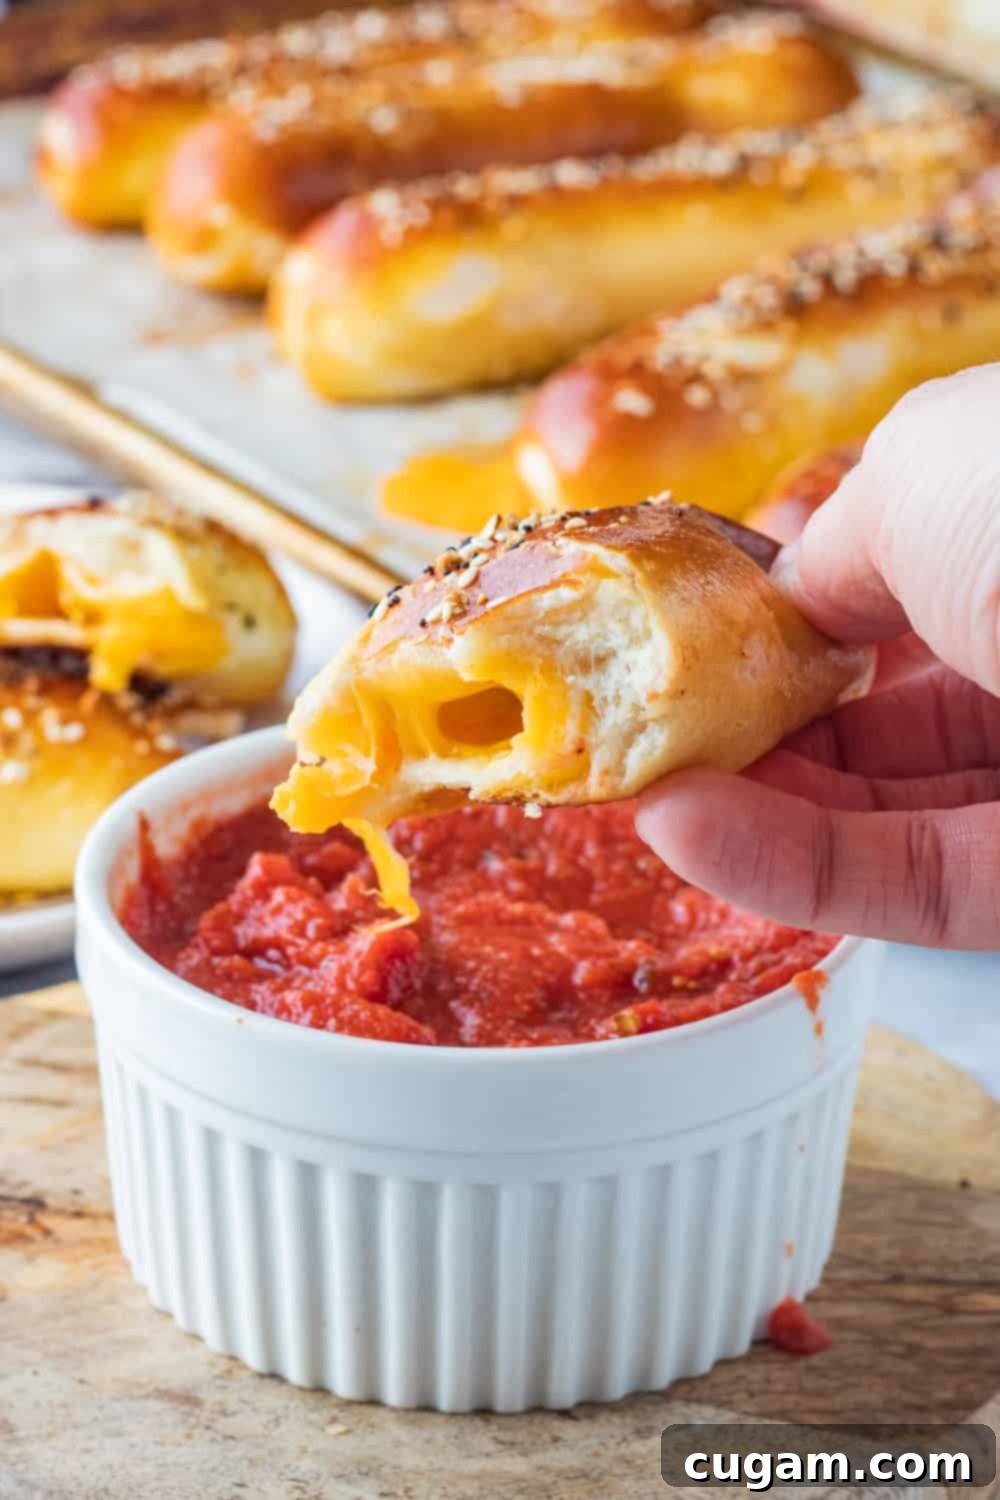
These homemade cheese pretzel sticks are best served warm, straight from the oven, when the cheese is perfectly gooey and the pretzel is at its softest. They are fantastic on their own, but truly shine when paired with your favorite dipping sauces. Consider serving them with a robust marinara, a creamy ranch dressing, a spicy sriracha mayo, or even a homemade beer cheese dip for an extra indulgent experience. They make a fantastic centerpiece for a snack board or a delightful addition to any meal.
Should you have any leftovers (which is unlikely, given how delicious they are!), these pretzels can be stored in an airtight container in the refrigerator for 1-2 days. To reheat and bring them back to their optimal texture, simply warm them in a toaster oven or conventional oven at 350°F (175°C) for a few minutes until heated through and slightly crisped. A quick zap in the microwave will also work, though it might result in a slightly softer crust. Enjoy the glorious simplicity of these homemade cheesy pretzel sticks – they’re sure to become a new favorite!
More Delicious Snack Recipes to Try:
If you’re anything like us, you’re always on the lookout for fantastic snack ideas. Here are some more of our favorites that you’ll love:
- Strawberry Pop Tart Cookies – A nostalgic treat with a homemade twist.
- Cheddar Garlic Biscuits – Fluffy, cheesy, and packed with garlic flavor.
- Chocolate Gooey Chex Mix – The perfect sweet and salty crunch for any occasion.
- Biscoff Filled Chocolate Crinkle Cookies – Decadent chocolate cookies with a surprise Biscoff center.
📝 Printable Recipe: Cheese Pretzel Sticks

Cheese Pretzel Sticks
Pin Recipe
Ingredients
- 16 oz cheddar cheese, sliced into 14 sticks. (½ inch by 6-7 inches)
- 1-½ cups warm milk (100-110 F°)
- 1 Tablespoon light brown sugar
- 1 Tablespoon active dry yeast
- 1½ teaspoons salt
- ¼ cup vegetable or olive oil
- 4- 4½ cups all purpose flour
- 10 cups water
- ½ cup baking soda
- 1 teaspoon salt
- 1 egg beaten for brushing onto pretzels
- 1-2 Tablespoons Everything Bagel seasoning (optional)
Instructions
-
Place cheddar cheese sticks onto a small tray or plate (ensuring they don’t touch), cover with plastic wrap, and put into the freezer to chill. This crucial step helps prevent cheese leakage while baking.
-
In a large measuring cup, combine the warm milk (100-110 F°) and sugar, mixing well until the sugar dissolves. Add the active dry yeast and let the mixture sit undisturbed for 5 minutes, until it becomes foamy, indicating the yeast is active.
Meanwhile, in a large mixing bowl, combine the 1½ teaspoons of salt, vegetable or olive oil, and 4 cups of all-purpose flour. Once the milk and yeast mixture has proofed, pour it into the flour mixture.
-
Mix the dough using a stand mixer with a dough hook attachment or by hand for 5 to 8 minutes, until the dough becomes smooth, elastic, and pulls away easily from the sides of the bowl. It should not be overly sticky. If the dough is still very sticky, add an additional 1 or 2 tablespoons of flour at a time (up to ½ cup total) and continue mixing until the desired smooth consistency is achieved.
-
Transfer the dough to an oiled bowl, turning it once to coat. Cover the bowl with plastic wrap and let it rise at room temperature for 1 hour, or until the dough has visibly doubled in size.
While the dough is rising, prepare your workstation: line 2-3 baking sheets with parchment paper. Next, prepare the baking soda bath by combining 10 cups of water, ½ cup of baking soda, and 1 teaspoon of salt in a large pot and bring it to a slow, gentle boil. Finally, preheat your oven to 450°F (230°C).
-
Once the dough has risen, use a ⅓ cup measuring scoop to divide it into 13-14 equal pieces. To prevent the dough from drying out, I recommend working with one piece at a time and keeping the remaining portions covered.
-
Roll each dough piece into a rectangle measuring approximately 4×8 inches. Place a chilled cheddar cheese stick in the middle, towards the top edge of the dough rectangle. Fold the short ends of the dough over the ends of the cheese stick. Then, carefully roll the cheese stick up into the dough, much like rolling a sleeping bag. Gently pinch and roll the seam and ends a few times to ensure they are securely sealed.
-
Gently lower the shaped pretzel sticks one by one into the simmering baking soda bath. Boil each pretzel for 20-30 seconds, turning once if needed. Using a flat slotted spatula, carefully lift them out, allowing excess water to drain for a few seconds, then transfer them directly to the parchment paper-lined baking sheets, spaced evenly apart.
-
Brush the boiled pretzel sticks generously with the beaten egg. If desired, sprinkle them with Everything Bagel seasoning or coarse salt. Bake in the preheated oven at 450°F (230°C) for 8 minutes (no longer than 10 minutes) until they are beautifully golden brown.
Some cheese may leak out and crisp up on the pan; this is perfectly fine and often adds a delicious texture!
Notes
Nutrition
PIN THIS IMAGE TO SAVE THE RECIPE:

