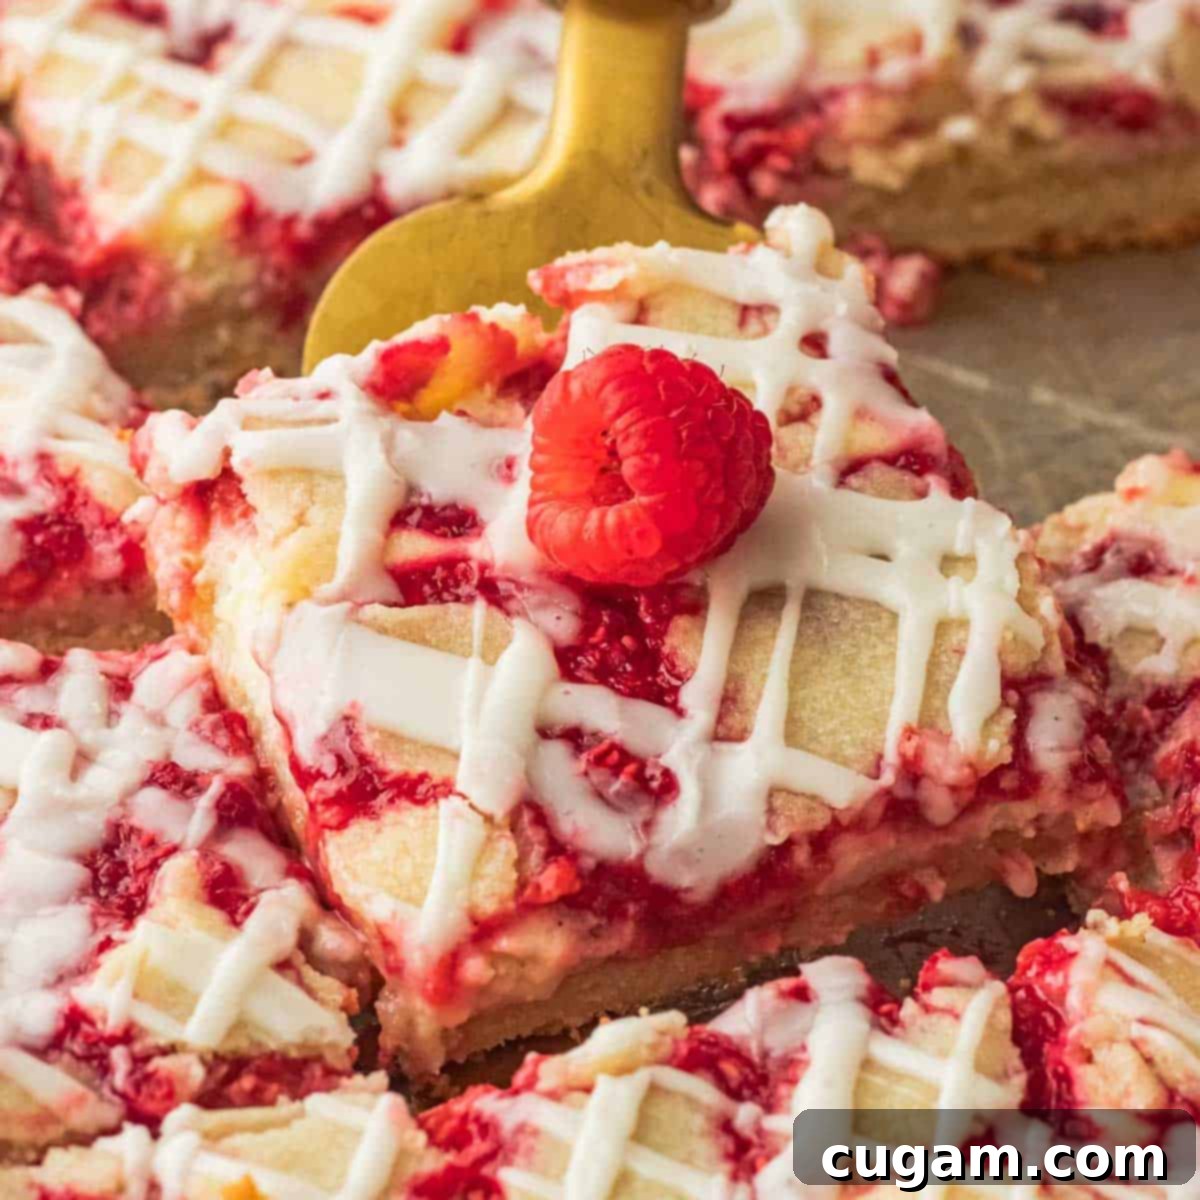
Irresistible Raspberry Cream Cheese Bars: Your New Favorite Potluck & Party Dessert
Prepare to fall in love with the ultimate crowd-plepleaser: these delightful Raspberry Cream Cheese Bars. They feature a sweet, chewy shortbread crust, a luscious, tangy cream cheese filling swirled with bright raspberries, and a smooth, sweet cream glaze on top. Best of all? This incredible dessert is baked to perfection in just 30 minutes!
This recipe builds upon the beloved foundation of our popular Strawberries and Cream Bars, offering a similar heavenly cream cheese base. However, this version celebrates the vibrant flavor and beautiful ruby hues of fresh raspberries, creating an unforgettable treat that’s both familiar and wonderfully new.
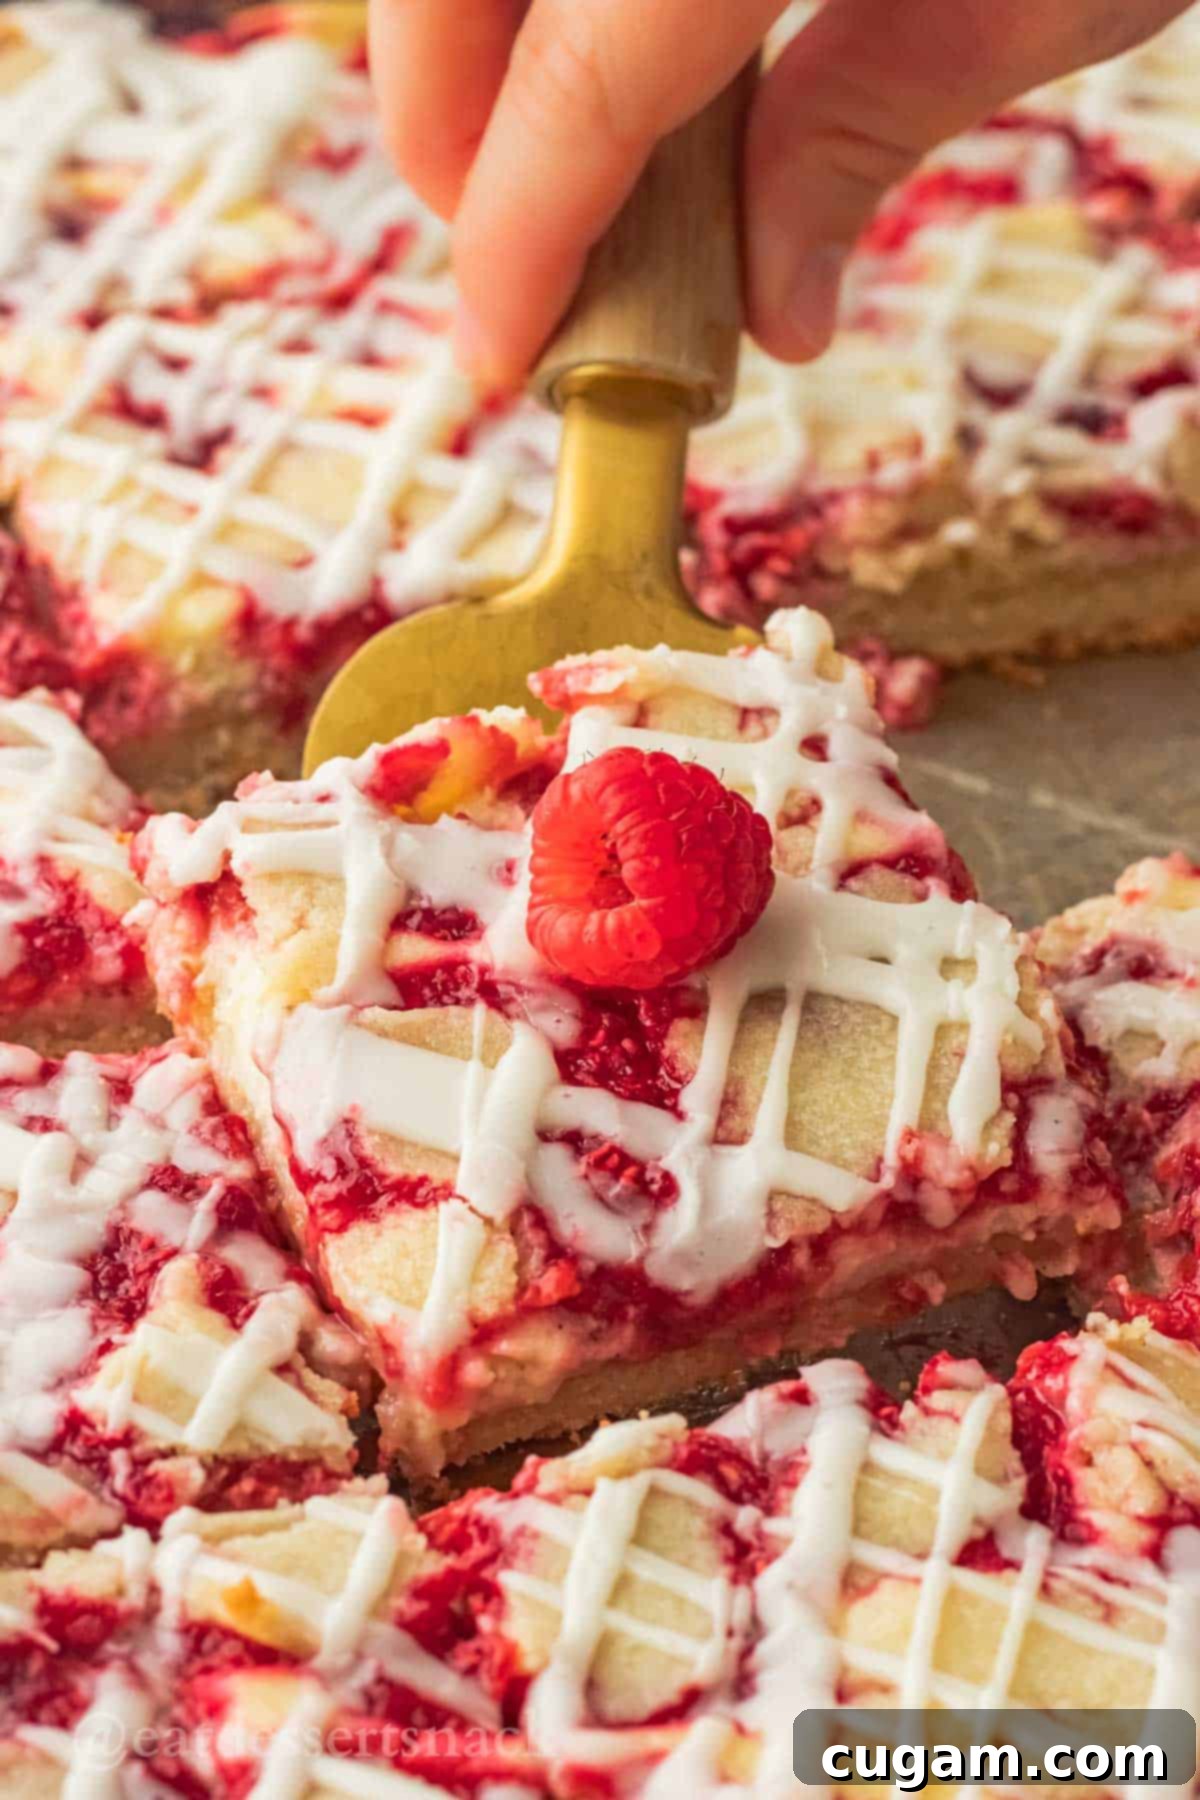
I genuinely adore sheet pan dessert recipes like these easy raspberry cream cheese bars. Their versatility is unmatched, allowing you to use fresh or frozen raspberries, raspberry pie filling, or even raspberry jam for that vibrant fruit layer. This adaptability makes them a fantastic choice for any occasion – from festive holiday gatherings to casual summer potlucks. They’re always a hit with friends and family, disappearing quickly from any dessert spread.
[feast_advanced_jump_to]
⭐️ Why You’ll LOVE These Raspberry Cream Cheese Bars
- Effortless Sheet Pan Dessert: This recipe is designed to be baked in a single sheet pan, making it incredibly simple to prepare and perfect for serving a large gathering. No individual servings or fussy layering required – just spread, bake, and slice!
- Divine Flavor Combination: The vibrant, tangy raspberry swirls perfectly complement the rich, smooth, and slightly sweet cheesecake filling. This contrast of flavors and textures creates a truly irresistible experience that will have everyone asking for seconds.
- Melt-in-Your-Mouth Crust: The base is a tender, buttery, shortbread-like crust that provides the ideal foundation for the creamy layers above. Its subtle sweetness and delicate chewiness make every bite pure bliss.
- Quick Baking Time: Despite their impressive appearance and complex flavor, these bars miraculously bake in just 30 minutes! This makes them an ideal last-minute dessert or a fantastic option when you need to whip up something delicious without spending hours in the kitchen.
- Flexible Fruit Options: Whether you have fresh, ripe raspberries on hand or a bag of frozen ones in your freezer, this recipe works beautifully. Just remember to thaw and thoroughly drain frozen berries to ensure the best texture and prevent a watery filling.
🛒 Key Ingredients for Raspberry Bliss
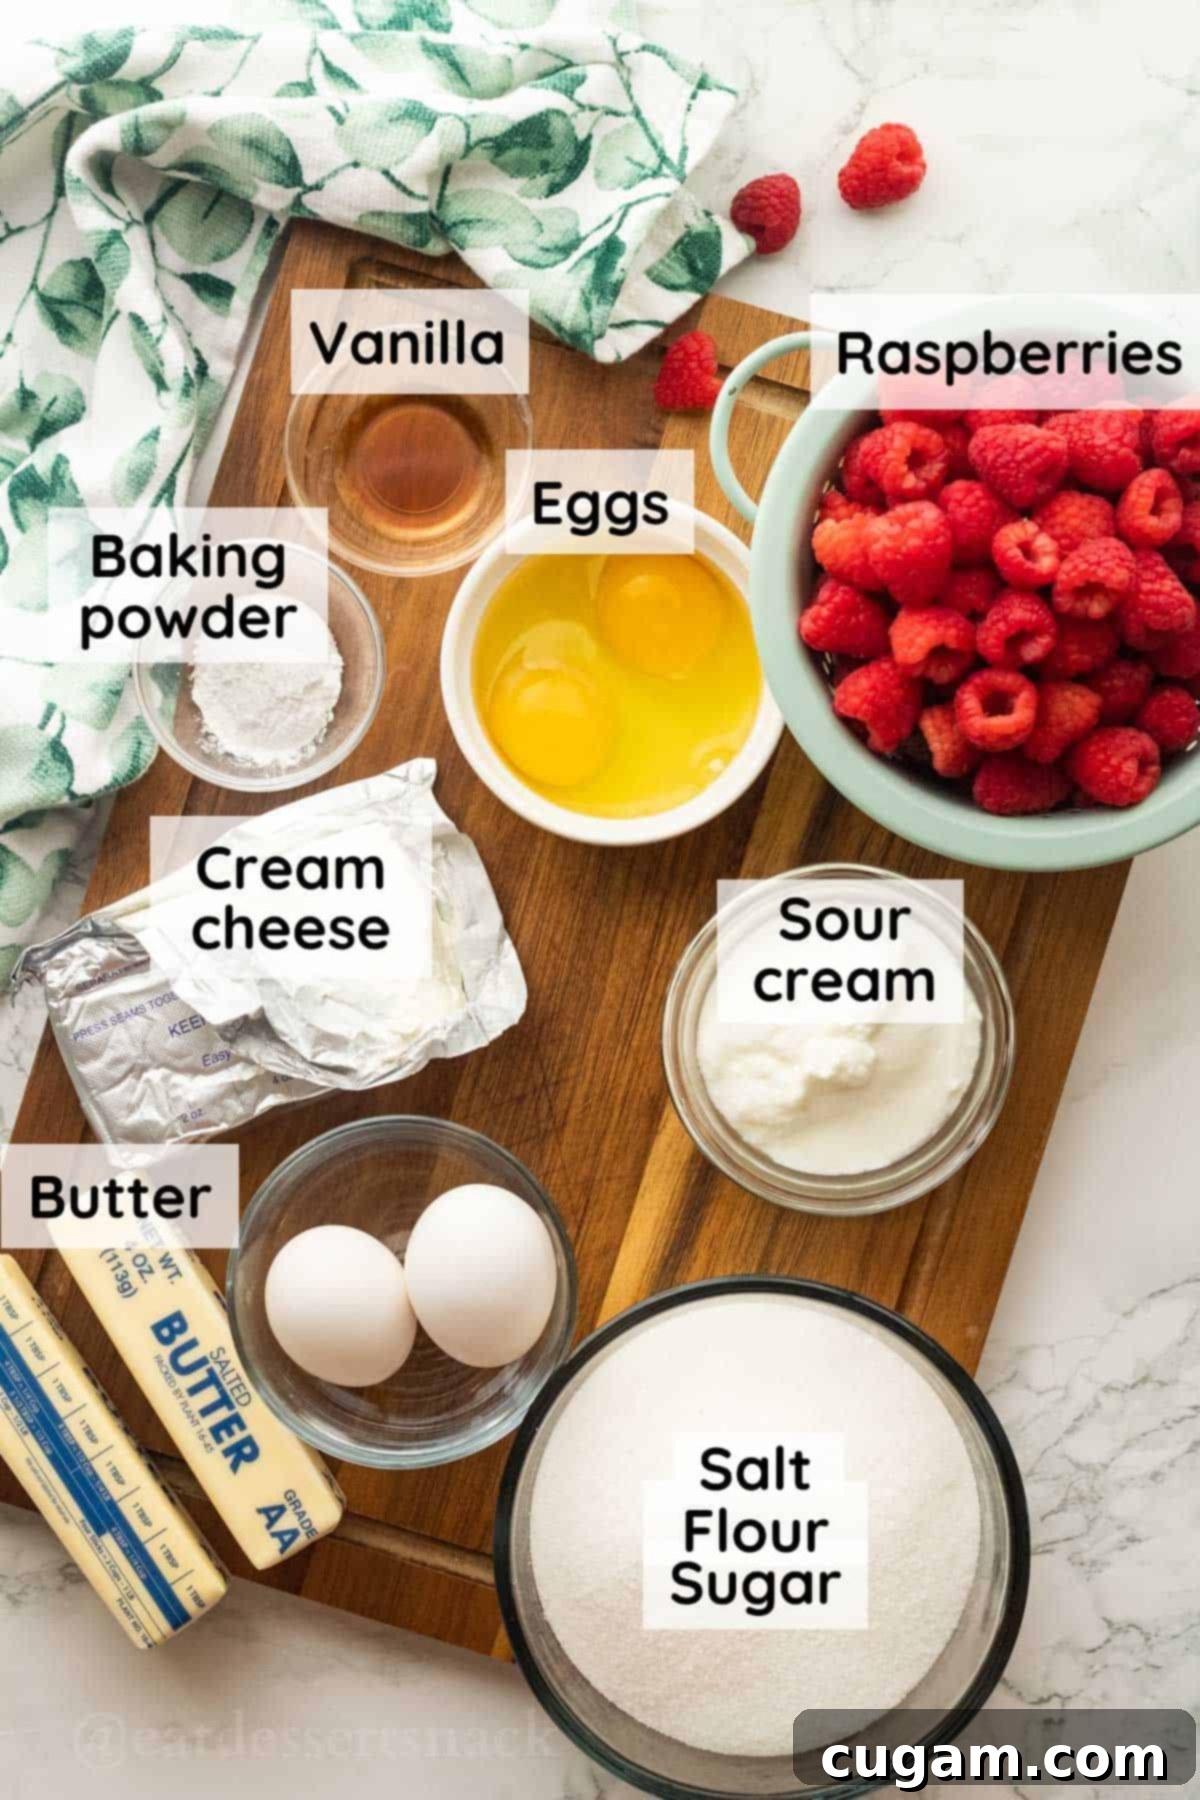
- Butter: For the crust, I personally prefer using salted butter as it adds a wonderful depth of flavor and balances the sweetness. If you’re sensitive to salt or prefer to control the sodium content, unsalted butter works perfectly fine – just add a tiny pinch more salt to the crust mixture to enhance the flavors. Ensure your butter is at room temperature for easy creaming with sugar, leading to a truly tender crust.
- Sour Cream: This unsung hero is crucial for achieving that signature smooth, creamy, and slightly tangy cheesecake filling. It adds a subtle tang that brightens the sweetness and prevents the cream cheese from becoming too dense or “gummy.” If sour cream isn’t available, plain Greek yogurt (full-fat for best results) is an excellent substitute, offering similar texture and a pleasant tang.
- Raspberries: Fresh raspberries are always a fantastic choice, providing the brightest flavor and most vibrant color. However, frozen raspberries are a perfectly acceptable and convenient alternative! The key when using frozen is to thaw them completely and drain them exceptionally well. Excess moisture from frozen berries can make your filling runny and increase baking time, so pat them dry if needed before mashing.
- Cream Cheese: The star of our creamy filling! While full-fat cream cheese always yields the richest, most decadent results, don’t shy away from using ⅓ fat (Neufchâtel) cream cheese if you prefer a slightly lighter option. Both budget-friendly store brands and premium name brands work beautifully, so choose what’s best for your pantry and palate. While fat-free cream cheese will technically work, it may compromise the luxurious texture and flavor we’re aiming for. Remember to soften your cream cheese to room temperature before mixing to ensure a lump-free, silky smooth filling.
You can find the complete list of ingredients and their precise quantities in the detailed recipe card below.
✏️ Smart Substitutions & Exciting Variations
This recipe is incredibly adaptable, allowing you to customize it based on what you have on hand or your preferred flavor profile. Here are some ideas to get you started:
Thoughtful Substitutions:
- Fruit Jam or Pie Filling: If fresh or frozen raspberries aren’t an option, or if you’re looking for an even quicker shortcut, you can easily use your favorite fruit jam or canned fruit pie filling. You’ll need approximately 2 cups of jam or one 21 oz can of fruit pie filling. Ensure the jam is a good quality one that you enjoy the flavor of.
- Cream Cheese Options: While full-fat cream cheese is recommended for the most luxurious texture and flavor, Neufchâtel (⅓ fat) cream cheese can be used without significantly altering the outcome. For a truly lightened version, fat-free cream cheese will work, but be aware that the texture might be slightly less creamy and the flavor less rich.
- Sour Cream Alternatives: Plain Greek yogurt (full-fat for the best consistency) is an excellent stand-in for sour cream. It provides a similar tang and richness, contributing to the smooth texture of the cheesecake layer.
- Zesty Lemon Glaze: For a delightful citrusy twist, substitute the milk in the glaze with a combination of fresh lemon juice and a pinch of lemon zest. This vibrant, lemony glaze will add a bright, refreshing “pop” of flavor that beautifully cuts through the sweetness of the bars.
Creative Variations:
- Endless Fruit Possibilities: The beauty of this recipe lies in its adaptability to various fruits! Imagine a luscious strawberry version, a warm and inviting peach, a tart blackberry, or a classic cherry. The possibilities are truly boundless, so feel free to experiment with your favorite seasonal berries or stone fruits.
- Convenient Pie Fillings: Beyond raspberries, you can utilize any flavor of canned fruit pie filling to create entirely new flavor profiles. For a homemade touch that’s still relatively quick, consider making a half batch of our Homemade Cherry Pie Filling or our Easy Homemade Blueberry Pie Filling to use in place of fresh or frozen raspberries. These homemade fillings offer a superior depth of flavor that elevates the bars even further.
🧑🍳 Step-by-Step Baking Instructions
Making these raspberry cream cheese bars is a straightforward and rewarding process. The steps are quite similar to crafting our popular Strawberries and Cream Bars, with just a slight tweak to the fruit filling recipe. Follow along for perfect results!
• Crafting the Perfect Shortbread Crust
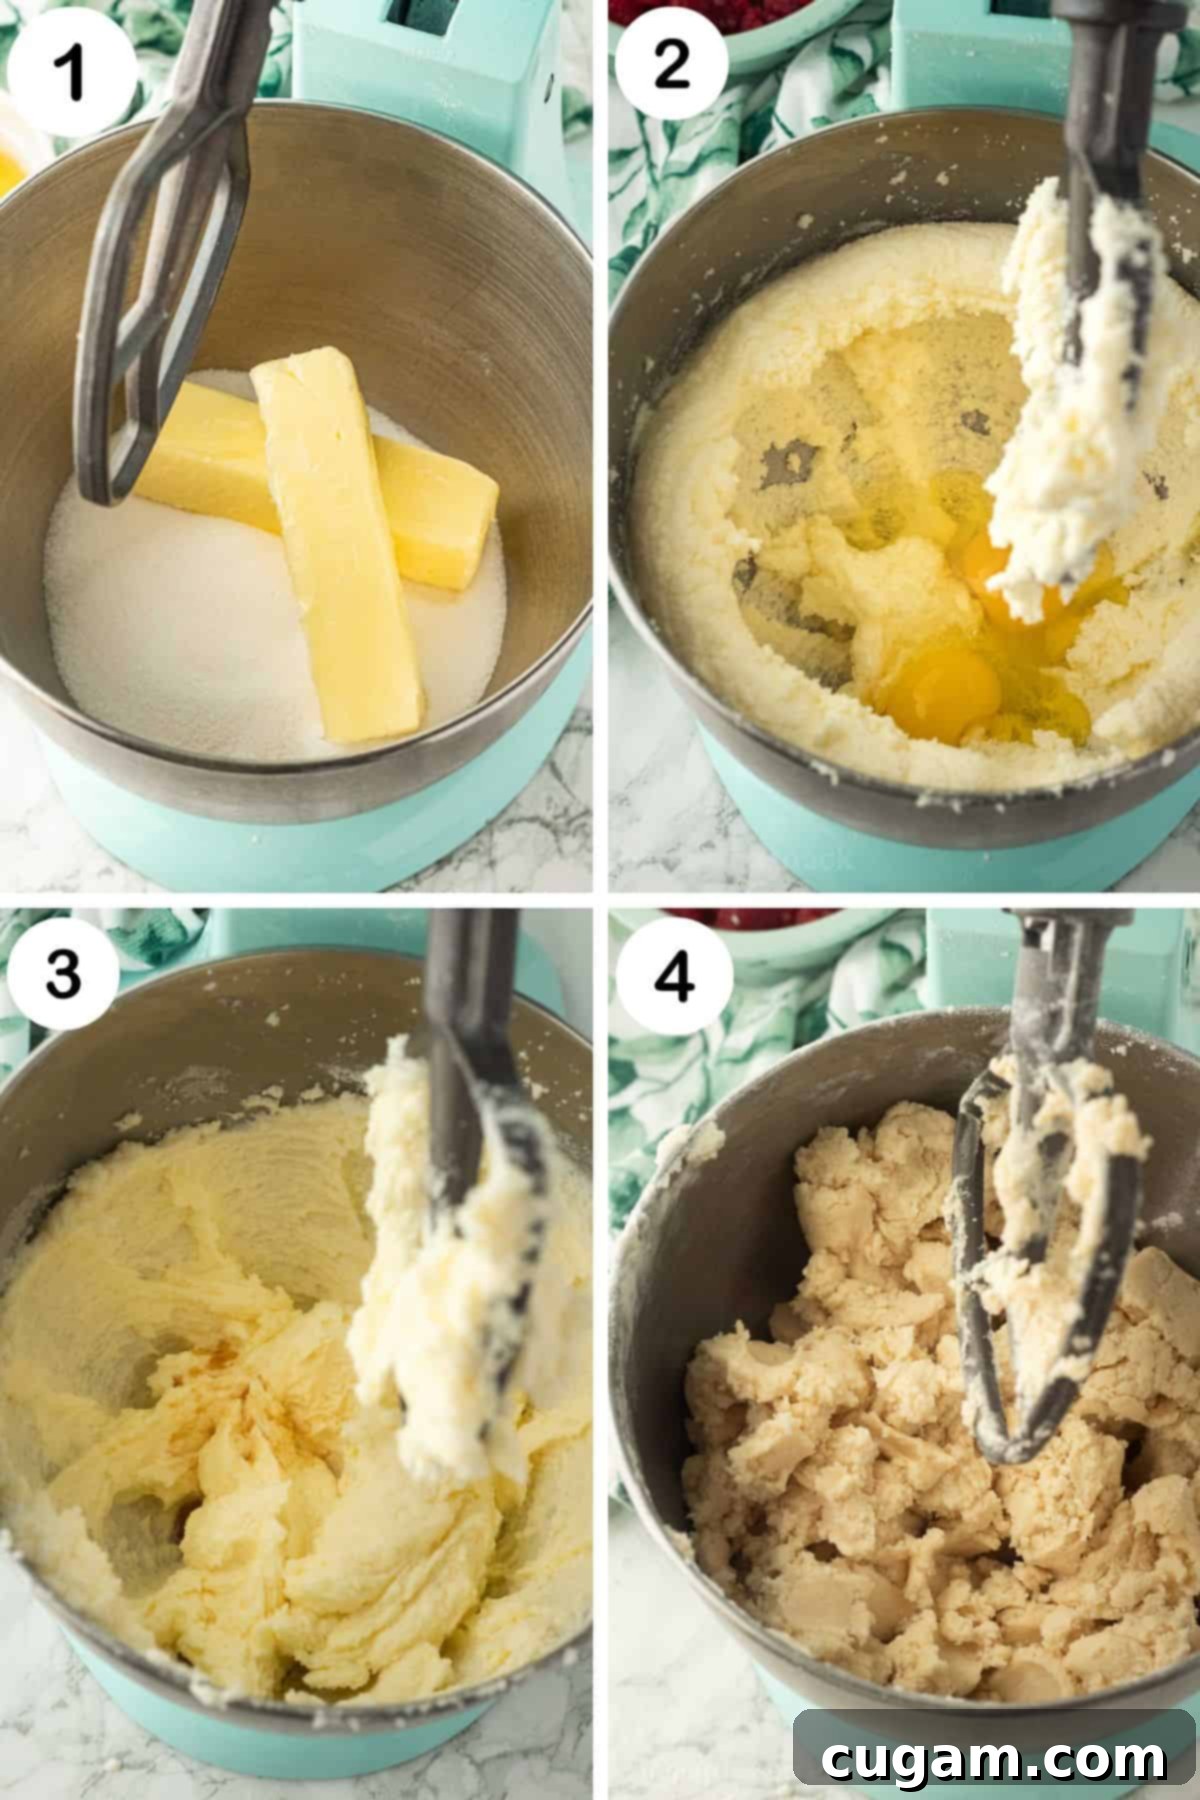
Step 1 (Picture 1 above): Begin by ensuring your butter is softened to a true room temperature, making it pliable and easy to cream. In a large mixing bowl fitted with a paddle attachment, combine the softened butter and white granulated sugar. “Cream” these ingredients together by mixing on medium-high speed for 2-3 minutes. You’re looking for a mixture that is light in color, fluffy in texture, and well-combined, resembling whipped butter.
Step 2 (Picture 2 above): Once your butter and sugar mixture is light and fluffy, crack in the eggs one at a time, mixing well after each addition. Scrape down the sides of the bowl to ensure everything is thoroughly incorporated and smooth.
Step 3 (Picture 3 above): Now, add the vanilla extract to the creamed butter, sugar, and egg mixture. Mix it in until just combined, infusing the dough with its warm, aromatic notes.
Step 4 (Picture 4 above): Gradually introduce the dry ingredients – flour, salt, and baking powder – into the wet mixture. Mix on low speed until the flour is just incorporated and a soft, cohesive dough forms. Be careful not to overmix, as this can lead to a tough crust. The dough should come together easily and feel slightly crumbly yet soft.
• Preparing the Creamy Cheesecake and Raspberry Fillings
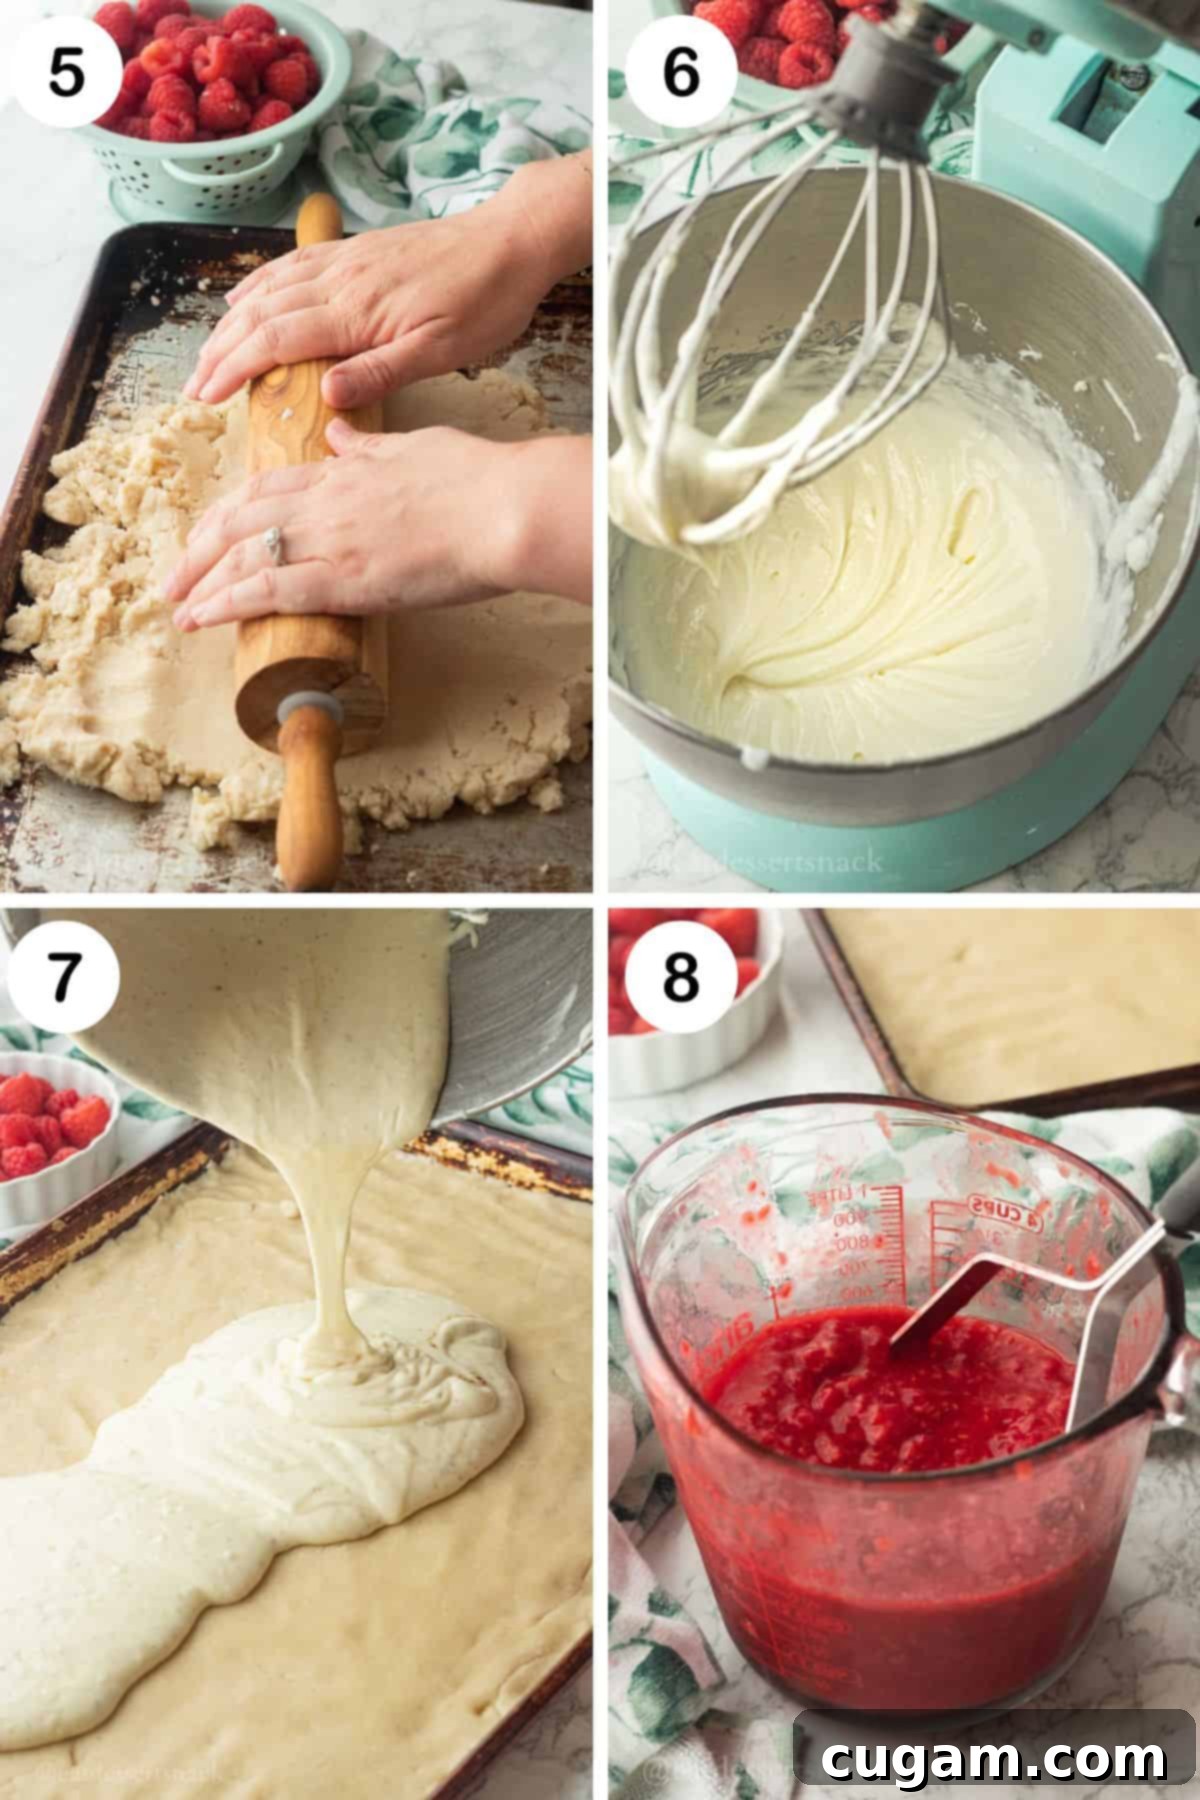
Step 5 (Picture 5 above): Once your dough is ready, carefully reserve about 1 cup of it and set it aside; this will be used for the topping later. Take the remaining dough and press it evenly into a large sheet pan with raised edges. A 9×13 inch pan works perfectly. You can use your fingers or the back of a spoon to create a uniform layer for the crust.
💡 PRO TIP: To streamline your process and minimize dishwashing, you can often use the same mixing bowl for the filling after making the dough. Simply use a rubber spatula to scrape the bowl out thoroughly to remove any dough remnants before proceeding with the filling. No need to wash the bowl unless you prefer!
Step 6 (Picture 6 above): In a clean mixing bowl (or the same one, scraped clean), combine your softened cream cheese with the white granulated sugar. Beat on high speed until the mixture is beautifully smooth, light, and creamy, with no lumps visible. Next, add the sour cream, eggs, and vanilla extract. Continue to mix until everything is thoroughly incorporated and the filling is silky smooth.
Step 7 (Picture 7 above): Gently pour the prepared cream cheese filling over the raw dough crust in the pan. Use an offset spatula or the back of a spoon to carefully spread the filling evenly over the dough, ensuring it reaches all corners.
Step 8 (Picture 8 above): In a separate bowl or a measuring cup, mash your fresh or well-drained thawed raspberries with a fork or a potato masher. Aim for a purée-like consistency, but don’t worry if there are still a few larger pieces of raspberry; these will add lovely bursts of fruit flavor and texture. The goal is to break them down enough so they can be easily spread and swirled.
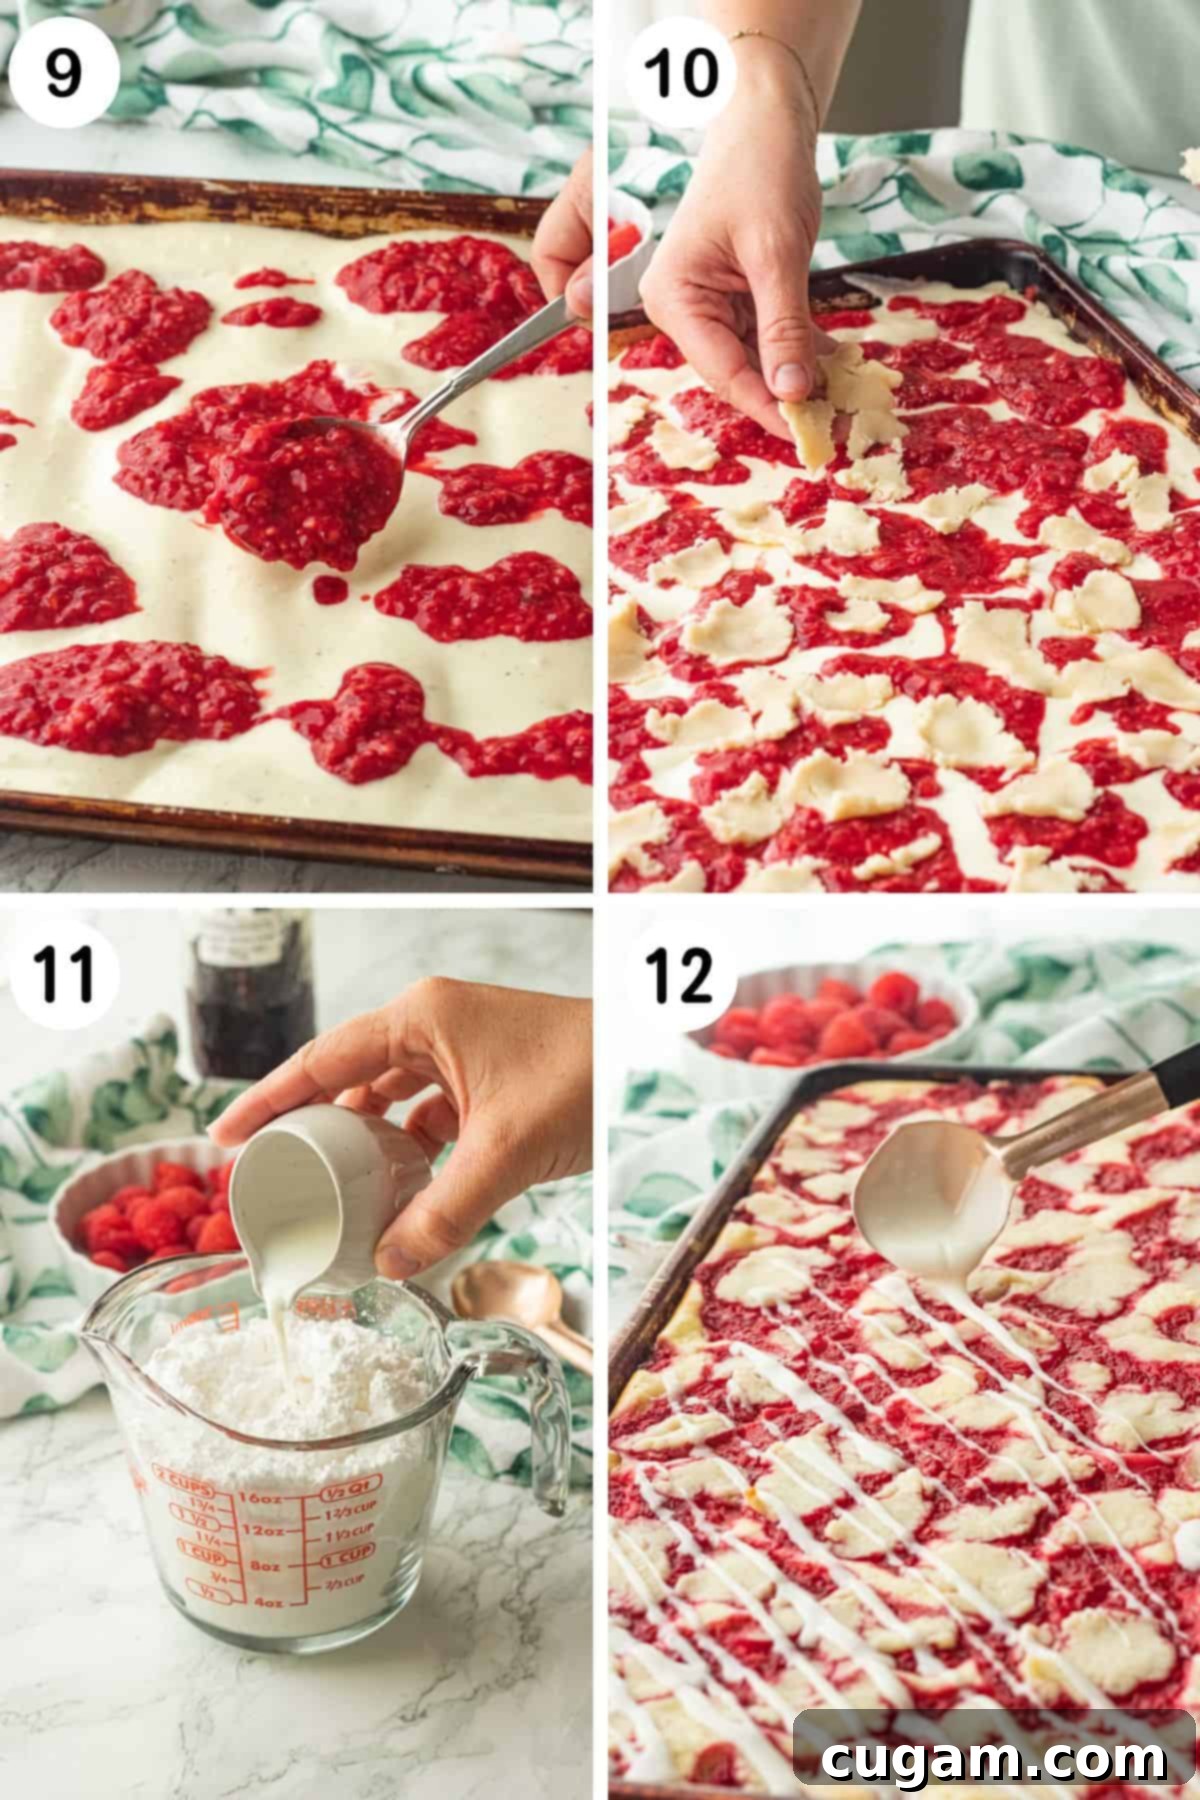
Step 9 (Picture 9 above): With care and a gentle hand, spoon dollops of the mashed raspberry filling lightly over the cream cheese filling. Try not to mix the two fillings together too much at this stage; instead, aim for distinct layers or soft swirls. You can use a knife or a toothpick to gently swirl the raspberry into the cream cheese for a marbled effect if desired.
Step 10 (Picture 10 above): Take the reserved cup of raw dough. Using your fingers, flatten small pieces of the dough and gently rip them into bits. Distribute these small dough pieces evenly over the fruit filling. This creates a wonderful crumbly top layer that bakes into a golden, buttery crust.
Now, your bars are ready for the oven! Bake them as directed in the recipe card below, typically at 350°F (175°C) for about 30 minutes. The bars are done when the edges are lightly golden, and the center is mostly set, though a slight jiggle is perfectly normal as it will firm up further upon cooling.
Step 11 (Picture 11 above): While your delicious bars are baking and then cooling, it’s the perfect time to prepare the dreamy sweet cream glaze. In a small bowl, whisk together the powdered sugar, melted butter, vanilla extract, and milk (or heavy cream) until completely smooth and lump-free. Adjust the consistency by adding a tiny bit more milk if it’s too thick, or a touch more powdered sugar if it’s too thin. You want a glaze that’s pourable but still holds its shape slightly.
Step 12 (Picture 12 above): Once the raspberry cream bars have finished baking and have cooled for at least 15-20 minutes on a wire rack (or even longer, until completely cool, for cleaner slices), generously drizzle the creamy glaze over the top. The glaze will set beautifully as it cools, adding another layer of sweet indulgence.
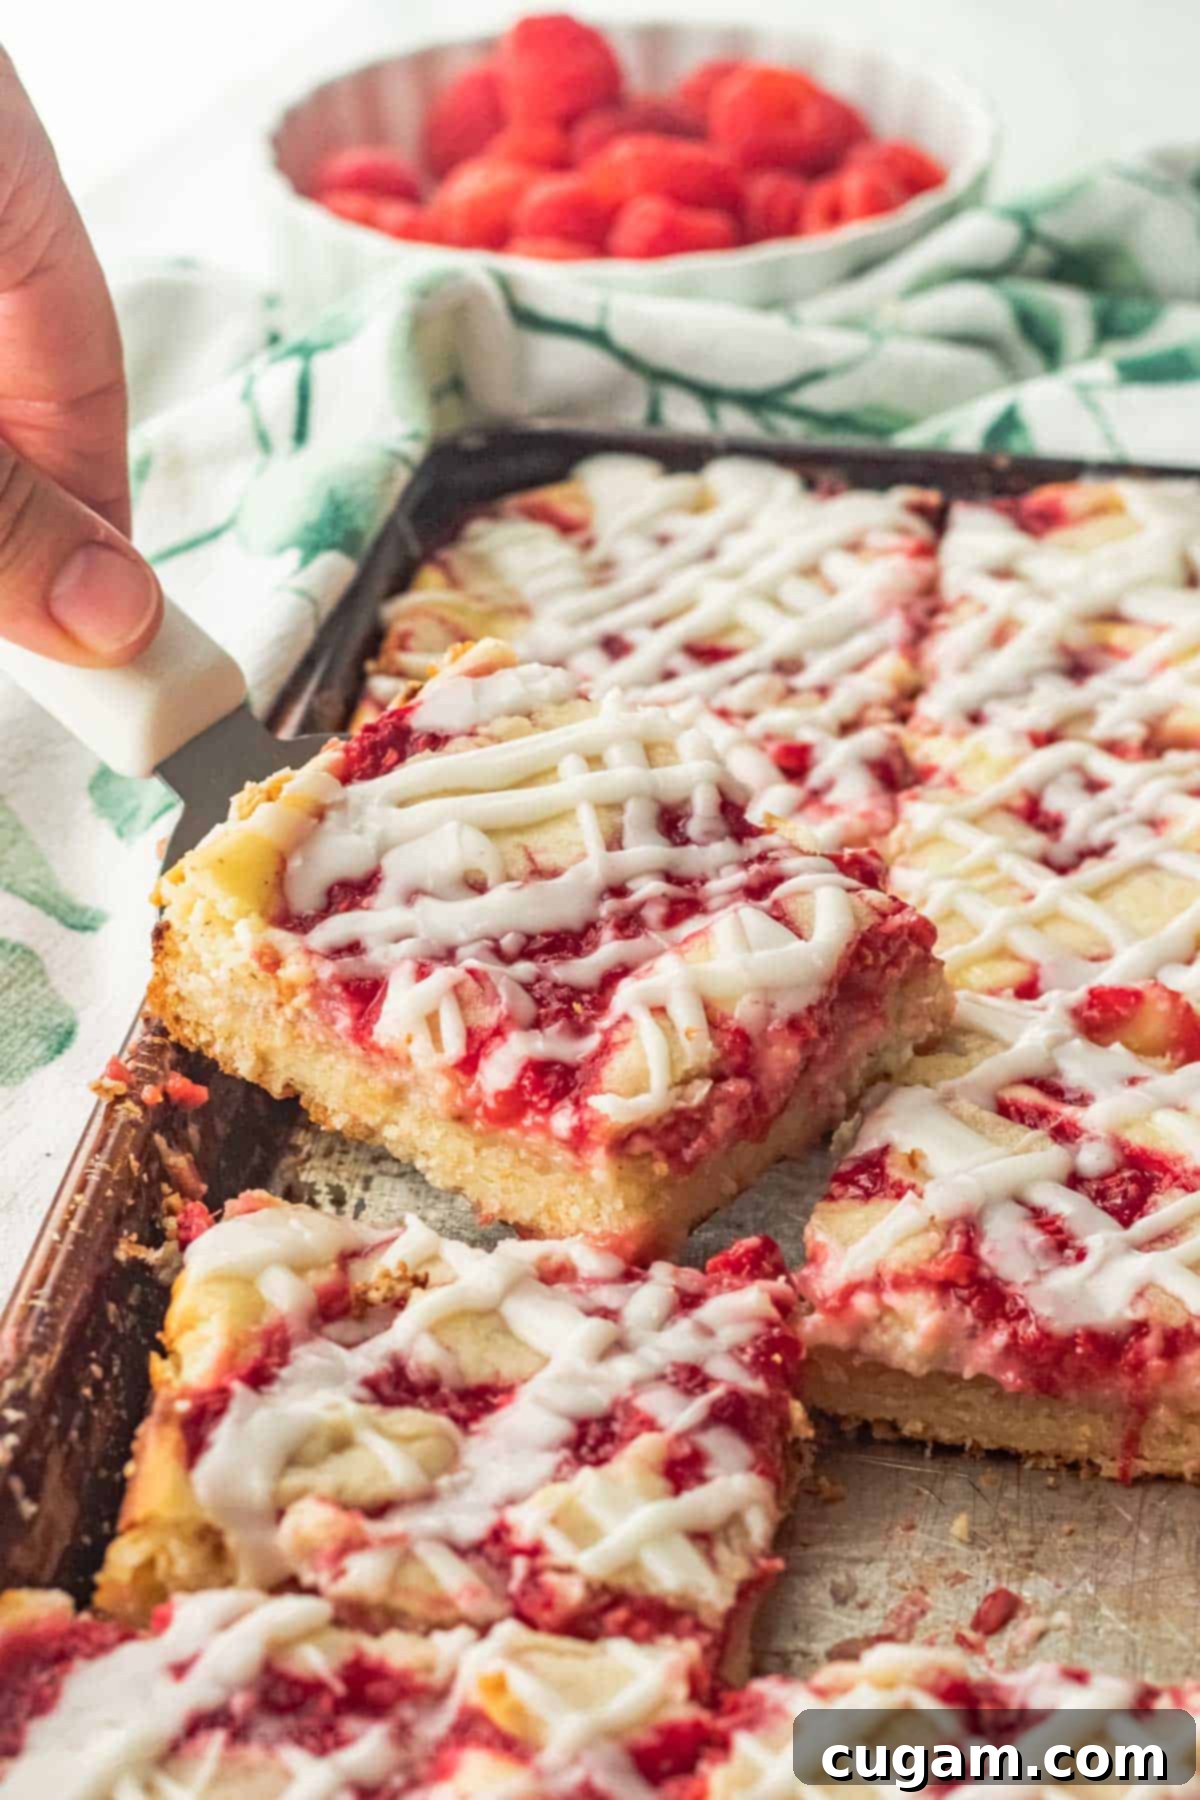
Allow the glaze to set slightly, then slice the bars into squares or rectangles and serve! For the cleanest cuts, ensure the bars are fully cooled before slicing.
❓Frequently Asked Questions About Raspberry Cream Bars
Absolutely! These raspberry cream cheese bars are an excellent make-ahead dessert. You can prepare them a day or two in advance and store them covered in the refrigerator. This allows the flavors to meld beautifully and makes entertaining a breeze. Just pull them out of the fridge about 30 minutes before serving for optimal texture and flavor.
Yes, absolutely! Frozen raspberries work wonderfully. The most crucial step when using them is to thaw them completely before mashing. Once thawed, be sure to thoroughly drain off any excess liquid. You might even want to gently press them in a sieve or pat them dry with a paper towel. Too much moisture can make your filling watery and affect the overall texture and baking time of the bars.
Yes, these delicious bars can be frozen! Once baked and completely cooled, slice them into individual portions. To prevent them from sticking together, freeze the slices in a single layer on a baking sheet until firm, then transfer them to an airtight container with layers of wax paper or parchment paper between them. Thaw individual portions at room temperature for a few hours before serving. While the flavor remains fantastic, the texture of the cream cheese filling might be slightly altered after freezing and thawing, becoming a little softer.
You can, provided it has been properly thawed! Cream cheese can be frozen for up to 2 months. When you’re ready to use it, ensure it thaws completely in the refrigerator. Before using, bring it to room temperature. It might have a slightly grainier texture than fresh cream cheese, but it will still yield good results in baked goods like these bars where it’s mixed with other ingredients.
🧁 More Irresistible Fruity Dessert Recipes to Try!
If you’ve fallen in love with these Raspberry Cream Cheese Bars, you’re in for a treat! Here are more of our favorite fruity dessert recipes that are sure to satisfy your sweet cravings and impress your guests:
- Raspberry Donut Cookies
- Cherry Cheesecake Brownies
- Baked Banana Pie
- Valentines Trail Mix
Did you try this amazing recipe? I would absolutely love to hear from you! Please make sure to leave a ⭐️ star rating and share your thoughts with a comment below the recipe card. Your feedback is incredibly helpful to other home bakers and truly brightens my day!
📲 FOLLOW Sara on Social! 👋 For the latest delicious recipes and behind-the-scenes fun, connect with me on Facebook, Instagram, or Pinterest to see the latest from the kitchen!
📝 Printable Recipe for Raspberry Cream Cheese Bars
Raspberries and Cream Bars
Pin Recipe
Ingredients
For the Sweet & Buttery Crust:
- 1 cup salted butter softened to room temperature
- 2 cups white granulated sugar
- 3 large eggs
- 1 teaspoon pure vanilla extract
- 4 cups all-purpose flour
- 1 teaspoon fine sea salt
- 1 teaspoon baking powder
For the Creamy Cheesecake Filling:
- 8 oz. cream cheese softened to room temperature
- ½ cup white granulated sugar
- ½ cup sour cream (or full-fat Greek yogurt)
- 1 teaspoon pure vanilla extract
- 1 large egg
- 2 cups mashed fresh or well-drained thawed raspberries (or a 21 oz. can of raspberry pie filling)
For the Sweet Cream Glaze:
- 2 cups powdered sugar (confectioners’ sugar)
- 1 tablespoon butter melted
- ½ teaspoon pure vanilla extract
- 3 tablespoons milk or heavy cream (adjust as needed for desired consistency)
Instructions
-
Preheat your oven to 350 degrees F (175°C). Lightly grease a 9×13 inch (approx. 23×33 cm) baking sheet or sheet pan with raised edges.
For the Dough:
-
In a large mixing bowl, cream together the softened butter and granulated sugar until the mixture is light, fluffy, and well combined (about 2-3 minutes on medium-high speed). Beat in the eggs one at a time, ensuring each is fully incorporated before adding the next. Stir in the vanilla extract until just combined.
-
In a separate medium bowl, whisk together the flour, salt, and baking powder. Gradually add this dry mixture to the creamed butter mixture, mixing on low speed until just combined and a soft dough forms. Do not overmix.
Reserve about 1 heaping cup of this dough and set it aside for the topping.
Press the remaining dough evenly into the bottom of your prepared 9×13 inch baking sheet to form the crust.
For the Creamy Filling & Assembly:
-
In a mixing bowl, beat the softened cream cheese and ½ cup granulated sugar together on high speed until the mixture is completely smooth and creamy, with no lumps. Incorporate the sour cream, vanilla extract, and the remaining egg, mixing until the filling is again smooth and uniform. Carefully spread this luscious cream cheese filling evenly over the raw dough crust in the pan.
-
Next, gently spoon dollops of the mashed raspberries on top of the cream cheese filling. Be careful not to aggressively mix the fillings together; you want to maintain distinct layers or gentle swirls. Take the reserved dough from Step 1 and, using your fingers, flatten small pieces and drop them in bits over the fruit filling.
-
Bake the bars in the preheated oven at 350℉ (175°C) for 30 minutes, or until the edges are lightly golden and a wooden toothpick inserted into the center (avoiding the raspberry swirls) comes out mostly clean. The very center may still be slightly jiggly; this is perfectly normal, as it will continue to set and firm up as it cools.
Allow the bars to cool completely on a wire rack before glazing for the best results and cleanest slices.
For the Sweet Cream Glaze:
-
In a small bowl, whisk together the powdered sugar, melted butter, vanilla extract, and milk (or heavy cream) until a smooth and pourable glaze forms. If the glaze is too thick, add a tiny bit more milk; if too thin, add a teaspoon more powdered sugar. Drizzle this creamy glaze generously over the completely cooled raspberry cream cheese bars. Once the glaze has set, slice the bars into desired portions and serve.
Notes
Storage: These raspberry cream cheese bars can be stored at room temperature in an airtight container for up to 3 days. For extended freshness, or if your kitchen is particularly warm, you can refrigerate them for up to 5 days.
