Decadent Brownie Cheesecake Bars: The Ultimate Fudgy, Creamy, and Easy-to-Make Dessert
Originally published August 28, 2017, updated with new photos, tips, and step-by-step instructions February 2024.
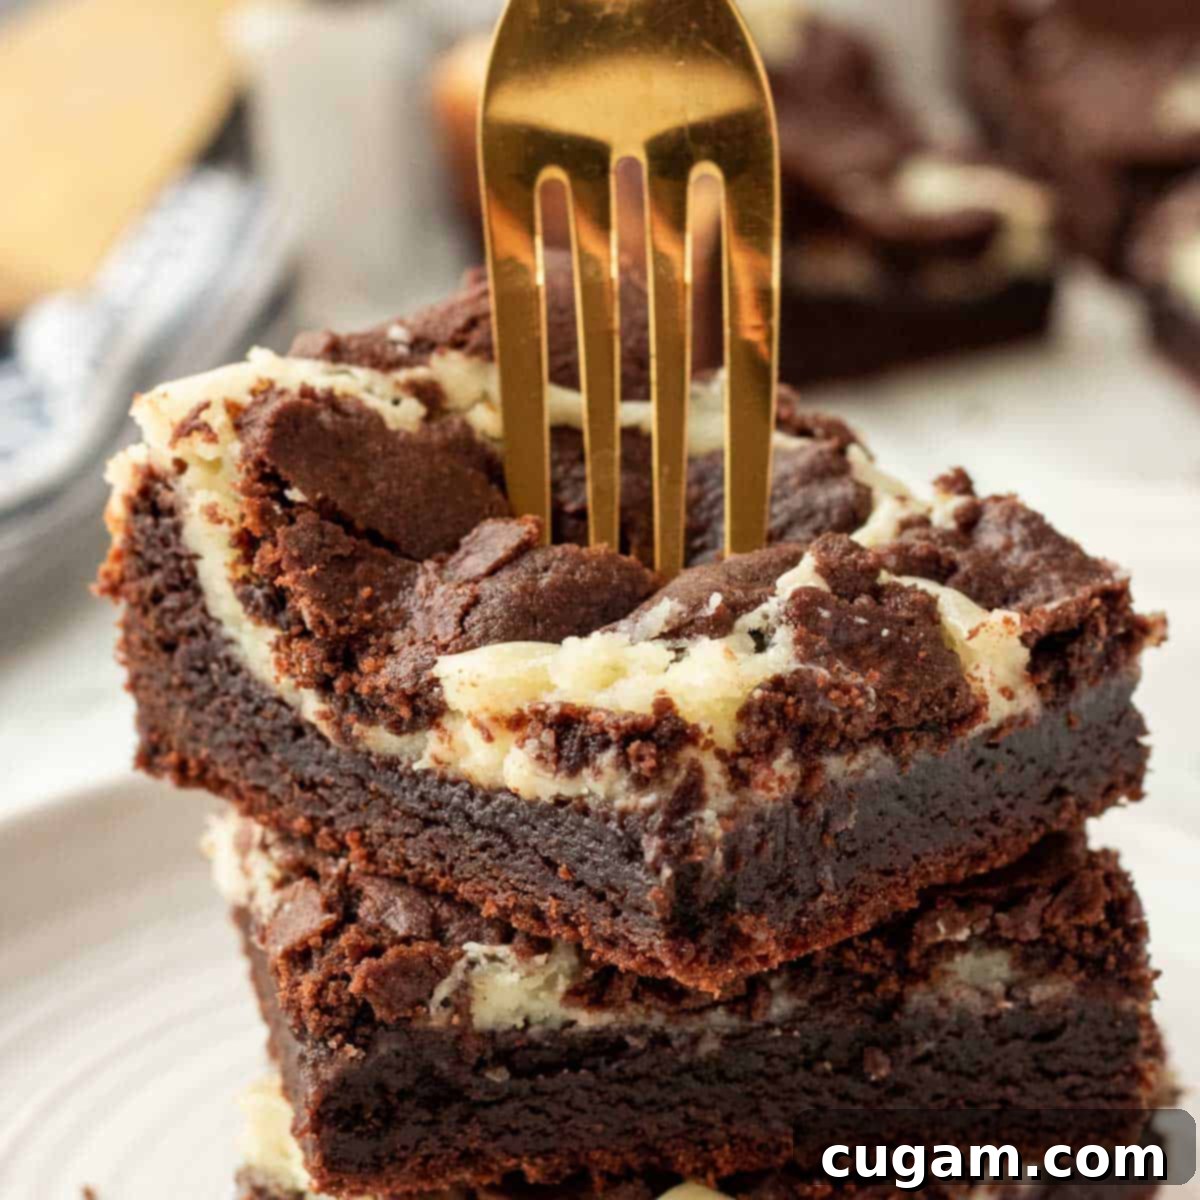
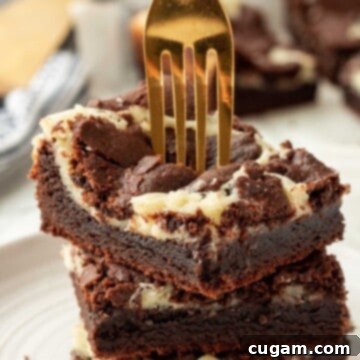
Prepare to fall in love with these irresistibly gooey chocolate Brownie Cheesecake Bars, a dessert that masterfully combines a rich, fudgy brownie base with a lusciously creamy cream cheese center, all topped with a soft, cookie-like brownie layer. What makes these bars truly remarkable is that they bake to perfection in just 30 minutes, offering a quick yet utterly decadent treat!
These delightful bars are a simplified, yet equally delicious, version of my popular Cherry Cheesecake Brownies. The sheer ease of preparation is one of their biggest selling points, making them a go-to recipe for any occasion, whether you’re a seasoned baker or just starting out in the kitchen.
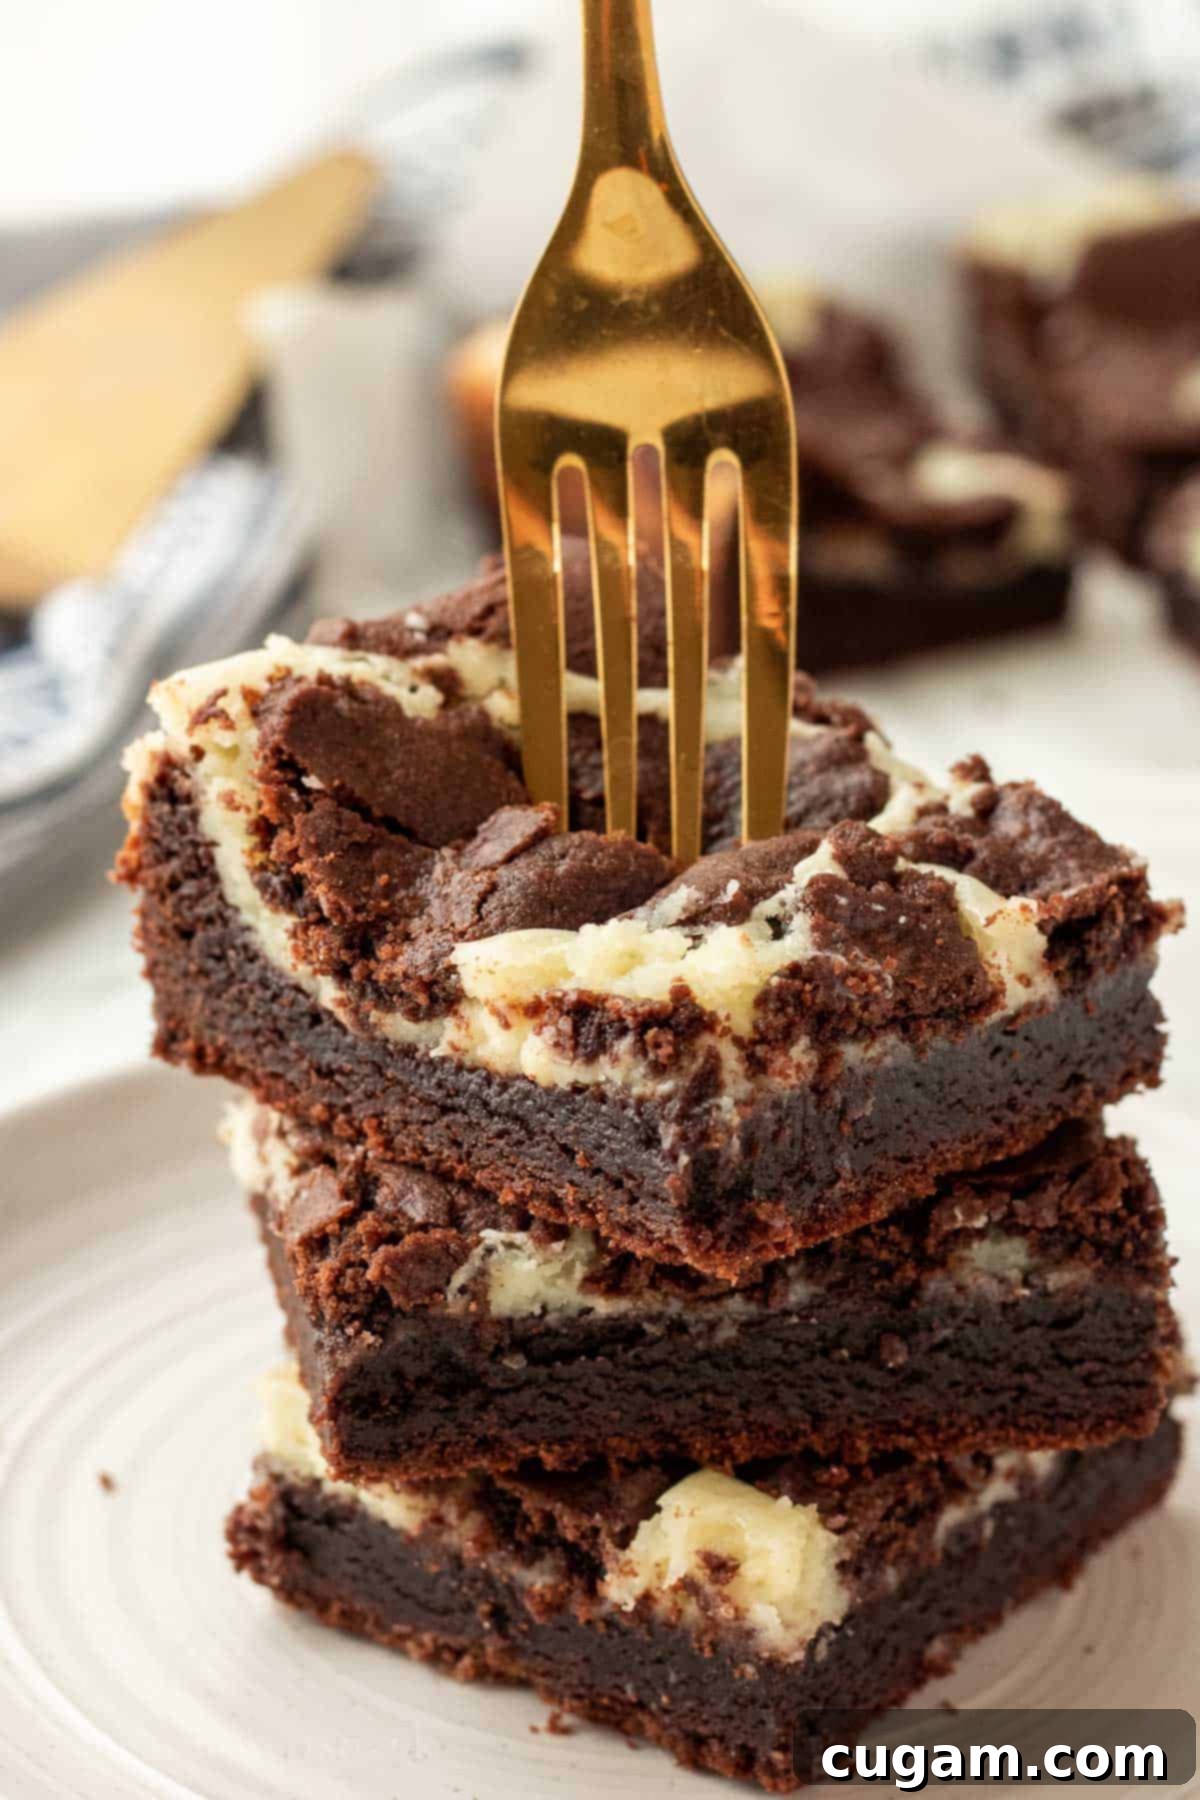
Brownie-bottom cheesecake bars have held a special place in my heart, and in the hearts of my friends and family, for a very long time. When I say old favorite, I truly mean it – I’ve been perfecting and making these delightful treats for over 15 years! They’ve graced countless girls’ nights, added a sweet touch to Valentine’s parties, and even served as celebratory desserts for birthdays. Their consistent popularity is a testament to their simple charm and incredible taste. The combination of dense chocolate brownie and tangy, sweet cheesecake is a match made in dessert heaven, creating a harmonious blend of textures and flavors that’s hard to resist.
[feast_advanced_jump_to]
⭐️ Why You’ll Love This Brownie Cheesecake Bars Recipe
- Effortless Layering: Unlike traditional multi-layered desserts, there’s no need to bake the brownie base and cheesecake filling separately. All the layers bake beautifully together at the same time, which drastically saves time and simplifies the entire baking process. This means less waiting and more enjoying!
- Beginner-Friendly Cheesecake: The cream cheese filling for these brownies is incredibly forgiving. It’s not fussy like some delicate cheesecakes, making it perfect for bakers of all skill levels. You’ll achieve a smooth, creamy result every time without stress.
- No Water Bath Required: Say goodbye to the common cheesecake dilemma of a water bath! This recipe eliminates that extra step, ensuring a perfectly set and delicious cheesecake layer without the hassle and potential for soggy crusts.
- Customization Galore: These bars are wonderfully versatile. You can easily customize them with fun flavors, add different toppings, or even get creative by cutting out shapes with the reserved dough for the top layer. Imagine spelling out friends’ names or creating festive designs for holidays – the possibilities are endless!
- Ultimate Texture Combo: Indulge in the delightful contrast of textures. The base offers a soft, rich chocolate brownie, while the topping provides a tender, cookie-like texture. This dual brownie layer perfectly complements the creamy, tangy cheesecake filling in the middle, creating a symphony of flavors and textures in every bite. MMMmmm, indeed!
- Crowd-Pleasing Dessert: Whether it’s a casual family gathering, a potluck, or a special celebration, these brownie cheesecake bars are always a hit. Their universal appeal and satisfying richness make them a guaranteed favorite among chocolate and cheesecake lovers alike.
🛒 Key Ingredients for Perfect Brownie Cheesecake Bars
Creating these delicious brownie cheesecake bars relies on a few essential ingredients that work together to form their signature fudgy, creamy, and soft textures. Here’s a closer look at what makes them so special:
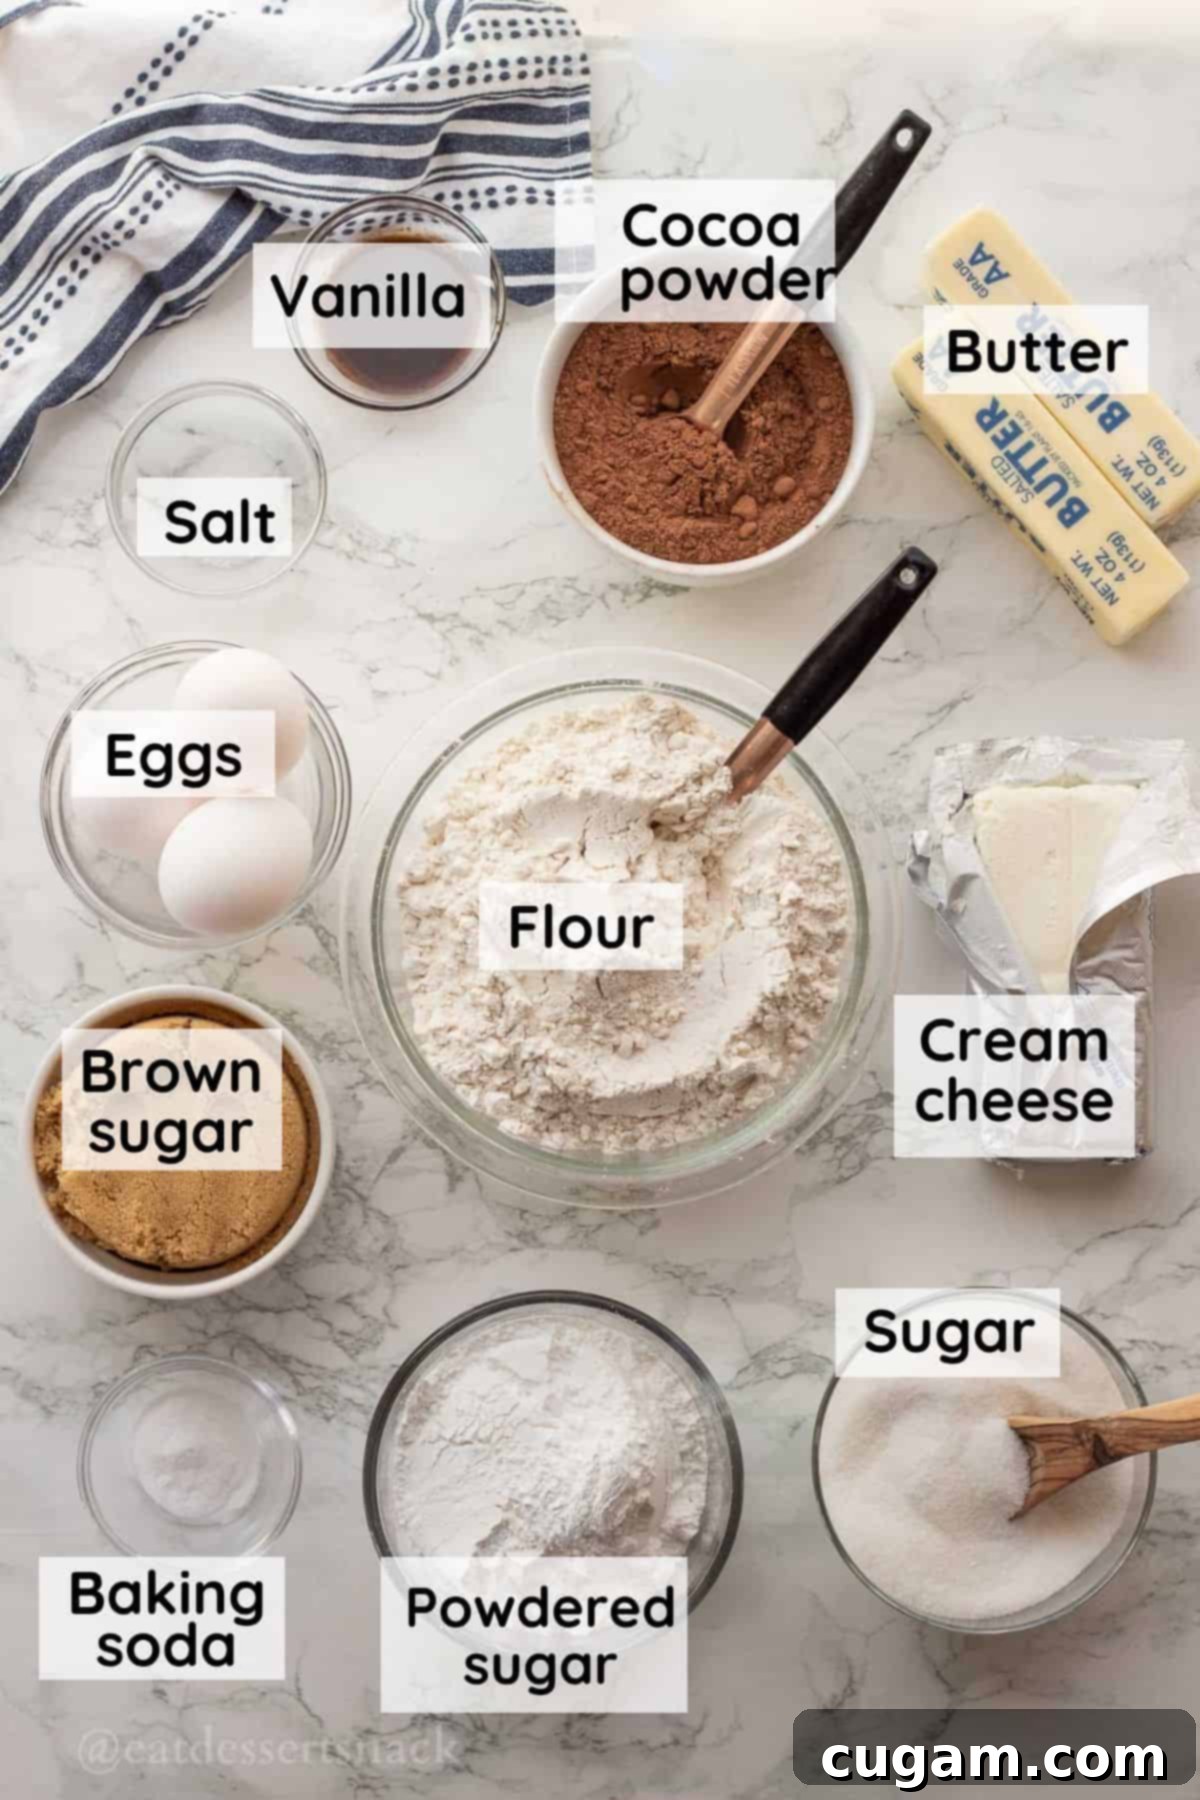
- Butter: This is truly the powerhouse of flavor and texture for both the brownie base and top layer. Using good quality, softened butter ensures a rich taste and contributes significantly to that irresistible fudgy texture in our cream cheese brownie bars. Make sure it’s at room temperature for optimal creaming.
- Granulated White Sugar & Brown Sugar: A combination of both sugars creates the perfect sweetness and texture. White sugar contributes to crisp edges and a balanced sweetness, while Brown Sugar is essential for giving the brownie bottom its deeply moist and wonderfully fudgy texture. It also adds a subtle caramel note.
- Cocoa Powder: The heart of the chocolate flavor! You can use regular unsweetened cocoa powder for a classic chocolate taste, or opt for “special dark” cocoa powder (Dutch-processed) for a deeper, richer, and less bitter chocolate experience. Both options are absolutely delicious and will yield fantastic results.
- All-Purpose Flour: Provides the structure for our brownie layers. Measured correctly, it ensures the bars are tender and chewy, not cakey or tough.
- Eggs: Act as a binder, adding richness, moisture, and helping the brownies achieve their classic chewy texture. For the cheesecake, eggs help with the custard-like set.
- Vanilla Extract: A crucial flavor enhancer that complements the chocolate and cream cheese beautifully, adding depth and warmth to the overall taste profile.
- Baking Soda: Works as a leavening agent, giving the brownie a slight lift without making it overly airy, preserving that desired fudginess.
- Salt: Essential for balancing the sweetness and intensifying the chocolate flavor, making the brownies taste even more indulgent.
- Cream Cheese: The star of the show for the creamy filling! Ensure it’s full-fat and thoroughly softened to room temperature for a lump-free, silky smooth cheesecake layer.
- Powdered Sugar (Confectioners’ Sugar): Used in the cheesecake filling to achieve a light, airy, and incredibly creamy consistency without any graininess. Its fine texture dissolves easily, creating a perfectly smooth filling.
See recipe card below for a full list of ingredients and precise measurements.
✏️ Substitutions & Variations for Your Brownie Cheesecake Bars
These brownie cheesecake bars are wonderfully adaptable, allowing you to get creative and tailor them to your personal preferences or what you have on hand. Here are some fantastic ideas to elevate your dessert:
- Luxurious Toppings: For an extra decadent treat, consider serving these warm with a dollop of freshly whipped cream, a scoop of vanilla bean ice cream, or even a drizzle of homemade caramel or chocolate sauce. The contrast of warm and cold, and the added richness, is truly heavenly.
- Enhance the Creaminess: If you desire an even richer, silkier cream cheese texture, simply add ⅓ cup of sour cream or full-fat plain Greek yogurt to the cream cheese filling. This addition introduces a slight tang and an incredibly smooth consistency that melts in your mouth.
- Chocolate Lover’s Dream: Elevate the chocolate factor by sprinkling a generous amount of chocolate chips (mini or regular-sized) on top of the cheesecake layer before baking for a delightful chocolate chip cheesecake brownie variation. Alternatively, for a fun and melty surprise, add Hershey’s Kisses to the top after the bars are baked and slightly cooled, similar to my beloved Peanut Butter Kiss Bars.
- Peanut Butter Swirl: For the ultimate sweet and salty combination, drizzle melted peanut butter generously over the baked and cooled bars. A peanut butter cheesecake brownie is a truly irresistible flavor profile that will surely impress.
- Chunky Chocolate Goodness: If you love an intense chocolate experience, you could sprinkle in large chocolate chunks or your favorite chopped chocolate bar into the brownie batter before pressing it into the pan. This adds pockets of melted chocolate throughout the fudgy base, just like in my signature Fudgy Brownie Recipe.
- Nutty Crunch: Fold in about ½ cup of chopped walnuts, pecans, or almonds into the brownie batter for an added layer of texture and nutty flavor.
- Coffee Boost: Enhance the chocolate flavor by adding 1 teaspoon of instant espresso powder or coffee granules to the cocoa powder mixture. It deepens the chocolate notes without making the brownies taste like coffee.
- Extract Experimentation: Swap out some of the vanilla extract for a different flavor. A hint of almond extract for a marzipan-like note, or peppermint extract for a festive twist, could transform these bars.
🧑🍳 Easy Step-by-Step Instructions for Brownie Cheesecake Bars
Creating these layered brownie cheesecake bars is surprisingly straightforward. The process involves making a simple fudgy brownie base and a luscious, creamy cheesecake filling, then combining them for a spectacular bake. Let me walk you through the steps to ensure your success!
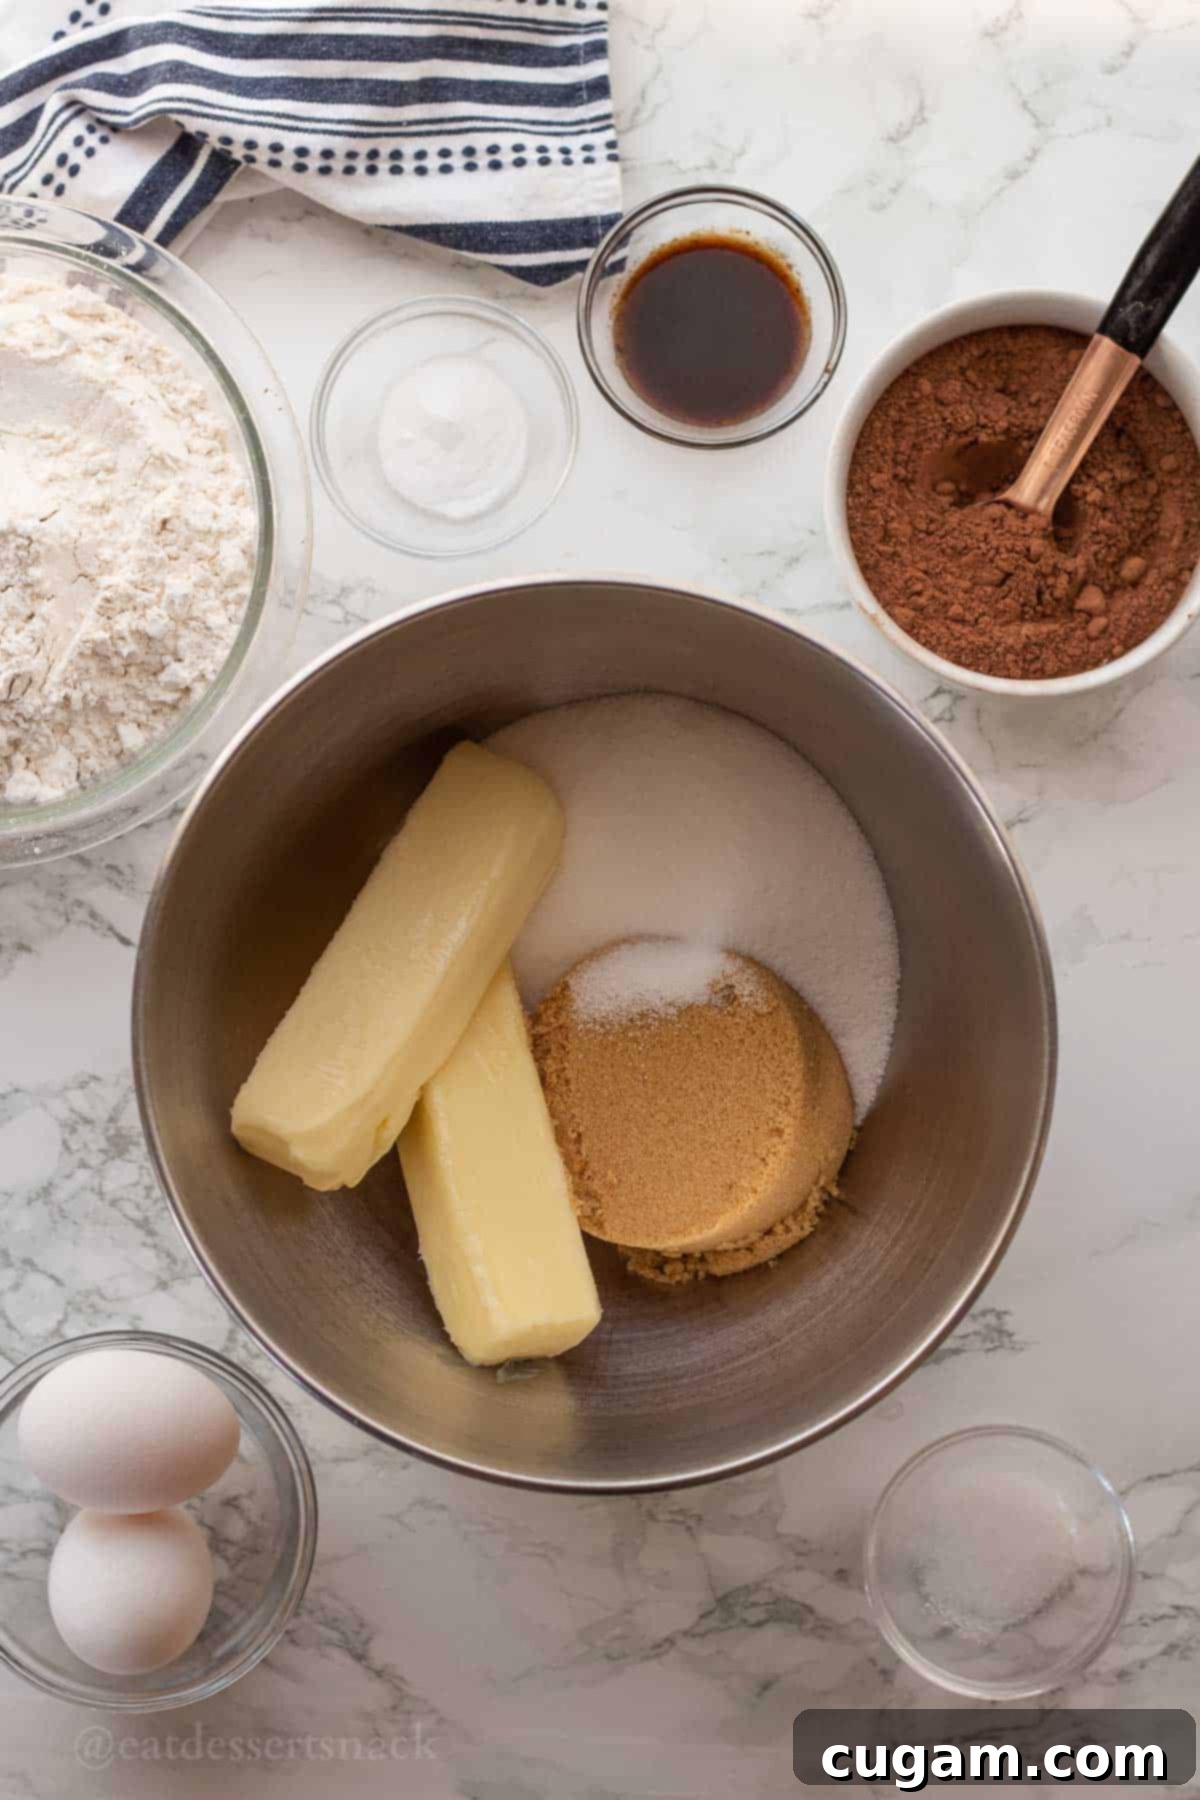
Step 1 – Cream Butter and Sugars: In a large mixing bowl, combine your softened butter, granulated white sugar, and brown sugar. Using an electric or stand mixer fitted with the paddle attachment, beat these ingredients together on medium to high speed for approximately 3 minutes. Continue mixing until the mixture becomes light, fluffy, and noticeably pale in color. This step is crucial for incorporating air and creating a tender brownie texture.
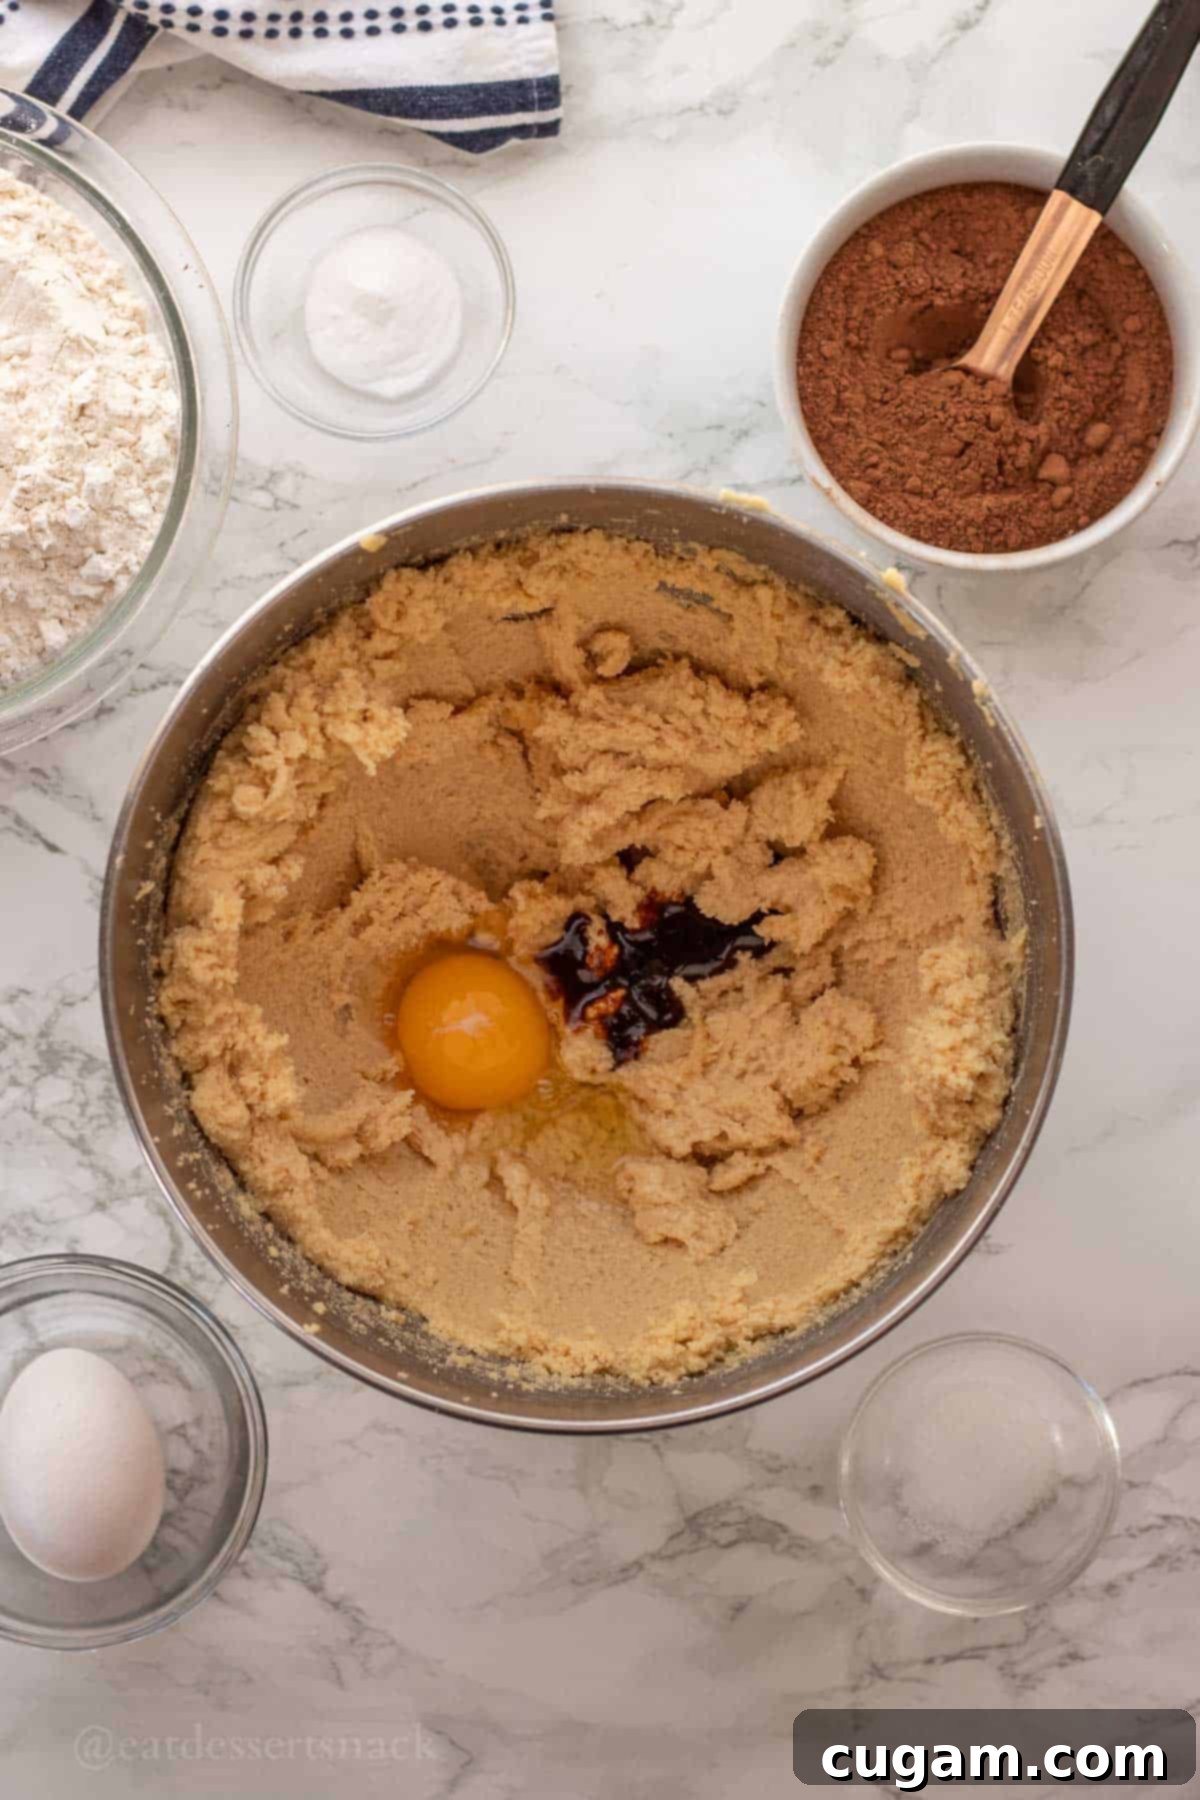
Step 2 – Add Wet Ingredients: Next, pour in the vanilla extract, then add the eggs one at a time. After each egg addition, mix thoroughly until it is just combined before adding the next. Continue mixing for another 1-2 minutes until the sugar starts to fully dissolve and the mixture appears smooth and fluffy. Scrape down the sides of the bowl as needed to ensure everything is well incorporated.
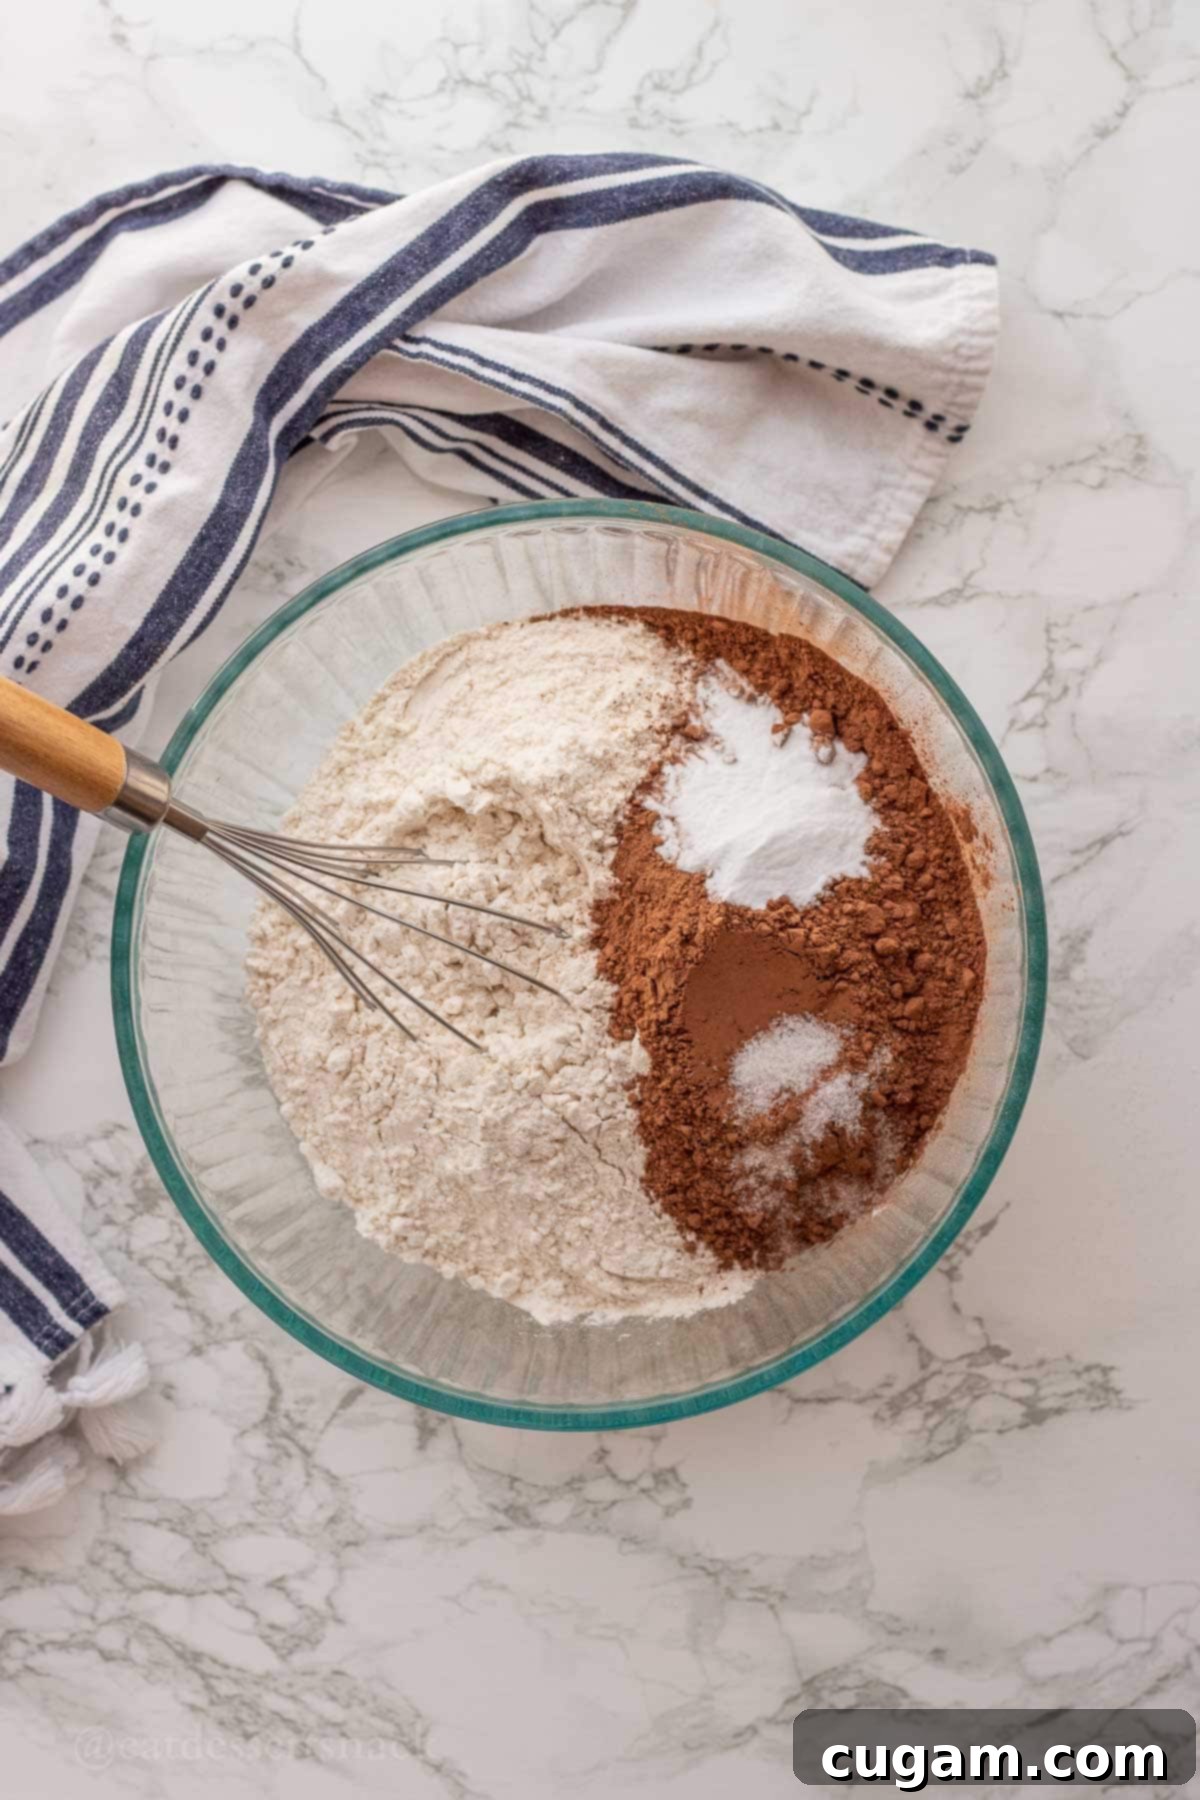
Step 3 – Combine Dry Ingredients: In a separate medium-sized bowl, whisk together the all-purpose flour, rich cocoa powder, a pinch of salt, and the baking soda. Ensure these dry ingredients are well combined to distribute the leavening and flavor evenly throughout the brownie batter.
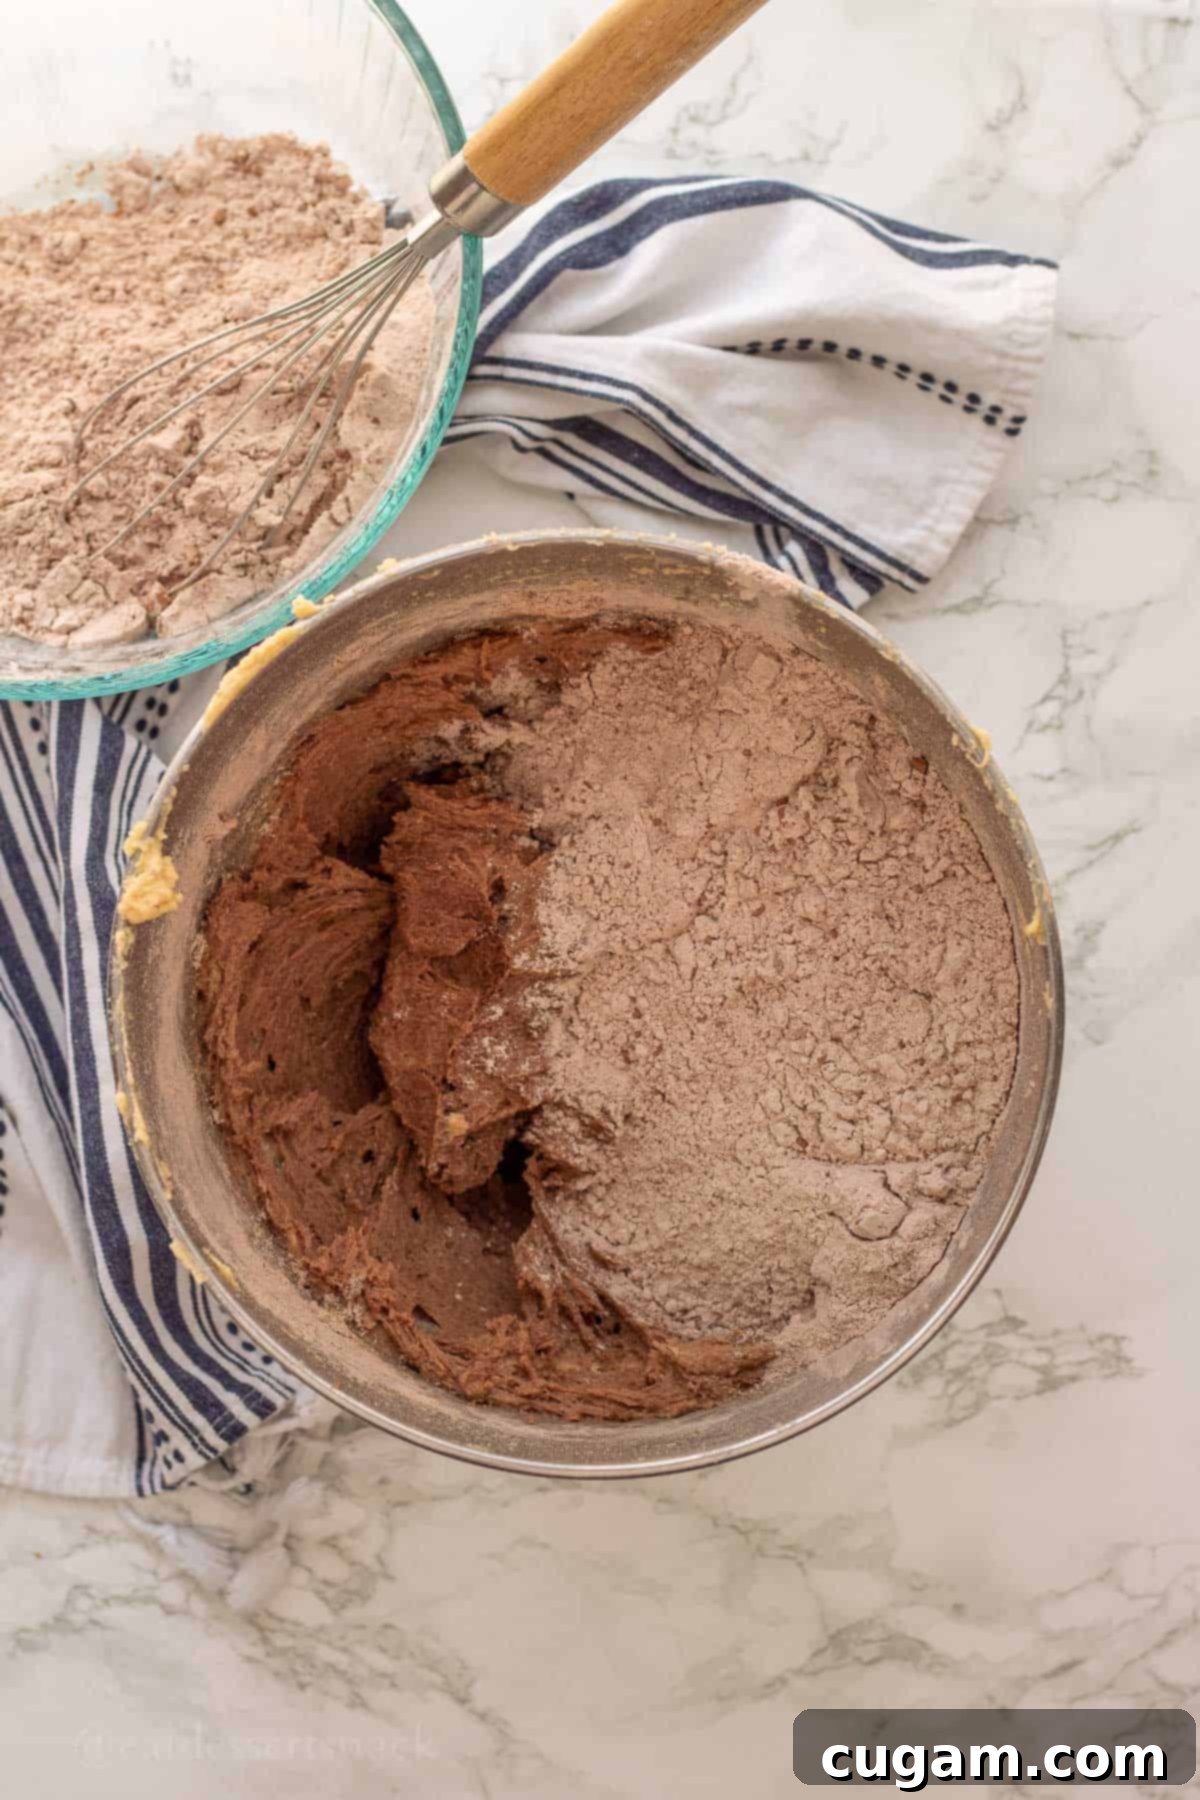
Step 4 – Mix Dry into Wet: Gradually add the dry flour mixture to the wet butter mixture in small batches. Mix on low speed, or by hand with a spatula, just until combined after each addition. Be careful not to overmix, as this can lead to tough brownies. The resulting texture will be thick, resembling a sticky, rich chocolate cookie dough. This is your delicious brownie batter!
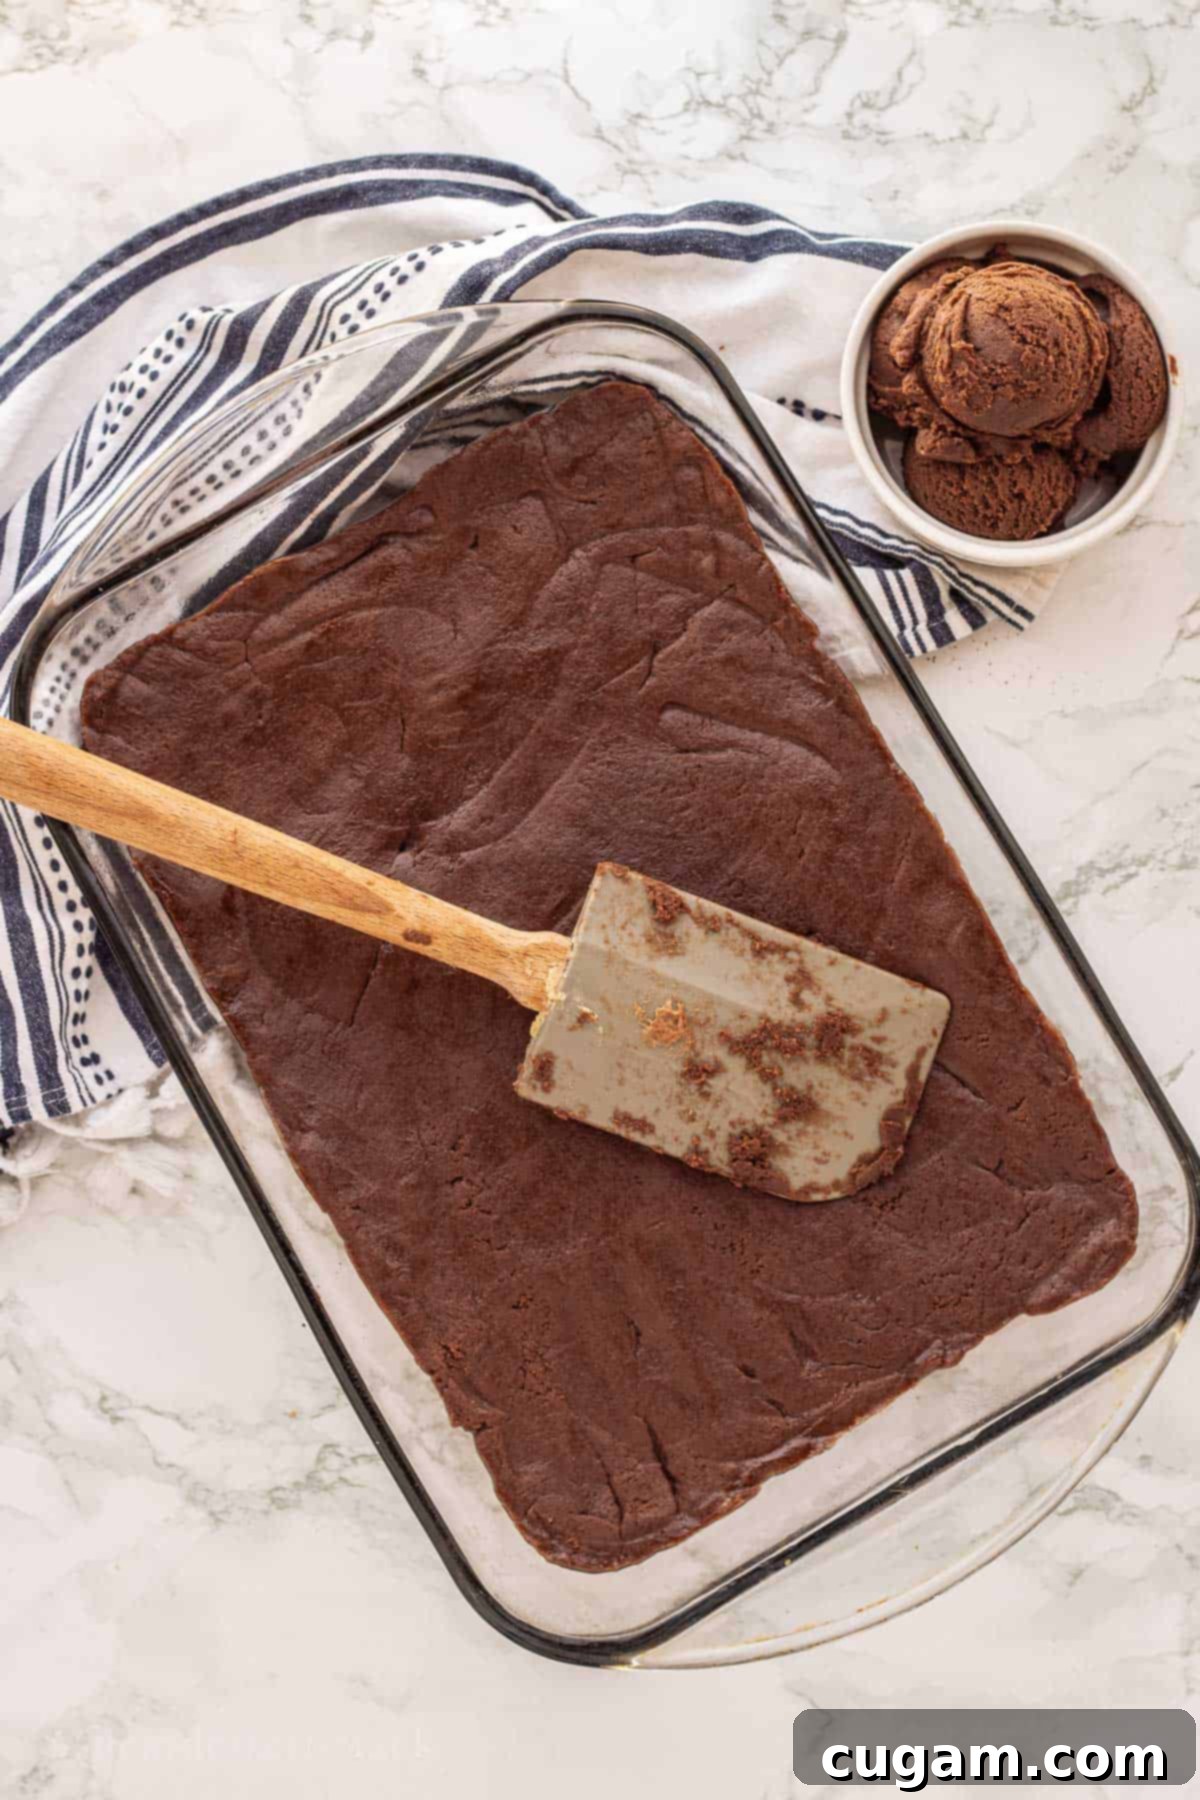
Step 5 – Prepare Brownie Base: Take one cup of the prepared brownie dough and set it aside for the topping later. With the remaining brownie dough, press it evenly into the bottom of a lightly greased or parchment-lined 9×13 inch baking pan. Use your hands or the back of a spoon to ensure a compact, uniform layer. Make sure it’s spread from edge to edge to form a sturdy base for the cheesecake.
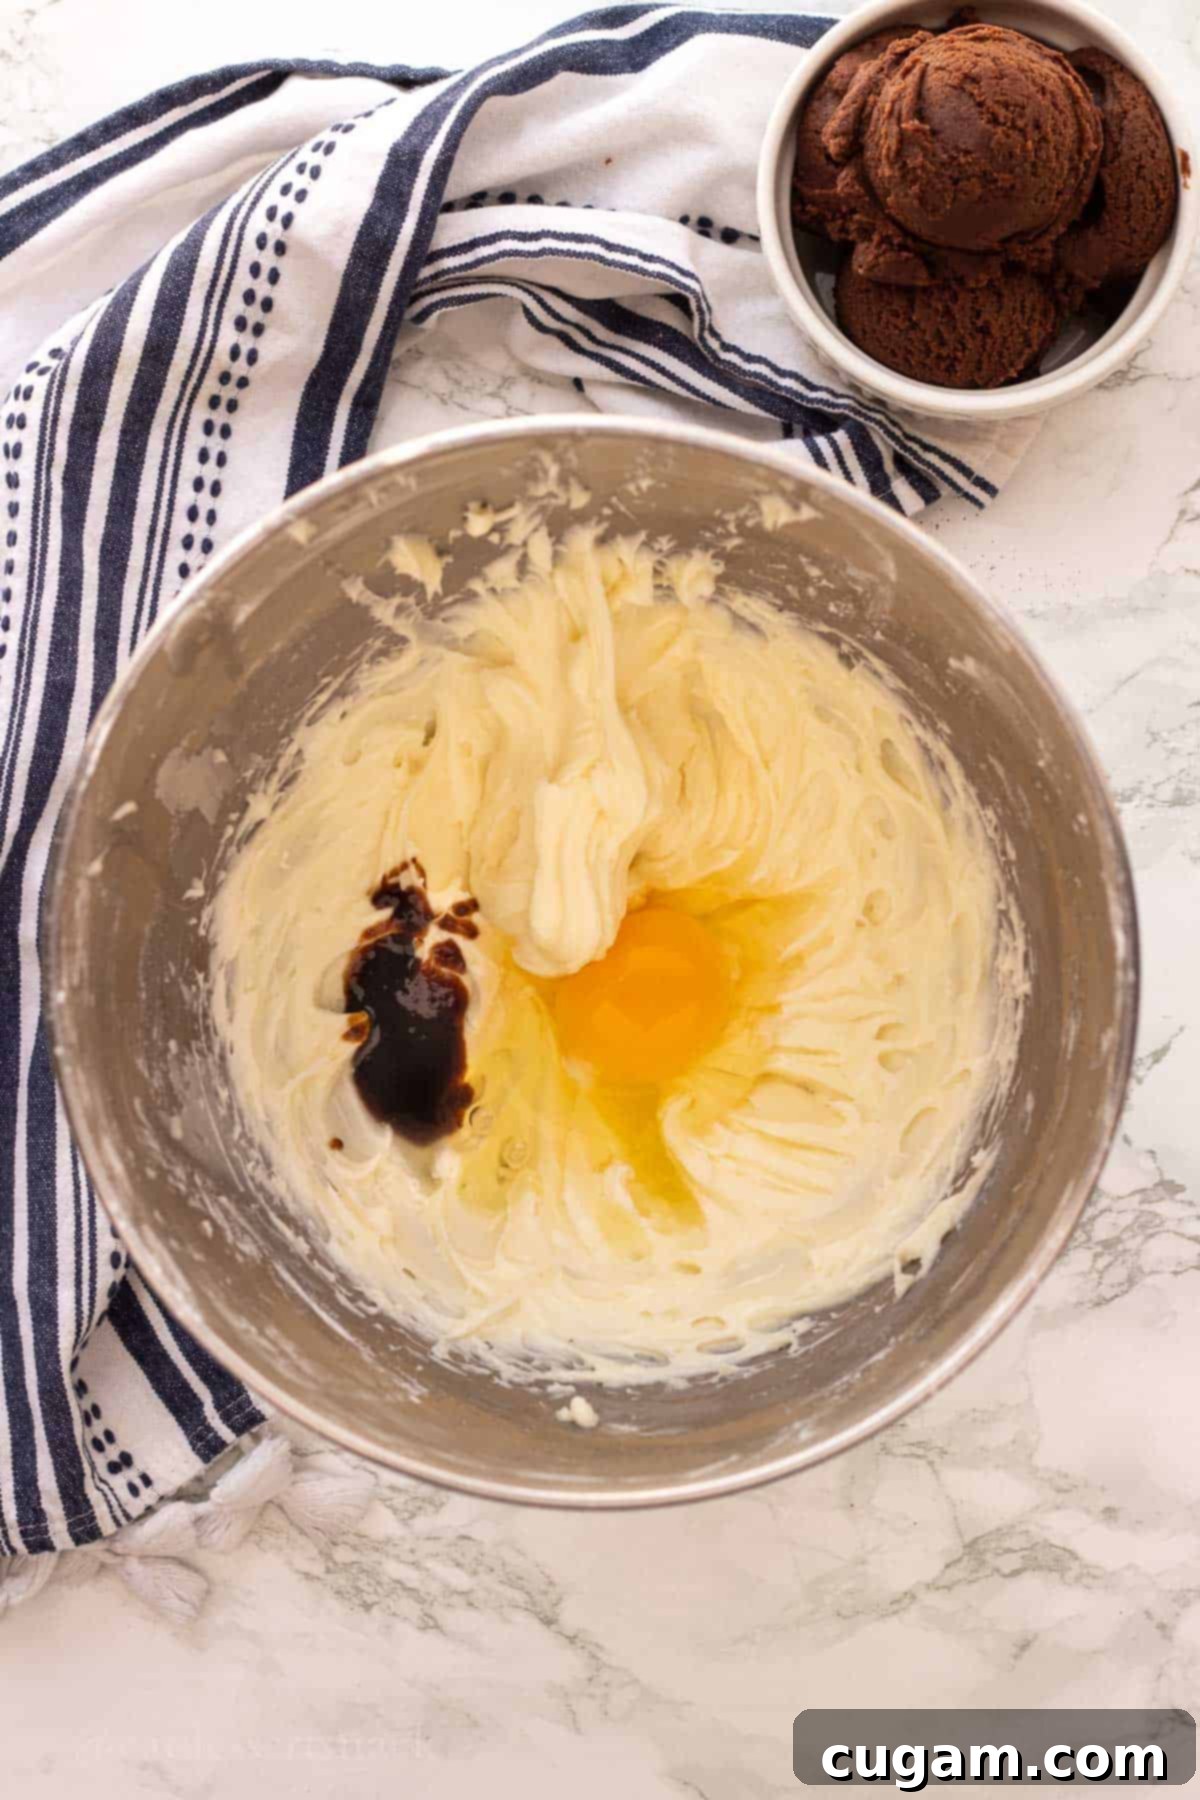
Step 6 – Craft the Creamy Cheesecake Filling: In a clean bowl, combine the softened cream cheese and powdered sugar. Mix with an electric mixer on medium speed for 1-2 minutes until the mixture is beautifully smooth and creamy with no lumps. Then, add in the egg and vanilla extract, and continue mixing for another 1-2 minutes until the filling is perfectly incorporated and boasts a luscious, smooth consistency. This easy filling is a highlight of these bars.
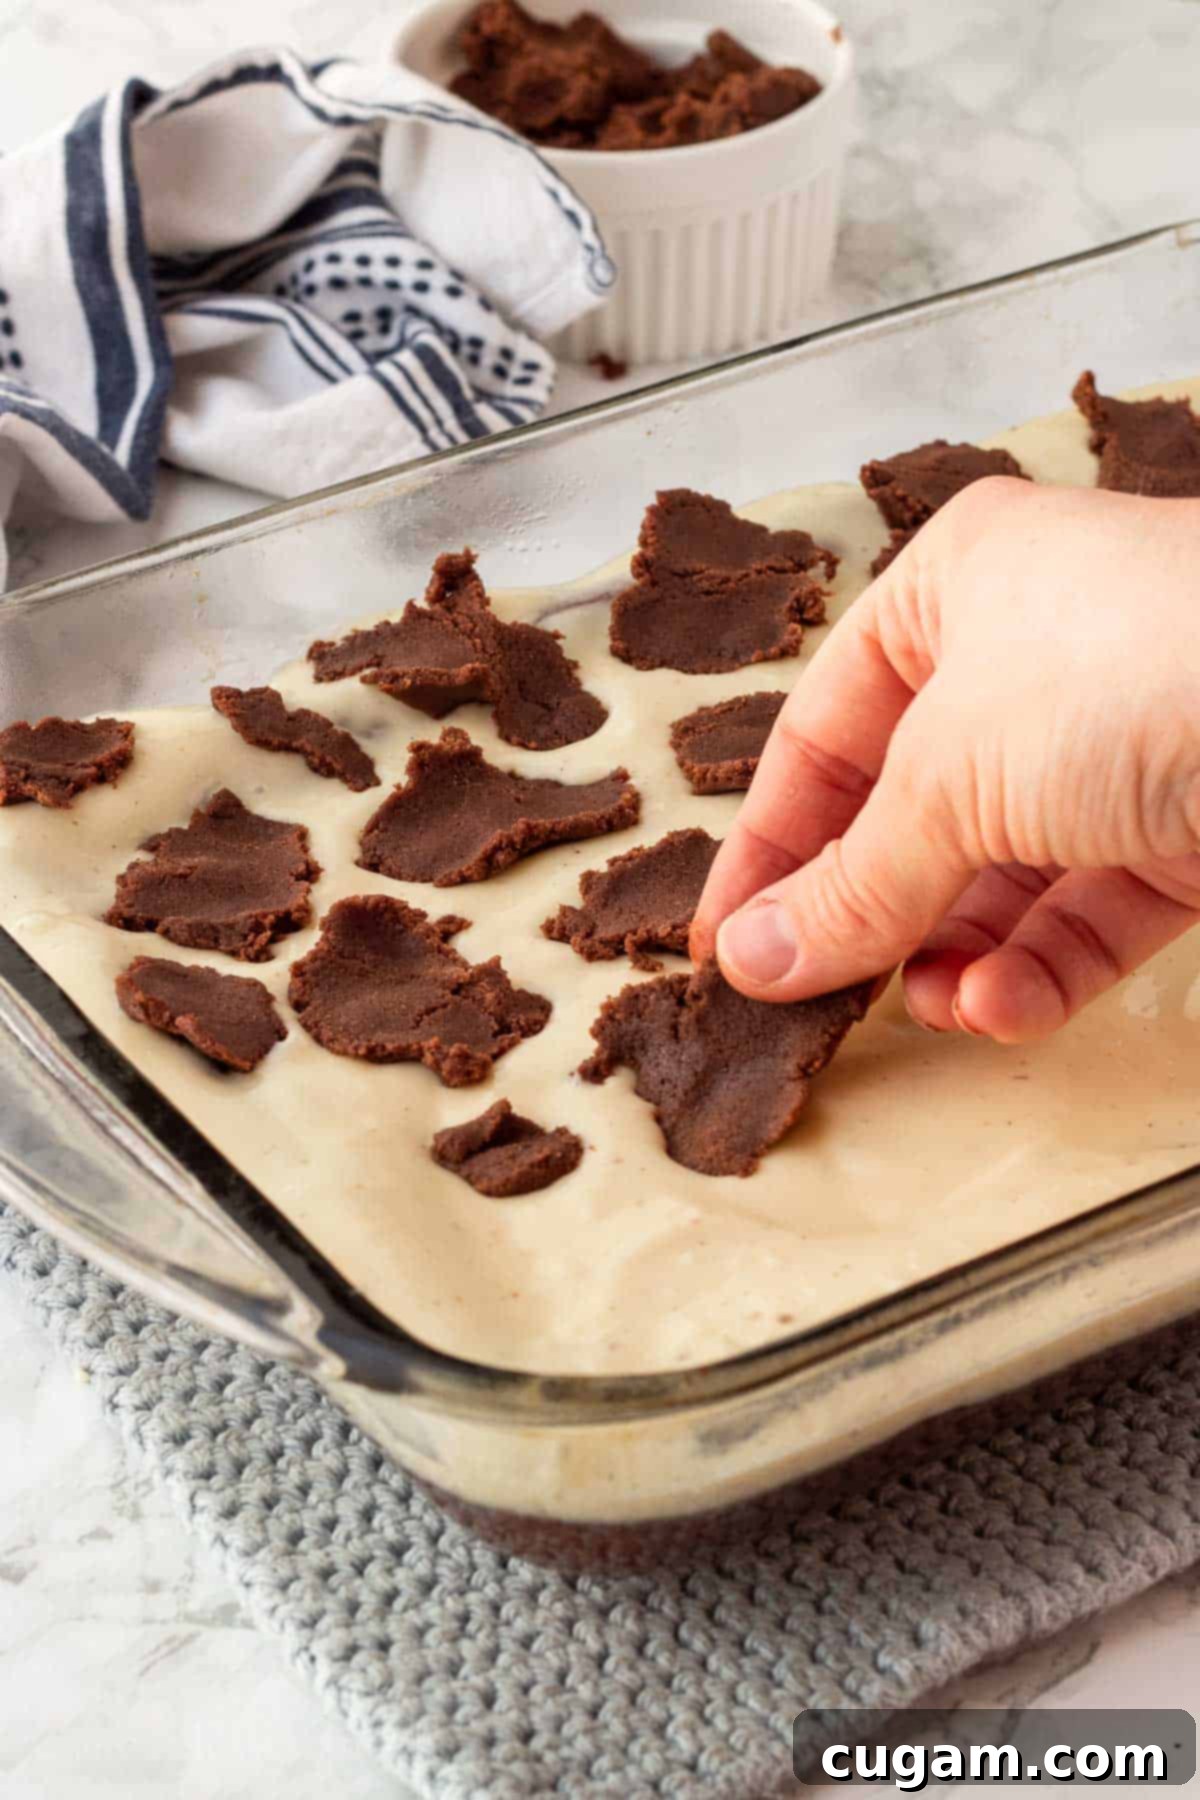
Step 7 – Assemble the Layers: Carefully pour the prepared cheesecake filling directly over the unbaked brownie dough base in the pan. Spread it gently and evenly with a spatula. Now, take the reserved one cup of brownie dough. Smash or flatten small pieces of this dough and artfully scatter them over the top of the cheesecake filling. You can create a marbling effect, a “giraffe” pattern, or even press them into fun shapes for a decorative touch!
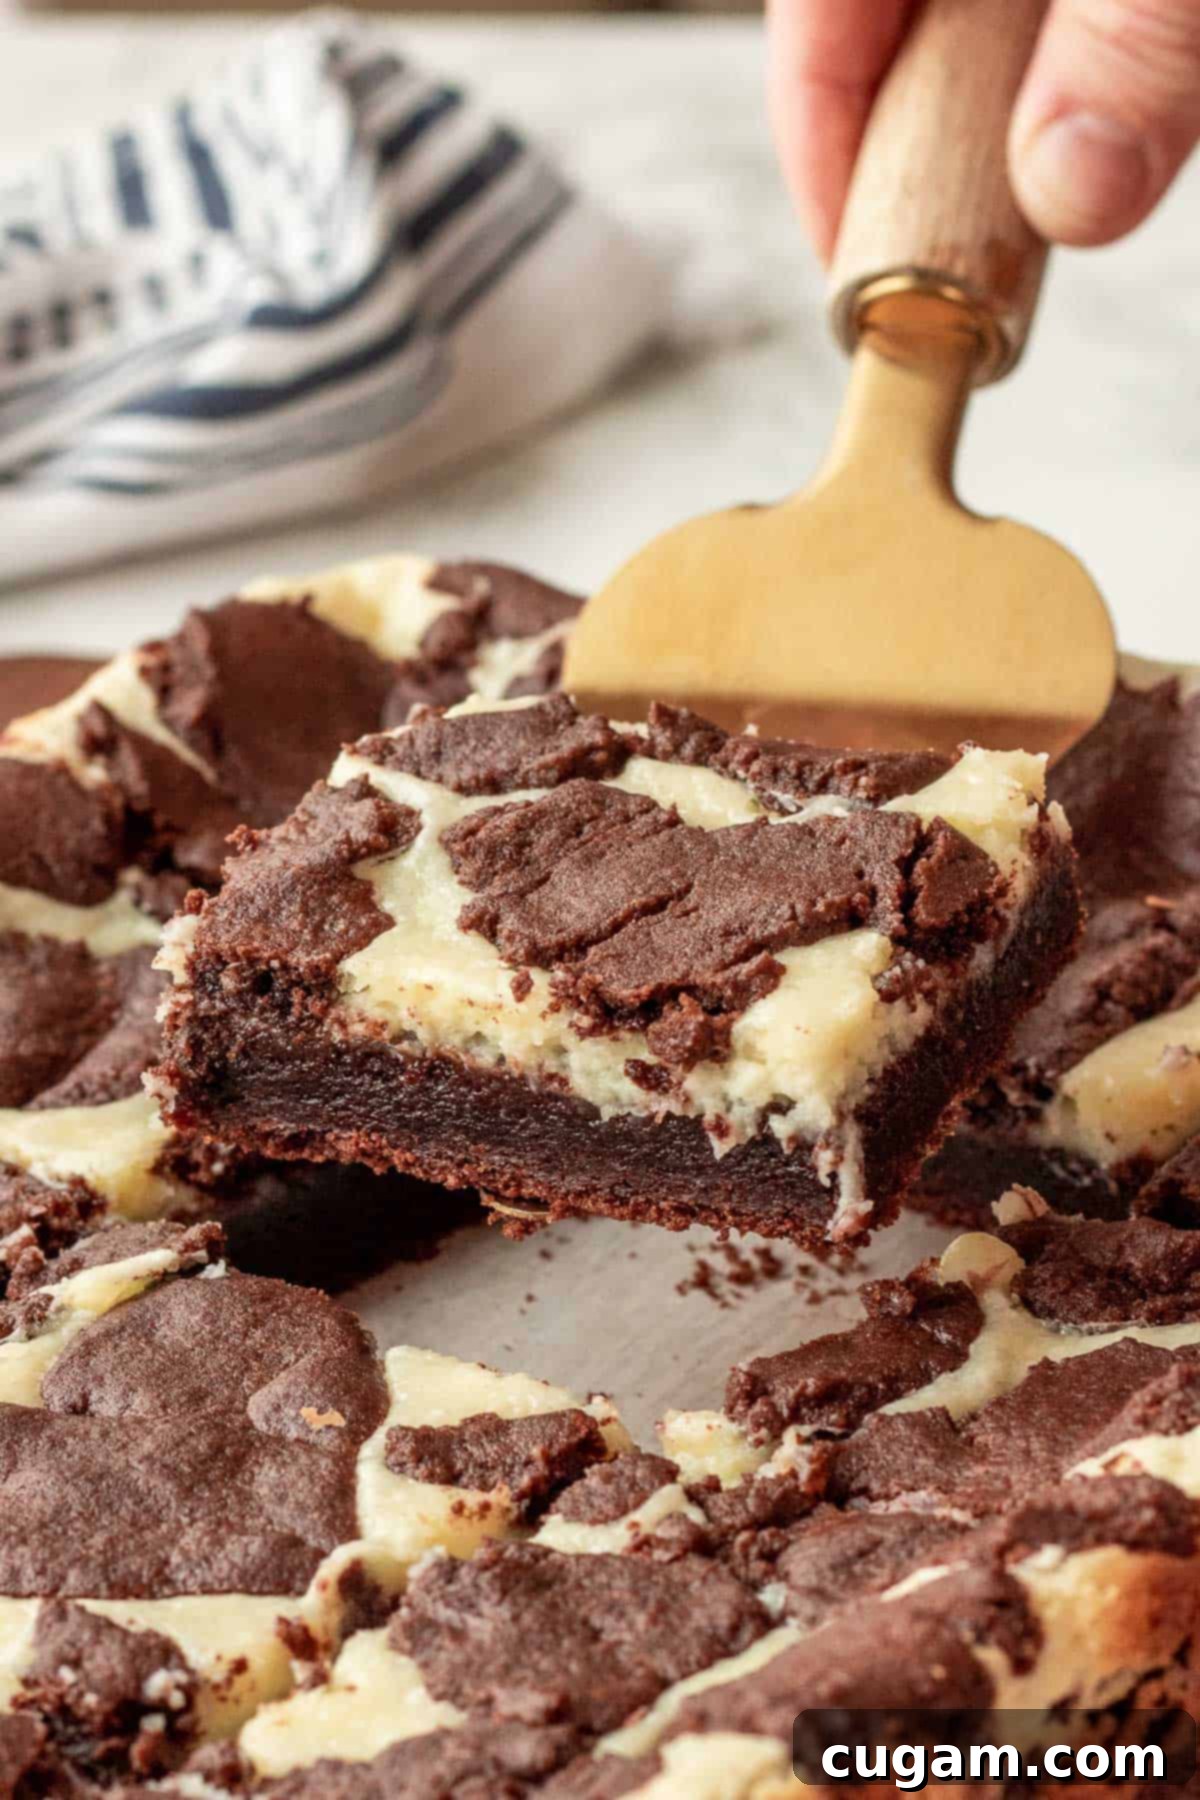
Step 8 – Bake and Cool: Place the assembled bars into your preheated oven and bake for approximately 30 minutes. The bars are ready when the cheesecake filling appears mostly set, though a slight jiggle in the very center is perfectly normal and actually desired – don’t worry, it will firm up further as it cools! Remove from the oven and allow the bars to cool completely on a wire rack before attempting to slice and serve. For the neatest slices, chilling them in the refrigerator for a few hours after they’ve cooled to room temperature is highly recommended.
📌 Top Tips for Perfect Brownie Cheesecake Bars
Achieving bakery-quality brownie cheesecake bars is easy with a few simple tricks. Follow these expert tips to ensure your dessert is nothing short of perfection:
- Room Temperature Cream Cheese is Key: For an incredibly smooth and lump-free cheesecake filling, it is absolutely essential to use softened cream cheese. Take it out of the refrigerator at least an hour before baking, or if you’re short on time, microwave it for 10-15 seconds (unwrapped) until it’s just soft to the touch. This allows it to blend seamlessly with the powdered sugar.
- Patience During Cooling: I know it’s tempting, but resist the urge to slice into your bars immediately after baking! For clean, neat-looking slices and the best texture, let the bars cool down completely on a wire rack. Then, transfer them to the refrigerator for at least 3 hours – or even overnight – to ensure they are thoroughly chilled and set.
- Creative Presentation: Once cooled and firm, you can cut the bars into small 1-inch squares to create adorable and perfectly portioned cheesecake brownie bites! These are fantastic for parties or as bite-sized treats.
- Fun with Shapes: Get creative with the reserved brownie dough for the topping! Roll it flat between two sheets of parchment paper (lightly floured underneath to prevent sticking) and use cookie cutters to cut out fun shapes. Hearts for Valentine’s Day, Christmas trees, Easter eggs, or even spooky ghosts or pumpkins for Halloween can add a delightful and personalized touch.
- Don’t Overbake: Brownies are always better slightly underbaked than overbaked. Watch for the cheesecake filling to be mostly set with a slight jiggle in the center. An overbaked cheesecake can become dry or rubbery, so err on the side of caution.
- Proper Pan Preparation: Always grease your baking pan thoroughly or line it with parchment paper, leaving an overhang on the sides. This “sling” of parchment makes it incredibly easy to lift the entire batch of cooled bars out of the pan, making slicing much simpler and less messy.
- Storage Savvy: Store any leftover brownie cheesecake bars in an airtight container to maintain their freshness. While they can last a day or two at room temperature, for optimal quality and safety, refrigerate them for up to 5 days. They actually taste wonderful slightly chilled or brought back to room temperature.
❓Frequently Asked Questions About Brownie Cheesecake Bars
Due to the cream cheese filling, it is generally recommended to refrigerate these bars. They can safely last 1-2 days at room temperature in an airtight container, especially if your home isn’t too warm. However, for maximum freshness and to prevent spoilage, they should be refrigerated if storing for longer than 2 days.
When stored properly in an airtight container in the refrigerator, these brownie cheesecake bars will last for about 5 days. While they are safe to eat chilled, many people find them to be softer and more flavorful at room temperature. If you prefer a softer texture, simply take them out of the fridge about 30 minutes before serving to allow them to warm up slightly.
For these particular brownies, you have a couple of great options. I typically use standard unsweetened cocoa powder, such as Hershey’s. If you’re looking for an even darker color and a richer, less bitter chocolate flavor, I highly recommend using Special Dark cocoa powder (which is Dutch-processed). Both will yield delicious results, so choose the one that aligns with your preferred chocolate intensity.
Absolutely! These cheesecake brownies freeze beautifully. After they have cooled completely and you’ve sliced them into individual bars, transfer them to a freezer-safe container, separating layers with parchment paper if stacking. They can be frozen for up to 3 months. When you’re ready to enjoy, simply thaw them in the refrigerator overnight or on the countertop for a few hours.
Cheesecake cracking is a common occurrence, often due to overbaking or sudden temperature changes. To minimize cracking, ensure you don’t overbake (remember, a slight jiggle is good!) and allow the bars to cool very slowly on a wire rack before transferring to the refrigerator. While aesthetically, cracks might be a minor imperfection, they don’t affect the delicious taste!
Yes, you can, but you may need to adjust the baking time. A smaller, thicker pan (like an 8×8 or 9×9 inch) will require a longer baking time (likely 40-50 minutes) and will yield thicker bars. A larger, thinner pan might require less time. Always watch for the cheesecake to be mostly set with a slight jiggle in the center, and use the toothpick test for the brownie portions.
🍫 More Delicious Cream Cheese Dessert Recipes
- Cherry Chocolate Cheesecake Cookies
- Easy Raspberry Cream Cheese Bars
- Cherry Cheesecake Cookies
- No Churn Cherry Cheesecake Ice Cream
Did you try this irresistible Brownie Cheesecake Bars recipe? I would absolutely love to hear from you! Please make sure to leave a ⭐️ star rating and a comment below the recipe card. Your feedback is incredibly helpful to other readers and brings a smile to my face.
📲 FOLLOW Sara on Social! 👋 Facebook, Instagram, or Pinterest to see the latest delicious creations from my kitchen and never miss a new recipe!
📝 Printable Recipe for Brownie Cheesecake Bars
Decadent Brownie Cheesecake Bars
Pin Recipe
Ingredients
For the Fudgy Brownie Layers:
- 1 cup of butter salted, softened to room temperature
- 1 cup granulated white sugar
- 1 cup brown sugar packed light or dark
- 2 teaspoons vanilla extract
- 2 eggs large
- 3 cups all-purpose flour
- ¾ cup cocoa powder unsweetened (regular or Dutch-processed)
- 1 teaspoon baking soda
- ½ teaspoon salt fine sea salt
For the Creamy Cheesecake Filling:
- 8 oz cream cheese full-fat, softened to room temperature
- 1 cup powdered sugar (confectioners’ sugar)
- 1 teaspoon vanilla pure vanilla extract
- 1 egg large
Instructions
For the Fudgy Brownie Layers:
-
Begin by preheating your oven to 350°F (175°C). Prepare a 9×13 inch baking pan by greasing it thoroughly or lining it with parchment paper, leaving an overhang on the sides for easy removal later.
-
In a large bowl, cream together the softened butter, granulated white sugar, and brown sugar using an electric mixer. Beat on medium to high speed for about 3 minutes until the mixture is light, fluffy, and pale. Don’t forget to scrape down the sides of the bowl periodically to ensure even mixing.
-
Add the 2 teaspoons of vanilla extract, then incorporate the eggs one at a time. Beat well after each addition, ensuring the egg is fully mixed in before adding the next. Continue beating for another 1-2 minutes until the mixture is cohesive and fluffy.
-
In a separate medium bowl, whisk together the all-purpose flour, cocoa powder, baking soda, and salt. Gradually add this dry mixture to the creamed butter mixture in batches, mixing on low speed until just combined after each addition. Mix until a thick, sticky chocolate dough forms, being careful not to overmix.
Crucially, reserve one cup of this brownie dough and set it aside; this will be used for the top layer of the bars.
-
Press the remaining brownie dough evenly into the bottom of the prepared 9×13 inch pan, creating a solid base. Ensure it’s spread from edge to edge. Do not bake this layer yet!
For the Creamy Cheesecake Filling and Assembly:
-
In a clean bowl, beat the softened cream cheese and powdered sugar together with an electric mixer until it’s smooth and creamy, about 1-2 minutes. Incorporate the large egg and 1 teaspoon of vanilla extract, mixing well until the filling is silky and lump-free. Carefully spread this creamy cheesecake filling over the unbaked brownie batter in the pan.
-
Take the one cup of reserved brownie dough. Break it into small pieces and gently drop them over the top of the cream cheese filling. You can arrange them in a decorative pattern, such as a “giraffe” spot effect, or get creative by flattening the dough and cutting out shapes or even spelling names for a personalized touch.
-
Bake the assembled bars in the preheated oven at 350°F (175°C) for 28-30 minutes, or until the cheesecake filling is mostly set with a slight jiggle in the center. A little jiggly is perfectly okay – it will continue to set as it cools. Remove from the oven and allow the bars to cool completely on a wire rack before attempting to slice.
For an extra gooey experience, you can serve them while slightly warm, but note that slices may not be as neat. For best results and clean cuts, chill thoroughly in the refrigerator for at least 3 hours after cooling to room temperature.
Notes
NOTE: The baking time can vary depending on your pan material. Glass or thick ceramic pans may require a slightly longer baking time (around 30-35 minutes) compared to darker metal pans (which typically bake in 25-30 minutes). Always check for doneness by observing the cheesecake’s set and the brownie’s texture.
