Easy No-Bake Halloween Dirt Pudding Cups: Spooky Graveyard Treats in Under 30 Minutes!
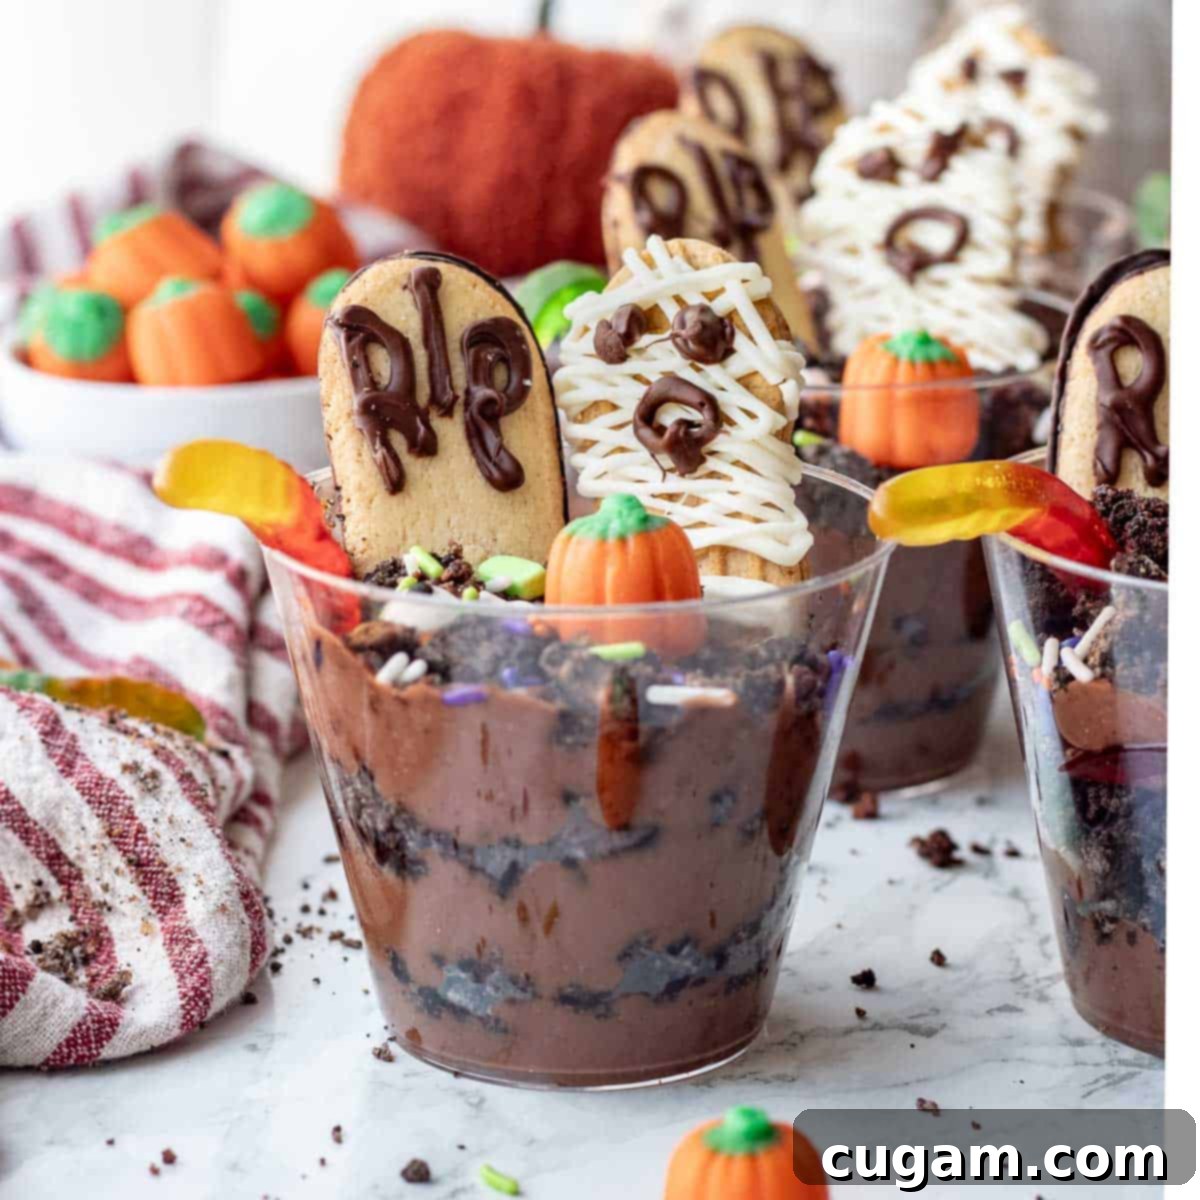
Get ready for a wickedly delicious and incredibly simple Halloween treat that will delight both kids and adults: these Halloween Dirt Pudding Cups! This recipe combines creamy chocolate pudding, crunchy Oreo crumbs, wiggly gummy worms, and fun Halloween candy decorations to create miniature graveyard scenes right in a cup. The best part? They are a fantastic no-bake dessert that can be whipped up in less than 30 minutes, making them perfect for busy October days and last-minute party preparations. This recipe yields approximately 12 delightful servings, ensuring there’s enough spooky sweetness for everyone.
Our family absolutely adores making these graveyard pudding cups every October. They’re more than just a dessert; they’re an engaging activity! Kids love helping with every step, from crushing Oreos to arranging the spooky decorations, which makes them an ideal centerpiece for any children’s Halloween party. Watching their creativity come to life as they design their own little graveyards is truly part of the fun.
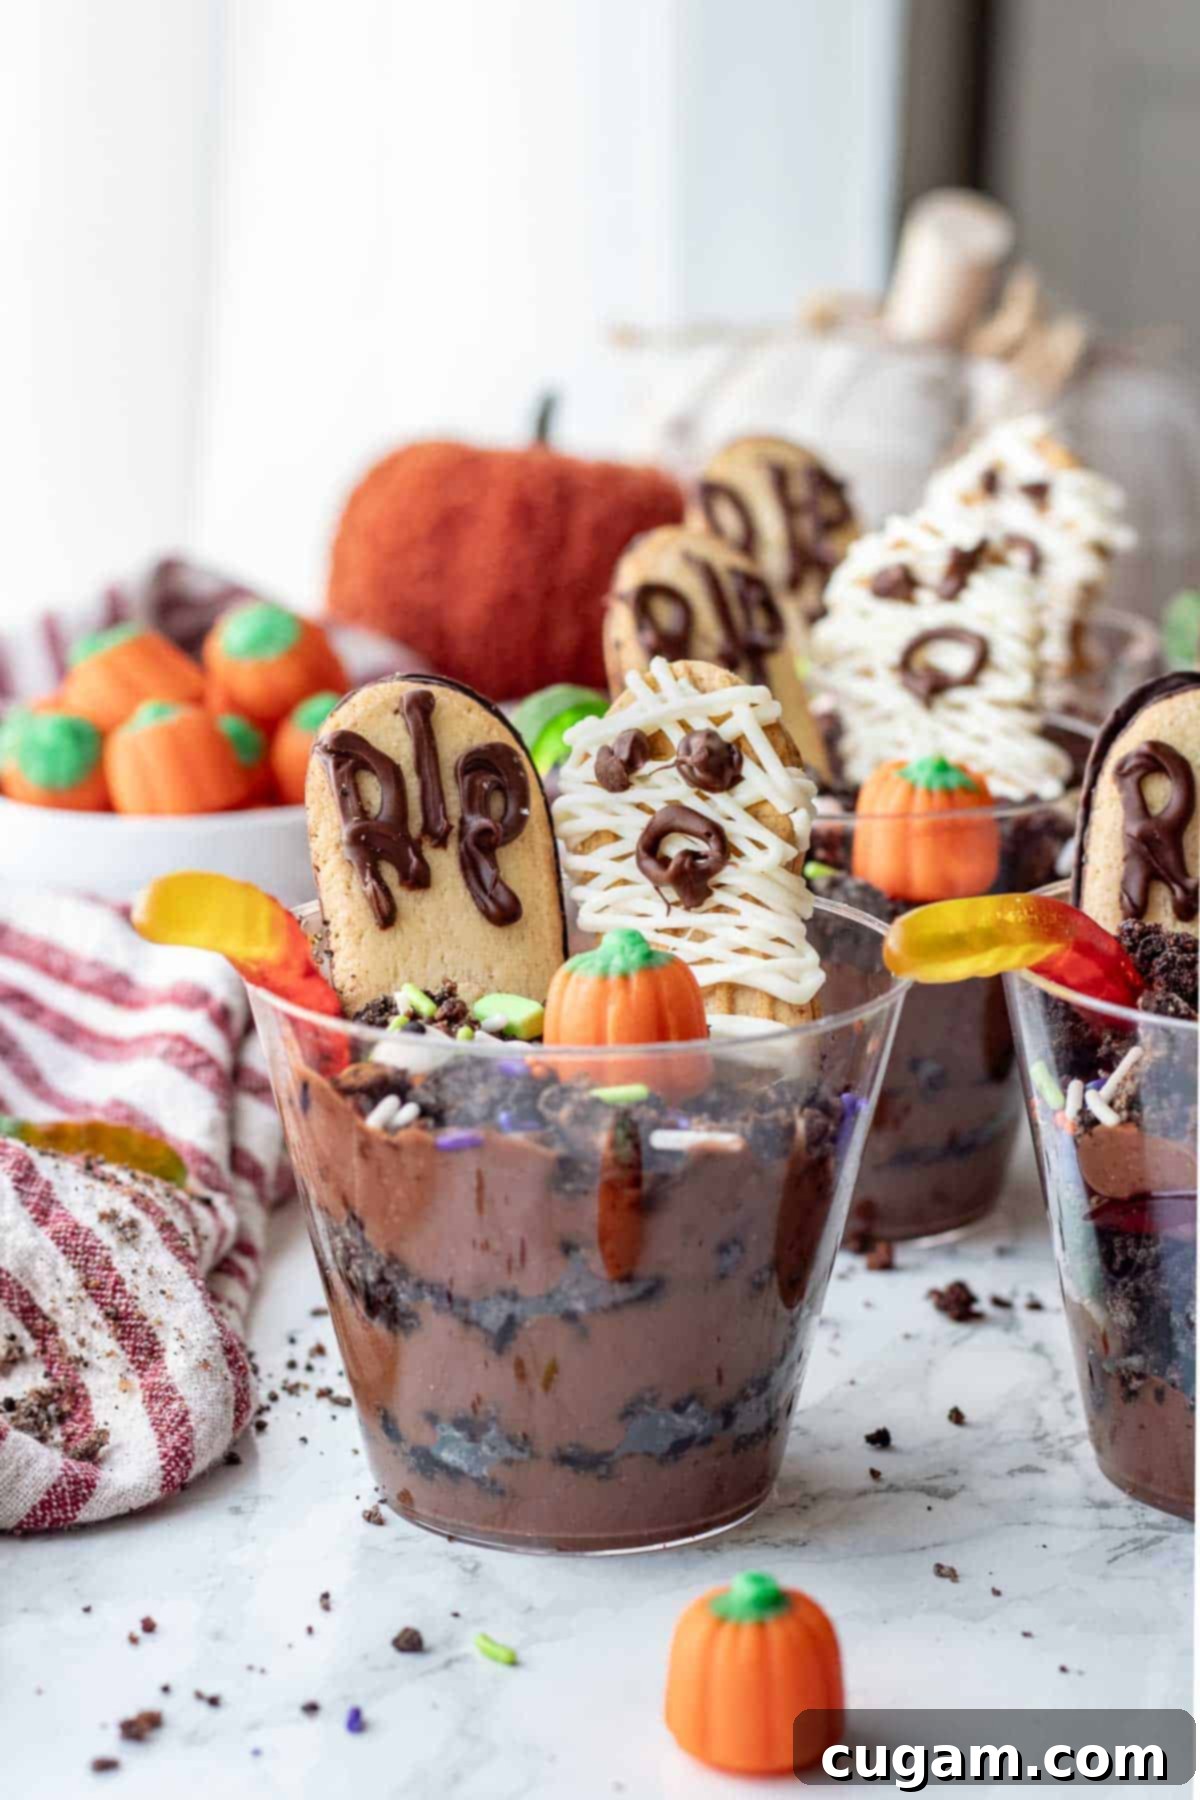
While they might not always be the tidiest creations – sometimes the “dirt” gets a little messy, and the “mummies” have a mind of their own – the kids never seem to mind, and neither do we! We are huge fans of no-bake Halloween treats, much like our Pumpkin Cream Cheese Dip, and these dirt cups have earned a coveted spot in our fall dessert rotation. In fact, I’ve been known to experiment by layering that pumpkin dip with Oreos instead of chocolate pudding, creating an equally delicious autumnal twist!
For a complete Halloween feast, we often pair these fun desserts with a hearty and comforting main course, such as our Creamy White Chicken Chili, served alongside warm, sweet Honey Butter Cornbread. And if we’re feeling extra indulgent, a batch of Instant Pot Caramel served with crisp apple slices makes for another fantastic fall dessert option. But for sheer fun and ease, these Halloween dirt pudding cups are truly unbeatable.
What to Expect from These Spooky Treats
- Taste: Prepare your taste buds for a delightful medley of flavors and textures! Each spoonful delivers creamy, rich chocolate pudding, perfectly complemented by the satisfying crunch of Oreo cookie bits. The special touch comes from a delicious peanut butter cookie on top, adorned with a playful gummy worm and a sweet mini pumpkin candy. It’s a fantastic combination that hits all the right notes for a Halloween-themed dessert.
- Ease: This is truly a beginner-friendly recipe, making it perfect for novice bakers and little helpers. There’s absolutely no cooking involved, which means less time in the kitchen and more time enjoying the festive fun. The only “cooking” you’ll do is a quick melt of chocolate for decorating, which is incredibly straightforward.
- Time: As a no-bake Halloween treat, these pudding cups are incredibly quick to prepare and assemble. You can have a full batch of 12 servings ready and decorated in less than 30 minutes! This efficiency makes them ideal for last-minute party needs or simply a fun, spontaneous activity with the kids.
🛒 Key Ingredients for Your Graveyard Cups
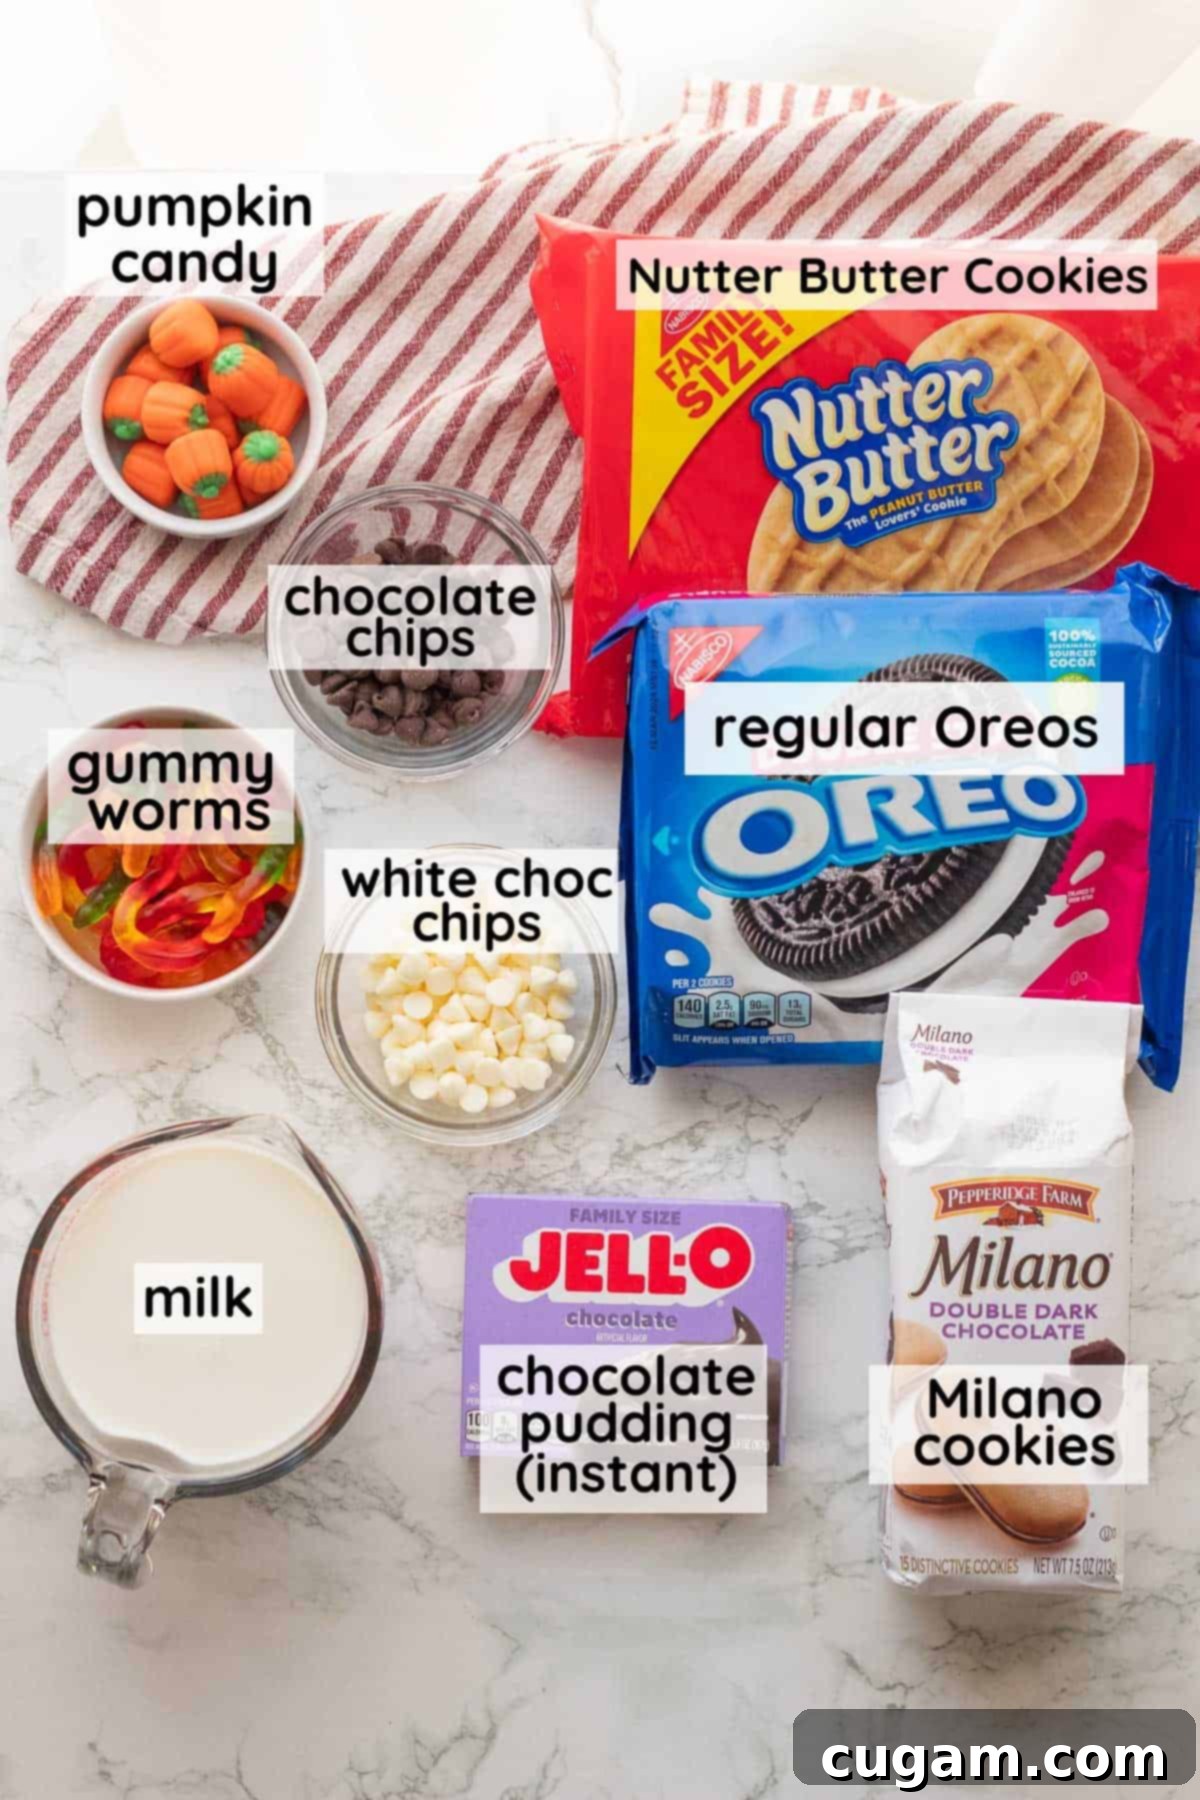
Crafting these spooky treats requires just a few simple ingredients, most of which you probably already have in your pantry or can easily find at any grocery store. Here’s what you’ll need:
- Chocolate Pudding Mix – This is the essential “mud” base for your graveyard! Be sure to grab the INSTANT chocolate pudding mix, as the “cook and serve” version requires heating and cooling, which would extend your prep time significantly. You’ll need two large (5.9oz) family-sized boxes to make enough for 12 cups.
- Oreos – These classic chocolate sandwich cookies are crushed to create the perfect “dirt” topping. Regular single-stuffed Oreos work best for achieving the ideal crumbly texture. While double-stuffed Oreos can be used, they tend to be a bit moister, which can alter the final consistency slightly. A family or party-sized package, containing at least 30-35 Oreos, will be sufficient for this recipe.
- Milk – For the pudding to set correctly and achieve its creamy consistency, you’ll need dairy milk. Whether you choose 1%, 2%, or whole milk, any dairy option will work beautifully. It’s crucial to note that non-dairy milks typically do not allow instant pudding mix to set up properly, so stick to traditional dairy for the best results.
- Chocolate Chips – You’ll need both dark or semi-sweet chocolate chips and white chocolate chips for decorating your spooky cookies. The darker chocolate will be used for writing “R.I.P.” on your gravestone cookies, while the white chocolate is perfect for creating the mummy wraps on your mummy cookies.
- Cookies – Beyond the Oreos, you’ll want two types of cookies for your decorations. Milano-style cookies (we used chocolate, but any flavor you enjoy will work) are ideal for gravestones. For the mummies, Nutter Butter cookies are a fantastic choice due to their shape and the delicious peanut butter flavor they add, though any similar rectangular or oval cookie could work.
- Candy – No graveyard is complete without its inhabitants! We love using classic gummy worms for a creepy-crawly effect and mini pumpkin candies to add a pop of Halloween color. However, feel free to get creative here! Candy corn, bone-shaped candies, or even fun Halloween sprinkles with eyeballs and ghosts would make excellent additions.
✏️ Substitutions & Variations for Your Spooky Desserts
One of the best things about these Halloween Dirt Pudding Cups is how adaptable they are! Feel free to customize them to your taste, dietary needs, or whatever Halloween candy you have on hand. Here are some ideas to get you started:
- Pudding – While chocolate pudding gives the most authentic “dirt” appearance, you’re not limited to it! You can experiment with other instant pudding flavors like chocolate fudge, white chocolate, cheesecake, or even butterscotch for a different taste profile. For a truly unique and seasonal twist, consider layering in Pumpkin Fluff Dip for a vibrant orange layer amidst the chocolate “dirt.”
- Candy – The possibilities for Halloween candy decorations are endless! Instead of just gummy worms, try sour gummy worms for a tangy kick, or opt for other creepy-crawly candies like plastic spiders (non-edible, of course!) or candy bugs. If mini pumpkins aren’t your thing, candy corn, seasonal M&Ms, or even edible sugar eyes would make fun and festive toppings.
- Oreos – If you want to switch up the “dirt” or can’t find Oreos, there are great alternatives. Chocolate cereal, such as Cocoa Pebbles or chocolate graham crackers, crushed finely, can mimic the look and texture. Just a word of caution: if using cereal, assemble the pudding cups closer to serving time, as cereal can get soggy if left in the pudding for too long.
- Cookies – For your “gravestones” and “mummies,” feel free to explore beyond Milano and Nutter Butter cookies. Marshmallow ghost Peeps can make adorable ghost additions. Reese’s pumpkins or bats can be stood upright for another themed element. Any pumpkin-shaped cookie or even simple round sugar cookies can be decorated to fit your desired Halloween theme. Get creative with cookie cutters!
🧑🍳 Easy Step-by-Step Instructions
Making these spooky dirt cups is a breeze. Just follow these simple steps for a fun and delicious Halloween treat!
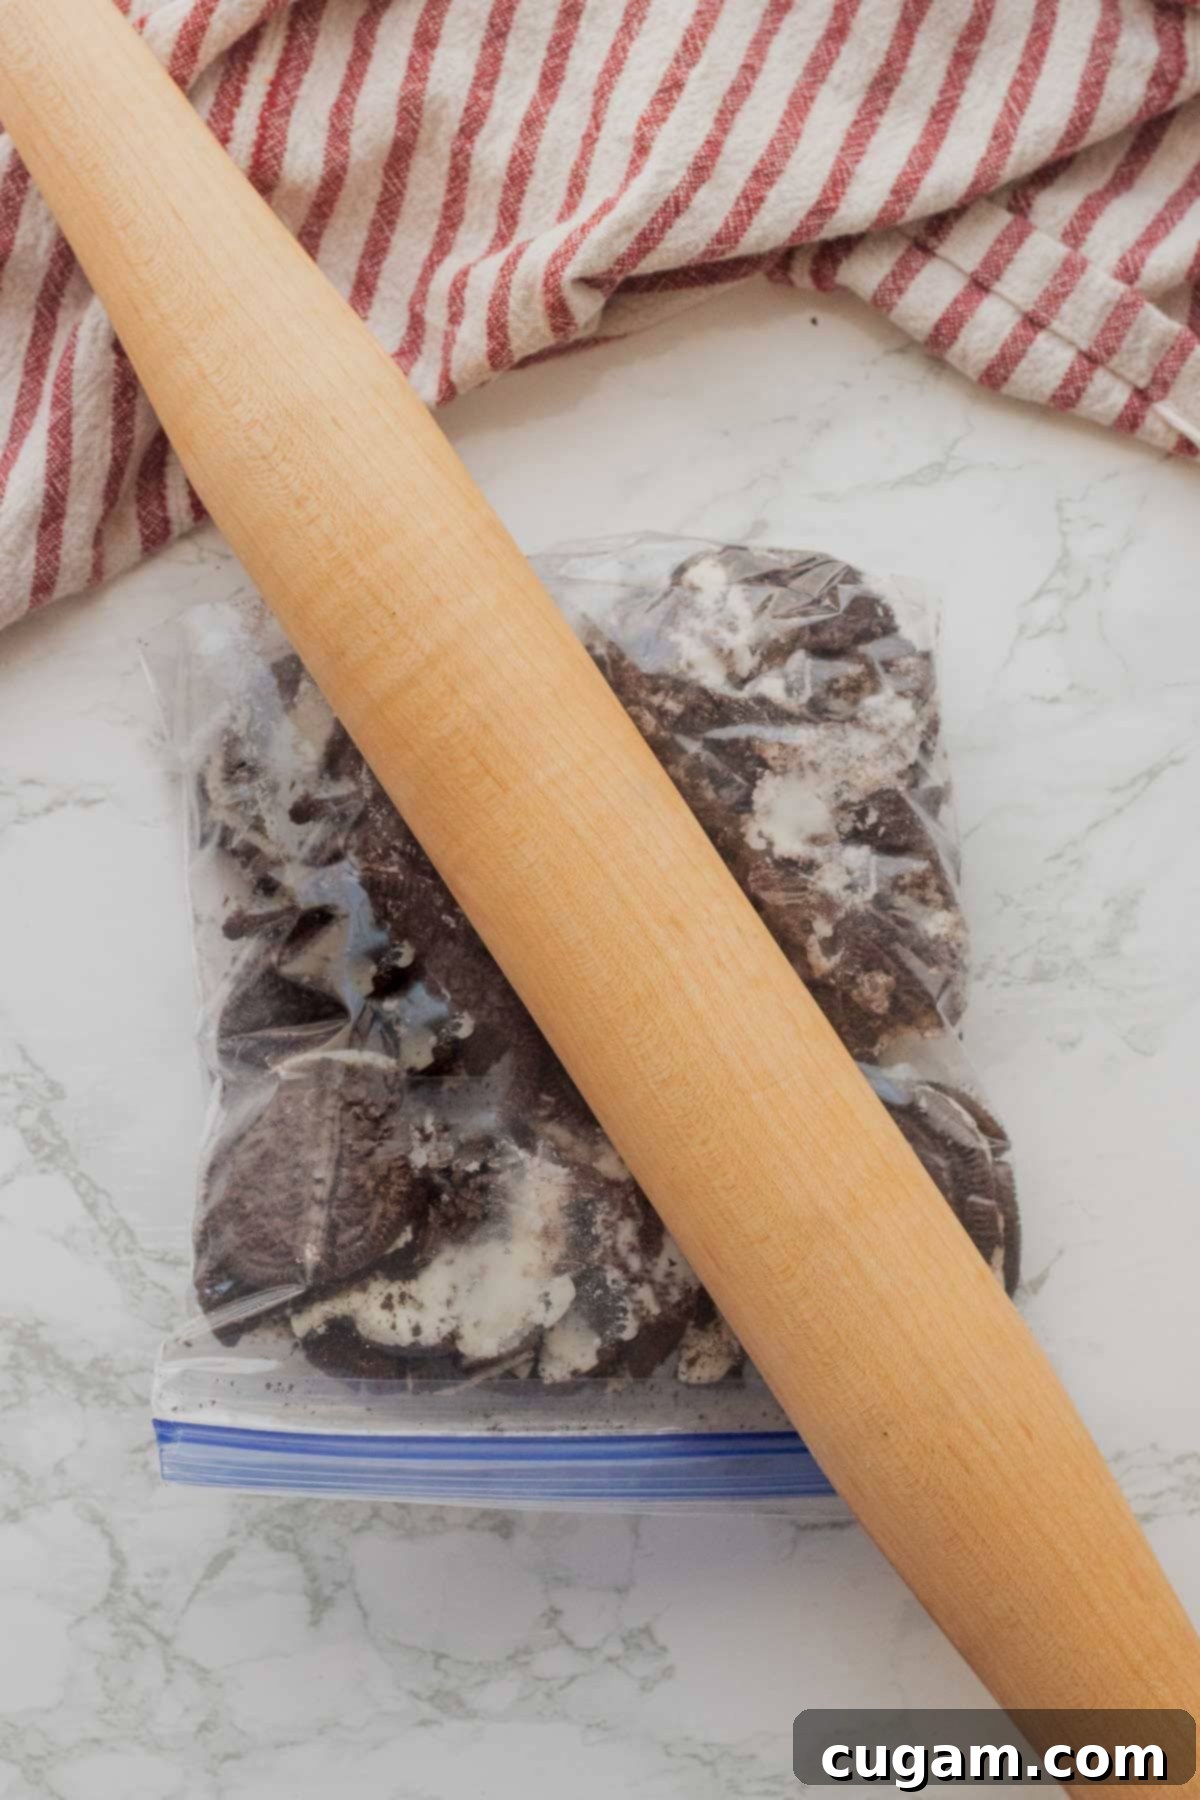
- Step 1: Crush the Oreos. Begin by placing 35-40 Oreos into a gallon-sized zip-close bag. Ensure the bag is sealed completely to prevent any crumbs from escaping. Now, get to crushing! You can do this by hand, breaking them into smaller pieces, or for a more uniform “dirt” texture, use a rolling pin to crush them until they resemble small, pea-sized crumbles. This is often a favorite task for little helpers!
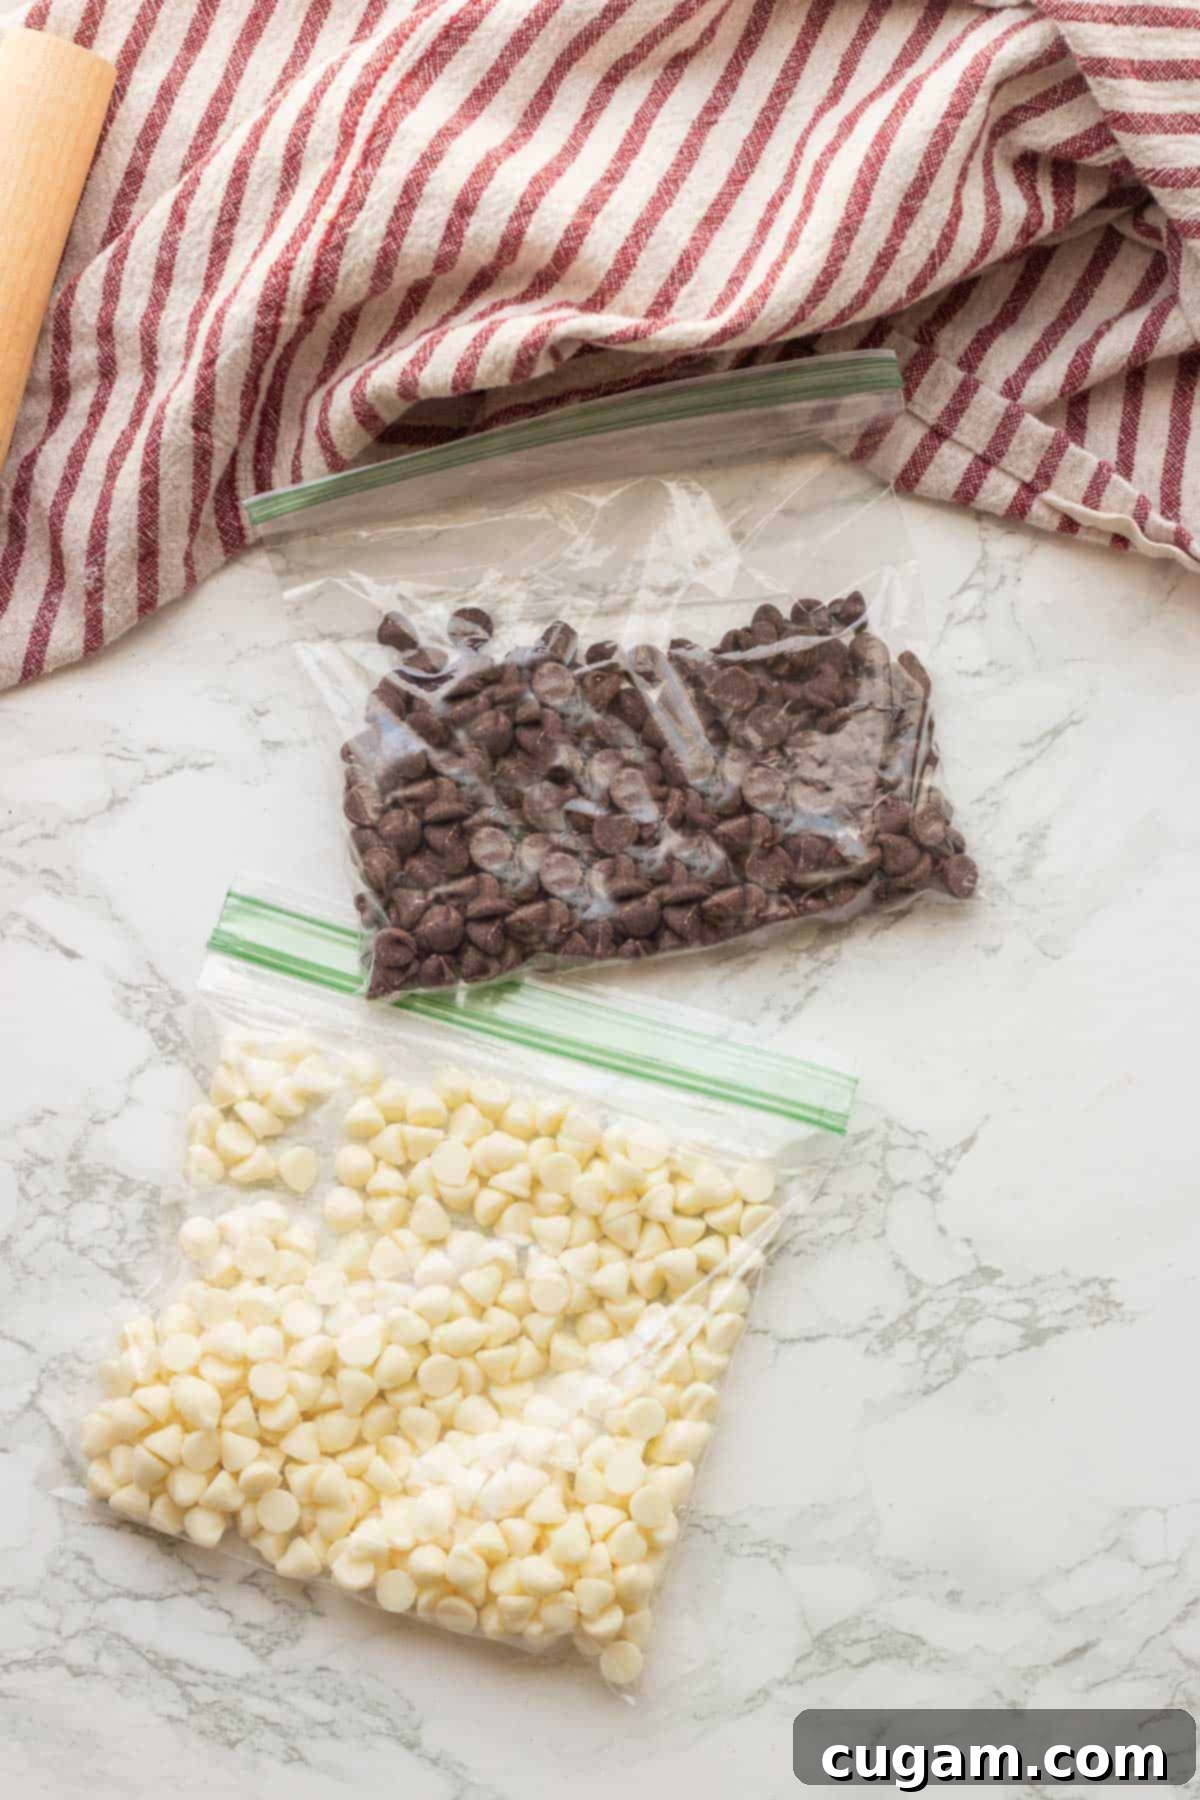
- Step 2: Prepare and Melt White Chocolate. Divide your white and semi-sweet chocolate chips into two separate small plastic zip-close bags or disposable frosting bags. Start with the white chocolate for your mummy cookies. Place the bag of white chocolate chips in the microwave and heat for about 20-30 seconds. Gently squish the bag to mix the chocolate. If not fully melted, warm for another 5-10 seconds, being very careful not to overheat.
IMPORTANT NOTE: White chocolate is quite delicate! Do not microwave it for longer than 20-40 seconds total, especially initially. Overheating white chocolate will cause it to “seize” – it will become thick, crumbly, and unusable for piping. It melts much faster and at a lower temperature than regular chocolate.
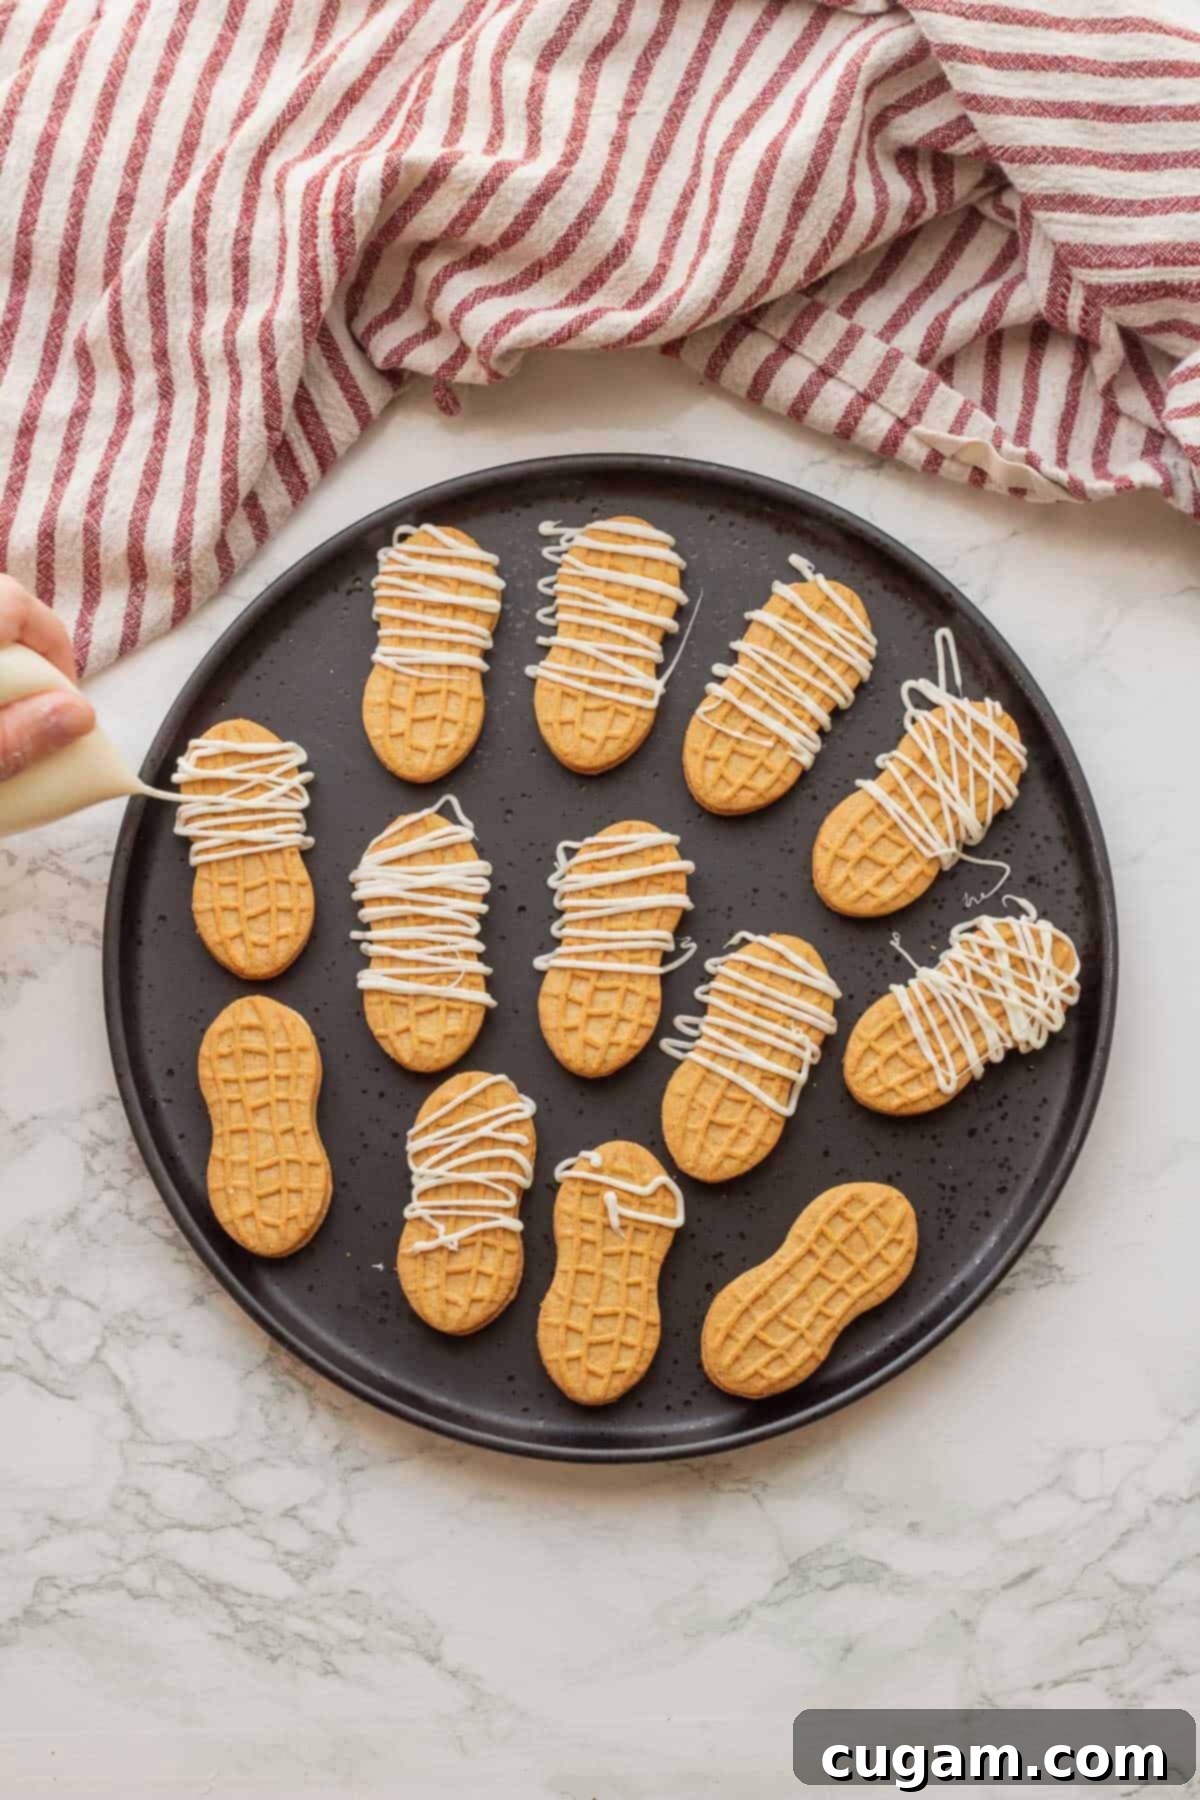
- Step 3: Decorate Mummy Cookies. Lay out about 12-15 Nutter Butter cookies on a plate or a sheet of parchment paper. Once your white chocolate is melted and smooth, snip a tiny hole in the corner of the bag. Drizzle the melted white chocolate across each cookie in a sideways motion. For a more authentic “mummy” look, you can then drizzle diagonally to create crisscross patterns, leaving a small space for “eyes.” Don’t worry about perfection; rustic mummies look charmingly spooky!
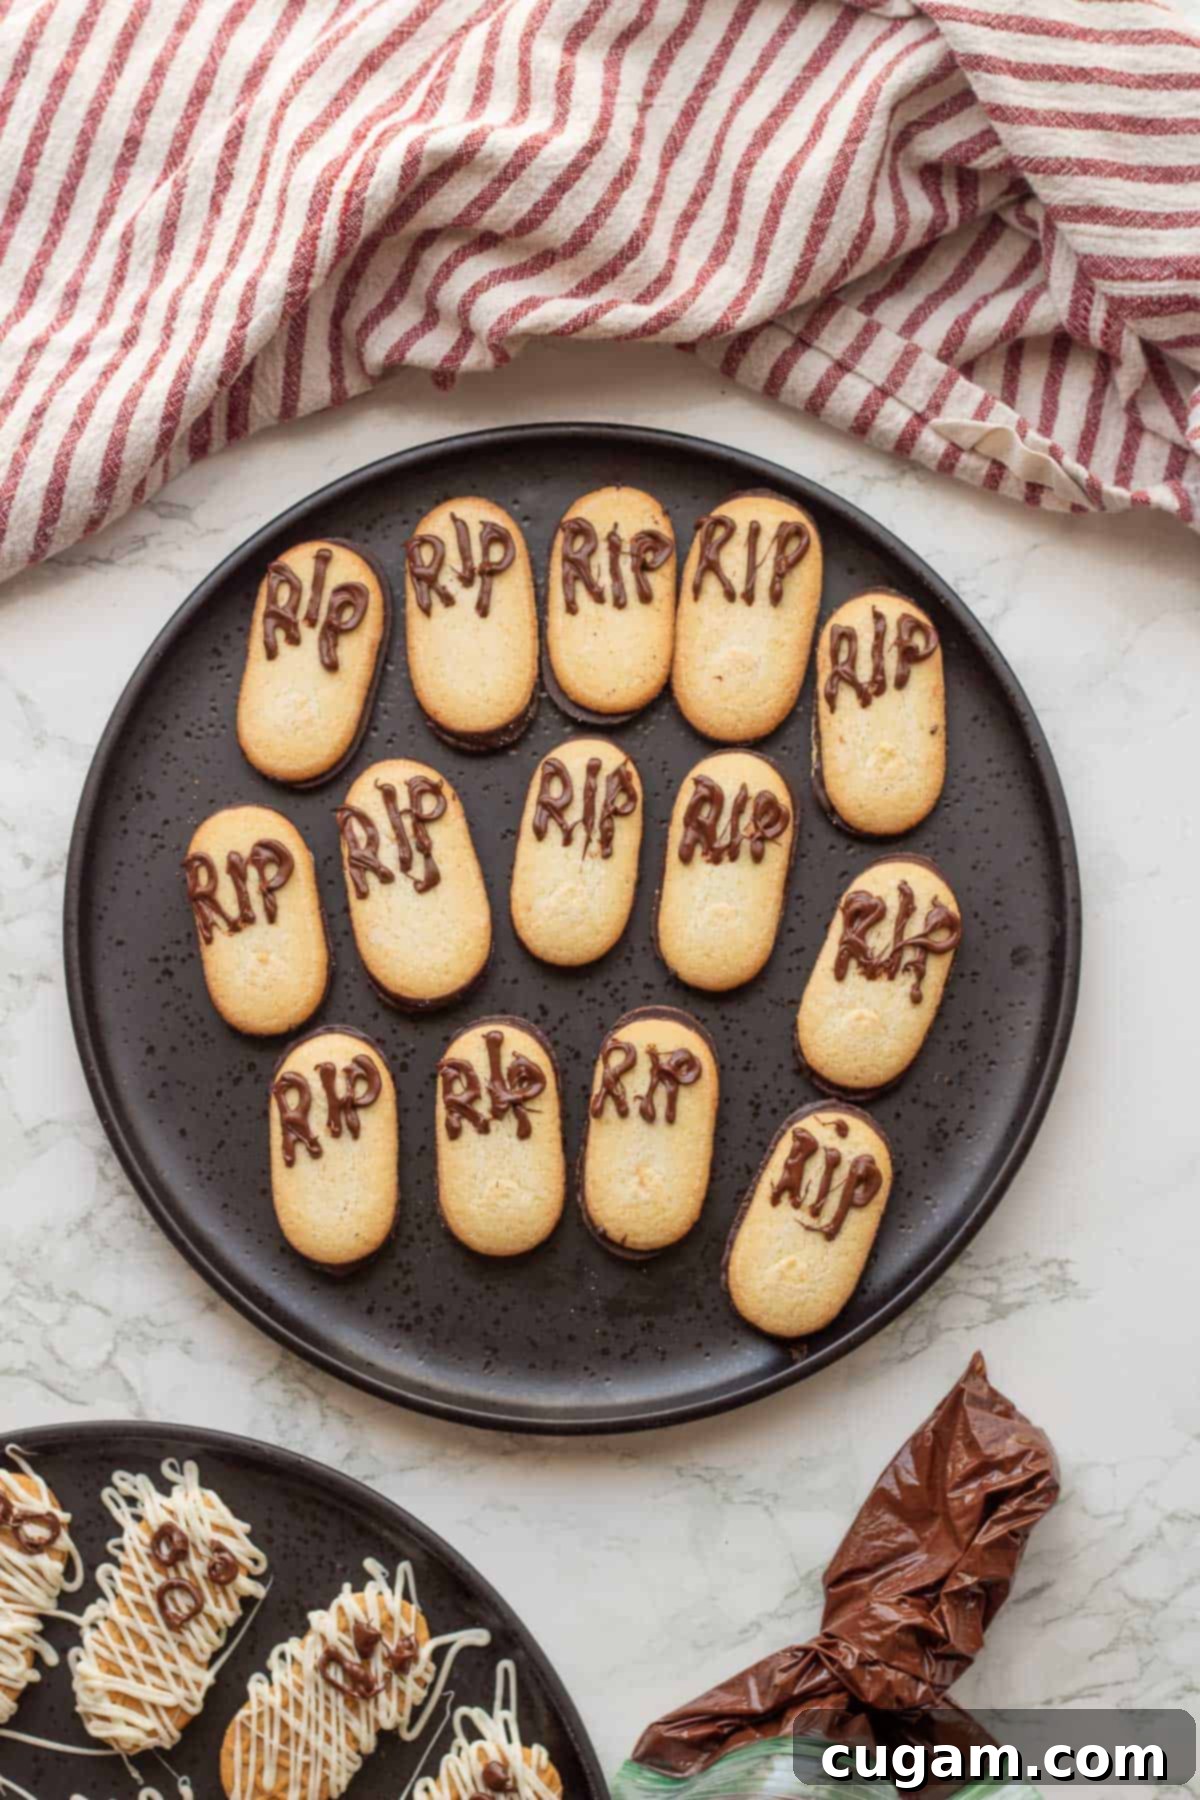
- Step 4: Decorate Gravestone Cookies. Next, arrange 12-15 Milano cookies on a clean plate or parchment paper. Melt the semi-sweet chocolate chips in their separate bag in the microwave for about 30 seconds. Squish the bag gently to ensure the chocolate is fully melted with no hard bits remaining. If needed, warm for another 10-15 seconds. Snip a tiny hole in the corner of this bag and carefully pipe “R.I.P.” onto each Milano cookie to create your gravestones. You can also use this chocolate to dot “eyes” onto your mummy cookies if you prefer.
Allow both sets of decorated cookies to rest and for the chocolate to set completely. To speed up this process, you can place them in the refrigerator or freezer for about 10 minutes.
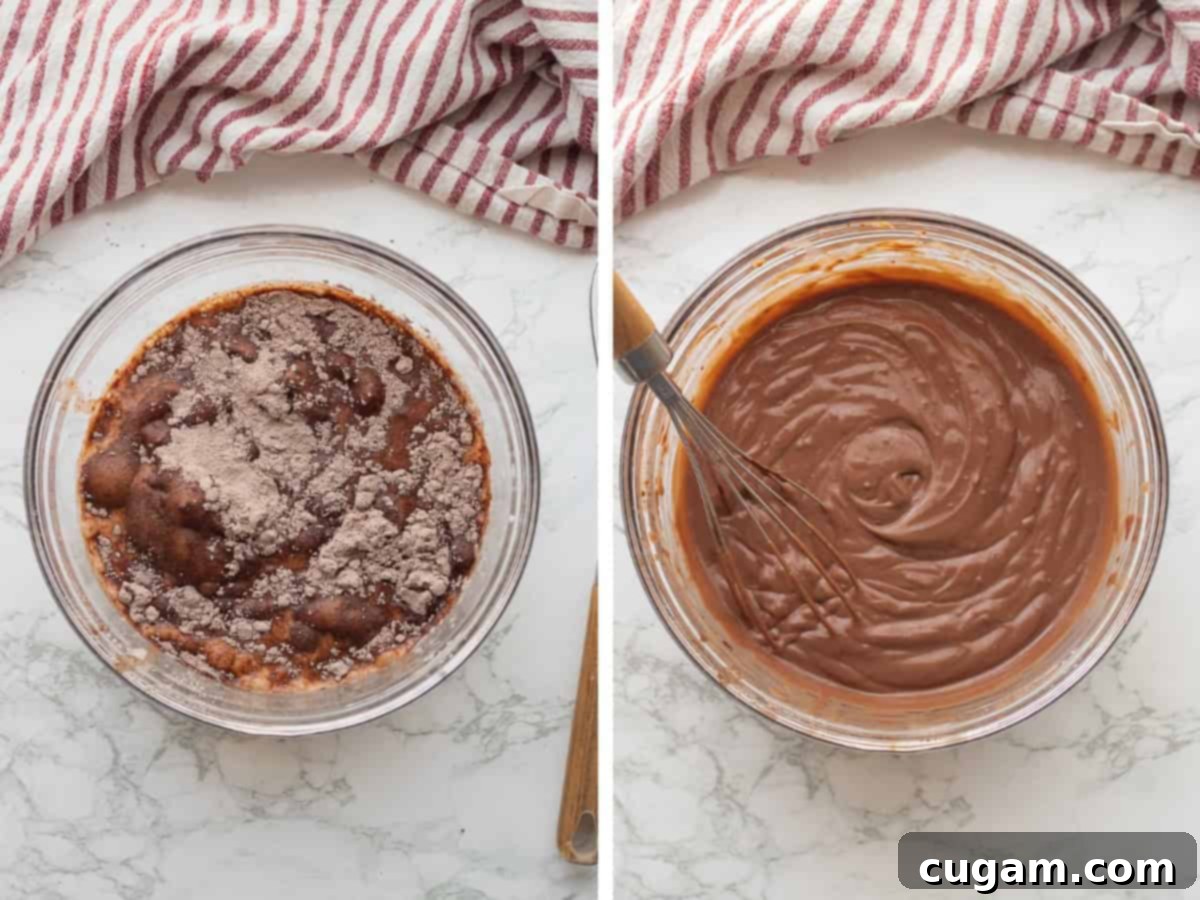
- Step 5: Make the Pudding. While your chocolate-decorated cookies are chilling and setting, prepare the chocolate pudding. In a medium-sized mixing bowl, combine the milk and instant chocolate pudding mix. Whisk vigorously for about 2 minutes, or according to the package directions, until the pudding begins to thicken and is soft set. The mixture should be smooth and creamy.
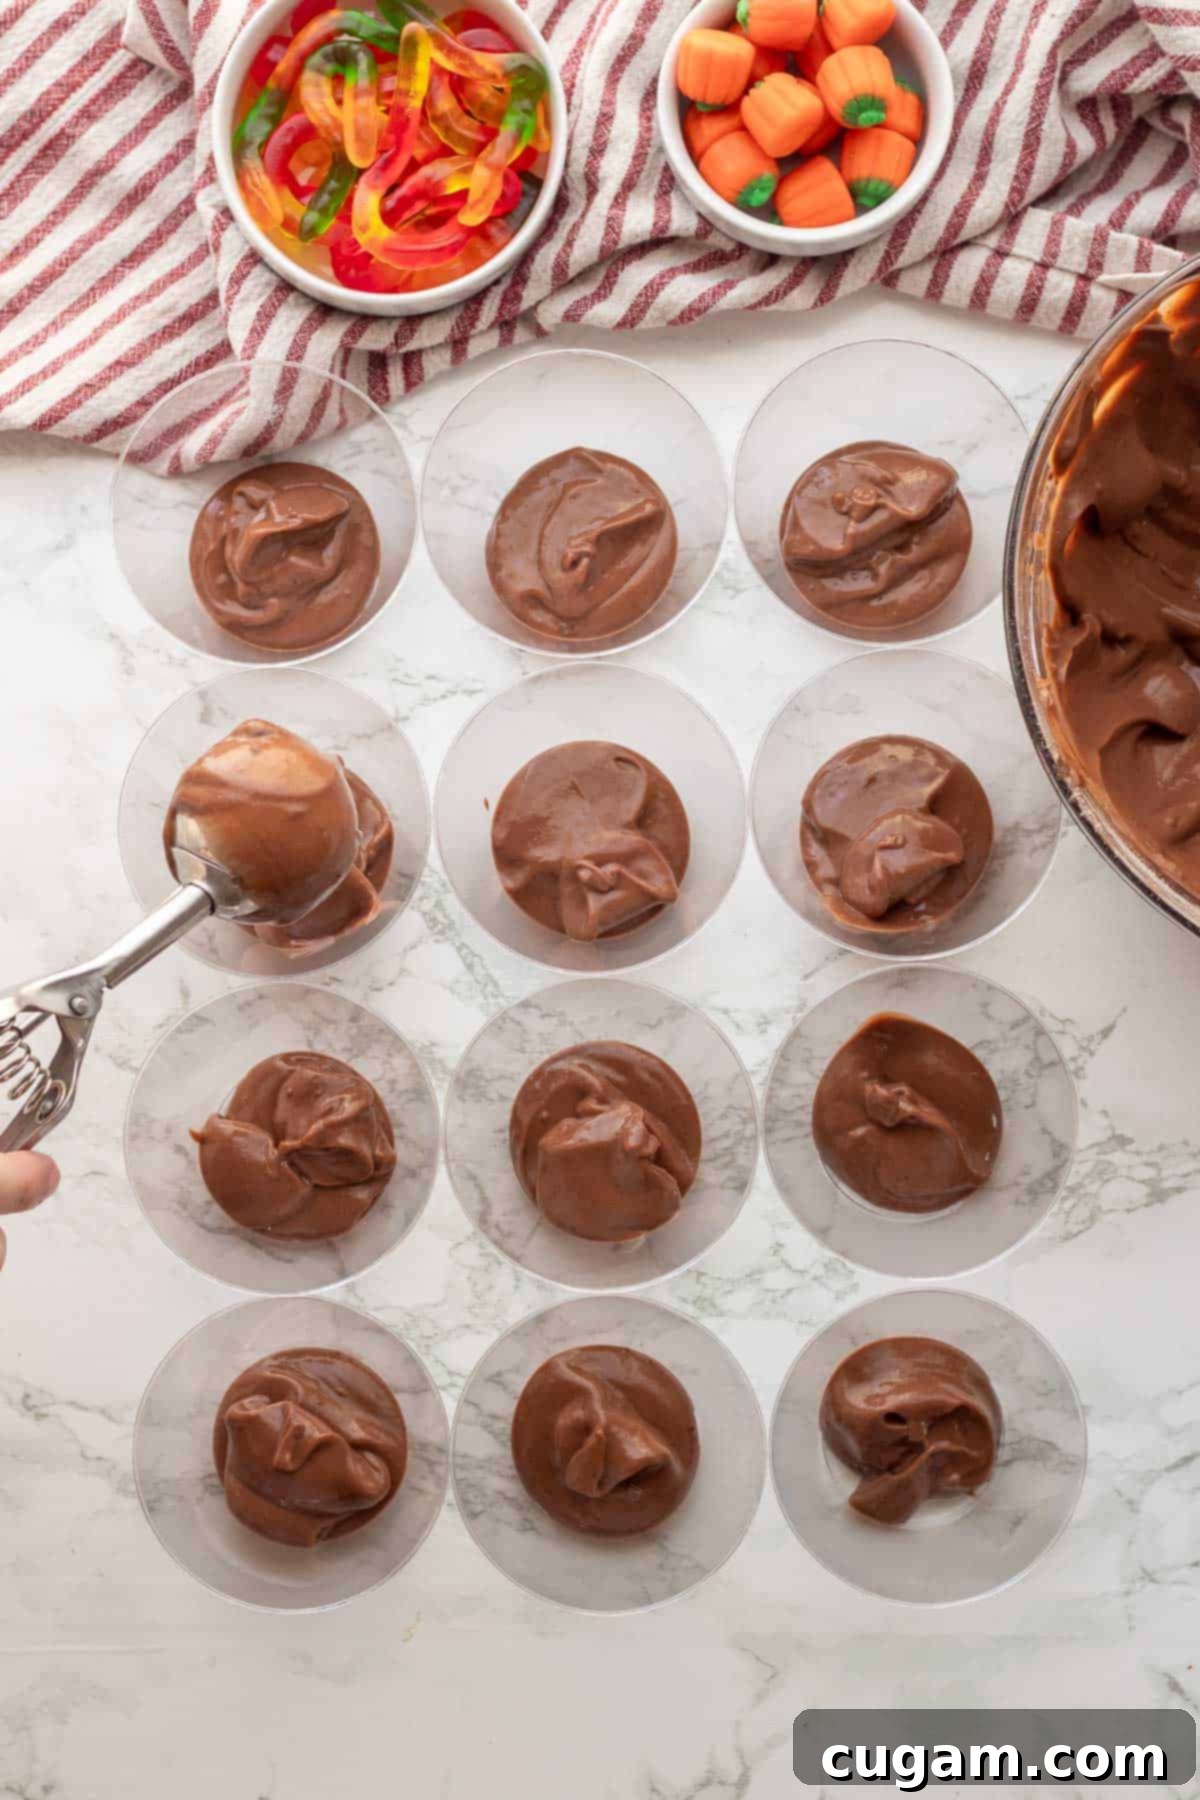
- Step 6: Layer the First Components. Now for the fun part: assembly! Gather about 12 clear plastic party cups, ideally short and wide 8 oz cups, as these are easiest for decorating. Start by scooping approximately 2-3 tablespoons of the prepared chocolate pudding into the bottom of each cup. This will form your first “mud” layer. A 3-tablespoon muffin scoop works perfectly for consistent portions.
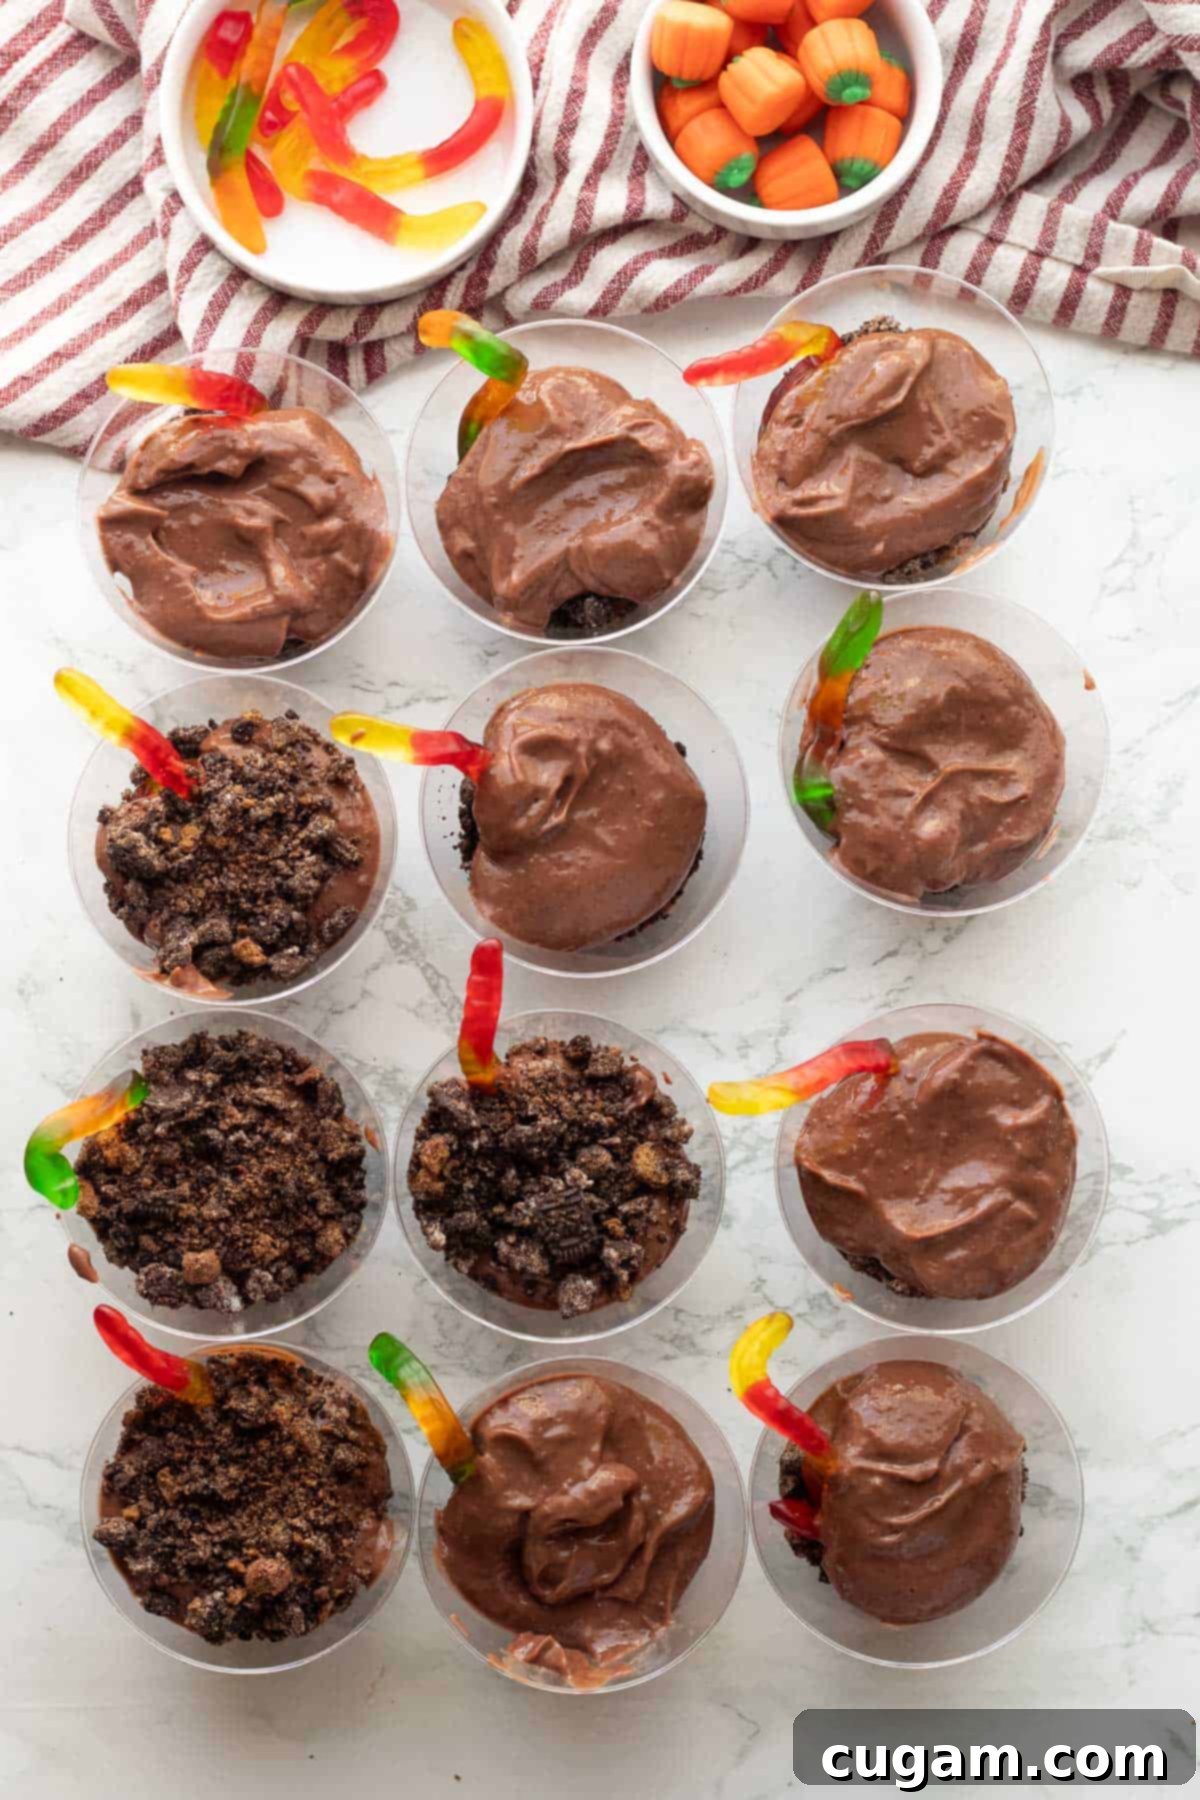
- Step 7: Build the Layers. On top of your first pudding layer, sprinkle about 1.5 tablespoons of the crushed Oreos. This creates your initial “dirt” layer. Repeat this process: add another layer of pudding, followed by another layer of crushed Oreos. Before adding the final layer, strategically place a few gummy worms around the edges of the cups. This allows them to peek out from the sides, adding to the creepy-crawly graveyard effect. Finally, add your third and last layers of pudding and crushed Oreos, ensuring the top is covered with “dirt.”
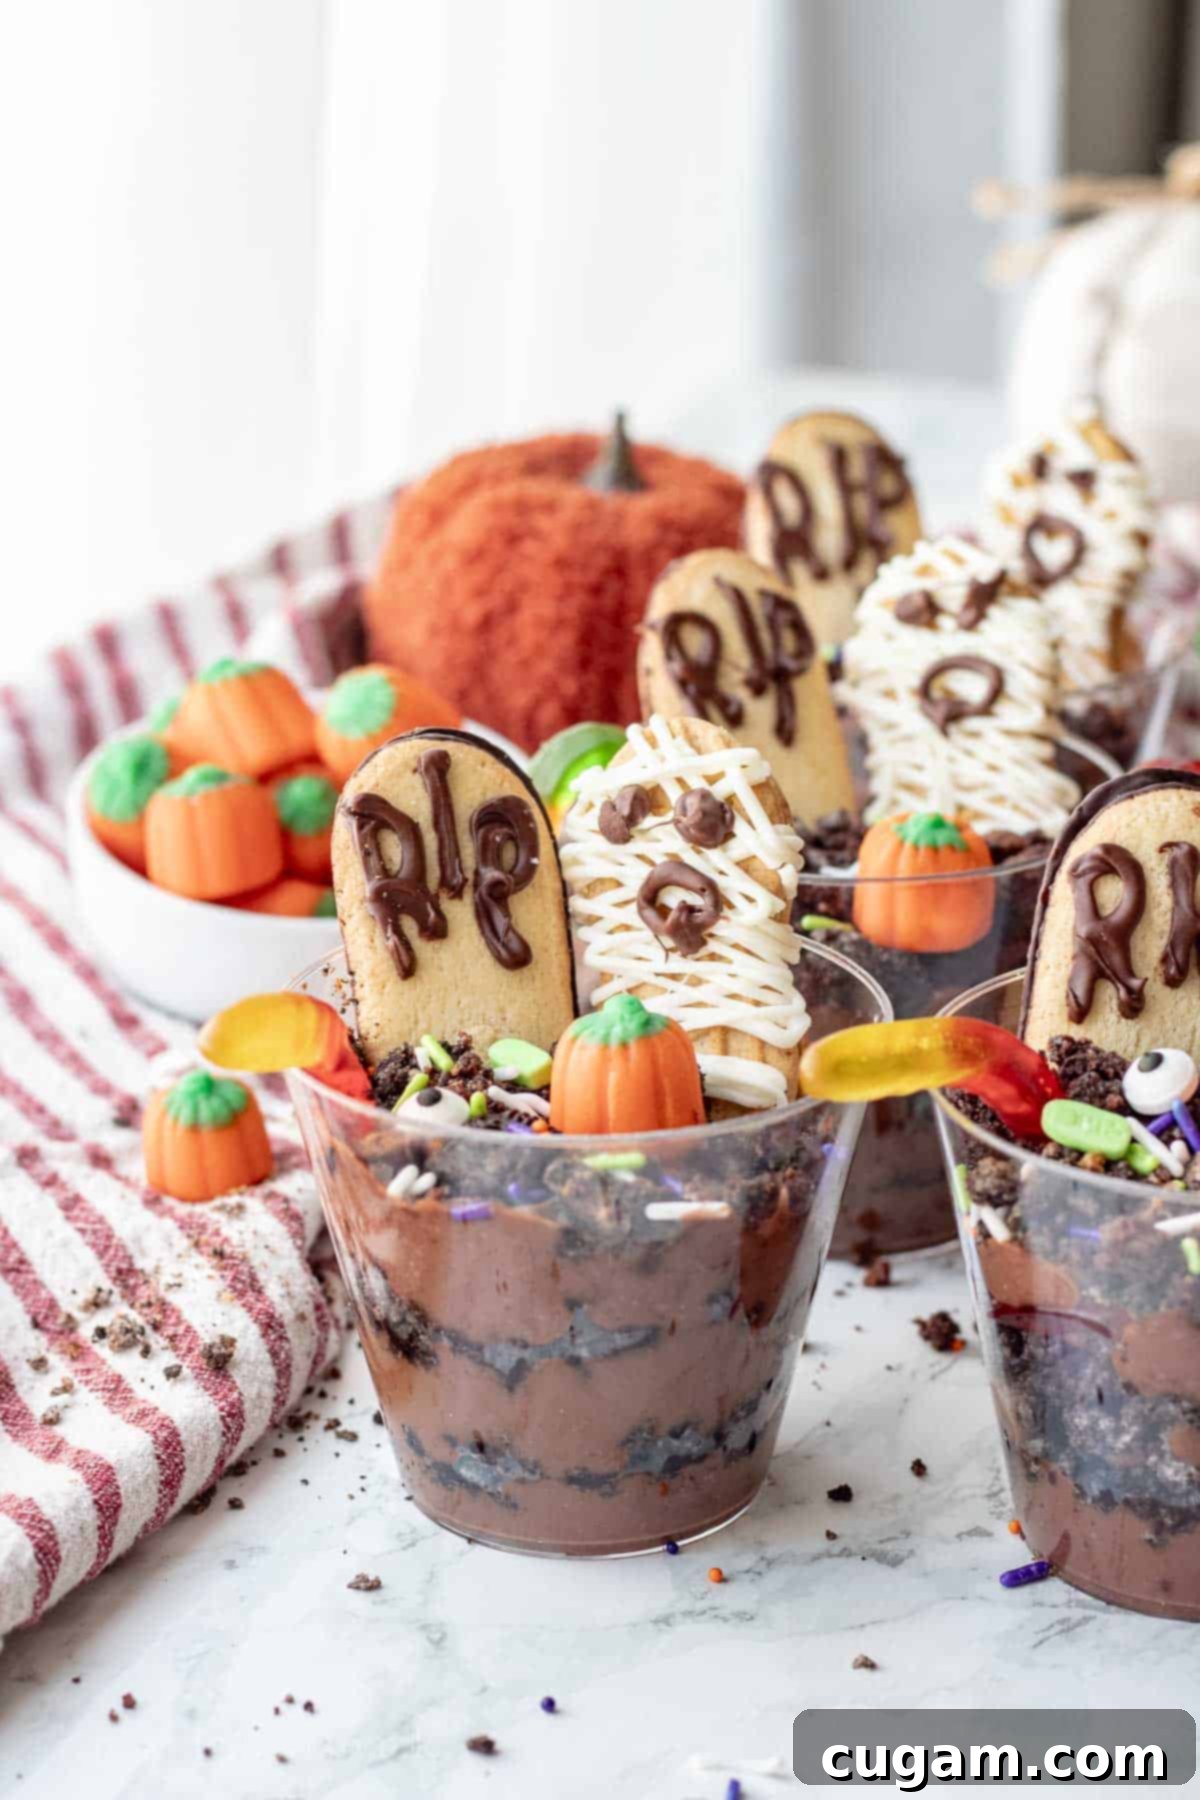
- Step 8: Final Decorations & Serve! The grand finale! Carefully place one “R.I.P.” gravestone cookie and one “mummy” cookie side-by-side towards the back of each cup, standing them upright if possible. Then, position a mini pumpkin candy in front of them, adding a splash of color. For an extra festive touch, sprinkle some fun Halloween sprinkles over the top – there are many mixes available with witches’ fingers, eyeballs, or tiny ghosts that look absolutely adorable. Now your spooky graveyard pudding cups are ready to be served and enjoyed by all your Halloween ghouls!
📌 Top Tips & Hacks for the Best Halloween Dirt Cups
To ensure your Halloween dirt pudding cups are a roaring success and look as fantastic as they taste, keep these expert tips in mind:
- Optimal Serving Time: These dirt pudding cups are best served within 2-4 hours of assembly. While they can be refrigerated longer, the Oreos, gummy worms, and decorative cookies can start to soften and lose their distinct textures if left overnight. For the freshest and most appealing presentation, aim to assemble them close to when you plan to enjoy them.
- Smart Prep Ahead: To minimize stress on the day of your Halloween party, you can prepare several components in advance. Make the pudding up to a day before and store it covered in the refrigerator. Crush the Oreos and keep them in an airtight container. Also, prepare and decorate your gravestone and mummy cookies ahead of time; once the chocolate has set, store them in an airtight container at room temperature. Just ensure these tempting treats don’t get ‘mysteriously’ eaten by eager kids (or even husbands!) before the party begins!
- Choose the Right Cups: The type of serving cup makes a big difference for both presentation and ease of decoration. We highly recommend using short, wide, clear plastic 8 oz party cups. Their wider opening makes it much easier to layer the pudding and Oreos, and critically, to arrange your festive cookie and candy decorations without them getting squished or hidden. While smaller 5 oz snack cups can be used for more servings, avoid tall, narrow cups as they make decorating challenging. Small, clear ice cream bowls are another excellent alternative that offers great visibility for your spooky creations.
- Prevent Chocolate Seizing: As noted in the instructions, be extra cautious when melting white chocolate. Microwave in short bursts (20-30 seconds initially, then 5-10 second increments) and stir well in between. If it seizes, it’s unfortunately irreversible, so it’s better to melt it slowly.
- Kid-Friendly Assembly Line: Turn the assembly process into a fun group activity! Set up an assembly line with bowls of pudding, crushed Oreos, gummy worms, and all the decorative candies and cookies. Assign each child a task, or let them build their own cup from start to finish. It’s a fantastic way to engage them and unleash their creativity.
❓Frequently Asked Questions
For the best taste and texture, these Halloween dirt pudding cups are ideal when served the same day they are assembled, within 2-4 hours. You can refrigerate them for up to 2 days, but please note that the cookies and Oreo crumbs will gradually become softer the longer they sit. Freezing is generally not recommended as it can significantly alter the pudding’s texture and cause the cookies to become very soggy upon thawing.
Absolutely, yes! While melting chocolate chips is a cost-effective choice if you have them on hand, using store-bought icing in a tube or a piping bag is a perfectly acceptable and convenient alternative. You could also opt for an edible food marker pen to write the “R.I.P.” letters, which offers even more precision and simplicity, especially for kids. The goal is to make these treats fun and easy!
Yes, you definitely can! Feel free to experiment with other instant pudding flavors beyond chocolate. Vanilla, white chocolate, butterscotch, or even pistachio could offer a fun twist. The key is to ensure you are using instant pudding mix, as the “cook and serve” varieties require a different preparation method and do not set up as quickly or easily. Just be aware that different colors might change the “dirt” aesthetic, but the taste will still be great!
Unfortunately, this specific recipe, as written, is not easily adaptable for a vegan diet because instant pudding mix requires dairy milk to set properly. Additionally, many Oreos and other cookies used for decoration, as well as gummy worms, contain animal products. You would need to seek out specific vegan instant pudding mixes, plant-based milks that work with them (check labels carefully), and certified vegan cookies and candies to create a fully vegan version.
More Delicious Fall Treats
If you’re still in the mood for more seasonal baking and no-bake delights, we have a variety of delicious fall-inspired recipes that are perfect for cozy evenings or festive gatherings. Explore these other fantastic options to complete your autumn dessert menu!
- Caramel Apple Cinnamon Scones
- Apple Cider Baked Donuts
- Maple Syrup Cookies
- Caramel Stuffed Snickerdoodles
Did you try this recipe? If you loved making these fun and spooky Halloween Dirt Pudding Cups, please make sure to leave a ⭐️ star rating and a comment below the recipe card. Your feedback is incredibly valuable, not only do I love hearing from you, but it’s also super helpful to other readers looking for new treats!
📲 FOLLOW Sara on Social! 👋 Facebook, Instagram, or Pinterest to see the latest delicious creations and fun treats from the kitchen!
📝 Printable Recipe

Halloween Pudding Cups
Pin Recipe
Equipment
-
1 gallon sized zip close bag
-
2 small plastic zip close or pastry bags
-
12 8 oz small wide party cups
Ingredients
- 35-40 Oreos
- ½ cup white chocolate chips 100g
- ¼ cup semi-sweet chocolate chips 50g
- 12 Nutter Butter Cookies
- 12 Milano Cookies
- 6 cups milk must be dairy
- 2 (5.9oz) Family sized boxes Instant Chocolate Pudding Mix
- 12 mini pumpkin candies
- gummy worms
- Optional: Halloween sprinkles
Instructions
-
Place the oreos into the gallon sized zip close bag, and make sure it’s fully closed. Smash the oreos by hand or with a rolling pin until they are in about pea sized crumbles.
For the Mummies and RIP cookies:
-
Transfer the chocoalte chips into separate bags. Lay out 12-15 Nutter butter cookies on a flat cutting board or parchment paper.
-
Melt the white chocolate first, for 20-30 seconds in the microwave. Gently squish the bag to make sure there is no hard chocolate pieces left. You can warm the bag for another 5-10 seconds if needed. The chocolate will seize if it gets too warm.
Cut a tiny hole in the corner of the bag and drizzle the chocolate sideways over the cookies, and once more in a diagonal direction for the mummy look. Let the cookies rest for the chocolate to set.
-
Microwave the semi-sweet chocolate next, for 20-30 seconds. Gently squish the bag to distribute the melted chocolate and warm in 10 second increments if needed. Lay out Milano cookies on a flat surface.
Cut a tiny hole in the corner of the bag and pipe the R.I.P. letters onto the cookies, and eyes and mouth onto the mummy cookies.
Allow the chocolate to set for 10-15 minutes, or place in the fridge for 5-10 minutes.
-
Mix the milk and chocolate pudding mix in a medium sized bowl with a whisk according to package directions until soft set.
-
Set out 12 serving cups. Scoop a 2-3 Tablespoon amount of pudding into each cup. (There will be about 3 layers each of pudding and Oreos). Then layer about 1.5 Tablespoons of crushed Oreos on top.
Do a second layer of pudding and Oreos, then lay gummy worms into the cups. Scoop the third and last layer of pudding and Oreos.
-
Decorate the dirt cups with the R.I.P. cookies, mummy cookies, pumpkin candy, and fun Halloween sprinkles as another option. Enjoy!
Notes
Serve within 2-4 hours of assembling, or refrigerate up to 2 days, keeping in mind that the cookies will become softer.
NOTE: if the chocolate chips get to warm in the microwave the chocolate will seize and won’t be usable to pipe onto the cookies. It can’t be saved and will need to be replaced with new chocolate chips.
