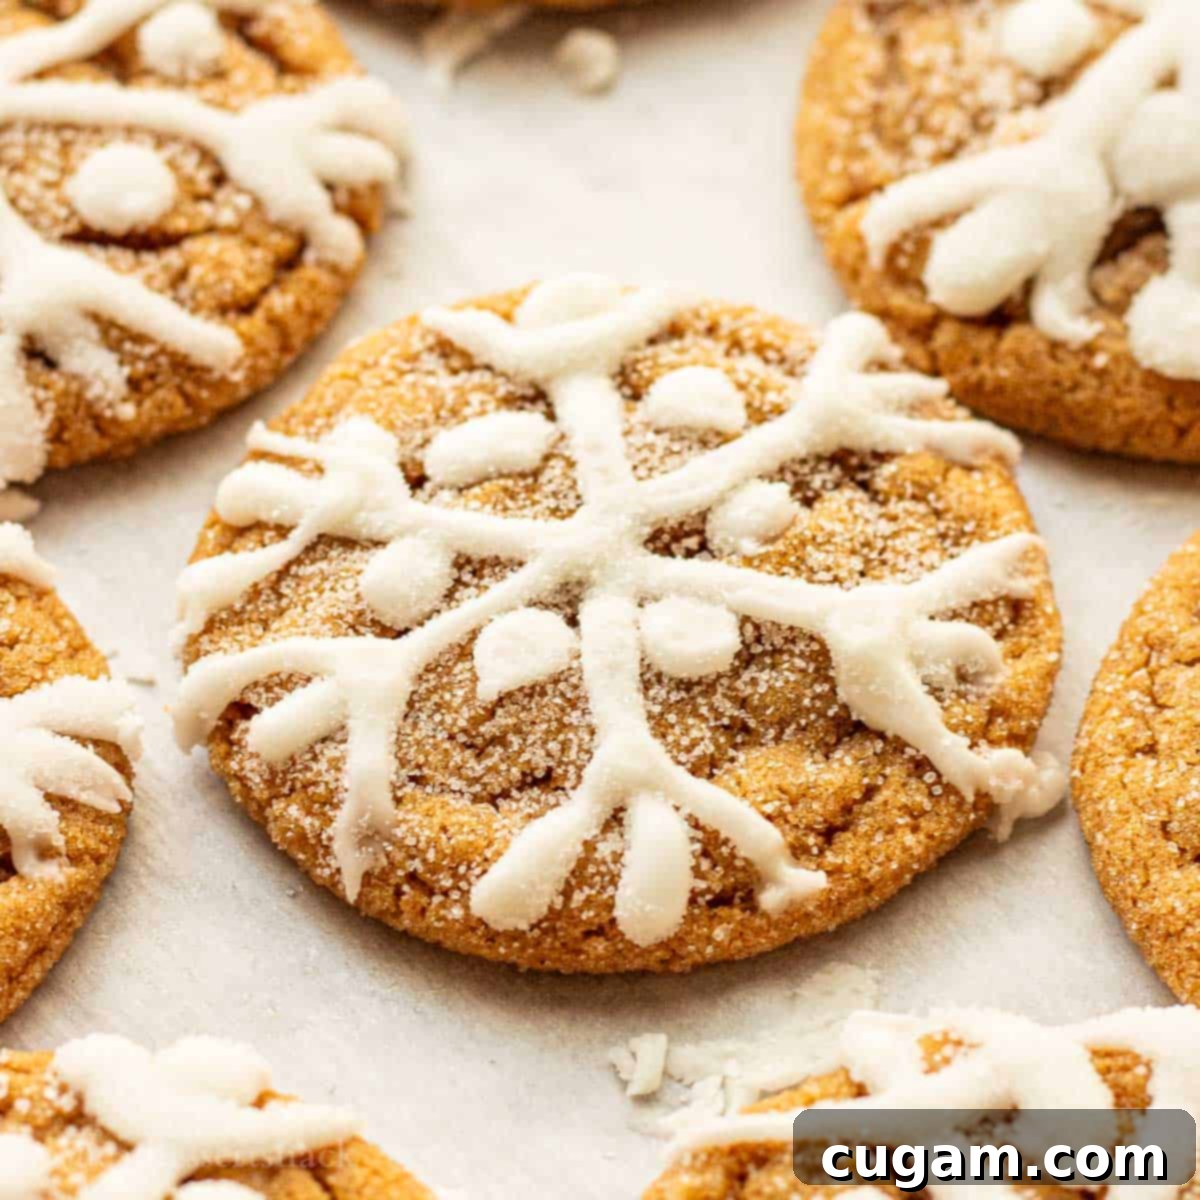
Chewy Ginger Molasses Cookies with Elegant Snowflake Icing: Your Ultimate Holiday Recipe
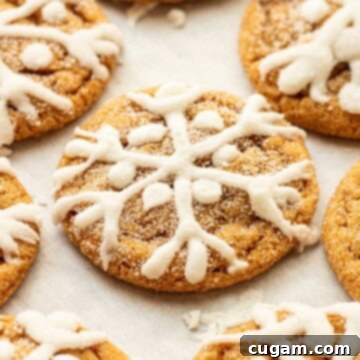
Step into a world of warm spices and sweet indulgence with these incredible Chewy Ginger Molasses Cookies! Imagine sinking your teeth into a perfectly soft, chewy cookie, bursting with the comforting flavors of cinnamon, rich molasses, and a delightful kick of ginger. But these aren’t just any ginger cookies; they’re crowned with a delicate, beautiful icing that resembles freshly fallen snowflakes, transforming a simple classic into a festive work of art. While elegant in appearance, they are surprisingly straightforward to create, making them a perfect project for bakers of all skill levels, especially when you want to add a touch of magic to your holiday spread.
What makes this recipe truly special is its incredible convenience. Forget the frustration of waiting around for dough to chill – this is a fantastic old-fashioned ginger molasses cookie recipe that requires absolutely NO CHILLING or tedious smashing. This means you can go from craving to cookie in record time! It quickly became one of our favorite easy holiday cookie recipes to prepare in advance and freeze, much like our beloved Maple Syrup Cookies or the always-popular family favorite, Classic Chocolate Chip Pudding Cookies. Their freezer-friendly nature makes them ideal for busy holiday seasons, ensuring you always have a batch of delicious, homemade cookies ready to enjoy or share.
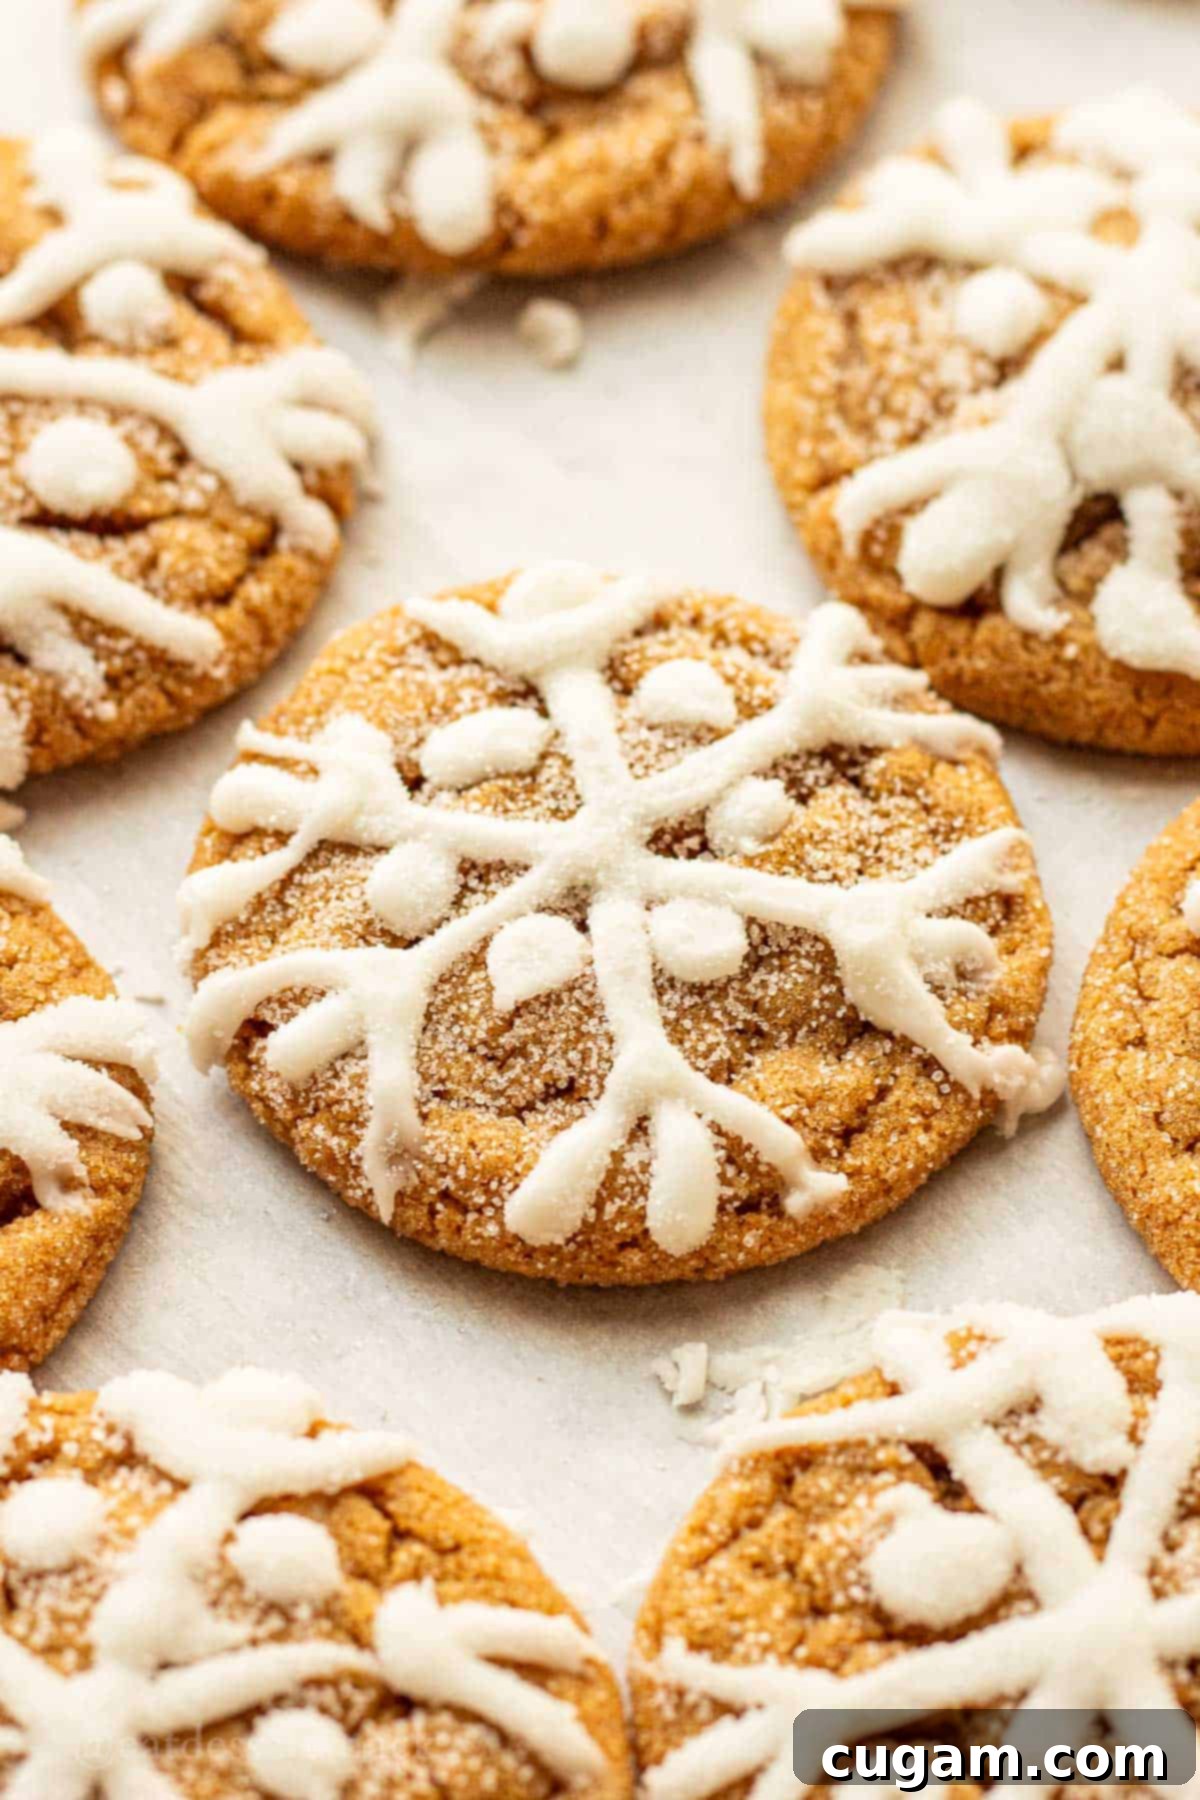
These cookies evoke the comforting taste of Grandma’s classic molasses cookies – that perfect blend of warmth and sweetness that feels like a hug in every bite. They are incredibly soft and boast an irresistible chewiness that keeps you coming back for more. You have the flexibility to make them thinner, which allows for more intricate snowflake icing designs to truly pop, or opt for a thicker, fluffier cookie if that’s your preference. Seriously, these are among my top favorite cookies in the WORLD! They’re not only a joy to bake, but they’re also a fantastic activity to share with kids, turning baking into a fun and memorable family tradition. And of course, they are absolutely perfect for any holiday cookie swap, guaranteed to be a crowd-pleaser and conversation starter.
Despite their beautiful, intricate appearance, these cookies are far from difficult to make. The process is straightforward and doesn’t demand hours of your precious time. Once you get into the rhythm of piping the delicate snowflake icing, you’ll find it goes quite quickly, and you might even discover a new artistic talent! The beauty of these cookies lies in their ability to impress without overwhelming you with complicated techniques. They bring a touch of elegance and festive cheer to any occasion, making them a staple for your holiday baking repertoire.
[feast_advanced_jump_to]
What To Expect From This Recipe
Before you dive into baking, here’s a quick overview of what you can anticipate from this delightful ginger molasses cookie recipe:
- Taste: Prepare your palate for a symphony of flavors! These chewy molasses ginger cookies feature a prominent, comforting blend of cinnamon and ginger, with the molasses contributing a subtle yet essential depth. The molasses, alongside the brown sugar, is key to developing that wonderfully soft, moist, and chewy texture that defines a perfect ginger cookie. You’ll notice hints of warmth from the other carefully selected spices, creating a truly irresistible flavor profile that is both classic and deeply satisfying.
- Ease: This is genuinely a simple cookie recipe, designed for stress-free baking. The dough comes together quickly with minimal effort. After mixing, you’ll roll the cookie dough balls in granulated sugar, which adds a beautiful sparkle and a slight crispness to the exterior during baking. The most crucial step is allowing the cookies to cool completely before you begin the exciting part: icing them. The snowflake pattern, while visually stunning, is entirely optional. If you’re short on time or prefer a quicker approach, a simple drizzle of the icing over the cooled cookies is equally delicious and charming.
- Time: Efficiency is a hallmark of this recipe. You’ll be able to whip up the molasses cookie dough in just 5-10 minutes – remember, NO chilling is required, saving you valuable time! Baking typically takes a quick 8-10 minutes, so keep a close eye on them. Once baked, allowing the cookies to cool sufficiently is important before icing. The icing process itself can take anywhere from 20-30 minutes, depending on your speed and the intricacy of your designs. However, many find the decorating to be a relaxing and enjoyable part of the process, especially when creating those charming snowflakes.
🛒 Key Ingredients for Perfect Molasses Ginger Cookies
Crafting the perfect chewy ginger molasses cookie relies on a handful of essential ingredients, each playing a vital role in achieving that signature flavor and texture. Here’s a closer look at what you’ll need and why it matters:
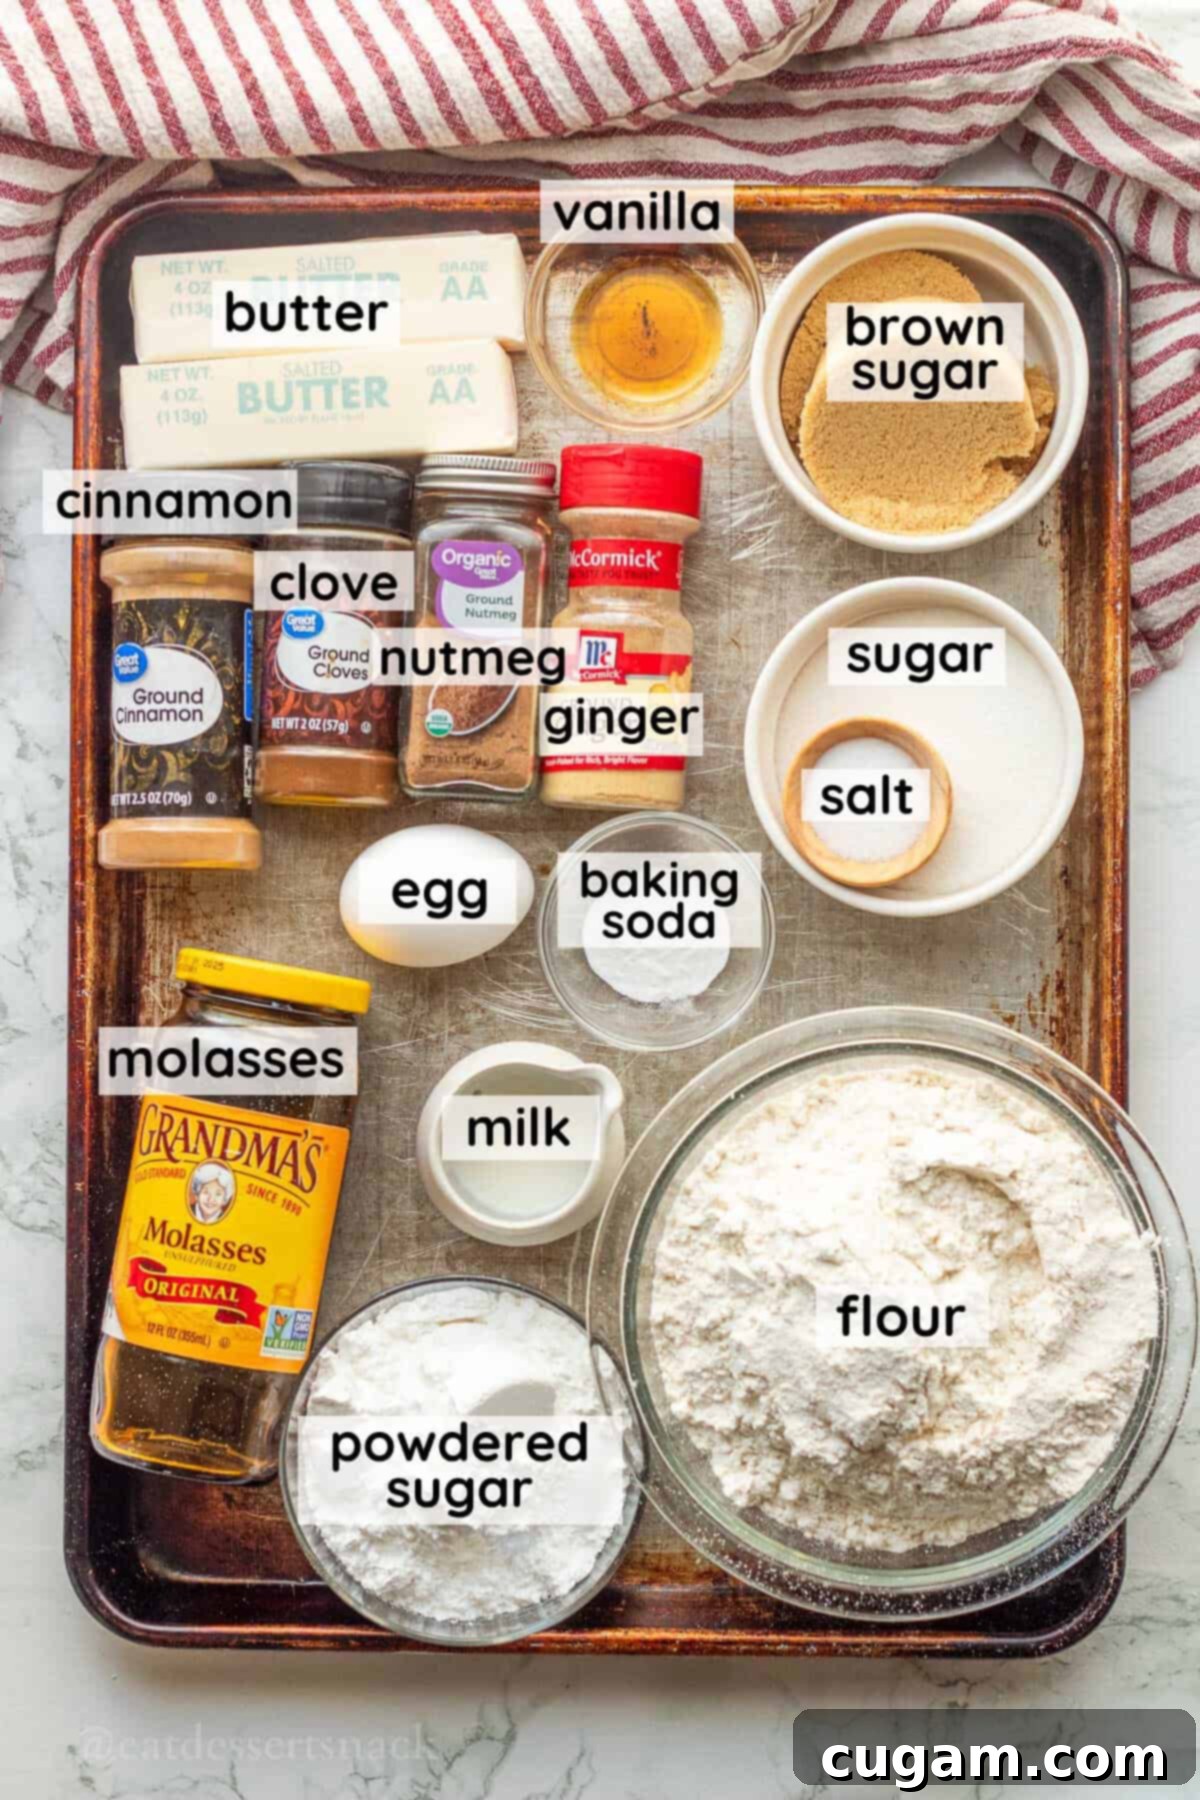
- Sugar – We utilize a thoughtful combination of brown sugar and white granulated sugar to achieve the ultimate cookie texture. Brown sugar contributes moisture and a deeper, caramelized flavor, which is crucial for the cookies’ chewy quality. White granulated sugar helps with spread and provides a delicate crispness to the edges. For the festive icing, finely ground powdered sugar ensures a smooth, lump-free consistency that’s perfect for piping intricate snowflake designs.
- Molasses – This is truly the star of our show, the ingredient that gives these cookies their distinctive character! Molasses is not just about flavor; it’s a powerful humectant, meaning it draws in and retains moisture. This is why it’s absolutely essential for those super soft, wonderfully chewy cookies that practically melt in your mouth. Its rich, slightly smoky, and subtly sweet flavor is unique, and you can think of it as using a SUPER dark brown sugar, but with an even more complex depth. It adds a beautiful, deep color to the cookies too. Lovely!
- Egg – A single egg acts as a crucial binder in our cookie dough, helping all the ingredients come together cohesively. Beyond its binding power, the egg also contributes significantly to the soft and chewy texture, adding richness and a subtle moistness that prevents the cookies from becoming dry or crumbly.
- Flour – This recipe calls for plain all-purpose flour, which provides the foundational structure for the cookies. Its moderate protein content allows for a tender yet sturdy cookie. While I’ve only tested this recipe with all-purpose flour, it generally yields consistent results for a wide range of baked goods.
- Spices – The heart and soul of these ginger molasses cookies lies in their harmonious blend of spices. We use a generous mix of ground cinnamon and ginger, which are the dominant flavor notes, providing that signature warmth and zest. Smaller amounts of ground cloves and nutmeg are included because of their stronger, more pungent flavors; they complement the ginger and cinnamon beautifully without overpowering them, adding a layer of complexity and a classic holiday aroma.
- Baking Soda – As the primary leavening agent in these cookies, baking soda is critical for achieving their ideal texture. When it reacts with the acidic molasses and brown sugar, it creates carbon dioxide gas, which helps the cookies rise slightly and spread out. This reaction is what gives them that characteristic soft interior and slightly crinkled, chewy exterior.
For a complete breakdown of exact ingredient quantities and measurements, please refer to the comprehensive recipe card located further down on this page.
✏️ Substitutions & Variations to Customize Your Cookies
While this recipe is perfect as written, don’t hesitate to experiment with these simple substitutions and variations to tailor these chewy ginger molasses cookies to your taste or dietary needs:
- Sugar Substitutions – If you’re looking for alternatives to refined sugars, you can successfully use coconut sugar in place of both the brown sugar and white granulated sugar within the cookie dough. This will impart a slightly different, more caramel-like flavor, but still result in a delicious cookie. For an extra textural element and a beautiful sparkle, I highly recommend using raw sugar or turbinado sugar (which have larger, coarser granules) to roll the cookie dough balls in before baking. It creates an amazing, crunchy crust that’s visually appealing and adds another layer of enjoyment.
- Some have used pure maple syrup in place of the molasses and have said it’s very delicious! While the flavor profile will shift from a deep, spiced molasses to a lighter, sweeter maple, it offers a wonderful alternative for those who prefer maple or don’t have molasses on hand. Keep in mind the texture might be slightly different, but still incredibly tasty.
- Spice Adjustments – Feel free to adjust the spices to your preference. If you love a stronger ginger kick, increase the ground ginger by another ¼ to ½ teaspoon. For a milder cookie, you can slightly reduce the amounts of cloves and nutmeg. You can also add a pinch of allspice for even more festive warmth.
- Adding Extracts – A touch of orange zest or a few drops of orange extract in the dough can brighten the flavors beautifully, complementing the ginger and cinnamon. Almond extract can also add a subtle, sophisticated note if you’re looking for something different.
- Chocolate Chip Molasses Cookies – For a decadent twist, fold in a half cup of mini chocolate chips or chopped white chocolate into the dough during the last mixing stage. The combination of warm spices and chocolate is absolutely divine!
🧑🍳 Step-by-Step Instructions: How to Make These Iced Ginger Molasses Cookies
Get ready to create some holiday magic in your kitchen! Follow these simple steps to bake your irresistibly chewy ginger molasses cookies and adorn them with charming snowflake icing. Remember, there’s no chilling required, so you’ll be enjoying these delightful treats in no time!
First, preheat your oven to 350°F (175°C) and prepare a baking sheet (or two, if you plan to bake multiple batches). Line your baking sheet with parchment paper or, for optimal results and to prevent excessive spreading, a silicone baking mat. I personally find baking mats help the cookies stay a little thicker and retain their shape beautifully.
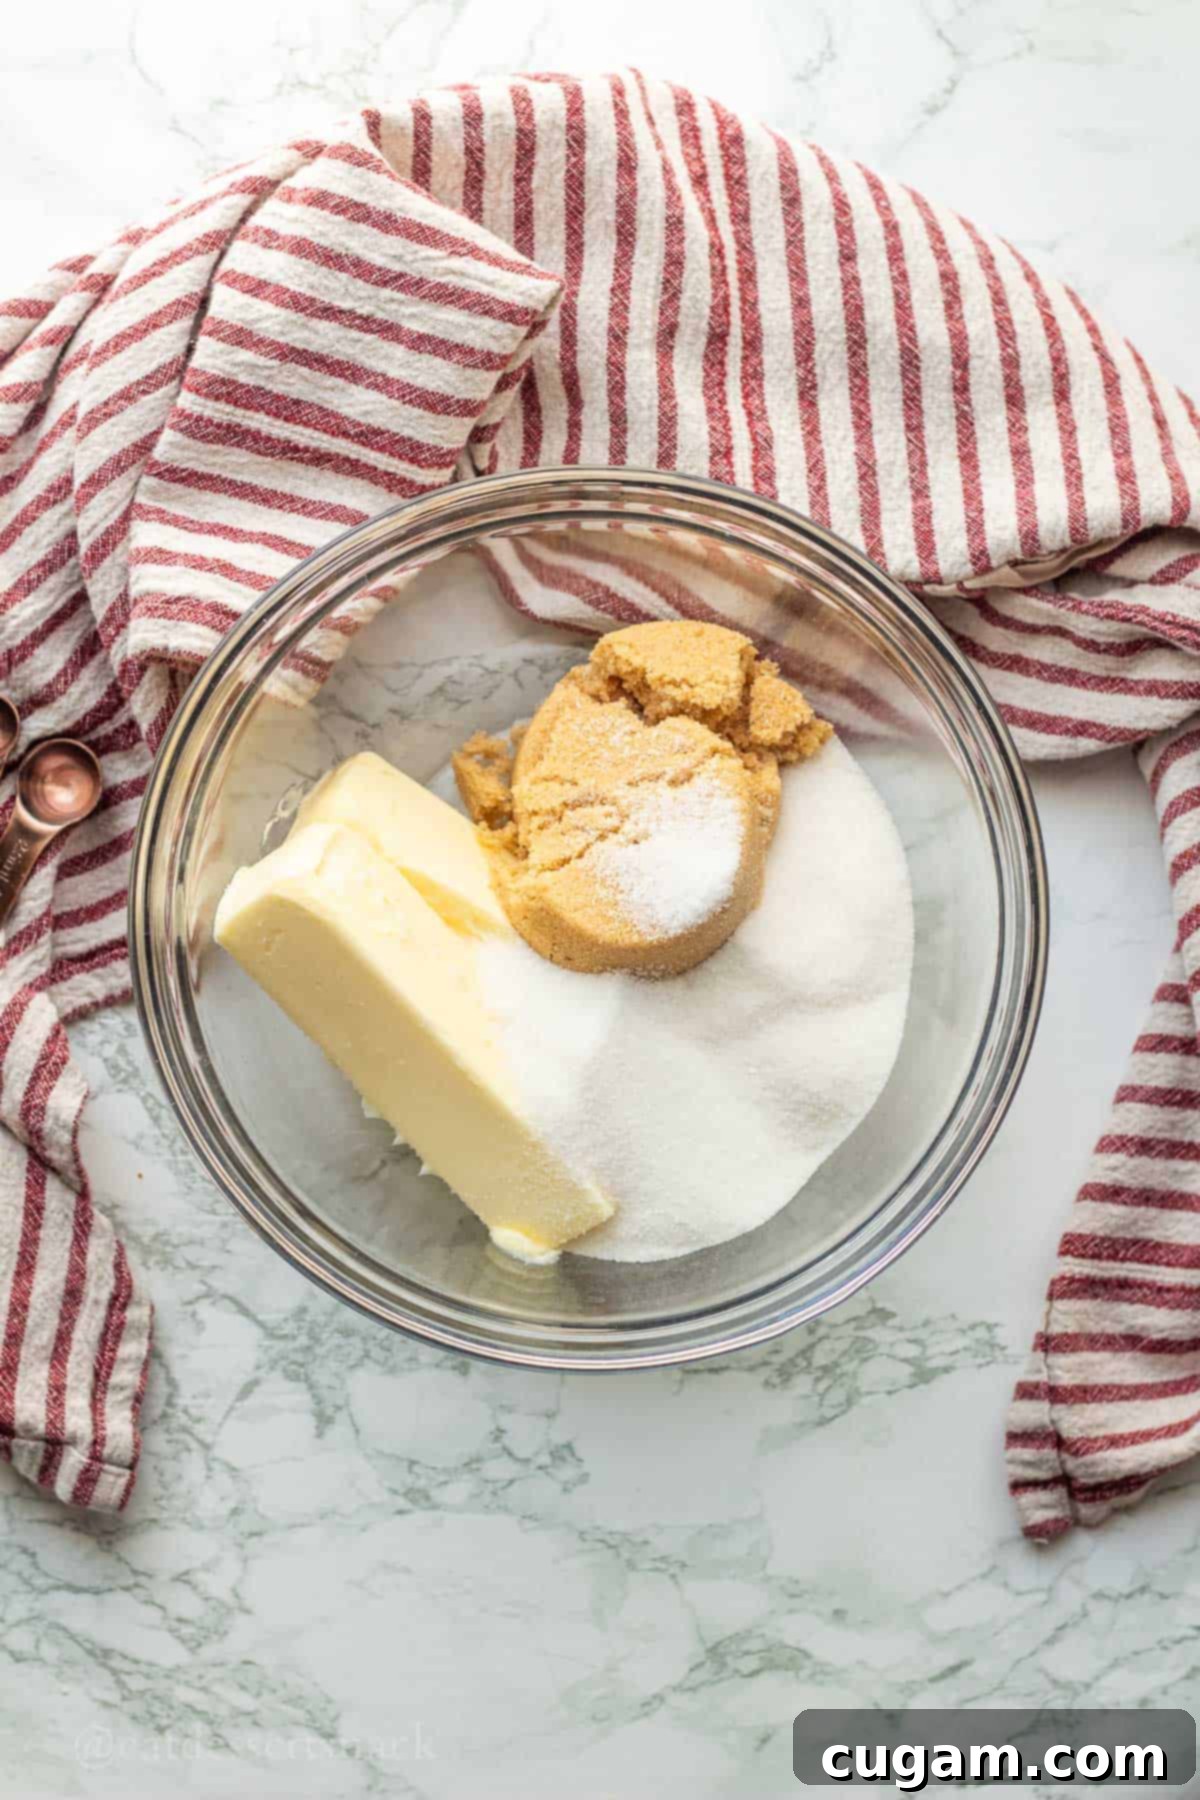
- Step 1: Cream the Wet Ingredients. In the bowl of a stand mixer fitted with the paddle attachment, or using an electric hand mixer, combine the softened room temperature butter, white granulated sugar, and brown sugar. Beat them together on medium speed until the mixture becomes light, fluffy, and pale in color, which usually takes about 2 minutes. This creaming process incorporates air, which contributes to the cookies’ light texture.
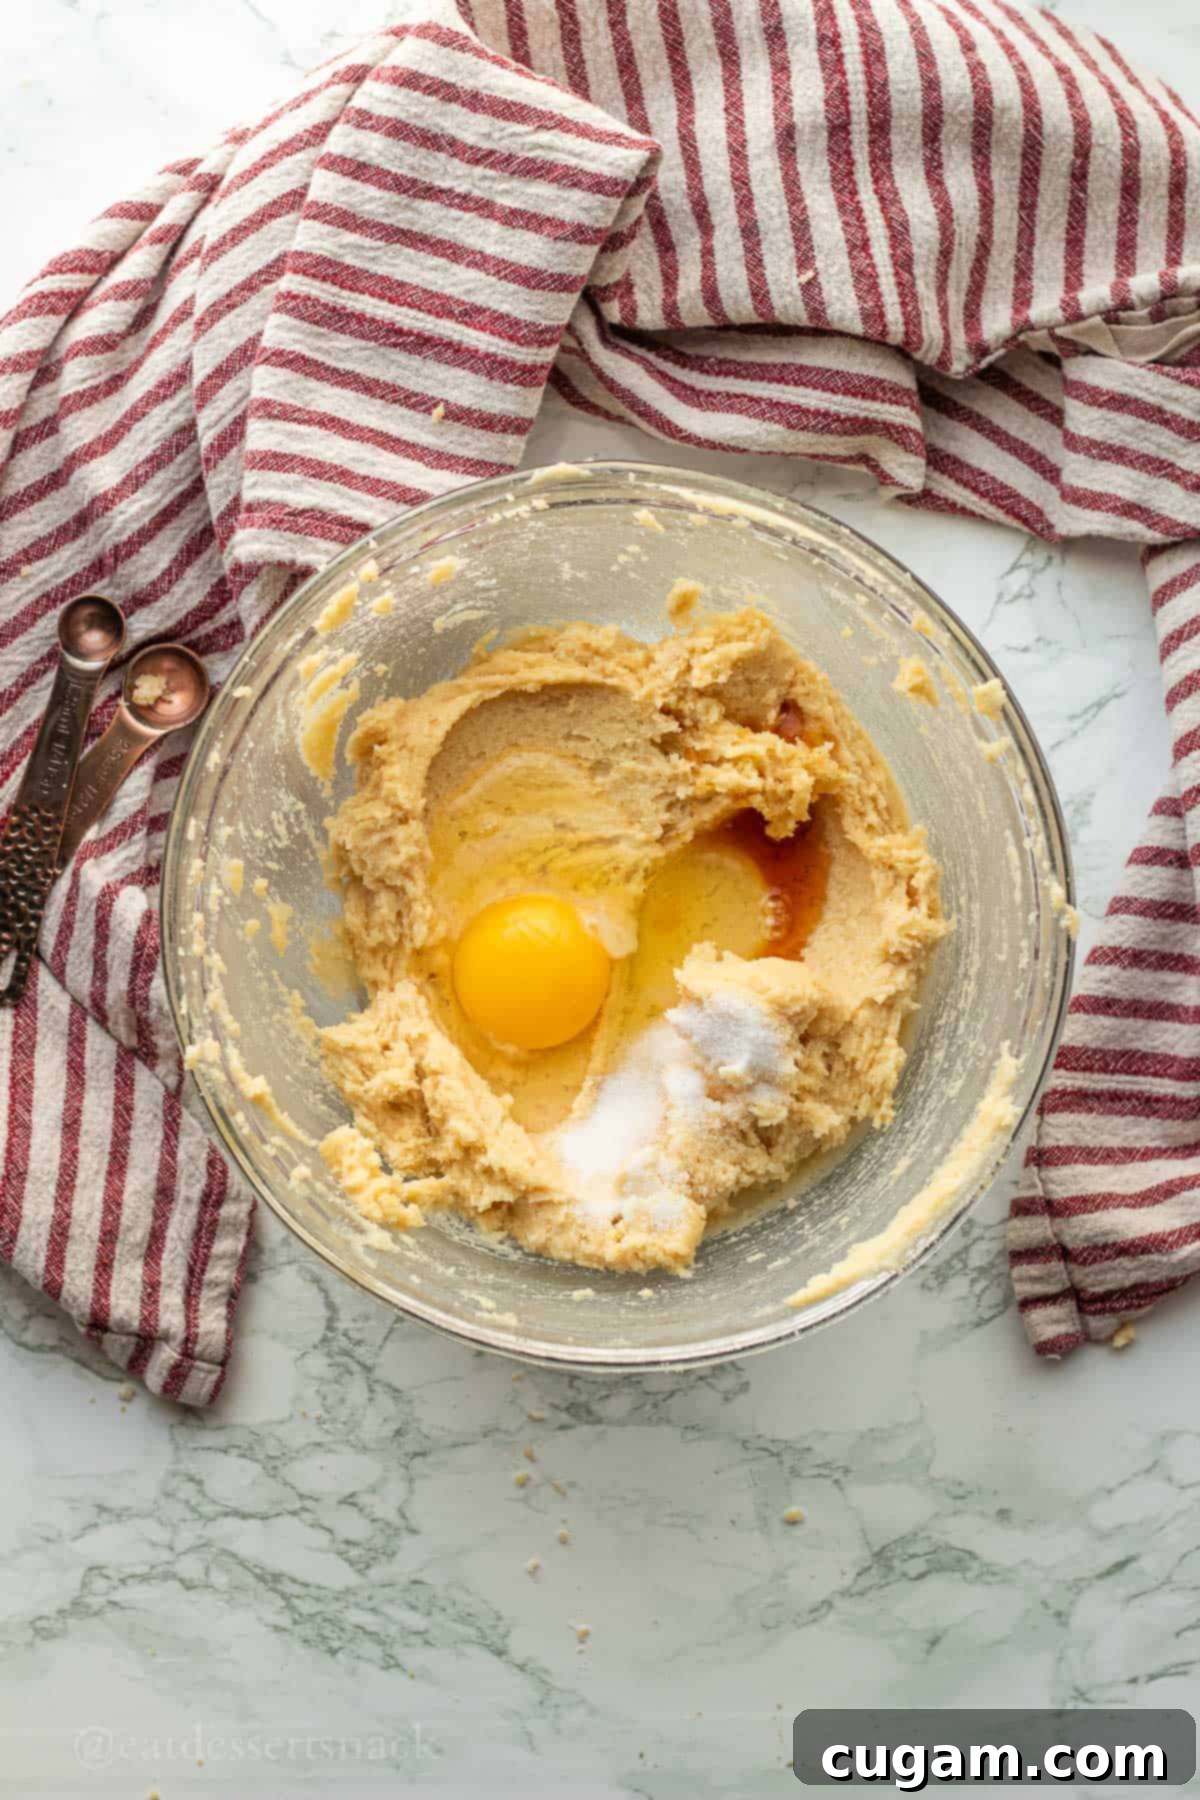
- Step 2: Incorporate Egg and Flavorings. Next, add the large egg, pure vanilla extract, and a teaspoon of salt to the creamed butter and sugar mixture. Mix thoroughly for approximately 1 minute until all ingredients are well combined and the mixture appears fluffy and uniform. The egg adds structure and moisture, while vanilla and salt enhance the overall flavor profile.
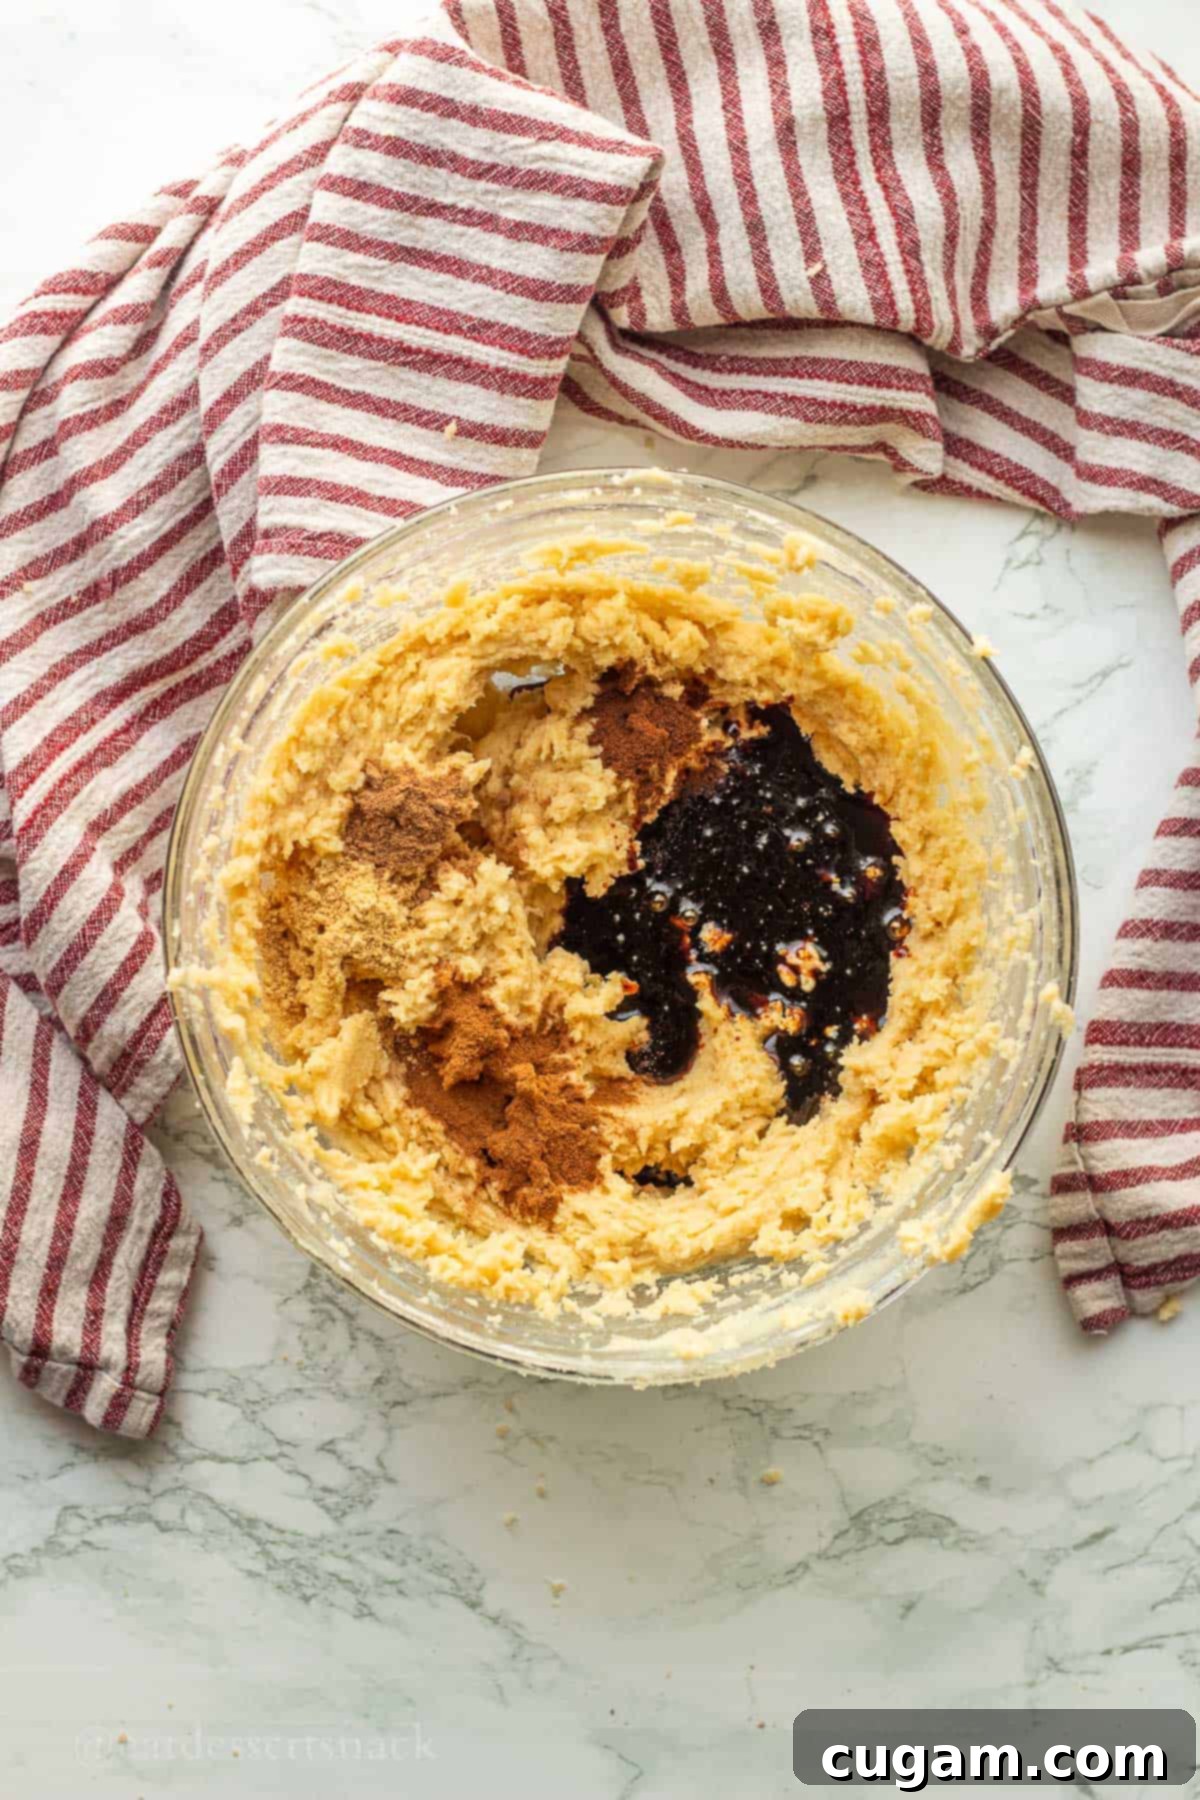
- Step 3: Add Spices and Molasses. Now, it’s time to bring in the signature flavors! Add all the ground spices – cinnamon, ginger, cloves, and nutmeg – along with the rich molasses. Mix these ingredients into the wet mixture until the molasses is completely and evenly distributed throughout the dough. Ensure there are no streaks of molasses, as this guarantees a consistent flavor in every cookie.
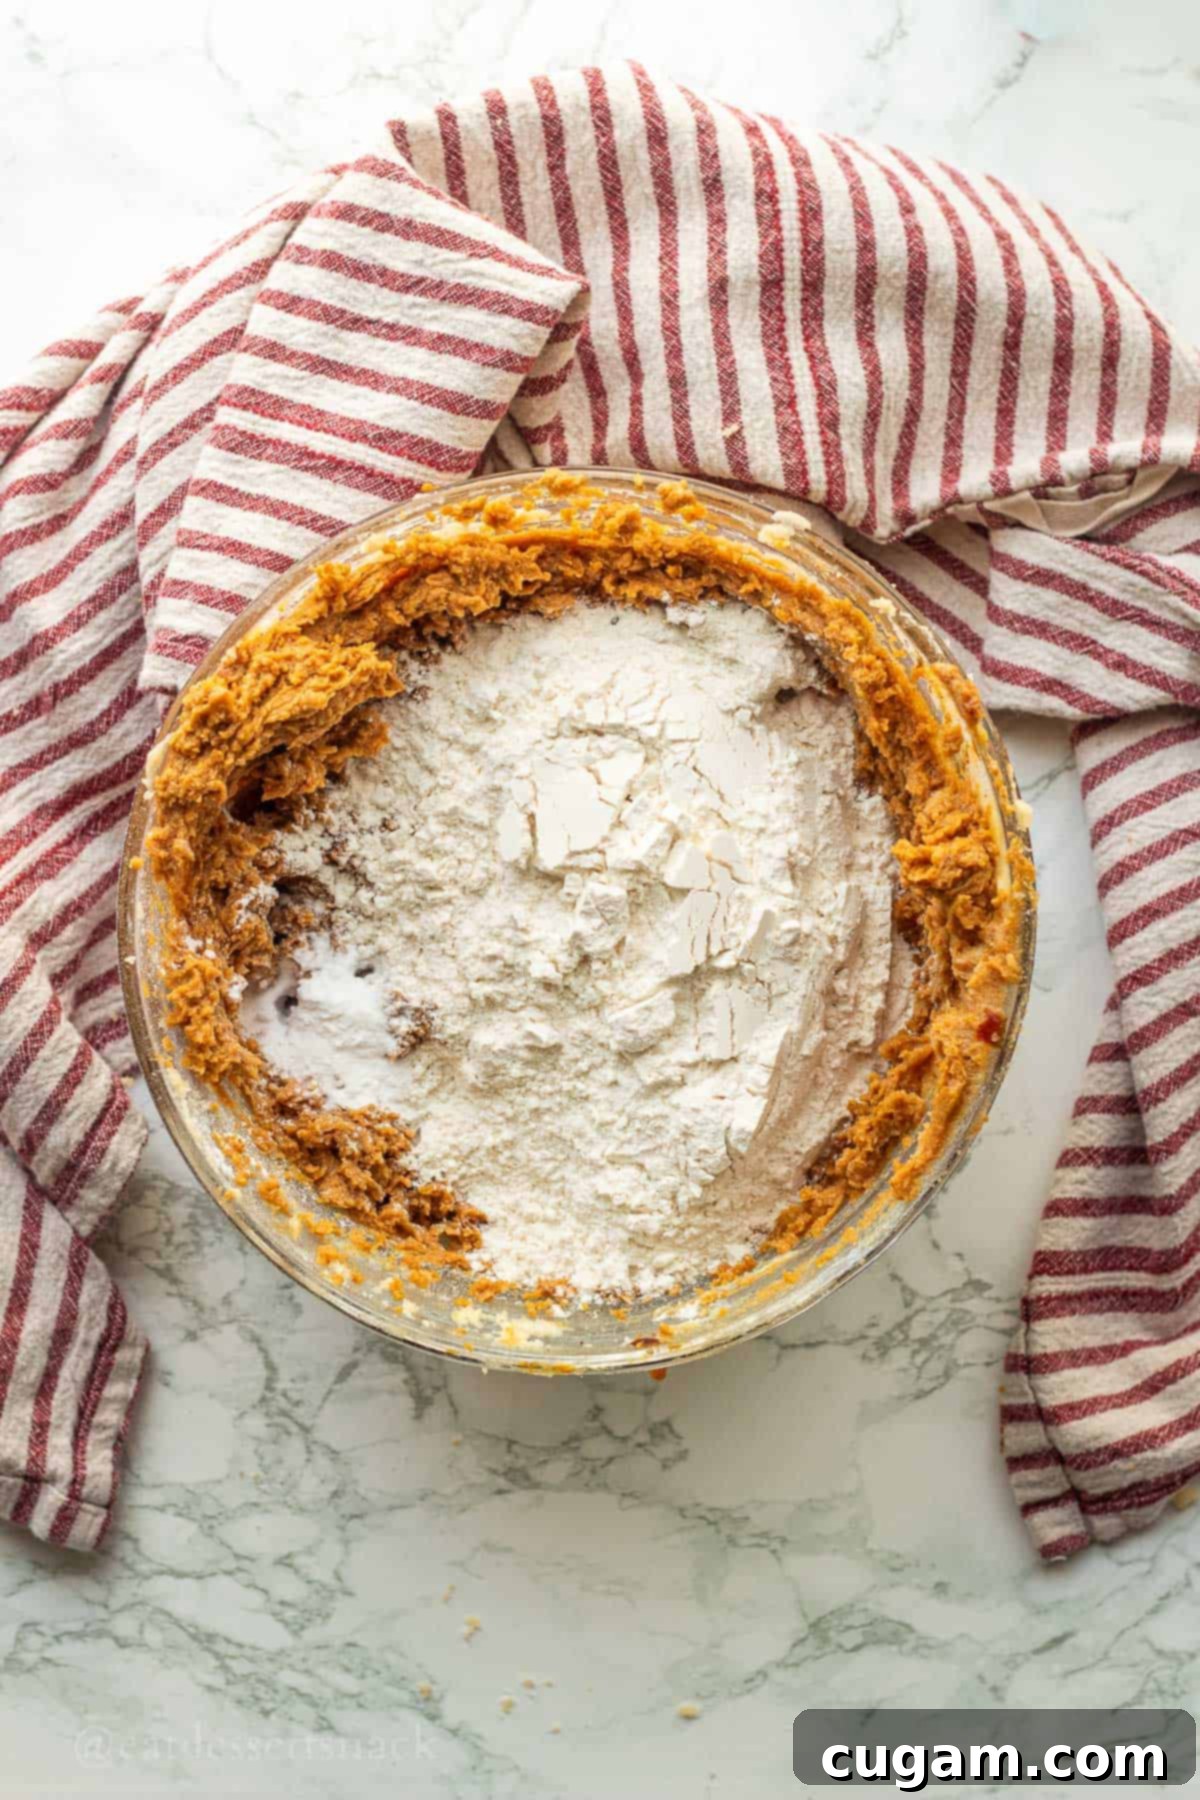
- Step 4: Incorporate Dry Ingredients. Finally, add the all-purpose flour and baking soda to the mixture. Mix on low speed just until there are no visible pockets of dry flour remaining, typically about 1 minute. Be careful not to overmix the dough, as overmixing can develop the gluten too much, resulting in tougher cookies. The dough should be soft and pliable.
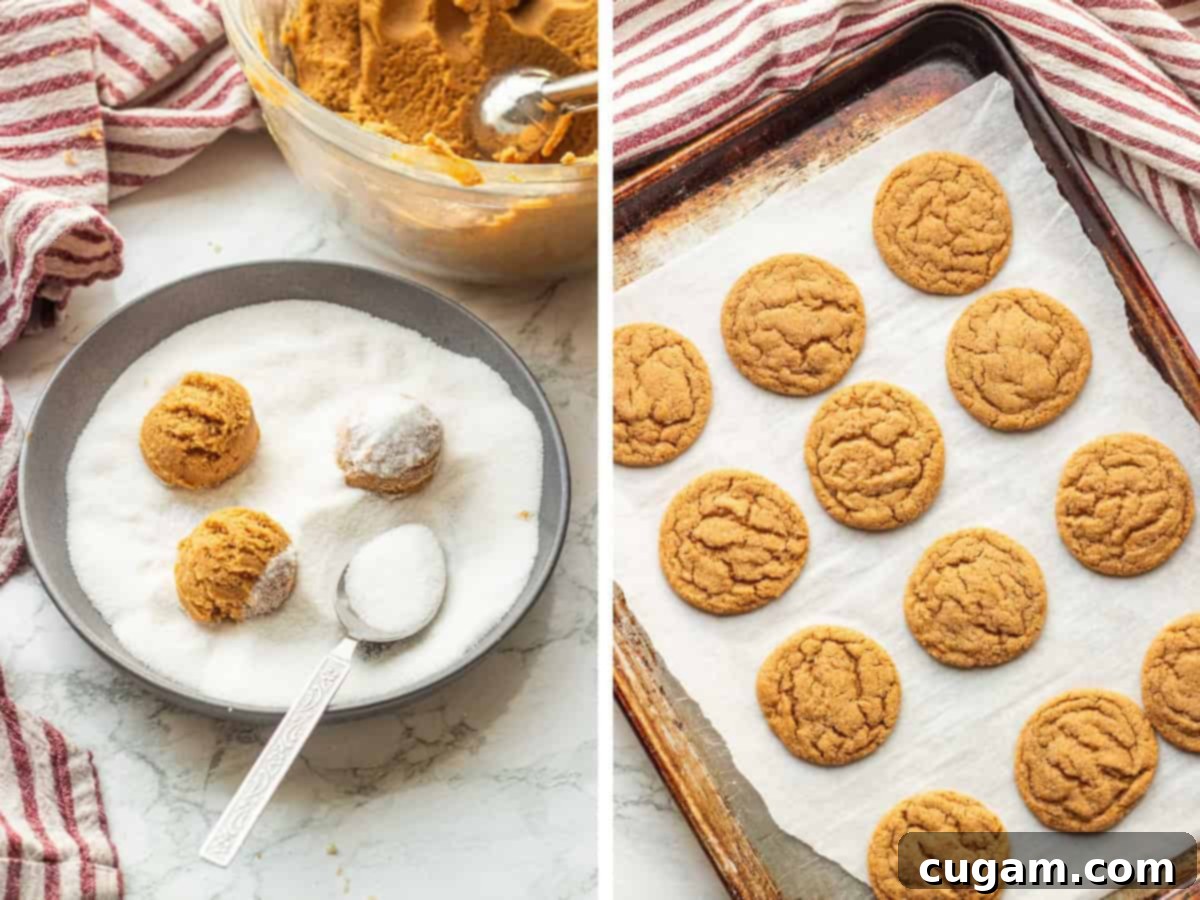
- Step 5: Portion and Sugar Coat. Once your dough is ready, scoop it into uniform balls. I highly recommend using a 1.5 Tablespoon cookie scoop for consistent sizing, which ensures even baking. Roll each dough ball generously in white granulated sugar, coating it completely (as shown in the above left image). This sugar coating adds a beautiful sparkle and a delightful textural contrast to the soft interior.
- Step 6: Bake the Cookies. Arrange the sugar-coated cookie dough balls on your prepared baking sheet, leaving enough space between them for spreading. Bake at 350°F (175°C) for 8-10 minutes. For me, the sweet spot is exactly 9 minutes, yielding a perfectly chewy cookie with slightly crisp edges. The cookies will look slightly puffed and set around the edges but may still appear soft in the center.
Allow the cookies to cool on the baking sheet for a few minutes before transferring them to a wire rack to cool completely. This step is crucial for achieving that ideal chewy texture and ensuring the icing adheres properly without melting. Now, let’s get to the fun part: decorating!
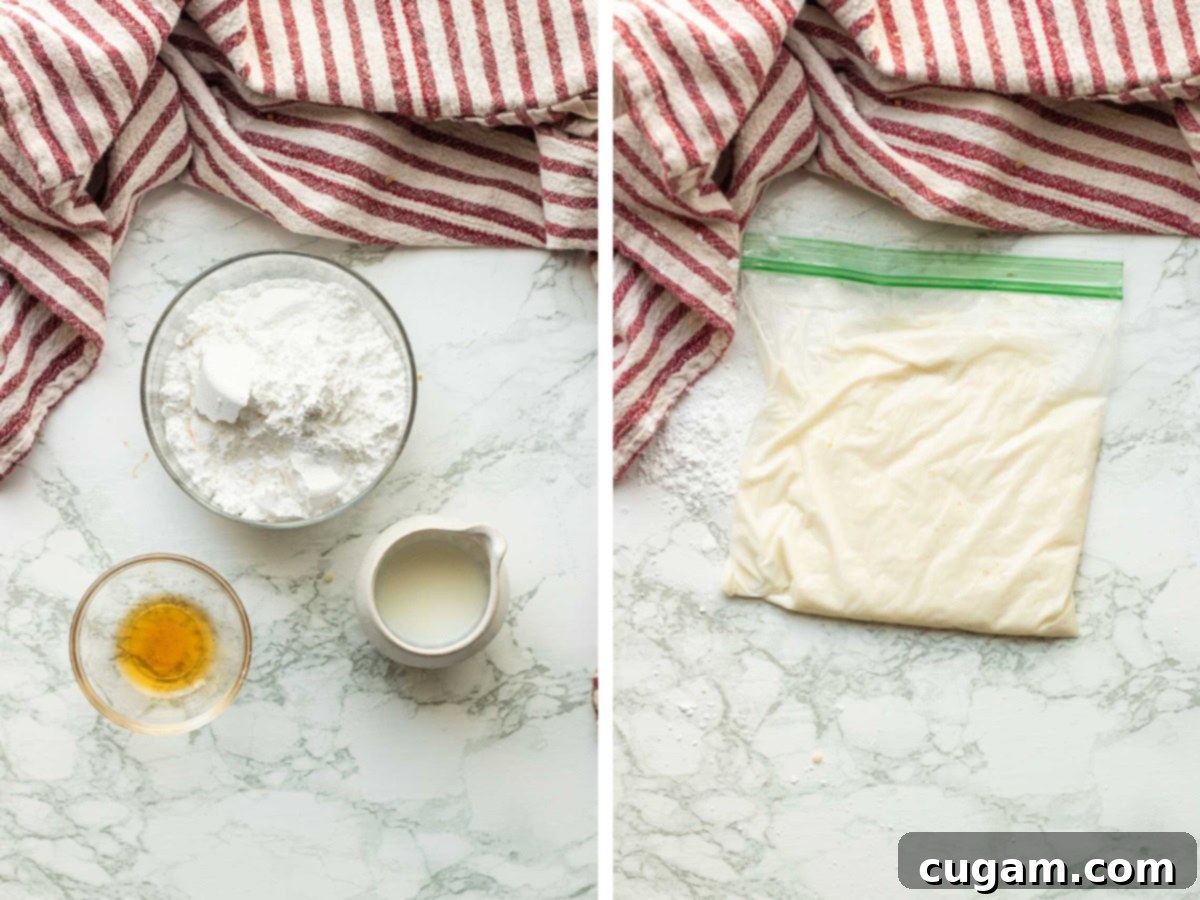
- Step 7: Prepare the Icing. In a medium bowl, or directly in a small zip-top bag if you’re using it for piping, combine the powdered sugar, milk, and vanilla extract. Whisk or mix these ingredients thoroughly until you achieve a smooth, lump-free icing. The consistency should be pourable but thick enough to hold a shape. If using a zip-top bag, carefully snip a tiny hole in one corner (as seen in the above images); the smaller the hole, the finer your snowflake lines will be!
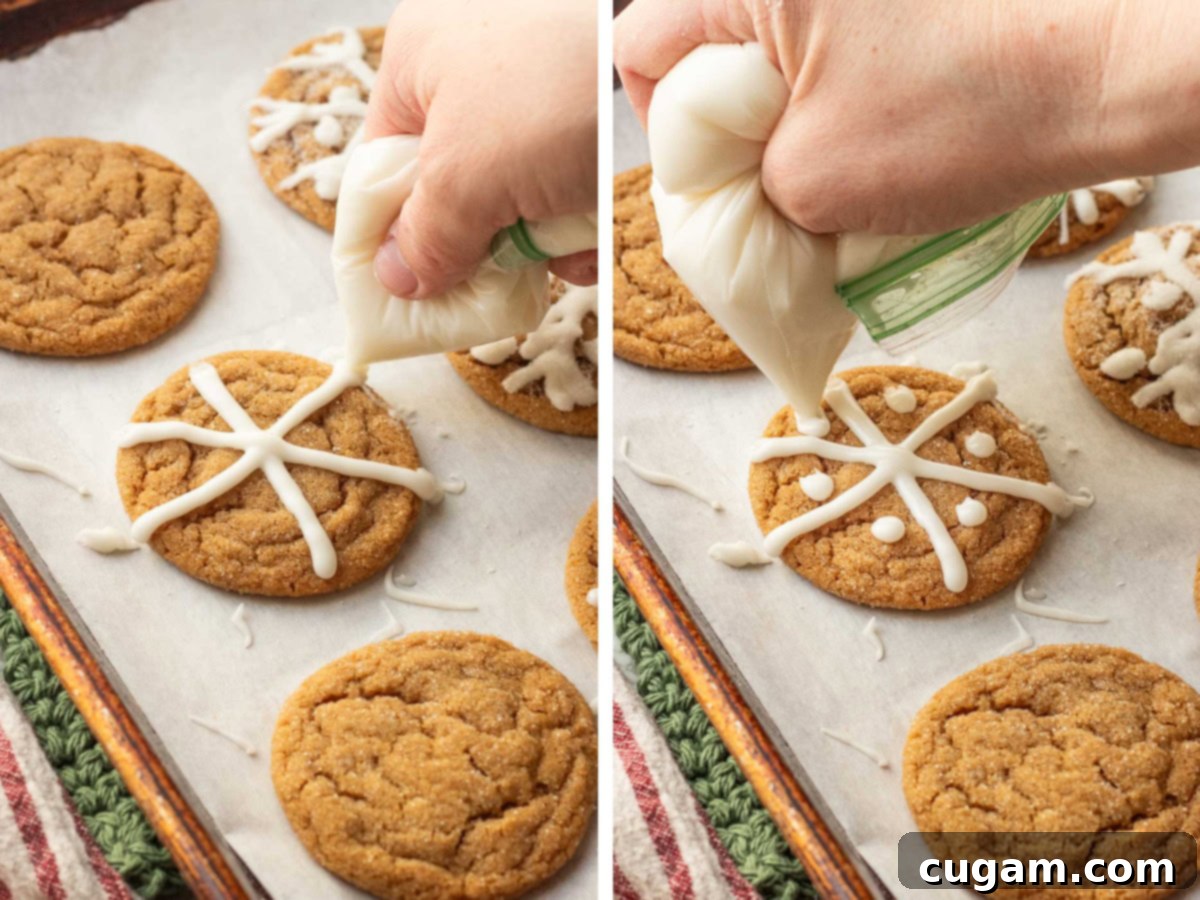
- Step 8: Pipe the Snowflake Base. Once your cookies are completely cool, hold your piping bag (or zip-top bag) steadily and pipe an “X” shape directly onto the center of each cookie. Then, pipe a single straight line either sideways or vertically, crossing through the center of the “X”. This creates a beautiful 6-branch star, forming the essential foundation of your snowflake design (as shown in the above left image).
- Step 9: Add Center Dots. For an extra touch of detail, add a tiny dot of icing in the center of every triangle created by your 6-branch star (as seen in the above right image). This simple addition gives your snowflakes more depth and intricacy.
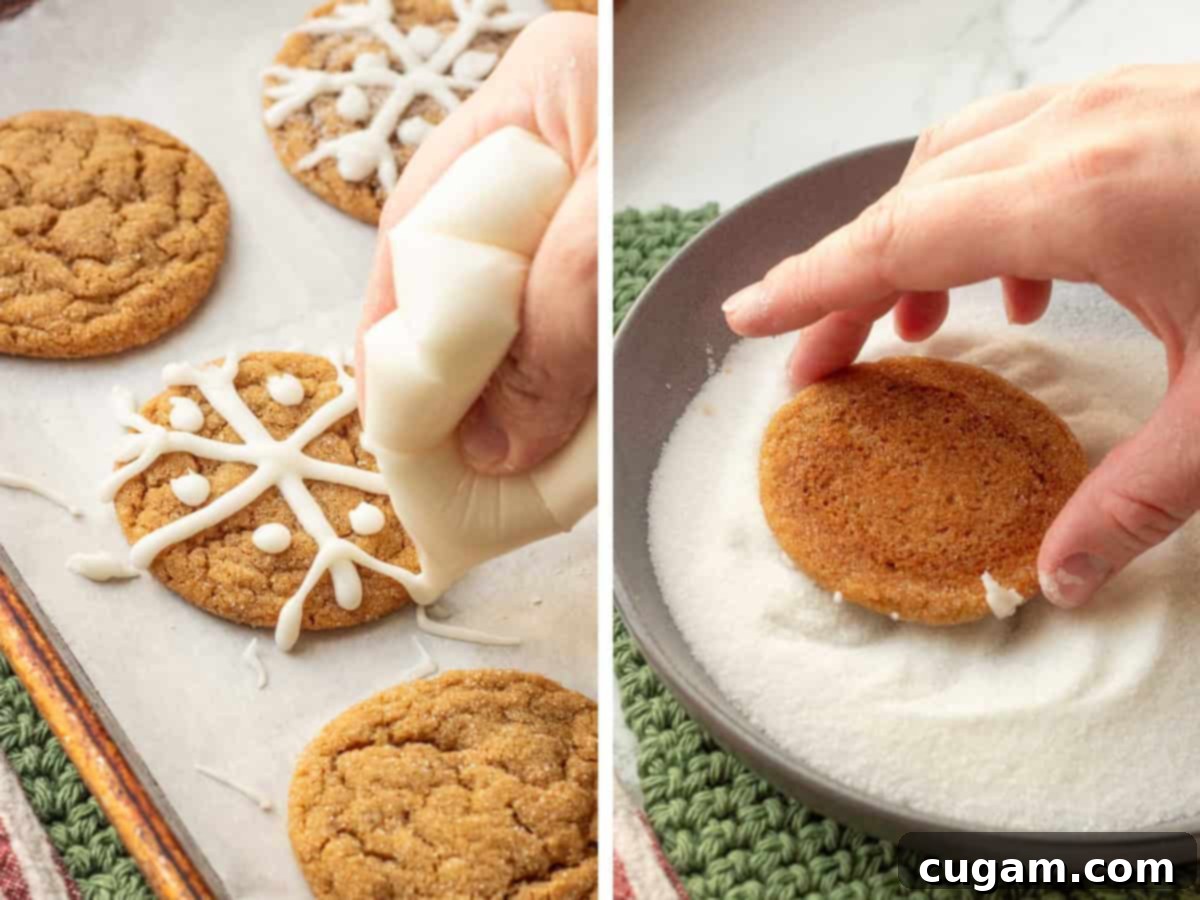
- Step 10: Complete the Snowflake Branches. To finalize your beautiful snowflake design, pipe a small “V” shape at the very end of each branch of the star, overlapping the branch slightly (as shown in the above left image). This creates the classic, delicate tips of a snowflake. Take your time and enjoy the creative process!
- Step 11 – Optional “Snow” Effect: For an extra magical touch that truly makes your snowflakes sparkle, carefully dip the iced cookies into a shallow dish of granulated sugar BEFORE the icing fully dries. This gives the snowflakes a gorgeous, crystalline snow effect, making them look even more authentic. Be very gentle to avoid smashing the cookies or smudging your intricate icing design! (See above right image for the dipping process).
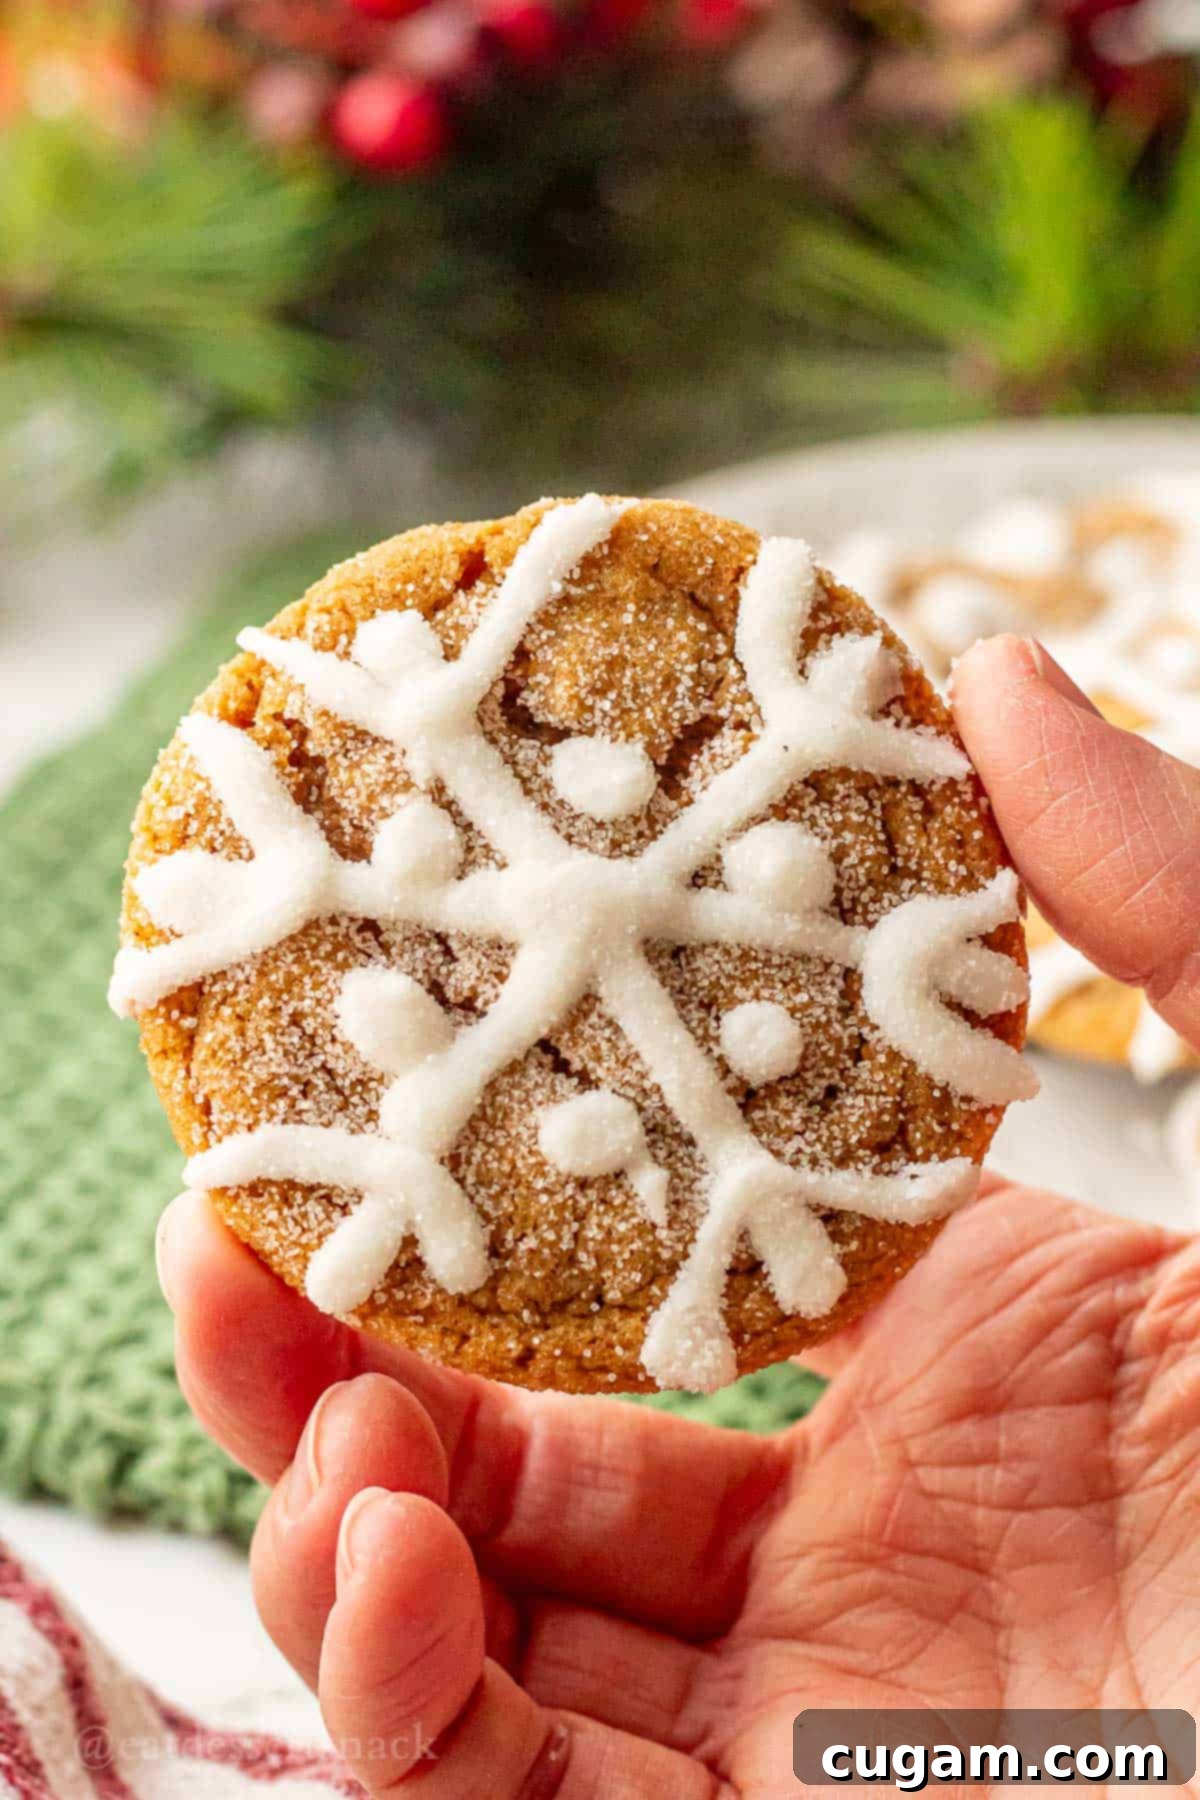
Once you’ve finished decorating, allow the icing to harden completely. This usually takes about 30 minutes to 1 hour, depending on the humidity in your kitchen. Patience here will prevent any smudging or sticking when you stack or store them. If you’re looking for a quicker decorating method, remember you can always simply drizzle the icing artfully over each cookie instead of creating the snowflake patterns. Either way, these cookies are a true delight! Enjoy every perfectly spiced, chewy bite of these festive treats!
📌 Top Tips & Hacks for Best Results
Achieving bakery-quality ginger molasses cookies with that perfect chew and festive icing is easier than you think with these helpful tips and tricks:
- Adjusting Cookie Thickness for Icing: For thinner, flatter cookies that provide a larger, smoother surface ideal for more intricate snowflake piping, you can slightly reduce the amount of flour to about 3¼ cups. This allows the cookies to spread a bit more during baking. Conversely, if you prefer a thicker, puffier cookie, sticking to the recommended 3½ cups of flour will achieve that delightful, soft texture. Experiment to find your preferred canvas for decoration!
- Piping Tools for Precision: For quick and easy icing, a standard zip-top bag with a tiny corner snipped off works wonderfully. However, if you’re aiming for impeccably neat and detailed snowflakes, investing in a very small piping tip (like a Wilton #1 or #2) and a dedicated piping bag will give you much greater control and finer lines. Practice on parchment paper first to get a feel for the pressure and flow.
- Spice Blend Shortcut: Don’t have all the individual ground spices on hand? No problem! A fantastic shortcut is to use 2 teaspoons of pumpkin pie spice blend in place of the individual cinnamon, ginger, cloves, and nutmeg. Pumpkin pie spice typically contains a very similar mix of warming spices, ensuring your cookies still have that classic, comforting holiday flavor profile. It’s a convenient hack that saves time without sacrificing taste.
- Room Temperature Ingredients: Ensure your butter and egg are at room temperature. This allows them to cream together more effectively, incorporating air and creating a smoother, more uniform dough that results in a tender cookie.
- Don’t Overbake: Molasses cookies are best when slightly underbaked. They will continue to cook slightly on the hot baking sheet after coming out of the oven. Look for edges that are just set and a center that still looks a little soft. This guarantees that signature chewy texture.
❓Frequently Asked Questions About Chewy Ginger Molasses Cookies
Here are answers to some common questions you might have about making, storing, and freezing these delicious ginger molasses cookies:
Yes, you absolutely can refrigerate the cookie dough overnight if you need to prepare it in advance. However, be aware that chilled dough will be firmer and potentially a bit more difficult to scoop. Cookies made from chilled dough also tend to spread less during baking, which might result in slightly thicker cookies. While it works, I personally find it much easier and more convenient to make the dough, shape it into individual balls, and then flash freeze those dough balls if I’m preparing them ahead of time. This allows for quick, bake-from-frozen convenience later on.
Proper storage is key to keeping your iced molasses cookies fresh and delicious. Once the icing has completely hardened (which usually takes about 30 minutes to an hour), you can store them in an airtight container at room temperature for up to 3 days. To prevent the icing from sticking or smudging, you can place a piece of parchment paper between layers of cookies if stacking them. For longer storage, they can be frozen, either raw or baked, for up to 3 months.
Freezing the cookie dough is a brilliant way to have fresh, warm cookies whenever a craving strikes! To do this, follow the recipe instructions to make the cookie dough. Once the dough is prepared and rolled into balls, coat them generously in granulated sugar. Then, arrange the individual dough balls on a baking tray lined with parchment paper, ensuring they are not touching each other. Place this tray in the freezer for about 30 minutes to flash freeze them. This quick freeze prevents them from sticking together. After flash freezing, transfer the hardened dough balls to a freezer-safe airtight container or a large zip-top bag. They can be safely stored in the freezer for up to 3 months, ready to be baked at a moment’s notice.
Baking these delicious ginger molasses cookies straight from the freezer is incredibly convenient. When ready to bake, simply place the frozen, sugar-coated dough balls on a prepared cookie sheet (parchment paper or silicone mat recommended). You will need to increase the baking time slightly. Bake them at 350°F (175°C) for approximately 12-14 minutes, or until the edges are set and lightly golden, and the centers are still soft and chewy. Keep an eye on them during the last few minutes as oven temperatures can vary.
🎄 More Favorite Holiday Cookie Recipes
Looking for more festive treats to fill your cookie platters this holiday season? Explore these other delightful cookie recipes from our collection:
- German Chocolate Cookies
- Maple Syrup Cookies
- Caramel Stuffed Snickerdoodles
- Cherry Chocolate Cheesecake Cookies
Did you try this recipe? If you loved these Chewy Ginger Molasses Cookies with Snowflake Icing, please make sure to leave a ⭐️ star rating and a comment below the recipe card. Your feedback is incredibly valuable, as I love hearing from you, and it is so helpful to other readers looking for delicious new recipes. Thank you for baking with us!
📲 FOLLOW Sara on Social! 👋 Facebook, Instagram, or Pinterest to see the latest from the kitchen and stay updated on new recipes!
📝 Printable Recipe for Iced Molasses Cookies
Iced Molasses Cookies
Pin Recipe
Ingredients
Ingredients:
- 1 cup salted butter, room temperature 226 g
- ¾ cup white granulated sugar 160 g
- ¾ cup brown sugar 160 g
- 1 egg
- 1 teaspoon vanilla
- 1 teaspoon salt 7 g
- 1 teaspoon ground cinnamon 3 g
- ½ teaspoon ground ginger 1½ g
- ¼ teaspoon ground clove
- ¼ teaspoon ground nutmeg
- ⅓ cup molasses 105 g
- 3½ cups flour 485 g
- 1 teaspoon baking soda 6 g
- ½ cup extra granulated white sugar for rolling dough in 80 g
For the icing:
- 1½ cups powdered sugar 195 g
- ½ teaspoon vanilla extract
- 1-2 Tablespoons milk or more as needed
Instructions
Instructions:
-
Preheat oven to 350°F (175°C). Prepare a baking sheet with a silicone baking mat or parchment paper.
In a stand mixer or electric hand mixer, cream together softened butter, white granulated sugar, and brown sugar until light and fluffy, about 2 minutes.
-
Add the egg, vanilla extract, and salt. Mix well for about 1 minute until the mixture is fully incorporated and fluffy.
-
Incorporate all the spices (cinnamon, ginger, cloves, and nutmeg) and the molasses into the mixture. Mix until the molasses is evenly distributed throughout the dough, giving it a rich, uniform color.
-
Add the flour and baking soda to the wet ingredients. Mix on low speed just until there are no dry flour pockets left, usually within 1 minute. Be careful not to overmix.
-
Scoop the dough into uniform balls (using a 1.5 Tablespoon cookie scoop is recommended) and roll each ball in a shallow dish of extra white granulated sugar to coat evenly.
-
Arrange the sugar-coated dough balls on the prepared baking sheet, spacing them out. Bake at 350°F (175°C) for 8-10 minutes, or until the edges are set and the centers are still soft.
-
While the cookies cool completely, prepare the icing. In a bowl or small zip-top bag, combine the powdered sugar, milk, and vanilla extract. Mix thoroughly until smooth and lump-free. If using a bag, snip a tiny hole in one corner.
-
Once cookies are cool, pipe an “X” shape onto the center of each cookie, followed by a vertical or horizontal line through the center, forming a 6-branch star.
-
Add a small dot of icing in the center of every triangle formed by the star branches.
-
To create the snowflake tips, pipe a small “V” shape at the end of each branch, overlapping slightly.
-
Optional “Snow” Effect: Before the icing dries, gently dip the iced cookies into granulated sugar for a sparkling, crystal snow finish. Allow the icing to harden completely (30 minutes to 1 hour) before stacking or freezing.
Notes
For optimal freshness, store your baked and iced cookies in an airtight container at room temperature for up to 3 days. If you’re looking to extend their shelf life, these cookies freeze exceptionally well! You can freeze them either raw (as dough balls) or after they’ve been baked and iced, for up to 3 months. Ensure the icing is completely set before freezing baked cookies to prevent sticking.
