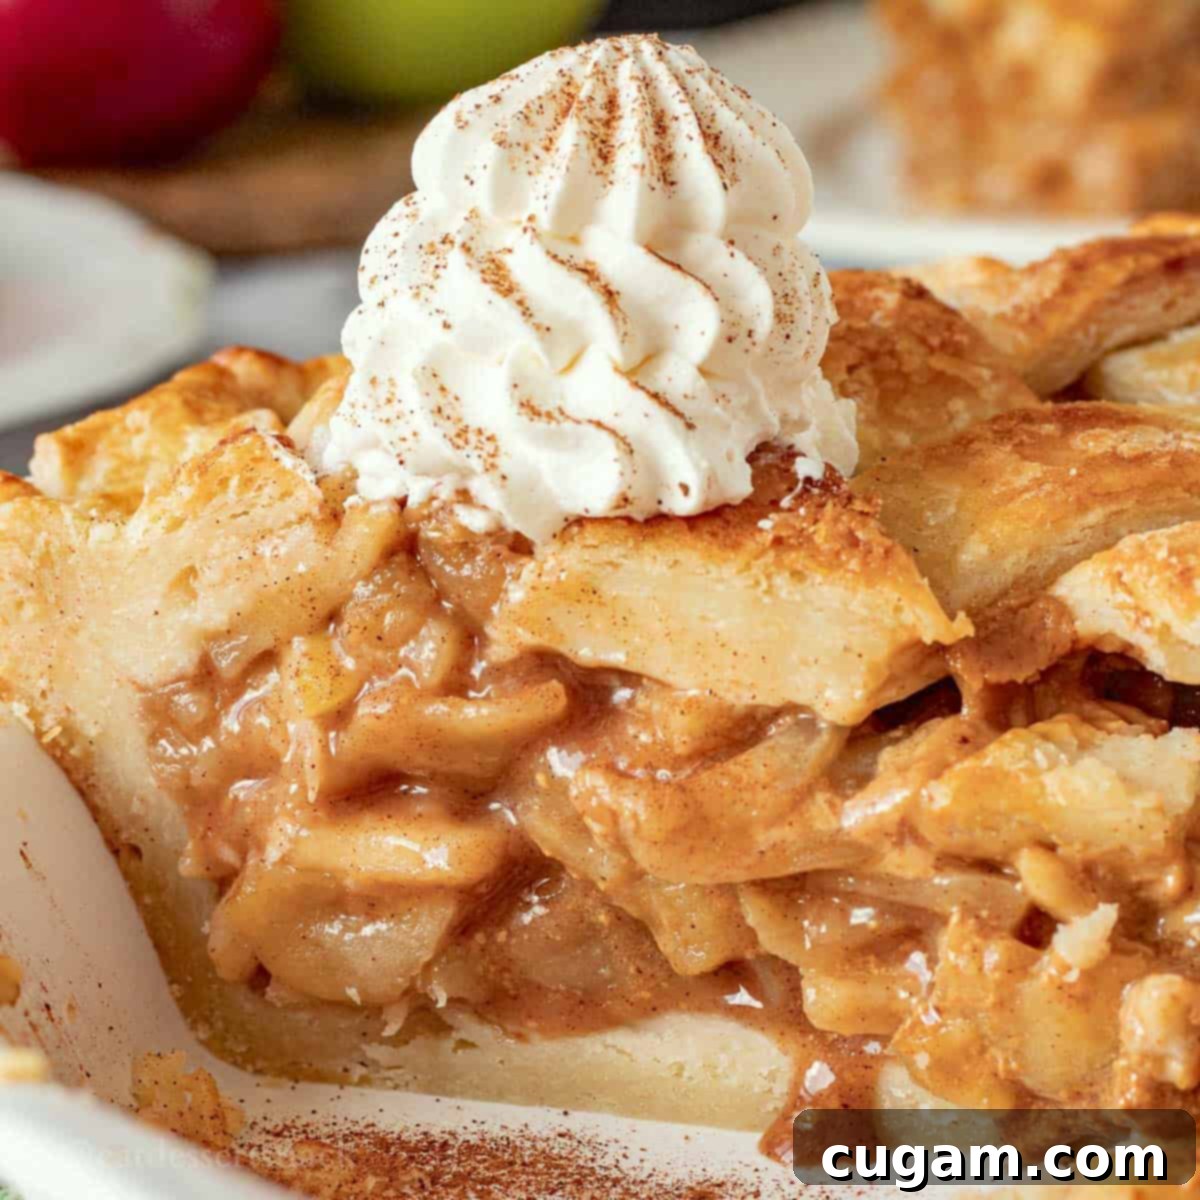
Decadent Dulce de Leche Apple Pie: The Ultimate Caramel Apple Delight
Prepare to elevate your dessert game with this truly irresistible Dulce de Leche Apple Pie. This show-stopping dessert combines the comforting familiarity of classic apple pie with the rich, buttery indulgence of dulce de leche caramel, all encased in a perfectly flaky, golden crust. Each bite offers a harmonious blend of tart, juicy apples, warm cinnamon, and luxurious caramel, making it an unforgettable treat for any occasion, especially as a dazzling centerpiece for your Thanksgiving feast or any holiday gathering.
Crafting this exceptional caramel apple pie involves an adapted homemade apple pie filling and luscious Instant Pot dulce de leche, resulting in a flavor combination that is nothing short of AMAZING. While it does require a bit of dedication and time in the kitchen to prepare both the decadent caramel and the meticulously baked pie, we assure you it is 1000% worth every moment. For the ultimate texture, I often pair this filling with a light and airy Cream Cheese Pie Crust. However, don’t hesitate to use your own favorite pie crust recipe if you have one you adore – the star here is truly the caramel apple filling!
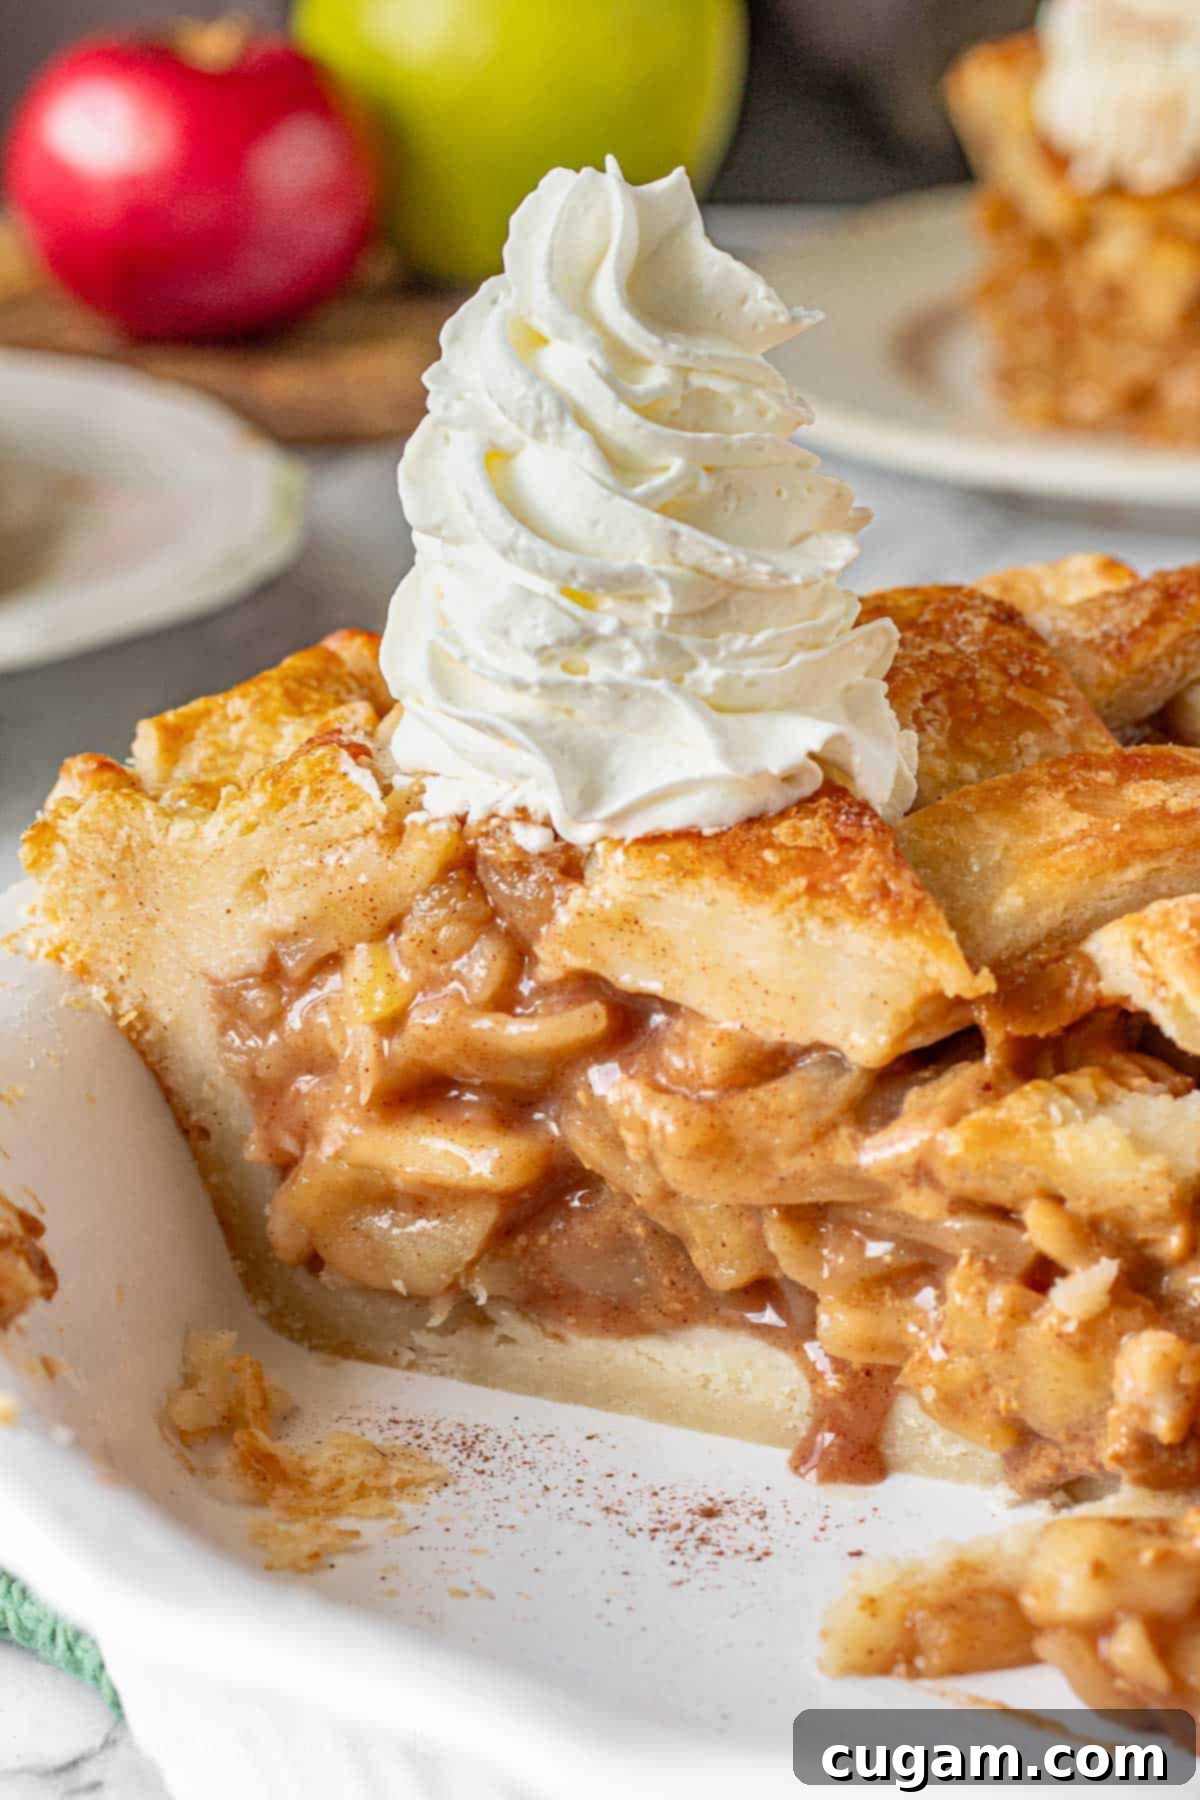
While our family’s Thanksgiving table often features beloved classics like The Best Pumpkin Pie or a delightful Baked Banana Pie, my personal affection for a well-made apple pie or a classic homemade cherry pie runs deep. The beauty of this particular apple pie filling lies in its perfectly balanced tartness, which prevents the added dulce de leche from making the overall dessert overly sweet. Instead, the caramel simply enhances and deepens the natural sweetness of the apples, creating a truly harmonious flavor profile.
Incorporating dulce de leche into an apple pie was a natural decision for me. I subtly adjusted the traditional pie filling recipe by reducing the sugar content slightly. This thoughtful modification ensures that when the rich, creamy caramel is introduced, the pie achieves a sublime sweetness without being cloying, allowing the individual flavors of the apples, spices, and caramel to shine through beautifully.
What To Expect from Your Dulce de Leche Apple Pie
- Taste: Imagine all the comforting, familiar flavors of a classic apple pie – crisp, sweet-tart apples, warm cinnamon, and a hint of spice – now imagine them infused with the deep, buttery notes of caramel. That’s precisely what you’ll experience with this pie! The apple filling is intentionally crafted with tart apples, ensuring that the rich caramel adds a layer of sweet complexity rather than overwhelming the palate. We’ve thoughtfully reduced the sugar in the apple filling to achieve this perfect balance.
- Ease: This recipe falls into the medium difficulty category. If you’ve ventured into pie-making before, you’ll find this recipe straightforward and manageable. While it’s not a quick microwave meal, the steps are clear, and the reward is absolutely worth the effort. The key to success is simply taking your time and enjoying the baking process!
- Time: From preparation to cooling, expect this recipe to take approximately 3-4 hours before it’s ready to be enjoyed. This includes the time needed to prepare the filling, assemble the pie, and allow it to bake and cool properly. The good news is that you can significantly reduce active preparation time on baking day by making the pie crust and the apple filling ahead of time. It’s particularly important to remember that the cooked pie filling will need 2-3 hours to cool down completely to room temperature before you pour it into your raw pie crust. This crucial cooling step prevents the crust from becoming soggy.
🛒 Key Ingredients for Your Caramel Apple Pie
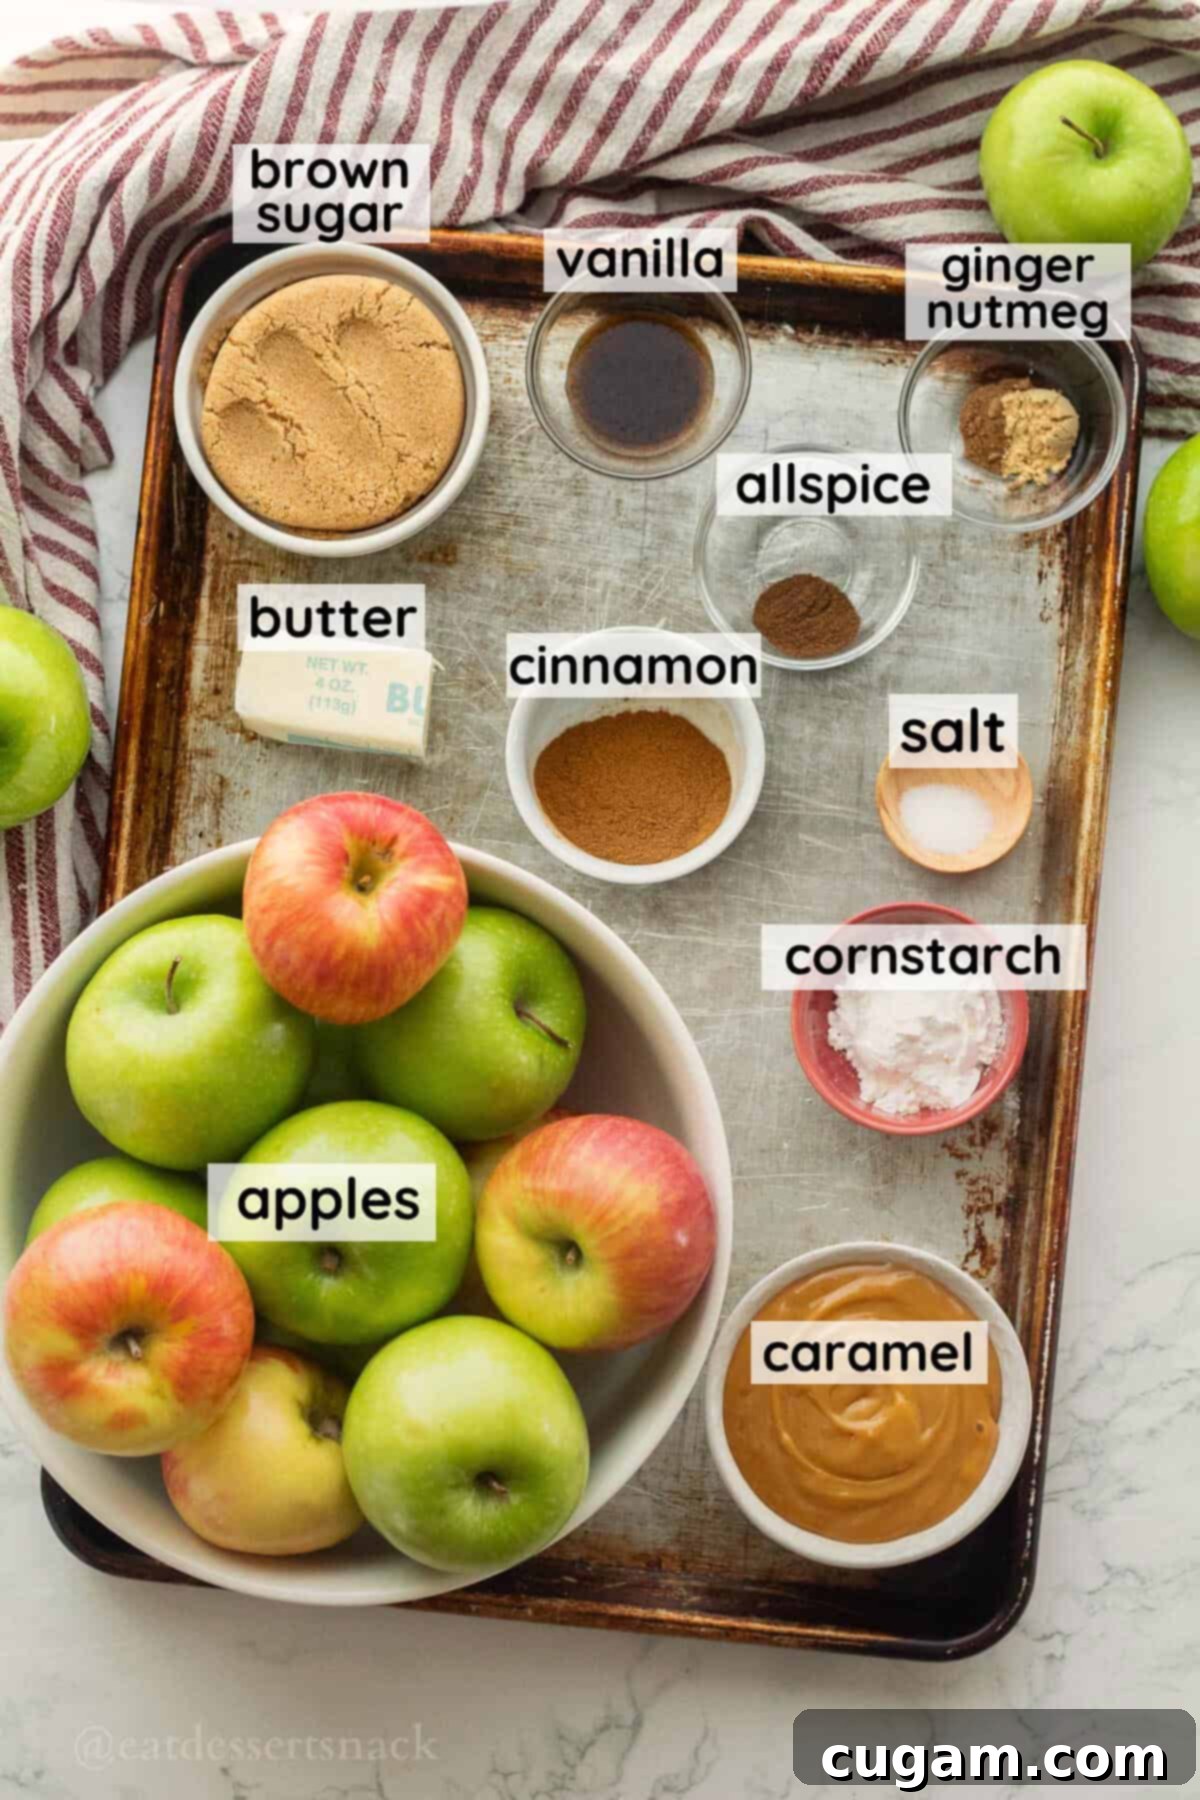
- Caramel – The type of caramel you choose is crucial for the success of this pie. You’ll need a good quality, thick caramel sauce. Avoid thin, runny syrups typically used for ice cream sundaes, as these will simply make your pie watery. Our top recommendation is homemade Instant Pot dulce de leche, known for its rich flavor and perfect consistency. For an extra layer of gourmet flavor, consider stirring in ⅛ teaspoon of salt and ½ teaspoon of vanilla extract into your dulce de leche to transform it into a delectable salted caramel.
- Apples – The best apple pies often feature a blend of apple varieties to achieve both flavor complexity and ideal texture. I typically use a mix of two types of apples, most commonly Granny Smith and either Honeycrisp or Pink Lady. Granny Smiths provide that essential tartness and firm texture that holds up well during baking, while Honeycrisp and Pink Lady add a lovely sweetness and a slight crispness. These varieties are usually readily available in most grocery stores.
- Brown Sugar – While white granulated sugar provides sweetness, brown sugar brings a deeper, more molasses-like flavor that perfectly complements and enhances the caramel notes in the pie without making it overpoweringly sweet. It contributes to a richer, more complex taste profile, making your apple pie taste even more like a truly gourmet caramel apple dessert.
For a comprehensive list of all ingredients and their exact quantities, please refer to the detailed recipe card provided below.
✏️ Substitutions & Variations to Customize Your Pie
Feel free to experiment with these suggestions to tailor the pie to your preferences or what you have on hand:
- Brown Sugar – If brown sugar isn’t available, you can substitute it with coconut sugar for a slightly different, more earthy flavor profile, or use granulated white sugar. Keep in mind that white sugar will result in a less complex caramel note, but the pie will still be delicious.
- Caramel – As mentioned, a thick caramel is paramount. Dulce de leche caramel is ideal due to its natural richness and density. If using another caramel sauce, ensure it has a thick consistency. You could also try making your own homemade caramel sauce from scratch if you prefer, just be sure it’s robust enough to hold up in the pie.
- Spices – The classic combination of cinnamon, nutmeg, ginger, and allspice provides a quintessential apple pie flavor. However, if you have a particular dislike for nutmeg or allspice, or simply wish to explore other flavors, you could use ground cloves or even a pinch of cardamom for a unique twist. Adjust quantities to your taste, remembering that a little goes a long way with strong spices.
🧑🍳 Step-by-Step Instructions for Dulce de Leche Apple Pie
Follow these detailed steps carefully to create your perfect Dulce de Leche Apple Pie. Precision in each stage will ensure a stunning and delicious result.
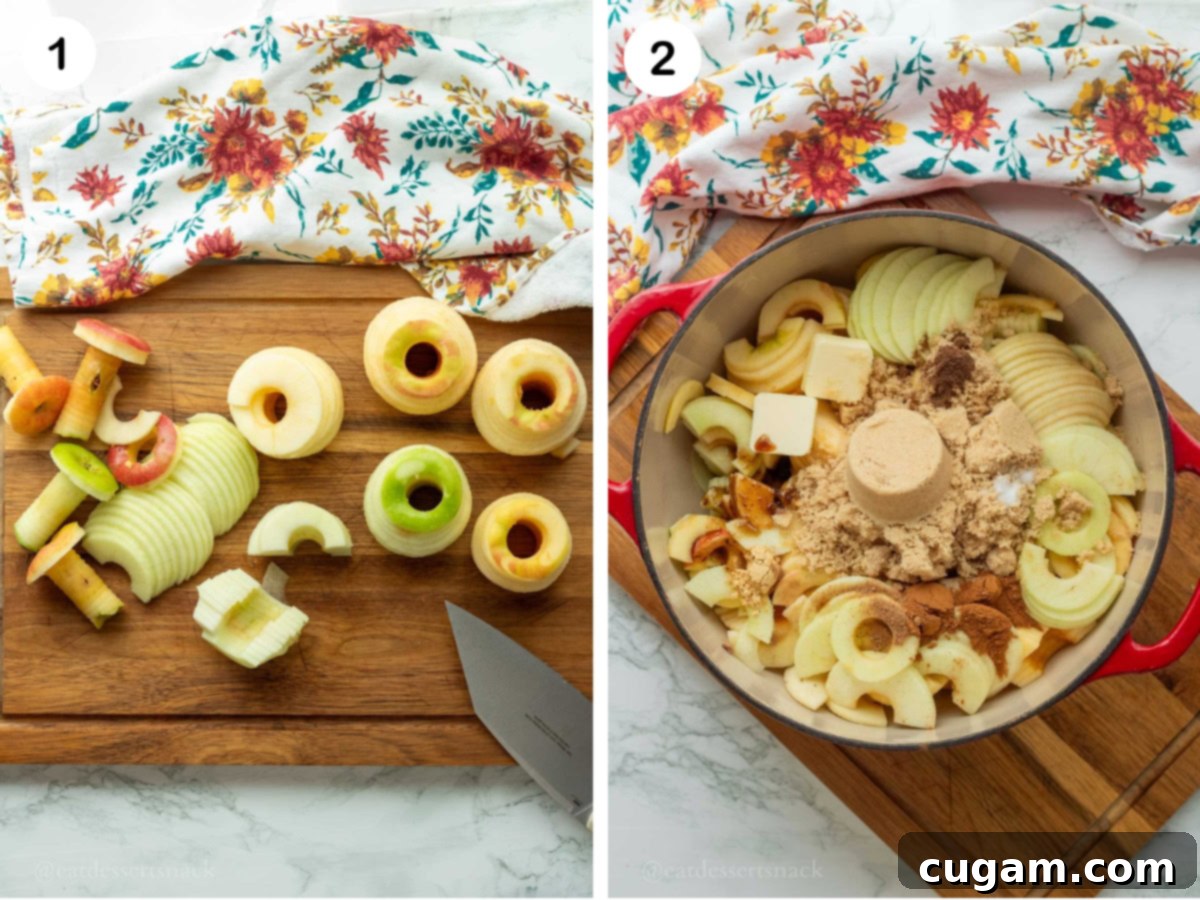
- Step 1. Prepare the Apples: Begin by peeling, coring, and slicing your chosen apples into consistently THIN slices, aiming for approximately ¼ inch (about ½ cm) thick. Uniform slices ensure even cooking and a tender, not mushy, filling. You can achieve this efficiently using an apple peeler/slicer tool, or simply with a steady hand, a peeler, and a sharp knife. (Refer to the above left image for visual guidance).
- Step 2. Start the Filling: Transfer the thinly sliced apples, butter (preferably salted for added depth), packed brown sugar, all the specified warm spices, and vanilla extract into a large, heavy-bottomed pot or Dutch oven. (See the above right image). Stir everything together to ensure the apples are well-coated with the sugar and spices.
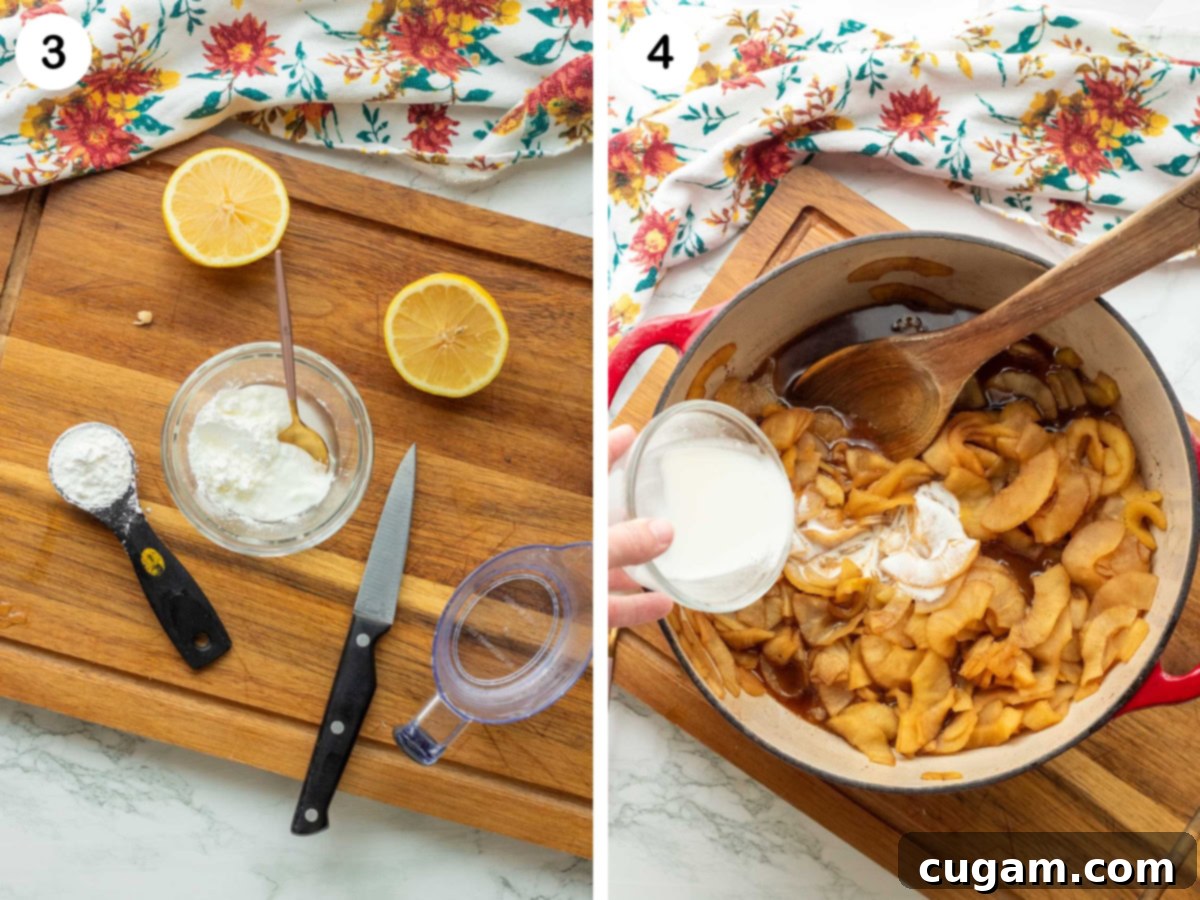
- Step 3. Prepare the Thickener: In a small separate bowl, combine the lemon juice, water, and cornstarch. Whisk these ingredients together until completely smooth and no lumps of cornstarch remain. The lemon juice adds a crucial bright note that balances the sweetness. If you prefer a sweeter filling and less tartness, you can use water in place of a portion of the lemon juice, ensuring the total liquid volume still equals almost ⅔ cup. (Observe the above left image for reference).
- Step 4. Thicken the Filling: Pour the cornstarch mixture directly into the apple pie filling that’s simmering in the pot. Stir continuously over medium heat for about 1-2 minutes. You’ll notice the filling quickly transforming, becoming beautifully thickened and glossy. This pre-cooking step is vital for preventing a runny pie and ensuring a perfectly set filling. (The above right image illustrates this stage).
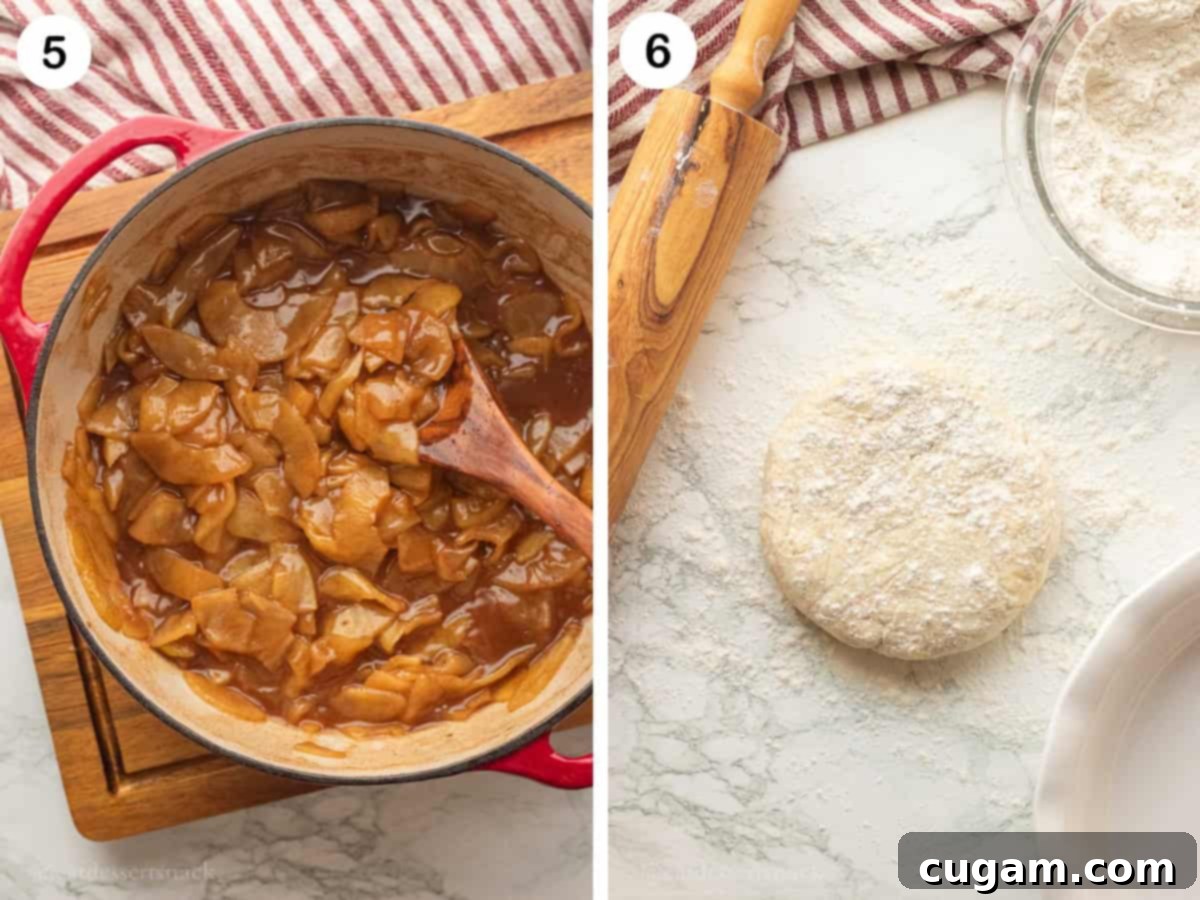
- Step 5. Cool the Filling: This is a critical step for a flaky crust! Allow the pie filling to cool completely to room temperature. Ideally, you can even chill it in the refrigerator. Do NOT pour warm filling into your raw pie crust, as this will melt the butter in the dough and result in a soggy bottom crust. Patience here is key to success. (The above left image shows the cooled filling).
- Step 6. Prepare Pie Crusts: While the filling cools, prepare your chosen pie crust recipe. You’ll need enough dough for both a bottom and a top crust. Chill the prepared pie dough. This resting period is essential for relaxing the gluten, making the dough easier to roll and ensuring a tender, flaky texture. Once chilled, roll out one disc of pie crust into a large enough circle to fit your 9-inch pie dish, aiming for about ¼ inch (.63 cm) thickness. (The above right image depicts prepared dough).
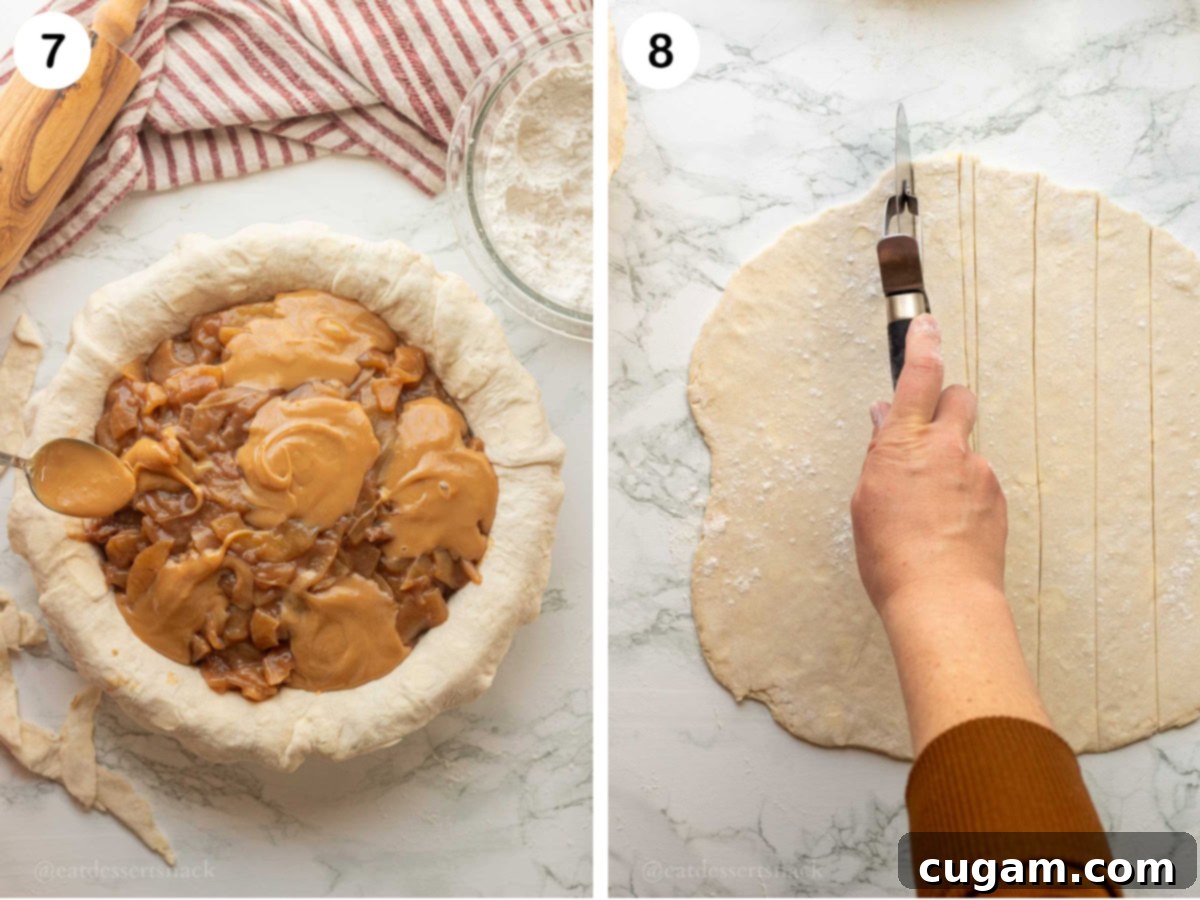
- Step 7. Assemble the Pie: Once the filling is completely cool, pour it evenly into your prepared bottom pie crust, which should already be nestled in its pie dish. Next, generously spoon the thick dulce de leche caramel over the apple filling. For an even more decadent caramel distribution, you can try layering: pour half the apple filling, then add a layer of caramel, then the remaining apple filling, and finally the rest of the caramel on top. This ensures pockets of gooey caramel throughout. (The above left image illustrates the filling and caramel in the crust).
- Step 8. Prepare Top Crust: Roll out your second disc of pie crust dough to the same ¼ inch thickness. Now, decide on your top crust design: you can either cut the dough into 1-inch strips for an elegant lattice pie crust, OR, for a simpler approach, you can lay the entire rolled-out crust directly over the pie, creating a solid top. (The above right image shows dough being cut for a lattice).
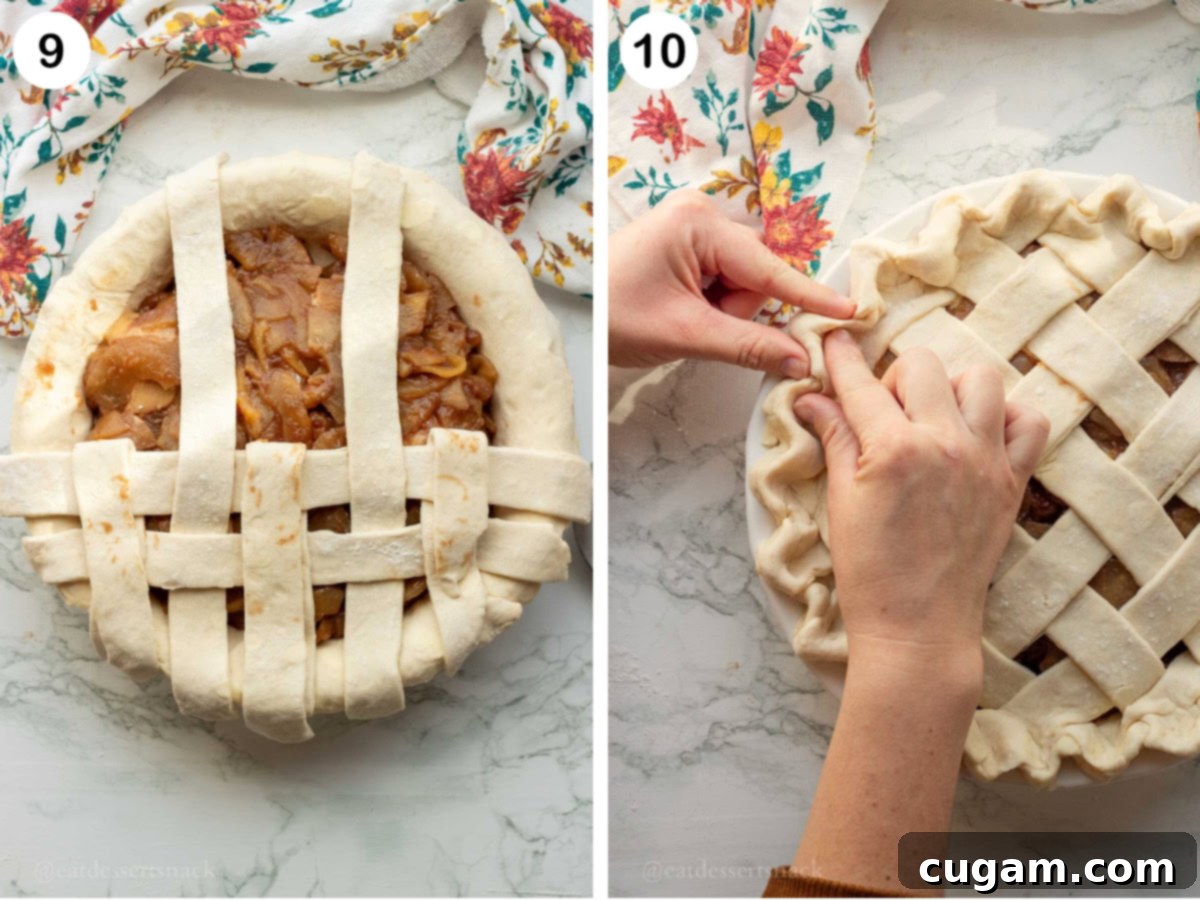
- Step 9. Create a Lattice (Optional): If you’ve opted for a beautiful lattice top, you’ll need approximately 10-12 strips of dough, with 5 or 6 strips going in each direction. The key to a good lattice is to lay them alternating over and under. A simple method is to first lay 3 vertical strips across the pie. Then, lift the middle vertical strip back before laying a horizontal strip closest to the bottom edge. Replace the middle vertical strip, then lift the two edge vertical strips back before laying another horizontal strip. Continue alternating lifting the middle and edge strips as you lay horizontal strips to complete the lattice pattern. Once your lattice is complete, trim the edges of both crusts neatly before crimping to help prevent any butter from dripping out during baking. (The above left image demonstrates a lattice top).
- Step 10. Crimp the Edges: To seal your pie and add a decorative touch, crimp the edges of the crust. This is done by gently pinching two fingers together on the outside edge of the bottom crust, then pressing a finger from your other hand between them to create a “V” shape in the dough. Repeat this motion all the way around the pie’s edge until the entire crust is beautifully crimped and securely sealed. This also helps contain the delicious filling. (The above right image shows the crimping technique).
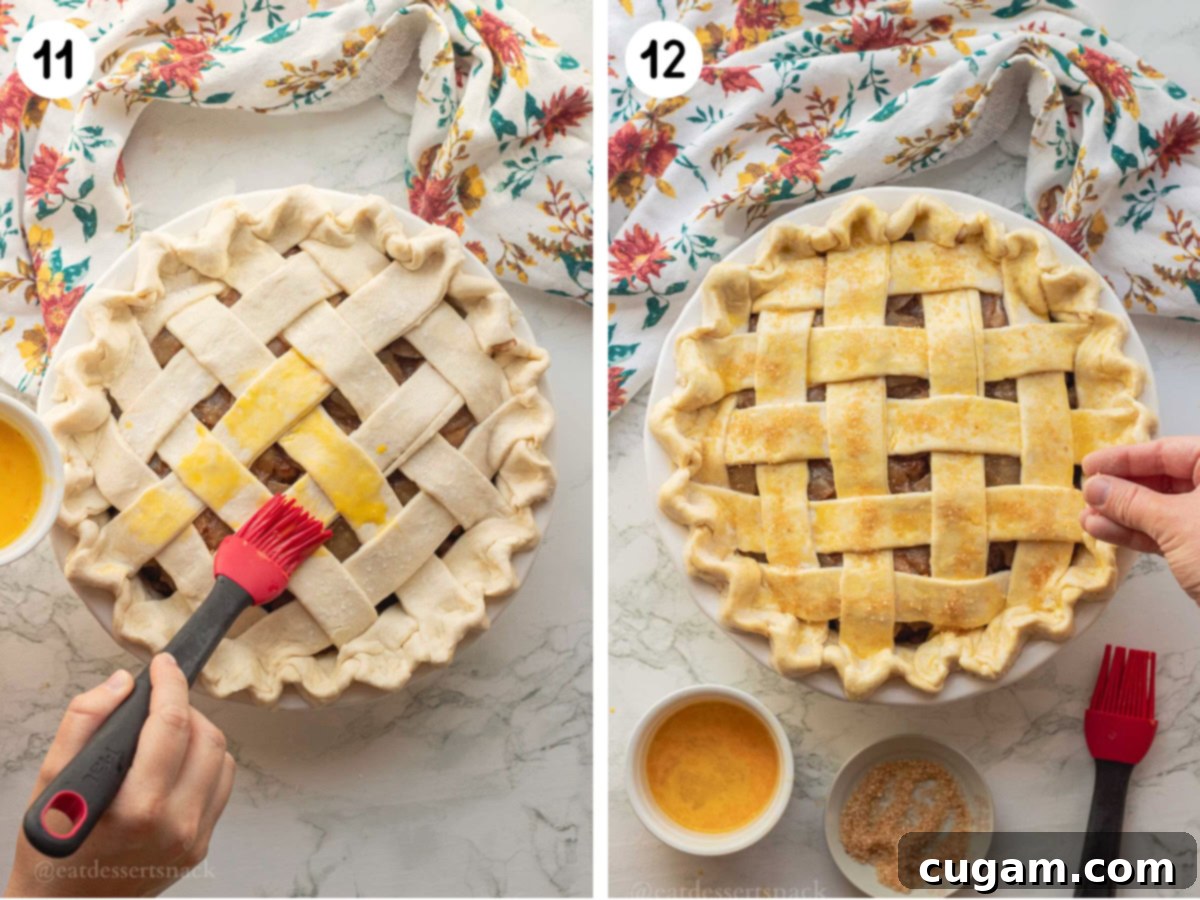
- Step 11. Egg Wash & Vents: For a beautiful golden-brown and slightly crispy crust, brush the entire top of the pie crust with a beaten egg (this is often called an egg wash). Ensure all visible dough is covered. If you’ve chosen a solid top crust (not a lattice), it’s crucial to cut 3-4 small slits or decorative vents into the top. These vents allow steam to escape during baking, preventing the crust from bubbling up and ensuring the pie bakes evenly. (The above left image shows the egg wash application).
- Step 12. Sugar & Bake: Finally, sprinkle a generous amount of coarse granulated or raw sugar over the top of the egg-washed crust. This adds sparkle and a delightful crunch. (The above right image depicts this final touch). Carefully transfer your assembled pie to a preheated oven, placing it directly onto an empty baking sheet. This baking sheet will catch any potential drips and ensure a crispier bottom crust. Bake for an initial 20 minutes at 400 ℉ (200 °C), then reduce the oven temperature to 350 ℉ (175 °C) and continue baking for another 40-45 minutes. The pie is ready when the crust is gorgeously golden brown and the filling is visibly bubbly around the edges. Remember, the filling will continue to thicken as the pie cools.
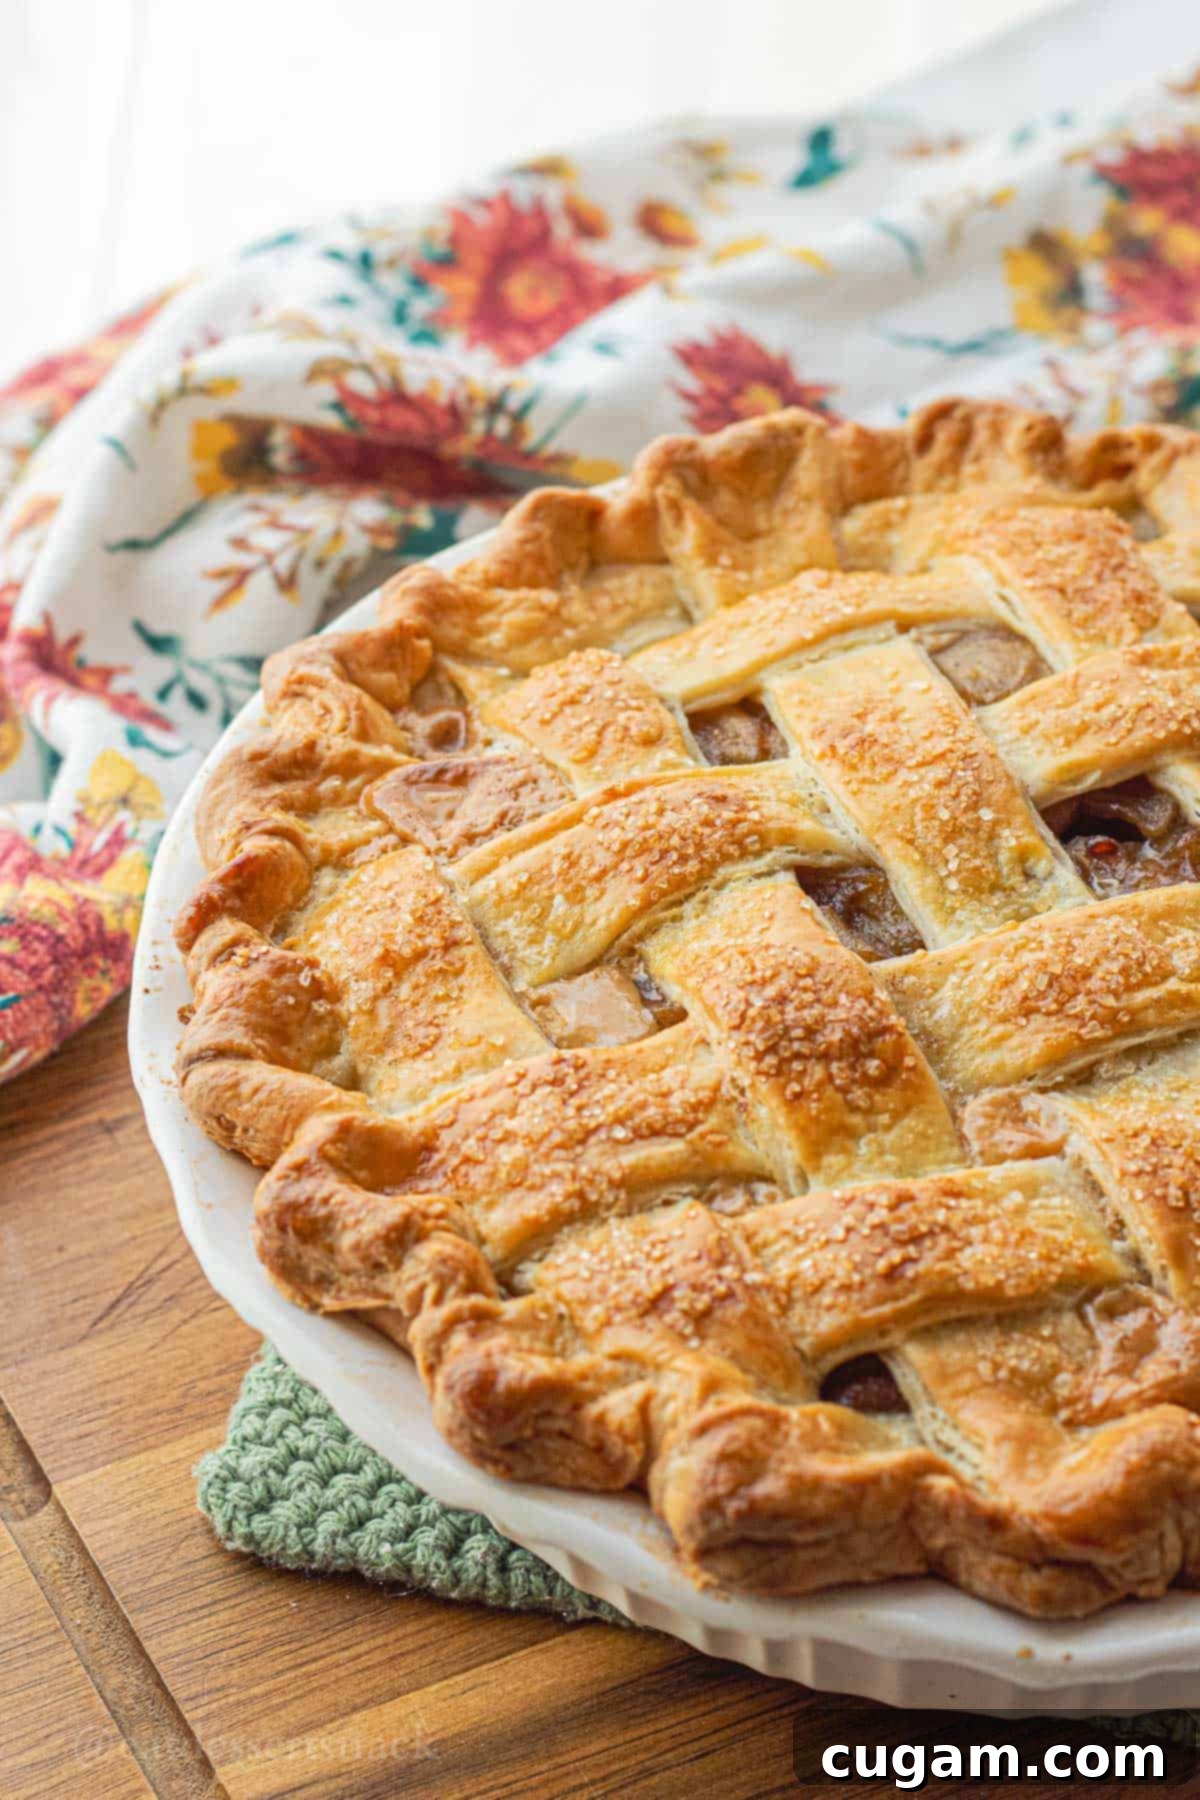
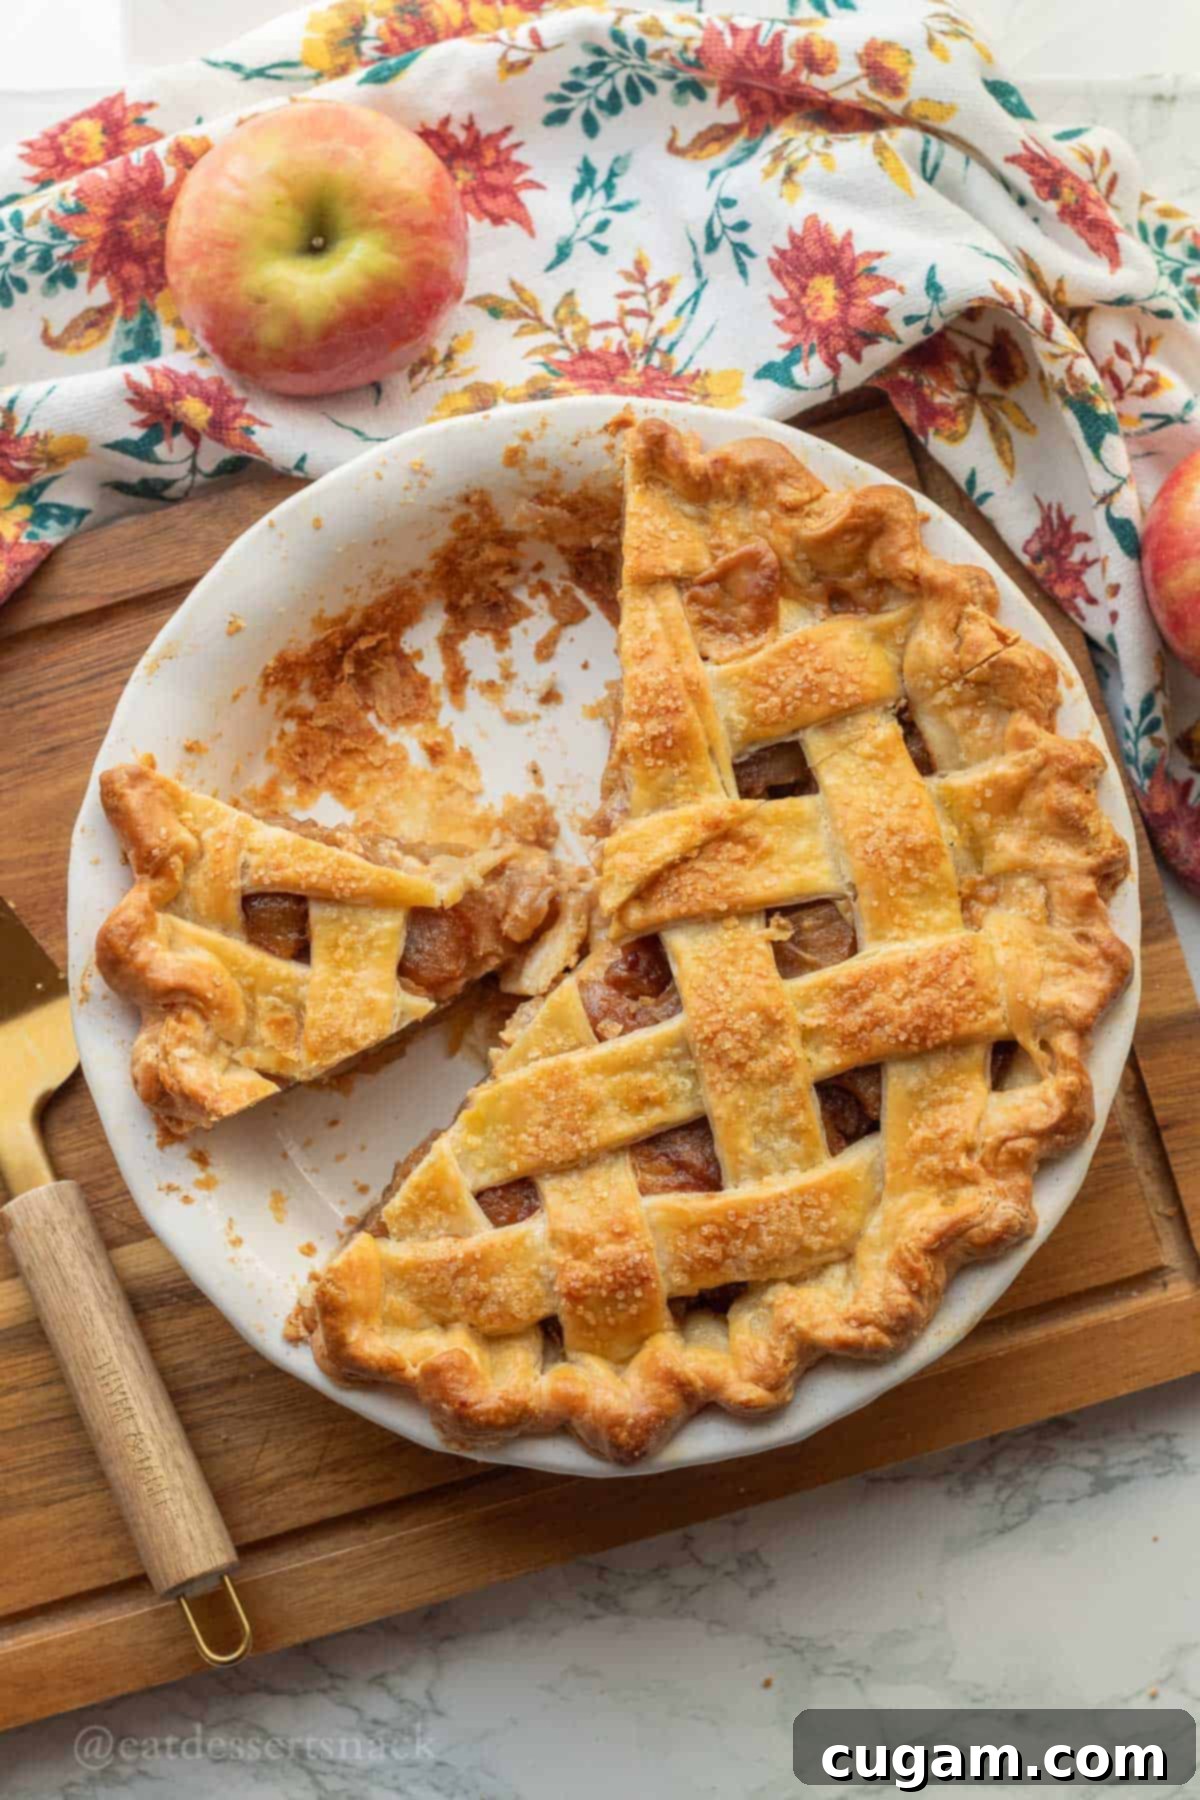
Once baked, allow your magnificent Dulce de Leche Apple Pie to cool sufficiently before serving. It’s truly divine on its own, but for an extra touch of indulgence, consider serving it warm with a scoop of vanilla bean ice cream, a dollop of freshly whipped cream, or an additional drizzle of that delectable caramel sauce on top! Enjoy your creation!
📌 Top Tips & Hacks for a Perfect Pie
Achieving pie perfection often comes down to a few key techniques. Here are our best tips for making your Dulce de Leche Apple Pie truly shine:
- Make it ahead! To streamline your baking process, especially if you’re preparing for a holiday or special event, both the pie dough and the pie filling can be made up to 3 days in advance. Simply prepare them, then store them separately in the refrigerator. We highly encourage preparing one or both components ahead of time, primarily because the cooked pie filling requires a significant cooling period – often 2-3 hours – to reach a suitable temperature before being poured into the raw pie crust. Planning ahead will save you a lot of stress on baking day.
- Cool your pie filling completely! This cannot be stressed enough. If you attempt to pour warm or even slightly warm apple filling into a raw pie crust, the heat will quickly melt the butter or other fats in your dough. This inevitably leads to a soggy, unappetizing crust, particularly the bottom layer. A completely cooled (or even chilled) filling is essential for achieving that desirable flaky, tender crust.
- Cool to room temperature for even slices. The dilemma: hot, gooey pie or neat, perfect slices? While there’s absolutely nothing wrong with diving into a hot slice of pie with its delightfully runny, melty caramel goodness (it’s my favorite way!), the filling will be less set. For more crisp, clean, and even lines when you slice and serve your pie, it’s best to allow it to cool completely to room temperature for several hours. As the pie cools, the cornstarch in the filling will fully set, resulting in a firmer, more sliceable consistency.
❓Frequently Asked Questions about Caramel Apple Pie
Here are answers to some common questions you might have when making this delicious Dulce de Leche Apple Pie:
While some traditional recipes call for fresh apples, using them uncooked in a pie filling can be a bit risky. It often results in a watery, runny pie filling and, consequently, a soggy bottom crust. The moisture released by raw apples during baking can be unpredictable. This is precisely why I *always* pre-cook my pie filling. This method allows the apples to soften slightly and the filling to thicken properly with cornstarch before it even enters the crust, guaranteeing a perfect set and avoiding sogginess. Rest assured, cooking the filling first does not negatively impact its flavor or texture when baked inside the crust.
For the best apple pie, you want a firm, tart apple that holds its shape well during baking and provides a good counterpoint to the sweetness of the caramel. My go-to choices are Granny Smith, Honeycrisp, or Pink Lady apples because they consistently deliver on both texture and flavor, and are widely available in most grocery stores. Apples to generally avoid include Red Delicious, Gala, or Fuji, as they tend to become mushy when baked and can be excessively sweet, especially when combined with the added sugar and caramel in the filling. A mix of a tart and a slightly sweeter firm apple often yields the most balanced flavor.
There are a few common culprits for a less-than-perfect pie. For a runny filling, the most frequent reason is not allowing the pie to cool sufficiently after baking. The filling needs at least 3 hours (preferably more) to set firmly as it cools. Patience here is key! As for a soggy crust, this usually stems from too much moisture in the filling (which is why pre-cooking the apples is so important!) or from not baking the pie long enough to properly cook and crisp the bottom crust. Ensure your oven temperature is accurate and the pie bakes until the bottom crust is golden, not just the top.
Proper storage ensures your delicious pie remains fresh and enjoyable for longer:
Room Temperature: A freshly baked and cooled pie can be stored covered at room temperature for up to 3 days.
Refrigerated: For extended freshness, transfer any leftover pie slices or the whole pie, covered tightly, to the refrigerator where it will keep well for up to 5 days.
Frozen: This pie freezes beautifully! You can freeze a baked and cooled pie for up to 3 months. Alternatively, if you wish to prepare the pie ahead of time for future baking, you can freeze it raw. Just ensure it’s thoroughly thawed in the refrigerator before baking according to the recipe instructions. Wrap it well to prevent freezer burn.
🥧 More Delicious Pie Recipes to Explore
If you’ve enjoyed this delightful Dulce de Leche Apple Pie, you’re sure to love these other fantastic pie creations from our kitchen. Expand your baking repertoire and find your next favorite dessert!
- Baked Banana Pie
- Pistachio Custard Pie
- Banana Cream Pie Bars
- Cream Cheese Pumpkin Pie
Did you try this recipe? If you’ve baked this incredible Dulce de Leche Apple Pie, we’d absolutely love to hear about your experience! Please make sure to leave a ⭐️ star rating and a comment below the recipe card. Your feedback is invaluable, not just to me, but also to other readers who are looking for their next favorite dessert. Your insights and ratings are so helpful!
📲 FOLLOW Sara on Social! 👋 Stay connected and be the first to discover new recipes, tips, and behind-the-scenes glimpses from my kitchen! Find me on Facebook, Instagram, or Pinterest. I can’t wait to connect with you there!
📝 Printable Recipe
Caramel Apple Pie
Pin Recipe
Ingredients
- 1 pie crust recipe, top & bottom crust
- 4 lb Granny Smith & Honeycrisp apples about 3 lb peeled and chopped
- 2 Tablespoons butter salted, 56 g
- 1 cup brown sugar, packed 225 g
- ¼ teaspoon salt
- 2 teaspoons cinnamon
- ½ teaspoon ginger
- ¼ teaspoon nutmeg
- ¼ teaspoon allspice
- 1 teaspoon vanilla extract
- ½ cup water 118 mL
- 2 Tablespoons lemon juice 30 mL
- 3 Tablespoons cornstarch 24 g
- ½ cup thick caramel 230 g
- 1 egg, beaten
- 1 Tablespoon granulated or raw coarse sugar for top of pie
Instructions
-
Peel, core, and slice apples into THIN slices, about ¼ inch (about ½ cm) thick. You can do this with a apple peeler/slicer, or with a peeler and knife.
-
Add the sliced apples, butter, brown sugar, and all spices and vanilla to a large pot.
Over medium heat, cook apples for 20 minutes until soft with a little bite to them.
-
Combine lemon juice, water, and cornstarch in a small bowl and whisk together. If you want a sweeter filling, use water in place of the lemon juice to equal almost ⅔ cup.
-
Pour cornstarch mixture into the apple pie filling and stir over medium heat for 1-2 minutes until the filling is thickened.
-
Let the pie filling cool completely to room temperature (or chilled) before pouring into a prepared raw pie crust.
-
Prepare pie crust recipe (enough for top and bottom crust) and chill while pie filling is cooling.
Preheat oven to 400℉ with empty baking sheet inside. Roll pie crust into a large enough circle to fill a 9 inch pie dish, about ¼ inch (.63 cm) thick.
-
Pour cooled pie filling into prepared pie crust. Spoon caramel onto the pie filling. (you can do half the filling, then the caramel, then the rest of the pie filling on top if you wish so there’s more caramel in the middle)
-
Roll out the second pie crust to ¼ inch thick and either cut 1 inch strips for a lattice pie crust, OR lay the whole crust on the pie.
-
If doing a lattice, you’ll need 10-12 strips of dough, 5 or 6 going each direction. Lay them alternating over and under.
It’s easiest for me to lay 3 strips down vertically and lift the middle one back before laying a horizontal strip down closest to the bottom edge.
Then replace the middle strip straight and lift the 2 edge vertical strips back before laying another horizontal strip. Alternate lifting the middle and edge strips between laying a horizontal strip to complete the lattice. Trim the edges before crimping to help prevent butter dripping while baking.
-
Crimp the edges by pinching two fingers together on the outside of the crust, then pressing a finger between them to make a “V” in the dough. Repeat around the edge until the whole pie is crimped and the edges sealed shut.
-
Brush beaten egg on top of pie crust, covering the entire crust. If doing a solid crust (not a lattice), make sure to cut 3-4 slits in the top of the pie to allow air to escape so it doesn’t bubble on top.
-
Sprinkle sugar on top of crust. Transfer pie to preheated oven onto the empty baking sheet and bake for 20 minutes at 400 ℉, then reduce heat to 350 ℉ and bake for 40-45 minutes until crust is golden brown and filling is bubbly.
Cool to room temp for more even slices. Or warm for melty caramel goodness!
Notes
Storage: Room Temperature: covered up to 3 days
Refrigerated: up to 5 days
Frozen: (baked & cooled) up to 3 months.
