Indulge in the Ultimate Cherry Cheesecake Brownies: A Decadent Fudgy Swirl Delight
Prepare to elevate your dessert game with these incredible Cherry Cheesecake Brownies. This recipe brings together three beloved components: a rich, fudgy brownie base, a luscious, creamy cheesecake layer, and a vibrant, tart cherry pie filling swirled on top. The result is a truly show-stopping dessert that’s as delightful to look at as it is to eat, offering a perfect balance of deep chocolate, tangy cream cheese, and sweet-tart cherry flavors in every bite. Whether you’re a seasoned baker or just starting out, this guide will walk you through creating a dessert that will impress everyone.
If you have a passion for desserts that combine multiple layers of deliciousness, then you’ve certainly landed in the right place. This particular recipe is a delightful descendant of my highly acclaimed Fudgy Brownie Recipe, taking that classic foundation and building something truly extraordinary upon it. It’s more than just a brownie; it’s an experience.
Why These Cherry Cheesecake Brownies Are a Must-Try
These aren’t just any brownies; they’re a celebration in every square. The combination of dense, fudgy chocolate, smooth, tangy cheesecake, and bright, fruity cherries creates a symphony of textures and tastes that’s absolutely irresistible. Many might recognize the appeal of both brownies and cheesecake individually, but bringing them together, especially with a vibrant cherry swirl, elevates them to an entirely new level. This dessert is perfect for special occasions, holidays, or simply when you want to treat yourself and your loved ones to something truly spectacular. The beautiful swirled pattern on top also makes them visually stunning, making them a fantastic centerpiece for any dessert table.
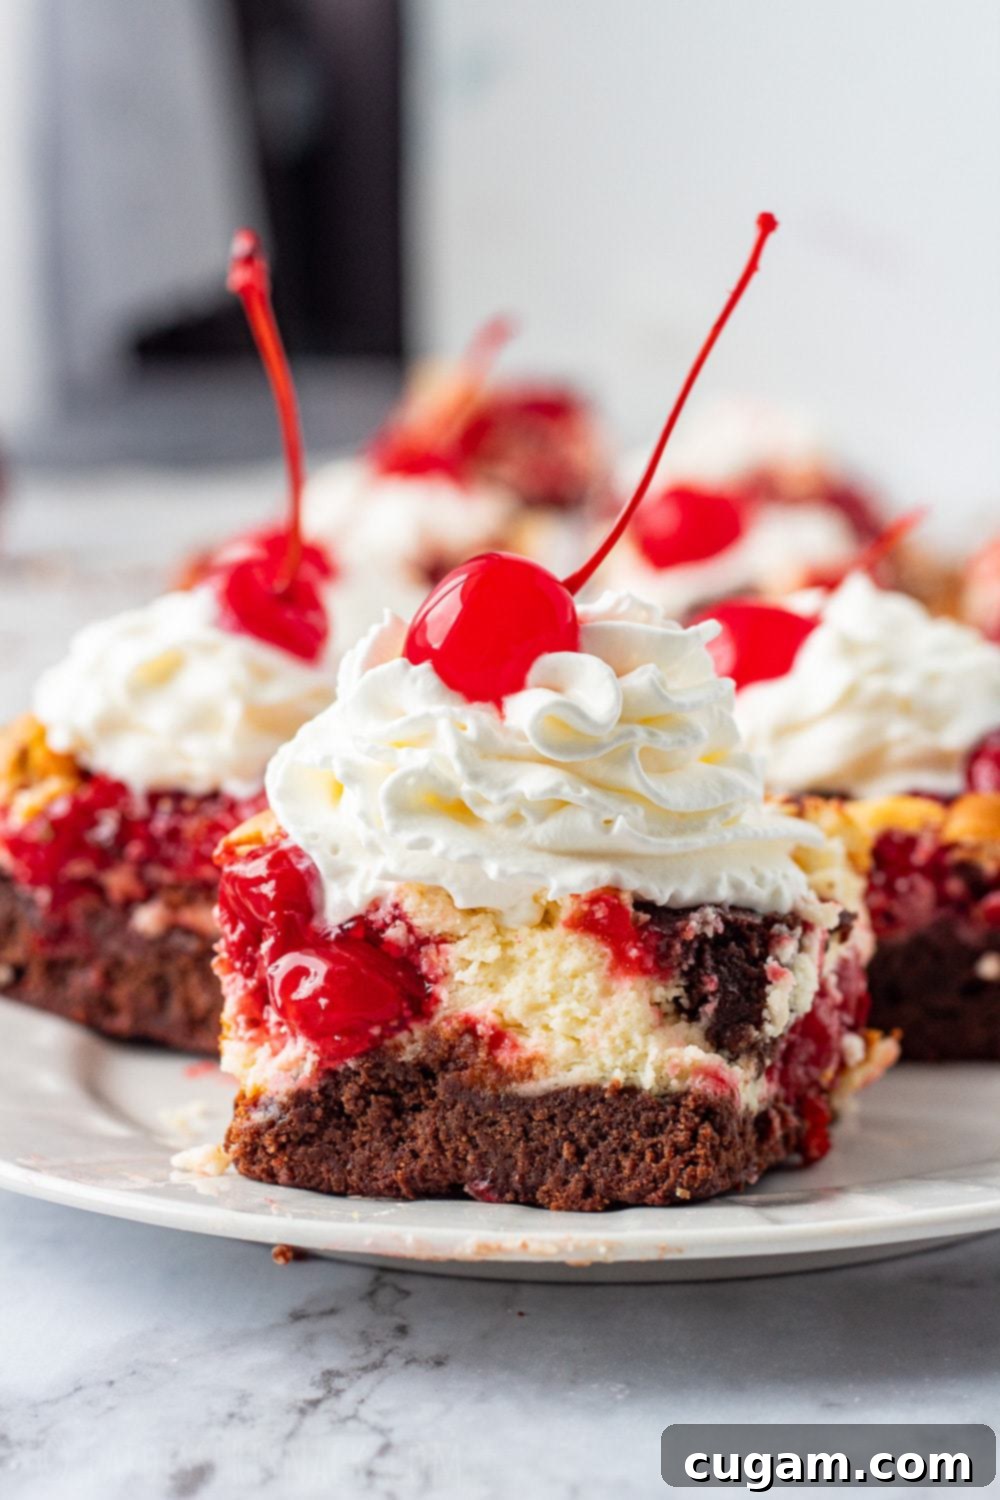
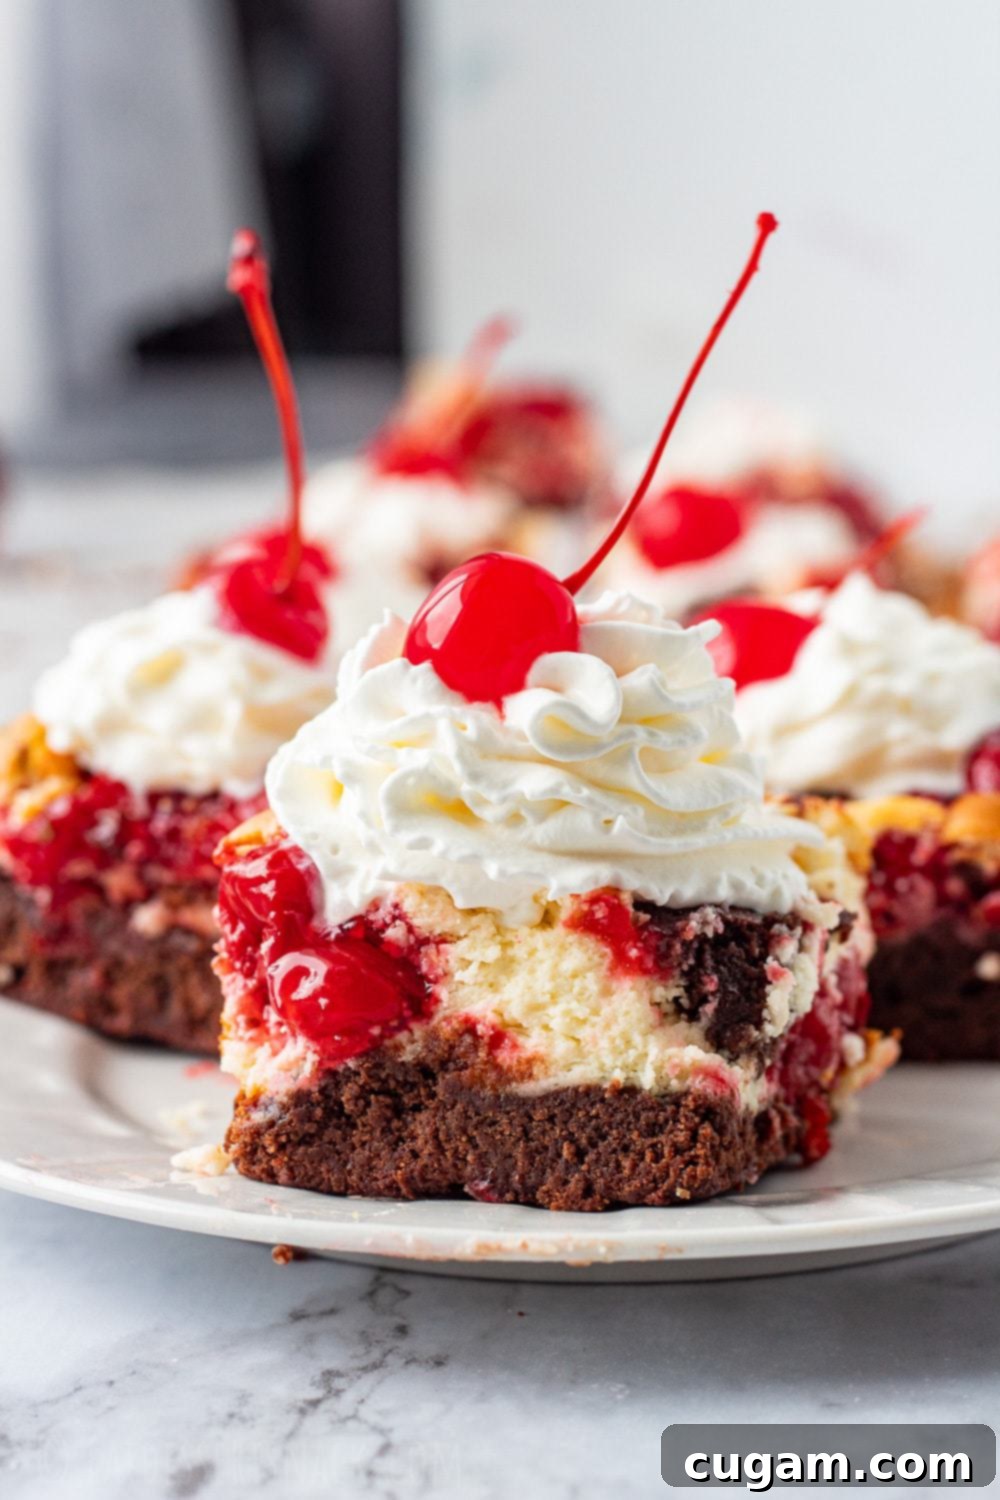
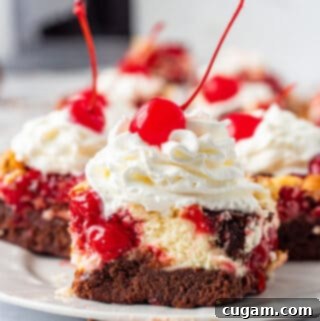
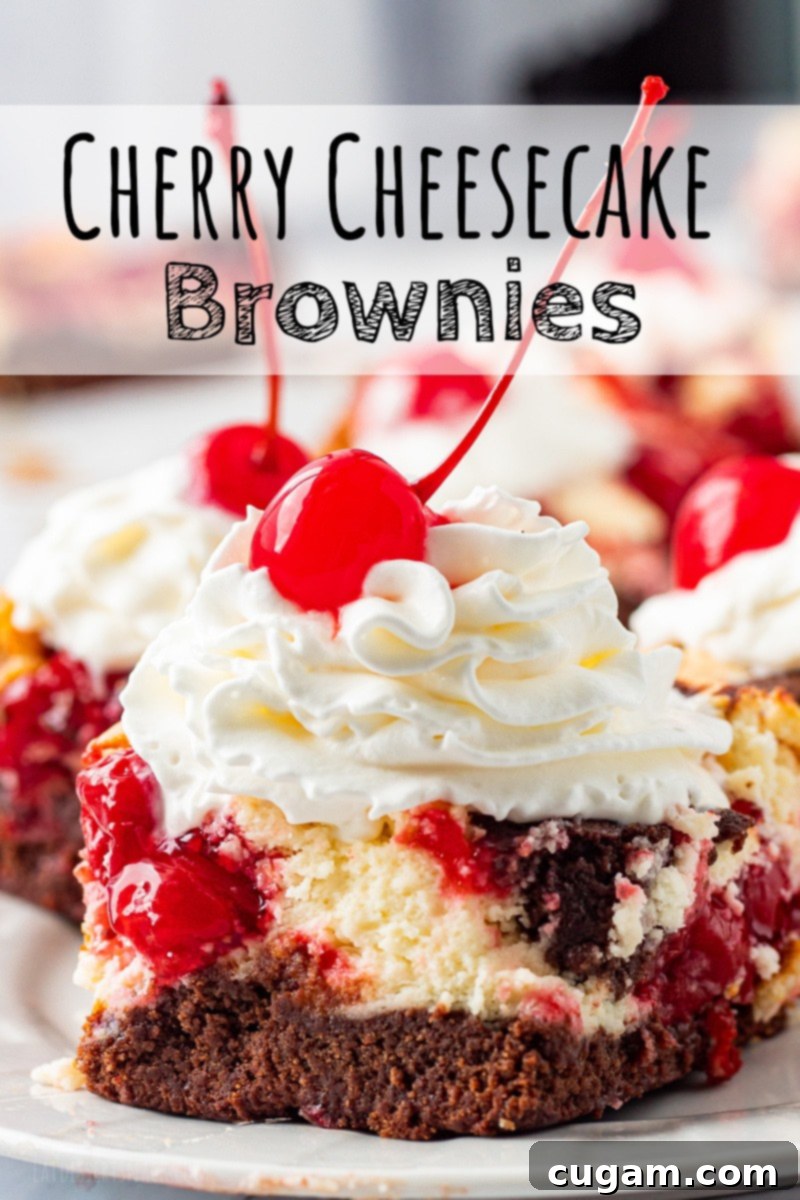
What sets these Cherry Cheesecake Swirl Brownies apart is the careful layering and the delightful interplay of flavors. Imagine a rich, dark chocolate brownie that’s intensely fudgy, forming the perfect foundation. On top of this, a velvety smooth cheesecake layer adds a tangy counterpoint, cutting through the sweetness of the chocolate. Then, dollops of luscious cherry pie filling are strategically placed and gently swirled with a reserved portion of brownie batter, creating an artistic marble effect that promises a burst of fruity goodness with every bite. I often refer to this particular creation as “My Forever Love” because it perfectly encapsulates everything I adore in a dessert. For that extra touch of perfection (and purely for research, of course!), I recommend topping them with a generous dollop of whipped cream and a glistening maraschino cherry. Trust me, it never disappoints!
The Anatomy of a Perfect Cherry Cheesecake Brownie
Crafting these extraordinary brownies involves three distinct yet harmonious layers, each contributing its unique character to the final masterpiece:
The Fudgy Brownie Base
Our journey begins with the foundation: a truly fudgy brownie. This isn’t a cakey brownie; it’s dense, moist, and intensely chocolatey. The secret to its incredible texture lies in using melted butter and cocoa powder, which are allowed to “bloom” together. This blooming process, where hot butter interacts with cocoa, deepens the chocolate flavor significantly, making it richer and more pronounced. Unlike many other baked goods, these brownies don’t rely on baking powder or soda for their rise; instead, eggs provide the necessary lift and structure, contributing to that signature chewy-fudgy texture. The perfect balance of brown sugar ensures a moist crumb and a subtle caramel note that complements the chocolate beautifully.
The Creamy Cheesecake Layer
Nestled between the brownie layers is a silken cheesecake filling that offers a delightful contrast. Made with softened cream cheese, a touch of sour cream, sugar, and an egg, this layer bakes up incredibly smooth and tangy. The sour cream is crucial here, as it not only adds a lovely tang but also contributes to the cheesecake’s tender, creamy texture, preventing it from becoming too dense. Using room temperature cream cheese is paramount for achieving a lump-free, perfectly smooth filling that melts in your mouth.
The Vibrant Cherry Pie Filling Swirl
The crown jewel of these brownies is the ruby-red cherry pie filling. Spooned generously over the cheesecake, it introduces a bright, fruity element that cuts through the richness of the chocolate and cream cheese. The tartness of the cherries is a fantastic counterpoint, providing a refreshing burst of flavor. While a full can offers maximum cherry goodness and a truly indulgent experience, using half a can can result in slightly neater slices and potentially a shorter baking time, if preferred. The way it’s swirled with the reserved brownie batter creates an eye-catching pattern that promises an exciting flavor combination in every bite.
Ingredients for Your Decadent Cherry Cheesecake Brownies
Gathering the right ingredients is the first step towards baking perfection. Here’s a detailed look at what you’ll need and why each component is important:
For the Fudgy Brownie Base:
- Salted Butter: Using salted butter adds a wonderful depth of flavor and helps balance the sweetness. If you only have unsalted butter, simply add a pinch more salt to the recipe. Melted butter is key for the fudgy texture.
- Cocoa Powder: This is where the rich chocolate flavor comes from. High-quality cocoa powder makes a significant difference. Allowing it to “bloom” with hot butter enhances its intensity.
- Brown Sugar: I prefer dark brown sugar for its deeper molasses flavor and moisture content, which contributes to a chewier brownie. However, light brown sugar works perfectly fine and will still yield delicious results.
- Vanilla Extract: A touch of vanilla enhances all the other flavors, particularly the chocolate.
- Large Eggs: These are crucial for binding the ingredients and providing structure, creating a dense, fudgy brownie without the need for chemical leavening agents like baking powder or soda.
- Salt: Essential for balancing sweetness and bringing out the chocolate flavor. Don’t skip it!
- All-Purpose Flour: Just enough to provide structure without making the brownies dry or cakey.
For the Creamy Cheesecake Filling:
- Cream Cheese: Full-fat cream cheese (softened to room temperature) is highly recommended for the richest, creamiest texture and best flavor. A ⅓ fat option can be used, but the texture might be slightly less decadent.
- Sour Cream or Plain Greek Yogurt: This adds tanginess and an incredibly smooth consistency to the cheesecake. Ensure it’s also at room temperature for easy mixing.
- Granulated White Sugar: For sweetness in the cheesecake layer.
- Large Egg: Helps the cheesecake set and contributes to its silky texture.
- Vanilla Extract: Again, for enhanced flavor in the cheesecake layer.
For the Cherry Topping:
- Cherry Pie Filling: I wholeheartedly recommend using a full 21 oz can for maximum cherry goodness and visual impact. However, if you prefer slightly neater slices and a marginally quicker baking time, using half a can is also an option. You can also experiment with homemade cherry pie filling for an extra gourmet touch.
Optional Garnishes:
- Whipped Cream: A dollop of freshly whipped cream adds a light, airy contrast.
- Maraschino Cherries: For that classic cherry-on-top finish and a pop of color.
Step-by-Step: How to Make Cherry Cheesecake Brownies
Follow these detailed instructions to create your masterpiece:
For the Fudgy Brownie Batter:
- Bloom the Cocoa: In a medium-sized heatproof bowl, combine the hot melted salted butter with the cocoa powder. Whisk them together until smooth. Allow this mixture to sit for about 5 minutes. This crucial “blooming” step deepens the chocolate flavor significantly, making your brownies intensely rich. During this short waiting period, you can start assembling the ingredients for your cheesecake batter.
- Combine Wet Ingredients: After the cocoa has bloomed, add the brown sugar and vanilla extract to the butter-cocoa mixture. Whisk well until fully combined and smooth.
- Incorporate Eggs and Dry Ingredients: Add the large eggs, one at a time, mixing thoroughly after each addition until just combined. Overmixing at this stage can lead to tougher brownies. Finally, add the salt and all-purpose flour. Mix gently until just combined; stop as soon as no dry streaks of flour remain.
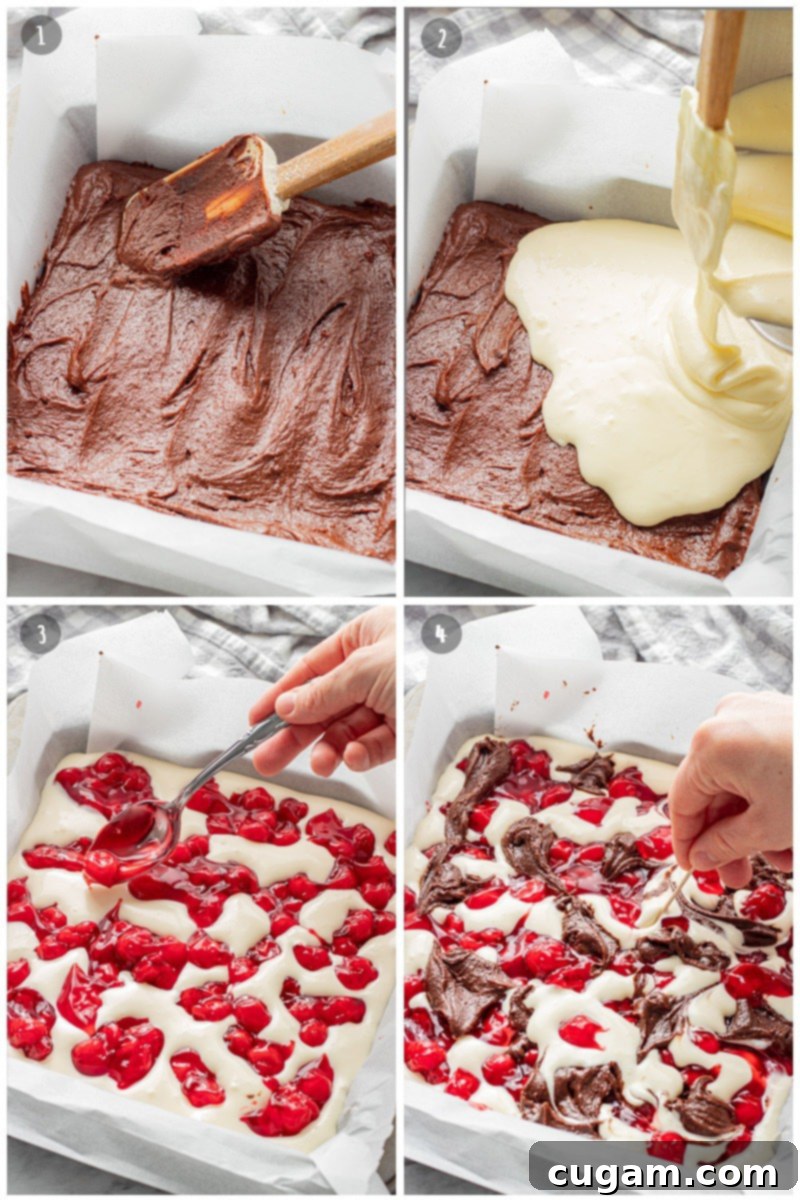
- Prepare Pan and Reserve Batter: Lightly grease a 9×9 inch baking pan or line it with parchment paper, leaving an overhang on two sides for easy removal. Spread approximately ¾ of the brownie batter evenly into the bottom of the prepared pan. Set aside the remaining ¾ cup of brownie batter; this will be used for swirling on top later.
For the Creamy Cheesecake Filling:
- Cream the Cheese and Sour Cream: In a separate mixing bowl, using either a hand mixer or a stand mixer fitted with a whisk attachment, beat the room temperature cream cheese and sour cream together on medium speed for 1-2 minutes until the mixture is completely creamy and smooth. There should be no lumps.
- Add Remaining Ingredients: Incorporate the granulated white sugar, the large egg, and the vanilla extract into the cream cheese mixture. Continue mixing on medium speed for another 2 minutes until the filling is perfectly smooth and well combined.
To Assemble and Bake Your Cherry Cheesecake Brownies:
- Preheat Oven: Preheat your oven to 350°F (175°C).
- Layer Cheesecake: Carefully pour the prepared cheesecake mixture evenly over the brownie batter base in the 9×9 inch pan. Gently spread it to cover the brownie layer.
- Add Cherry Filling: Spoon the cherry pie filling in small, evenly spaced dollops over the cheesecake layer. Aim to leave about an inch of space between each spoonful of cherry filling.
- Swirl the Magic: Now, take the reserved ¾ cup of brownie batter and spoon it into the empty spaces between the cherry dollops. Once both the cherry filling and reserved brownie batter are on top, take a toothpick, a thin knife, or a skewer and gently swirl it through the layers. Create a beautiful marble or swirl design, being careful not to overmix, as this could cause the layers to blend too much and lose their distinct appearance.
- Bake to Perfection: Place the pan in the preheated oven and bake for 40-45 minutes. The brownies are done when the edges are set and a toothpick inserted into the cheesecake (but not the brownie base) comes out mostly clean, or the middle is only slightly jiggly when gently shaken.
- Cool Completely (Crucial Step!): This is arguably the most important step for perfectly sliceable brownies. Remove the pan from the oven and let it cool on a wire rack for a minimum of 2-3 hours at room temperature. For even neater slices and easier handling, you can transfer the pan to the refrigerator once it’s no longer hot, allowing it to chill for an additional few hours or even overnight. The cooler the brownies, the cleaner your slices will be.
- Serve and Garnish: Once completely cooled, lift the brownies out of the pan using the parchment paper overhang. Slice into squares. Optionally, top each serving with fresh whipped cream and a maraschino cherry for an extra touch of elegance and flavor.
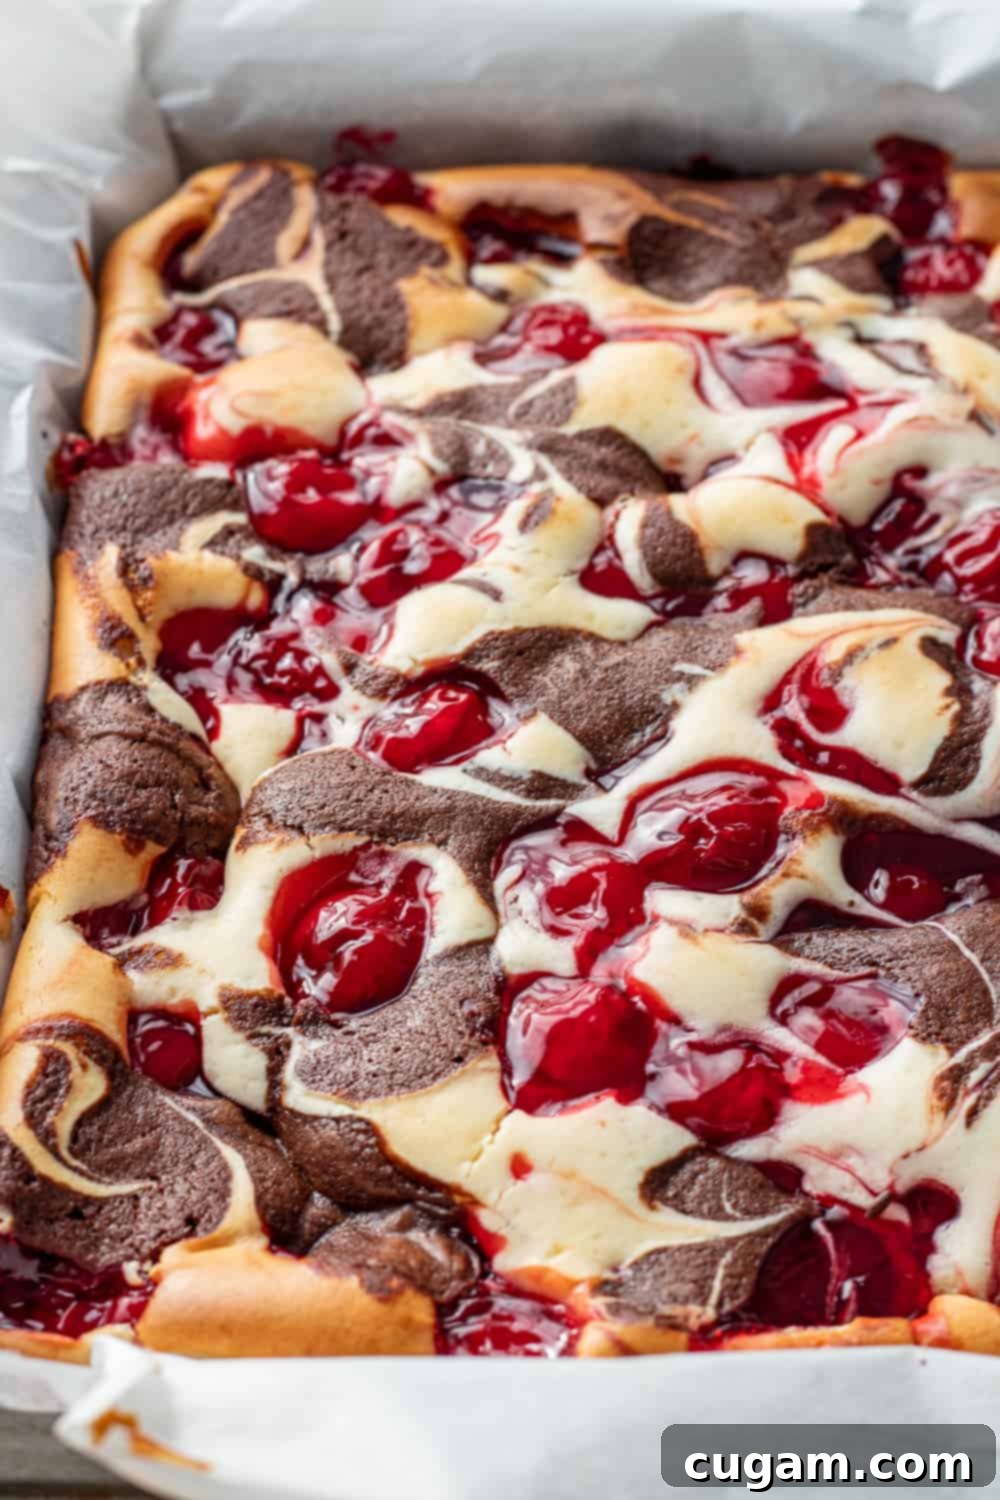
While these cheesecake swirled brownies are indeed a little more time-intensive than a simple batch of fudgy brownies, they are absolutely 1000000% worth every minute of effort. The layered complexity and stunning presentation make them ideal for special occasions. They’ve become a particular favorite for Valentine’s Day, but honestly, any day can be a special occasion when these are on the menu!
Expert Tips for Achieving Bakery-Quality Results
- Room Temperature Ingredients: For both the brownie and cheesecake batters, ensure your eggs, cream cheese, and sour cream are at room temperature. This allows them to incorporate smoothly and evenly, preventing lumps in the cheesecake and ensuring a consistent texture.
- Don’t Overmix: When adding flour to the brownie batter, mix only until just combined. Overmixing develops gluten, which can lead to tough, cakey brownies rather than fudgy ones. Similarly, don’t overbeat the cheesecake mixture once the egg is added.
- The “Bloom” is Key: Don’t skip the step of combining hot melted butter with cocoa powder and letting it sit. This process (blooming) significantly enhances the chocolate flavor, making your brownies incredibly rich.
- Parchment Paper is Your Friend: Lining your baking pan with parchment paper, with an overhang, makes lifting the cooled brownies out of the pan effortless. This helps prevent sticking and ensures beautifully intact squares.
- Cooling is Non-Negotiable: Patience is a virtue, especially with cheesecake brownies. Allow them to cool completely at room temperature for at least 2-3 hours, or better yet, chill them in the refrigerator for several hours or overnight. This firming-up period is essential for clean, neat slices and for the layers to fully set. Trying to slice them warm will result in a messy disaster.
- Gentle Swirling: When creating the swirl pattern, be gentle and don’t overdo it. A few careful passes with a toothpick or knife are enough to create a beautiful marbled effect without mixing the layers into a uniform color.
Customizing Your Cherry Cheesecake Brownies
While the classic cherry cheesecake brownie is perfection, feel free to experiment and make this recipe your own:
- Alternative Pie Fillings: Not a fan of cherries? Try blueberry, strawberry, apple, or even peach pie filling for a different fruity twist.
- Brownie Mix Shortcut: If you’re short on time but still want the impressive result, you can use a high-quality boxed brownie mix for the base. Just prepare it according to package directions, but remember to reserve about ¾ cup of the prepared batter for the swirl.
- Add-ins: Fold some chocolate chips (milk, dark, or white) into your brownie batter, or sprinkle some chopped nuts (like walnuts or pecans) for added texture and flavor.
- Cream Cheese Variations: For a slightly lighter cheesecake, while still maintaining creaminess, Greek yogurt can be used in place of sour cream.
Serving and Storage Suggestions
These Cherry Cheesecake Brownies are best served chilled or at cool room temperature. For an extra special treat, serve them with:
- A dollop of freshly whipped cream.
- A scoop of vanilla bean ice cream.
- A few fresh cherries or a sprinkle of chocolate shavings.
Store any leftover brownies in an airtight container in the refrigerator for up to 3 days. For longer storage, you can freeze individual squares, wrapped tightly in plastic wrap and then foil, for up to 1-2 months. Thaw them in the refrigerator before serving.
When to Enjoy These Decadent Treats
These brownies are incredibly versatile and suitable for a multitude of occasions:
- Holiday Gatherings: Their festive colors and indulgent nature make them perfect for Christmas, Easter, or Thanksgiving dessert tables.
- Valentine’s Day: As mentioned, the red cherries and rich chocolate make them an ideal romantic treat.
- Potlucks and Parties: They are always a crowd-pleaser and travel well.
- Birthdays and Celebrations: A unique alternative to traditional cake.
- “Just Because”: Sometimes, you don’t need a reason to enjoy something this delicious!
📝 Printable Recipe
Cherry Cheesecake Brownies
Pin Recipe
Ingredients
For the Brownies
- ½ cup salted butter (melted)
- ½ cup cocoa powder
- 1 cup brown sugar
- 1 teaspoon vanilla extract
- 2 large eggs
- 1 teaspoon salt
- 1 cup all purpose flour
For the Cheesecake filling:
- 8 oz cream cheese (room temperature)
- ¼ cup sour cream or plain greek yogurt
- ⅓ cup granulated white sugar
- 1 large egg
- 1 teaspoon vanilla extract
- 1 (21 oz) can cherry pie filling (use ½ can if preferred for shorter baking time and neater slices)
- Optional: whipped cream and maraschino cherries to top
Instructions
For the brownies:
-
In a medium sized bowl combine hot melted butter and cocoa powder. Let sit 5 minutes to “bloom” to enhance the chocolate flavor. (May prepare cheesecake filling during this time.)
After 5 minutes add brown sugar and vanilla to the butter/cocoa powder and mix well with wire whisk.
-
Add eggs one at a time, mixing well between each addition. Add salt and flour and mix until combined.
-
Prepare a 9×9 inch baking pan with cooking spray or parchment paper and spread about ¾ of the batter into the bottom of the pan. Reserve about ¾ cup of batter to spoon on later.
For the Cheesecake filling:
-
In a mixing bowl, beat cream cheese and sour cream together with hand mixer or stand mixer with whisk attachment on medium speed until creamy, about 1-2 minutes.
Add sugar, egg, and vanilla and mix on medium speed until smooth, about 2 minutes.
To assemble:
-
Preheat oven to 350 F.
Pour cheesecake mixture on top of brownie batter.
-
Spoon cherry pie filling in small spoonfuls about 1 inch apart evenly on top of cheesecake mixture.
-
Last, spoon reserved brownie batter into remaining spaces on top of the cheesecake mixture. Swirl with toothpick lightly across surface to spread the pie filling and brownie batter together in a swirl design. Don’t swirl too much or it will mix together and look like mush.
Bake at 350 F for 40-45 minutes until edges are set and middle is slightly jiggly. Cool for 2-3 hours minimum before slicing, can be placed in fridge when no longer hot to finish cooling, the cooler the brownies the neater the slices/easier to slice.
-
Optional: top with whipped cream and maraschino cherries.
Notes
These can be stored in an airtight container in the refrigerator for up to 3 days.
Nutrition
PIN THIS IMAGE TO SAVE THE RECIPE:
Frequently Asked Questions (FAQ)
Why do you “bloom” the cocoa powder?
Blooming cocoa powder means combining it with a hot liquid (in this case, hot melted butter) and letting it sit for a few minutes. This process allows the cocoa particles to fully dissolve and release their full flavor potential. It results in a significantly richer, deeper, and more intense chocolate flavor in your brownies, making them taste even more decadent.
Is it important for cream cheese to be at room temperature?
Absolutely! Using room temperature cream cheese is crucial for achieving a smooth, lump-free cheesecake filling. Cold cream cheese will be difficult to beat and will likely result in a lumpy texture that won’t blend well with the other ingredients, affecting the overall creaminess of your cheesecake layer.
Can I use homemade cherry pie filling instead of canned?
Yes, you can definitely use homemade cherry pie filling! If you have a favorite recipe for homemade cherry pie filling, it would be a fantastic addition and would likely elevate the flavor even further. Just ensure it has a similar consistency to store-bought filling so it layers and swirls properly without being too runny.
How do I get clean slices?
The secret to clean slices is patience and a sharp knife. Firstly, ensure the brownies are completely cooled and ideally chilled in the refrigerator for several hours (or overnight) before slicing. Secondly, use a long, sharp knife. For each slice, wipe the knife clean with a damp cloth and warm it slightly under hot water (then dry it) between cuts. This prevents the layers from sticking and smudging, giving you beautifully neat squares.
Can these brownies be frozen?
Yes, these cherry cheesecake brownies freeze wonderfully! Once completely cooled and sliced, wrap individual squares tightly in plastic wrap, then wrap them again in aluminum foil. Store them in an airtight freezer-safe container for up to 1-2 months. Thaw them in the refrigerator overnight or on the counter for a few hours before serving.
There you have it – a comprehensive guide to crafting the most irresistible Cherry Cheesecake Brownies. This dessert is a true labor of love, but the smiles and rave reviews you’ll receive make every step worthwhile. So, roll up your sleeves, gather your ingredients, and get ready to bake a masterpiece that combines the best of fudgy brownies, creamy cheesecake, and bright cherry goodness. Happy baking!
