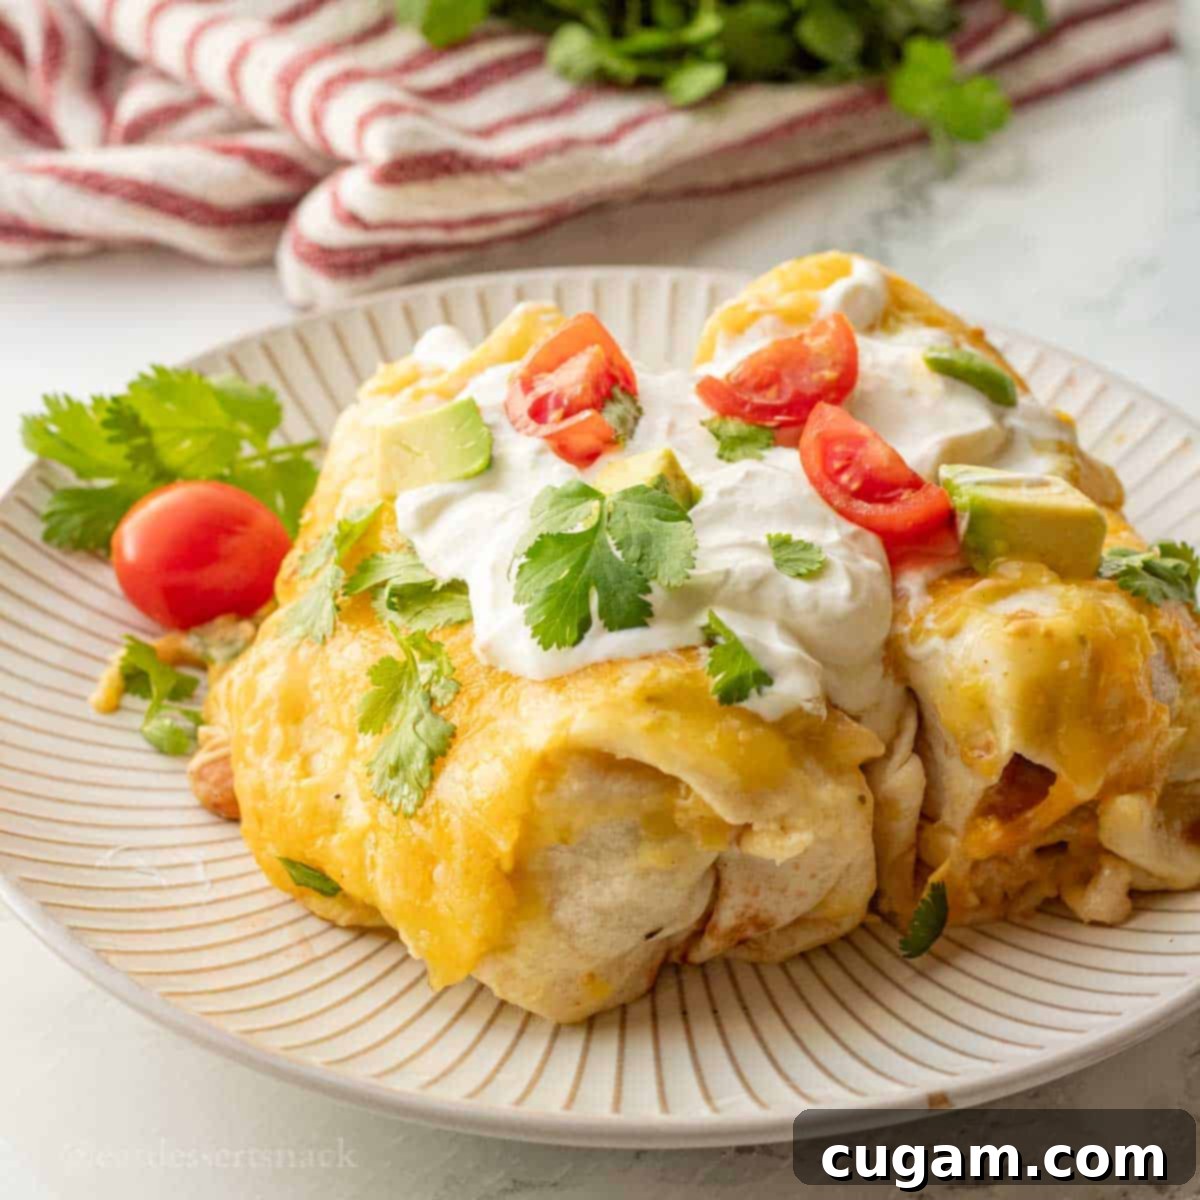
Authentic Green Chile Chicken Enchiladas: A Creamy New Mexico Classic
Embark on a culinary journey to the heart of the Southwest with these incredible Green Chile Chicken Enchiladas. This recipe captures the vibrant essence of a New Mexico classic, combining the smoky heat of authentic Hatch Valley chile peppers with tangy salsa verde, rich cream cheese, tender chicken, and hearty navy beans. It’s a dish that promises a burst of flavor in every bite, delivering comfort and a touch of regional spice straight to your kitchen table.
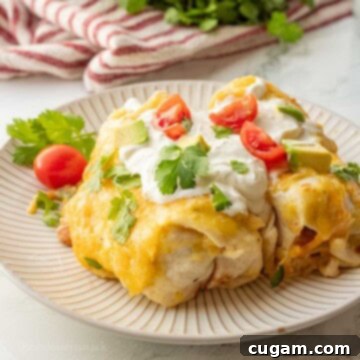
What truly elevates these chicken enchiladas from a simple meal to a memorable experience is the distinctive kick from the green chiles, perfectly balanced by the indulgent, wonderfully melty cheese generously layered on top. For an extra touch of homemade goodness, we often prepare these green chile enchiladas using our homemade sourdough discard tortillas. Once baked to golden perfection, they are crowned with a dollop of creamy Avocado Lime Ranch Dressing, then lavishly garnished with fresh diced tomatoes, fragrant cilantro, and cool sour cream – creating a symphony of textures and flavors that will undoubtedly satisfy all your cravings.
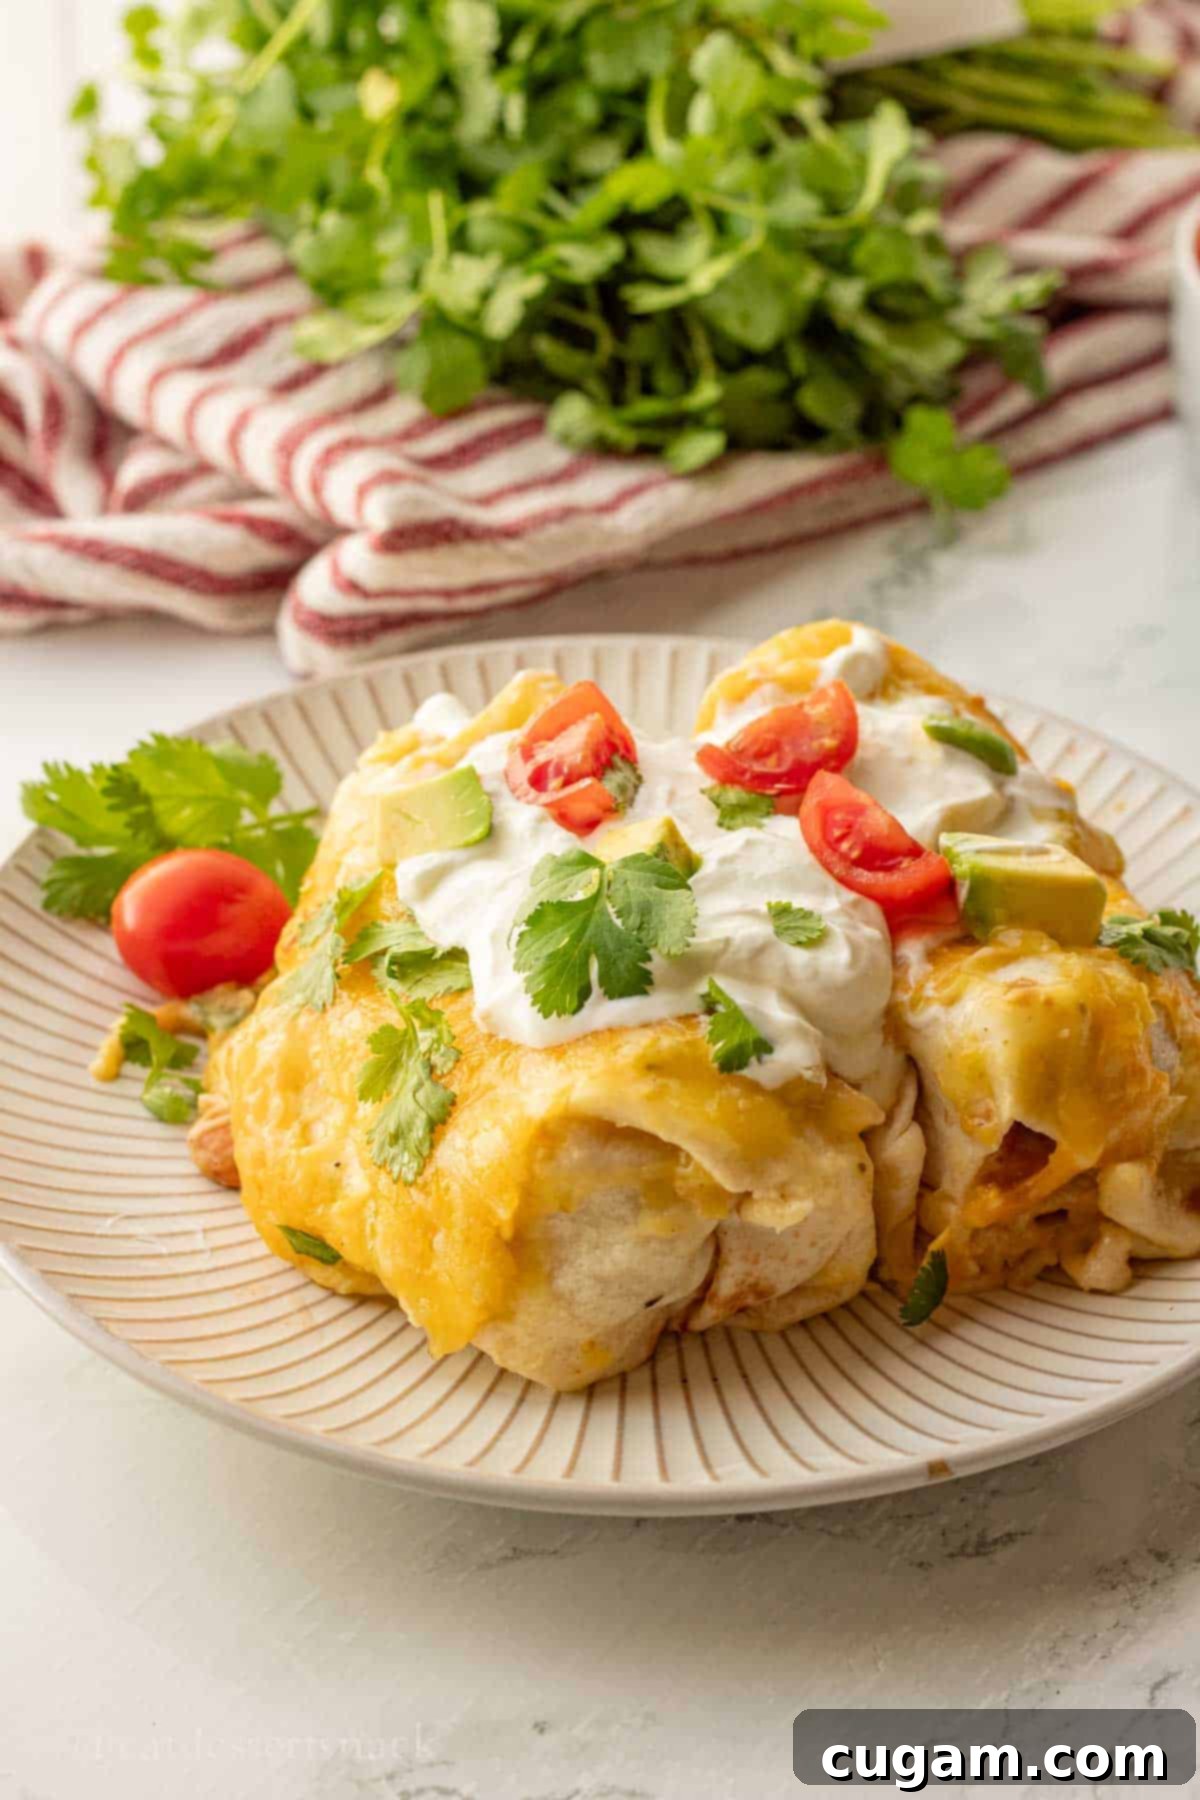
While the authentic flavor profile of these enchiladas is deeply rooted in the renowned Hatch Valley green chiles from New Mexico, please know that any high-quality brand of green chiles will work beautifully for this recipe! You absolutely do NOT need to feel restricted to sourcing specific Hatch Valley green chiles if they are not readily available in your area; a good canned or jarred green chile will still deliver fantastic results. New Mexico proudly boasts its fame for exceptional chile peppers, particularly those cultivated in the sun-drenched Hatch Valley. The most prized, freshly roasted peppers are often savored within the state during their annual harvest season. However, it’s the distinctive, earthy, and often spicy character of these incredible chiles that truly elevates this enchilada recipe, making it uniquely special and profoundly packed with unforgettable flavor.
This comprehensive guide will walk you through every step of creating these delightful enchiladas. From preparing a succulent filling and exploring creative variations to offering practical storage tips and answering frequently asked questions, we’ve got you covered. Get ready to master this classic dish and impress your family and friends!
Why You’ll Fall in Love with This Green Chile Chicken Enchilada Recipe
These aren’t just any enchiladas; they are a culinary celebration designed to delight your senses and simplify your meal prep. Here’s why this recipe deserves a permanent spot in your rotation:
- Exceptional Taste: Prepare for a harmonious blend of rich, creamy textures and savory flavors. Each bite delivers the perfect balance of cheesy goodness, infused with a gentle warmth from the authentic Hatch green chiles. Complemented by classic Latin seasonings, this dish offers a genuine, hearty taste of New Mexico. What truly sets our recipe apart is the use of vibrant salsa verde, which lends a bright, tangy zest that vastly outperforms the often-bland flavor of traditional canned green enchilada sauce.
- Effortless Ease: Despite its gourmet taste, this recipe is remarkably straightforward. Once your flavorful filling is cooked to perfection, assembling the enchiladas becomes a quick and satisfying task. We’ve designed it to be incredibly versatile and endlessly customizable, ensuring it fits your family’s preferences. Whether you want to dial up the spice, experiment with various cheeses, or swap out proteins, our detailed substitutions section provides all the guidance you need to make it uniquely yours.
- Time-Saving Convenience: Short on time but craving something spectacular? This recipe is your answer. The flavorful filling comes together in just 15-20 minutes, followed by a swift assembly, and then only 30 minutes in the oven to bake to golden, bubbly perfection. For ultimate convenience, these enchiladas are also an excellent make-ahead option. Prepare them in advance and freeze for a busy weeknight, ensuring a delicious, home-cooked meal is always just a bake away.
🛒 Key Ingredients for Flavorful Green Chile Enchiladas
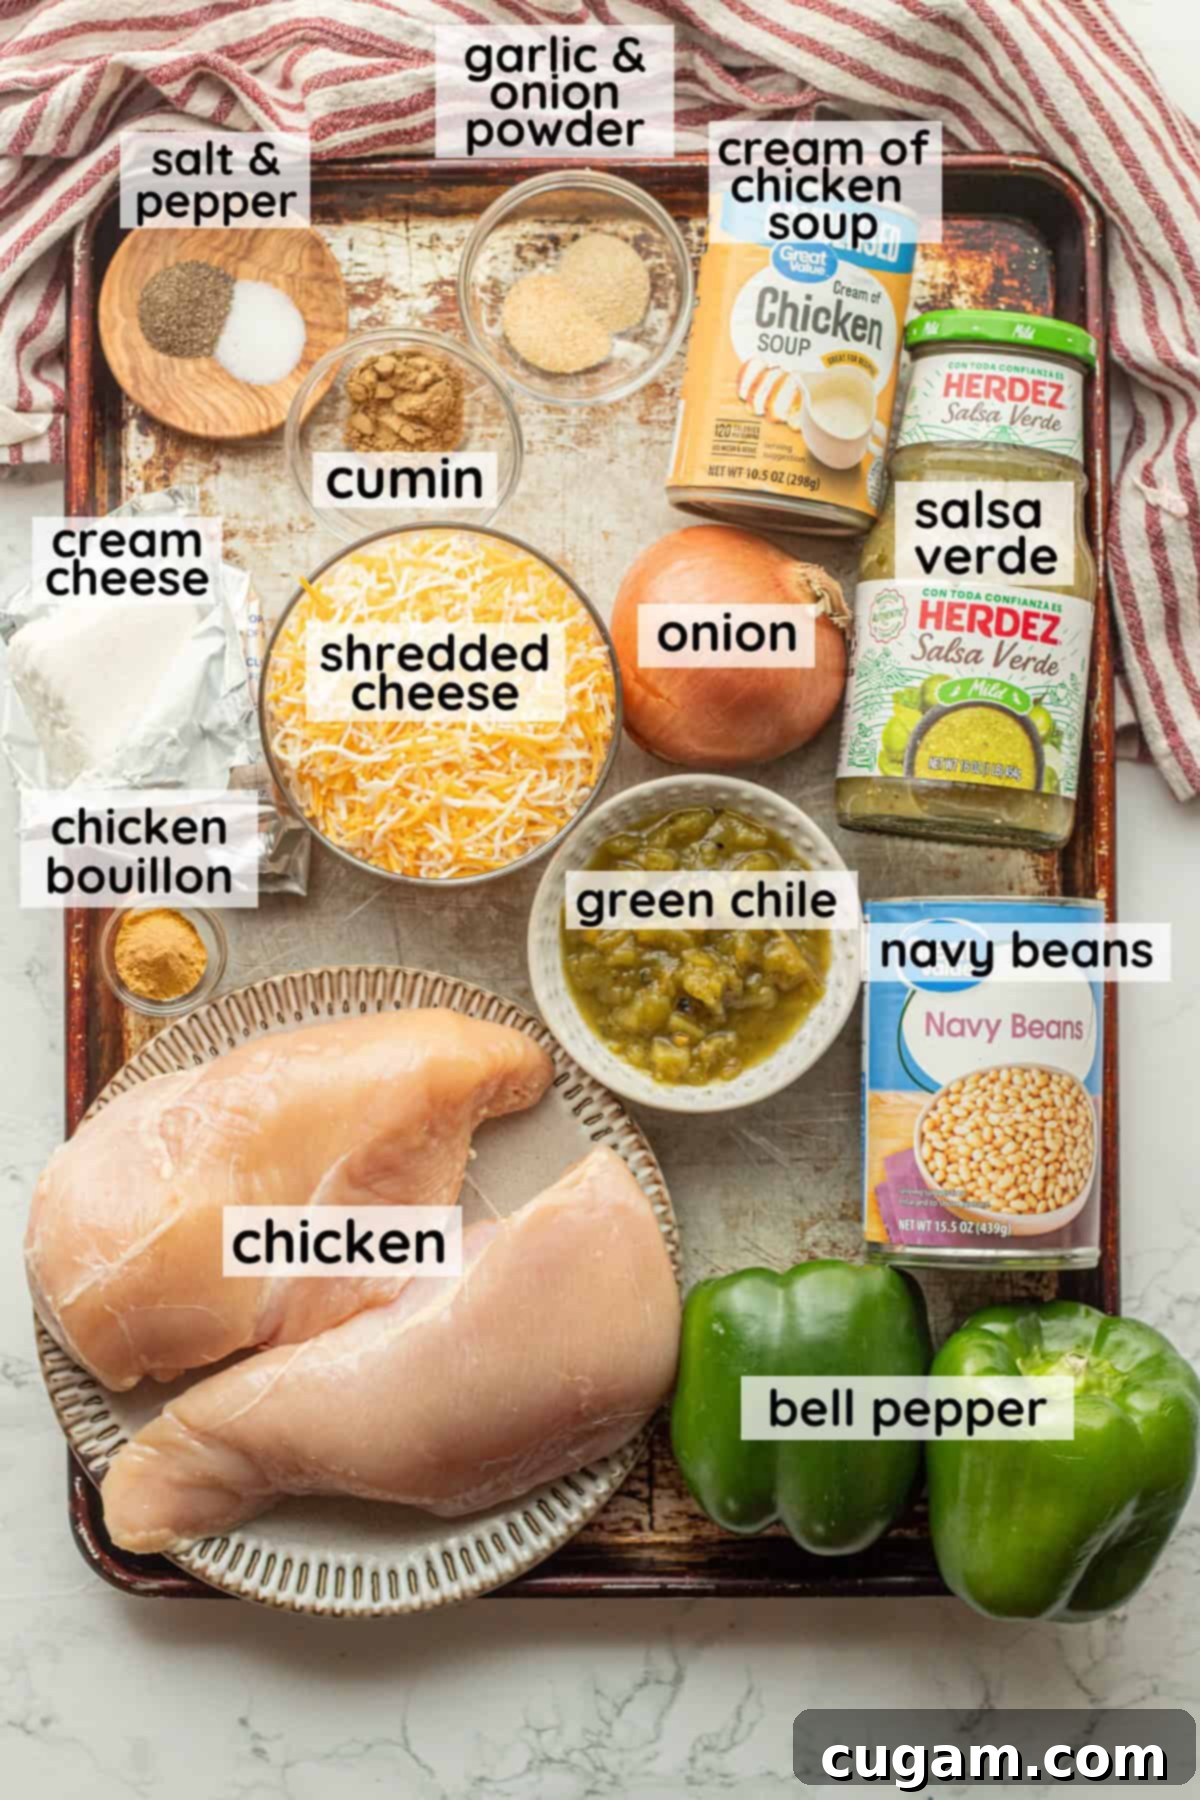
- Chicken: For the most flavorful and tender enchiladas, both boneless, skinless chicken breasts or chicken thighs are excellent choices. They cook evenly and maintain their juiciness within the rich filling. We season our chicken with a robust blend, much like our popular Homemade Chicken Taco Seasoning, ensuring every shred is packed with savory goodness.
- Diced Green Chiles (Hatch Preferred): These are the soul of the dish. While Hatch chiles from New Mexico are highly recommended for their unique smoky, earthy flavor and perfect heat balance, widely available canned or jarred diced green chiles will still yield delicious results. You can find them in most grocery stores or even online. Opt for a flame-roasted variety if possible to capture that authentic depth.
- Cream Cheese: This secret ingredient is what transforms our enchilada filling into an irresistibly smooth and creamy delight. It melts beautifully, binding all the flavors together and adding a luxurious richness that makes these enchiladas so comforting and satisfying.
- Navy Beans: Adding navy beans is a fantastic way to boost the protein content, enhance the texture, and add a subtle, wholesome earthiness that perfectly complements the other ingredients. They help round out the enchiladas, making them more substantial and filling. If beans aren’t your preference, feel free to omit them, but we highly recommend trying them, especially when prepared using our quick Instant Pot Navy Beans method.
- Salsa Verde: Forget bland, store-bought green enchilada sauce! Our recipe champions salsa verde for its bright, zesty, and authentically tangy flavor. Made primarily with tomatillos, cilantro, and sometimes jalapeños, salsa verde delivers a fresh, vibrant kick that a canned green chile sauce simply cannot replicate. It provides a much more distinct and lively taste profile, elevating the entire dish.
See the recipe card below for full information on ingredients and quantities.
✏️ Substitutions & Variations for Your Perfect Enchiladas
- Rotisserie Chicken: Pressed for time? Pre-cooked rotisserie chicken is an absolute game-changer! Simply shred or dice the chicken, then sauté your onions and bell peppers as directed. Once softened, stir in the cooked rotisserie chicken. This not only shaves off cooking time but also infuses the dish with a wonderfully roasted flavor. Remember to omit or significantly reduce the added salt from the recipe if using rotisserie chicken, as it’s often pre-seasoned.
- Vegetarian Option: Transform this recipe into a satisfying meat-free meal by replacing the chicken with sautéed mushrooms, diced zucchini, or even crumbled plant-based protein. For the bouillon, opt for vegetable bouillon, and for the soup base, cream of celery soup or a dairy-free cream soup alternative works well. Ensure all other ingredients are vegetarian-friendly for a delicious, hearty alternative.
- Creamy Alternatives: If cream cheese isn’t on hand, or if you prefer a slightly lighter or tangier flavor, sour cream or plain Greek yogurt make excellent substitutes. They will still provide a creamy texture, with Greek yogurt adding a pleasant tartness and extra protein. Stir them in at the same stage as the cream cheese.
- Pepper Power-Up: Elevate the flavor and add a touch more complexity by swapping out the green bell pepper for a poblano pepper. Poblano peppers offer a milder heat than jalapeños but boast a richer, earthier, and slightly smoky flavor that complements the green chiles beautifully.
- Heat Level Adjustment: Craving more heat? It’s easy to customize! Opt for hot green chiles instead of mild ones. For an extra fiery kick, finely dice and sauté fresh or pickled jalapeños (or even serrano peppers for extreme heat) along with your onions and bell peppers. You can also add a pinch of cayenne pepper to the seasoning blend.
- Cheese Variety: While cheddar cheese is a classic, don’t hesitate to experiment with other melting cheeses. Monterey Jack, Pepper Jack (for more spice), a Mexican blend, or even a combination of cheddar and a milder white cheese like Oaxaca or Asadero can introduce new dimensions of flavor and texture.
- Bean Alternatives: Not a fan of navy beans? Black beans, pinto beans, or cannellini beans are all fantastic substitutes that will maintain the hearty texture and protein boost of the original recipe. Just be sure to rinse and drain them well before adding.
Pro Tip: Roasting your own green chiles enhances the smoky flavor of the enchiladas, especially if you don’t have roasted Hatch chiles readily available.
🧑🍳 Step-by-Step Instructions to Make Green Chile Chicken Enchiladas
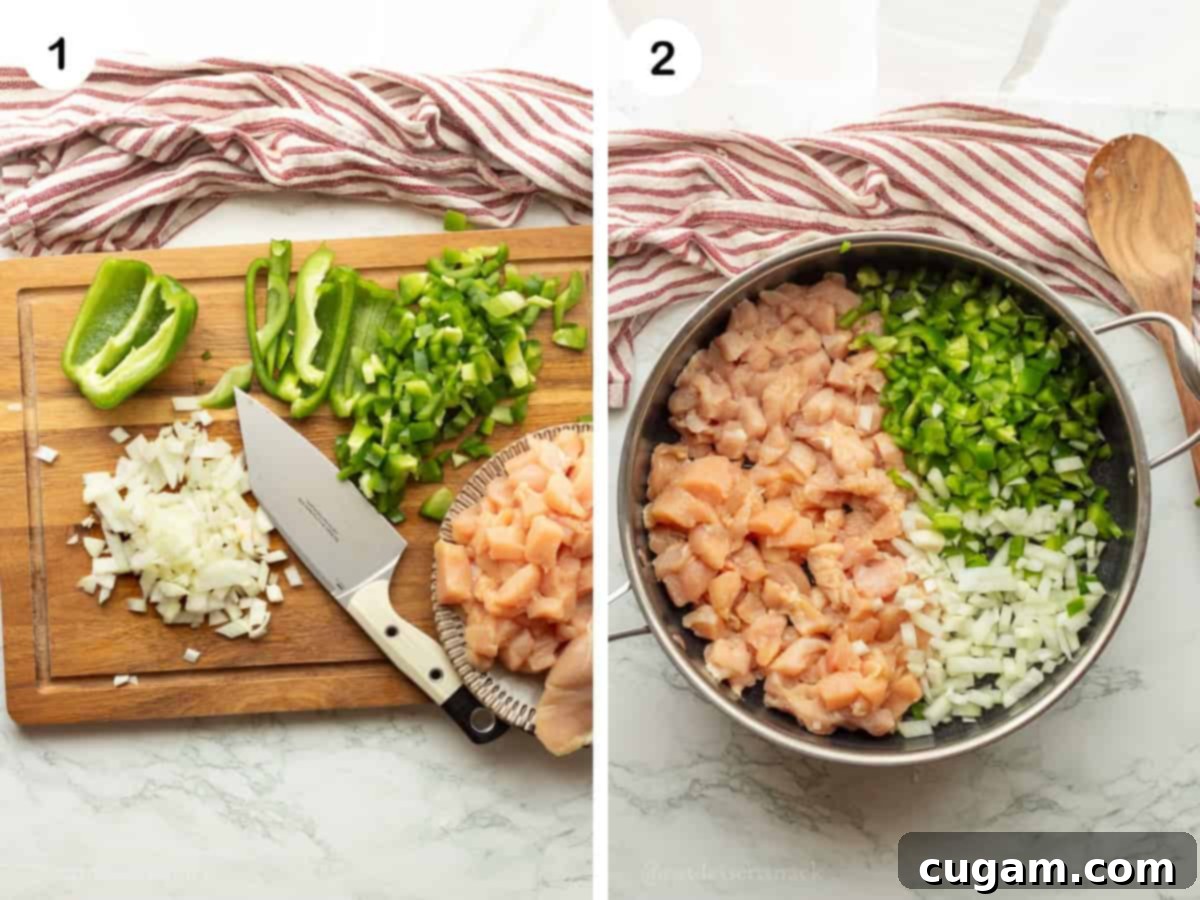
- Step 1: Prepare Your Ingredients. Begin by meticulously dicing your chosen chicken (breasts or thighs) into small, uniform ½-inch cubes. This ensures even cooking and integrates beautifully into the filling. Next, finely dice your bell pepper and yellow onion. Uniformity in dicing is key for consistent flavor and texture throughout the enchiladas (refer to the above left image for visual guidance).
- Step 2: Sauté the Aromatics and Chicken. Place a large frying pan or a spacious pot over high heat and add 1 tablespoon of olive oil. It’s crucial to use a generously sized pan or pot to accommodate all the ingredients without overcrowding, allowing them to cook evenly and caramelize properly (as shown in the above right image). Once the oil is shimmering, add the diced chicken, bell peppers, and onions to the hot pan.
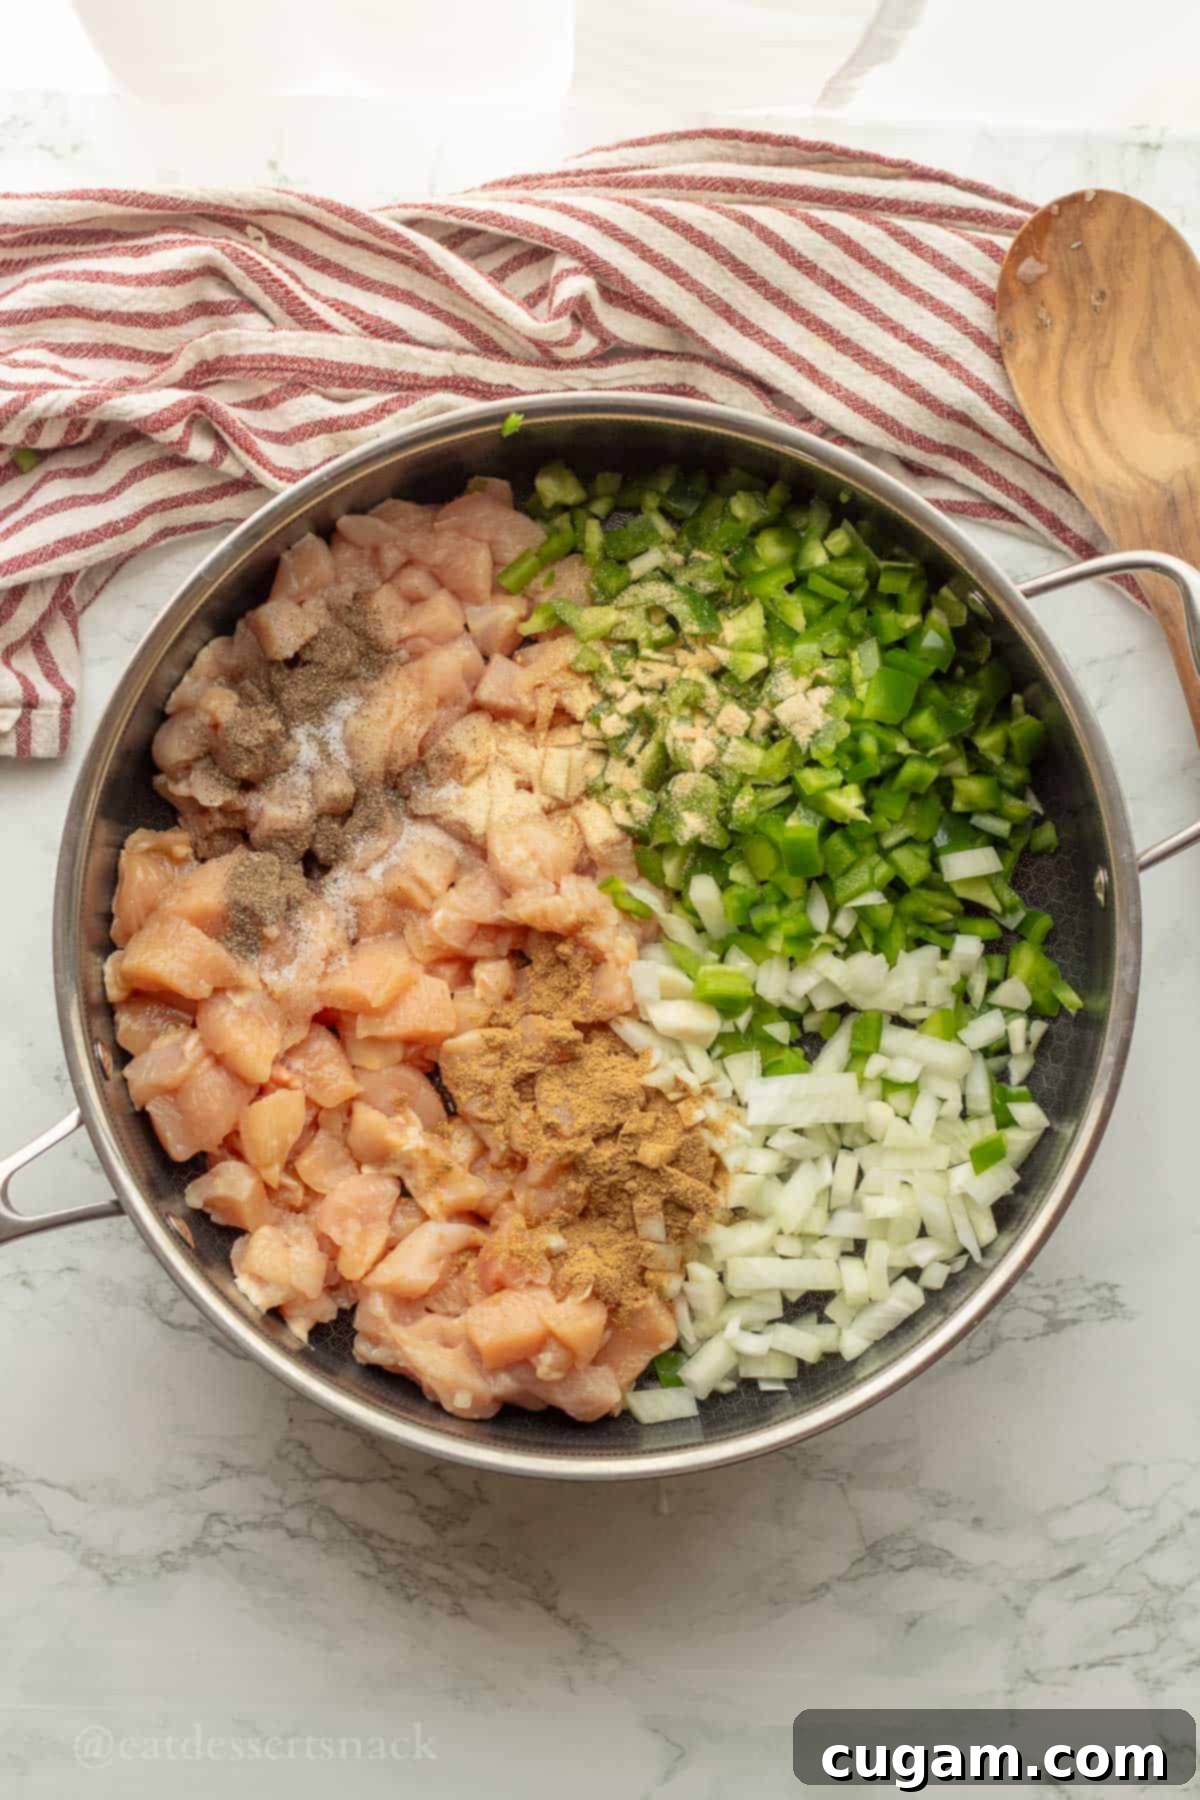
- Step 3: Season and Sauté. Once the chicken begins to lose its raw pink color, add all the dry seasonings: salt, black pepper, garlic powder, onion powder, ground cumin, and chicken bouillon. Stir well to ensure the chicken and vegetables are thoroughly coated. Continue to sauté for 5-7 minutes, or until the chicken is fully cooked through and the peppers and onions have softened to a tender-crisp consistency. This step builds the foundational flavors for your enchilada filling.
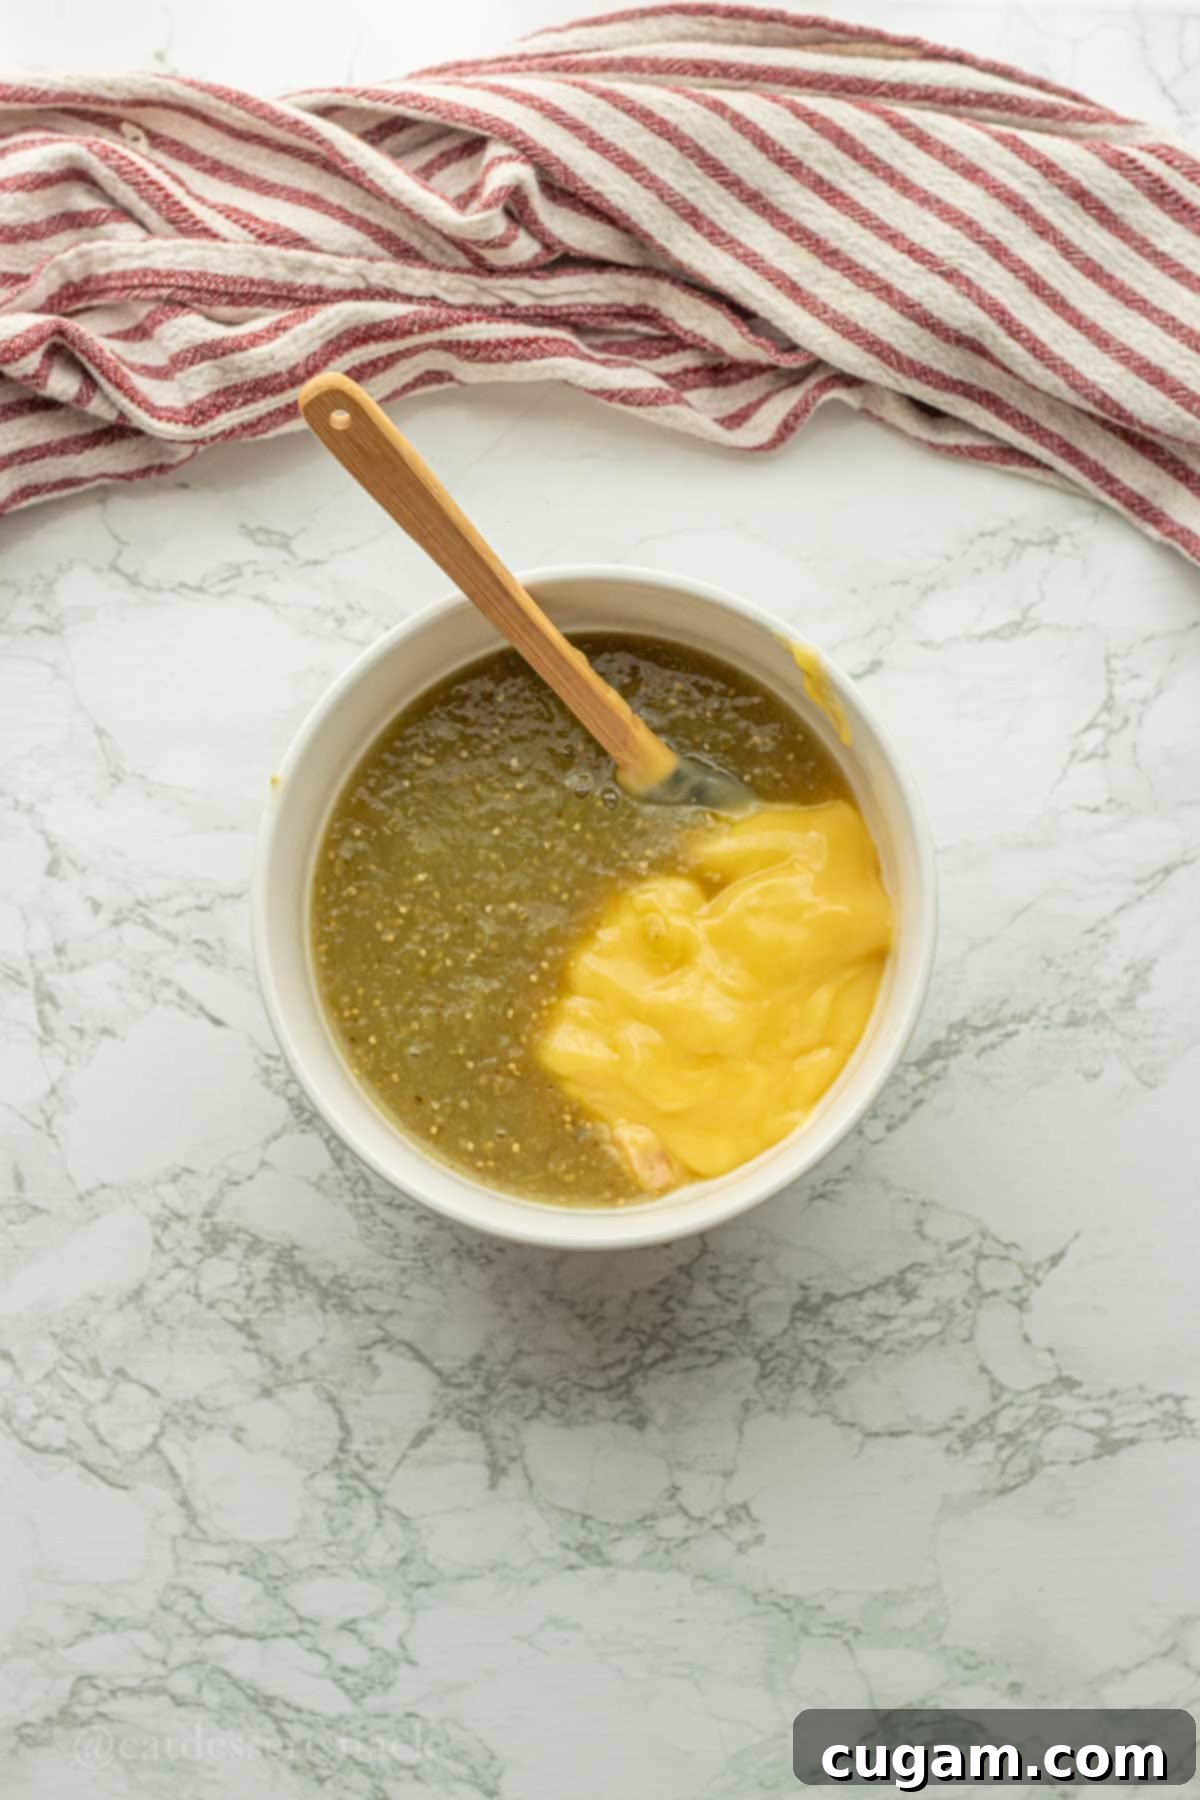
- Step 4: Prepare the Enchilada Sauce. While your filling cooks, prepare the luscious sauce. In a small, separate bowl, combine the vibrant salsa verde with the condensed cream of chicken soup. Whisk these two ingredients together until they are thoroughly blended and smooth. This creates the creamy, tangy sauce that will coat your enchiladas, both inside and out.
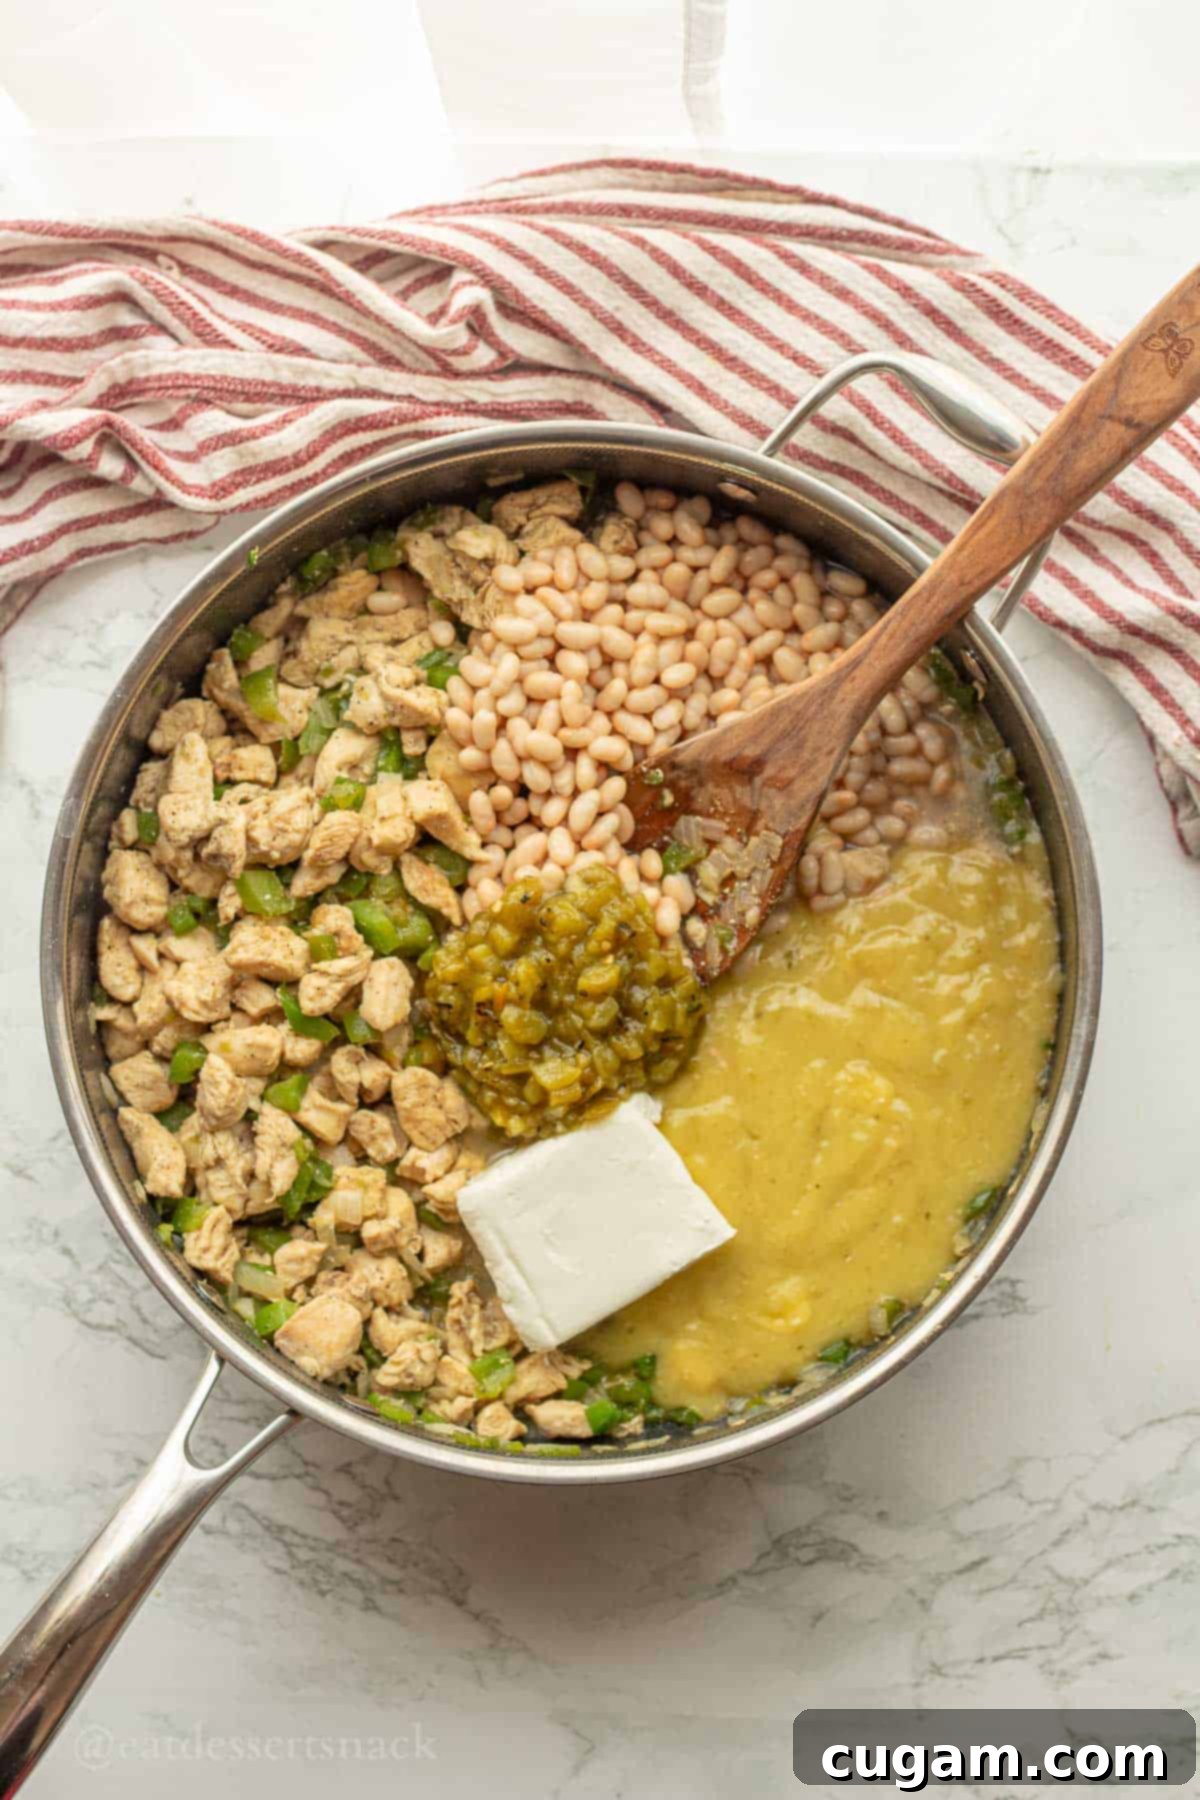
- Step 5: Create the Creamy Filling. To your sautéed chicken and vegetable mixture, add the drained navy beans, softened cream cheese, and diced green chiles. Now, gently fold in only HALF of the prepared salsa verde and cream of chicken soup mixture. Stir thoroughly until the cream cheese is fully melted and all ingredients are evenly combined, forming a rich, cohesive filling. It’s crucial to save the remaining half of the sauce; this will be spread over the top of your assembled enchiladas to ensure they bake up beautifully moist and saucy, preventing them from drying out or becoming overly crispy.
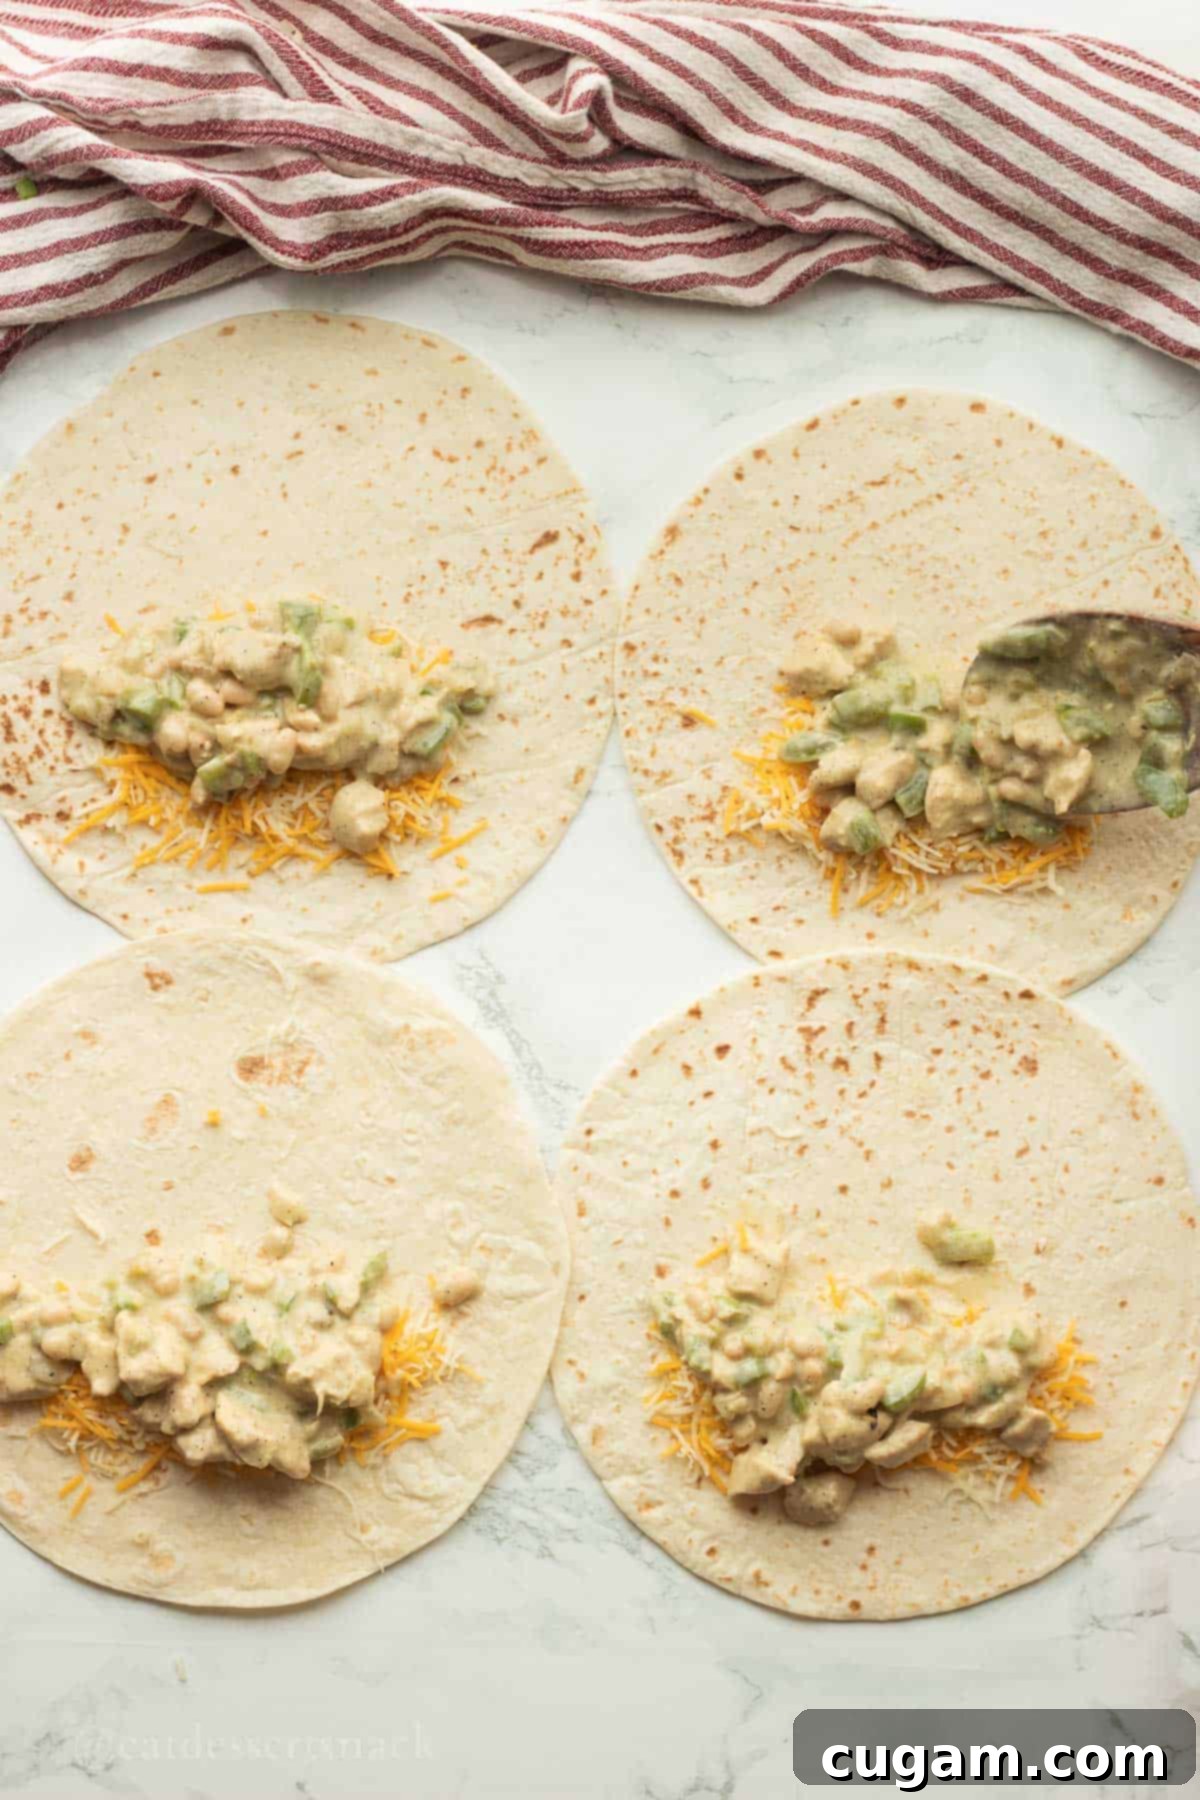
- Step 6: Assemble the Enchiladas. Lay out about 4 tortillas at a time on a clean surface; working in batches can significantly boost your efficiency. Sprinkle approximately 2 tablespoons of shredded cheddar cheese evenly across each tortilla. Following this, spoon about ⅓ cup of the delicious enchilada filling onto one end of each cheese-covered tortilla. Ensure the filling is distributed slightly away from the edges to allow for easy rolling and prevent spillage.
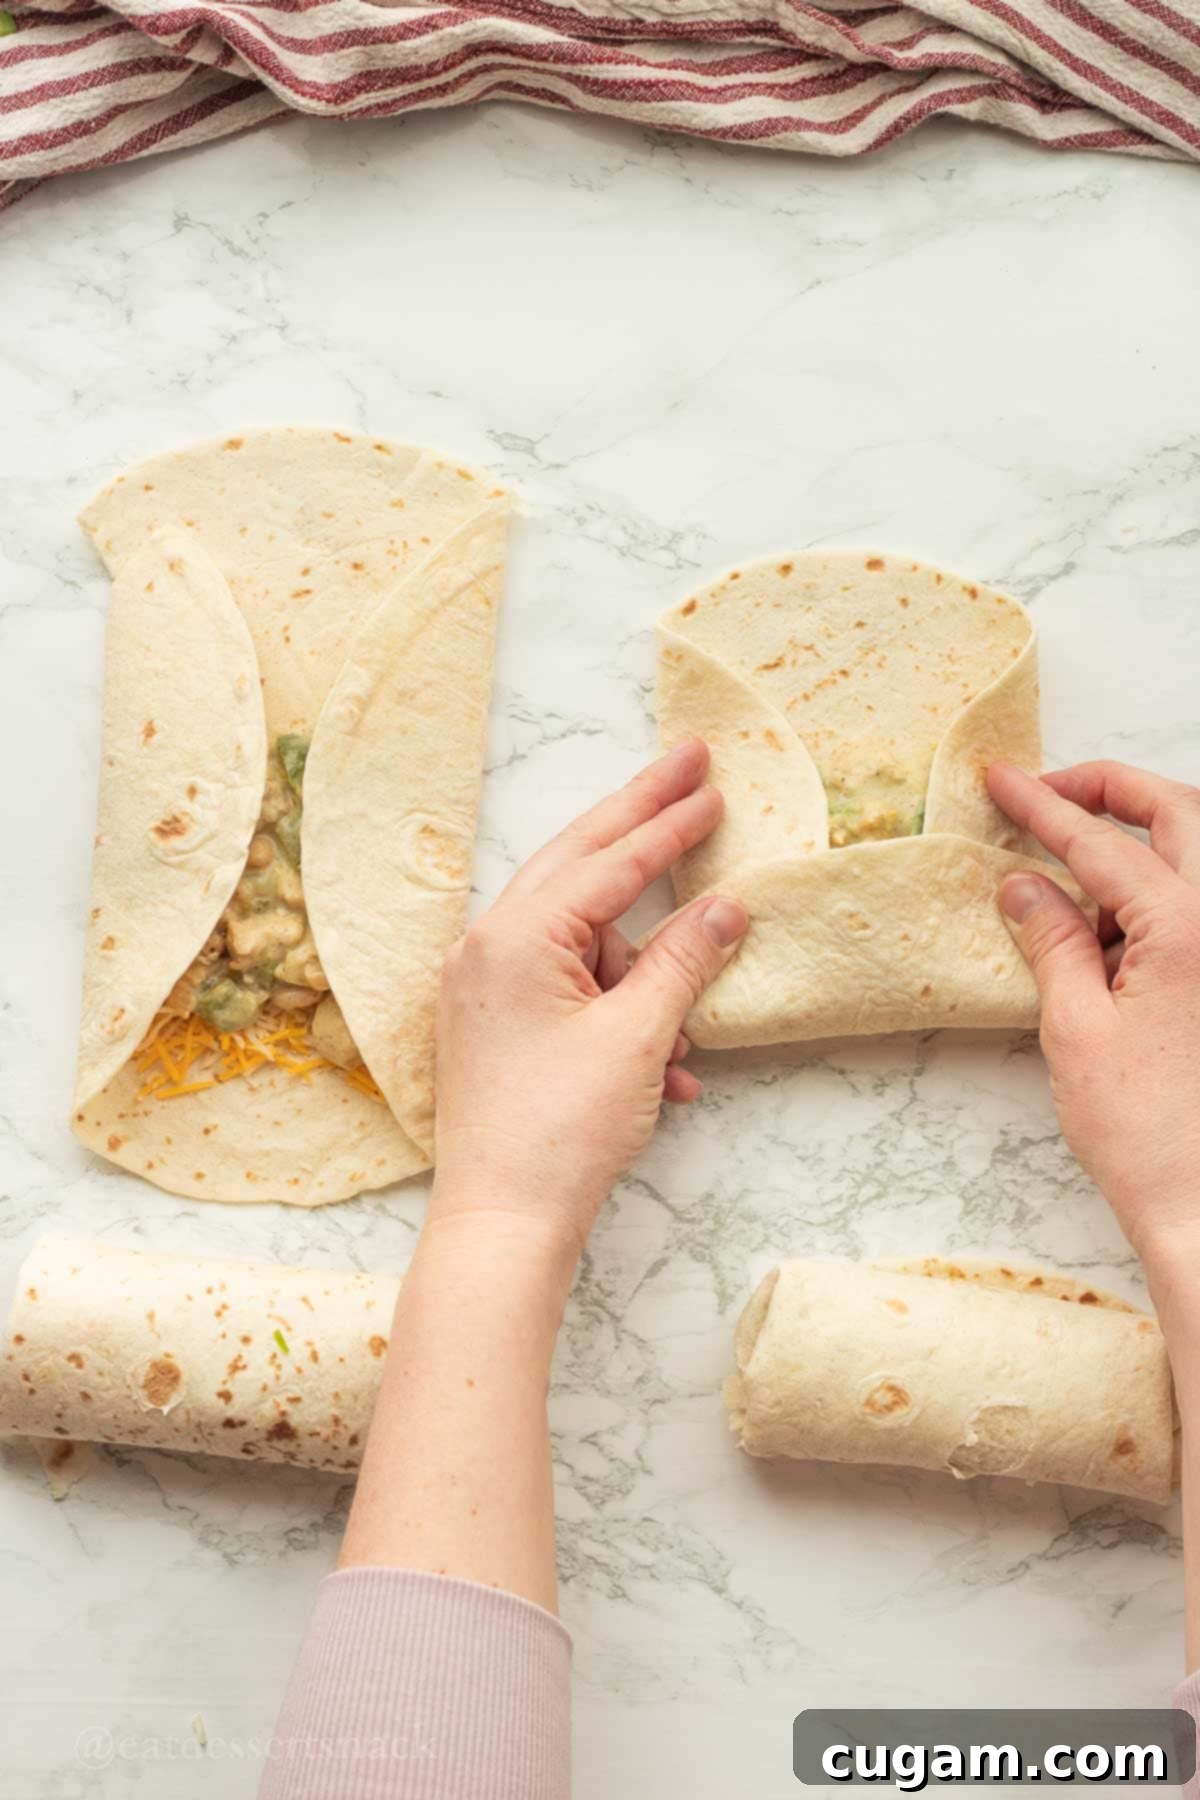
- Step 7: Roll and Arrange. To roll your enchiladas, first fold in the shorter sides of the tortilla over the filling, then firmly roll the tortilla from one end to the other, keeping the sides tucked in. The goal is to create short, plump enchiladas that will snugly fit side-by-side in your baking pan. Arrange the rolled enchiladas seam-side down in a lightly greased 9×13-inch baking pan. You should be able to fit approximately 10-12 enchiladas, depending on their size, typically in two neat rows.
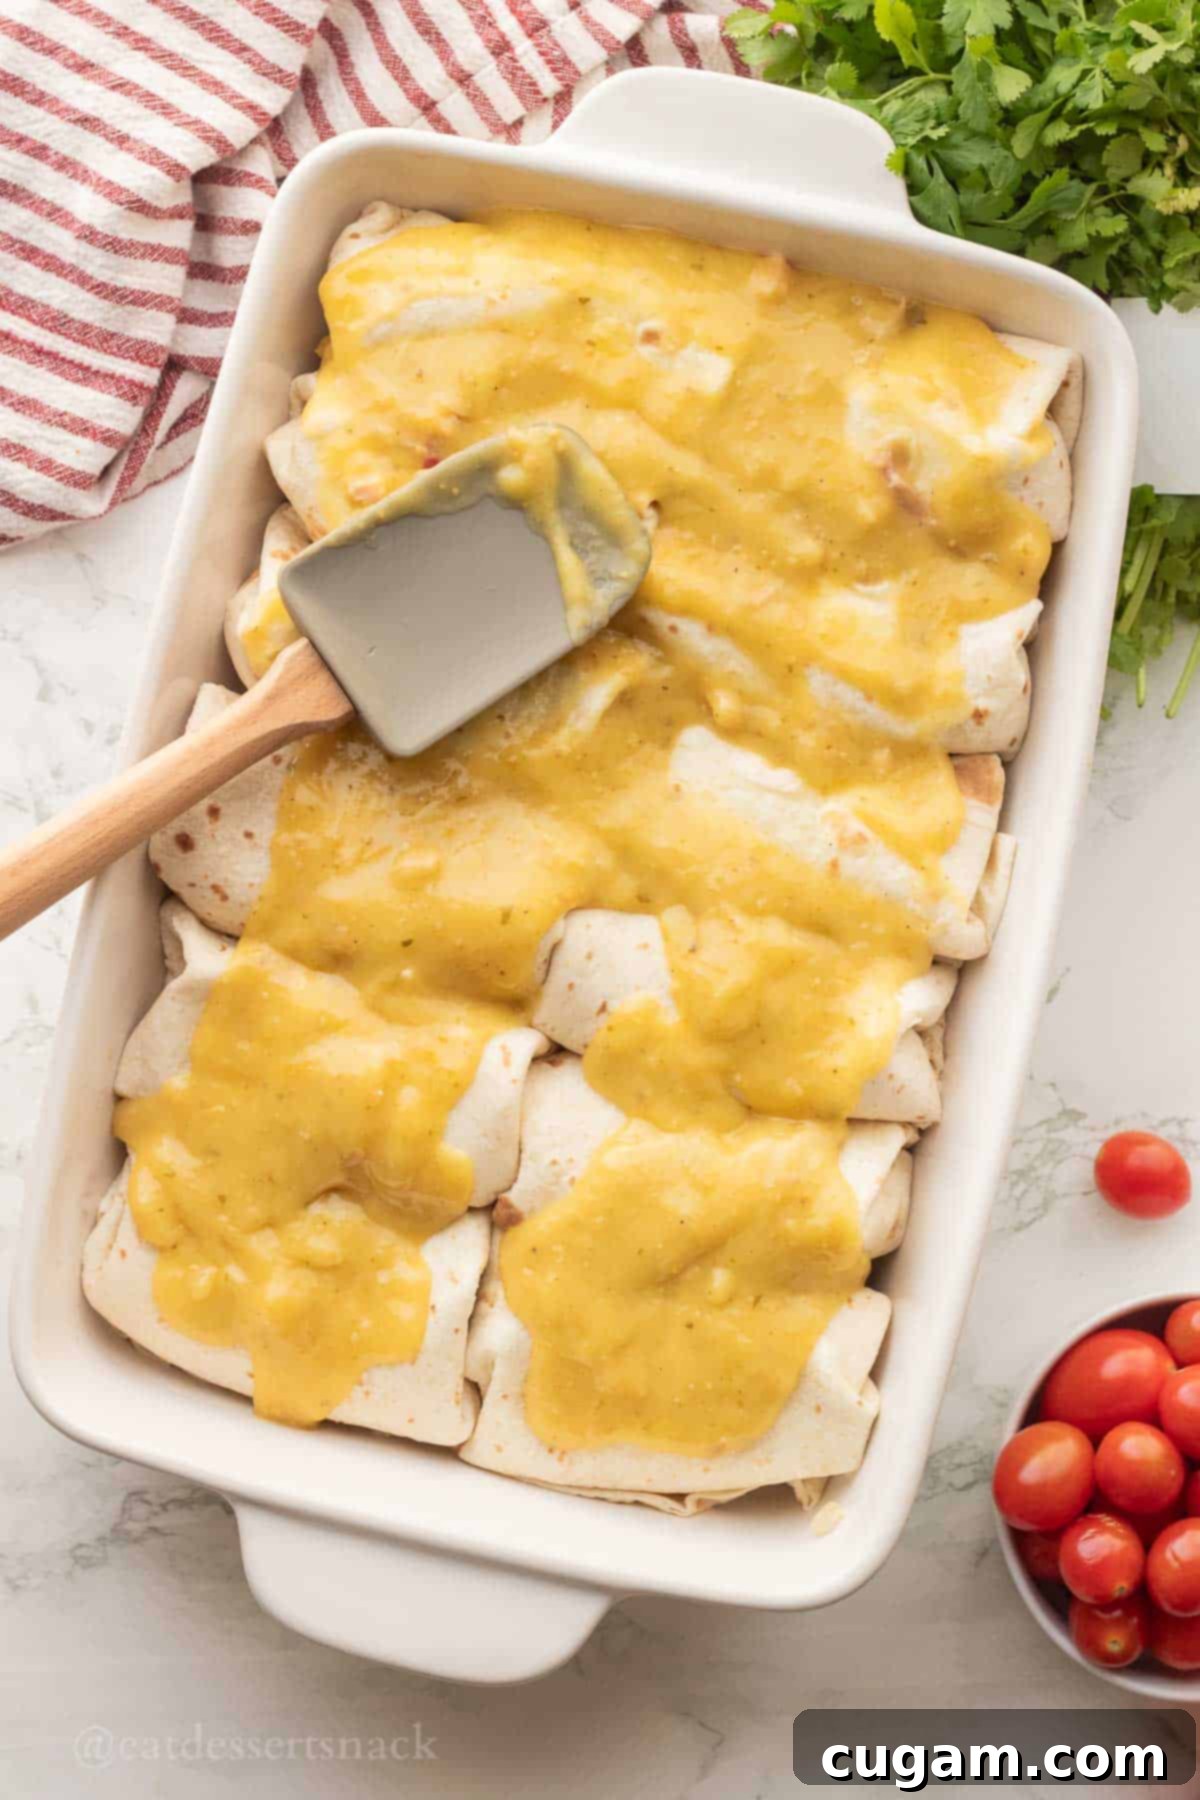
- Step 8: Top with Sauce and Cheese. Retrieve the remaining half of your luscious salsa verde and cream of chicken soup mixture. Evenly spread this sauce over the tops of all the assembled enchiladas in the pan, ensuring every surface is lightly coated. This layer will keep them moist and flavorful during baking. Finally, generously sprinkle with 1 cup of shredded cheddar cheese (or more, if you’re a cheese lover!). This final layer will melt into a golden, bubbly crust.
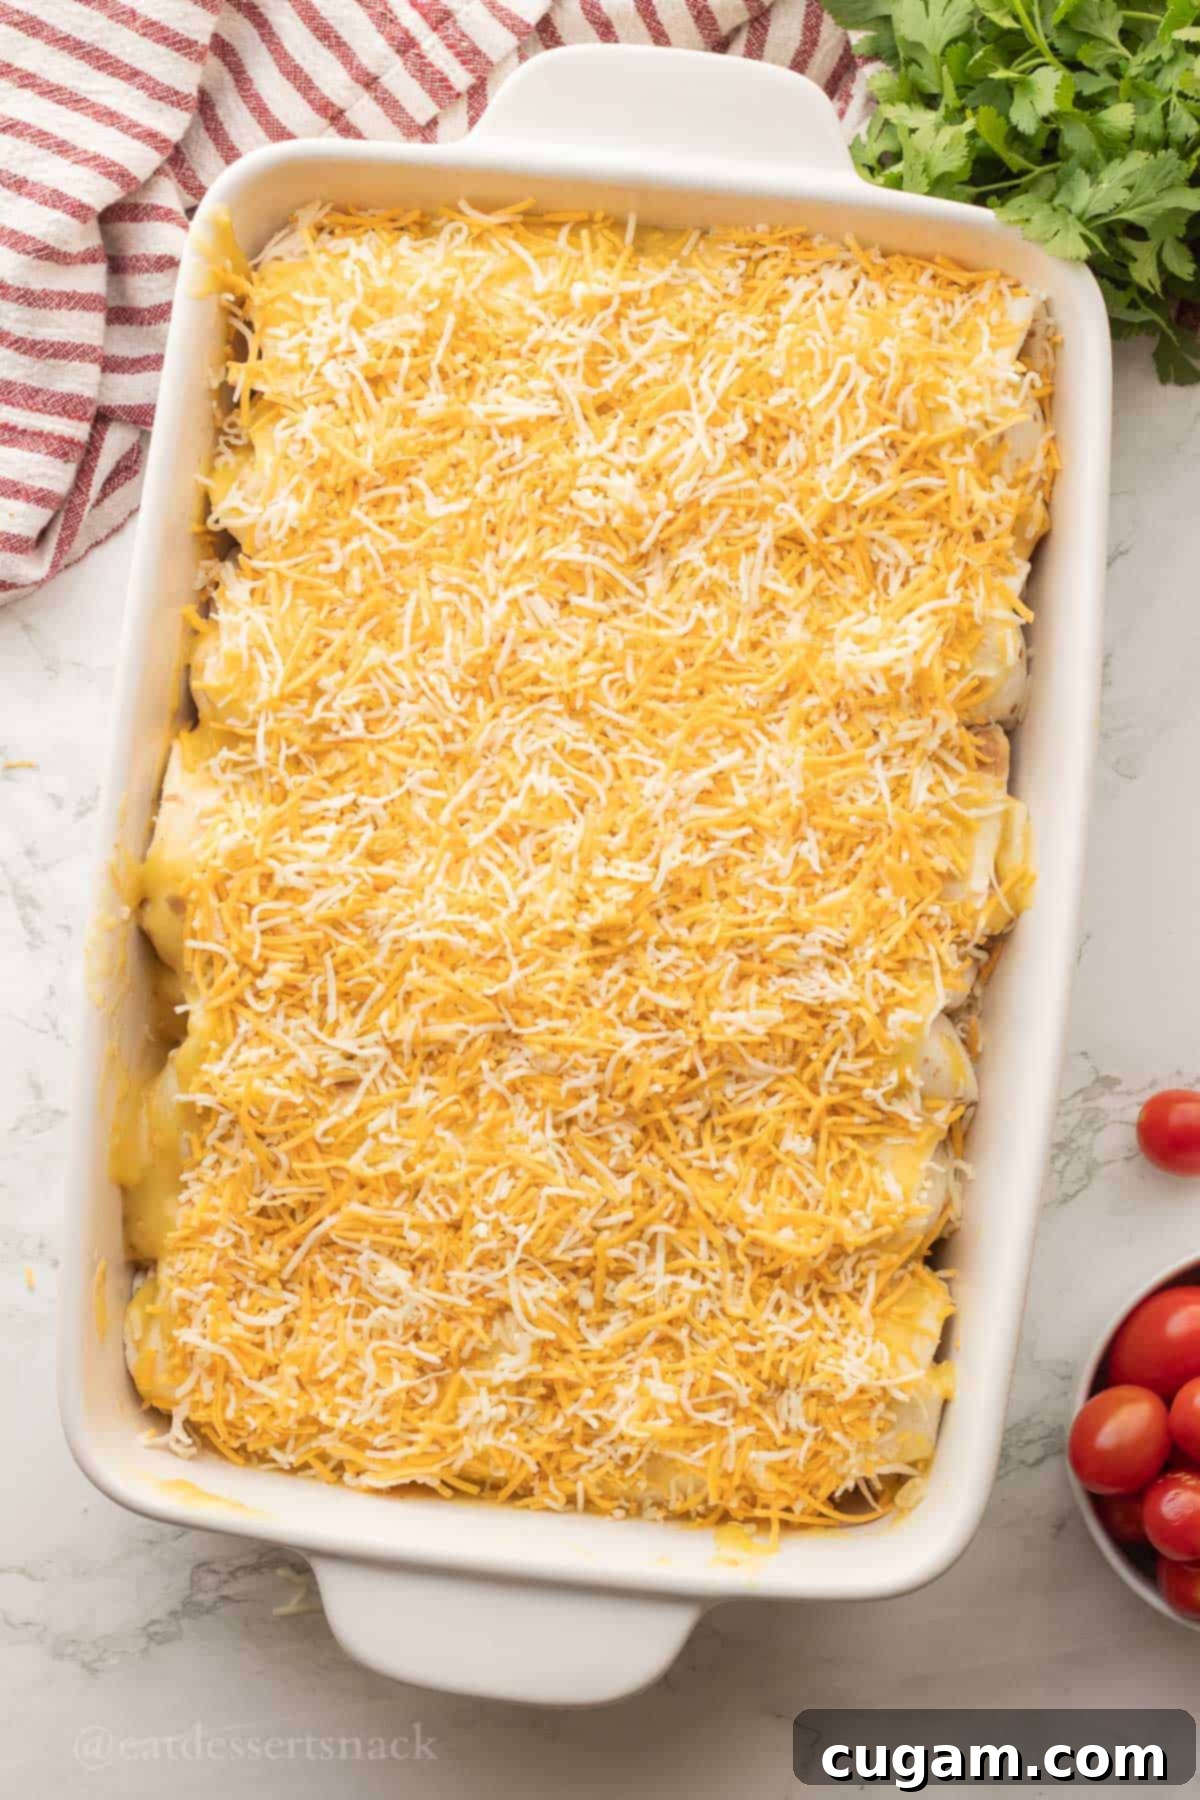
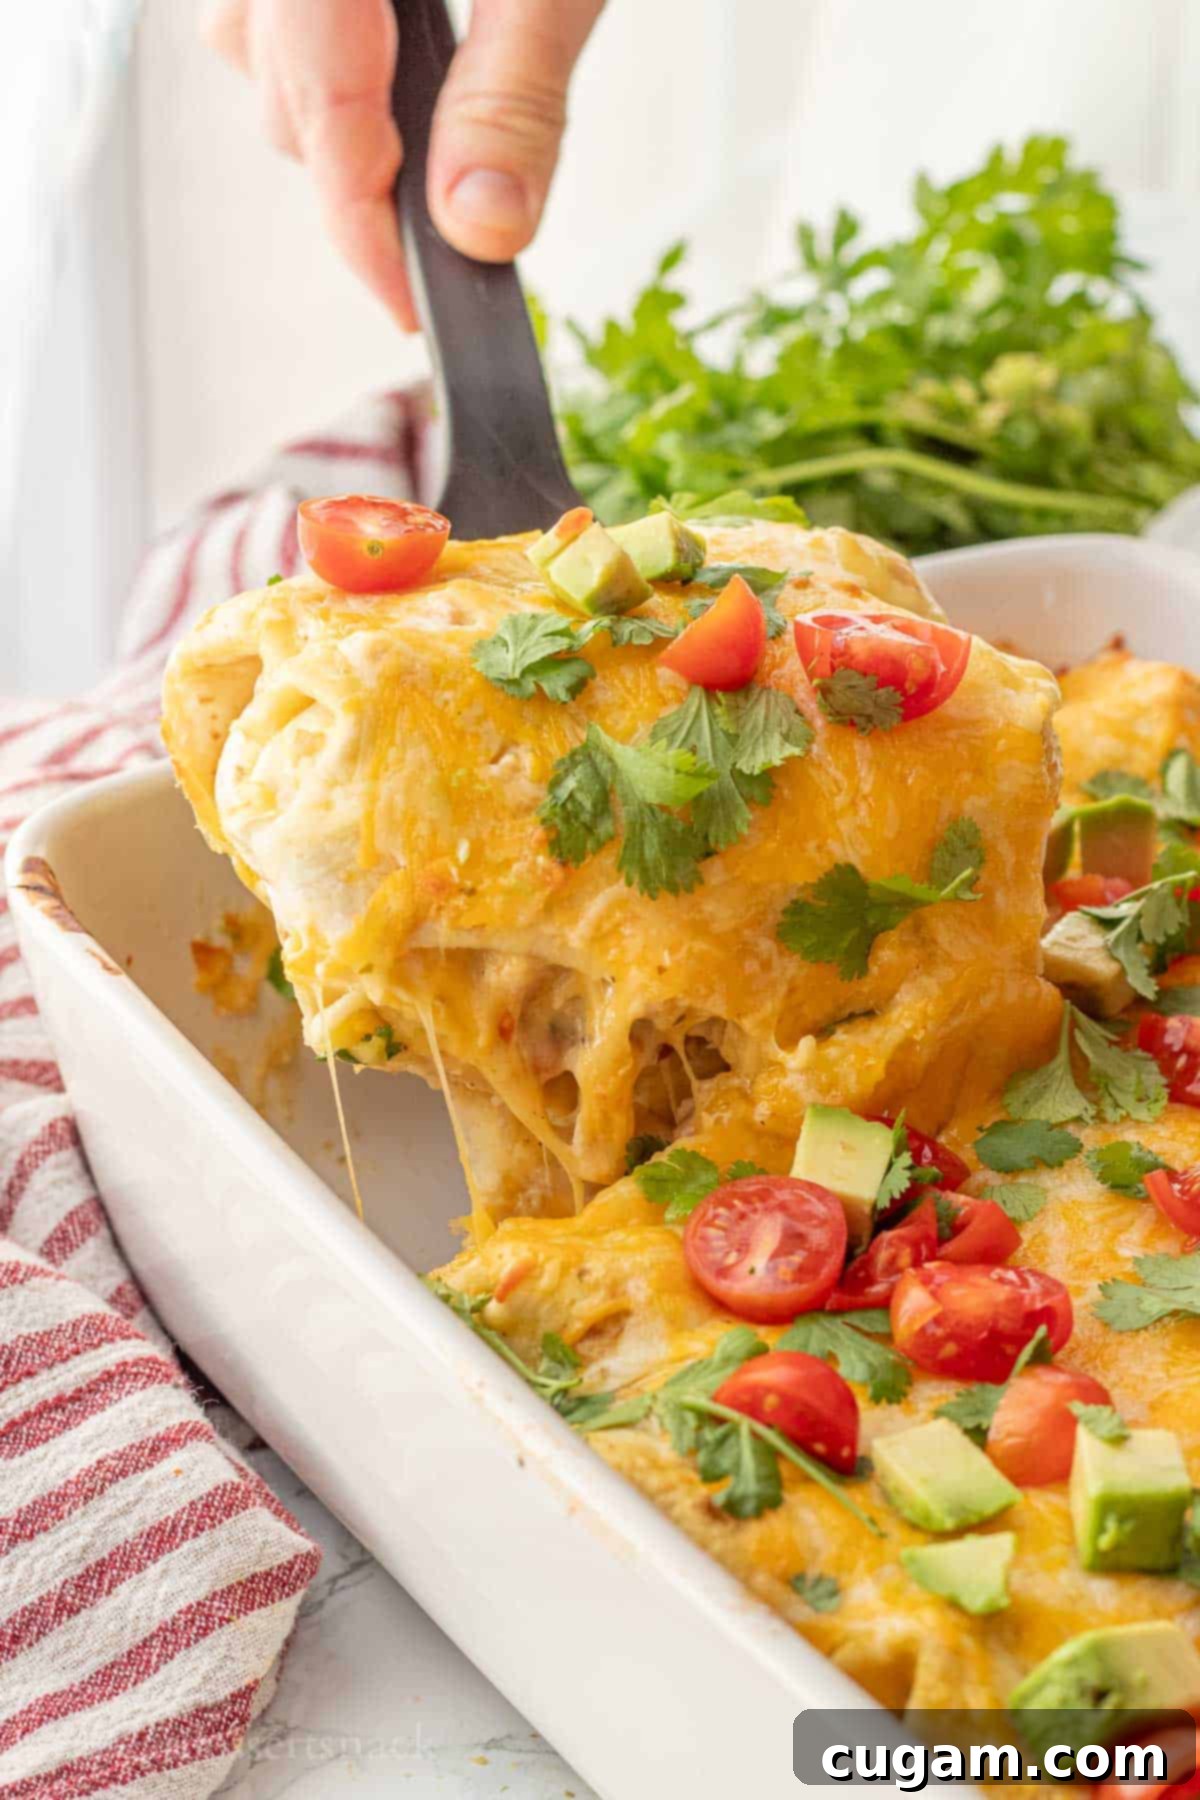
Once assembled and topped, transfer your pan of enchiladas to the preheated oven. Bake for approximately 30 minutes, or until the enchiladas are thoroughly heated through, the sauce is bubbly, and the cheese on top has melted into a glorious, golden, and irresistible layer. The aroma filling your kitchen will be your cue! Serve these magnificent enchiladas hot, straight from the oven. They are absolutely divine on their own, but truly shine when accompanied by a medley of fresh toppings and satisfying side dishes. Consider a generous dollop of cool sour cream, a sprinkle of vibrant diced tomatoes, fresh cilantro, or creamy, easy 4-ingredient guacamole. Chopped green onions add a nice bite, while a side of savory Instant Pot black beans or fragrant brown cilantro lime rice completes the meal. Customize with any of your favorite Tex-Mex accompaniments!
📌 Common Mistakes & Troubleshooting for Perfect Enchiladas
Even seasoned home cooks can encounter small hiccups when making enchiladas. Here are some common issues and how to easily resolve them for flawless results:
- Tortillas Breaking During Rolling:
- This is a common frustration, often caused by cold or dry tortillas. The simple solution is to warm them up before filling and rolling. Stack your tortillas (in their original packaging or wrapped in a damp paper towel) and microwave them for 30-45 seconds. This makes them pliable and prevents frustrating cracks and tears, ensuring a smooth rolling process.
- Soggy Enchiladas:
- No one wants a mushy enchilada! Soggy results can stem from several factors. First, be mindful not to over-sauce the enchiladas before baking; a generous but not excessive layer is ideal. Secondly, ensure your oven is fully preheated to the correct temperature before placing the dish inside. A hot oven helps the tortillas firm up and prevents them from absorbing too much moisture. Lastly, if using corn tortillas, a quick dip in warm oil before filling can create a barrier against sogginess.
- Bland Flavor Profile:
- If your enchiladas taste a bit lackluster, it’s usually an easy fix. The key is to taste as you go! Always sample your filling and sauce before assembling and baking. This allows you to adjust seasonings—adding more garlic powder, onion powder, salt, pepper, or cumin—until the flavor truly sings. Don’t be afraid to add a pinch more bouillon or a dash of hot sauce if you feel it needs a boost.
🍽️ Serving Suggestions for Your Green Chile Chicken Enchiladas
To complete your Green Chile Chicken Enchilada experience, consider these delectable serving suggestions:
Perfect Side Dishes
- Flavorful Rice: A classic pairing, our vibrant Mexican cilantro lime rice offers a light, zesty contrast. The freshness of cilantro and a hint of lime cut through the richness of the enchiladas beautifully.
- Hearty Beans: Complement your meal with creamy refried beans or our easy-to-make homemade Instant Pot black beans. Both add a satisfying, earthy depth and extra protein to your plate.
- Fresh Green Salad: For a lighter touch, a crisp green salad with a light vinaigrette provides a refreshing balance and adds a delightful crunch to the meal.
Irresistible Toppings
No enchilada is complete without a generous array of fresh toppings! These add layers of texture and flavor, allowing everyone to customize their plate:
- Fresh Cilantro: A scattering of freshly chopped cilantro brightens the dish with its herbaceous notes.
- Green Onions: Sliced green onions provide a mild, piquant crunch.
- Creamy Avocado: Cubed or sliced avocado, or a dollop of our quick 4-ingredient guacamole, adds a cool, buttery richness.
- Diced Tomatoes: Freshly diced tomatoes introduce a burst of juicy sweetness and color.
- Sour Cream or Greek Yogurt: A generous dollop of cool sour cream or plain Greek yogurt offers a creamy, tangy counterpoint to the chile heat.
- Hot Sauce: For those who crave extra heat, a drizzle of your favorite hot sauce is always welcome.
Refreshing Beverages
- Zesty Limeade: A tall glass of cold Brazilian Limeade provides a sweet and tart refreshment that cuts through the richness of the enchiladas.
- Agua Fresca: Opt for a traditional Mexican agua fresca, perhaps hibiscus (Jamaica) or cantaloupe, for a light and natural fruity pairing.
❓Frequently Asked Questions About Green Chile Chicken Enchiladas
Absolutely! While our recipe highlights the superior flavor of salsa verde, you can certainly use a good quality store-bought green chile enchilada sauce as a convenient alternative. When selecting a brand, try to find one that prioritizes authentic ingredients for the best possible flavor. Keep in mind that salsa verde generally offers a tangier, fresher profile compared to most canned enchilada sauces, which can sometimes be a bit milder in zest.
The primary difference lies in their main ingredients and flavor profiles. Traditional green chile sauce typically features roasted green chiles (like Hatch chiles) as its base, giving it a deeper, often smoky flavor with varying levels of heat. Salsa verde, on the other hand, is predominantly made with fresh or roasted tomatillos, along with cilantro, onions, and sometimes jalapeños, resulting in a distinctly brighter, tangier, and more acidic taste. Both are delicious, but they offer different culinary experiences.
Making these enchiladas gluten-free is quite simple! The most crucial step is to swap out traditional flour tortillas for certified gluten-free corn tortillas. Additionally, always double-check the labels of all other ingredients, especially the cream of chicken soup and chicken bouillon, to ensure they are explicitly marked as gluten-free. Many brands offer gluten-free versions of these common pantry staples.
Yes, these green chile chicken enchiladas are perfect for meal prepping! You can fully assemble them (without baking) and cover tightly with foil. They can be refrigerated for up to 24 hours before baking. For longer storage, see our detailed freezing instructions in the “Storage & Reheating” section below. Preparing them in advance makes them an ideal choice for entertaining or busy weeknights.
❄️ Storage & Reheating for Fresh-Tasting Enchiladas
These Green Chile Chicken Enchiladas are just as delicious the next day, and they freeze beautifully too, making them perfect for meal prep or future busy evenings.
Refrigeration: Any leftover baked enchiladas should be stored promptly in an airtight container. They will keep well in the refrigerator for up to 3-4 days. For best results, allow them to cool completely before transferring to storage.
Freezing: For a convenient make-ahead meal, you can freeze these enchiladas either baked or unbaked. To freeze unbaked enchiladas: assemble them in a foil-lined disposable 9×13-inch baking pan (this makes for easy transfer and less cleanup). Wrap the pan tightly with multiple layers of plastic wrap, then seal with heavy-duty aluminum foil. They can be safely stored in the freezer for up to 3 months. To freeze baked enchiladas: let them cool completely, then slice into individual portions or leave whole. Wrap tightly and freeze for up to 2 months. Label with the date!
Reheating:
- From Refrigerator (Baked): Reheat individual portions in the microwave for 1-2 minutes until warmed through, or place the entire pan (covered with foil) in an oven preheated to 350°F (175°C) for 15-20 minutes, or until bubbling and hot.
- From Frozen (Unbaked): If baking from frozen, remove the plastic wrap but keep the foil cover on. Bake at 350°F (175°C) for approximately 1 hour, then remove the foil and bake for another 15-30 minutes, or until heated through and the cheese is melted and bubbly. Alternatively, thaw them overnight in the refrigerator first, then bake as directed for fresh enchiladas.
- From Frozen (Baked): Thaw overnight in the refrigerator, then reheat as described for refrigerated baked enchiladas. You can also reheat directly from frozen in the oven at 350°F (175°C) for 30-45 minutes (covered), then uncovered for another 10-15 minutes.
🍗 More Delicious Chicken Recipes You’ll Love
- Creamy Italian Crock Pot Chicken
- Chicken Roll Ups
- Lemon Chicken Gnocchi
- Bone Broth Chicken Noodle Soup
Did you try this recipe? Make sure to leave a ⭐️ star rating and a comment below the recipe card, I love hearing from you, and it is so helpful to other readers.
📲 FOLLOW Sara on Social! 👋 Facebook, Instagram, or Pinterest to see the latest from the kitchen!
📝 Printable Recipe
Hatch Green Chile Chicken Enchiladas
Pin Recipe
Equipment
-
1 Large frying pan
-
1 9×13 inch pan
Ingredients
- 1½ lb chicken
- 1 green bell pepper
- ½ medium yellow onion
- ½ teaspoon salt
- ½ teaspoon pepper
- ½ teaspoon garlic powder
- ½ teaspoon onion powder
- 1 teaspoon cumin
- 1 teaspoon chicken bouillon
- 1 (10.5 oz) can condensed cream of chicken soup
- 8 oz salsa verde
- 1 (15 oz) can navy beans
- 4 oz cream cheese
- ½ cup (4 oz) Hatch green chiles (mild or hot, can be canned)
- 3 cups shredded cheddar cheese
Instructions
-
Preheat oven to 350 ℉.
Dice the chicken, bell pepper, and onion. Smaller chicken pieces (½ inch cubes) is best.
-
Heat a large frying pan or pot over high heat with 1 Tablespoon olive oil. Add chicken, peppers, and onions,
-
Add all seasonings to the chicken: salt & pepper, garlic & onion powder, cumin, and chicken bouillon. Saute 5-7 minutes, until everything is cooked and peppers/onions are semisoft.
-
In a small bowl mix together salsa verde and cream of chicken soup.
-
To the chicken add in beans, cream cheese, green chiles, and HALF the salsa verde mixture. Save the rest for the top of the enchiladas.
-
Spread out 4 tortillas at a time, and sprinkle 2ish Tablespoons cheese into each, followed by ⅓ cup of enchilada filling.
-
Roll up tortillas (sides first, then from one end to the other so they are short and fat) and line up into a foil lined (9x13inch) pan side by side in two rows of six. Spread remaining salsa verde mixture over the tops of the enchiladas, and top with 1 cup shredded cheese or more if you like.
-
Bake for 30 minutes, until heated through and cheese is melted.
Notes
Bake from frozen for 2 hours at 350 ℉ or thaw completely and bake for 1 hour until heated through.
Nutrition

Hi there, I’m Sara!
Registered Nurse by day, food blogger by weekend. Perfect dip tester & snack quester. I love short walks on the beach and long naps. Sharing my love for food, one bite at a time.
