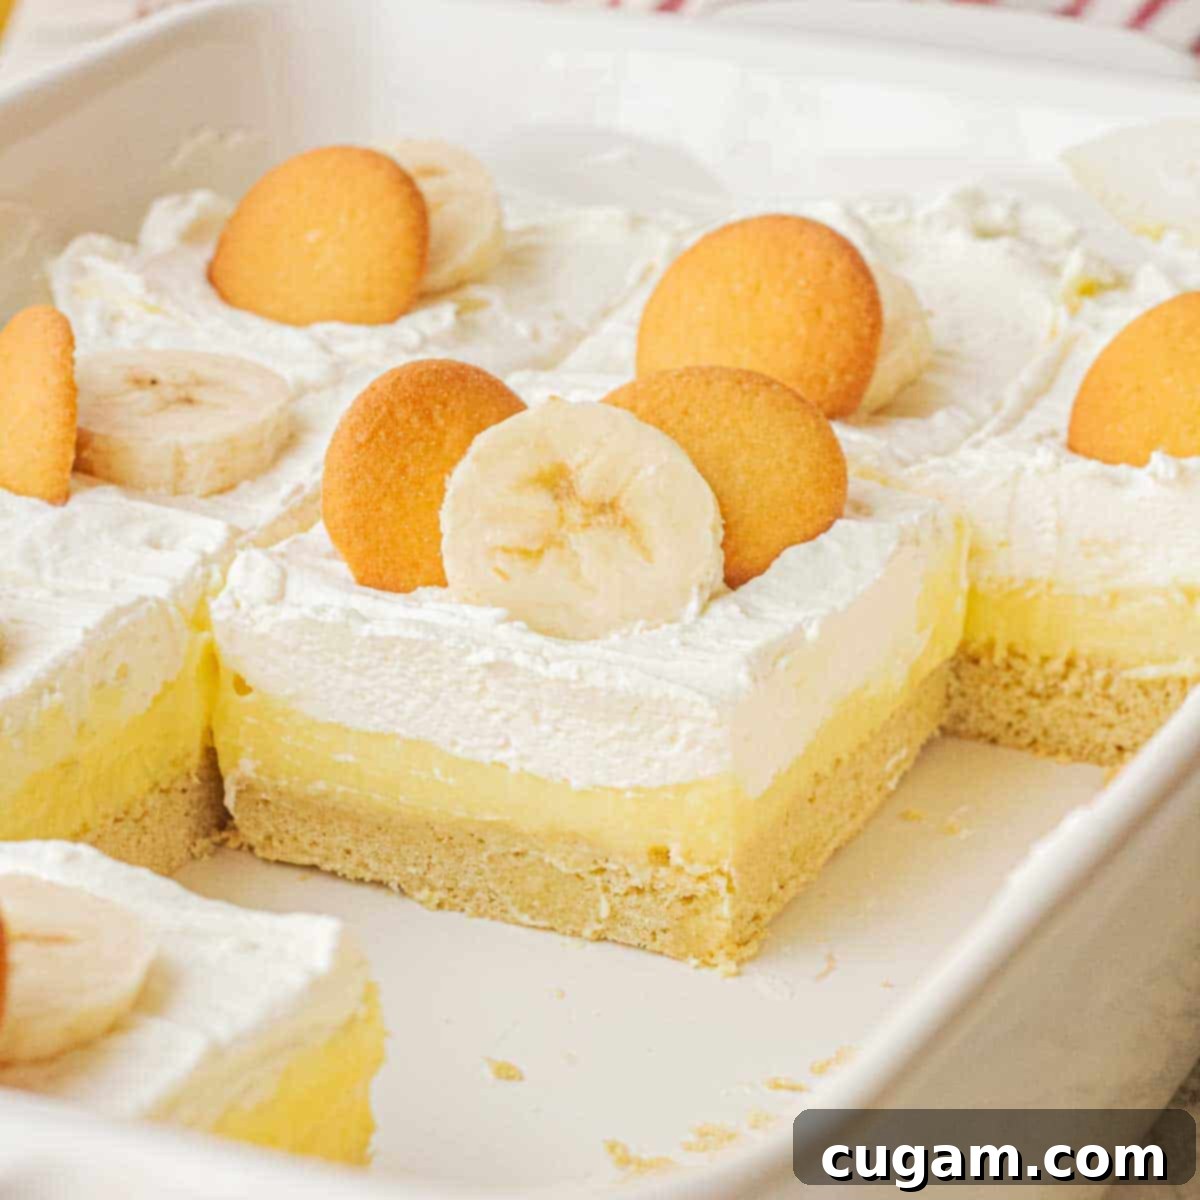
Easy & Irresistible Homemade Banana Pudding Bars with Cream Cheese Topping
Get ready to indulge in the ultimate comfort dessert: these amazing Banana Pudding Bars! This recipe masterfully transforms the beloved classic banana pudding into a convenient, crowd-pleasing bar format, making it perfect for any gathering or a delightful treat for your family. Each bar features three distinct, delectable layers: a soft, chewy sugar cookie crust, a rich and creamy banana pudding center, and a luscious, airy whipped cream cheese topping. The combination of textures and flavors creates a truly unforgettable dessert experience that’s surprisingly simple to prepare, even for novice bakers.
While my cherished baked banana cream pie remains a festive favorite for holidays and special occasions, these banana cream bars offer a quicker and equally satisfying alternative. The base of these bars is a unique cookie-like crust, a delightful departure from traditional pie crusts, offering a softer and more yielding texture. It’s quite similar to the crust I use for my popular Easy Raspberry Cream Cheese Bars, and here’s a secret – it actually gets even softer and more delicious when prepared a day in advance! This makes it an ideal dessert for make-ahead planning, significantly easing your entertaining stress.
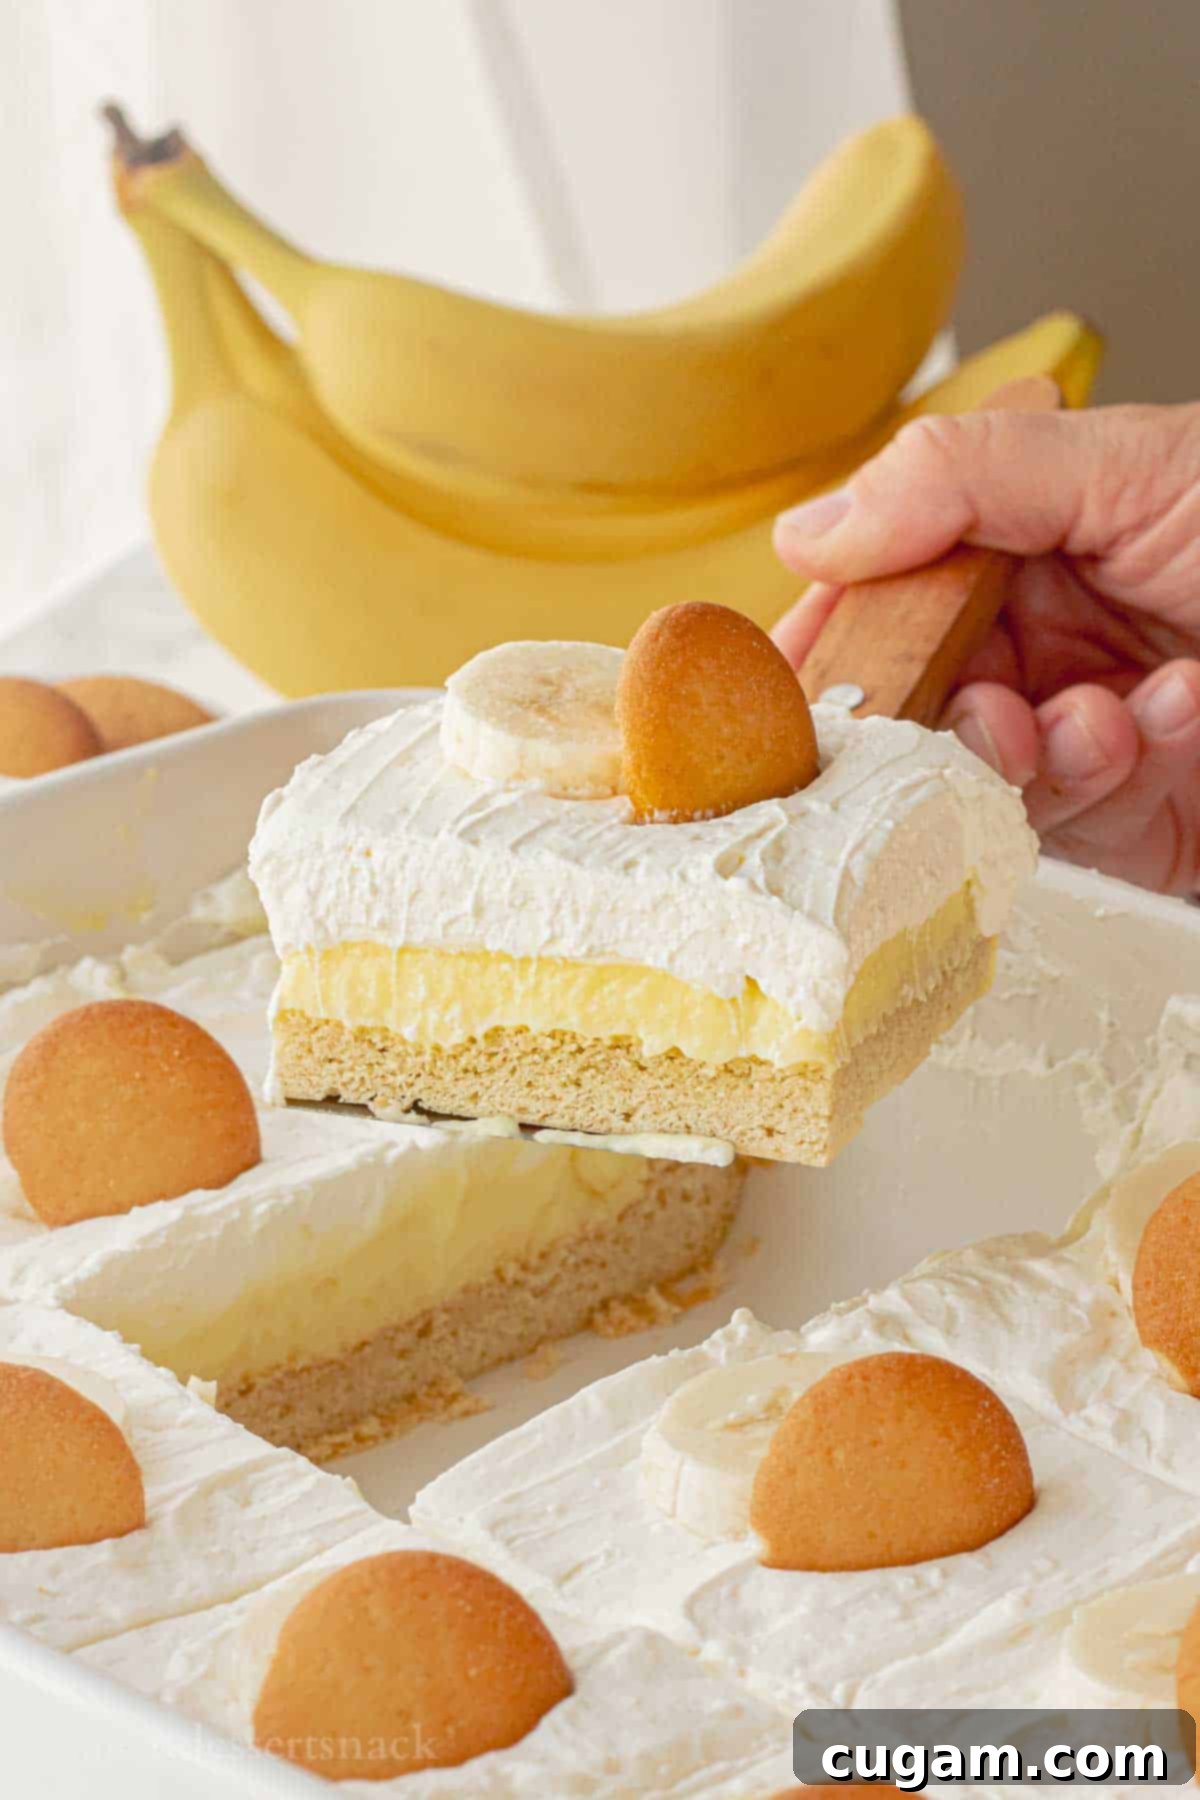
Through various experiments with different pan sizes over the years, I’ve discovered that a standard 9×13-inch cake pan yields the most superior results for these banana pudding bars. This size allows for generous, thick layers of the creamy banana pudding, ensuring every bite is packed with flavor and proper structure. The delightful texture of these banana cream squares primarily stems from that luxurious, smooth banana pudding middle layer and the light, fluffy whipped topping. However, I must confess, the soft, slightly chewy sugar cookie crust on the bottom is one of my personal favorite elements, providing a wonderful contrast that completes this exceptional dessert.
These banana pudding bars are more than just a dessert; they are a delightful experience for your palate. Each ingredient and layer contributes harmoniously to create a nostalgic yet fresh take on a beloved classic. Whether you’re hosting a party, bringing a dish to a potluck, or simply craving a sweet escape at home, these bars are guaranteed to impress. Their straightforward preparation, incredible flavor profile, and appealing presentation make them a consistent winner. So, gather your ingredients and prepare to dive into this fantastic recipe – it might just become your new favorite banana dessert!
What to Expect from This Delicious Banana Pudding Bars Recipe
Before you begin your baking adventure, here’s a concise overview of what you can anticipate when making and savoring these delightful homemade banana pudding bars:
- Ease of Preparation: This recipe is crafted to be straightforward and approachable for most home bakers. While it involves creating three distinct layers – the sugar cookie crust, the banana pudding filling, and the whipped cream cheese topping – each step is relatively simple. I confidently rate this recipe as suitable for beginner to mid-level bakers. You won’t encounter any overly complicated techniques, just simple mixing, a quick bake for the crust, and essential chilling time.
- Unforgettable Taste Experience: Imagine the comforting, rich flavors of classic banana cream pie, reimagined and enhanced in an easy-to-serve bar format. These are truly a triple-layered banana dessert, delivering a magnificent blend of flavors and textures in every mouthful. You’ll enjoy the sweet, slightly caramelized notes and chewy texture of the cookie-like crust, followed by the creamy, deeply banana-flavored pudding, all finished with a light, tangy, and fluffy cream cheese topping. It’s a perfectly balanced and incredibly satisfying dessert that hits all the right notes.
- Time Commitment: From your initial preparation to the moment you take your first bite, the total time required is just over an hour. The most significant portion of this is passive chilling time, as the baked crust needs to cool completely, which typically takes about 30-40 minutes in the refrigerator or freezer. This cooling step is absolutely critical to prevent your pudding and topping layers from melting. The excellent news is that these banana pudding bars are exceptionally well-suited for preparing in advance, even the night before, making them an ideal choice for parties, potlucks, or when you have a busy schedule ahead.
🛒 Essential Ingredients for Your Delicious Banana Pudding Bars
Creating the perfect batch of banana pudding bars starts with understanding the role of each high-quality ingredient. Here’s a detailed look at what you’ll need and why each component is vital for achieving that irresistible flavor and ideal texture:
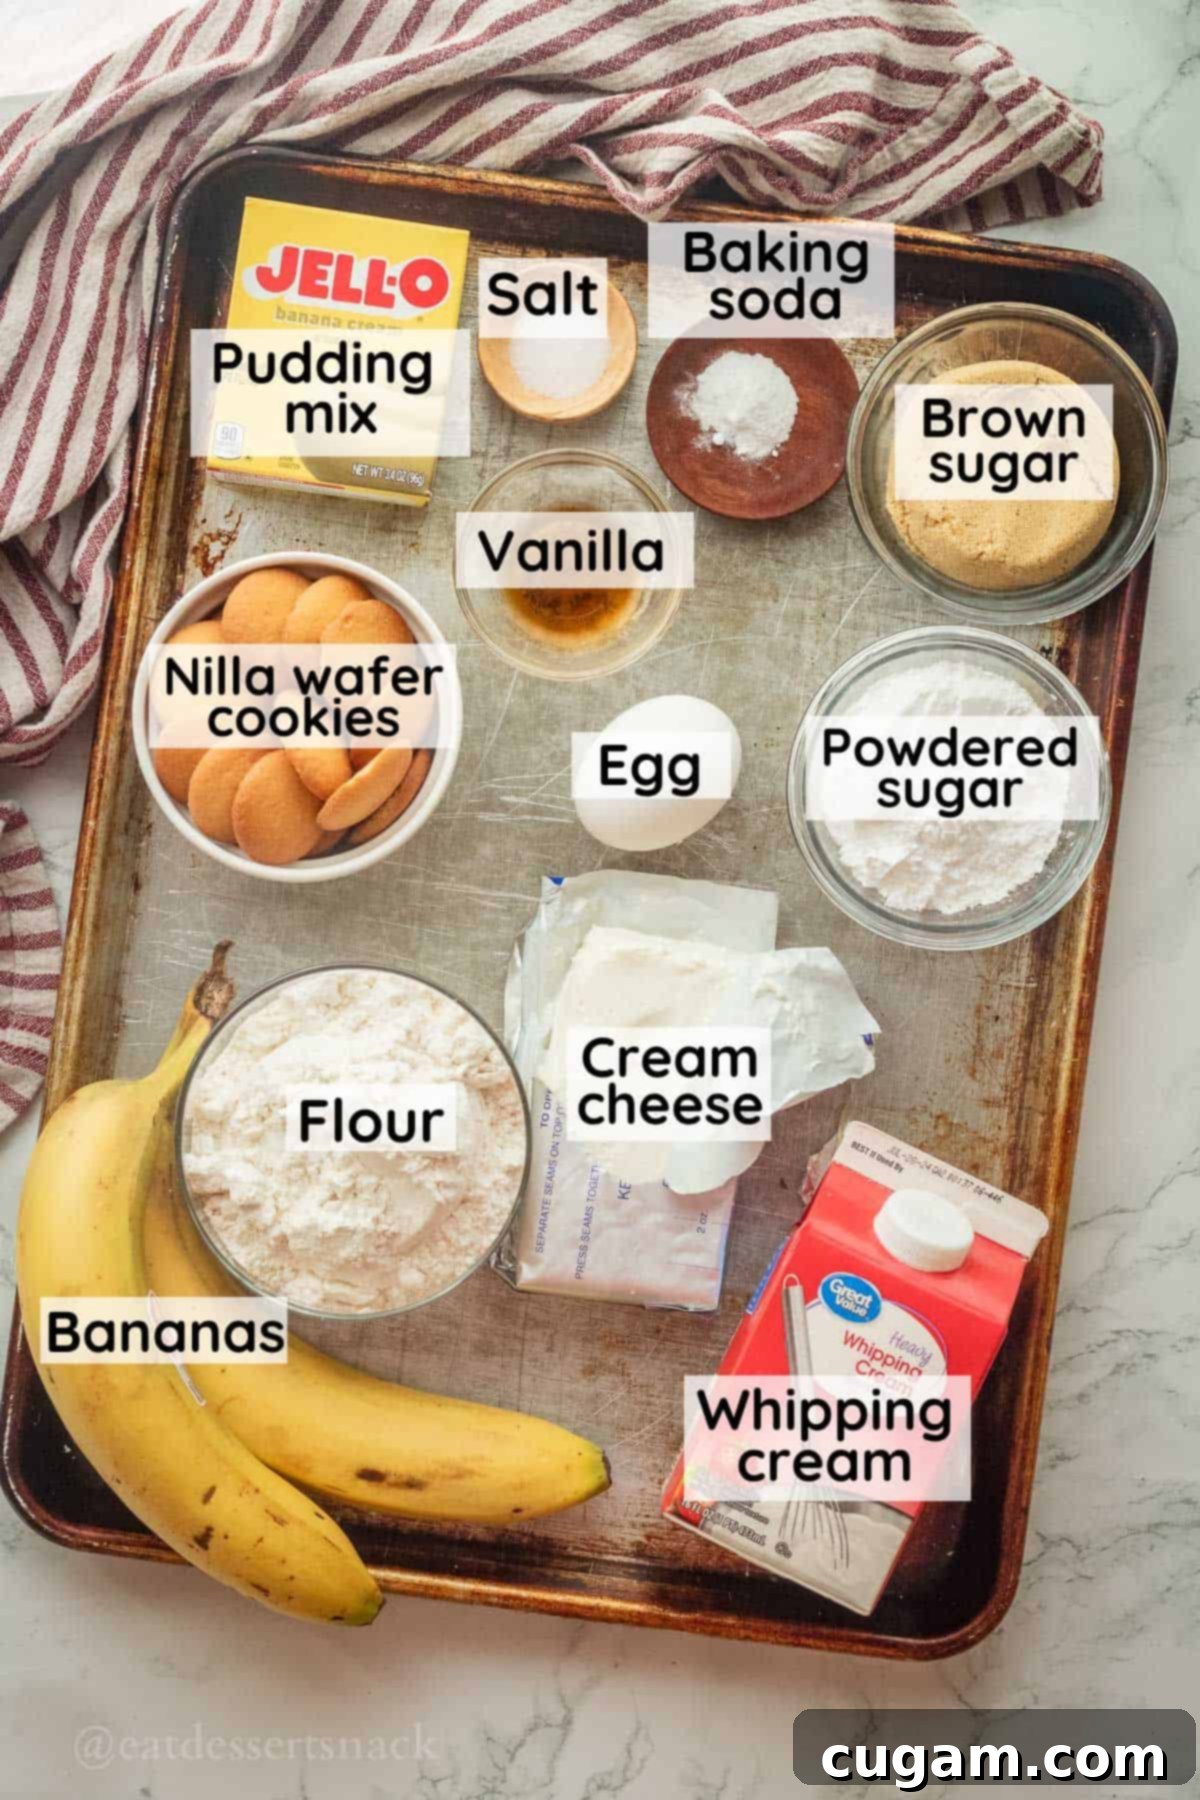
- Sugars (Brown & Powdered): This recipe utilizes two types of sugar, each playing a crucial role. Brown sugar is essential for the cookie crust, imparting a moist, chewy texture and a lovely, subtle molasses flavor that beautifully complements the banana. Powdered sugar (also known as confectioners’ sugar) is used in the whipped cream cheese topping. Its fine consistency ensures a smooth, lump-free topping and a delicate sweetness that isn’t overpowering.
- Instant Banana Cream Pudding Mix: This is the hero of your creamy middle layer. It is absolutely vital to use instant banana cream pudding mix. Instant pudding is specifically formulated to set quickly and firmly when whisked with cold milk, which is paramount for the bars to maintain their structure and be easily sliceable. Do not substitute with “cook-and-serve” pudding, as it will not achieve the required thickness and stability for this bar recipe.
- Cream Cheese: Incorporated into the whipped topping, cream cheese serves multiple purposes. It adds a delightful tangy flavor that cuts through the sweetness, and, importantly, it helps stabilize the whipped cream, preventing it from losing its fluffiness or “weeping.” For the richest flavor and best texture, I recommend using full-fat or ⅓ fat cream cheese. While fat-free cream cheese can be used for a lighter version, be aware that it might result in a slightly less robust flavor and a different texture. Ensure your cream cheese is at room temperature before mixing to achieve a perfectly smooth, lump-free consistency.
- Heavy Whipping Cream: This ingredient is combined with the cream cheese to create the star of the topping: a light, airy, and incredibly fluffy whipped cream. The blend of cream cheese and heavy cream results in a topping that tastes remarkably similar to a banana cream cheesecake – a truly divine element! For optimal whipping and maximum volume, always ensure your heavy cream is thoroughly chilled before use.
- Vanilla Wafer Cookies (Optional, but Highly Recommended): While not strictly a structural component, vanilla wafer cookies are a time-honored accompaniment to banana pudding and add an extra layer of flavor and a pleasing textural contrast. I love to place a whole vanilla wafer on top of each individual slice of the banana cream dessert just before serving for that iconic look and a delightful crunch. Alternatively, you can crush them and sprinkle them over the top for a crumbly garnish.
- Fresh Bananas: Ripe, but firm (not overly soft or bruised) bananas are indispensable for the fresh fruit topping. To prevent unsightly browning and keep your bars looking their best, always slice and arrange the fresh bananas just before you are ready to serve the dessert. Their natural sweetness and soft texture provide the perfect fresh finishing touch.
For a comprehensive list of all ingredients and their precise quantities, please refer to the detailed recipe card conveniently located further down on this page.
✏️ Creative Substitutions & Exciting Variations for Your Banana Pudding Bars
One of the most enjoyable aspects of home baking is the freedom to customize recipes to suit your preferences, and these banana pudding bars are exceptionally versatile! Here are some fantastic ideas to help you put your unique spin on this delightful dessert:
- Crust Alternatives to the Sugar Cookie Base: If you’re looking for a different kind of base or want to experiment with flavors, the possibilities are vast. Instead of the sugar cookie crust, you could use a press-in crust made from crushed cookies. Graham cracker crumbs make for a classic, sweet pie-crust flavor. For a delightful spiced twist, try using crushed cinnamon cookies or zesty ginger snaps. You could even explore crushed chocolate wafers for a decadent banana-chocolate combination. Simply mix your chosen crushed cookies with a bit of melted butter (usually about 4-6 tablespoons per 1 ½ cups of crumbs) and press into the pan before chilling or baking lightly, depending on the cookie type.
- Cool Whip for the Whipped Cream Topping: For those seeking a shortcut or preferring a lighter topping, many bakers successfully substitute the homemade whipped cream cheese topping with Cool Whip. If you choose this option, ensure the Cool Whip is fully thawed according to the package directions before spreading. To retain some of the tangy depth and added stability of the homemade version, you can gently fold in a few ounces of softened cream cheese (around 2-4 oz) with the thawed Cool Whip before spreading. Otherwise, use it straight from the tub for ultimate convenience.
- Pudding Mix Flavor Adventures: Why limit yourself to just banana pudding? This recipe serves as an excellent foundation for a variety of pudding flavors. Imagine the possibilities: a classic vanilla pudding for a universally loved taste, refreshing coconut pudding for a tropical twist, rich chocolate pudding for the chocoholics, sweet and buttery butterscotch, or even a creamy cheesecake pudding for an extra layer of decadence. Each pudding substitution will impart a unique and exciting profile to your bars, making this recipe endlessly adaptable to your cravings.
- Exciting Add-ins for the Pudding Layer: To introduce additional texture and flavor dimensions, consider gently folding in some finely chopped nuts, such as toasted pecans or walnuts, into the banana pudding layer before you spread it over the crust. A generous sprinkle of mini chocolate chips would also be a wonderfully delicious and popular addition, especially if you’re a fan of chocolate and banana together.
- A Boozy Twist (Adult Version): For an elevated, adult-only dessert, you can introduce a splash of your favorite liqueur. A teaspoon or two of banana liqueur, rum, or even a hint of bourbon can be added to the pudding mix (you may need to slightly reduce the milk amount to compensate) to enhance the overall flavor complexity.
- Diverse Fruit Topping & Garnish Variations: While fresh banana slices are traditional, you can get creative with your garnishes. Consider a luxurious drizzle of warm caramel sauce, a sprinkle of toasted shredded coconut, a dusting of fine cocoa powder for a sophisticated touch, or a medley of other fresh fruits that pair well with banana, such as sliced strawberries or kiwi, for an appealing visual and flavor contrast.
🧑🍳 Step-by-Step Instructions: Crafting Your Perfect Banana Pudding Bars
Follow this detailed, easy-to-understand guide to create your own batch of irresistible banana pudding bars. Paying attention to each step will ensure beautifully layered and perfectly set results!
Before you begin, make sure your oven is preheated to 375°F (190°C). Lightly grease a 9×13-inch baking pan. This simple step is crucial to prevent the cookie crust from sticking and ensures easy removal and slicing of your finished bars.
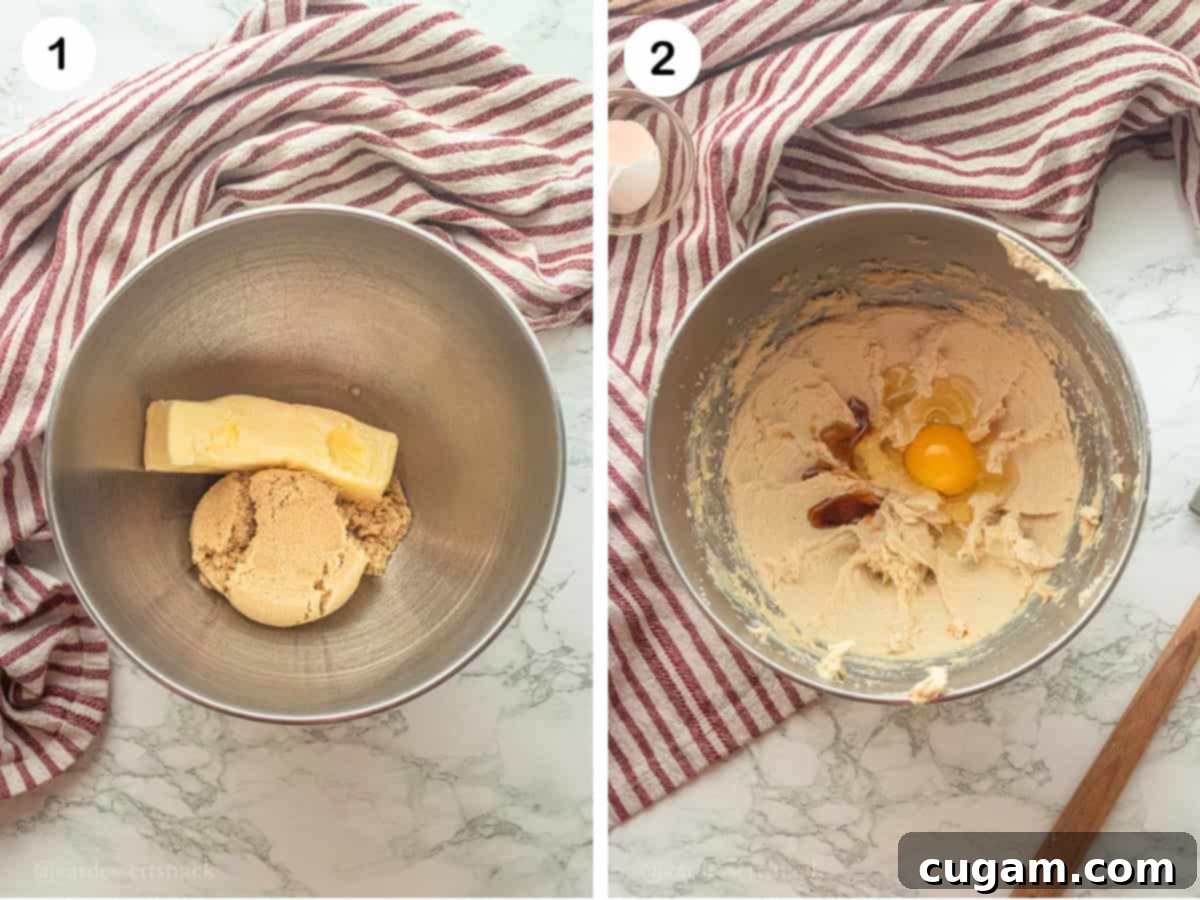
Step 1. (Illustrated Above) Prepare the Creamed Base for the Crust: In the bowl of a stand mixer fitted with a paddle attachment (or using a sturdy hand mixer), combine your room temperature, softened butter and packed brown sugar. Beat them together on medium-high speed for a good 2-3 minutes. You’re looking for a mixture that is light, fluffy, and visibly well-creamed. Don’t forget to pause and scrape down the sides of the bowl with a rubber spatula as needed; this ensures all ingredients are thoroughly incorporated and prevents unmixed patches.
Step 2. (Illustrated Above) Incorporate the Egg and Vanilla: To the fluffy butter and sugar mixture, add the large egg and the vanilla extract. Continue mixing for another minute. It’s important to ensure the egg is fully blended into the mixture and that the consistency remains light and airy. This step adds essential moisture and richness, contributing to the crust’s signature chewy texture.
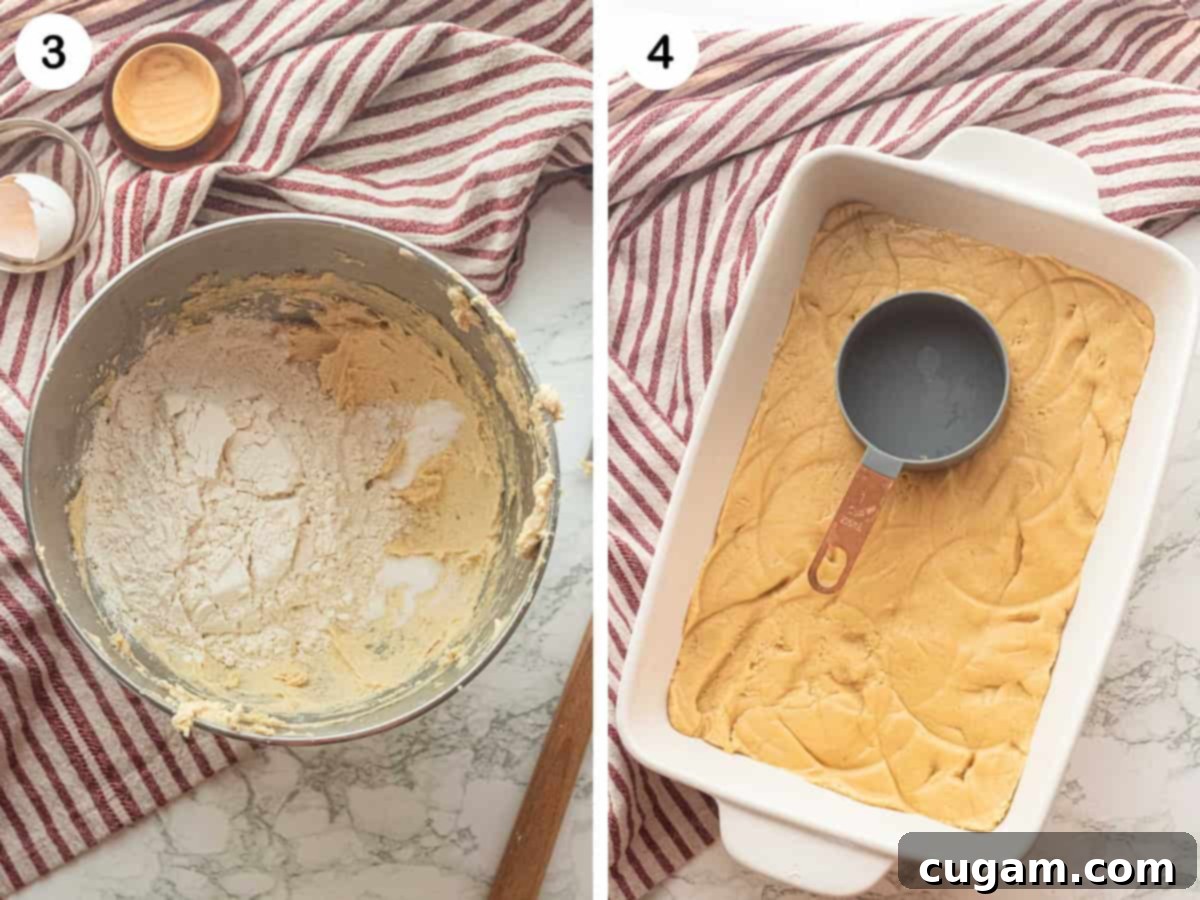
Step 3. (Illustrated Above) Add the Dry Ingredients to the Crust: Gently add the salt, baking soda, and all-purpose flour to your wet mixture. Mix on a low speed until the ingredients are just combined. It’s crucial not to overmix the dough at this stage, as overmixing can lead to a tough crust. Stop as soon as you no longer see any visible pockets of dry flour. The resulting dough will be notably soft and slightly sticky, which is perfectly normal and desired for this recipe.
Step 4. (Illustrated Above) Bake the Cookie Crust: Carefully pat the soft dough evenly into your prepared 9×13-inch baking pan. Use your hands or a flat bottomed measuring cup to gently press it down, ensuring an even layer that reaches all the way to the edges of the pan. Bake in the preheated oven at 375°F (190°C) for 10-12 minutes (if you’re using a thicker ceramic pan, you might need 12-14 minutes). When it’s done, the crust will appear very soft and look somewhat underbaked, much like a giant, soft cookie. This is precisely the desired outcome, as it guarantees a wonderfully chewy and moist base for your bars, preventing it from becoming dry or overly crumbly. Once baked, remove the pan from the oven and let the crust cool completely on a wire rack before you proceed with adding any fillings.
💡 Pro Tip for Speedy Cooling and Efficient Multitasking
Ensuring your crust is completely cool before adding the pudding is a non-negotiable step to prevent the pudding layer from melting or becoming runny. To significantly accelerate this cooling process, once your baked crust is out of the oven, let it sit at room temperature for just a few minutes until it’s no longer piping hot (you don’t want to put a hot pan directly into your fridge or freezer, as it can raise the internal temperature of your appliance and affect other foods). After this initial cooling, transfer the pan to the refrigerator or freezer for about 20-30 minutes. This will quickly firm up the crust and prepare it for the next layers.
This cooling period is also an excellent opportunity for efficient multitasking! While your crust chills, take this time to wash your mixing bowl (if you only have one) and then proceed to prepare both the thick banana pudding filling and the fluffy whipped cream cheese topping. By working on these components simultaneously, you’ll dramatically reduce your overall preparation time, getting you to those delicious banana pudding bars even faster.
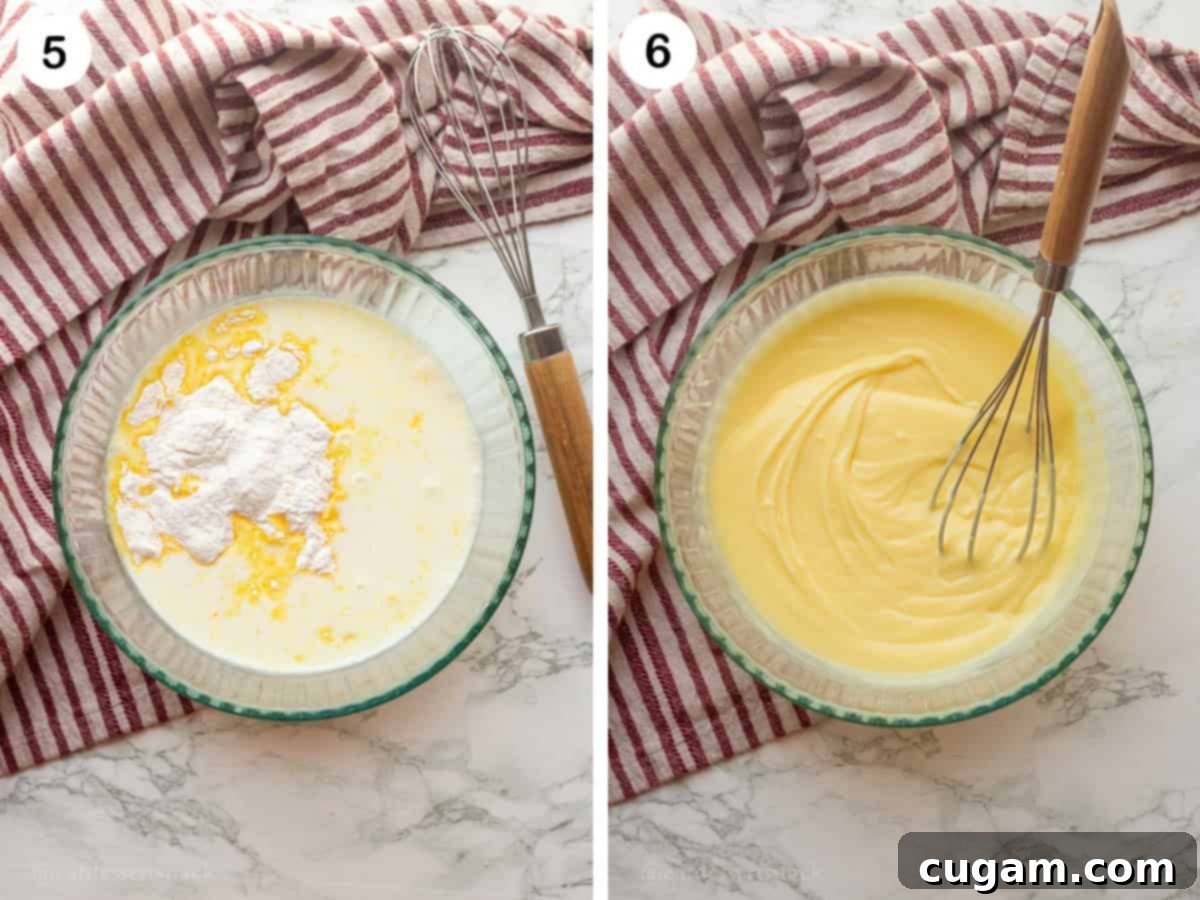
Step 5. (Illustrated Above) Mix the Instant Pudding Filling: In a separate, clean mixing bowl, combine the instant banana pudding mix with the specified amount of cold milk. It is crucial to carefully read the recipe card for the exact milk quantity; this recipe specifically calls for slightly less milk than what is typically recommended on the pudding box. This adjustment is absolutely vital for achieving a much thicker and firmer pudding, which is essential for the bars to hold their shape and slice cleanly.
Step 6. (Illustrated Above) Thicken and Set the Pudding: Vigorously whisk the pudding mix and milk together for a full 2 minutes. You’ll observe the mixture rapidly thickening to an “extra thick” consistency. Once mixed, let the pudding rest briefly while you finalize the cooling of your crust and prepare the delicious whipped cream cheese topping. The pudding will continue to set and firm up as it rests.
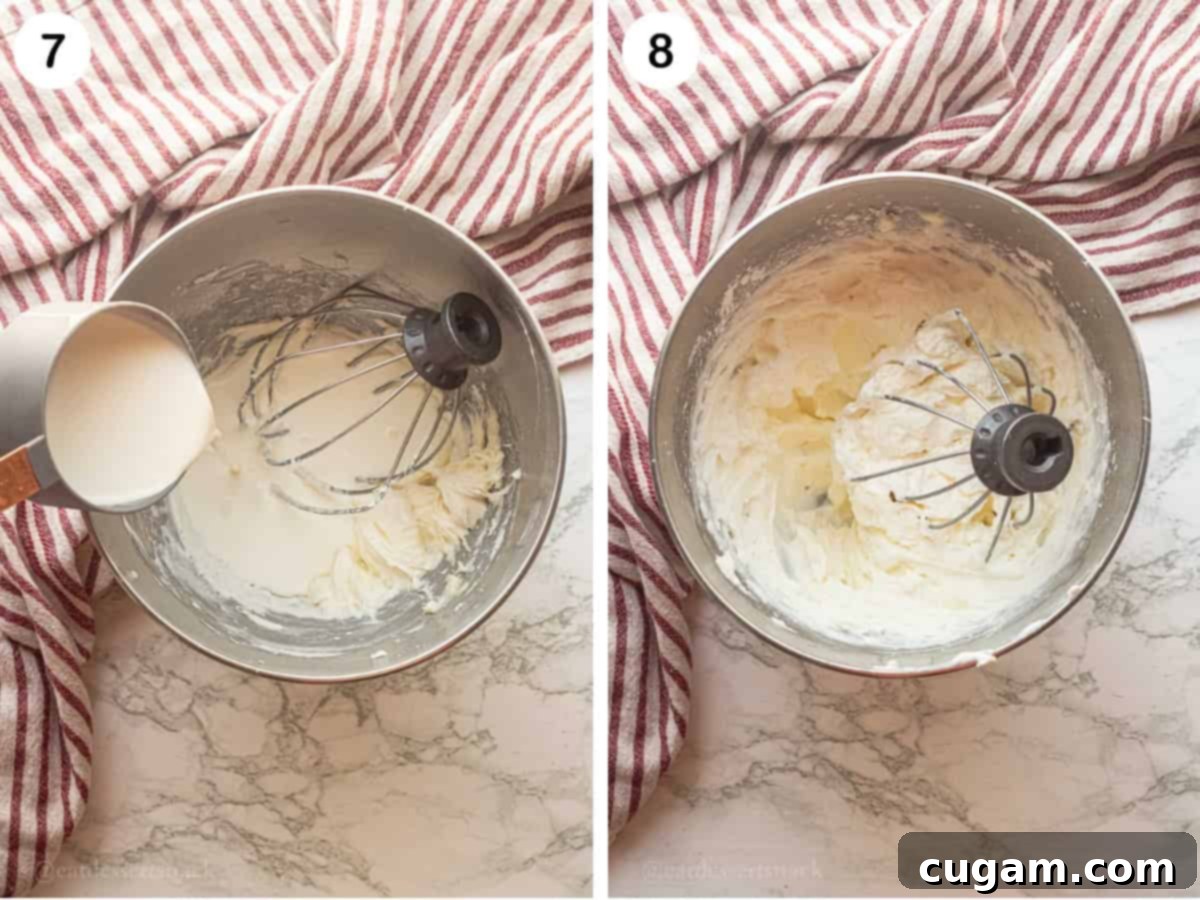
Step 7. (Illustrated Above) Prepare the Cream Cheese Base for the Topping: In yet another clean mixing bowl (or the same one, if you’ve washed it thoroughly), use the whisk attachment of your electric mixer. Cream together the room temperature cream cheese, vanilla extract, and powdered sugar for approximately 3 minutes. Beat until the mixture is beautifully smooth, light, and fluffy, with absolutely no lumps remaining. Following this, add about ½ cup of the cold heavy cream and mix until it is fully incorporated into the cream cheese mixture, creating a smooth and creamy base.
Step 8. (Illustrated Above) Whip to Fluffy Perfection: Continue adding the remaining cold heavy cream, ½ cup at a time, mixing thoroughly between each addition until each portion is fully blended and the mixture is smooth. Once all the heavy cream has been incorporated, increase the mixer speed to high. Whip the mixture for 1-2 minutes until the topping is wonderfully light, airy, and fluffy, forming soft peaks. Be careful not to over-whip, as this can cause the mixture to become grainy.
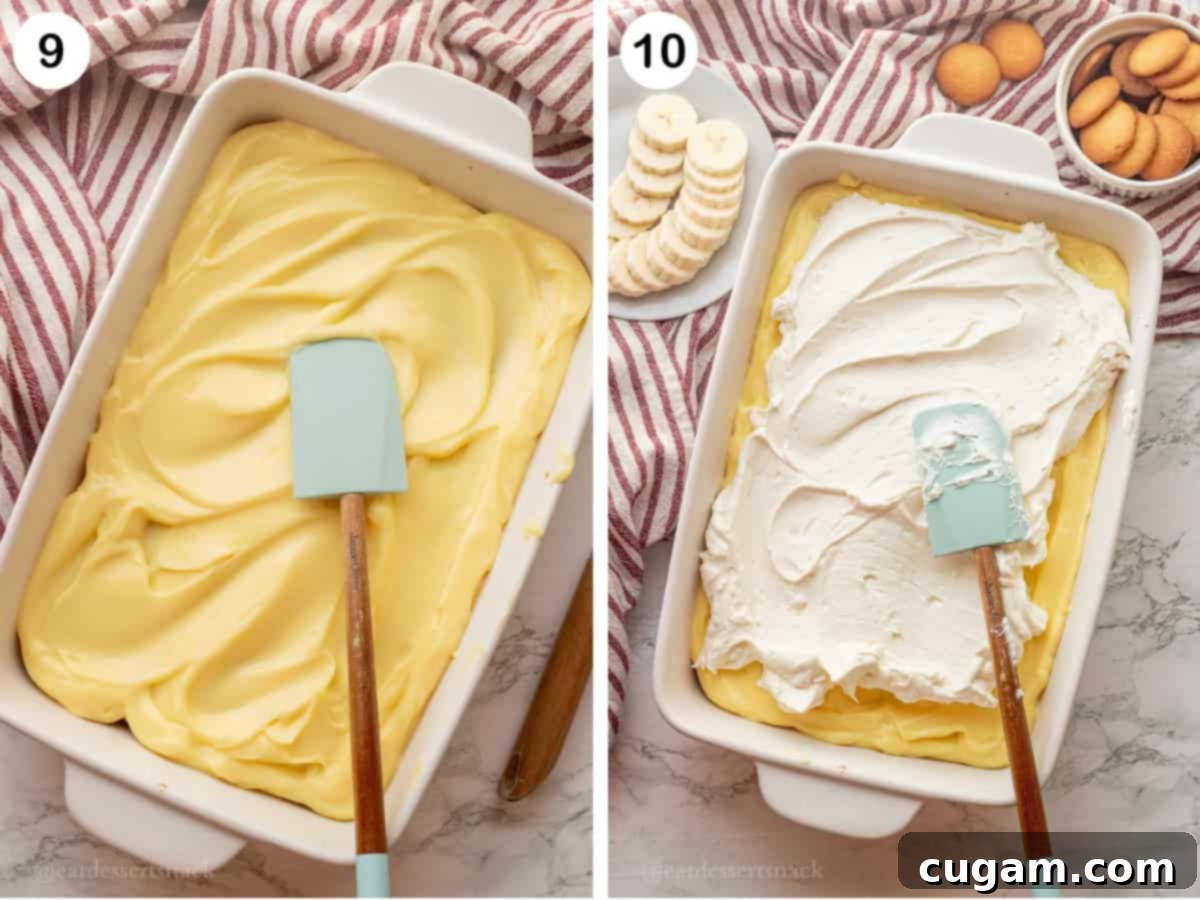
Step 9. (Illustrated Above) Layer the Banana Pudding: Once your cookie crust is completely and thoroughly cooled, spread the thickened banana pudding mix evenly over its surface. It’s best to work relatively quickly here before the pudding sets up too firmly in the bowl. If it has become quite firm, a quick whisk with a fork or spatula can help loosen it up and make it easier to spread smoothly over the crust, ensuring a consistent and even pudding layer.
Step 10. (Illustrated Above) Add the Whipped Topping: Now, carefully spread the fluffy whipped cream cheese topping evenly over the banana pudding layer. Use a gentle hand and a rubber spatula, working slowly to prevent the two layers from mixing together. Aim for a smooth, uniform top. The contrast between the creamy pudding and the light, airy topping is a key element of this dessert’s appeal.
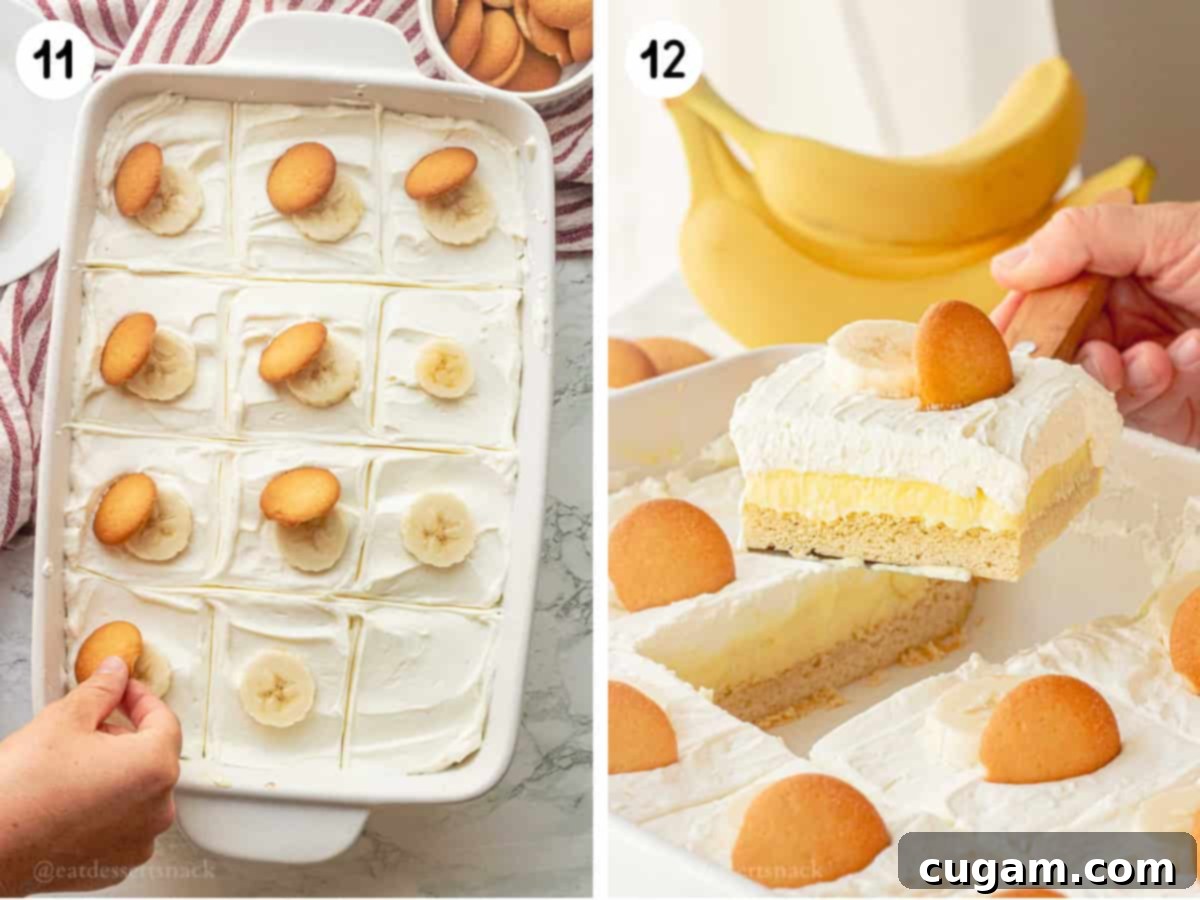
Step 11. (Illustrated Above) Garnish and Decorate: This is where you add the classic finishing touches! Top your banana pudding bars with whole vanilla wafer cookies, freshly sliced bananas, or a sprinkle of crushed graham cracker crumbs. Remember, for the best visual appeal and to prevent browning, it’s always best to add fresh banana slices just before you’re ready to serve the bars.
Step 12. (Illustrated Above) Chill and Serve: Refrigerate the assembled bars for a minimum of 2-4 hours, or even better, overnight. This extended chilling time is absolutely essential for all the layers to set completely and firm up, ensuring clean, neat slices and allowing the flavors to fully meld together. Once thoroughly chilled, slice into your desired portions and serve these magnificent banana pudding bars!
📌 Top Tips for Success: Achieving Perfect Banana Pudding Bars Every Time
While these banana pudding bars are generally easy to make, a few insider tips can truly elevate your results, transforming a good dessert into an absolutely extraordinary one. Keep these crucial points in mind as you prepare your masterpiece:
- Do NOT Over-Bake the Crust! This is paramount for texture. When your sugar cookie crust finishes baking, it will deliberately appear very soft and slightly underbaked in the center. Do not be tempted to bake it longer! This is the key to achieving that wonderfully soft, incredibly chewy, and melt-in-your-mouth cookie-like texture. If you over-bake it, the crust will become dry, hard, and crumbly, losing its delightful characteristic. Trust the recipe’s timing; the aim is a tender, not crispy, base.
- Exclusively Use Cow’s Milk for the Pudding: For the instant pudding layer to achieve its proper, firm set, it is absolutely essential to use traditional cow’s milk (whole milk often yields the creamiest result). DO NOT attempt to substitute with plant-based milk alternatives such as almond milk, soy milk, oat milk, or cashew milk. These alternative milks contain different protein and fat compositions that prevent instant pudding from setting correctly, almost certainly leading to a runny, soupy pudding layer that will not hold its shape in the bars. Stick to dairy for guaranteed success.
- Master the Timing for Fresh Bananas: While adding fresh banana slices to the top is a classic and delicious garnish, it’s vital to add them only right before you are ready to slice and serve the bars. Sliced bananas are highly susceptible to oxidation when exposed to air, which causes them to brown quickly and look unappealing. By adding them at the last possible moment, you ensure they retain their vibrant color and fresh appearance, significantly enhancing the visual appeal of your dessert.
- Cream Cheese Must Be Room Temperature: To achieve a perfectly smooth, lump-free, and silky whipped topping, ensure your cream cheese is at proper room temperature. Cold cream cheese will be difficult to blend, resulting in a topping with undesirable small lumps that won’t spread smoothly.
- Thorough Chilling is Non-Negotiable: Patience truly pays off with layered desserts like this. Allowing the assembled bars to chill for at least 2-4 hours (and ideally overnight) in the refrigerator is absolutely crucial. This extended chilling time gives the pudding ample opportunity to set completely, allows all layers to firm up beautifully, and ensures clean, crisp slices. Trying to cut them too soon will result in messy, unformed bars.
- Achieve Clean Slices: For the neatest, most professional-looking slices, use a sharp, thin knife. After each cut, wipe the blade clean with a warm, damp cloth. This simple trick prevents the layers from dragging and smearing, giving you picture-perfect squares every time.
❓ Frequently Asked Questions About Banana Pudding Bars
Here are answers to some of the most common questions regarding the preparation, serving, and storage of your delightful banana pudding bars:
This recipe is designed to be prepared in a standard 9×13-inch baking pan, making it ideal for feeding a group. You have excellent flexibility in how you portion the bars: you can easily cut them into 12 generous slices, 16 moderate-sized pieces, or even 20 smaller squares, depending on your desired portion sizes and the number of guests you’re serving. It’s a versatile dessert for any crowd!
These banana pudding bars are an excellent make-ahead dessert! You can fully assemble and refrigerate the entire batch 1-2 days in advance without compromising quality. Beyond two days, there’s a slight risk that the cookie crust might start to absorb too much moisture from the pudding and topping, potentially becoming a bit soggy. For the absolute freshest taste and best texture, it’s recommended to enjoy them within 2 days of preparation.
To ensure your banana pudding bars remain fresh, flavorful, and safe to eat, it’s essential to store them correctly. Cover the baking pan tightly with plastic wrap or transfer individual slices to an airtight container. Always keep them refrigerated. They will stay delicious for up to 3 days from the day they are made, including any advance preparation time. Due to the dairy components, never leave them at room temperature for extended periods.
While the homemade whipped cream cheese topping offers a superior, richer flavor and more stable texture, you absolutely can opt for convenience by using Cool Whip as a substitute. If you choose Cool Whip, ensure it is completely thawed according to the package instructions before you spread it over the pudding layer. For a taste closer to the homemade version and added stability, you might consider gently folding in 2-4 ounces of softened cream cheese into the thawed Cool Whip before using it.
Freezing these banana pudding bars is generally not recommended. The dairy-based pudding and whipped cream layers can develop an undesirable icy, watery, or grainy texture upon thawing. Furthermore, fresh banana slices will turn mushy and brown significantly after being frozen and then defrosted. These bars are truly at their best when enjoyed fresh and thoroughly chilled from the refrigerator.
There are a few common reasons why instant pudding might fail to set. The most frequent culprits include: using a plant-based milk (such as almond, soy, or oat milk) instead of traditional cow’s milk (instant pudding requires the specific properties of dairy to set); accidentally using “cook-and-serve” pudding mix instead of “instant”; or not allowing sufficient chilling time in the refrigerator. Ensure your milk is very cold when mixing, whisk for the full recommended time, and grant the assembled bars ample time to firm up in the fridge.
🍌 More Easy & Delicious Banana Recipes You’ll Love
If you’ve fallen in love with the delightful flavor of bananas in these bars, then you’re in for a treat! Here are some other fantastic and easy-to-make banana-infused recipes from my collection that are sure to become new favorites:
- Sourdough Discard Banana Bread
- Banana Bread Cinnamon Rolls
- Baked Banana Pie
- Strawberry Banana Bread
💖 Why You Will Absolutely Adore These Banana Pudding Bars
Beyond their simply delicious taste, these banana pudding bars offer a multitude of reasons why they’re destined to become a cherished and frequently requested recipe in your kitchen:
- Perfect for Any Occasion: Whether it’s a casual family dessert night, an impressive contribution to a potluck, or an elegant treat for a party, these bars seamlessly fit into any event. They are remarkably easy to transport and serve, offering a stress-free dessert option for hosts.
- Nostalgic Comfort, Modern Convenience: They perfectly capture the heartwarming, old-fashioned taste and comforting essence of classic banana pudding, but in a much more practical, less messy, and easily shareable bar form. Say goodbye to individual serving dishes and hello to simple grab-and-go deliciousness!
- A Symphony of Textures: The exquisite combination of the wonderfully chewy sugar cookie crust, the silky-smooth, creamy banana pudding, and the light, airy whipped cream cheese topping creates an incredibly satisfying and dynamic textural experience that will keep you coming back for just one more bite.
- Effortlessly Make-Ahead Friendly: As highlighted, these bars actually benefit from being prepared ahead of time. Allowing the flavors to meld and the crust to soften beautifully overnight enhances their overall deliciousness. This invaluable feature means significantly less last-minute stress when you’re preparing for an event.
- Highly Customizable: With a plethora of substitution and variation options available, you can easily tailor this recipe. Whether you need to accommodate dietary preferences, utilize ingredients you have on hand, or simply want to unleash your creative culinary whims, these bars are a fantastic canvas for your imagination.
Did you try this amazing Banana Pudding Bars recipe? I’m eager to hear about your experience! Please make sure to leave a ⭐️ star rating and a comment below the recipe card. Your valuable feedback means the world to me and is incredibly helpful to other readers searching for delicious new recipes. Thank you for sharing your culinary journey!
📲 FOLLOW Sara on Social Media! 👋 Stay connected and discover the latest delicious creations from my kitchen by following me on Facebook, Instagram, or Pinterest! Don’t miss out on more sweet treats and snack ideas.
📝 Printable Recipe Card: Banana Cream Pie Bars
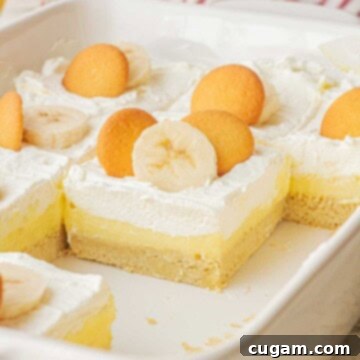
Banana Cream Pie Bars
Sara Smith | Eat Dessert Snack
Pin Recipe
20 minutes
10 minutes
30 minutes
1 hour
Dessert, Snack
American
12 slices
219 kcal
Prevent your screen from going dark
Ingredients
For the Crust:
- ½ cup unsalted butter (at room temperature)
- ½ cup packed brown sugar
- 1 large egg
- 1 teaspoon vanilla extract
- ½ teaspoon salt
- ½ teaspoon baking soda
- 1¾ cups all-purpose flour
For the Banana Pudding Filling:
- 1 (5.1 oz) boxinstantbanana pudding mix
- 2½ cups cold whole milk
For the Whipped Cream Cheese Topping:
- 4 oz cream cheese (at room temperature)
- ½ teaspoon vanilla extract
- ½ cup powdered sugar
- 2 cups cold heavy whipping cream
Optional Toppings:
- fresh banana slices
- vanilla wafer cookies (crushed graham crackers, mini chocolate chips, or chopped nuts also work well)
Instructions
For the Crust:
-
Preheat your oven to 375°F (190°C). Prepare a 9×13-inch baking pan by lightly greasing it. This ensures easy removal of your delicious bars.
-
In a large mixing bowl, using an electric mixer with a paddle or whisk attachment, combine the softened butter and brown sugar. Beat on medium-high speed for 2-3 minutes until the mixture is light, fluffy, and well-creamed. Remember to scrape down the sides of the bowl with a spatula periodically to ensure even mixing.
-
Add the egg and vanilla extract to the creamed mixture. Continue to mix thoroughly for about 1 minute until the egg is fully incorporated and the mixture is smooth and fluffy.
-
Next, add the dry ingredients: salt, baking soda, and all-purpose flour. Mix on low speed until just combined, ensuring there are no remaining pockets of dry flour. The dough will be soft and slightly sticky, which is ideal for a chewy crust.
-
Evenly pat the dough into the prepared baking pan, pressing it gently to form a consistent layer. Bake at 375°F (190°C) for 10-12 minutes (or 12-14 minutes if using a thick ceramic pan). The crust should look soft and slightly underbaked, similar to a cookie. This is crucial for its desired chewy texture! Remove from the oven and let the crust cool completely on a wire rack before adding any fillings. While it cools, prepare your delicious fillings.
For the Banana Pudding Filling:
-
In a clean bowl, combine the instant banana pudding mix with the cold milk. Whisk vigorously for 2 minutes until the mixture becomes extra thick. It’s important to use less milk than the box usually suggests to achieve the perfect bar consistency. As soon as your crust is completely cooled, spread this thickened pudding mix evenly over the crust before it sets too firmly in the bowl. Transfer to the refrigerator and let it rest for 20-30 minutes to firm up further before adding the whipped topping.
For the Whipped Cream Cheese Topping & Assembly:
-
With an electric mixer using the whisk attachment, mix together the room temperature cream cheese, vanilla extract, and powdered sugar on high speed for 2-3 minutes until completely smooth, light, and creamy, with no lumps.
-
Add ½ cup of the cold heavy cream to the cream cheese mixture and mix well until fully incorporated and smooth again. Continue adding the remaining heavy cream in ½ cup increments, mixing thoroughly after each addition. Once all the cream is mixed in, increase the mixer speed to high and whip for 1-2 minutes until the topping is light, fluffy, and holds soft peaks. Be careful not to over-whip.
-
Carefully spread the whipped cream cheese topping evenly over the banana pudding layer. Use a gentle hand to avoid disturbing the pudding layer beneath. For a beautiful finish, garnish the top with fresh banana slices (added just before serving), crumbled graham crackers, or whole vanilla wafer cookies.
Refrigerate the completed banana pudding bars for at least 2-4 hours, or until thoroughly chilled and firm. This is essential for clean slices and optimal flavor. Once chilled, slice and serve!
Notes
Storage: Store leftover banana pudding bars tightly covered in the refrigerator for up to 3 days. For best flavor and texture, aim to enjoy them within 1-2 days.
Nutrition Information
Carbohydrates: 33g
Protein: 6g
Fat: 7g
Saturated Fat: 4g
Polyunsaturated Fat: 0.4g
Monounsaturated Fat: 2g
Trans Fat: 0.002g
Cholesterol: 35mg
Sodium: 224mg
Potassium: 189mg
Fiber: 0.5g
Sugar: 19g
Vitamin A: 311IU
Calcium: 138mg
Iron: 1mg
