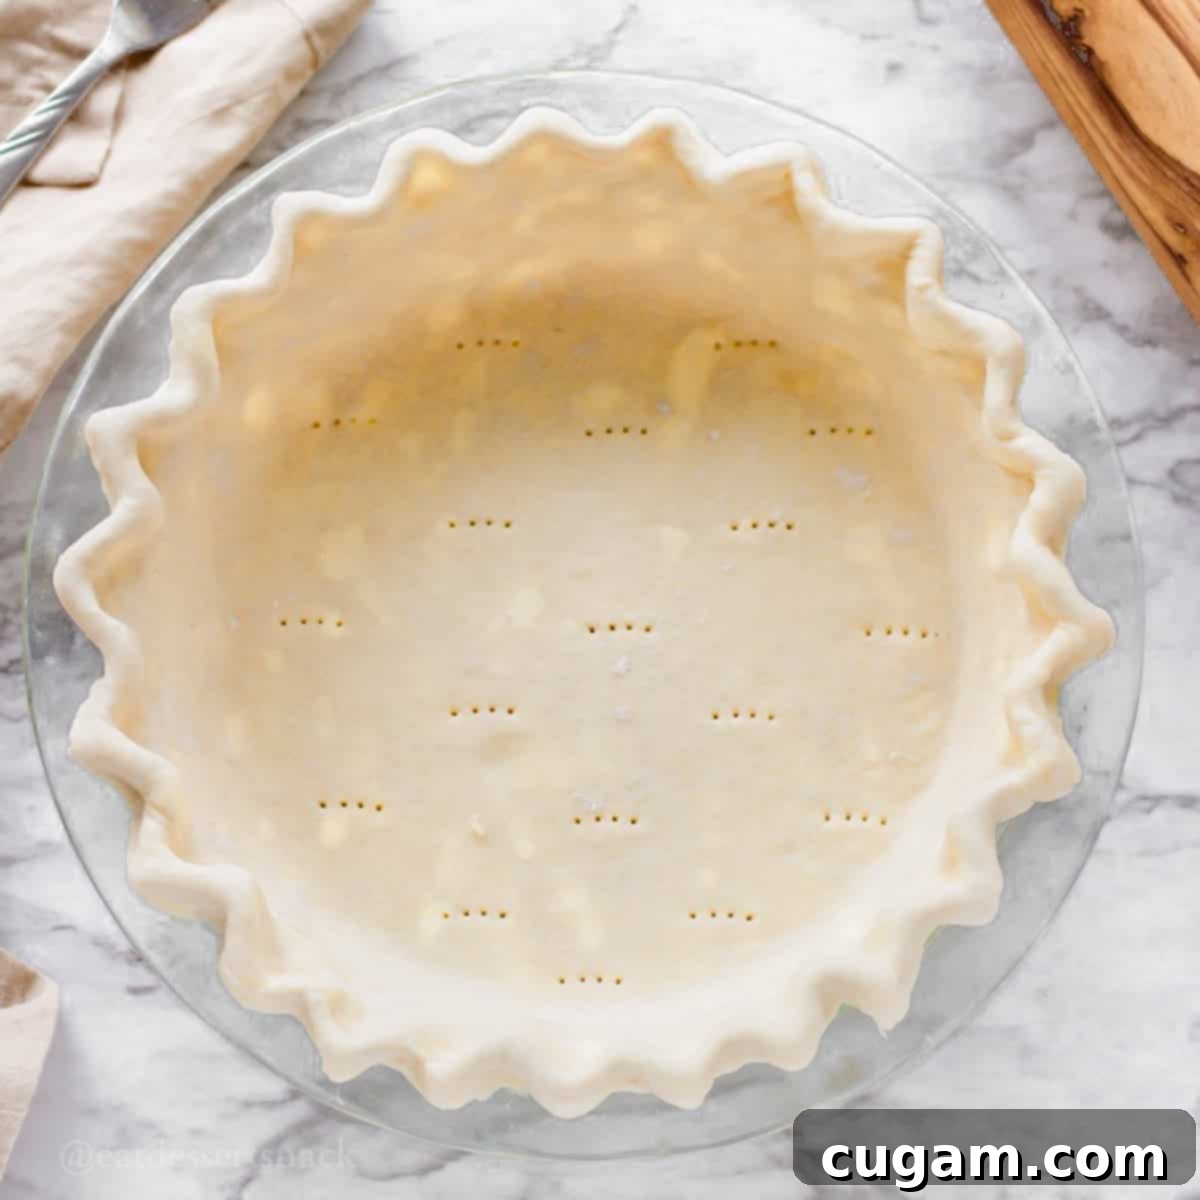
The Ultimate Cream Cheese Pie Crust Recipe: Flaky, Flavorful & Foolproof
Welcome to the ultimate guide for creating a truly exceptional pie crust – one that combines the buttery flakiness you adore with a rich, tender texture from cream cheese. This recipe isn’t just good; it’s a game-changer, featuring a perfect balance of half cream cheese and half butter, resulting in an irresistibly delicious and wonderfully sturdy crust that stands up to any filling. Whether you’re a seasoned baker or just starting out, this foolproof method will elevate your homemade pies to new heights.
This versatile cream cheese pie dough yields enough for one double-crust pie (both top and bottom) or two single bottom crusts, making it incredibly practical for a variety of baking projects. Its unique flavor profile and superior texture make it the ideal partner for a wide range of fillings. Imagine this crust cradling a vibrant Homemade Cherry Pie Filling, a luscious Blueberry Pie Filling, or the comforting classic Old Fashioned Apple Pie Filling. All of these fillings are not only easy to prepare but become truly extraordinary when paired with this perfect crust.
The magic behind this crust lies in its dual-fat composition. Butter, known for its ability to create crisp, golden layers, is combined with cream cheese, which contributes a remarkable tenderness and subtle richness that you simply can’t achieve with butter alone. While butter provides essential stability for flakiness, cream cheese ensures the dough remains moist and pliable, preventing it from becoming tough. This combination strikes a harmonious balance, delivering a crust that is both robust and delicately flaky.
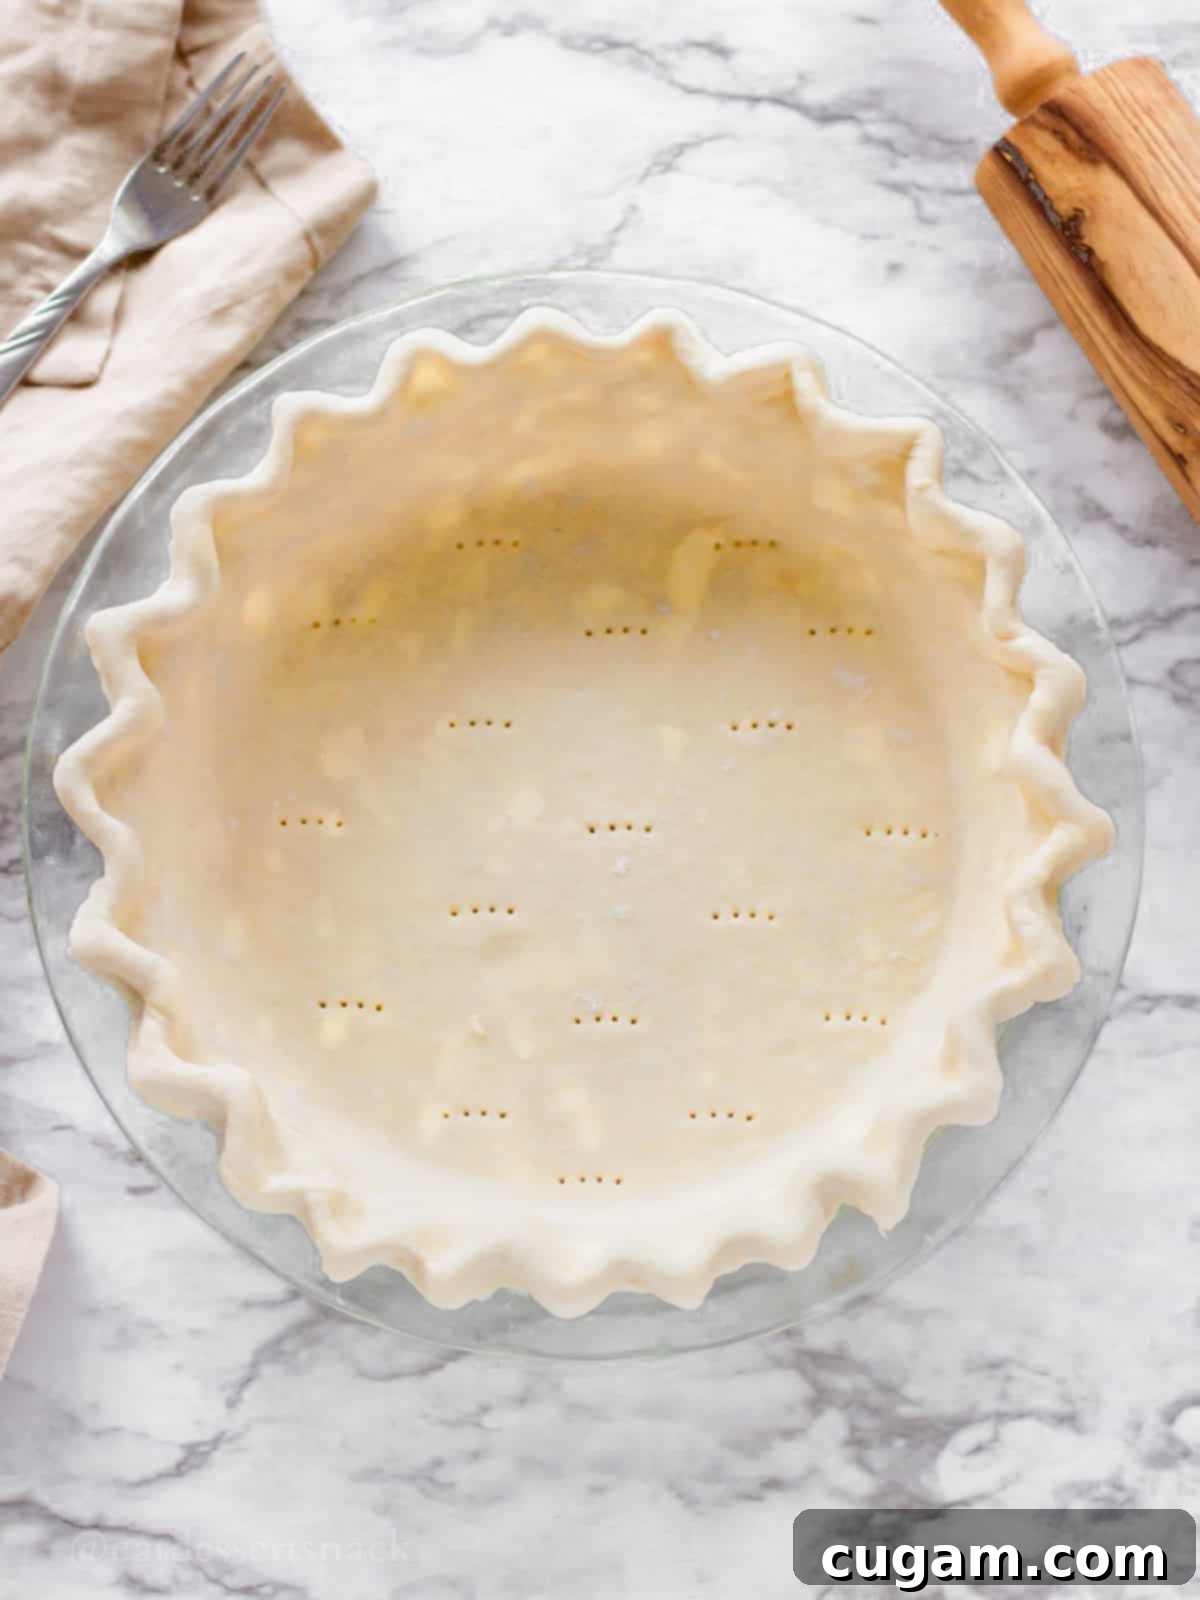
What I truly love about this cream cheese pie crust recipe is its incredible adaptability. It performs beautifully in both sweet and savory applications. For savory delights, such as a hearty Chicken Pot Pie with Frozen Veggies, simply omit the sugar from the dough. This crust has consistently delivered perfect results, never once letting me down. It’s a testament to its robust and forgiving nature.
Let’s talk about common pie crust frustrations. Many traditional recipes, especially those relying solely on shortening, often fall flat in terms of flavor. The crust can taste bland, failing to add any discernible character to your pie. Then there are the tough crusts – a common pitfall usually caused by overworking the dough or incorporating too much water, which encourages gluten development, much like in bread making. This leads to a chewy, rather than tender, texture. On the opposite end of the spectrum, some crusts are excessively crumbly, disintegrating into bits as you try to transfer a slice to a plate, no matter how flaky they might be. This cream cheese pie crust, however, perfectly balances these qualities. It is consistently flaky, wonderfully crispy, and remarkably sturdy, holding its shape beautifully, as evidenced by the last picture in this post.
[feast_advanced_jump_to]
What To Expect From This Cream Cheese Pie Crust
- Taste: Prepare your taste buds for a revelation! This pie crust offers a delightful, pronounced buttery flavor, complemented by an added richness and subtle tang from the cream cheese. This unique combination creates a more complex and satisfying flavor profile than traditional all-butter or all-shortening crusts. The resulting crust is sturdy enough to hold generous fillings, yet its texture is distinctly crispy and tender, offering a pleasant contrast to a denser, shortcrust pastry. It truly enhances any pie, whether sweet or savory.
- Ease: While making pie crust can sometimes feel intimidating, this cream cheese recipe is surprisingly straightforward for a medium-difficulty level. The key to success lies in working with thoroughly chilled ingredients and diligently following each step of the instructions. Even if you’re not an expert baker, you’ll find that with a little attention to detail, this recipe consistently yields wonderful results. Best of all, you have the flexibility to prepare this dough either by hand, ensuring a hands-on feel, or quickly and efficiently with a food processor, depending on your preference and available tools.
- Time: One of the great advantages of this recipe is how quickly the dough comes together. The active preparation time for combining the ingredients is just a few minutes, making it a relatively fast process. However, the dough does require at least 30 minutes of chilling time in the refrigerator before it can be rolled out. This chilling period is crucial as it allows the fats to firm up, preventing stickiness and ensuring a perfectly flaky texture when baked. So, while the hands-on time is minimal, factor in the essential resting period for best results.
🛒 Key Ingredients for a Perfect Cream Cheese Pie Crust
Achieving a superior pie crust begins with selecting the right ingredients and understanding their roles. Here’s a breakdown of what you’ll need for this cream cheese pie crust:
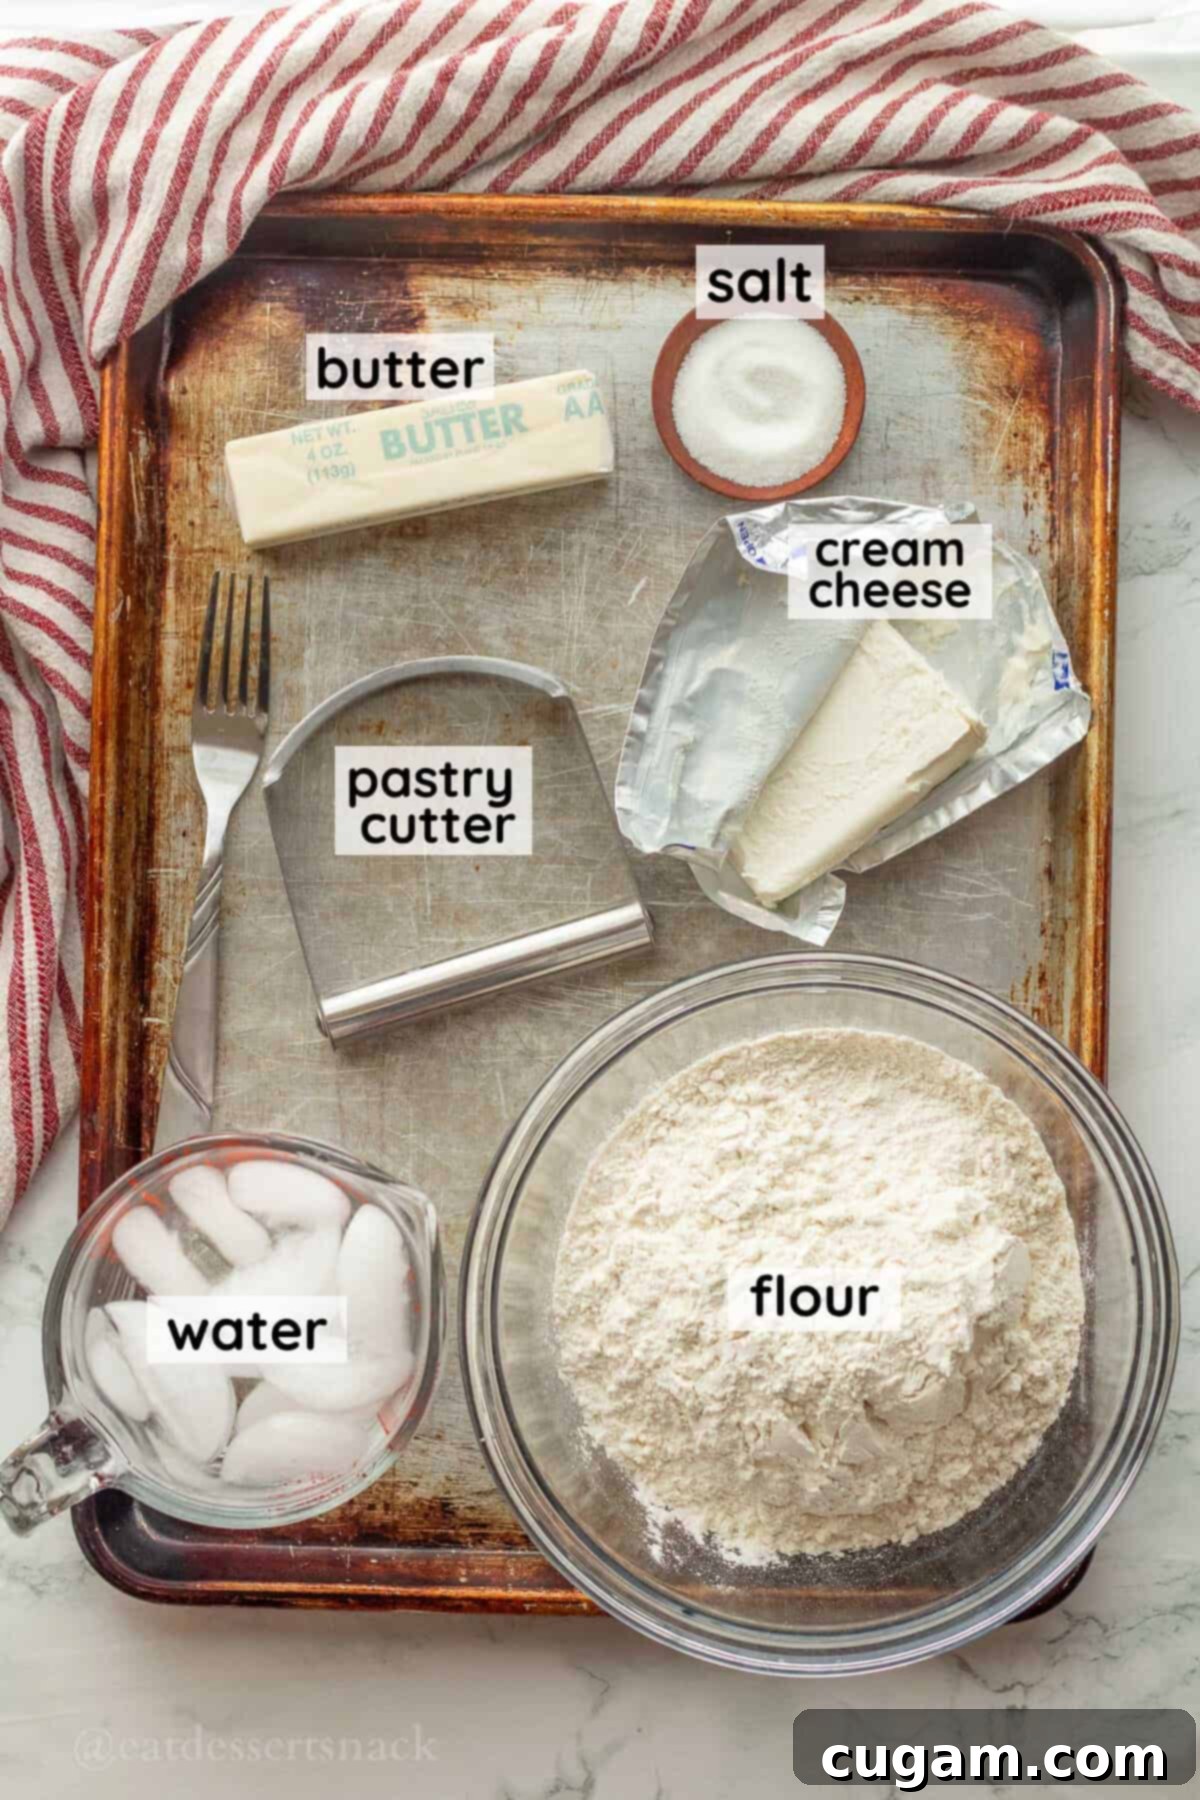
- Cream Cheese – For the best flavor and texture, I highly recommend using full-fat cream cheese. Its higher fat content contributes to a richer, more tender, and slightly tangy crust. However, if you’re looking to reduce fat, ⅓ fat or even fat-free cream cheese can be used, though it might slightly alter the richness and overall texture. Ensure it is very cold when you start!
- Butter – Butter is indispensable for creating the signature flaky layers of a pie crust. It’s a more stable fat than cream cheese, providing structure and that classic buttery flavor. A specific ratio of at least ½ butter to ½ cream cheese is essential. This balance ensures optimal flakiness while still benefiting from the tenderness of the cream cheese. Like the cream cheese, the butter must be thoroughly chilled.
- All-Purpose Flour – This is the foundation of our pie crust. All-purpose flour is chosen for its ease of use, widespread availability, and cost-effectiveness. Its moderate protein content allows for a workable dough that develops just enough gluten for structure without becoming tough, provided it’s not overmixed.
- Salt – A small amount of salt makes a surprisingly significant difference. It doesn’t just add seasoning; it acts as a flavor enhancer, bringing out the delicious notes of the butter and cream cheese, ensuring the crust isn’t bland but beautifully balanced.
- COLD Water – The temperature of the water is perhaps one of the most critical elements. Ice-cold water serves as the binding agent, bringing all the dry ingredients and fats together into a cohesive dough. Crucially, its low temperature prevents the butter and cream cheese from melting prematurely, which is vital for achieving those desirable flaky layers when the pie bakes. Without cold water, the fats would melt into the flour, resulting in a tough, unappetizing crust.
For precise measurements and detailed quantities, please refer to the comprehensive recipe card located below.
✏️ Substitutions & Variations to Customize Your Crust
While this recipe is perfect as written, don’t hesitate to experiment with these simple substitutions and variations to tailor the cream cheese pie crust to your specific preferences or dietary needs:
- Cream Cheese – As mentioned, full-fat cream cheese offers the best results in terms of richness and texture. However, if you’re looking for a lighter option, fat-free or ⅓ fat cream cheese can certainly be used. Be aware that these alternatives might slightly reduce the richness and tenderness of the final crust, but they will still provide a delicious alternative to a traditional shortening-based crust.
- Sugar – The small amount of sugar in this recipe is intended to complement sweet pie fillings, providing a subtle sweetness to the crust. If you’re preparing a savory pie, such as a quiche or chicken pot pie, you can absolutely leave the sugar out entirely without affecting the structural integrity of the dough. For a refined sugar-free sweet option, you can replace granulated sugar with an equal amount of coconut sugar, which adds a delicate caramel-like note.
- Flour Alternatives (Advanced) – While all-purpose flour is recommended for consistency, adventurous bakers might experiment with a small percentage of whole wheat pastry flour for a nuttier flavor in savory pies, or even a gluten-free all-purpose blend (ensure it contains xanthan gum) for a gluten-sensitive version. Note that these may require adjustments to liquid content and handling.
- Flavor Boosters (Spices & Herbs) – For sweet pies, consider adding a pinch of ground cinnamon, nutmeg, or even a tiny amount of cardamom to the dry ingredients for an aromatic boost. For savory pies, a teaspoon of garlic powder, onion powder, or a finely chopped herb like rosemary or thyme can beautifully complement your filling, adding an extra layer of flavor to the crust itself.
🧑🍳 Step-by-Step Instructions for Your Cream Cheese Pie Crust
The secret to a truly flaky pie crust starts and ends with maintaining cold temperatures. It is paramount that both your butter and cream cheese are thoroughly refrigerated, almost rock-hard, before you begin. I also highly recommend preparing your cold water in advance by adding a cup or two of water to a measuring cup and filling it with ice cubes. This ensures you have perfectly chilled water ready when needed, as warm water can compromise the flakiness of the crust.
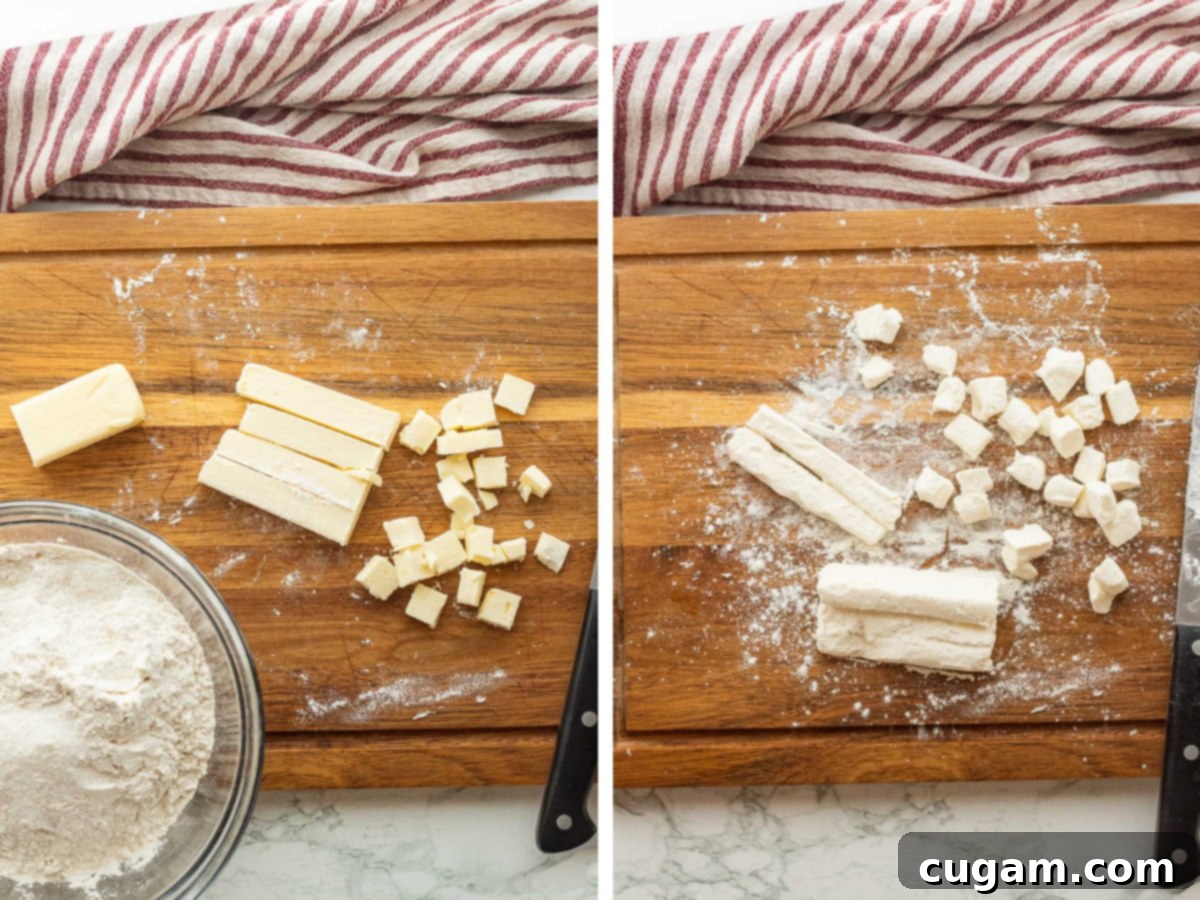
- Step 1: Prepare Your Fats. Begin by taking your thoroughly chilled butter and cream cheese out of the refrigerator. Cut both fats into small, even cubes, approximately ½-inch (1.25 cm) in size. Smaller, consistent pieces make it easier to incorporate them into the flour mixture, ensuring an even distribution and ultimately, a more uniformly flaky crust.
TIP: Cream cheese can be notoriously sticky when cold. A helpful trick is to lightly dust your knife with a bit of flour, or even quickly dip the cream cheese itself into a bowl of flour, before cutting it into cubes. This simple step prevents the cheese from sticking excessively to your knife, making the cubing process much smoother and less messy.
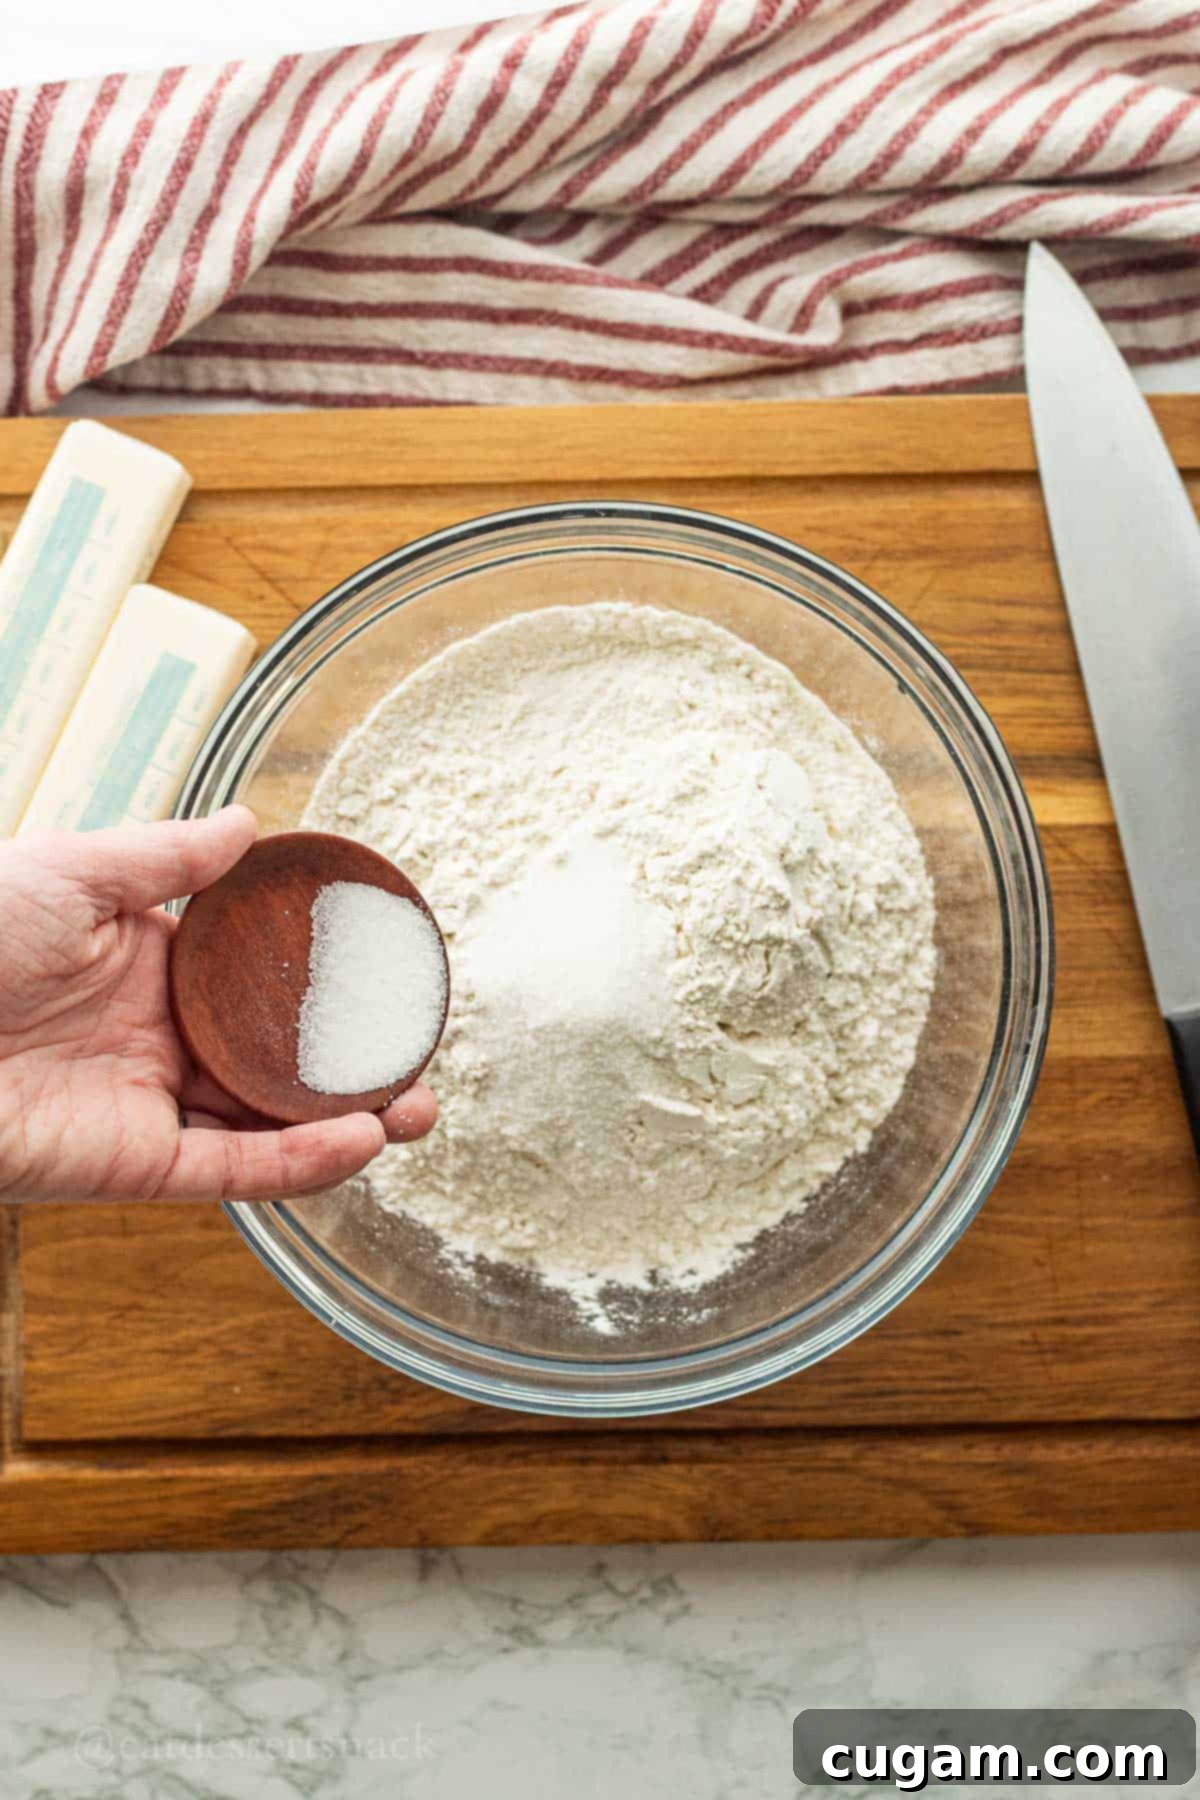
- Step 2: Combine Dry Ingredients. In a large mixing bowl, whisk together the cold all-purpose flour, granulated sugar (if using for a sweet pie), and salt. Ensure these ingredients are well combined. It’s also a good practice to chill your mixing bowl and even the flour itself in the refrigerator for about 20 minutes before starting, especially on a warm day. This helps maintain the overall cold temperature of your ingredients.
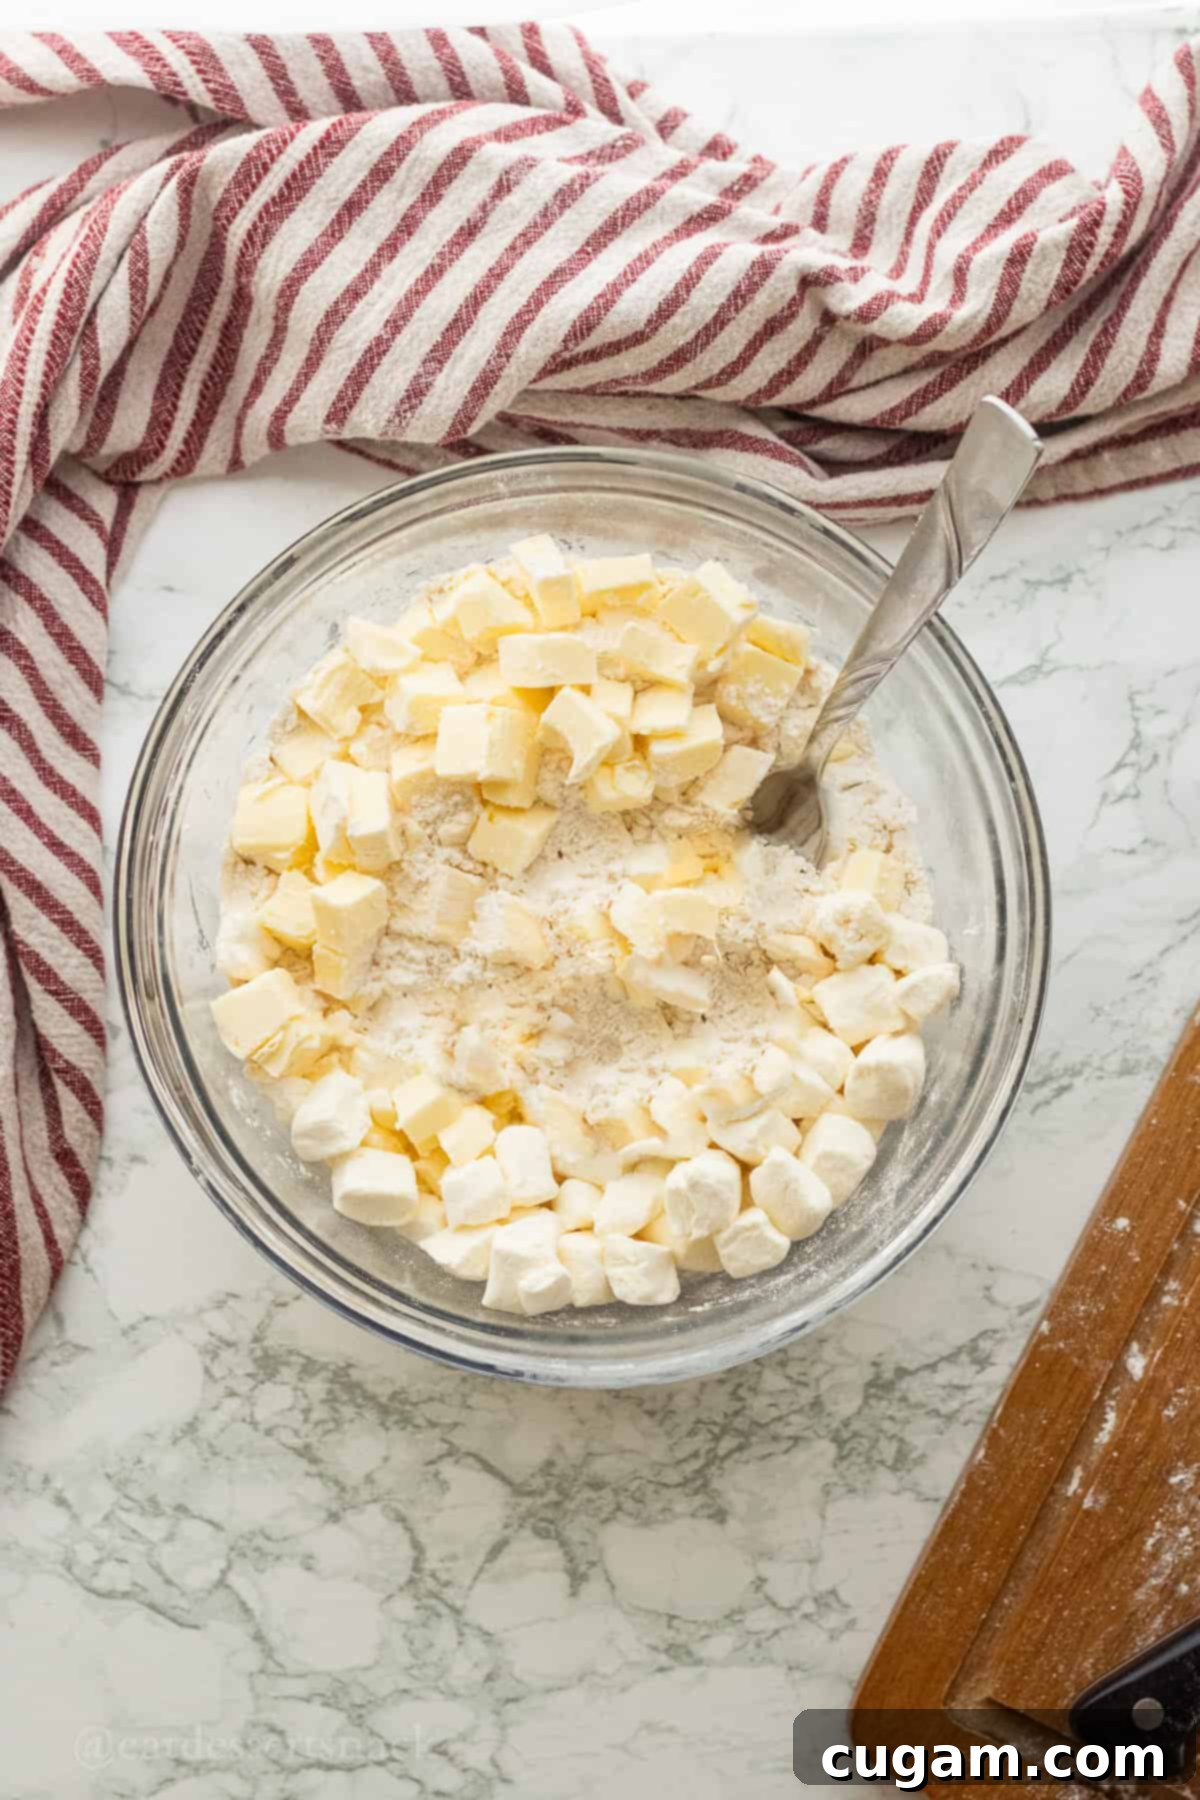
- Step 3: Add Chilled Fats to Dry Ingredients. Carefully add the cubed, chilled butter and cream cheese directly into the bowl with your combined dry ingredients. Spreading them out evenly will make the next step of incorporating them much simpler and more efficient.
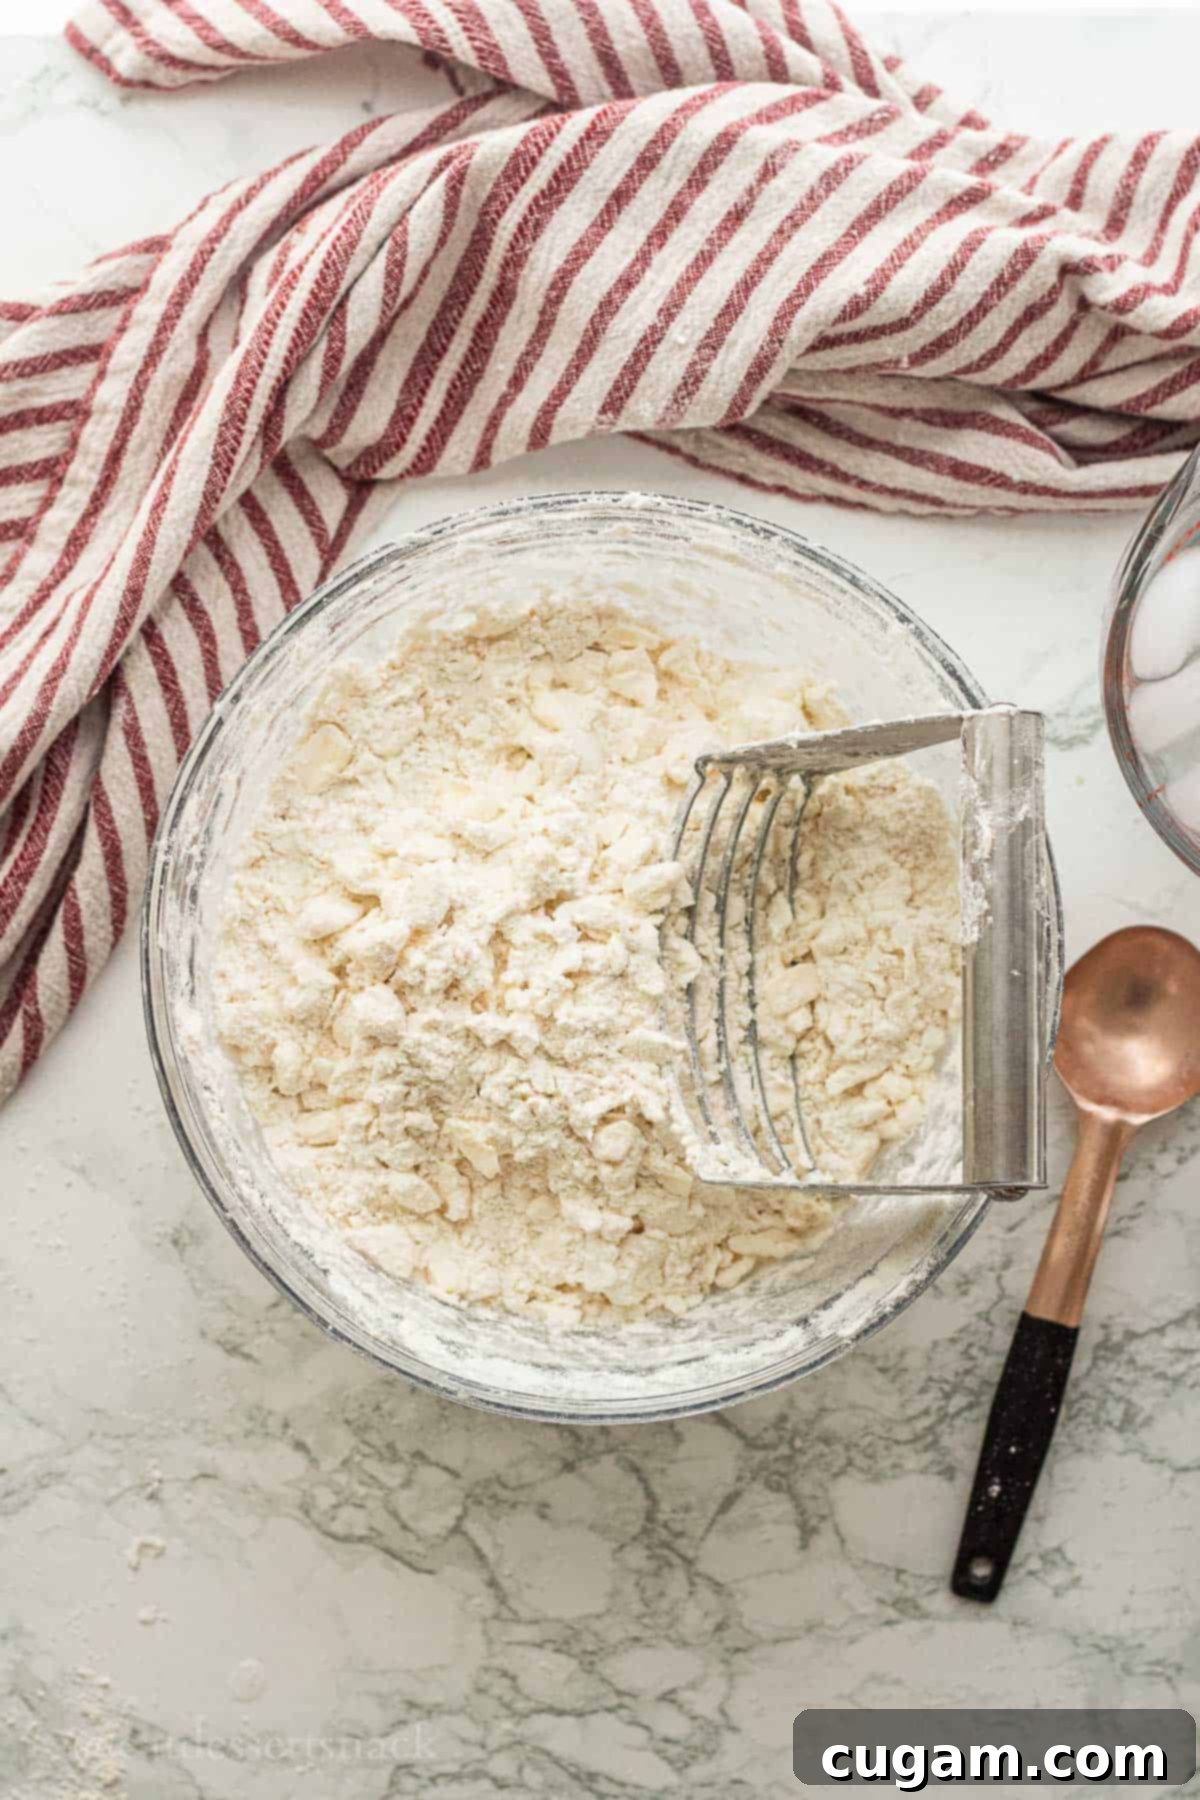
- Step 4: Incorporate the Fats. Now comes a critical step for flakiness. Using a fork, a pastry blender, or a food processor(fitted with this pastry attachment if you have one), work the butter and cream cheese into the dry ingredients. The goal is to break down the fats until they resemble pea-sized chunks or even smaller. These small pockets of fat are what will melt and create steam during baking, resulting in those wonderful, distinct flaky layers. Continue mixing until the mixture resembles very coarse sand with visible, small pieces of fat throughout. Avoid overmixing, as this can warm the fats too much and lead to a less flaky crust.
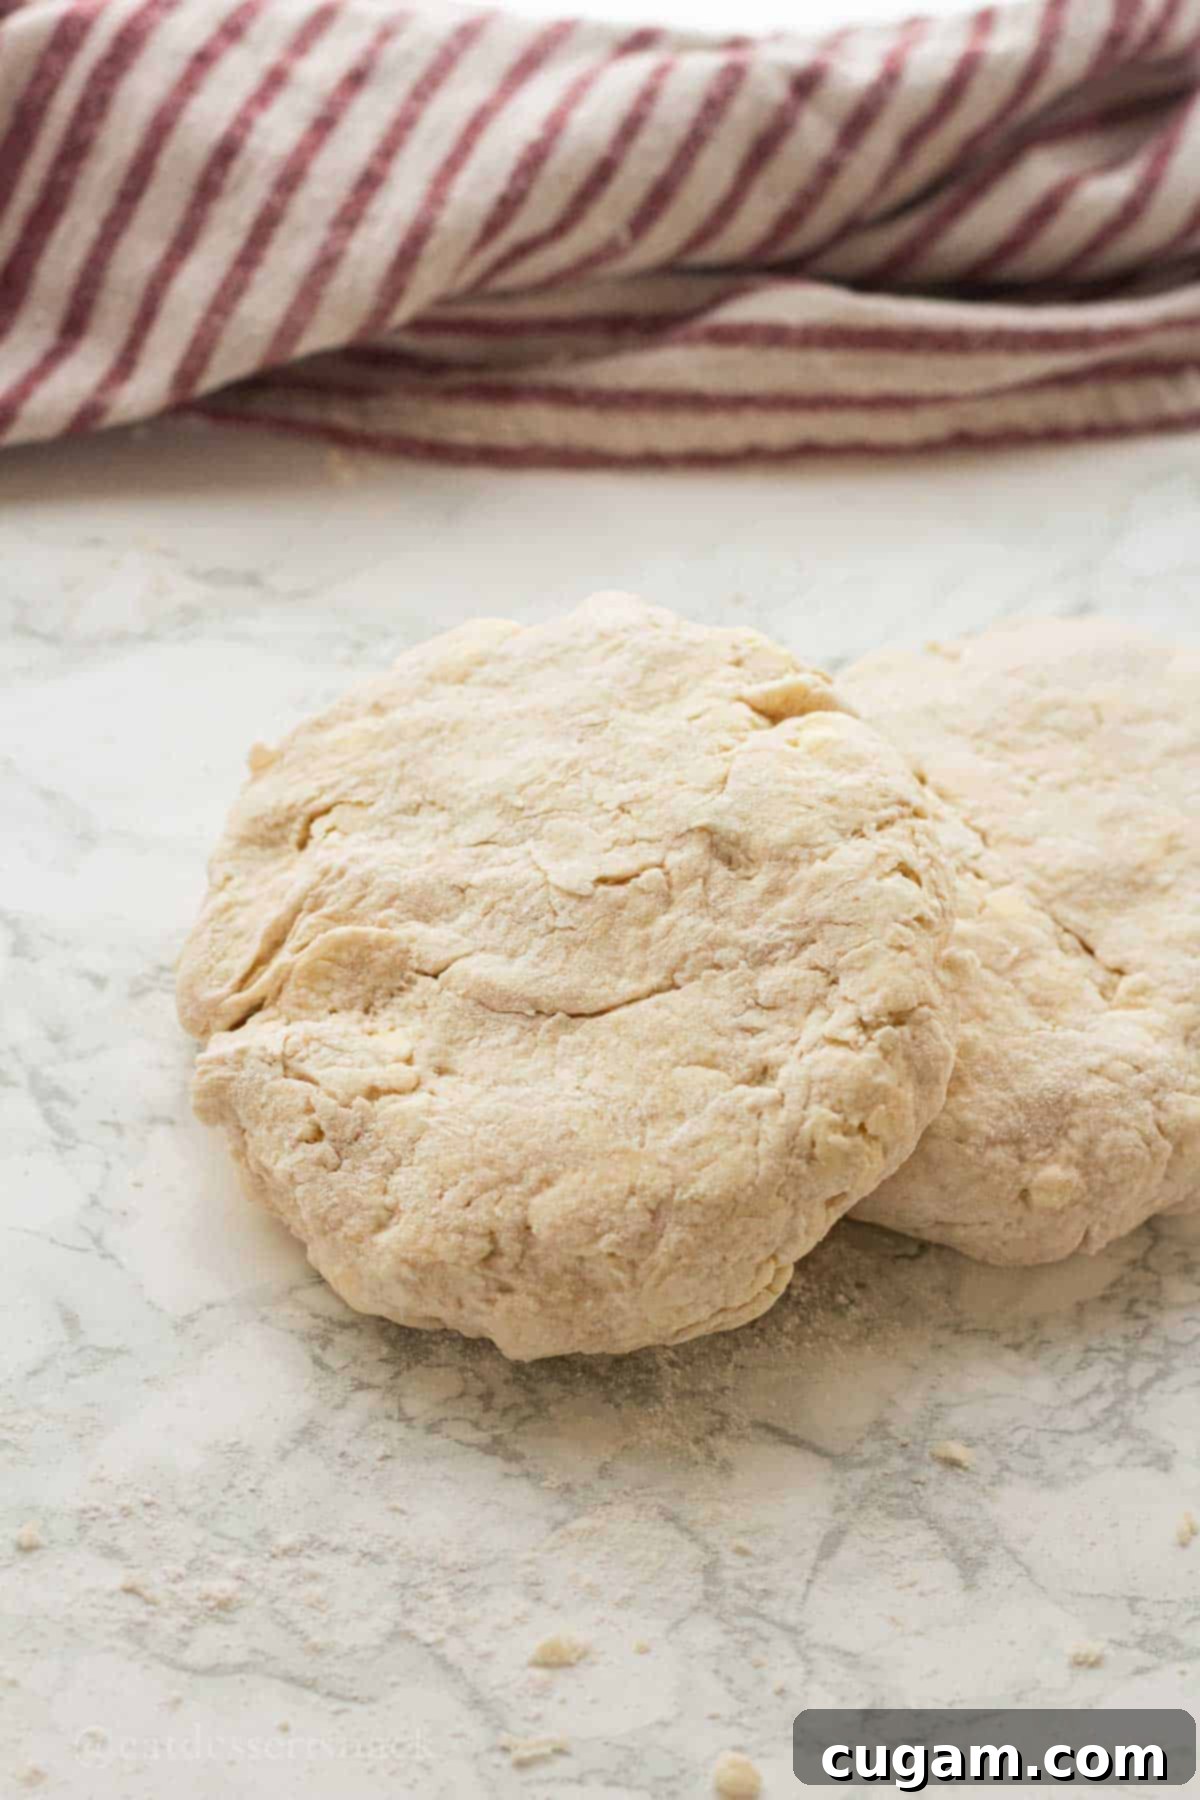
- Step 5: Add Cold Water and Form Dough. Begin adding the ice-cold water, ¼ cup at a time, mixing gently after each addition. The key is to add just enough water until the dough comes together and is workable, with a texture similar to stiff play dough. You should be able to press it together without it crumbling, but it shouldn’t be overly sticky. The exact amount of water needed can vary depending on the humidity and the temperature of your ingredients, so add it gradually. Crucially, try not to overwork the dough at this stage. Excessive kneading develops gluten, which can lead to a tough crust. Mix just enough until it forms a cohesive mass, no longer crumbly, and then stop.
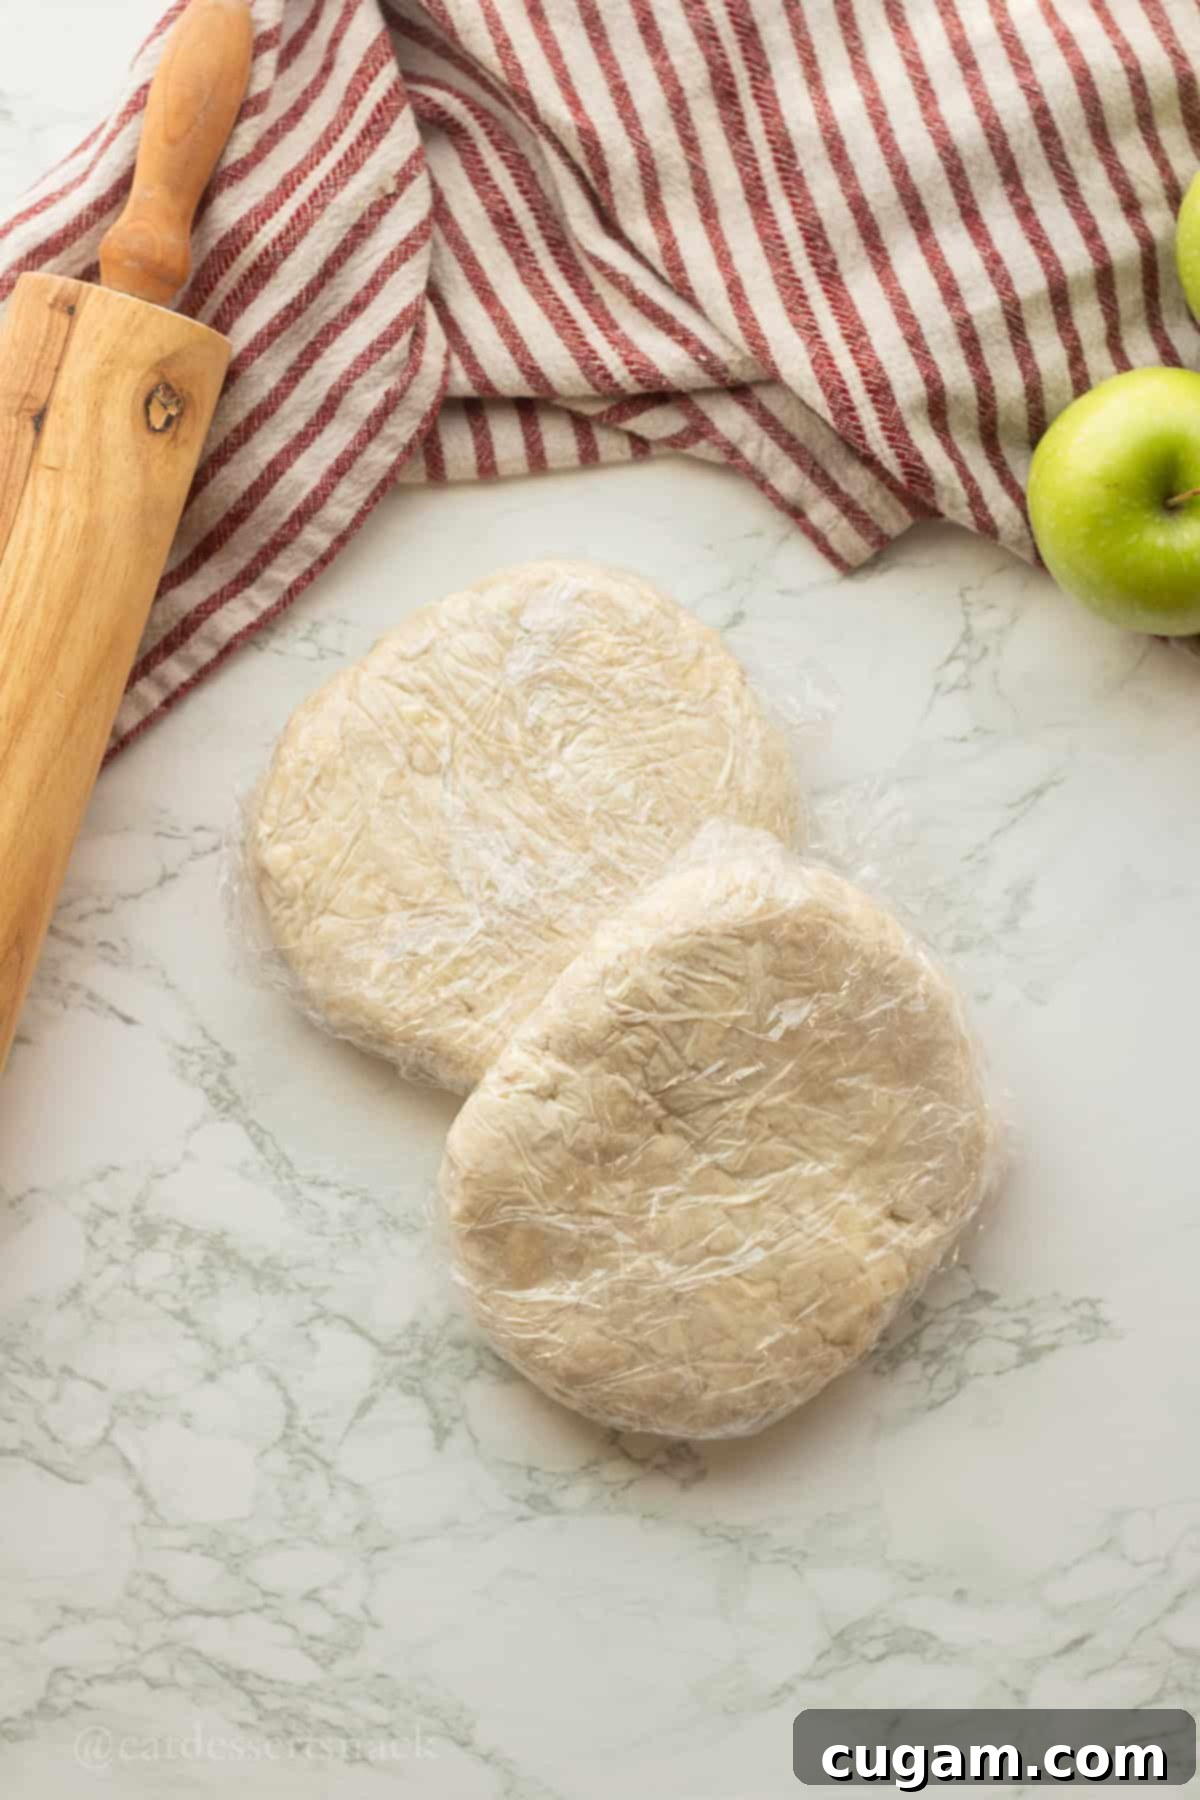
- Step 6: Chill the Dough. Once the dough has formed, divide it into two equal discs. You can use one immediately for a single-crust pie or wrap both tightly in plastic wrap for later use. For optimal results and ease of handling, always chill the dough for at least 30 minutes in the refrigerator before rolling it out. If storing for longer, ensure it’s well-wrapped to prevent drying. Before rolling out, it’s a good idea to gently smooth and press the edges of the disc on a flat surface until any small cracks disappear. This extra step significantly helps in preventing larger cracks from forming while you’re rolling out the pie crust, ensuring a smooth, beautiful finished product.
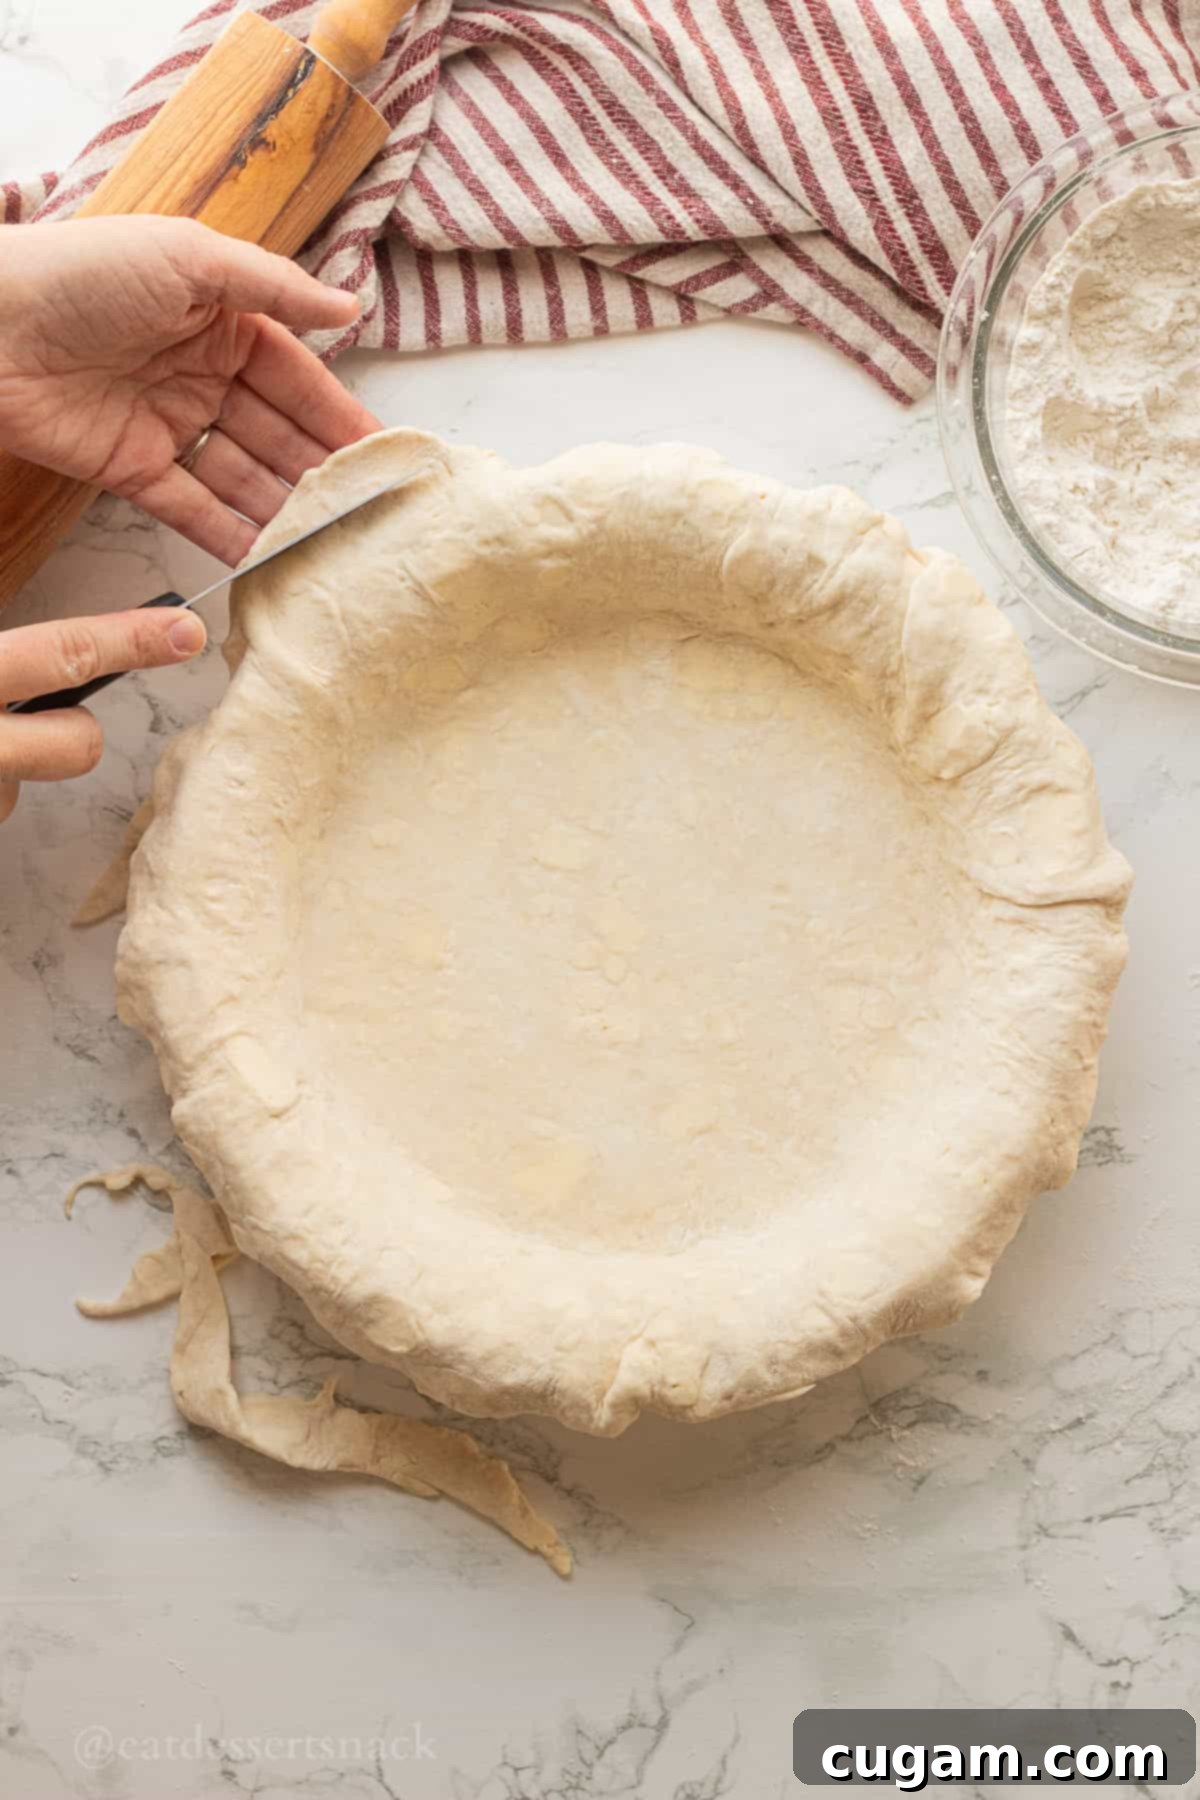
- Step 7: Roll Out and Fit to Pan. On a lightly floured surface, roll out one of your chilled dough discs. Aim for an even thickness of about ⅛ inch (¼ cm). Periodically lift and rotate the dough to prevent sticking and ensure a round shape. Once rolled, carefully transfer the dough to a 9-inch pie pan. Gently press it into the contours of the pan without stretching it. Trim any excess dough from the edges of the pan using a butter knife or kitchen shears, leaving a slight overhang (about 1 inch) which will be used for crimping.
TIP: For a thicker, more decorative edge that holds its shape well, I typically leave about 1 inch of excess dough when trimming. I then tuck this excess dough underneath itself, creating a slightly thicker, more substantial border ready for crimping. This little trick provides a beautiful finish and prevents the edges from slumping during baking.
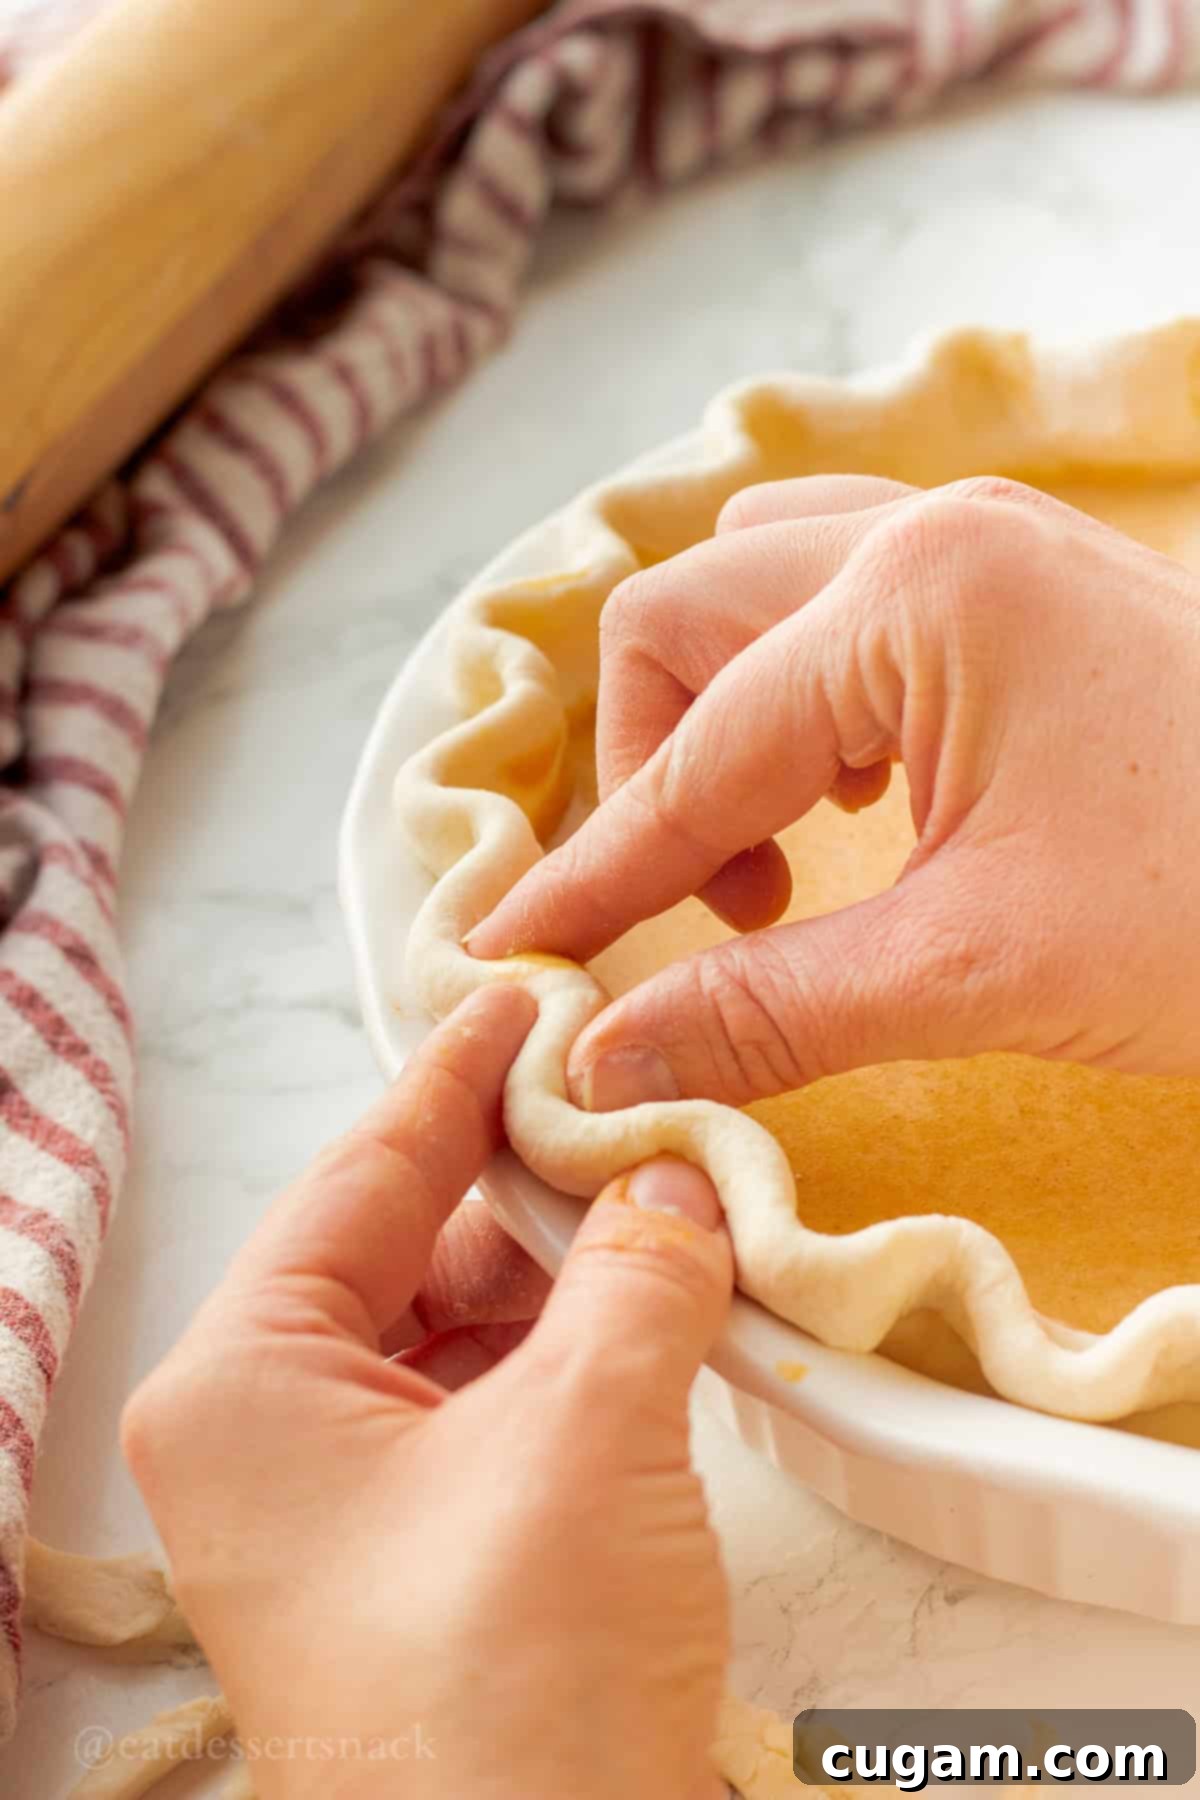
- Step 8: Prepare for Filling or Baking. With your pie crust beautifully fitted and crimped, you now have a couple of options depending on your pie recipe. For pies that don’t require further baking, such as a cold pudding pie or a fresh fruit pie, you will need to blind bake the crust first (detailed instructions on this essential process can be found in the FAQ section below). Alternatively, if you’re making a pie that will be baked after filling, like a rich cream cheese pumpkin pie or a classic Caramel Apple Pie, you can proceed directly to filling the raw pie crust and then baking according to your pie recipe’s instructions.
📌 Top Tips & Hacks for a Flawless Cream Cheese Pie Crust
- Embrace the Cold: This is arguably the most important rule of pie crust making. Always use COLD butter, COLD cream cheese, and COLD water. The colder the fats and liquids, the less they will melt into the flour during mixing. This ensures distinct pockets of fat remain, which then create steam and separate the layers of gluten during baking, leading to that coveted flaky texture. Warm ingredients result in a tougher, less tender dough.
- Pre-Chill Your Tools (Especially for Hand Mixing): If you’re not using a food processor and are mixing by hand (like me), take an extra step to chill your mixing bowl and even the dry ingredients (flour, sugar, salt) in the fridge or freezer for 15-20 minutes before you start. This prolongs the cold environment for your fats, giving you more working time without the butter and cream cheese melting. Remember, cold ingredients are truly your pie crust’s best friends!
- Avoid Overworking the Dough: Once the water is added, mix the dough just until it comes together and is no longer crumbly. Over-kneading or over-mixing develops gluten extensively, which will result in a tough, chewy crust rather than a tender, flaky one. As soon as it forms a cohesive, workable ball, stop mixing.
- Infuse Flavor with Spice: For an extra layer of deliciousness, consider adding a teaspoon of complementary spices to your dry ingredients. For sweet pies, cinnamon or nutmeg are classic choices that pair beautifully with fruit fillings. For savory crusts, a little garlic powder or onion powder can enhance the overall flavor profile, making it perfect for quiches or pot pies. This is entirely optional but incredibly delicious!
- Prevent a Soggy Bottom with Blind Baking: A soggy pie crust is a common baking disappointment. To effectively avoid this, especially for wet fillings or no-bake pies, you must blind bake (or par-bake) your crust. I will explain the full process and the science behind it in the “How to avoid a soggy bottom pie crust” section in the Frequently Asked Questions below. It’s a simple step that makes all the difference!
- Don’t Over-Flour Your Surface: When rolling out the dough, resist the urge to use too much flour on your countertop or rolling pin. While a light dusting is necessary to prevent sticking, excessive flour can be incorporated into the dough, making it dry and tough. Use just enough to ensure the dough doesn’t adhere.
- Use Parchment Paper for Rolling (Optional): For an even easier rolling experience and minimal mess, try rolling your dough between two sheets of parchment paper. This method eliminates the need for extra flour, keeps your countertop clean, and makes transferring the rolled dough to the pie pan a breeze.

❓Frequently Asked Questions About Cream Cheese Pie Crust
Absolutely, this is one of the fantastic advantages of homemade pie dough! I regularly prepare extra dough to store for future baking. You can easily freeze the pie dough for up to 3 months. When you’re ready to use it, simply transfer it to the refrigerator to thaw completely overnight, or let it sit at room temperature for a couple of hours until it becomes pliable but is still cold to the touch. For refrigeration, the dough can be stored, tightly wrapped, for up to 3 days. Similar to frozen dough, allow it to rest at room temperature for about 30-60 minutes before rolling out; this makes it much easier to work with without it cracking, while still maintaining the crucial coldness needed for flakiness.
A soggy bottom is a common enemy of delicious pies, but it’s easily preventable with a technique called par-baking or blind baking. The goal is to partially cook the crust before adding the filling, allowing it to firm up and create a barrier against moisture. Here’s how to par-bake your crust:
Preheat your oven to a hot 400℉ (200°C).
1. Prepare the crust for baking: Once your raw pie crust is fitted into the pan and crimped, it’s crucial to line it. Use parchment paper or aluminum foil, gently pressing it against the bottom and sides of the crust. Then, fill this lined crust with pie weights, dried beans, or rice (I’m a bit of a rebel and sometimes use plastic wrap, as it surprisingly doesn’t melt at this temperature, but parchment or foil are safer bets). This weight is essential! If you skip this step, the crust will puff up and melt, becoming unusable due to the fats rendering too quickly, leading to much sadness and wasted effort.
2. First Bake: Bake for 15-20 minutes. At this point, the pie crust should be slightly set and firm, but it should not yet be browning. The goal is to cook it just enough to dry it out and give it structure. Carefully remove the dried beans/weights and the lining. Allow the crust to cool slightly before adding your filling, then proceed to bake according to your specific pie recipe’s instructions.
For pies with cold fillings (like pudding or cream pies) or quiches that require a fully baked crust before filling, the blind baking process is slightly extended to ensure a golden, crisp finish:
1. First Bake (with weights): Line your prepared pie crust with parchment paper or foil and fill it generously with about 2 cups of dried beans, rice, or dedicated baking weights. Bake at 400°F (200°C) for 20-25 minutes, or until the edges of the crust just begin to turn a light golden brown. The weights prevent the crust from shrinking or bubbling up.
2. Second Bake (without weights): Carefully remove the parchment paper/foil and the weights. Return the crust to the oven for another 10-12 minutes. During this stage, the bottom and sides of the crust will fully cook and turn a beautiful golden brown. For pies that will be baked again after filling (like many pumpkin pies or quiches), the second bake might only need to be 5-10 minutes, as it will continue to cook with the filling.
When it comes to flavor, cream cheese unequivocally offers a superior taste compared to shortening. Shortening is flavorless, designed primarily for texture. Cream cheese, on the other hand, imparts a delightful richness and a subtle tangy depth that butter alone cannot provide. In terms of texture, it truly depends on personal preference. Shortening often produces a “shortbread-like” or very crumbly crust that can be quite tender but lacks the distinct flakiness. The combination of cream cheese and butter, as used in this recipe, yields a more complex texture: it’s wonderfully crispy, incredibly flaky, and still exceptionally tender. This blend provides the best of both worlds – outstanding flavor and a satisfying texture that holds together beautifully. While shortening offers a different kind of tenderness, the cream cheese and butter blend provides a more luxurious and flavorful experience.
🥧 Our Favorite Easy Pie Recipes to Enjoy with this Crust
Now that you’ve mastered the art of the perfect cream cheese pie crust, it’s time to put it to good use! This versatile crust pairs wonderfully with an array of delicious fillings. Here are some of our top picks for easy and satisfying pies that will shine with your homemade crust:
- Caramel Apple Pie
- Baked Banana Pie
- Pistachio Custard Pie
- Chicken Pot Pie with Frozen Veggies
Did you try this recipe? If you loved this cream cheese pie crust, we’d be thrilled to hear about it! Please take a moment to leave a ⭐️ star rating and a comment below the recipe card. Your feedback is incredibly valuable to me and so helpful to other readers looking to create delicious pies.
📲 FOLLOW Sara on Social! 👋 Facebook, Instagram, or Pinterest to see the latest delicious recipes and baking tips from our kitchen!
📝 Printable Recipe: Cream Cheese Pie Crust
Cream Cheese Pie Crust
Pin Recipe
Ingredients
- 3 cups all purpose flour 410 g
- 2 teaspoons sugar skip if doing a savory pie
- ¼ teaspoon salt
- ½ cup salted butter, cold 113 g
- 4 oz cream cheese, cold 113 g
- ¾-1 cup ice cold water 177-235 mL
Instructions
-
Cut chilled butter and cream cheese into cubes. It helps to dip the cream cheese in a bit flour so it doesn’t stick to the knife.
-
In a large mixing bowl combine cold flour, sugar, and salt. Add chilled butter and cream cheese.
-
Using a fork or pastry blender, work cream cheese and butter into dry ingredients until there are pea-sized chunks or less (chunk size is important for flakiness) and the mixture resembles very coarse sand.
-
Add cold water ¼ cup at a time and mix until the dough is combined and workable, with a stiff play dough texture. Depending on the temperature of the ingredients, more or less water may be needed. Try not to work dough too much (this makes it tough), just enough to not be crumbly.
-
Divide into two discs and use immediately or wrap in plastic wrap for a later use. Before rolling out, smooth and press the edges of the disc until there are no cracks. This helps prevent any big cracking while rolling out the pie crust.
-
Roll out dough to about ⅛ inch (¼ cm) thick and transfer to 9 inch pie pan. Trim edges of dough from pan with butter knife and crimp edges by pinching pointer and thumb fingers together into a V shape and pressing dough between them.
If making a cold fruit or pudding pie (fully baked crust):
-
Line with parchment paper or foil and fill with 2 cups dried beans, rice, or baking weights. Bake at 400 F for 20-25 minutes or until light golden brown. Remove parchment paper/foil and bake for another 10-12 minutes, until crust is golden brown.
For pies that need to be baked after filling, the second bake will be only 5-10 minutes (i.e. pumpkin pie or quiches).
Notes
Freeze for up to 3 months and thaw at room temperature until dough is workable but still cold.
If baking a no-bake pie, let crust cool completely before filling. For pies that will go back in the oven (i.e. for quiches or pumpkin pie) the crust can be warm when adding filling.
