Delicious & Easy 30-Minute Creamy White Chicken Chili with Corn (Slow Cooker Friendly!)
There’s nothing quite like a warm, comforting bowl of chili to embrace the crisp air of autumn. This recipe for creamy white chicken chili with corn is not just easy, it’s incredibly quick to prepare, making it a perfect weeknight meal. Featuring tender chicken, hearty white navy beans, sweet corn, and a blend of simple pantry staples, it comes together in just about 30 minutes. Plus, it’s wonderfully versatile and can be adapted for your slow cooker, ensuring a delicious meal with minimal effort.
For the ultimate comfort food experience, we highly recommend serving this chili with a side of warm, fluffy Honeybutter Corn Bread, generously slathered with Honey Butter Spread. The slightly sweet cornbread perfectly complements the savory, subtly spiced chili, creating a truly unforgettable combination. This recipe is also fantastic for meal prepping – double the batch and freeze portions for those busy days when you need a quick, wholesome dinner!
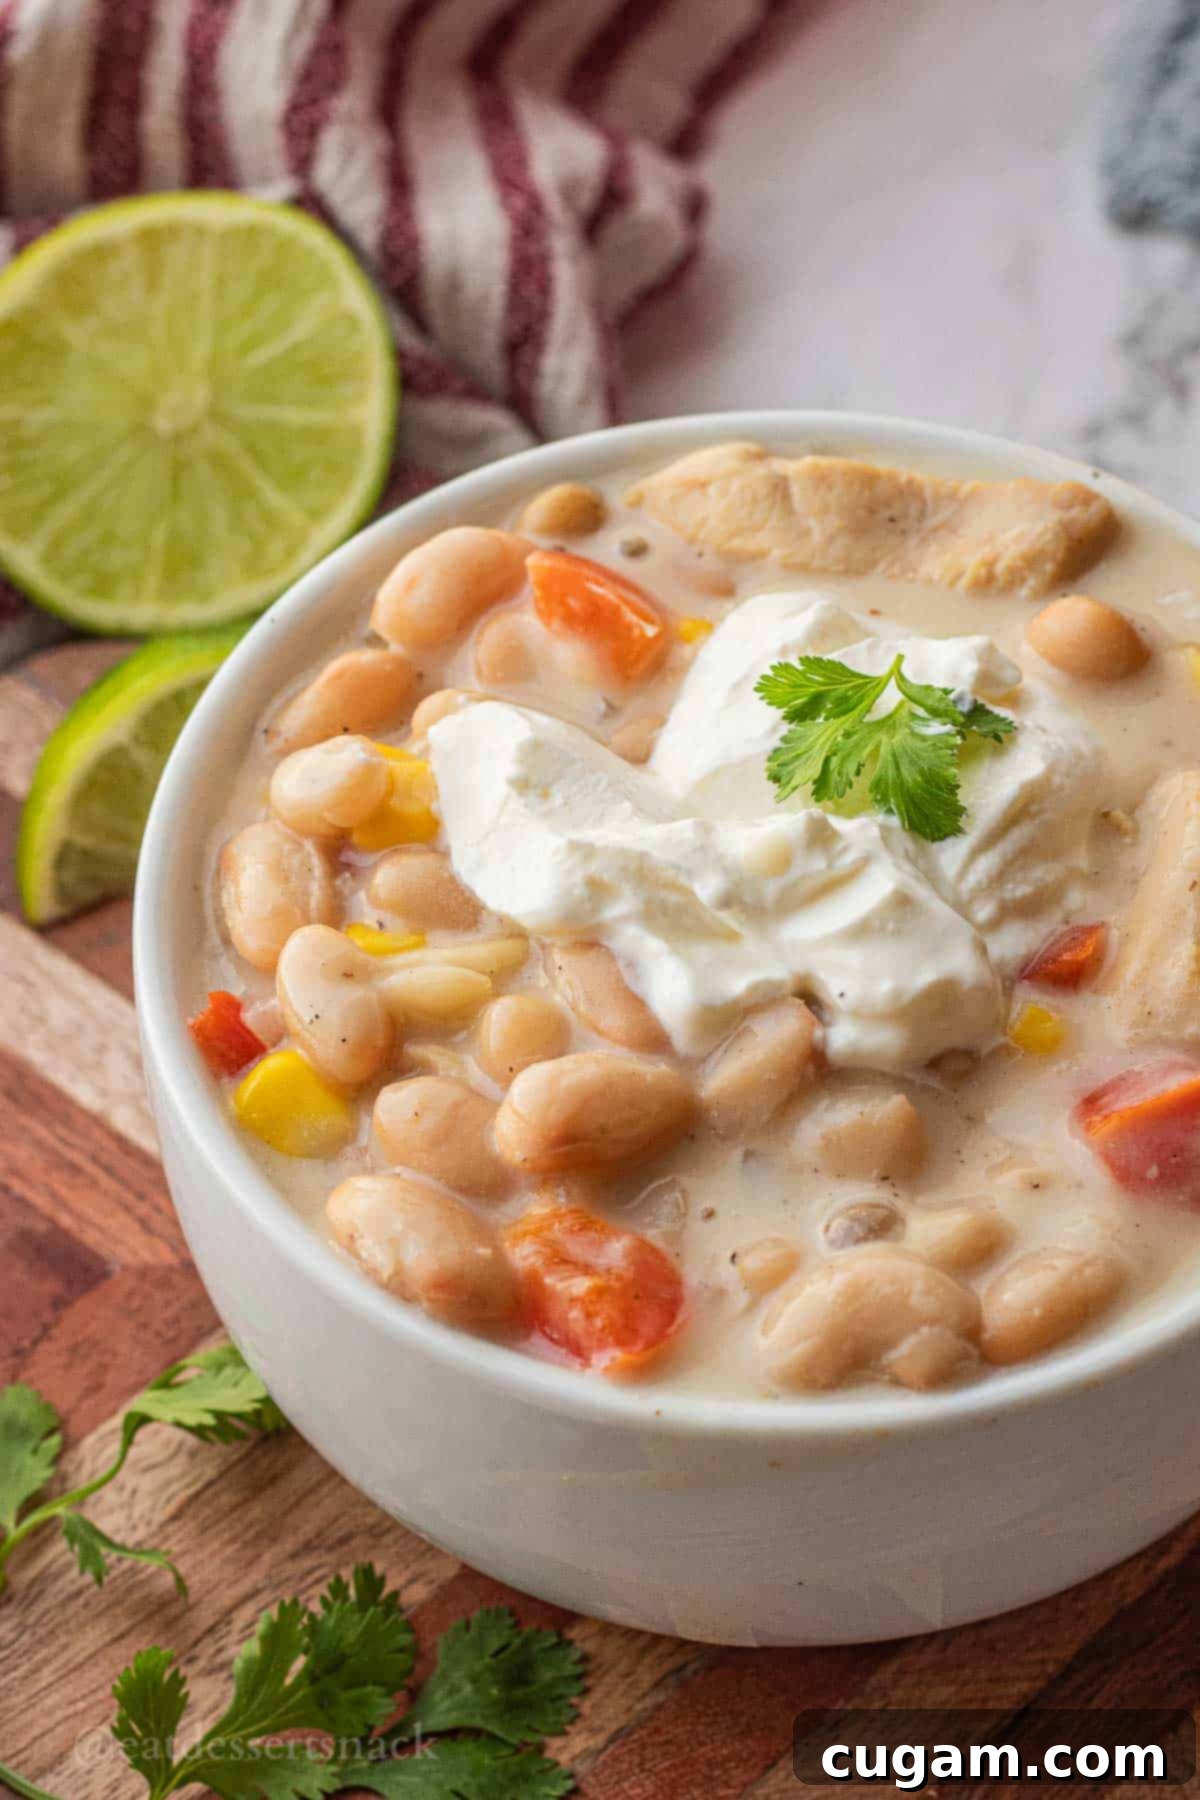
This simple white chicken chili recipe is designed to be family-friendly and not overly spicy, focusing instead on rich, savory flavors from the chicken and beans, brightened by sweet corn and a medley of mild spices. Its gentle seasoning makes it a wonderful alternative to more traditional, red chili recipes, such as my popular Ground Turkey Crockpot Chili. However, if you enjoy a little more heat, it’s incredibly easy to dial up the spice to your preference – a few pinches of red pepper flakes or some diced green chilies can transform it. Along with my comforting Italian White Bean Soup, this is one of my go-to white bean recipes for the autumn season. White beans are a fantastic base for soups and stews, offering a creamy texture and a nutritional boost, packed with fiber and plant-based protein, making this chili both satisfying and wholesome.
Why You’ll Love This Easy White Chicken Chili
- Effortless Preparation with Pantry Staples: This recipe truly shines in its simplicity. You likely already have most of the ingredients in your pantry, from canned white beans and corn to essential spices. This means less time at the grocery store and more time enjoying a homemade meal. It’s perfect for busy weeknights or when you need a hearty dinner without a lot of fuss. The minimal chopping and quick cooking time make it a go-to for anyone looking for a satisfying meal in under an hour.
- Highly Customizable and Adaptable: One of the best features of this white chicken chili is its flexibility. Whether you want to adjust the spice level, swap out vegetables, or make it dairy-free or gluten-free, this recipe provides an excellent foundation. It’s easy to make it your own, catering to various dietary needs and taste preferences. This adaptability ensures that everyone at your table, from picky eaters to spice lovers, can enjoy a personalized bowl.
- Freezer-Friendly and Slow Cooker Compatible: Batch cooking and meal prep are made simple with this chili. It freezes beautifully, allowing you to prepare a large quantity and store it for quick, convenient meals later. Additionally, it’s perfectly suited for the slow cooker, letting you set it and forget it for a delicious, warm meal ready when you are. This dual functionality offers incredible convenience for modern lifestyles.
- Nutrient-Packed with Protein and Veggies: This chili isn’t just tasty; it’s also a nutritious powerhouse. Loaded with lean chicken, fiber-rich white beans, and a generous amount of vegetables like corn and bell peppers, it provides a balanced meal that will keep you feeling full and energized. It’s a smart choice for those looking for a wholesome dish that doesn’t compromise on flavor.
- Naturally Lighter Option: Unlike many creamy chili recipes that rely heavily on cream, half and half, or cream cheese, this version is naturally lighter. We achieve its wonderful creaminess without those heavy additions, making it a healthier choice. This means you can enjoy a rich and satisfying meal without feeling weighed down. However, if you prefer an extra decadent chili, it’s very easy to incorporate those ingredients for an even richer texture.
🛒 Essential Ingredients for Your White Chicken Chili
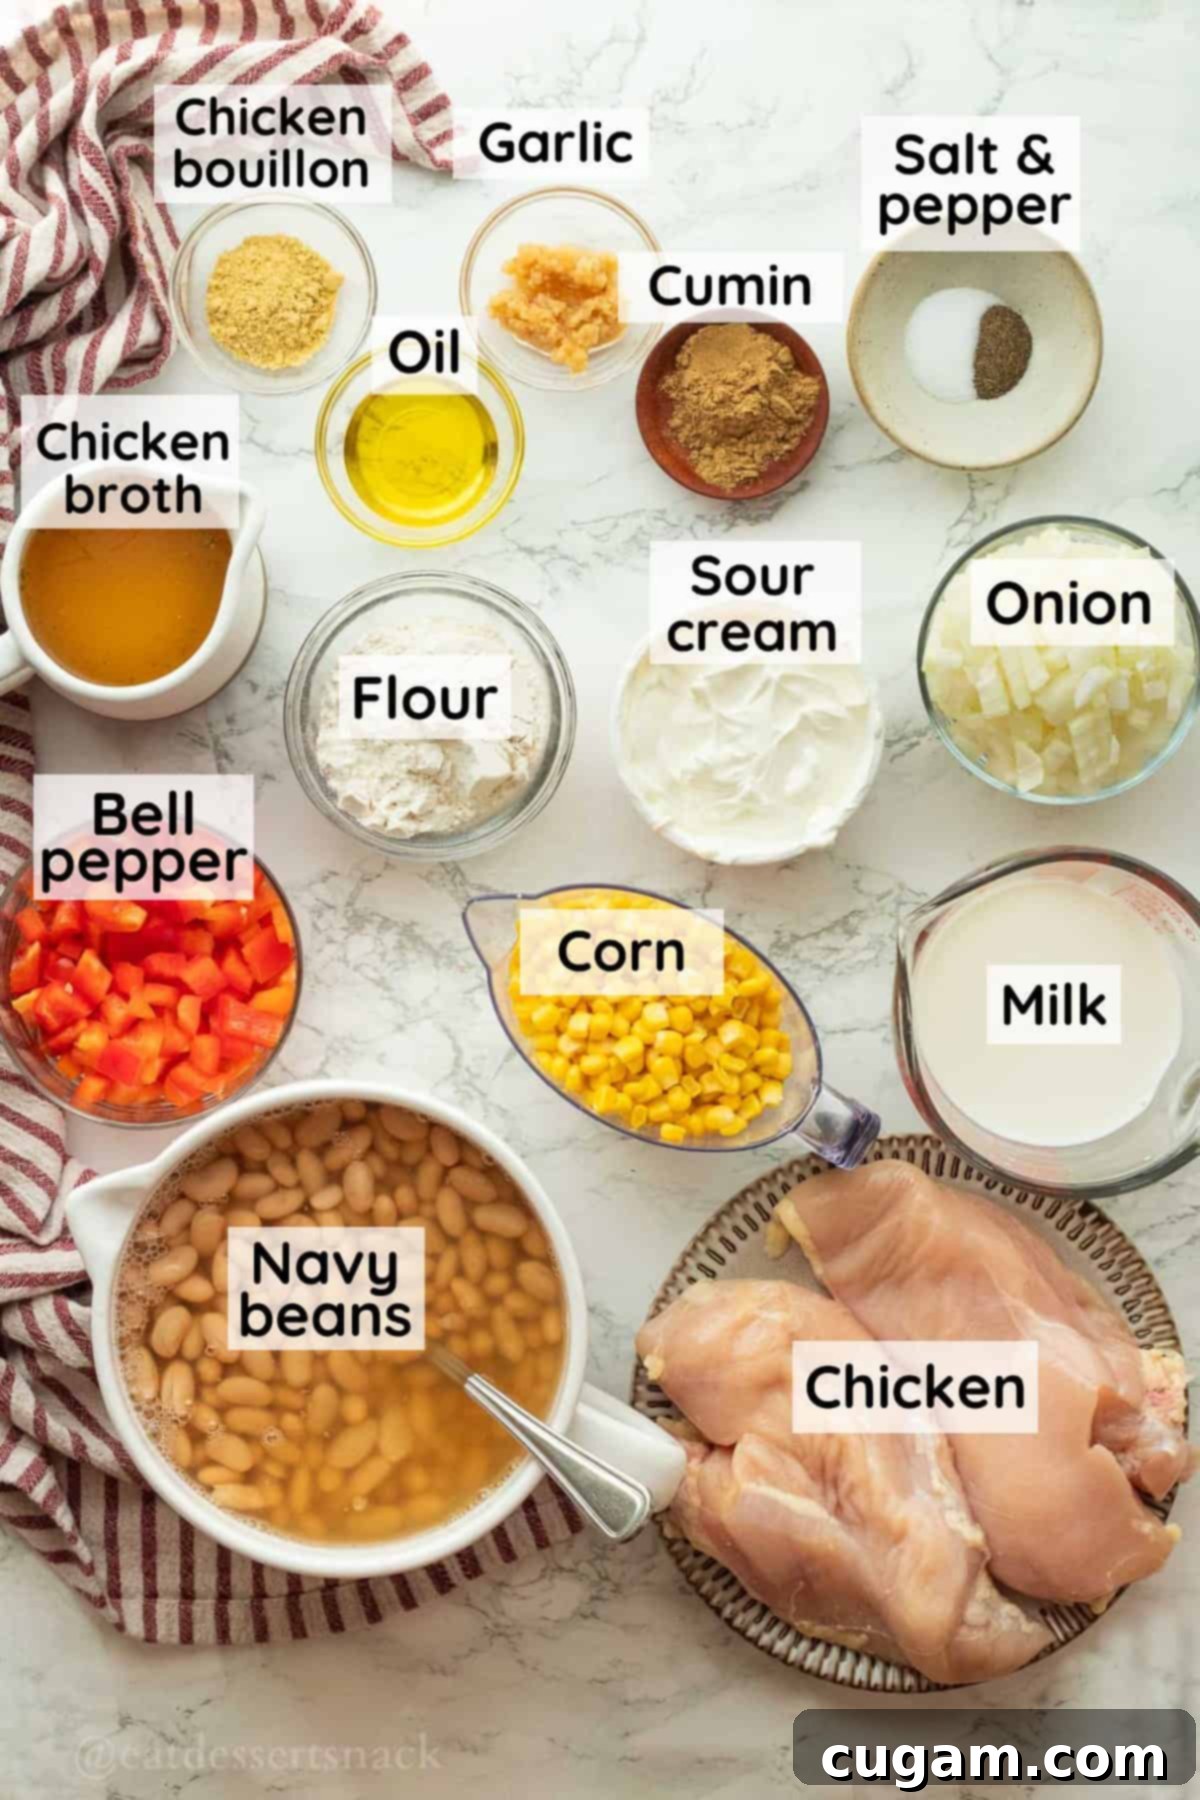
Gathering your ingredients is the first step to creating this delightful white chicken chili. Here’s a closer look at what you’ll need and why each component is crucial for the perfect flavor and texture:
- Beans – The foundation of this white chili! I typically opt for mild-flavored white beans such as navy beans, cannellini beans, or great northern beans. Their creamy texture and subtle taste blend seamlessly into the chili without overpowering other ingredients. They absorb the spices beautifully, adding body and substance to the dish. Pinto beans are also a good alternative if you prefer, as their lighter color won’t drastically change the appearance of the chili. Remember, we’re using canned beans here for convenience, and you won’t need to drain them as the liquid contributes to the chili’s body and flavor.
- Milk – Whole milk is my preferred choice for this recipe. It contributes significantly to the chili’s creamy texture and adds a lovely richness that makes each spoonful incredibly satisfying. It also brings a touch of extra protein. The fat content in whole milk helps create a smooth, velvety consistency. For those seeking dairy-free options, a suitable substitution can easily be made (see the “Substitutions” section below).
- Corn – Sweet corn adds a wonderful burst of flavor and a pleasant texture contrast to the chili. Its natural sweetness provides a delightful balance to the savory and mildly spiced elements of the dish. You can use fresh corn cut from the cob when in season for optimal flavor, frozen corn for year-round convenience (no thawing needed!), or even canned corn (just remember not to drain it, as the liquid adds flavor and moisture).
- Bell Pepper – Any color of bell pepper will work beautifully in this chili, adding both flavor and visual appeal. I often reach for red or green bell peppers for a vibrant pop of color and a slightly different flavor profile (green is more pungent, red is sweeter), but yellow or orange peppers are equally delicious and will add a slightly sweeter note. They provide a fresh, crisp element when sautéed, and their gentle flavor blends well with the other ingredients.
- Flour – This is our secret ingredient for achieving that luxurious, thick consistency without using heavy cream. All-purpose flour is whisked with milk to create a “slurry,” which, when added to the simmering chili, acts as a natural thickener. This method ensures a smooth, creamy texture that coats every ingredient, giving the chili its comforting body. For a gluten-free option, cornstarch works wonderfully as well.
- Sour Cream – Beyond being a fantastic garnish, sour cream is incorporated into the chili itself to enhance its creaminess and add a subtle tanginess that brightens the overall flavor profile. It melts into the chili, creating a velvety consistency that is truly irresistible. Opt for full-fat sour cream for the best texture and taste.
- Chicken Broth – Or chicken stock, forms the liquid base of our chili. Using low-sodium broth allows you to control the saltiness of the dish, but regular broth works just as well. It’s essential for creating a flavorful backdrop for all the other ingredients to meld together, providing depth and savory notes. If you don’t have broth, you can use water and a bit more chicken bouillon.
- Chicken – Boneless, skinless chicken breasts cut into small cubes cook quickly and evenly, absorbing all the wonderful flavors of the spices. This ensures every bite is tender and flavorful. You can also use chicken thighs for a slightly richer flavor and more tender texture, or even leftover cooked chicken (shredded or diced) to further reduce cooking time.
- Spices – A thoughtful blend of chicken bouillon, ground cumin, garlic powder (or fresh garlic), salt, and pepper provides the signature warm, savory, and mildly aromatic profile of this white chili. Cumin is particularly key here, offering an earthy depth that defines chili flavor, while garlic and bouillon build a robust base. Adjust salt and pepper to your personal taste.
- Onion – Diced yellow onion adds a foundational aromatic sweetness when sautéed, building the first layer of flavor for the chili. It mellows beautifully during cooking, contributing a subtle sweetness that enhances the overall taste.
- Olive Oil – Used for sautéing the chicken and vegetables. A good quality olive oil helps them brown and release their delicious flavors, creating a rich start to your chili.
For a precise list of quantities and detailed instructions, please refer to the complete recipe card below.
✏️ Smart Substitutions to Customize Your Chili
This white chicken chili recipe is incredibly forgiving and easy to adapt to what you have on hand or to accommodate dietary preferences. Here are some smart substitutions to help you make it your own:
- Milk – If you’re looking for a dairy-free alternative, unsweetened, unflavored nut milk (like almond milk or cashew milk) can be an excellent substitute for whole milk. Be sure to choose a variety that doesn’t have strong competing flavors, as sweetened versions could alter the chili’s taste. The goal is to maintain that creamy consistency without the dairy.
- Chicken Broth – For a vegetarian version or simply if you’re out of chicken broth, vegetable broth can be swapped in directly, cup for cup. It will still provide a flavorful liquid base for the chili, ensuring depth without the meat-based stock. You could also use a good quality mushroom broth for an umami kick.
- Flour – To make this a gluten-free white chicken chili, substitute the all-purpose flour with half the amount of cornstarch. Whisk the cornstarch with a small amount of cold water or milk to create a smooth slurry before adding it to the simmering chili. This prevents lumps and ensures your chili thickens beautifully without gluten.
- Sour Cream – Plain, unflavored Greek yogurt is a fantastic substitute for sour cream, offering a similar tangy creaminess with an added protein boost, making your chili even more nutritious. If you desire an even richer, more indulgent chili, a block of cream cheese (softened and cut into cubes) can be stirred in until melted, adding incredible richness and a thicker consistency that’s wonderfully decadent.
- Chicken – Leftover cooked chicken (shredded or diced) can be used to shorten the cooking time even further. Simply add it in with the beans and corn to heat through, skipping the initial sautéing step for the raw chicken. For a vegetarian option, consider adding extra beans, diced potatoes, mushrooms, or even a can of rinsed and drained chickpeas in place of the chicken to maintain a hearty texture.
- Onion & Bell Pepper – If you’re short on time or ingredients, you can use frozen diced onion and bell pepper mixes. They cook down quickly and save on prep time.
🆒 Creative Variations to Elevate Your White Chili
Once you’ve mastered the basic recipe, don’t hesitate to get creative! This white chicken chili is a fantastic canvas for various flavor enhancements and additional ingredients to suit your taste:
- For an Extra Kick of Spice: If you love a bit of heat, consider adding ½ cup of diced green chilies (canned, fresh, or frozen) when you add the beans and corn. These provide a lovely, mild warmth. For a more intense heat, a few sprinkles of red pepper flakes or a dash of cayenne pepper also work wonders for an immediate spice boost. You could even sauté a finely diced jalapeño with the onions and bell peppers for a fresh, spicy flavor. As folks in New Mexico know, green chilies can elevate almost any dish!
- Alternative Beans: While white beans are traditional for this recipe, you can experiment with other varieties. For a delicious black bean chicken chili, swap out the navy beans for black beans. Just be sure to drain and rinse them thoroughly to prevent them from coloring your chili too dark, maintaining a lighter base while introducing a different flavor and texture. Kidney beans or cannellini beans also work well.
- Add More Vegetables: Enhance the nutritional value and texture by incorporating other vegetables. Diced zucchini, carrots, or even a handful of fresh spinach stirred in at the very end (it will wilt quickly) can add more goodness without altering the cooking time significantly. Fire-roasted tomatoes (diced) can also add a smoky, acidic depth.
- Smoky Flavor: A pinch of smoked paprika (about ½-1 teaspoon) added with the other spices or a dash of liquid smoke can introduce a wonderful smoky depth to the chili, complementing the savory flavors beautifully and adding complexity.
- Cheese Integration: For an even cheesier chili, stir in ½ cup of shredded Monterey Jack, pepper jack, or mild cheddar cheese during the last few minutes of simmering, allowing it to melt into the creamy base. This creates an even richer and more luxurious consistency.
- Herbaceous Twist: Fresh cilantro is a common garnish, but consider adding a tablespoon of fresh chopped oregano or a bay leaf during simmering for an extra layer of aromatic flavor. Remember to remove the bay leaf before serving. A touch of dried thyme can also add an earthy note.
- Cream Cheese Richness: For an ultra-creamy and indulgent chili, stir in 4 ounces (half a block) of softened cream cheese along with the sour cream. It will melt smoothly into the chili, making it incredibly rich and thick.
🧑🍳 Step-by-Step Instructions for Your Creamy White Chicken Chili
Follow these simple steps to create a hearty and flavorful white chicken chili that will quickly become a family favorite. This recipe is designed for ease and efficiency, perfect for any home cook looking for a delicious meal in minimal time.

Step 1: Sauté the Aromatics and Chicken. Begin by heating 1 tablespoon of olive oil in a large, heavy-bottomed pot or Dutch oven over medium-high heat. Once the oil shimmers, add your diced chicken, chopped yellow onion, and bell pepper. Stir in the chicken bouillon, ground cumin, garlic powder (or minced fresh garlic cloves), salt, and ground pepper. Sauté this mixture for about 5-7 minutes, stirring occasionally, until the chicken is cooked through and no longer pink in the center, and the onions and bell peppers have softened and become tender. This step is crucial for building the foundational flavors of your chili.

Step 2: Combine Wet Ingredients and Initial Simmer. To the cooked chicken and vegetables, add the undrained white beans (the liquid adds flavor and body), corn (no need to drain if canned, or use frozen directly), sour cream, and chicken broth. Stir everything together gently to combine all the ingredients thoroughly. Bring the mixture to a gentle simmer over medium heat. Allow it to simmer for a few minutes (about 5 minutes) to allow the flavors to start melding together. It’s important not to let it come to a rolling boil at this stage, especially with the sour cream already added, to prevent curdling.

Step 3: Thicken the Chili with a Slurry. In a separate small bowl, vigorously whisk together the milk and all-purpose flour until the mixture is completely smooth and lump-free. This creates what’s known as a “slurry,” which will thicken your chili. Slowly pour this milk-flour slurry into the simmering chili, stirring constantly as you pour. Continue to stir gently to ensure the thickener is evenly distributed and doesn’t clump at the bottom of the pot. Bring the chili back to a gentle simmer and continue to cook for another 15-20 minutes, stirring occasionally to prevent sticking. During this time, the chili will thicken to a creamy, luscious consistency as the flour cooks, and the flavors will deepen significantly.

Step 4: Serve and Garnish. Once the chili has simmered for the recommended time and achieved your desired thickness (it should be rich and creamy), it’s ready to serve! The flour and milk slurry will have worked its magic, transforming the liquid into a hearty, comforting meal. Keep in mind that the chili will continue to thicken slightly as it cools. Ladle generous portions into bowls and get ready to customize with your favorite toppings for maximum deliciousness. Suggested toppings include shredded cheese, diced tomatoes, fresh cilantro, creamy avocado, and a squeeze of fresh lime for a vibrant finish.
📌 Top Tips for the Best Creamy White Chicken Chili
- Embrace the Toppings: Chili is all about the toppings! Don’t hold back. Classic choices like a generous dollop of extra sour cream or plain Greek yogurt, a sprinkle of shredded cheese (Monterey Jack or cheddar are fantastic), and a handful of fresh cilantro are always winners. For added freshness and texture, try diced fresh tomatoes, thinly sliced jalapeños (fresh or pickled for a tangy kick), creamy avocado slices, or even a sprinkle of crushed tortilla chips for a delightful crunch. Each topping adds a layer of flavor, texture, and visual appeal, making the chili even more exciting.
- Allow for Proper Simmering for Flavor: The simmering phase is crucial for flavor development. Make sure to simmer the chili for at least 10-15 minutes after adding all the main ingredients. This extended gentle cooking allows the spices, chicken, beans, and corn to fully meld together, creating a deeper, more cohesive flavor profile that’s far superior to chili that’s simply heated through. Patience in this step truly pays off, transforming simple ingredients into a complex, comforting dish.
- Constant Stirring After Slurry Addition: When you add the milk and flour slurry, it’s absolutely essential to stir the chili constantly and vigorously. This ensures that the thickener is fully incorporated and prevents it from settling at the bottom of the pot, where it can easily burn or clump, ruining the texture of your chili. Continue stirring until the chili begins to thicken evenly, typically within a few minutes.
- Gentle Heat for Dairy: Once sour cream is added (either into the chili itself or as a garnish), avoid bringing the chili to a vigorous, heavy boil. High heat can cause dairy products like sour cream (and even milk) to separate or curdle, resulting in an unappetizing, grainy texture. A gentle, consistent simmer is all that’s needed to keep everything smooth and wonderfully creamy.
- The Magical Touch of Limes: A simple squeeze of fresh lime juice over your individual serving of chili might seem like a minor detail, but it makes a huge difference! The bright, acidic citrus burst cuts through the richness of the chili, awakening all the flavors and adding an incredibly refreshing finish. It’s a simple trick that elevates the entire dish, making it taste even more vibrant and complex. Don’t skip it!
This satisfying recipe is perfect for feeding a crowd, and it’s an incredibly easy white chicken chili to prepare, especially if you utilize a large slow cooker. For even easier cleanup, consider using these awesome crock pot liners, which turn tidying up into a breeze. As mentioned before, we frequently make double batches of this delicious chili because it freezes so well. Having pre-made portions on hand means you’re always just a reheat away from a wholesome and comforting meal, making your busy weeknights a little bit easier and a lot more flavorful! It’s truly a versatile and beloved recipe that fits perfectly into any fall or winter menu.
Storage and Reheating Tips for Your Chili
Making a big batch of this creamy white chicken chili is a smart move, and knowing how to store and reheat it properly ensures you can enjoy its deliciousness for days to come, minimizing waste and maximizing convenience.
- Refrigeration: Once your chili has cooled completely to room temperature (this is important for food safety), transfer any leftover portions into an airtight container. This will keep safely in the refrigerator for 4-5 days. For the best flavor and texture, it’s advisable to reheat individual portions as needed, rather than reheating the entire batch multiple times.
- Freezing: This chili is exceptionally freezer-friendly, making it ideal for meal prep! To freeze, allow the chili to cool completely first. Then, transfer it to freezer-safe containers or heavy-duty reusable freezer bags. If using containers, leave a little headspace at the top to allow for expansion during freezing. Remove as much air as possible from bags to prevent freezer burn. It can be safely frozen for up to 3 months without significant loss of quality.
- Thawing & Reheating: To thaw frozen chili, the safest method is to transfer it to the refrigerator overnight. Once thawed, reheat gently on the stovetop over medium-low heat, stirring occasionally, until it is warmed through and simmering. If the chili appears too thick after thawing, you can add a splash of chicken broth or milk to reach your desired consistency. Individual portions can also be reheated in the microwave, stirring halfway through.
❓Frequently Asked Questions About White Chicken Chili
Absolutely! This recipe is perfectly suited for a slow cooker, making it an ideal “set-it-and-forget-it” meal. For the slow cooker method, simply add all ingredients (diced chicken, onion, bell pepper, white beans, corn, chicken bouillon, cumin, garlic, salt, pepper, chicken broth, milk, and flour) directly to your crock pot. Stir everything well to combine. Cook on high for 3-4 hours or on low for 5-6 hours, or until the chicken is thoroughly cooked, wonderfully tender, and the chili has thickened. Just before serving, turn off the heat and stir in the sour cream until it’s fully incorporated and creamy. This slow cooking method allows the flavors to meld beautifully over time, resulting in an even richer chili.
To freeze white bean chicken chili effectively, first ensure it has completely cooled down to room temperature. This prevents ice crystal formation and maintains quality. Then, transfer it into freezer-safe containers or heavy-duty reusable freezer bags. For best results, divide it into individual or family-sized portions. If using containers, leave a small amount of headspace at the top for expansion. It can be safely frozen for up to 3 months. When you’re ready to enjoy it, simply thaw it overnight in the refrigerator before gently reheating on the stovetop or in the microwave. If it seems too thick after thawing, a splash of broth or milk can help restore the consistency.
When stored properly in an airtight container immediately after cooling, your delicious white chicken chili will last for 4-5 days in the refrigerator. Ensure it’s kept at a consistent cold temperature to maintain freshness and safety. This makes it a great option for meal prepping at the beginning of the week, providing you with several easy and wholesome meals to enjoy throughout your busy schedule.
Each generous serving of this hearty white chicken chili is approximately 1.5 cups. This portion size is designed to be satisfying and filling on its own, especially when topped with your favorite garnishes and perhaps served alongside a piece of cornbread or a light side salad. It’s a substantial meal that will leave you feeling comforted and content.
🥣 More Cozy Fall & Winter Dinner Recipes to Love
As the weather turns cooler, there’s nothing better than a warm and comforting meal to gather around. If you enjoyed this creamy white chicken chili, you’ll love these other cozy recipes perfect for fall and winter evenings. They’re designed to be hearty, flavorful, and bring warmth and satisfaction to your table, making them ideal for family dinners or entertaining guests on chilly nights.
- Creamy Chicken Wild Rice Soup
- Tuscan White Bean Soup
- Healthy Taco Soup
- Chicken and Dumpling Soup
📝 Printable Recipe Card: Easy White Chicken Chili

Creamy White Chicken Chili with Corn
Pin Recipe
Ingredients
For the Chili Base:
- 1 tablespoon olive oil
- 2 raw chicken breasts cut into small, bite-sized cubes for quick cooking
- 1 small yellow onion finely diced
- 1 bell pepper diced (red, green, yellow, or orange all work well)
- 2 teaspoons chicken bouillon (or use 1 cup of broth + 1 tsp bouillon)
- 2 teaspoons ground cumin
- 2 teaspoons garlic powder or 3 cloves fresh minced garlic
- 1 teaspoon salt (adjust to taste)
- ½ teaspoon ground black pepper (or more, to your preference)
- 3 15 oz. cans white beans (navy, cannellini, or great northern – do not drain!)
- 2 cups corn (fresh, frozen, or canned – do not drain if canned)
- 8 oz. sour cream (or plain full-fat Greek yogurt for a protein boost)
- 1 cup chicken broth or stock (low sodium recommended; or mix 1 teaspoon chicken bouillon with 1 cup water)
For the Thickening Slurry:
- 1 cup whole milk (or unsweetened nut milk for dairy-free)
- ½ cup all-purpose flour (use half the amount of cornstarch for gluten-free)
Optional Toppings (highly recommended!):
- Shredded cheese (Monterey Jack, cheddar, or a Mexican blend)
- Diced tomatoes
- Fresh cilantro (chopped)
- Avocado (diced or sliced)
- Sliced jalapeños (fresh or pickled)
- Lime wedges (for serving)
Instructions
-
In a large, heavy-bottomed pot or Dutch oven, heat 1 tablespoon of olive oil over medium-high heat. Add the diced chicken, chopped yellow onion, diced bell pepper, chicken bouillon, ground cumin, garlic powder (or minced garlic cloves), salt, and ground pepper. Cook, stirring occasionally, for 5-7 minutes, until the chicken is cooked through and lightly browned, and the vegetables are tender. Ensure there’s no pink left in the chicken.
-
Stir in the undrained white beans, corn (undrained if canned), sour cream, and chicken broth. Mix well to combine all ingredients. Bring the mixture to a gentle simmer over medium heat. Let it simmer for a few minutes (about 5 minutes) to allow the flavors to combine and deepen, but do not let it come to a rolling boil.
-
In a separate small bowl, whisk together the 1 cup of whole milk and ½ cup of all-purpose flour until completely smooth and free of lumps. This creates your thickening slurry. Ensure there are no dry pockets of flour.
-
Slowly pour the milk and flour slurry into the simmering chili, stirring constantly to ensure it incorporates smoothly and evenly throughout the pot. Continue to simmer for an additional 15-20 minutes, stirring occasionally, until the chili has thickened to your desired creamy consistency. The flour needs time to cook out any raw taste. Taste and adjust seasonings as needed, adding more salt, pepper, or cumin if desired.
Serve your warm, delicious white chicken chili immediately. Garnish generously with your favorite toppings such as shredded cheese, diced tomatoes, fresh cilantro, creamy avocado slices, or a refreshing squeeze of fresh lime juice for an extra burst of flavor. Enjoy this hearty and comforting meal!
Notes
Freezing Instructions: To best preserve the quality and flavor of your chili, allow the prepared chili to cool completely to room temperature before freezing. Transfer it to airtight, freezer-safe containers or heavy-duty freezer bags. For easier meal planning, consider freezing in individual or family-sized portions. It can be stored in the freezer for up to 3 months. To reheat, thaw overnight in the refrigerator and then gently warm on the stovetop over low to medium heat, stirring occasionally. Add a splash of broth or milk if the chili appears too thick after thawing to achieve your desired consistency.
