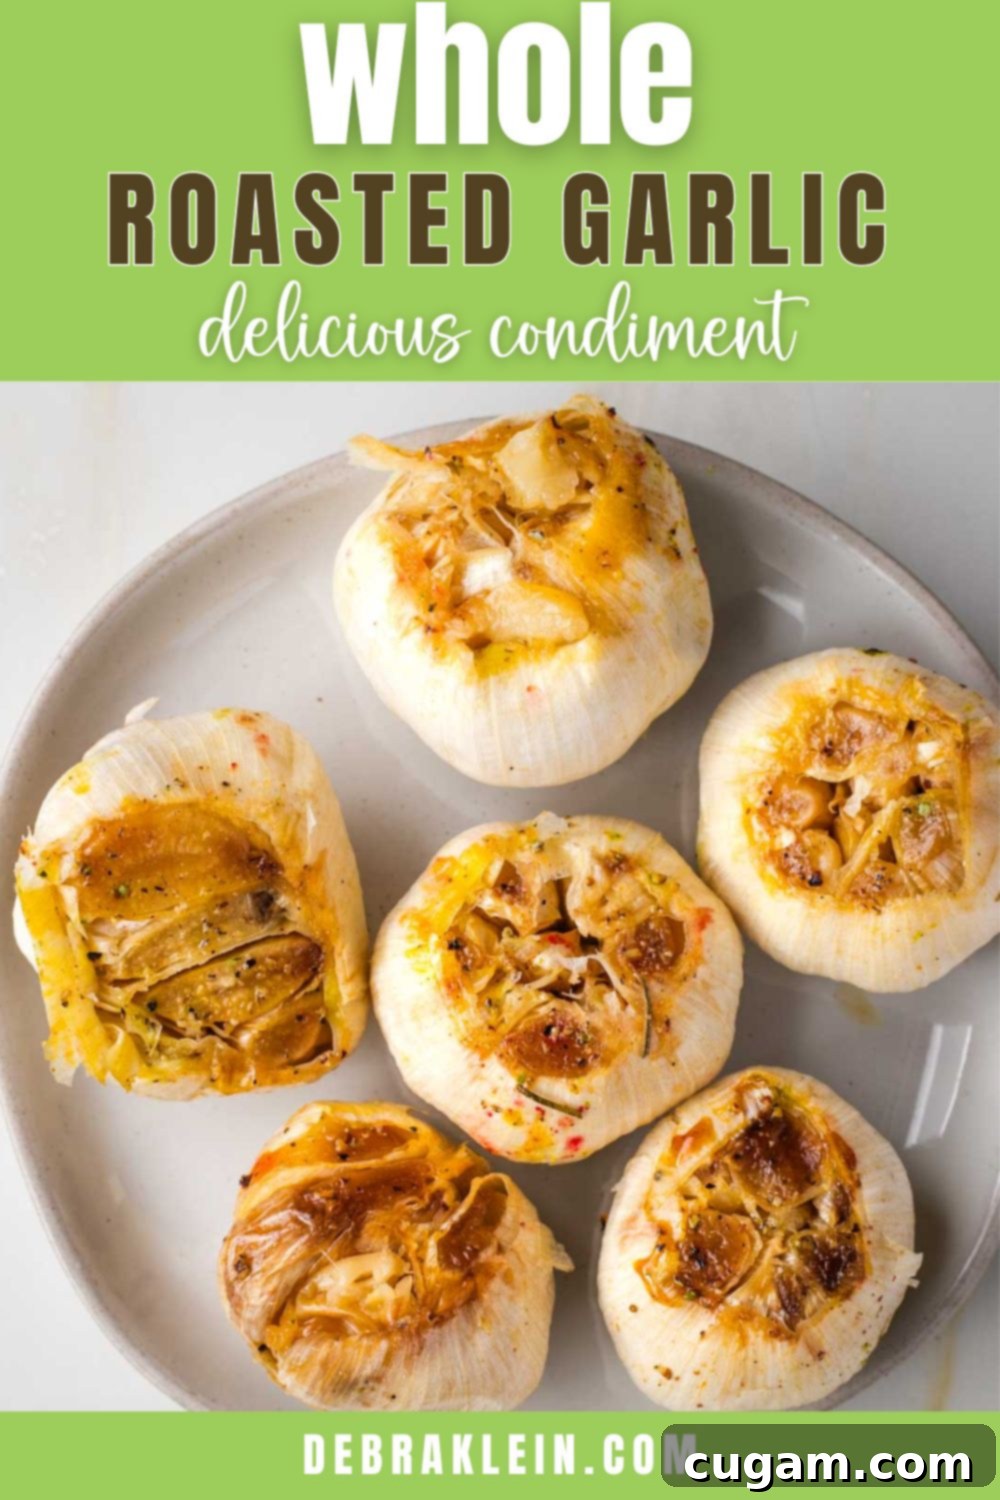
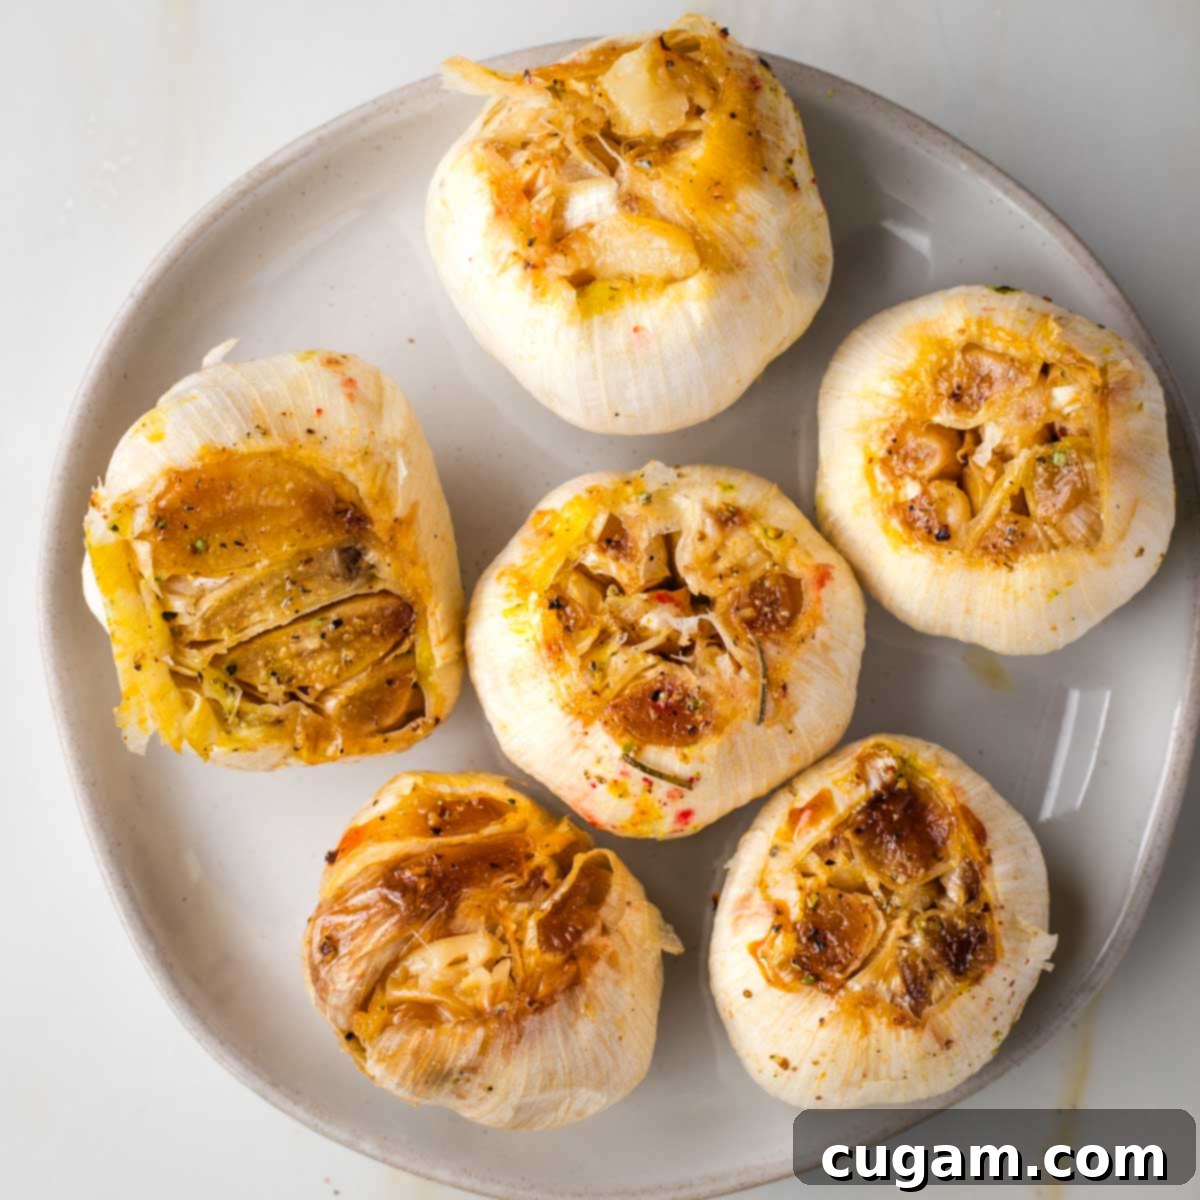
The Ultimate Guide to Perfectly Oven-Roasted Garlic: Easy, Flavorful & Versatile
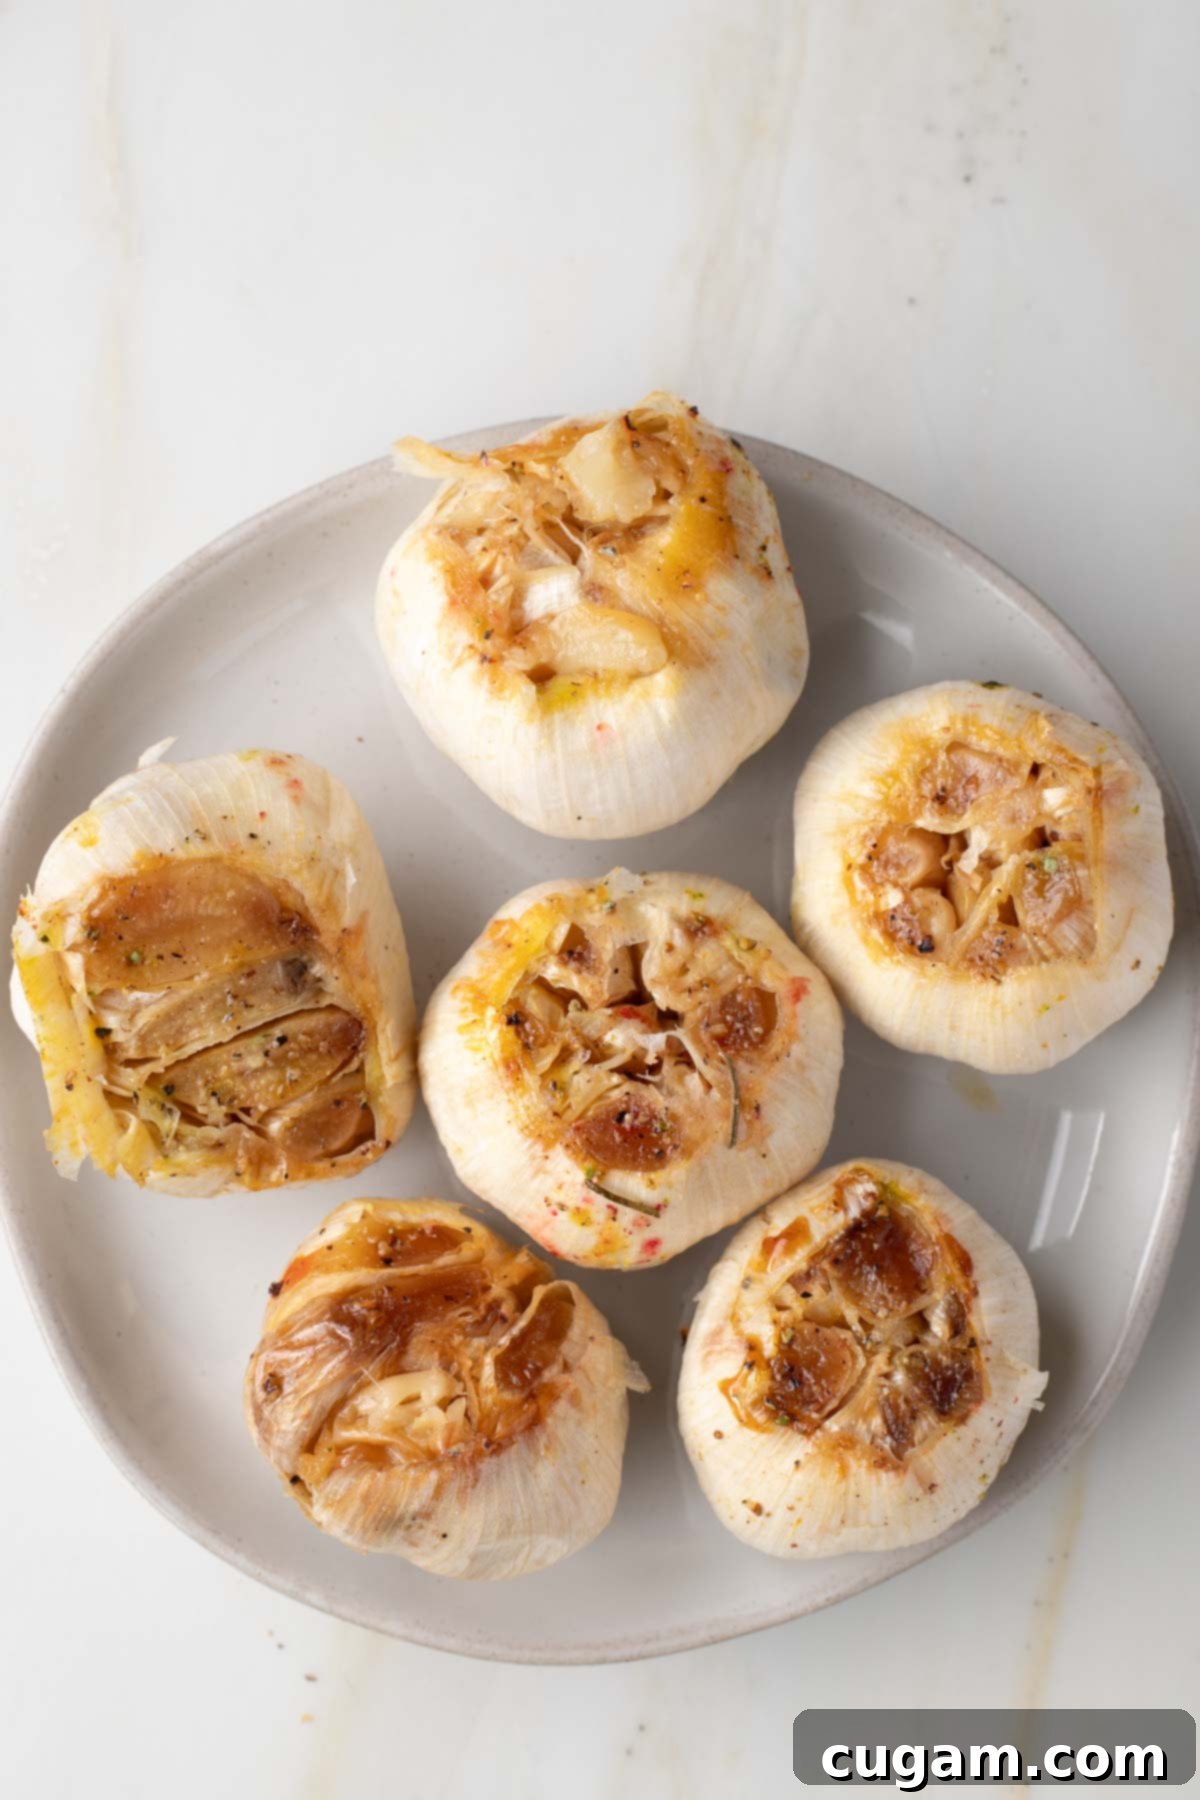
Welcome, fellow garlic enthusiasts! If you adore the rich, aromatic essence of garlic but sometimes find raw garlic a bit too intense, then you’ve come to the right place. This incredibly easy oven-roasted garlic recipe is truly the best way to transform whole heads of garlic into a mild, sweet, and wonderfully creamy spread. Once roasted to golden perfection, the softened pulp effortlessly squeezes out from its papery skin, ready to elevate a myriad of your favorite dishes.
Imagine this: creamy, caramelized garlic smeared onto warm, crusty bread, crackers, or bruschetta, instantly turning simple appetizers into gourmet delights. It’s also fantastic as a flavorful spread for wraps and sandwiches, adding a depth that raw garlic simply can’t match. Beyond a simple spread, this versatile ingredient is a secret weapon for enhancing countless recipes, from savory sauces to comforting soups. It’s an indispensable component for any home cook looking to infuse their meals with a touch of culinary magic.
This comprehensive guide has been updated and expanded from its original publication on October 11, 2016, to bring you even more tips and tricks for perfect roasted garlic every time.
[feast_advanced_jump_to]
Why Roast Garlic? The Benefits of Transformation
For many garlic lovers, raw garlic can sometimes lead to digestive discomfort, like heartburn. The wonderful thing about the roasting process is that it completely transforms garlic’s chemical properties, making it significantly easier to digest. The sharp, pungent notes mellow out, giving way to an even deeper, sweeter, and more complex garlic flavor. It’s a true win-win: you get to enjoy more of that incredible garlic taste without the potential downsides of its raw form.
This simple method involves taking an entire bulb of raw garlic and roasting it whole in a small baking dish. This technique is key to locking in all the delicious moisture and flavor. While similar, it’s important to distinguish this from garlic confit, which typically involves slow-baking individual garlic cloves submerged in oil, yielding a different kind of rich, infused deliciousness. Our method focuses on whole bulb roasting for a distinct, creamy result.
By roasting the garlic while still encased in its natural papery skin, each clove is protected and allowed to steam gently within its own wrapper. This ensures that the roasted cloves remain incredibly moist and develop a gloriously creamy texture, with a rich, caramelized, and subtly buttery flavor. It’s a flavor profile that is truly “super yum” and incredibly versatile.
Once roasted, that transformed bulb of garlic becomes a culinary gem, ready to be spread on nearly anything or incorporated into your favorite recipes. Think beyond simple toast! Integrate it into creamy dishes like vegan basil pesto for a milder, more profound garlic note, swirl it into baba ganoush for an added layer of smoky sweetness, or mix it into dairy-free mashed potatoes for an unforgettable savory kick. The possibilities are endless for this golden, delectable ingredient.
Selecting the Best Garlic: A Guide to Buying Fresh Bulbs
The secret to delicious roasted garlic starts with selecting high-quality fresh garlic. A good bulb of garlic will not only roast better but will also yield a more flavorful and tender result. Here’s what to look for when you’re at the grocery store or farmer’s market:
- Examine the Skins: Always choose garlic with dry, intact, and unblemished papery skins. These outer layers act as a protective barrier, keeping the cloves fresh. Avoid bulbs with torn or bruised skins, as this can indicate damage or an older product.
- Feel for Firmness: Gently press on the garlic bulb. It should feel firm and solid, with individual cloves tightly packed together. Any softness or sponginess is a clear sign that the garlic is old, dried out, or beginning to spoil.
- Check the Color: Opt for lighter-colored cloves. Fresher garlic typically has a more vibrant white or off-white hue. A yellowish tint can suggest that the garlic is aging and might have a weaker flavor or be less tender when roasted.
- Beware of Green Shoots: If you see green shoots emerging from the ends of the cloves, this means the garlic is older and has started to sprout. Sprouting garlic has often been exposed to excessive heat, light, or moisture, which can cause it to develop a noticeably bitter taste – definitely something you want to avoid for your sweet roasted garlic.
- Avoid Dry or Soft Garlic: As mentioned, softness indicates spoilage. Additionally, very dry, shriveled, or withered garlic bulbs are past their prime. They won’t roast well and will lack the juicy, plump texture you desire for creamy roasted garlic.
By following these simple tips, you’ll ensure you’re starting with the freshest, most vibrant garlic, laying the foundation for a truly exceptional roasted garlic experience.
Optimal Storage Methods for Fresh Garlic
Properly storing garlic is crucial to maintaining its freshness, flavor, and preventing premature sprouting or spoilage. Different forms of garlic require different storage approaches:
Storing Whole, Unpeeled Garlic Bulbs
The best way to store fresh, whole garlic bulbs is in a cool, dry, and dark place with good air circulation. A pantry, a mesh bag, or even a breathable basket on your counter (away from direct sunlight) works perfectly. Crucially, whole heads of garlic do not need to be refrigerated. In fact, refrigerating whole bulbs can actually shorten their shelf life by encouraging moisture and sprouting, which leads to a bitter taste. If you must refrigerate a whole bulb, ensure it’s in a well-ventilated container, perhaps with a paper towel to absorb any condensation, and avoid the crisper drawer.
Storing Peeled Raw Garlic Cloves
Once you’ve separated and peeled individual raw garlic cloves, their shelf life significantly decreases. They can be stored in an airtight container or a jar in the refrigerator, but should be used within one week to ensure optimal freshness and prevent mold growth. For longer storage, peeled raw cloves can be frozen for up to 6 months. To freeze, simply place them in a freezer-safe bag or container.
Storing Chopped Fresh Garlic
Chopped fresh garlic has an even shorter refrigerated life. If stored covered in oil in an airtight container in the refrigerator, it will last approximately 4 days. Be mindful that chopped garlic in oil, especially at room temperature, can pose a risk of botulism if not handled and stored correctly, so always keep it refrigerated and use quickly. For extended storage, chopped fresh garlic covered in oil can be frozen for up to 6 months. However, for the best flavor, aim to use it within 3 months, as the intensity of the garlic will start to diminish over time in the freezer.
For specific guidance on how to preserve your delicious roasted garlic, please refer to the “How to Store Roasted Garlic” section below.
Health Benefits and Nutritional Profile of Roasted Garlic
While some of garlic’s potent sulfur compounds, like allicin (responsible for much of its raw pungency and some health benefits), are reduced during the roasting process, roasted garlic still offers a wealth of nutritional advantages. The significant change in its chemical properties during roasting makes it a fantastic option for those who find raw garlic challenging to digest. This means more people can comfortably consume larger quantities, potentially making the available health benefits more accessible and enjoyable.
- Rich in Antioxidants: Roasted garlic retains a good portion of its antioxidant compounds. These powerful substances play a crucial role in fighting free radicals in the body, which helps to control blood pressure, boost overall immunity, and protect our cells from oxidative damage and infections.
- Vitamin C Retention: Interestingly, the roasting process has only a minimal effect on garlic’s Vitamin C content. Vitamin C is a vital nutrient known for its ability to support a robust immune system, aid in collagen production, and offer protection against various chronic diseases, including heart disease and stroke.
- Essential Minerals: Garlic, both raw and roasted, is a good source of several essential minerals that are bioavailable to the body. These include manganese, which is important for bone health and metabolism; copper, crucial for energy production and iron absorption; and selenium, a powerful antioxidant that supports thyroid function and immune health.
- Improved Digestibility: Perhaps one of the most practical benefits, as highlighted earlier, is the vastly improved digestibility of roasted garlic. This allows individuals sensitive to raw garlic to still enjoy its rich flavor and nutritional contributions without discomfort.
- Anti-inflammatory Properties: Garlic, in its various forms, is known for its anti-inflammatory effects, which can contribute to overall wellness and the management of chronic inflammatory conditions.
So, even though it undergoes a transformation, roasted garlic remains a delicious and nutritious addition to a healthy diet, offering a gentler way to enjoy its many virtues.
Simple Ingredients for Irresistible Roasted Garlic
You’ll be delighted by how few ingredients are needed to create such a profoundly flavorful component. The beauty of this recipe lies in its simplicity, allowing the natural sweetness of the roasted garlic to shine. Here’s a breakdown of what you’ll need and potential substitutions:
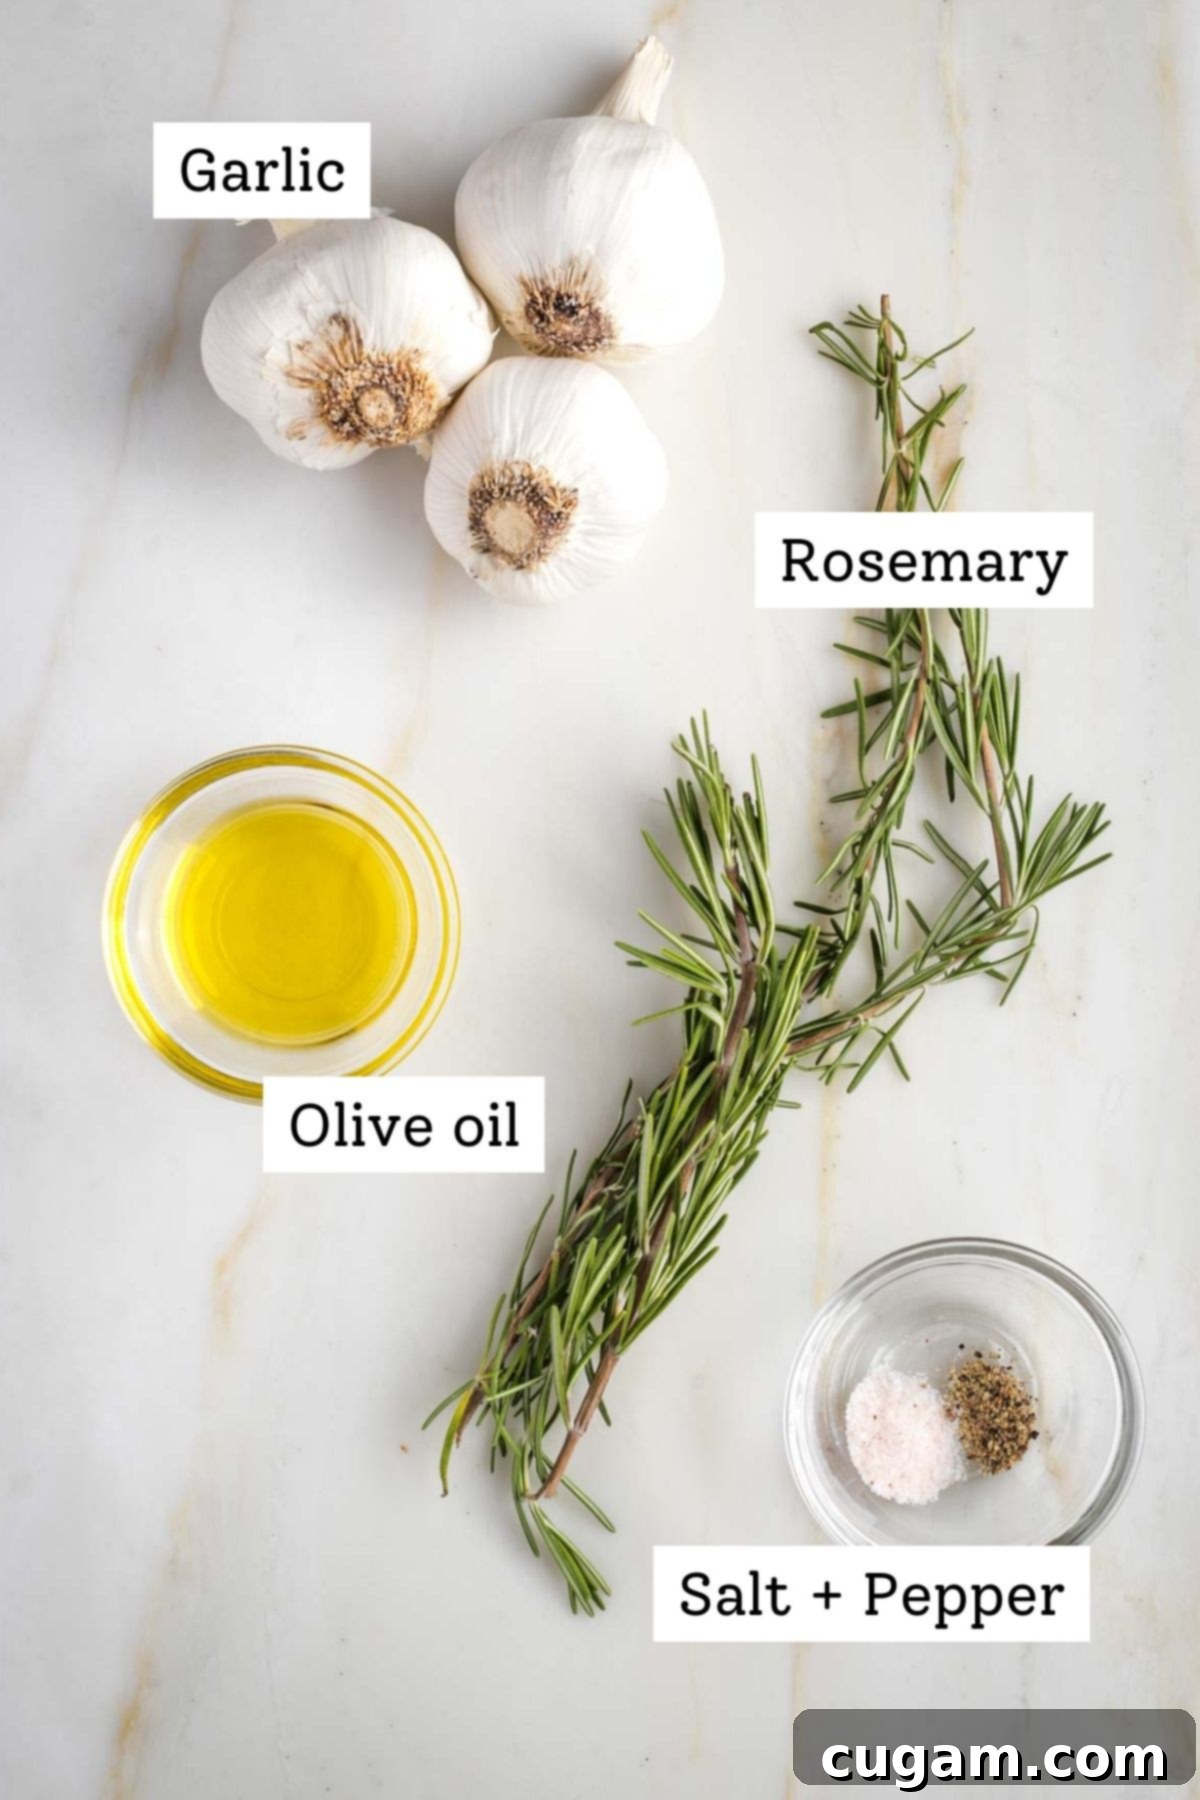
- Whole Heads of Garlic: This is, of course, the star of our show! The recipe calls for whole, unpeeled heads of garlic. For the best results, refer to our detailed guide above on “Selecting the Best Garlic” to ensure you choose fresh, firm, and unblemished bulbs. The number of heads you use can vary based on your needs, but even just a couple can yield a substantial amount of delicious pulp.
- Fresh Herbs (Rosemary recommended): Fresh herbs are optional but highly recommended as they impart a beautiful aroma and a subtle, complementary flavor to the garlic as it roasts. Fresh rosemary is a classic pairing with garlic, offering a piney, fragrant note.
- Substitutions for Rosemary: If fresh rosemary isn’t available, excellent alternatives include fresh oregano or thyme sprigs. These herbs also have a robust flavor that stands up well to roasting.
- Using Dried Herbs: If fresh herbs aren’t an option, you can certainly use dried herbs. A good quality dried Italian seasoning mix works wonderfully, or you can use individual dried herbs like parsley, dried rosemary (in moderation, as dried rosemary is more potent than fresh), thyme, or oregano. Add about ½ teaspoon per bulb of garlic, adjusting to your taste.
- Olive Oil (Extra Virgin): A drizzle of olive oil is essential. It helps to keep the garlic bulbs moist during the roasting process, preventing them from drying out and ensuring that creamy, tender texture we’re aiming for. Extra virgin olive oil is preferred for its flavor, but any good quality olive oil or even avocado oil will work.
- Oil-Free Option: If you prefer to make this recipe oil-free, you can substitute the olive oil with a small amount of vegetable broth or water. Just ensure the tops of the garlic bulbs are lightly moistened before covering and roasting. This will still help with moisture retention.
- Salt and Black Pepper: A pinch of coarse sea salt and a few grinds of fresh black pepper are used to season the exposed garlic cloves. These simple seasonings enhance the natural sweetness of the roasted garlic.
Gather these ingredients, and you’re just a few steps away from creating a batch of perfectly roasted garlic that will become a staple in your kitchen!
Foil Packet Roasting: An Alternative Method with a Key Precaution
While this recipe primarily uses a baking dish, some prefer to roast garlic in foil packets on a baking sheet. This method works well for individual bulbs or smaller batches. However, if you choose this approach, there’s a crucial step to ensure food safety and quality: always use parchment paper as a barrier.
The Parchment Paper Precaution: It’s important to first wrap your whole garlic bulbs in unbleached parchment paper. This step prevents the aluminum foil from coming into direct contact with the garlic, as acidic foods (and garlic can be mildly acidic) can potentially leach aluminum into your food during cooking. After wrapping the garlic in parchment paper, you can then take a piece of aluminum foil and wrap it tightly around the outside of the parchment packet. This creates a secure seal, locking in moisture and flavor while keeping the garlic safely separated from the aluminum.
Ensuring the tops of the garlic cloves, especially where they are exposed, do not directly touch the aluminum foil is key to a safe and delicious result when using this alternative roasting method.
Step-by-Step Guide: How to Perfectly Oven Roast Garlic Bulbs
Once you try this oven-roasting method, you’ll understand why it’s considered the easiest and most foolproof way to achieve perfectly tender, sweet garlic every time. While some might consider using an air fryer for speed, I’ve found it’s far too easy to burn the delicate garlic cloves in an air fryer, resulting in an unpleasant bitter taste and a chewy, rather than creamy, texture. The oven provides a more consistent and gentle heat, essential for that desirable caramelized goodness.
Preparation Steps:
-
Preheat Your Oven: Start by preheating your oven to 375°F (190°C). This ensures a consistent temperature from the moment your garlic enters the oven.
-
Prepare the Garlic Bulbs: Begin by gently peeling away the outermost layers of the papery skin from each garlic bulb, being careful not to separate the individual cloves. This simply helps the heat penetrate more evenly.
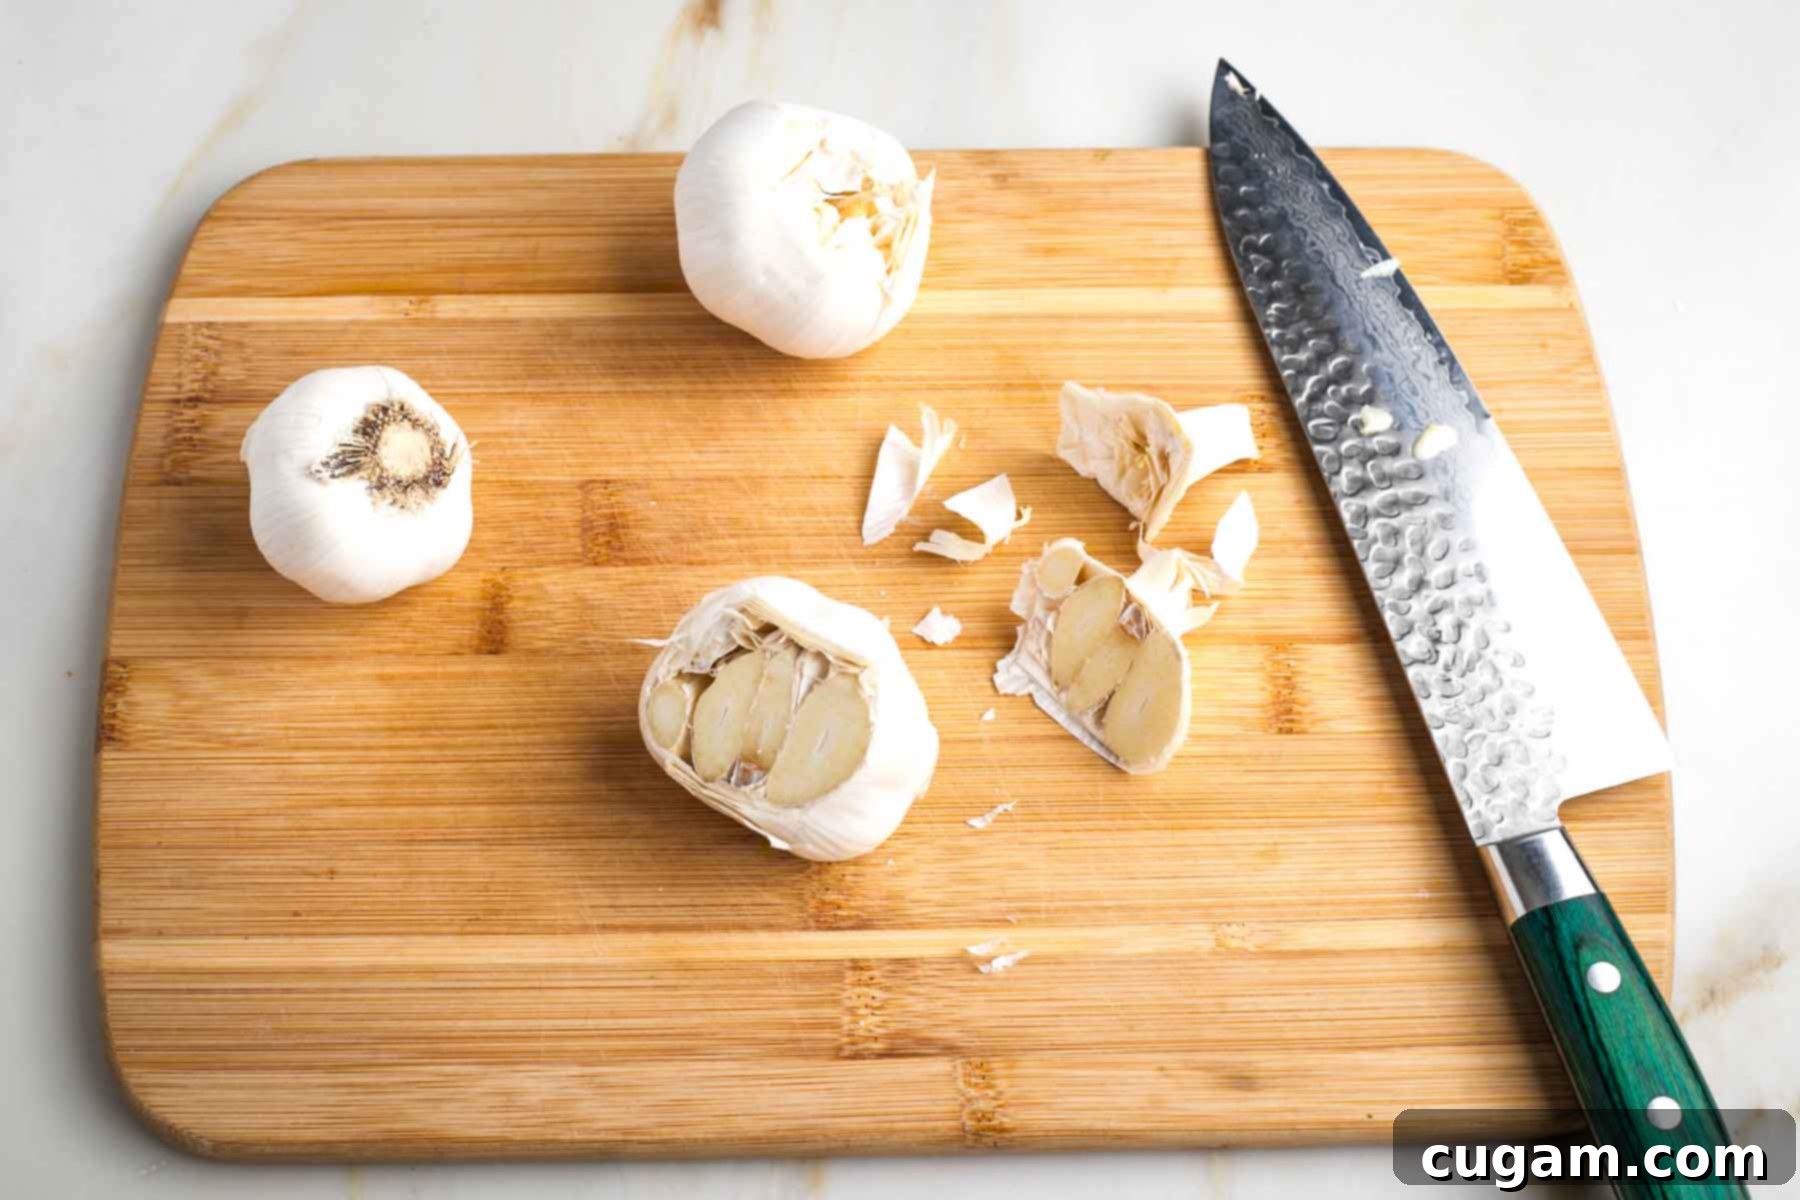
Trim the Tops: Using a sharp knife, make a thin, horizontal slice off the very top of each garlic bulb. Make sure you’re slicing from the end opposite the root (the flat bottom part). This exposes the tips of the individual garlic cloves, allowing the olive oil and seasonings to penetrate and providing a flat surface for the bulb to rest on when flipped later.
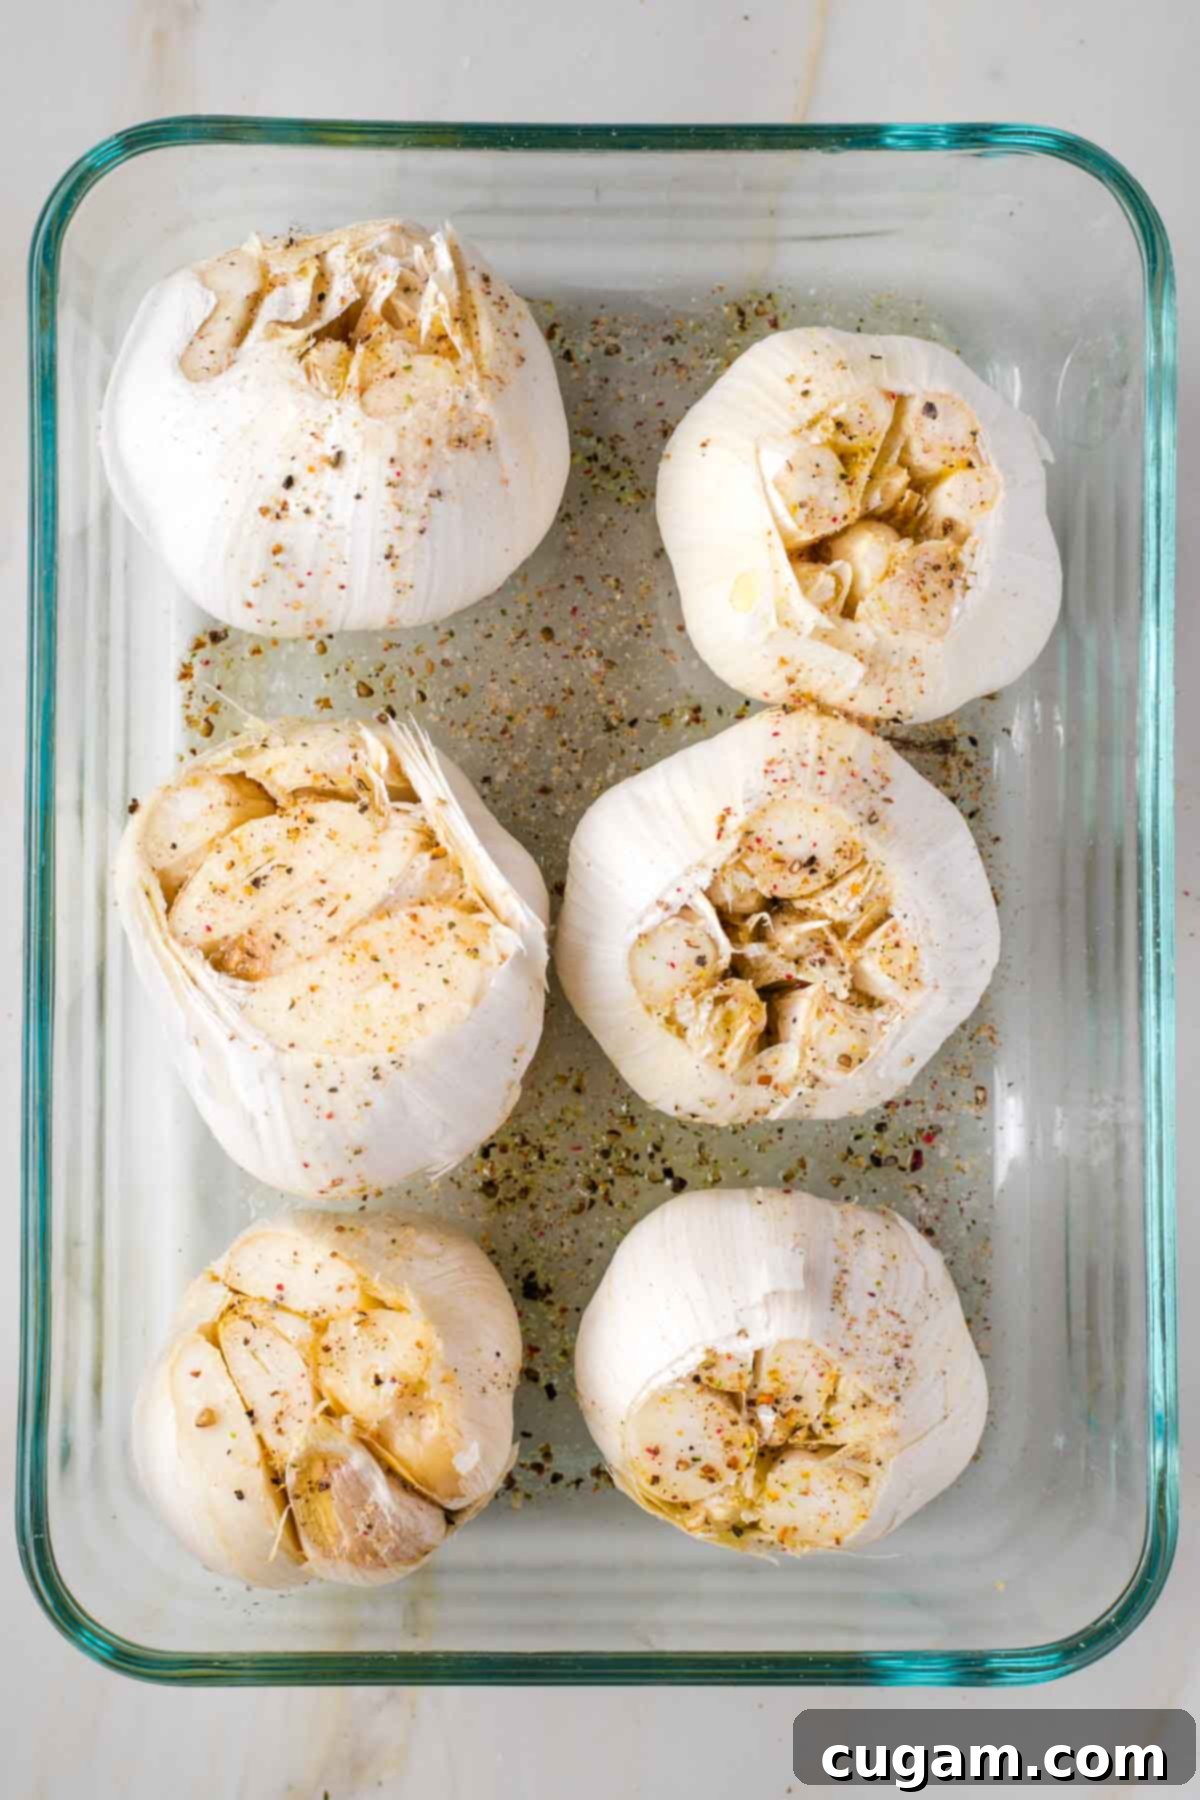
Season and Place in Baking Dish: Place the prepared garlic bulbs, cut-side up, into a small baking dish that’s just large enough to hold them snugly. Drizzle a little olive oil over the exposed garlic flesh of each bulb. Then, sprinkle generously with coarse sea salt and freshly ground black pepper. This initial seasoning helps build flavor from the start.
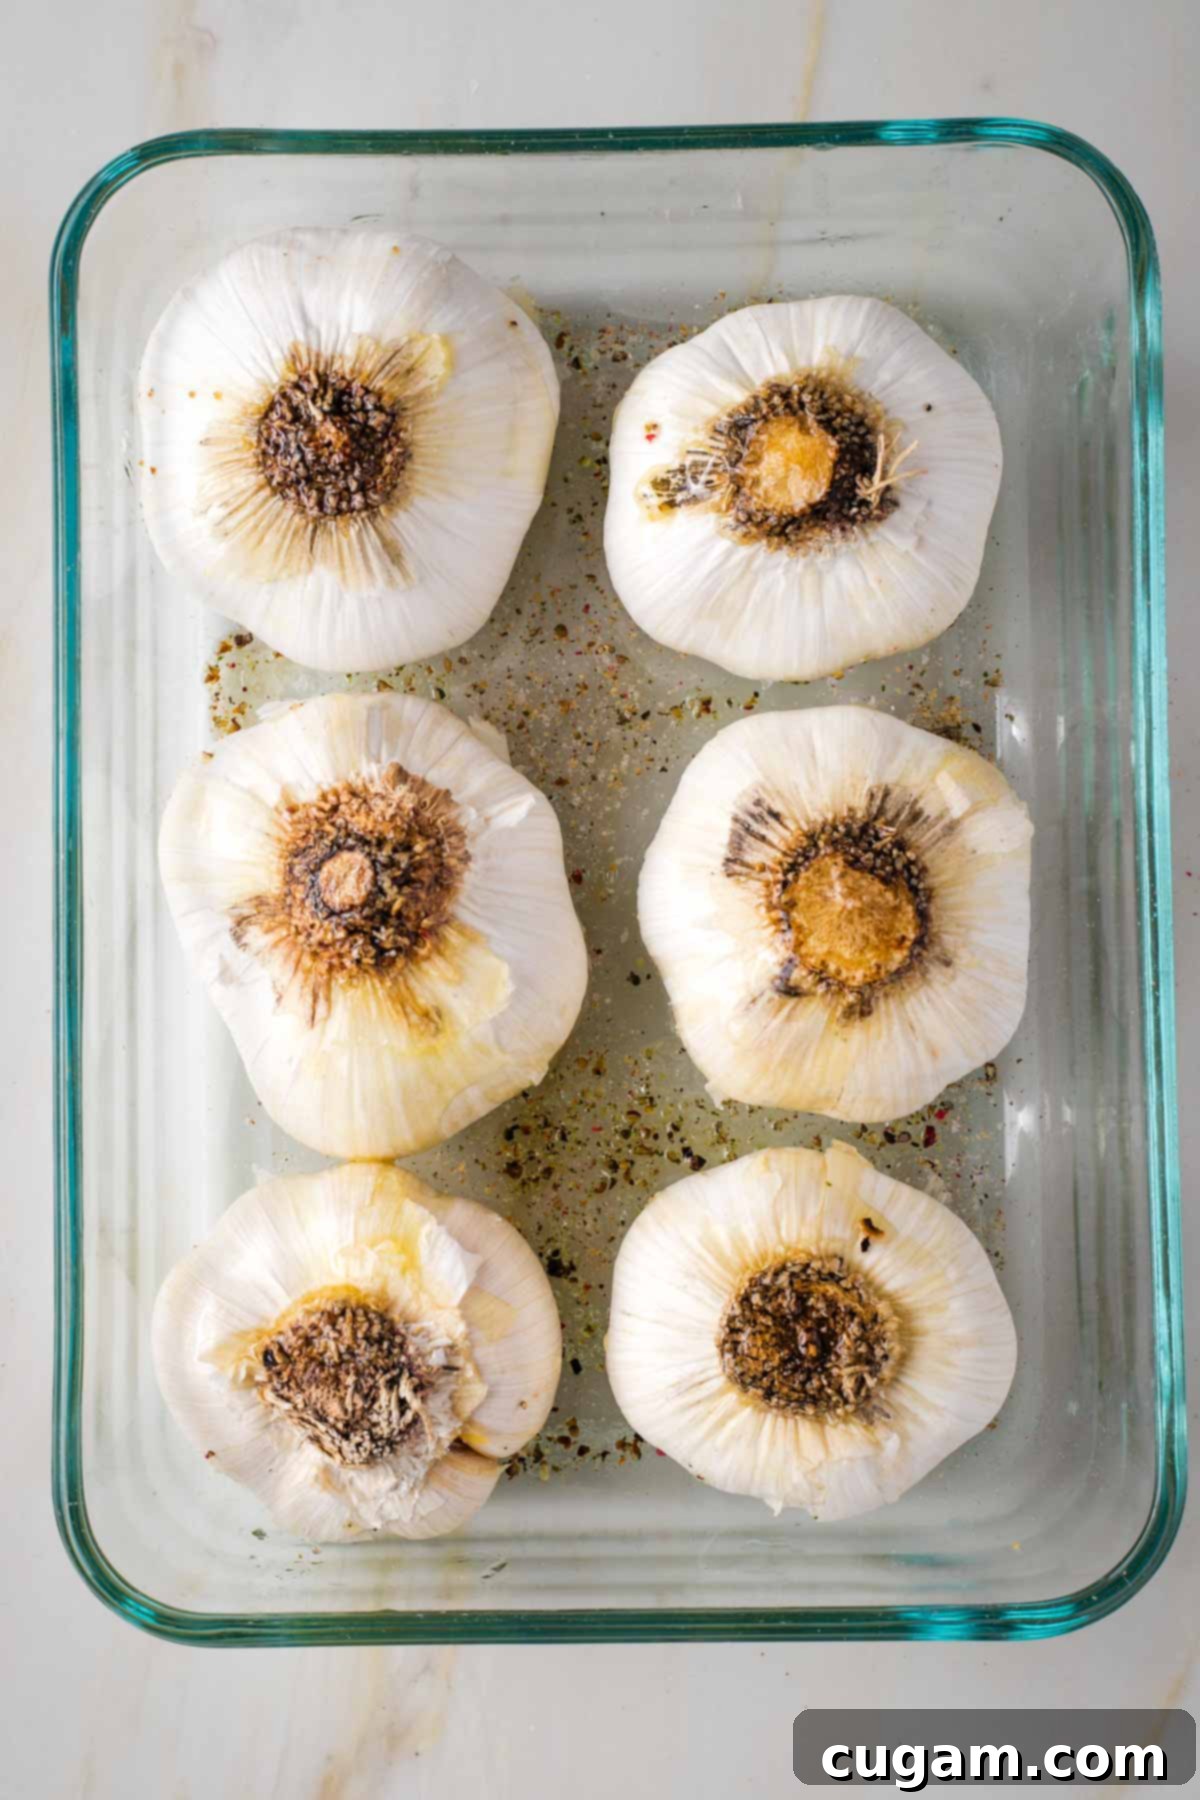
Flip for Moisture Retention: Here’s a crucial step for achieving maximum creaminess: flip the garlic bulbs over so that the cut side is now face down in your baking pan. This ingenious technique ensures that the exposed garlic flesh remains bathed in the olive oil and its own juices, keeping it incredibly moist and preventing it from drying out or burning during the roasting process. This is my tried and true method for the ultimate tender result.
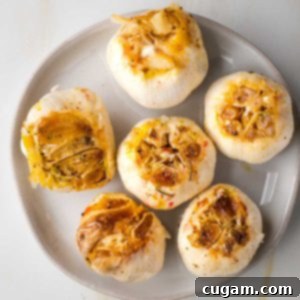
As you might notice in the accompanying photos, I often double or even triple this recipe! That’s because roasted garlic is incredibly versatile and freezes beautifully, making it perfect for meal prepping. This week, for instance, I’m stocking up for delicious dishes like a comforting cauliflower leek soup, a batch of homemade vegan ricotta, and a generous quantity of creamy garlic dressing. All of these recipes are immensely enhanced by the sweet, mild addition of this creamy roasted garlic.
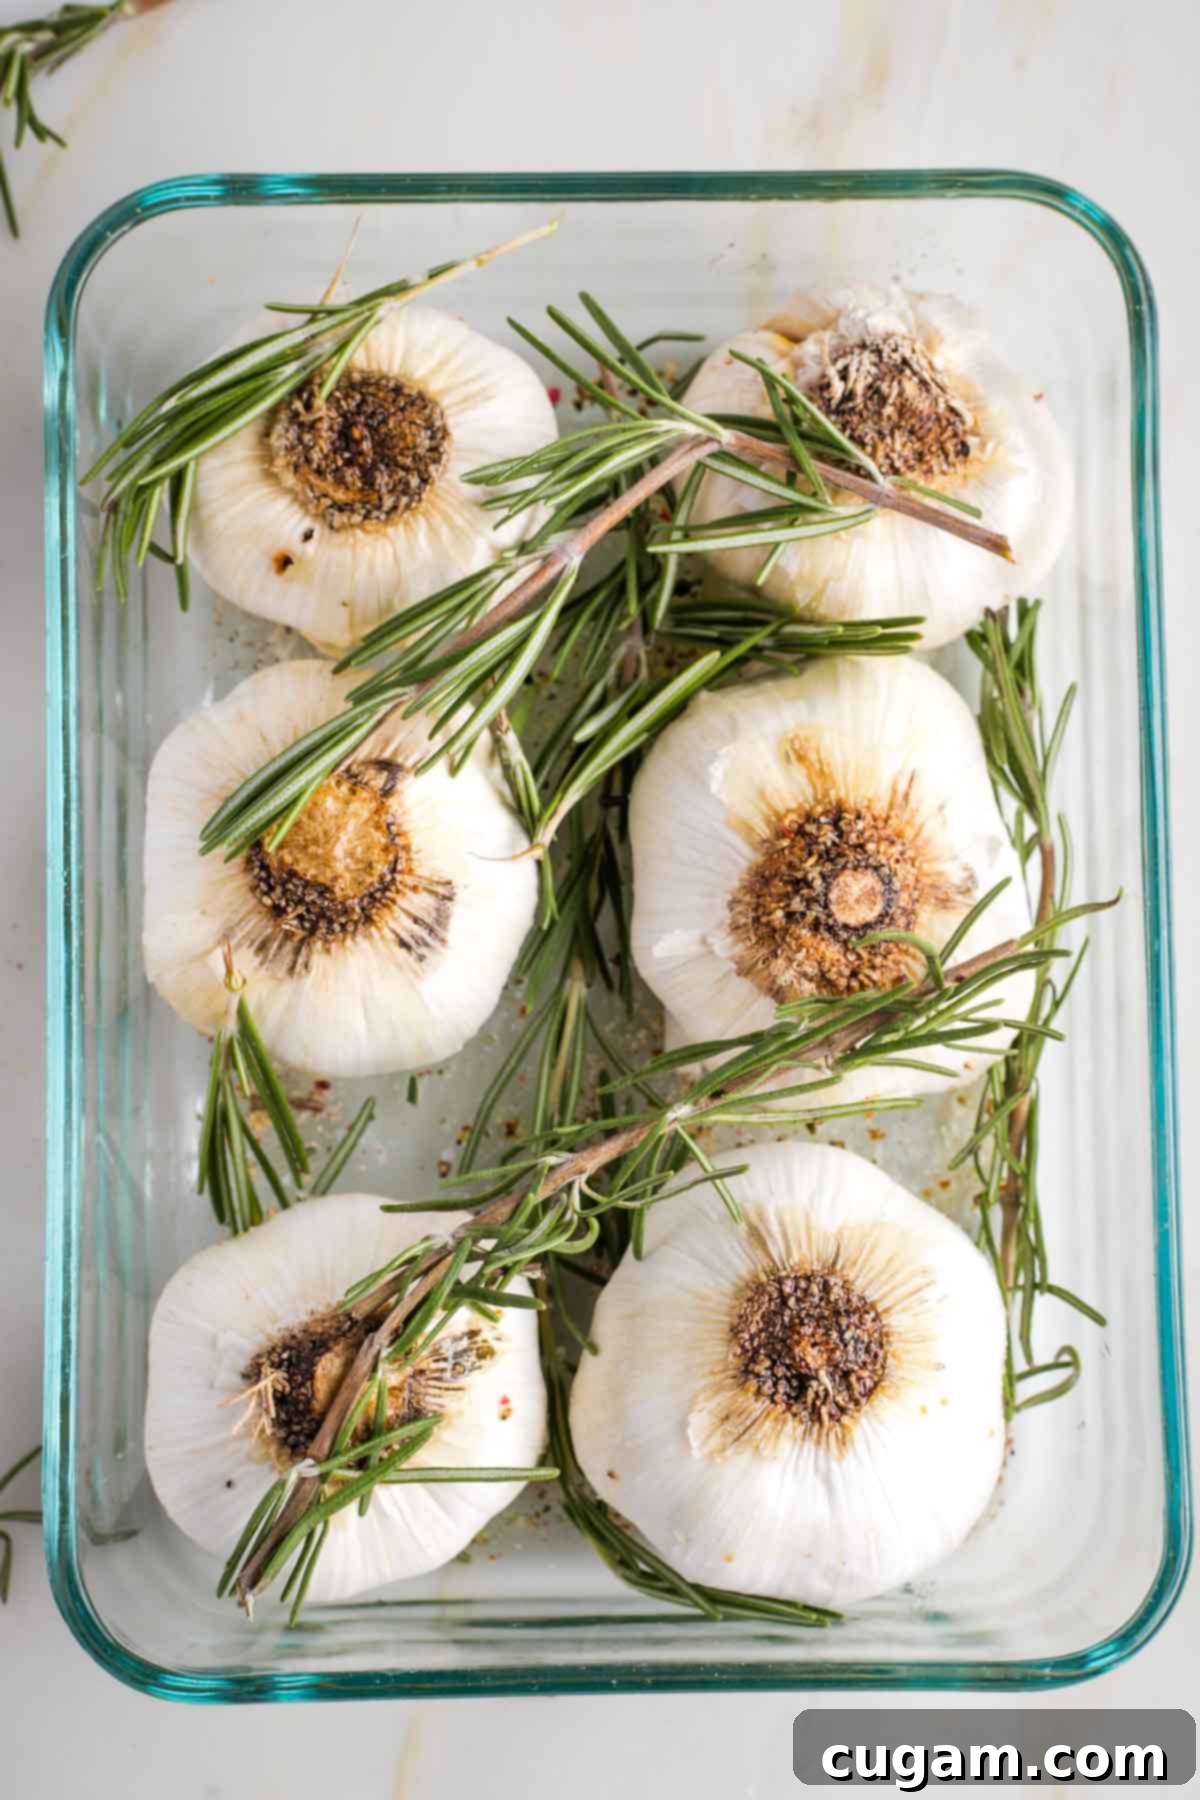
Add Fresh Herbs (Optional but Recommended): If you didn’t already incorporate fresh herbs during the initial seasoning, now is the perfect time to add them to the baking dish. Fresh rosemary sprigs are my personal favorite to use with garlic, as their robust aroma beautifully complements the garlic’s sweetness. However, fresh oregano or thyme sprigs will also infuse your roasted garlic with fantastic flavor and aroma, so feel free to use what you have on hand.
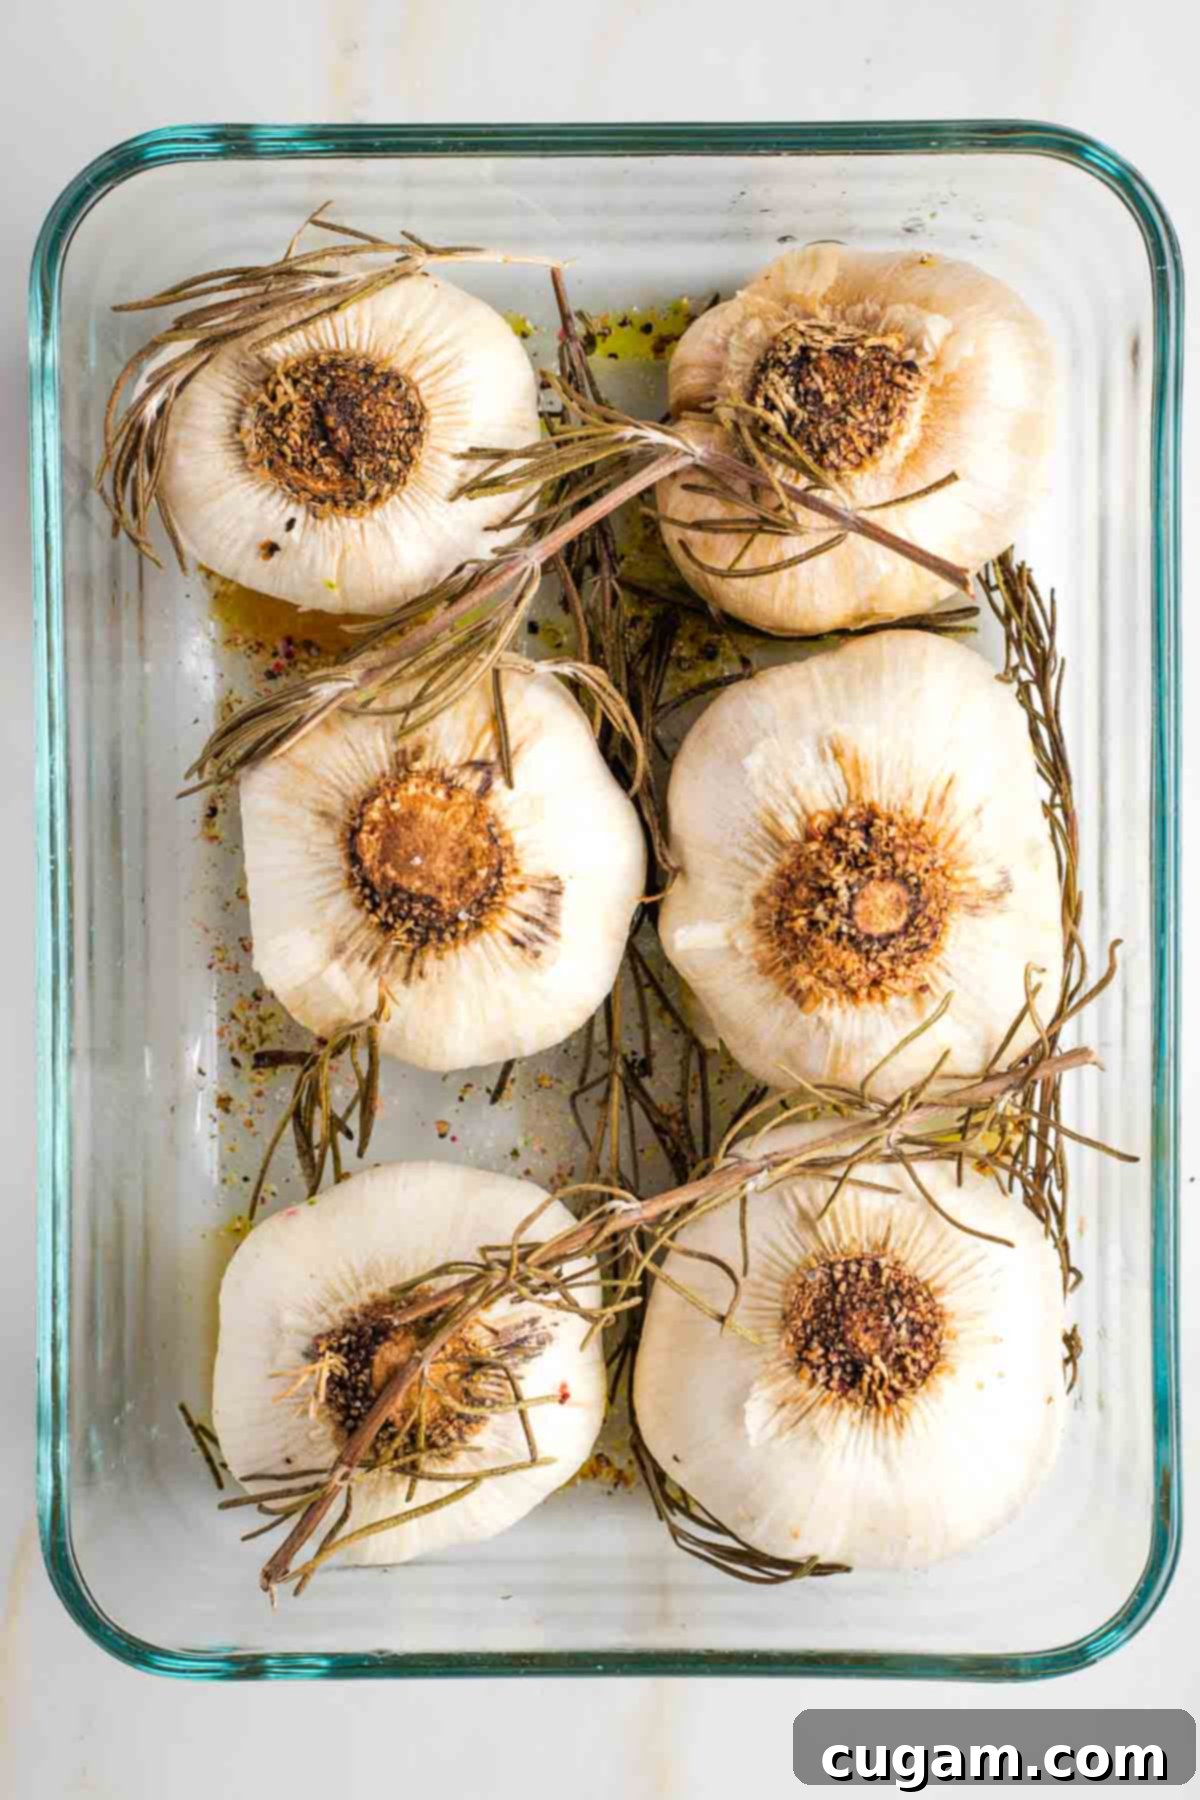
Cover and Roast: Once all your garlic bulbs are seasoned and nestled in the baking dish with herbs, seal the dish tightly with aluminum foil. This creates a steamy environment that helps tenderize the garlic without drying it out. Place the covered dish into your preheated oven and roast for approximately 45 minutes. If you’re using particularly large heads of garlic, or if you prefer them exceptionally soft, you may need to extend the roasting time by another 10-15 minutes.
After 45 minutes (or slightly longer for larger bulbs), your kitchen will be filled with an irresistible aroma! Now comes the best part: enjoying your perfectly roasted garlic.
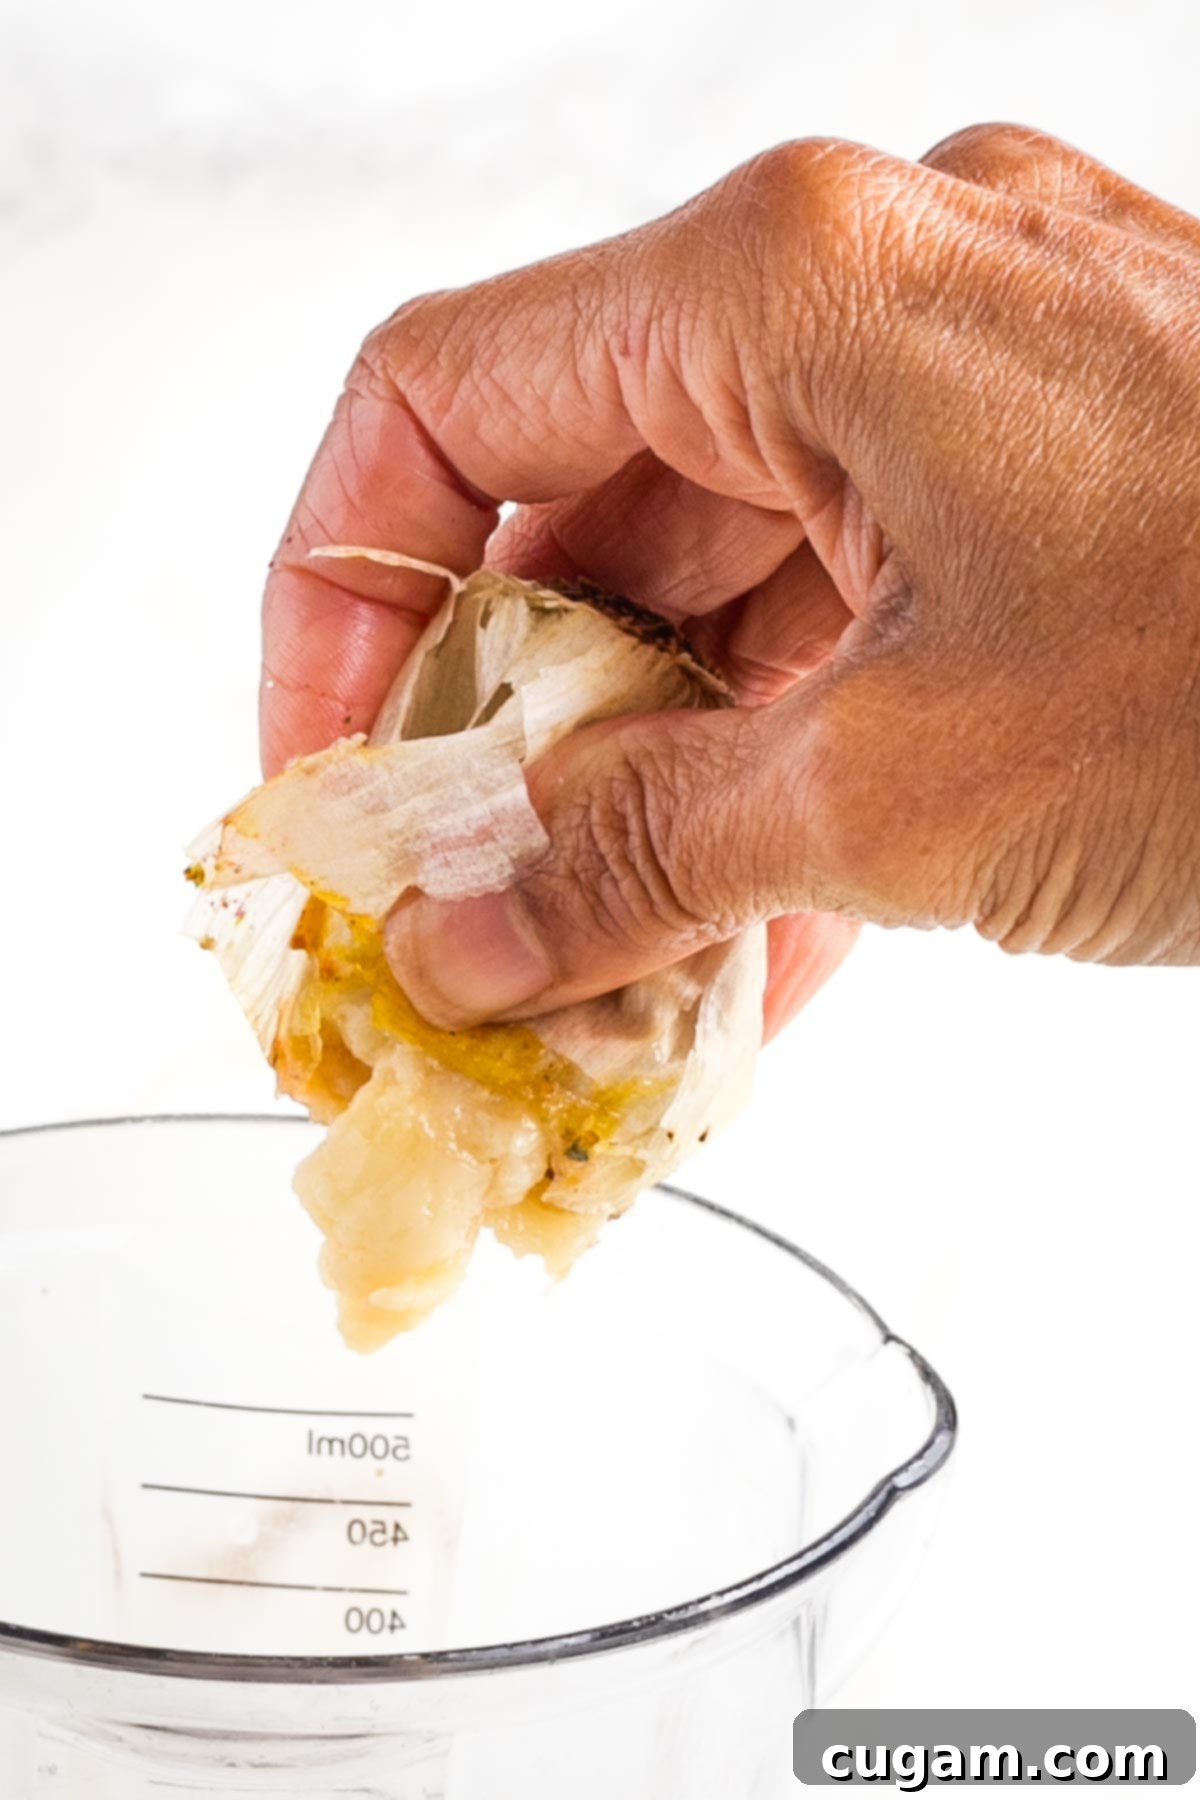
Cool and Extract the Pulp: Carefully remove the baking dish from the oven and, with caution, remove the foil. Allow the roasted garlic heads to cool down to room temperature before attempting to handle them with bare hands; super hot garlic can be sticky and will burn your fingers! Once cool enough, hold the bottom, root end of a whole bulb firmly and gently squeeze from the bottom. The soft, creamy flesh will effortlessly push out from the top, directly into a container or onto your serving dish.
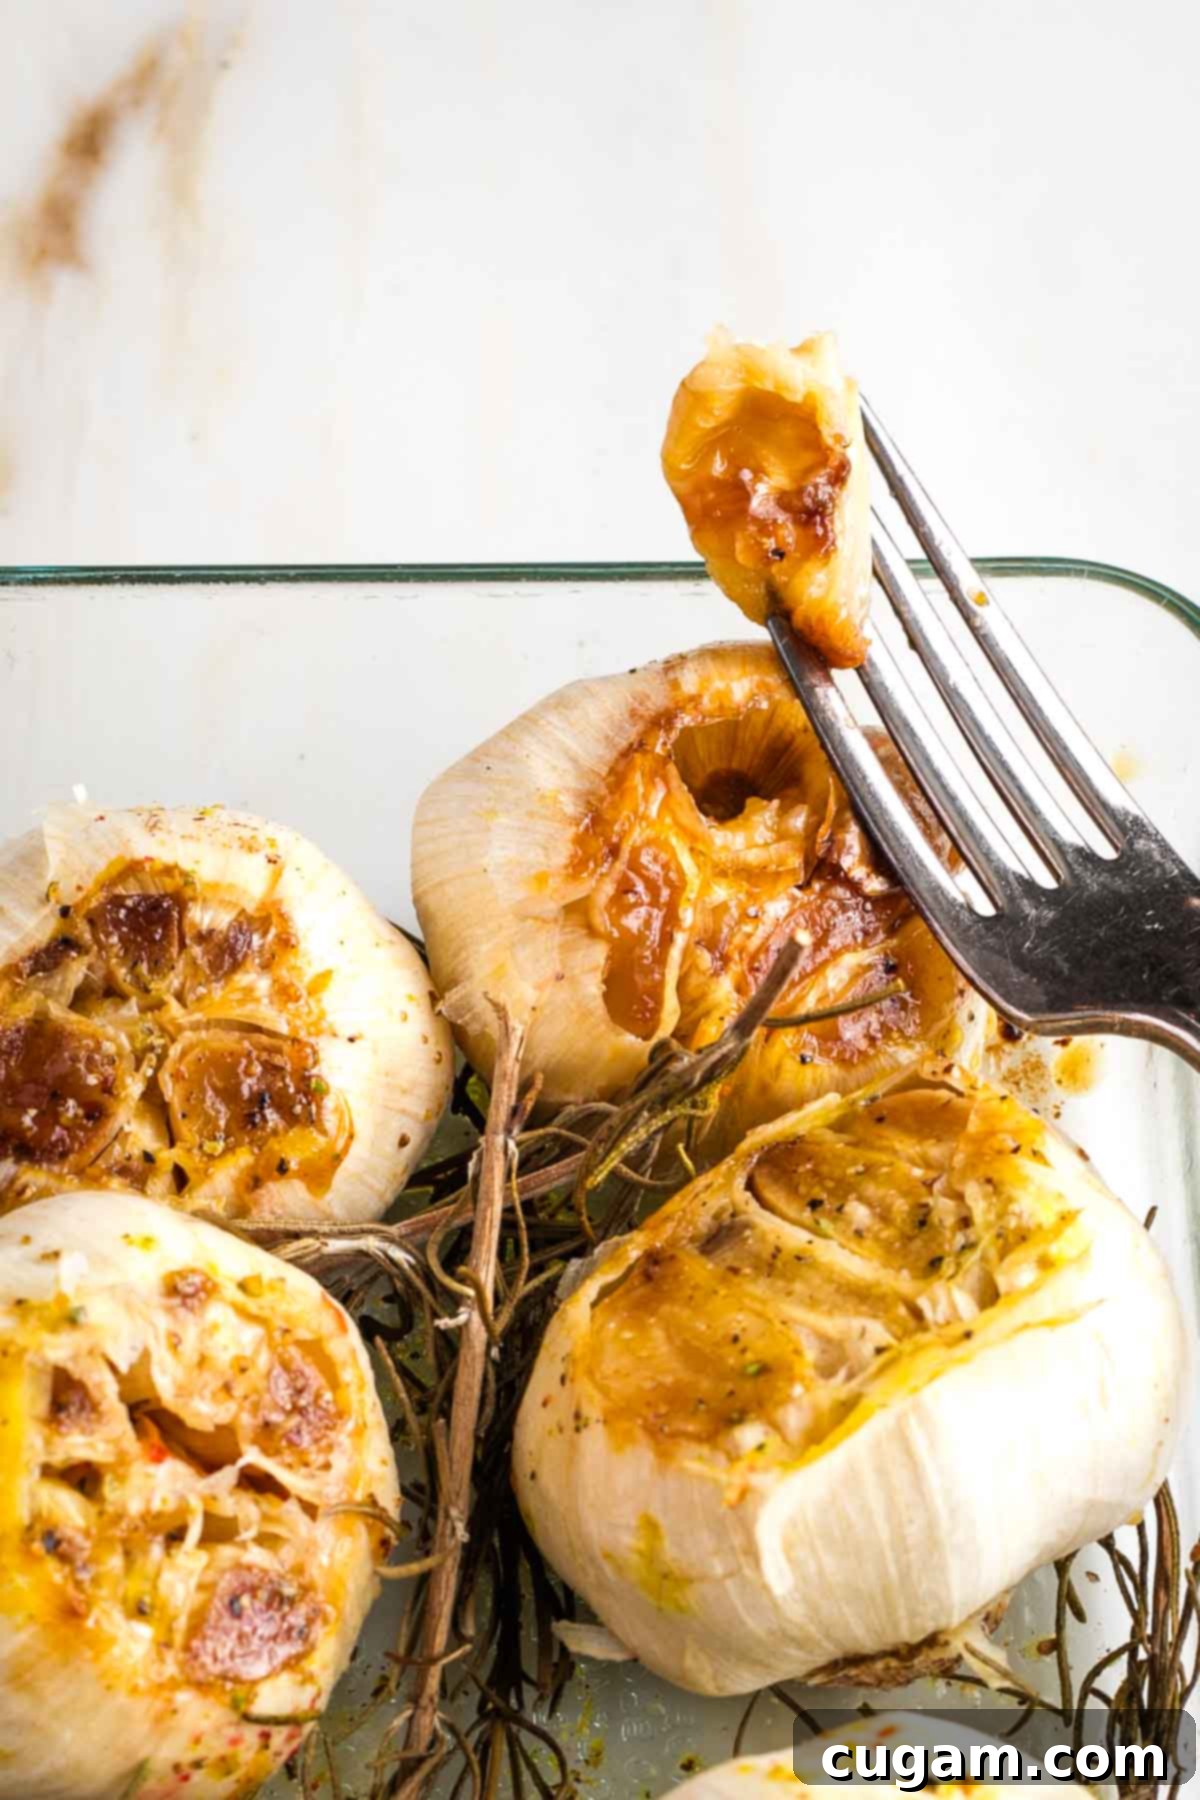
Alternatively, Extract Individual Cloves: If you prefer to keep the cloves whole, or if a bulb isn’t quite soft enough for the squeeze method, you can easily use the tines of a fork or a small paring knife to gently scoop or pull out individual roasted garlic cloves from their papery casings. Both methods work perfectly, depending on how you plan to use your roasted garlic.
Maximizing Freshness: How to Store Your Roasted Garlic
One of the best things about roasted garlic is how well it stores, allowing you to always have some on hand to elevate your meals. Proper storage is key to maintaining its creamy texture and rich flavor.
- Storing Whole Roasted Garlic (Refrigerated): If you prefer to store the garlic in its whole bulb form, it will stay fresh in the refrigerator for up to two weeks. Once your roasted garlic has cooled completely to room temperature, transfer the entire bulbs (skins and all) to an airtight container. This prevents any odors from permeating other foods in your fridge and keeps the garlic from drying out.
- Storing Roasted Garlic Pulp in Oil (Refrigerated): For extended freshness and convenience, you can extract the roasted garlic pulp from its papery skins and transfer it to an airtight container. Then, completely cover the pulp with olive oil. This oil layer acts as a sealant, significantly prolonging the freshness of the garlic. Roasted garlic pulp stored this way in the refrigerator can last for up to a month. Ensure the garlic is always fully submerged in oil.
- Freezing Roasted Garlic Pulp (Long-Term Storage): For the longest-term storage, freezing is an excellent option. Transfer the roasted garlic pulp into silicone ice cube trays. For an extra layer of protection and flavor, you can cover the garlic in the trays with olive oil before freezing. Freeze until the cubes are solid and firm. Once frozen, pop out the cubes and transfer them to a freezer-safe zip-top bag or container. Stored this way, roasted garlic cubes will maintain their quality for up to 6 months, offering convenient, pre-portioned bursts of flavor whenever you need them.
Having a stash of roasted garlic ready to go means you’re always just a step away from adding incredible depth to your cooking!
Unleash the Flavor: Incredible Recipes Using Roasted Garlic
The culinary possibilities with roasted garlic are truly endless. Its sweet, mellow, and creamy profile makes it a fantastic addition to both savory and even some sweet dishes, offering a depth of flavor that raw garlic simply can’t provide. Here are some of my favorite ways to incorporate this golden ingredient into everyday cooking:
- Roasted Garlic Hummus: Elevate your hummus game! The subtle sweetness of roasted garlic pairs beautifully with chickpeas, creating a richer, milder, and more sophisticated spread. It’s perfect in oil-free hummus for a lighter option or in roasted cauliflower hummus for an extra layer of roasted goodness. Remember, any recipe that typically calls for raw garlic will benefit from the easier digestibility and nuanced flavor of its roasted counterpart.
- Creamy Pureed Soups: Adding roasted garlic to pureed soups is a game-changer. It infuses them with a rich, comforting, and deeply savory flavor without any sharpness. My top picks for creamy vegan soups that are wonderfully enhanced by roasted garlic include a hearty cauliflower leek soup, a vibrant creamy asparagus soup, a warming carrot ginger soup, and a delicate creamy vegan zucchini soup.
- Baba Ganoush: For an authentically smoky and deeply flavorful baba ganoush, pureeing already roasted garlic into this eggplant dip is an absolute must. It complements the smoky notes of the eggplant beautifully.
- Creamy Roasted Garlic Dressing: Forget bland salads! A homemade dressing featuring roasted garlic is incredibly flavorful and adds a luxurious, creamy texture to any greens. It’s a simple way to make your salads the star of the meal.
- Enhance Vegan Dairy Alternatives: Introduce a sophisticated garlic flavor to your homemade vegan “dairy” products. Stir a couple of mashed roasted garlic cloves into your vegan sour cream or vegan ricotta recipes for an unexpectedly delicious twist that will impress.
- Savory Vegan Gravy: Take your vegan gravy to the next level by pureeing a few cloves of roasted garlic into it. The result is an incredibly rich, aromatic, and absolutely “delish” gravy that’s perfect for holiday meals or any savory dish.
- Vegan Pesto Recipes: While fresh raw garlic is traditional in pesto, roasted garlic offers a fantastic alternative, especially if you prefer a milder, sweeter flavor. It greatly enhances a variety of pesto recipes, from carrot top pesto to arugula spinach pesto or your classic fresh basil pesto, adding a subtle depth without overwhelming the fresh herbs.
- Perfect Pizza Topping: Roasted garlic is a phenomenal topping for pizza. Instead of raw garlic, which can burn, spread a few mashed roasted cloves directly onto your pizza crust before adding other toppings. It’s perfect on my no-yeast flatbread pizza or my easy vegan flatbread recipe, lending a sweet, savory burst in every bite.
- Simple Spreads and Dips: Don’t forget the simplest applications! Mix mashed roasted garlic into softened vegan butter or cream cheese for a delectable spread. Blend it into any creamy dip for an instant flavor boost.
- Pasta Dishes: Stir a generous amount of roasted garlic pulp into your favorite pasta sauces or simply toss it with olive oil, pasta, and a sprinkle of fresh herbs for a quick, flavorful meal.
With roasted garlic in your culinary arsenal, your meals are guaranteed to be more flavorful, aromatic, and satisfying.
Debra’s Pro Tips for Roasted Garlic Success
Over the years, I’ve gathered a few invaluable tips and tricks to make your roasted garlic experience even better. These insights will help you maximize flavor, ensure safety, and make the most of every delicious clove.
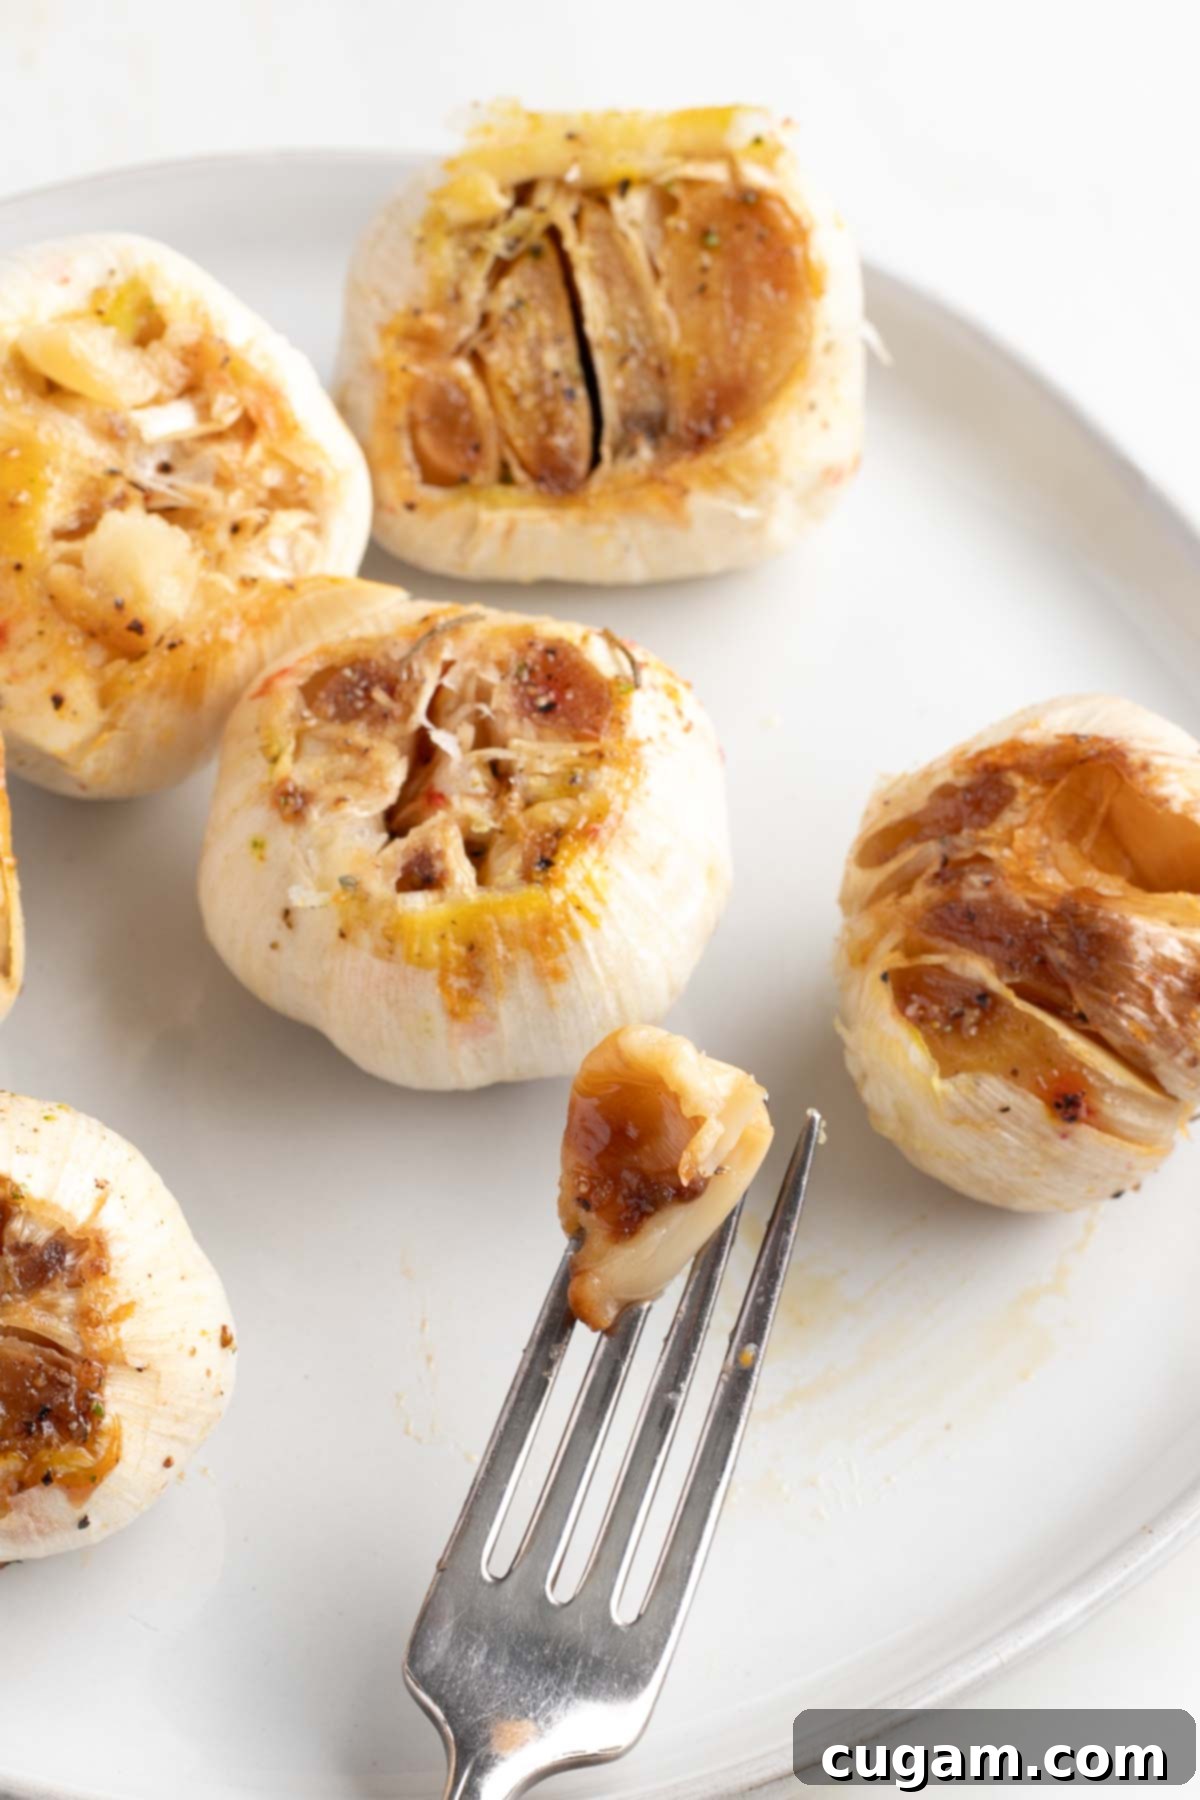
- Batch Roasting for Efficiency: Whenever your oven is already in use for other dishes, consider it an excellent opportunity to roast a batch of garlic. Whether you’re making a hearty vegan meatloaf, a flavorful roasted whole head of cauliflower, or simply baking, adding a baking dish with garlic bulbs is a smart way to utilize residual heat and get ahead on your meal prep. You’ll thank yourself later for having this versatile ingredient ready!
- Ensure Proper Covering: When covering your baking dish with foil, it’s essential to use a dish deep enough so that the tops of your garlic cloves do not directly touch the aluminum foil. This prevents any potential metallic taste and ensures even roasting. Alternatively, and highly recommended for food safety, always cover the garlic first with unbleached parchment paper before sealing the dish tightly with aluminum foil. This creates a safe barrier, especially when dealing with acidic ingredients.
- Handle with Care (Cool Before Handling!): A crucial safety reminder: super hot roasted garlic is incredibly sticky and can cause severe burns if handled improperly. The natural sugars in the garlic caramelize and become very hot. Always allow your roasted garlic to cool down to at least room temperature before attempting to handle the bulbs with your bare hands. Patience is key here to avoid any kitchen mishaps.
- Versatile Usage of the Pulp: Once you’ve squeezed out the soft, buttery garlic pulp, its uses are boundless. Beyond its primary role in recipes that call for raw garlic (where it provides a milder, sweeter flavor), consider spreading it generously on warm, crusty bread or toast, mashing it into potatoes, or stirring it directly into warm pasta dishes with a drizzle of olive oil for an instant gourmet meal.
- Preserving Whole Cloves: If you prefer to use whole roasted garlic cloves in certain dishes, rather than a mashed pulp, you can easily pull them out individually. Use a toothpick or the tines of a fork to extract the soft cloves from their skins. These whole cloves can then be stored in an airtight container, perhaps submerged in olive oil, for future use, making them perfect for adding directly to salads, stir-fries, or as a garnish.
Did you know that taking a moment to comment on and rate recipes is one of the most impactful ways to support your favorite food bloggers? If you enjoyed making this easy roasted garlic recipe, please consider leaving a five-star rating below and sharing your thoughts in the comments. We love to hear from you! Additionally, please share your beautiful photos on Instagram by tagging me @dkhealthcoach and using the hashtag #debraklein so I can see your culinary creations!
📖 Recipe
Roasted Garlic
Rate this Recipe
Pin Recipe
Equipment
-
2 quart baking dish
-
Unbleached Parchment Paper
Ingredients
Ingredients:
- 3 heads garlic
- 1 teaspoon olive oil extra virgin
- ¼ teaspoon coarse sea salt
- Pinch black pepper
- 3-4 sprigs Fresh rosemary
Instructions
-
Preheat oven to 375
-
Slice off about ¼” from the ends of the garlic heads (not the root end) to expose inner cloves.
-
Place in small baking dish, drizzle with olive oil then sprinkle with coarse sea salt and a few grinds of black pepper.
-
Turn garlic heads upside down, add fresh herbs to the pan and tightly cover with a piece of foil.
-
Place covered dish in the hot oven and roast for 45 minutes. A bit longer if your heads and cloves are on the larger side.
-
Carefully remove foil and wait until garlic heads are cool enough to handle. Gently squeeze garlic pulp out of skins (or use a toothpick or tines of a fork to “pull” the pulp out) to use in recipe, OR squeeze the entire head over a small dish until all the pureed garlic has come out. You can also leave whole heads intact and plate to serve with small spreader.
-
Store whole heads in an airtight container in the refrigerator for a week or put the garlic puree in ice cube molds and freeze. Transfer frozen garlic cubes to a freezer safe container. Frozen garlic will stay good in an airtight container for 3 months.
Notes
Nutrition information is based on a serving size of 1 clove. Information will vary depending on the size of your head of garlic and individual clove size.
Nutrition
Note
The nutrition calculations were done using online tools. To obtain the most accurate representation of the nutritional information in any given recipe, you should calculate the nutritional information with the actual ingredients you used. You are ultimately responsible for ensuring that any nutritional information is accurate, complete and useful.
