The Ultimate Guide to Easy Homemade Gravy: Perfect Every Time (with or without Drippings)
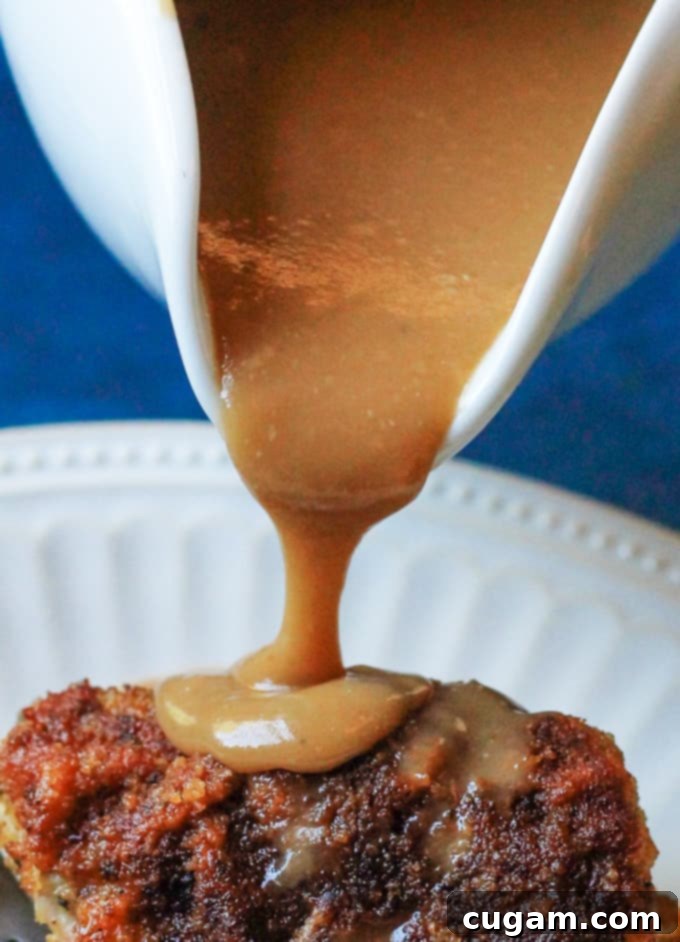
Forget about the bland, store-bought cans for your next holiday feast or a cozy Sunday dinner. This comprehensive guide will empower you to create a truly spectacular homemade gravy, effortlessly, whether you have flavorful pan drippings from meat, poultry, or fish, or are starting from scratch. We’ll delve into the simple yet powerful formula of balancing fat, starch, and liquid, combined with the right seasonings, to guarantee an amazing, velvety gravy right in your own kitchen. Elevate any meal from ordinary to extraordinary with this essential skill!
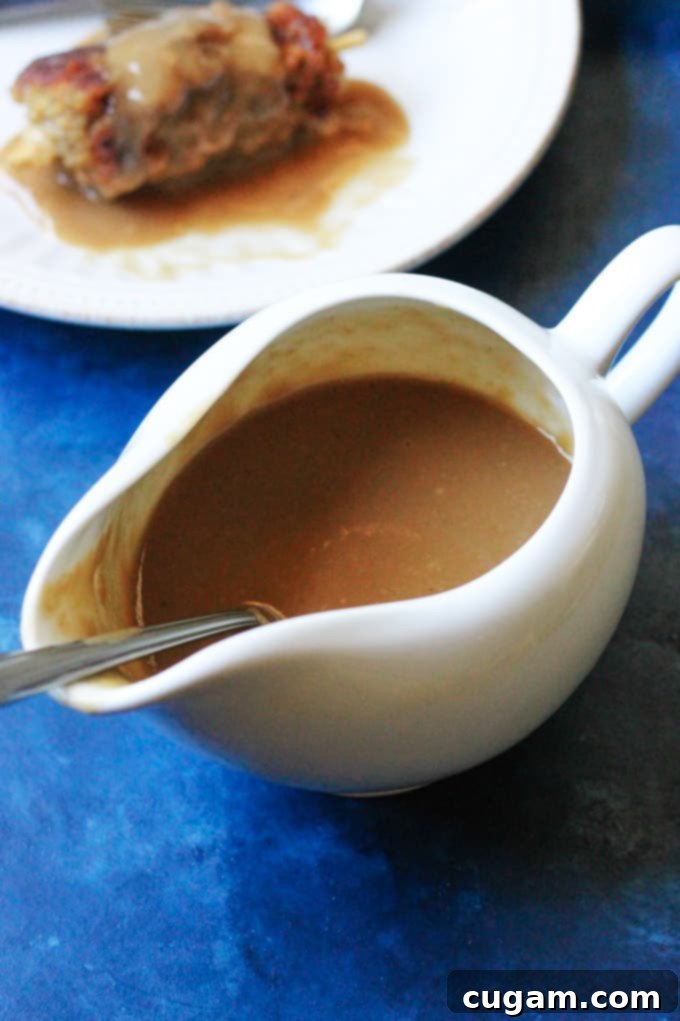
Imagine pouring this rich, savory gravy over a succulent slow cooker turkey breast, transforming a simple dinner into a memorable experience. It’s the kind of comfort food that brings warmth and joy to any table, and it’s surprisingly easy to master.
 This post may contain affiliate links. You can read my disclosure policy HERE.
Mastering Homemade Gravy: With or Without Drippings
For many, the idea of making gravy from scratch conjures images of complicated culinary techniques or lumpy, flavorless sauces. But fear not! Crafting a perfect homemade gravy is actually much easier and more forgiving than you might imagine. The secret lies in understanding a few fundamental principles and mastering a simple technique.
The beauty of this recipe is its incredible versatility. While pan drippings from roasted meats, like turkey, chicken, or beef, undeniably contribute a depth of flavor that is hard to replicate, they are by no means essential. You can achieve an equally delicious and satisfying gravy using readily available ingredients like butter or olive oil as your fat base. This means you can whip up a batch of incredible gravy any time you desire, not just when you’ve roasted a holiday bird.
At its heart, making gravy boils down to three basic components: **fat, starch, and liquid**. In the sections that follow, we’ll explore each of these in detail, providing you with the exact ratios and options to create a truly delicious gravy every single time, tailored to your preferences and what you have on hand.

Essential Ingredients for Your Easy Homemade Gravy
As highlighted, the foundation of any great homemade gravy rests on three key components. The choices you make for each will influence the final flavor, color, and texture of your gravy. Let’s break down the options:
- Fat: The Flavor Carrier
- Pan Drippings: These are the golden standard for flavor. The rendered fat and flavorful juices left in the roasting pan after cooking meat, poultry, or fish provide an unparalleled depth of taste. They often carry the essence of any herbs and spices used in the roast.
- Unsalted Butter: A fantastic alternative when pan drippings aren’t available, or if you prefer a rich, creamy flavor. Unsalted butter allows you to control the seasoning precisely.
- Olive Oil (or other neutral oil like vegetable or canola oil): A great option for a lighter gravy or if you’re avoiding dairy. Neutral oils will let the flavor of your liquid and seasonings shine through.
- Starch: The Thickener
- All-Purpose Flour: The most common choice for gravy, flour creates a classic, velvety texture. It’s used to make a roux, which also adds a nutty flavor as it cooks.
- Cornstarch: For a gluten-free option or a gravy with a very glossy, almost translucent finish. Cornstarch is often mixed with a cold liquid to form a “slurry” before being added to the hot gravy. It thickens quickly and provides a different texture compared to flour-based gravy.
- Liquid: The Body and Flavor Base
- Pan Juices: Beyond the fat, the liquid juices in the roasting pan are liquid gold. Deglaze the pan with a bit of broth or water to capture all those flavorful bits (fond) stuck to the bottom.
- Chicken/Turkey Stock or Broth: Excellent for poultry gravies. Use a high-quality, low-sodium broth to control the overall saltiness. Homemade stock will yield the best flavor.
- Beef Stock: Ideal for beef roasts and mashed potatoes. Again, opt for a good quality stock for robust flavor.
- Vegetable Broth: A versatile choice for vegetarian gravy or for a lighter, all-purpose option.
- Water: While not as flavorful on its own, water can be used in a pinch, especially if you have very flavorful pan drippings or plan to add a lot of seasonings.

The Golden Ratio: An Easy Formula for Perfect Homemade Gravy
Forget complex equations; making delicious gravy relies on a remarkably simple formula. For a consistently excellent, moderately thick gravy, remember this easy ratio: **1 tablespoon of fat + 1 tablespoon of starch + 1 cup of liquid.** This 1:1:1 proportion is your secret weapon for a perfectly balanced gravy.
This formula creates a roux, the magical thickening base for your gravy. The fat coats the starch particles, preventing lumps and allowing them to disperse evenly into the liquid. As the roux cooks and then combines with the liquid, the starch swells, thickening the sauce.
Want your gravy a bit thicker? Simply increase the fat and starch proportionately. For instance, using 2 tablespoons of fat and 2 tablespoons of starch for one cup of liquid will yield a significantly richer and thicker gravy. Conversely, if you prefer a thinner consistency, you can either reduce the starch slightly or add a little more liquid at the end.
The key is consistency in the ratio between fat and starch when making your roux, and then gradually incorporating the liquid until your desired thickness is achieved. This flexibility means you’re always in control of your gravy’s final texture.
How to Make Gravy from Scratch: A Step-by-Step Guide
Creating a truly exceptional gravy from scratch is incredibly rewarding and, with these simple steps, entirely achievable. The process involves a few key stages, each crucial for developing flavor and achieving that desirable smooth texture:
- Step 1: Heat Your Fat. Begin by heating your chosen fat (pan drippings, butter, or oil) in a skillet or saucepan over medium-low heat. If using drippings, make sure to separate the fat from the juices if needed, reserving the juices for the liquid component. Allow the fat to melt or warm up until it’s shimmering, but not smoking. This step is crucial for creating a smooth roux.
- Step 2: Create the Roux. Once your fat is hot, add your starch (all-purpose flour or cornstarch, if making a slurry for later). If using flour, sprinkle it directly into the hot fat and immediately begin whisking vigorously. Continue whisking for 1-2 minutes until a smooth paste, called a roux, forms. This step is essential to cook out the raw flour taste and can even be extended to create a lightly browned roux for a deeper, nuttier flavor, especially for beef gravies. For cornstarch, you’ll typically make a slurry later, as described in the liquid step.
- Step 3: Gradually Add Liquid. This is where patience pays off to prevent lumps. It’s best to use a room-temperature or warm liquid (chicken broth, beef broth, vegetable broth, or pan juices) rather than cold, as cold liquid can cause the starch to seize and clump. Add the liquid gradually, about 1/4 to 1/2 cup at a time, vigorously whisking after each addition until it’s fully incorporated and smooth before adding more. This gradual process ensures a silky, lump-free gravy. If using a cornstarch slurry, add a small amount of liquid to the cornstarch in a separate bowl to make a smooth paste, then slowly whisk it into your hot liquid base.
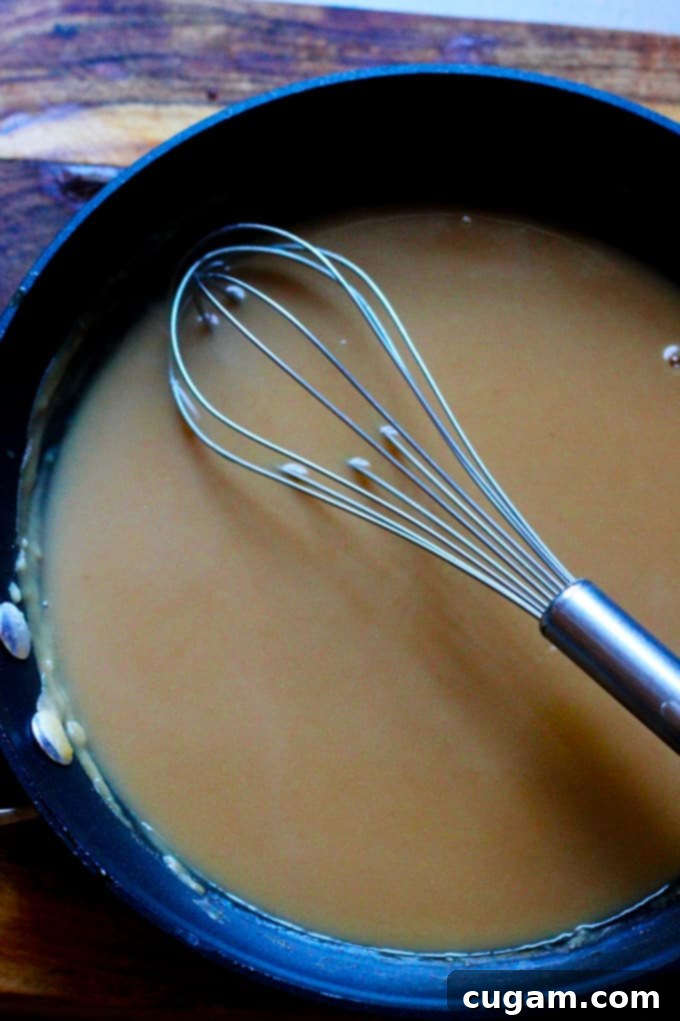
- Step 4: Simmer and Thicken. Once all the liquid is incorporated and the sauce is smooth, bring the gravy to a gentle simmer over medium heat, continuing to whisk occasionally. As it simmers, the starch will activate and the gravy will begin to thicken. Let it simmer for 3-5 minutes, or until it reaches your desired consistency. Remember, it will thicken slightly more as it cools.
- Step 5: Season to Perfection. The more flavorful your chosen liquid, the better your gravy will taste inherently. However, the final seasoning is where you can truly elevate your gravy. Taste as you go! Options are not limited, but here are some suggestions to guide you:
- Salt and Pepper: These are fundamental. Adjust according to the saltiness of your broth and your personal preference.
- Worcestershire Sauce: A fantastic addition for an extra layer of umami and savory depth. Just a teaspoon or two can make a significant difference.
- Dry Garlic Powder & Dry Onion Powder: These offer concentrated flavor without adding texture, enhancing the overall savory profile.
- Fresh or Dried Herbs: Thyme, sage, rosemary, or a poultry seasoning blend can add wonderful aromatic notes, especially if complementing a roasted dish.
- Maggie Seasoning: If you’ve never tried it, Maggie seasoning (or liquid amino acids) provides a rich, savory, umami flavor, similar to soy sauce but often more intense and complex. It’s excellent for deepening meat flavors. You can often find it in European or international food stores.

Versatile Ways to Enjoy Your Homemade Gravy
Once you’ve mastered this easy homemade gravy, its uses are virtually endless. Depending on the type of liquid (and drippings, if used) that formed your base, you can pour this rich, flavorful sauce over almost anything to elevate your meal. Here are some popular and delicious suggestions:
- Roasted Meats: The classic pairing! Drench your favorite roasts like succulent beef, tender pork, or juicy lamb in a generous serving of gravy.
- Poultry Perfection: A must-have for any chicken or turkey dinner. Whether it’s a whole roasted bird, breast, or legs, gravy adds that essential moisture and savory kick.
- Pan-Seared Fish: A lighter, broth-based gravy (perhaps with white wine and lemon) can beautifully complement pan-seared fish, adding moisture and depth without overpowering the delicate flavors.
- Mashed Potatoes: Is there anything more comforting than a mountain of creamy mashed potatoes swimming in gravy? It’s a match made in heaven.
- Vegetables: Don’t underestimate gravy’s ability to transform simple steamed or roasted vegetables. Green beans, asparagus, broccoli, or glazed carrots all benefit from a drizzle of savory gravy.
- Fries and Poutine: For a hearty, indulgent treat, pour hot gravy over crispy french fries, perhaps with some cheese curds for a homemade poutine experience.
- Hot Sandwiches: Create an open-faced hot turkey or beef sandwich, smothered in gravy, for a truly satisfying meal.
Here are a couple of my personal favorite dishes that pair wonderfully with homemade gravy, offering you some inspiration:
- Slow Cooker Turkey Breast
- Slow Cooker Whole Roasted Chicken
- Maple Mustard Roasted Turkey
- Slow Roasted Chicken Leg Quarters
- Oven Roasted Chicken Legs and Thighs
- Potato Cutlets with Asparagus
- Potato Fondant
Troubleshooting Common Gravy Problems
Even with a simple recipe, things can sometimes go awry. Here’s how to fix common gravy mishaps:
- Lumpy Gravy: This is usually caused by adding liquid too quickly or not whisking enough. To fix it, you can push the gravy through a fine-mesh sieve, or for a super smooth result, use an immersion blender or transfer it to a regular blender (be careful with hot liquids!).
- Gravy is Too Thin: If your gravy isn’t thickening, don’t panic. Create a cornstarch slurry by mixing 1 tablespoon of cornstarch with 2 tablespoons of cold water in a separate bowl. Whisk this mixture into your simmering gravy a little at a time until it reaches your desired thickness. Alternatively, you can make a small roux with equal parts fat and flour, cook it for a minute, and whisk it into the gravy.
- Gravy is Too Thick: This is an easy fix! Simply whisk in a little more warm broth or water, a tablespoon at a time, until it reaches your preferred consistency.
- Gravy Lacks Flavor: If your gravy tastes a bit flat, it might just need more seasoning. Add a pinch more salt and pepper, a dash of Worcestershire sauce, some garlic or onion powder, or a touch of bouillon concentrate. Remember to taste after each addition.
- Gravy is Too Salty: If you’ve over-salted, try adding a splash of unsalted broth or water. A small amount of sugar or a potato slice simmered in the gravy for a few minutes (then removed) can also help to balance the saltiness.
Storing and Reheating Homemade Gravy
One of the best things about homemade gravy is that it can often be made ahead of time or enjoyed for a few days after. Proper storage ensures both safety and flavor.
- Refrigeration: Store leftover gravy in an airtight container in the refrigerator for up to 3-4 days.
- Freezing: Gravy freezes exceptionally well. Pour cooled gravy into freezer-safe containers or heavy-duty freezer bags, leaving a little headspace. It can be frozen for up to 3 months. Thaw overnight in the refrigerator before reheating.
- Reheating: To reheat, gently warm the gravy in a saucepan over medium-low heat, whisking constantly. If it’s too thick, add a splash of broth or water until it reaches your desired consistency. Taste and adjust seasonings if necessary.

Easy Homemade Gravy
Print
Pin
Rate
Ingredients
- 2 tbsp Butter Unsalted* or pan drippings/oil
- 2 tbsp Flour** All-purpose (or cornstarch for gluten-free)
- 2 cups Broth*** Chicken, beef, vegetable, or pan juices
- 1 teaspoon Worcestershire Sauce
- 1/2 teaspoon Garlic Powder
- 1/4 teaspoon Black Pepper
- Salt or Maggie seasoning to taste (the amount of salt will depend on the saltiness of your broth and drippings)
Instructions
-
Heat up your butter (or drippings or oil) in a skillet or saucepan on medium-low heat. Ensure the fat is shimmering but not burning.
-
Add your flour (or corn starch for a slurry – see notes) and mix it with a whisk until a smooth roux forms. Cook for 1-2 minutes, stirring, to remove the raw flour taste.
-
Use a room-temperature or warm liquid (chicken broth, beef broth, vegetable broth or pan juices) and add 1/4 cup at a time, vigorously whisking after each addition to avoid any lumps.
-
Continue until all the liquid is incorporated and the sauce is smooth. Bring to a gentle simmer and let it cook for 3-5 minutes, whisking occasionally, until thickened to your desired consistency. Remember: the more flavorful your liquid, the better your gravy.
-
At the end, add whatever spices and aromatics that you’d like. Options are not limited, but here is a list of what was used for this gravy recipe: Salt and Black Pepper, Worcestershire Sauce, Dry Garlic Powder, and Maggie seasoning. Taste and adjust as needed.
-
Serve your homemade gravy immediately with your favorite roast, poultry, fish, vegetables, or mashed potatoes! Enjoy the rich, savory flavor.
Notes
*Fat Options:
-
- Pan drippings (from roasted meat, poultry, or fish) for the richest flavor.
- Olive Oil or other neutral cooking oil (vegetable, canola) for a lighter gravy.
**Starch Options:
-
-
- Cornstarch: For a gluten-free option, mix 1 tbsp cornstarch with 2 tbsp cold water (this is a slurry). Whisk the slurry into the hot liquid *after* it’s simmering, instead of making a roux with fat and flour at the start. It will thicken quickly.
-
***Liquid Options:
-
-
-
- Pan juices (liquid from your roasting pan).
- Turkey stock or broth.
- Beef stock or broth.
- Vegetable broth (for a vegetarian gravy).
- Water (can be used if you have very flavorful drippings, but broth is always preferred for depth).
-
-
Nutrition
Conclusion: Embrace the Art of Homemade Gravy
There you have it – a comprehensive guide to making the best homemade gravy, whether you’re working with delicious pan drippings or starting from scratch. By understanding the simple interplay of fat, starch, and liquid, and by following these easy steps, you can confidently create a smooth, rich, and incredibly flavorful gravy that will impress everyone at your table. Say goodbye to canned gravy forever and embrace the joy of this simple yet profound culinary skill. Your taste buds, and your guests, will thank you!
To learn more about the author, Edyta, visit her bio here. Don’t forget to follow Eating European on social media for more delicious recipes and cooking inspiration: Facebook, Instagram, Pinterest, and Twitter.
