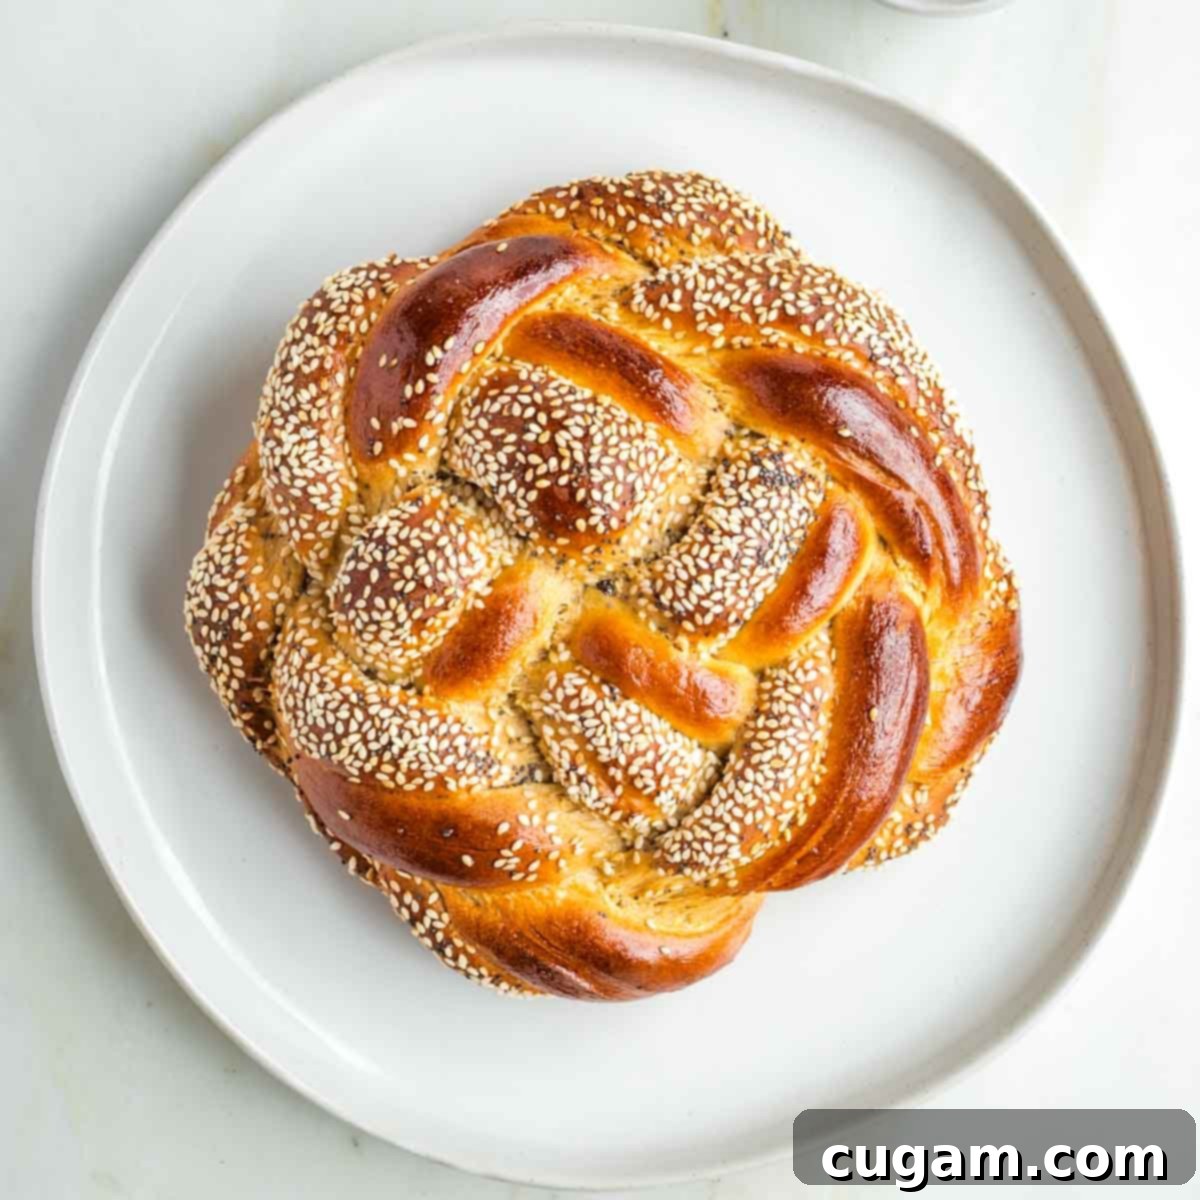
Homemade Sweet Round Challah Bread: A Festive Recipe for Rosh Hashanah & Jewish Holidays
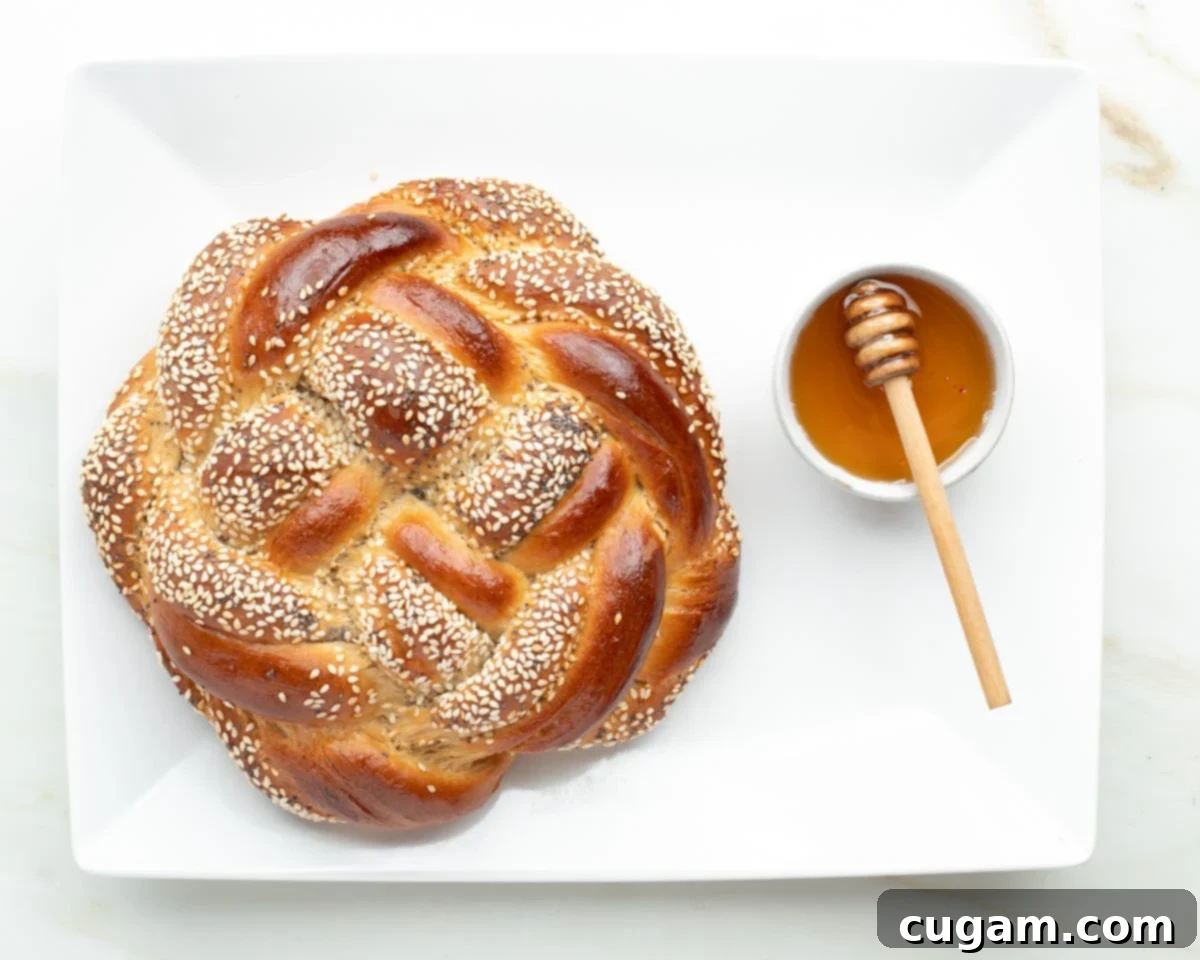
Sweet Round Challah Bread holds a cherished place at the heart of Jewish Holiday Traditions. This delightful challah dough recipe is naturally sweetened with honey, forgoing granulated sugar entirely, and then artfully divided and braided into beautiful round loaves. It’s absolutely perfect for Rosh Hashanah, symbolizing a sweet new year, and makes a wonderful addition to all the Jewish High Holidays. Plus, any leftover sweet challah transforms into the most exquisite French toast you’ll ever taste!
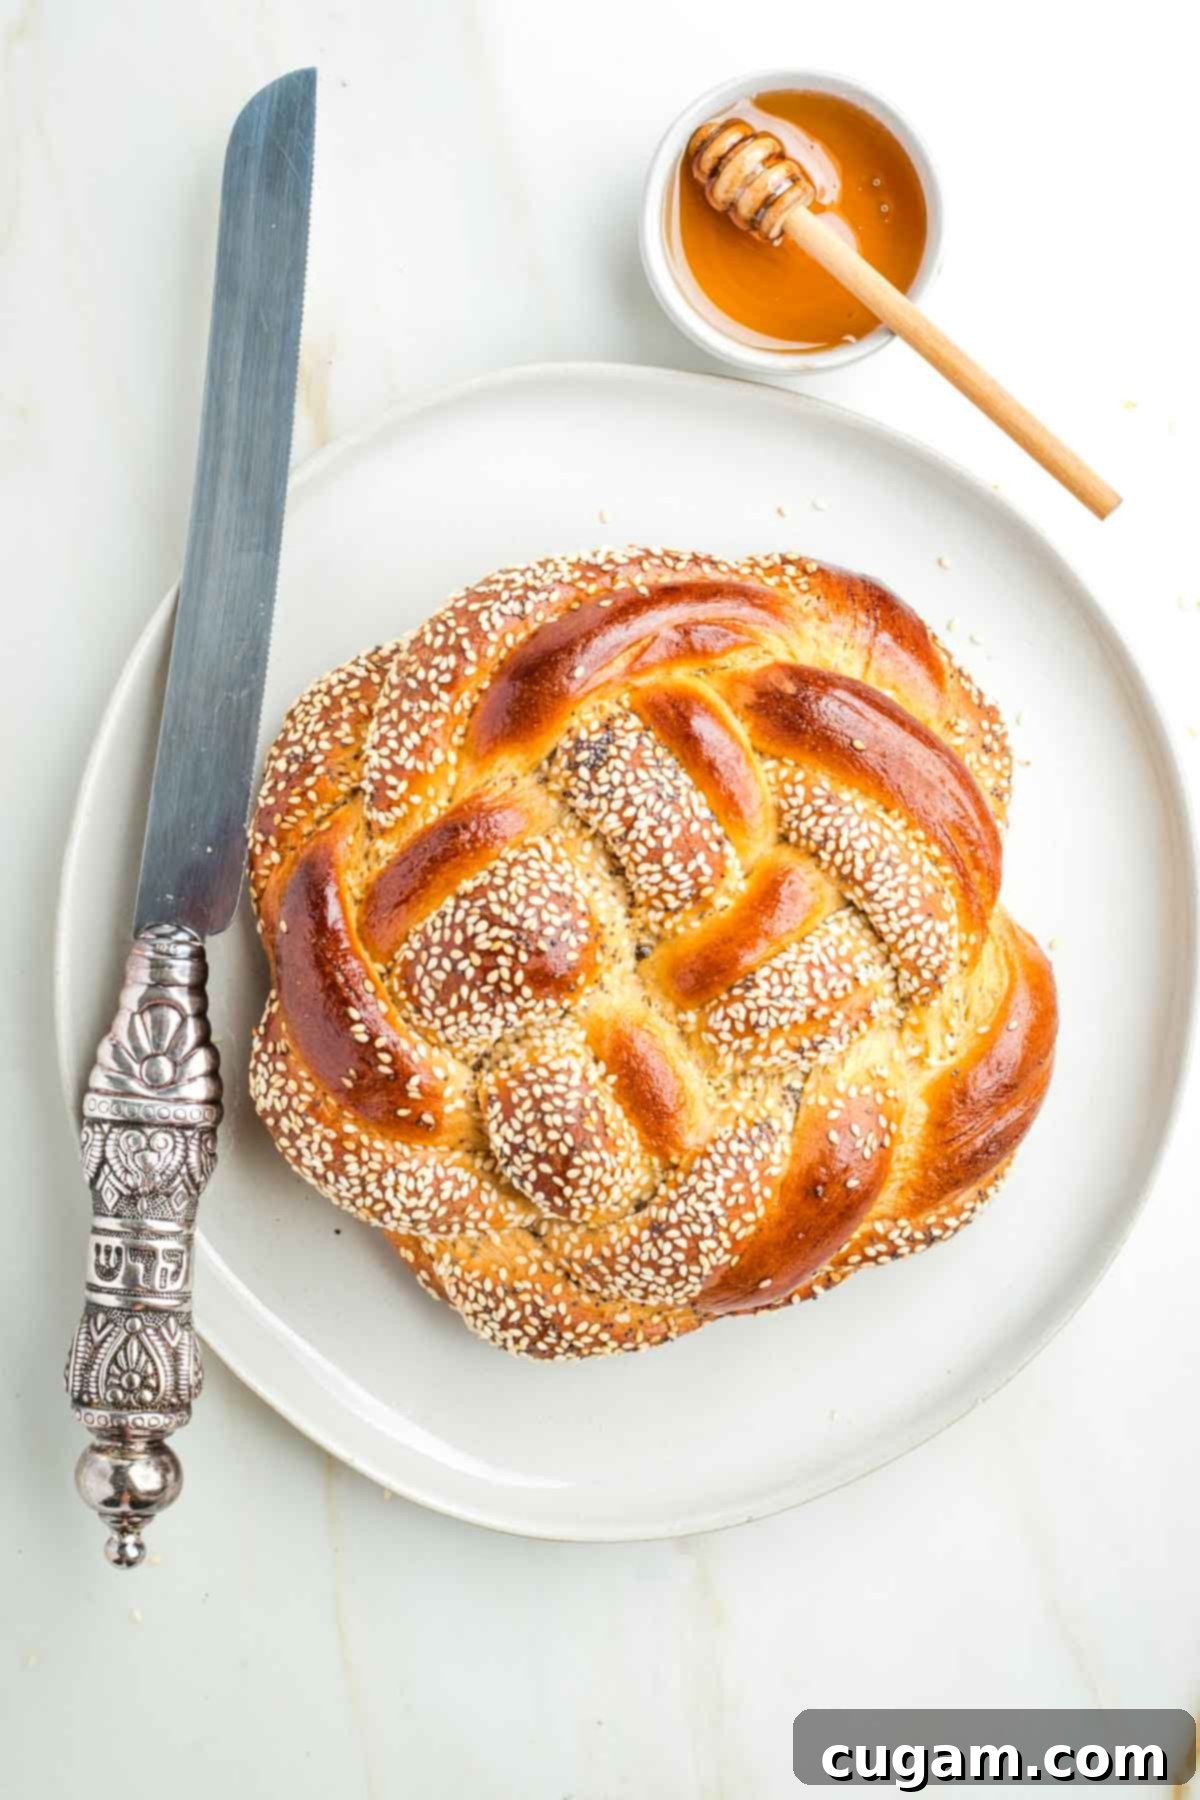
Baking Homemade Challah Bread from scratch might seem intimidating, but it’s truly simpler than you imagine and such a deeply rewarding and special tradition. With over 25 years of baking challah weekly for Shabbat and crafting round loaves for every holiday, I’ve gathered a wealth of experience in perfecting this dough. My goal is to guide you through each step, ensuring your challah turns out beautifully every time.
Specifically for Rosh Hashanah and Sukkot, I enhance my traditional dough with a touch of extra honey. This isn’t just for flavor; it’s a beautiful culinary metaphor, symbolizing our hopes for a sweet new year ahead. I often gather friends the weekend before the holidays for a lively marathon baking session, producing plenty of these round, braided challahs. There’s something truly special about sharing the warmth and joy of baking together, making the experience even sweeter.
After you’ve enjoyed a slice of this challah dipped in honey, consider offering something savory to spread on it. My two favorite accompaniments for this sweet challah are a rich and flavorful vegetarian mock chopped liver and a luxurious garlic and leek confit. These savory spreads offer a delightful contrast that complements the challah beautifully.
Looking to start the Jewish New Year off with healthy and delicious recipes? No Jewish holiday is truly complete without an abundance of yummy food. Be sure to check out my comprehensive roundup of Healthy Rosh Hashanah Recipes to discover new and exciting dishes to add to your festive menus this year.
Essential Ingredient Notes for Perfect Challah
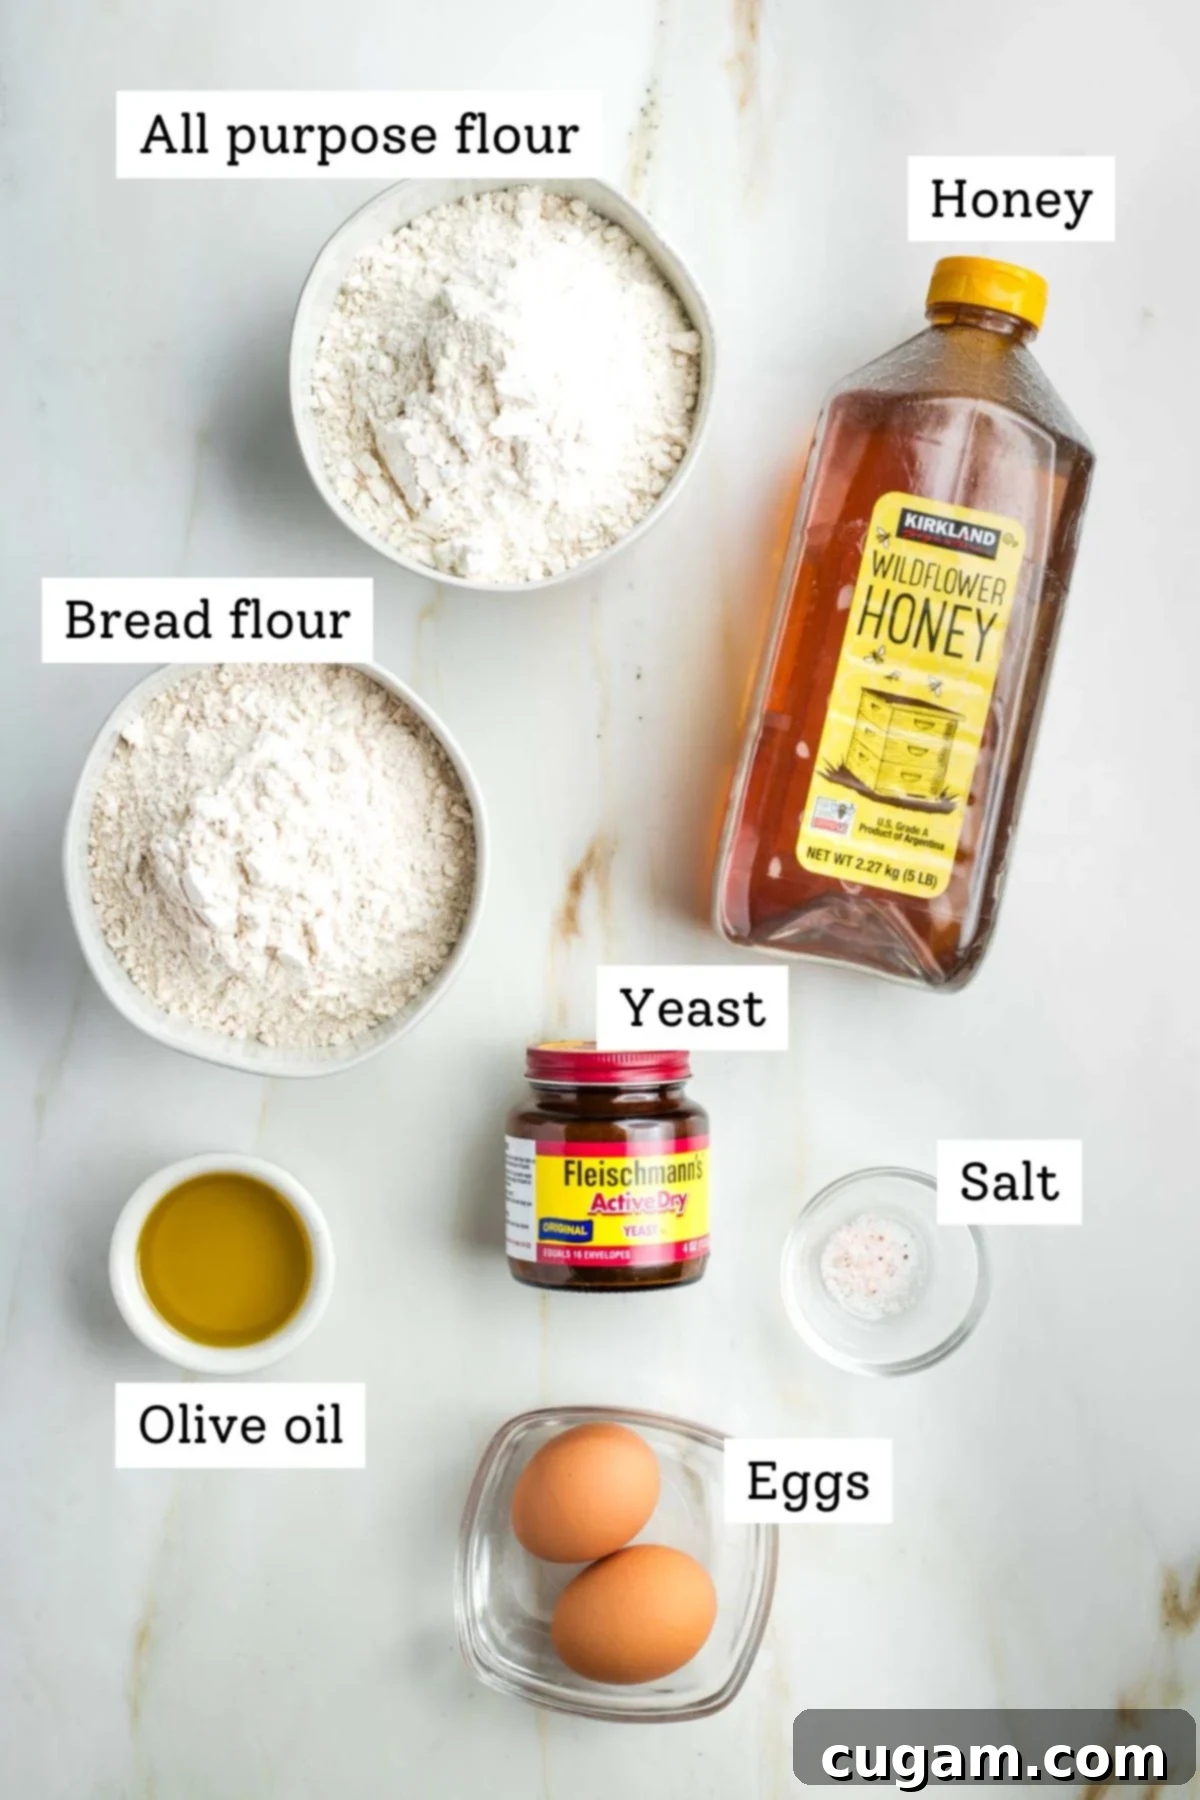
- Flour: The choice of flour significantly impacts the challah’s texture. I prefer using freshly milled whole grain flour, often a blend of bread flour and all-purpose flour. Through years of weekly baking, I’ve found this combination yields the best results – a perfect balance of tenderness and structure. However, don’t let a specific flour type stop you! I’ve successfully baked challah with various flours, even while traveling, so feel free to use what you have on hand. Just be mindful that different flours absorb liquids differently, so you might need slight adjustments.
- Yeast: Active dry yeast is my preferred choice over rapid-rise yeast for challah. It generally provides a more reliable and consistent rise, contributing to a better texture and flavor. Whether you use pre-portioned packets or measure from a jar, always check the expiration date to ensure your yeast is fresh and active.
- Honey: In this recipe, honey is not just a sweetener; it plays a crucial role in activating the yeast and enriching the dough. I consciously avoid processed white sugar, finding that honey delivers a wonderful, nuanced sweetness and helps achieve that characteristic golden-brown crust. Its natural properties also contribute to a beautifully moist crumb.
- Eggs: Eggs add richness, structure, and a beautiful golden hue to the challah. They also help bind the dough and contribute to its characteristic soft texture.
- Olive Oil: A good quality olive oil keeps the challah incredibly tender and moist. It also contributes to the golden crust and helps prevent the dough from drying out during the rising process.
- Salt: Essential for flavor balance, salt also helps control the yeast activity and strengthens the gluten structure in the dough, leading to a better rise and texture.
I completely understand that baking from scratch, especially a recipe with many steps and photos, can appear daunting at first glance. Please don’t let the length of this post or the abundance of process shots deter you! Every image and detailed instruction is here to make your journey easier, acting as a visual guide so you can compare your progress and feel confident that you’re on the right track. Consider all these photos as me cheering you on and showing you the way, step by step. You absolutely can do this!
The First Step: Proofing the Yeast for a Perfect Rise
Honestly, proofing the yeast is often considered the trickiest part of bread baking, but it’s actually quite straightforward. The key is getting the water temperature just right – warm enough to activate the yeast, but not so hot that it kills it. While a kitchen thermometer can be incredibly helpful for precision (aim for 105-110 degrees Fahrenheit), it’s not strictly essential. You can learn to gauge the temperature by touch. For best results, use filtered water if your tap water contains high levels of chlorine, which can inhibit yeast activity.
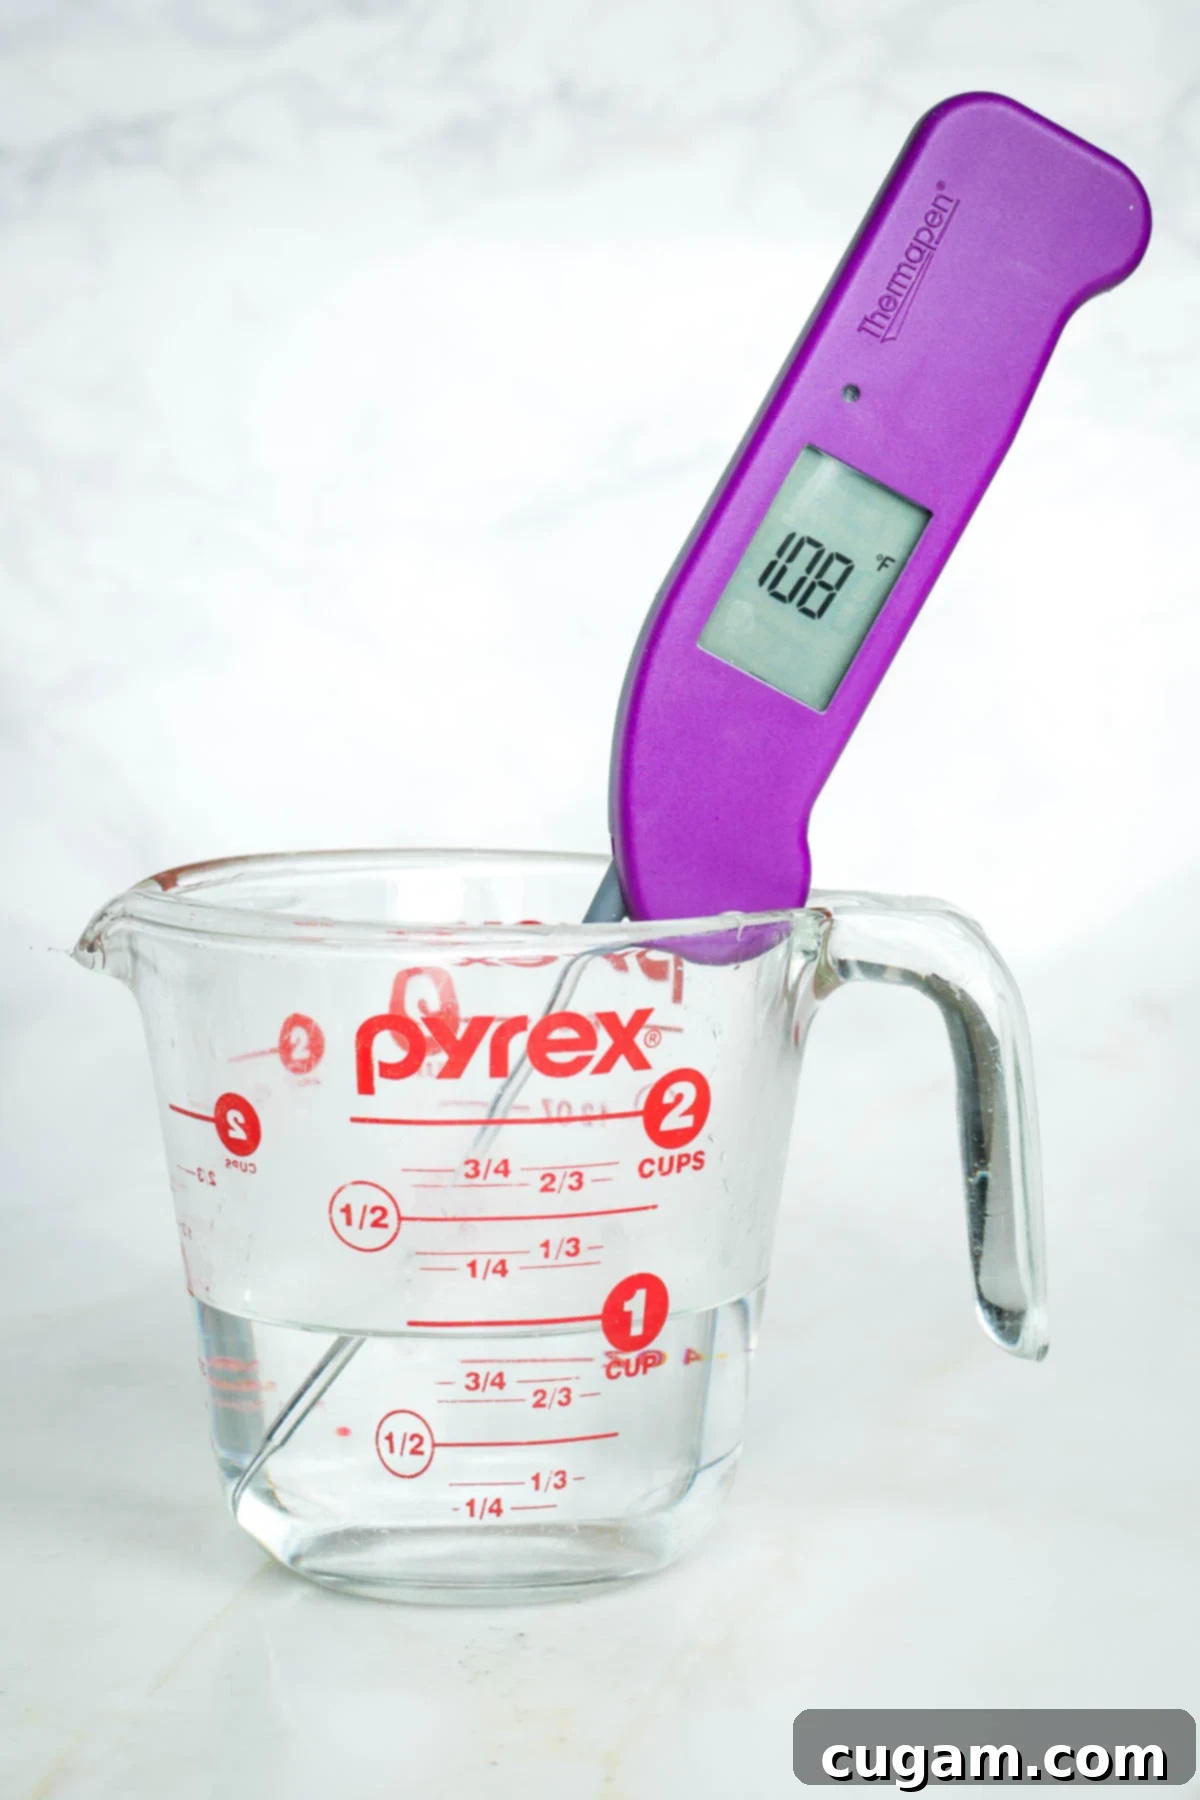
If you have a thermometer, use it until you become familiar with what the correct temperature (anything between 105-110 degrees F) feels like on your skin. If not, simply turn on your hot water tap and let it run until it’s comfortably hot, but definitely not scalding or painfully hot to the touch. Too hot, and you’ll kill the yeast; too cold, and it won’t activate.
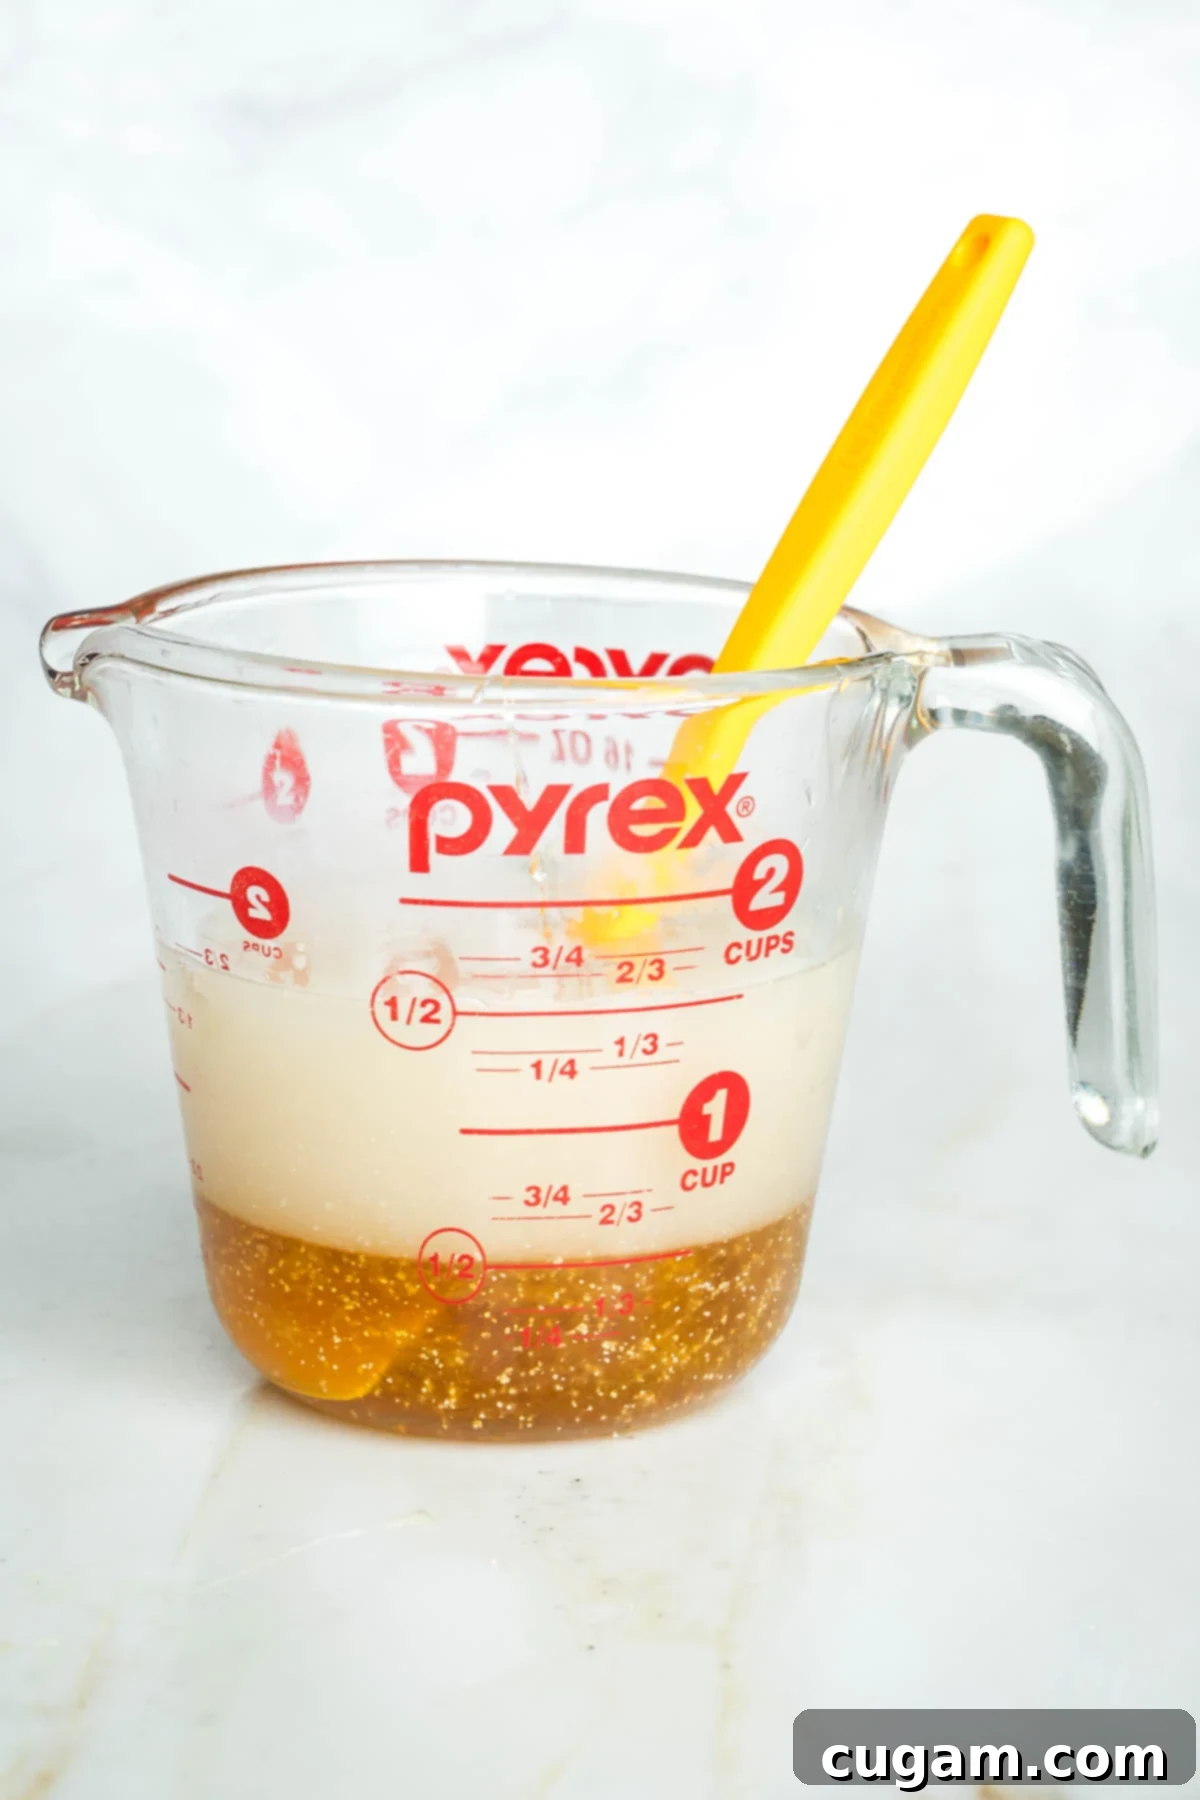
Using a 2-cup glass measuring cup is incredibly helpful here. Add the honey first; it will naturally settle at the bottom, making it easy to see when you’ve reached the ½ cup mark. Then, add the salt and yeast, stirring everything thoroughly until combined. This mixture of warm water and honey provides the ideal environment for the yeast to awaken.
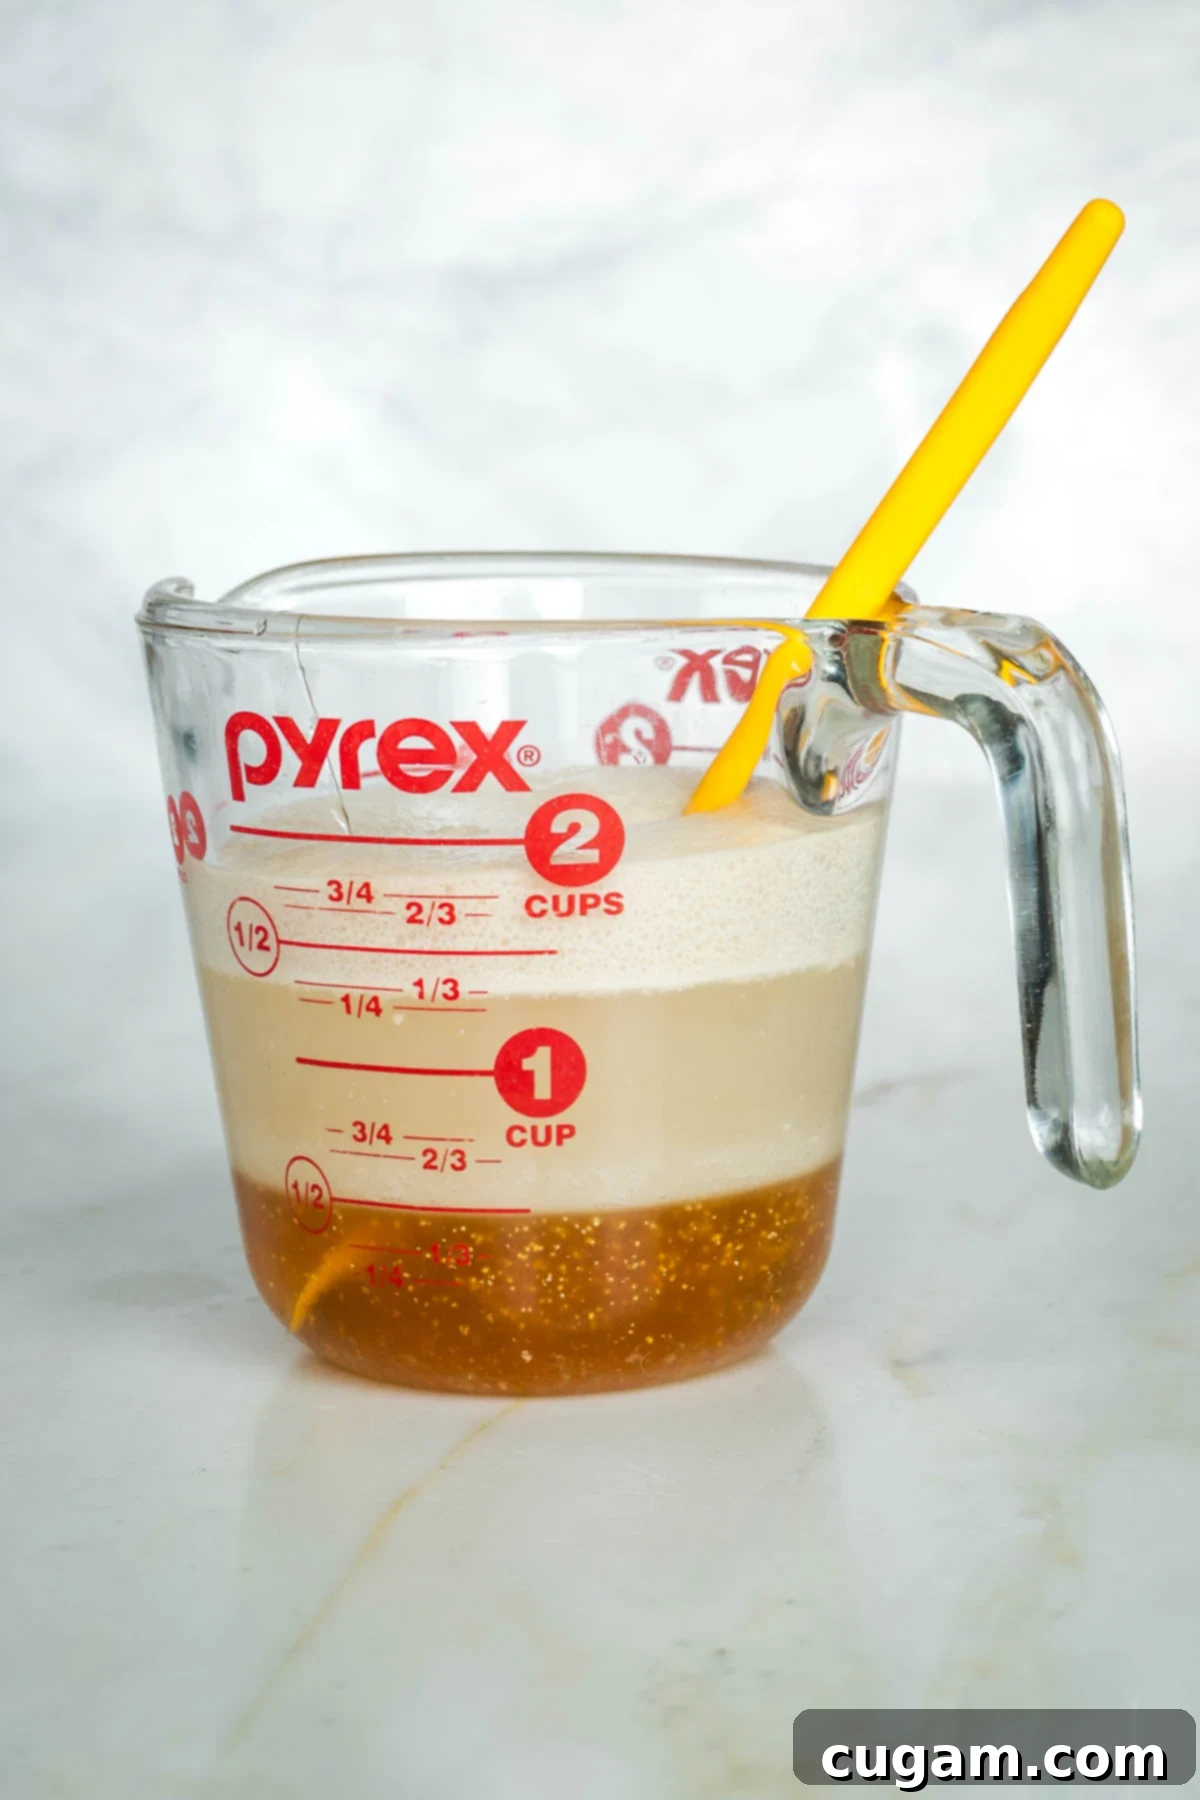
Allow the mixture to sit undisturbed for at least 5 minutes. During this time, you should observe the yeast beginning to bubble and then expanding into a cohesive, frothy, beige mound on the surface. This is a clear indication that your yeast is active and alive. The bubbles are carbon dioxide being released as the yeast feeds on the sugar, a sign of successful proofing.
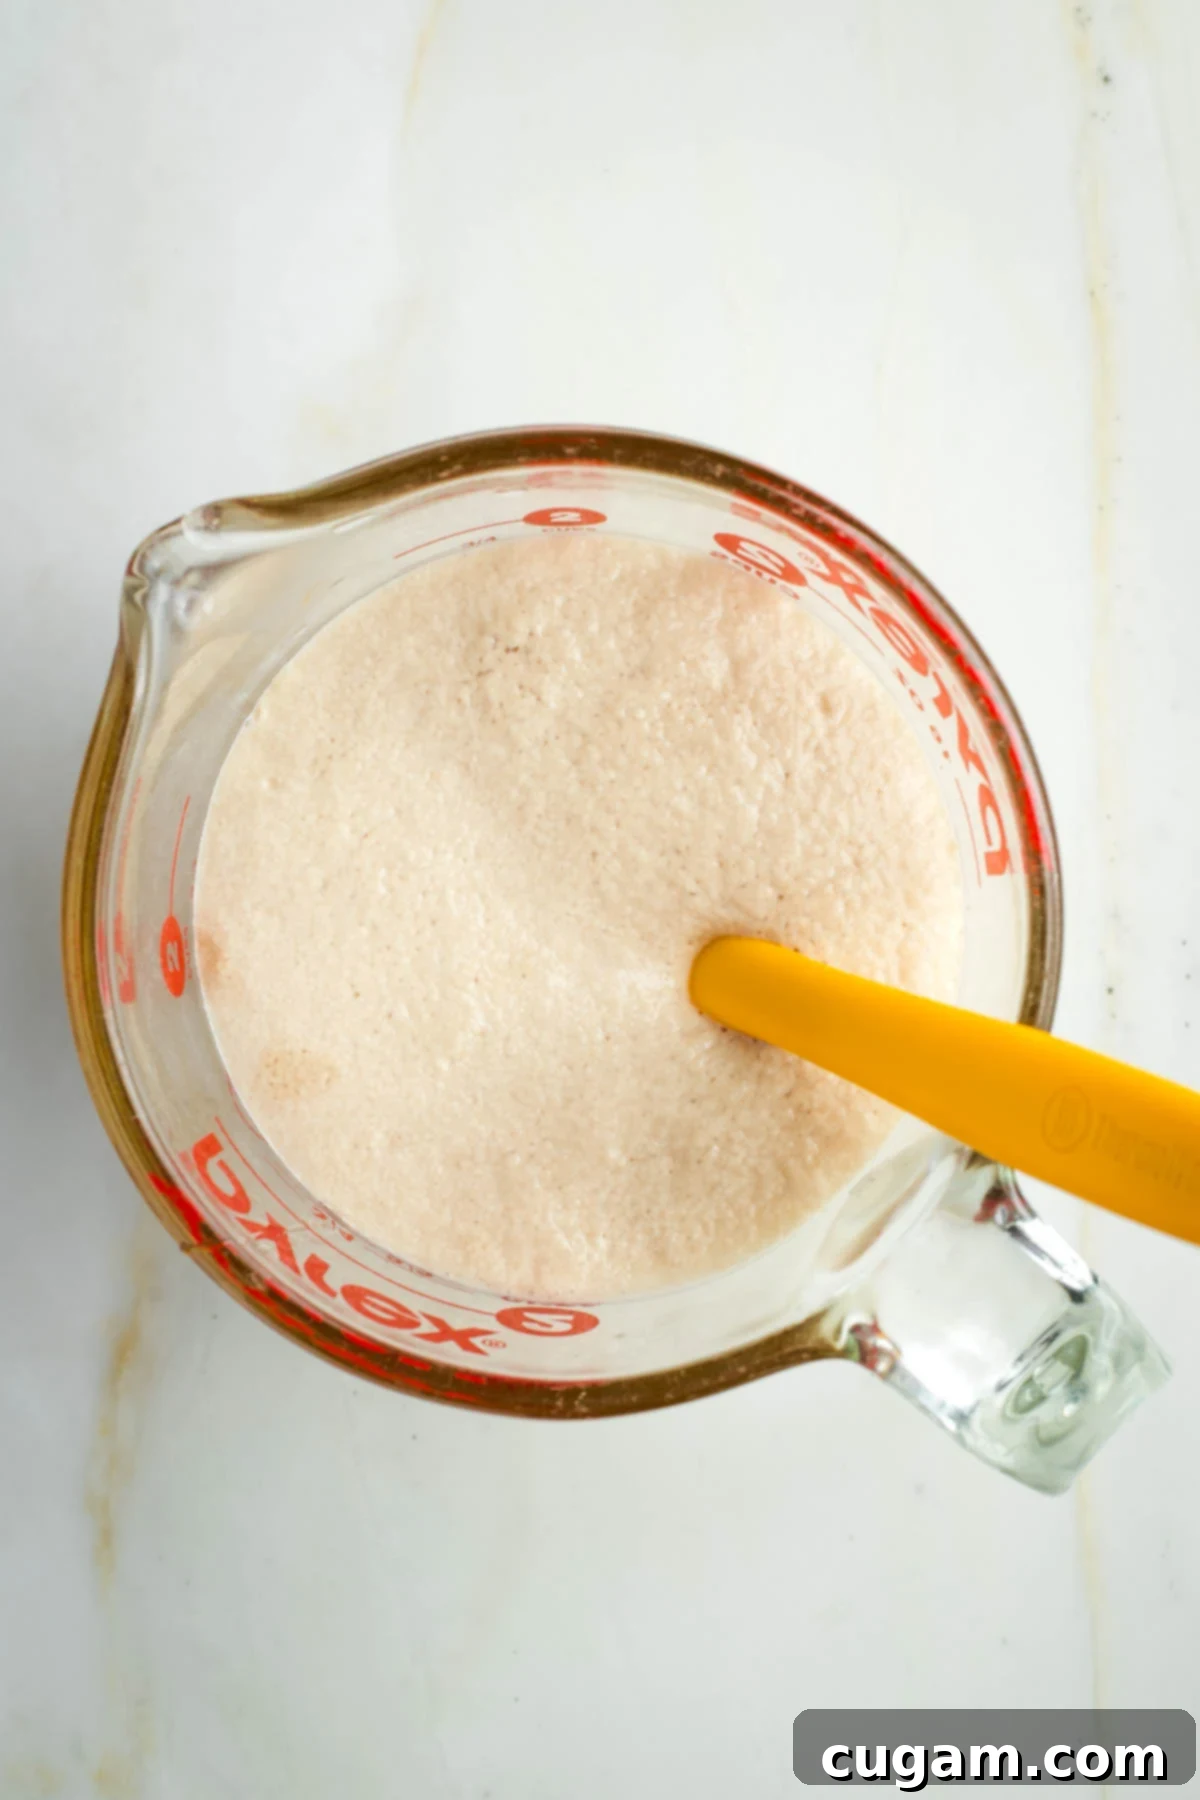
If, after 5 minutes, your yeast mixture shows no signs of bubbling or growth, something is amiss. This usually means your water was either too hot (killing the yeast) or not warm enough (keeping it dormant), or your yeast is simply no longer fresh. Double-check the expiration date on your yeast package. If it doesn’t resemble the frothy, active state shown in this photo, it’s best to discard it and begin again. Your challah will not rise properly if the yeast isn’t successfully proofed.
Crafting the Perfect Challah Dough
Once your yeast is proofed and ready, the next exciting step is creating the challah dough. This process can be done using a food processor, a stand mixer, or even by hand – choose the method that best suits your comfort level and kitchen equipment. Each method yields excellent results with a little patience and attention to detail.
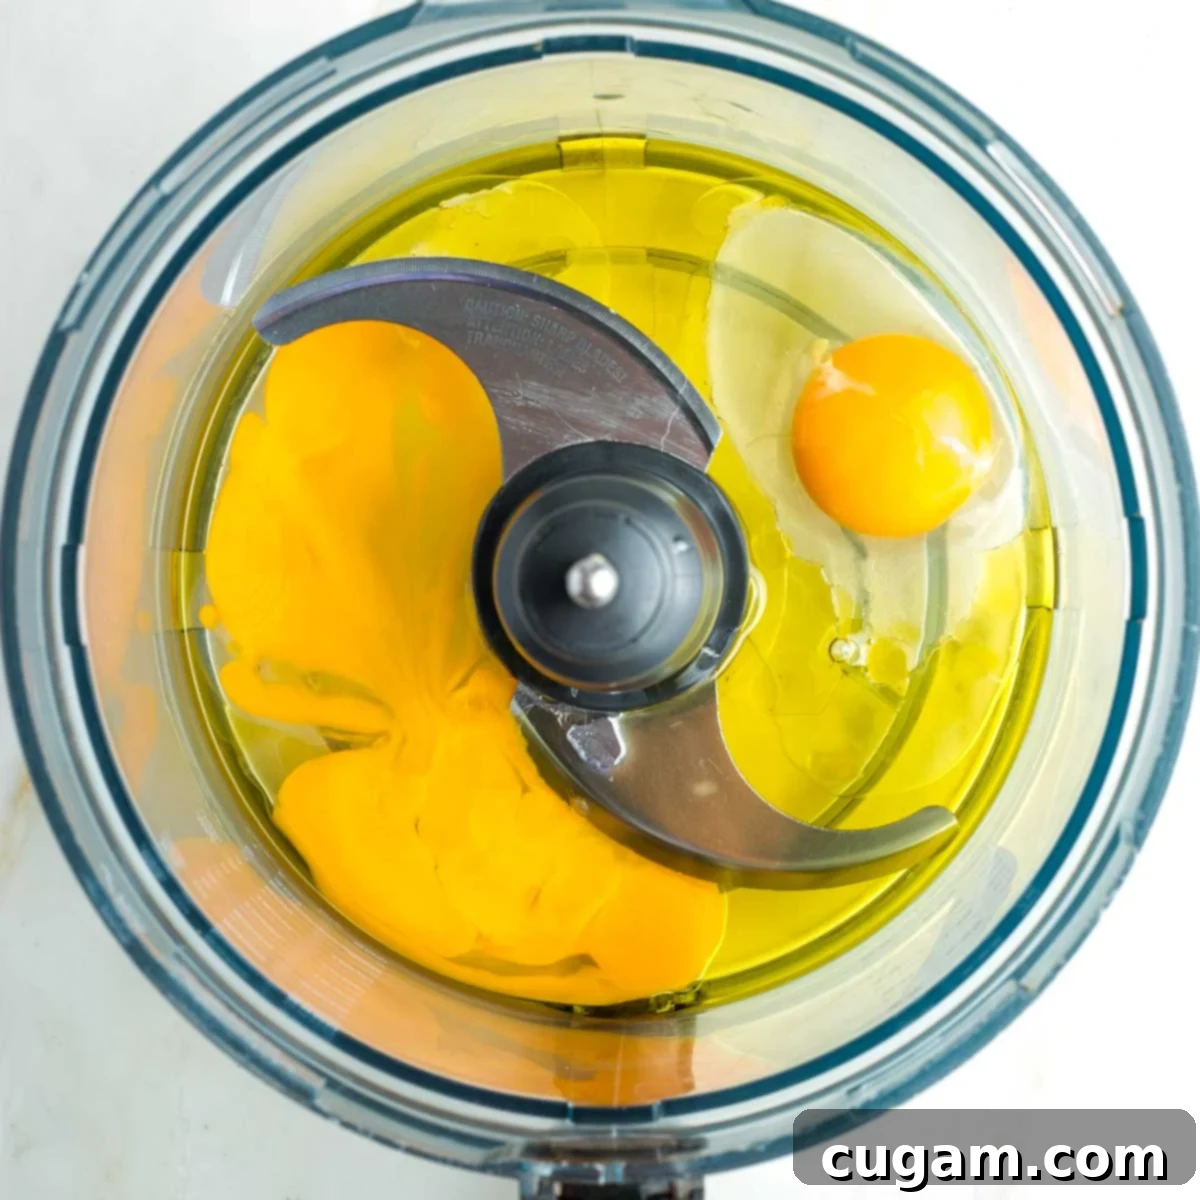
Begin by measuring the olive oil and eggs into the bowl of your chosen appliance. If using a food processor, ensure it’s fitted with the “S” blade. For a stand mixer, use the dough hook attachment. If mixing by hand, a large bowl and a sturdy spoon or your hands will suffice.
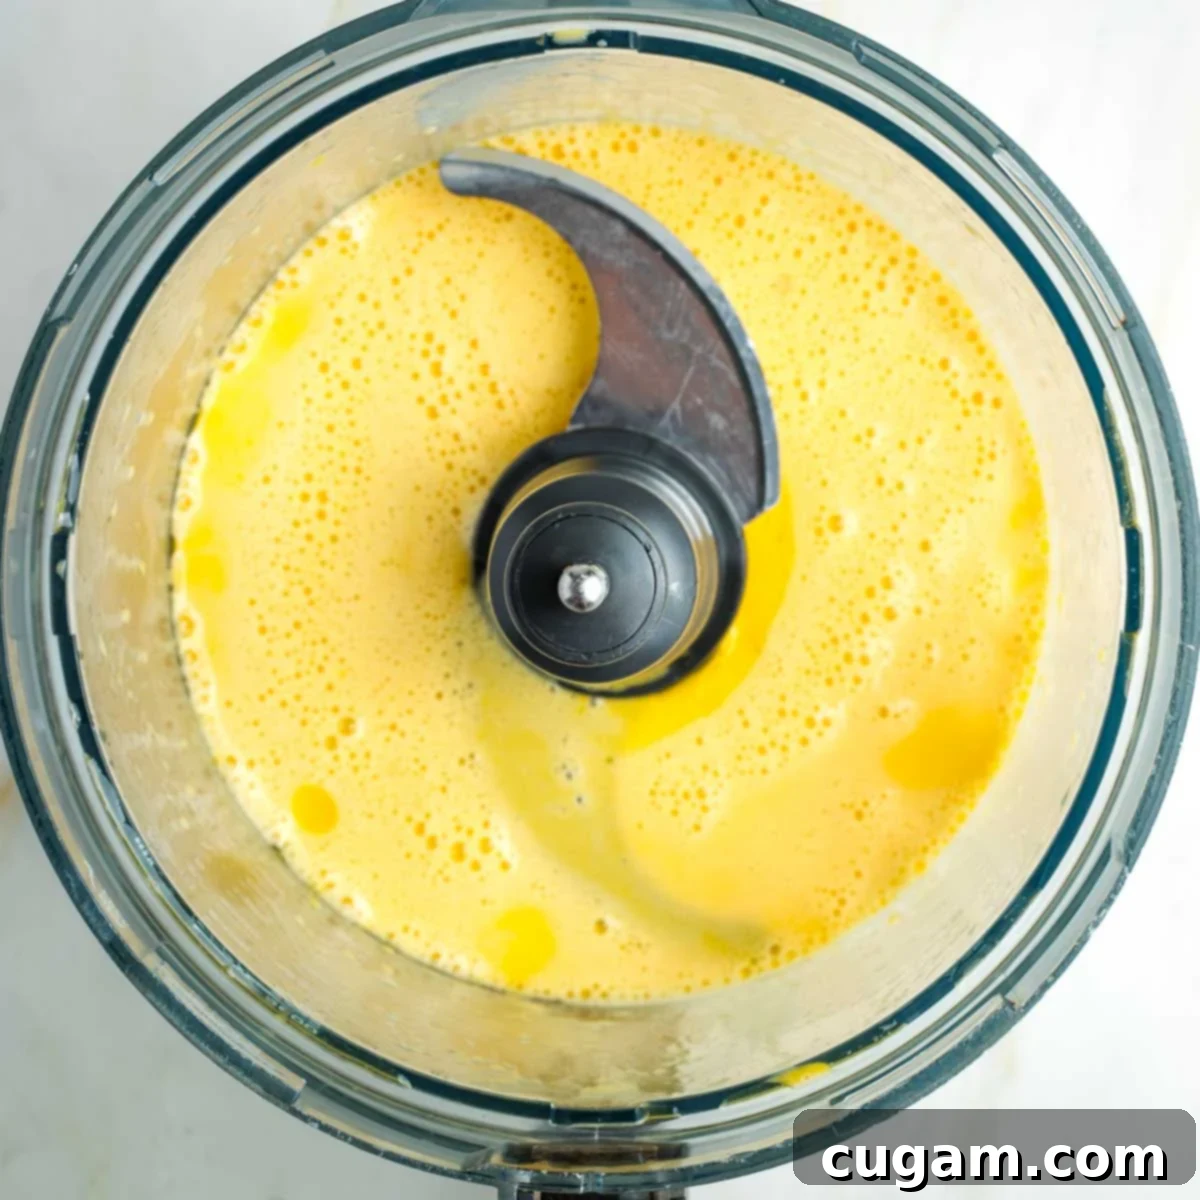
Mix the eggs and oil until they are thoroughly emulsified and appear light and frothy. This step is crucial for incorporating air and ensuring a tender texture in the finished challah. The mixture should look pale yellow and slightly increased in volume.
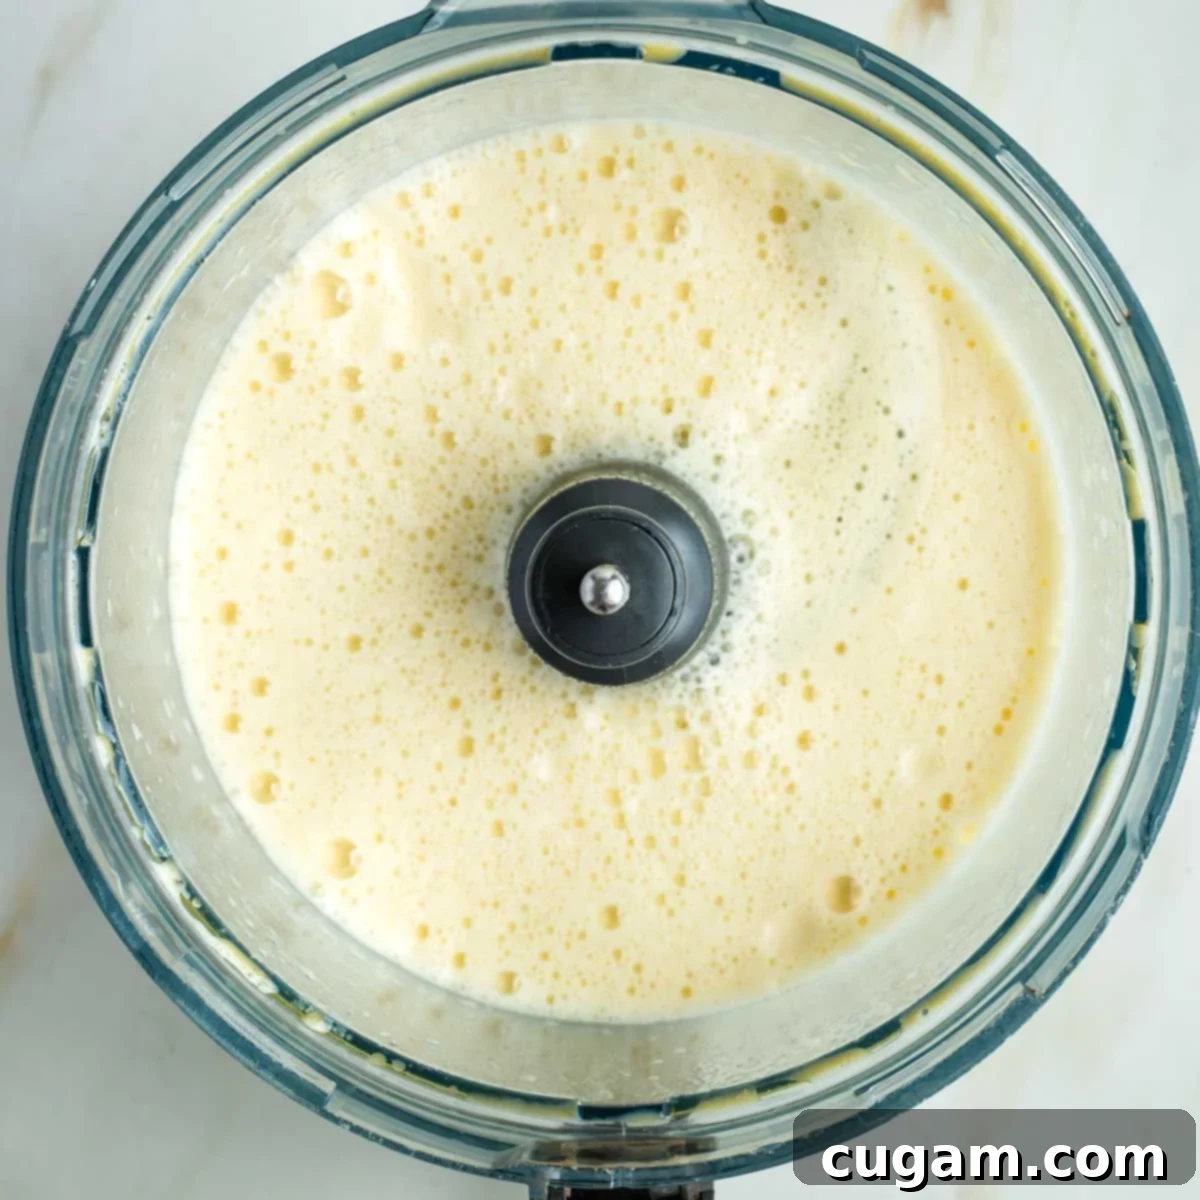
Once your yeast mixture has successfully proofed and is visibly bubbly and active, carefully add it to the frothy egg and oil mixture. Mix again briefly to combine. The entire mixture should now be very bubbly, indicating the yeast is ready to work its magic.
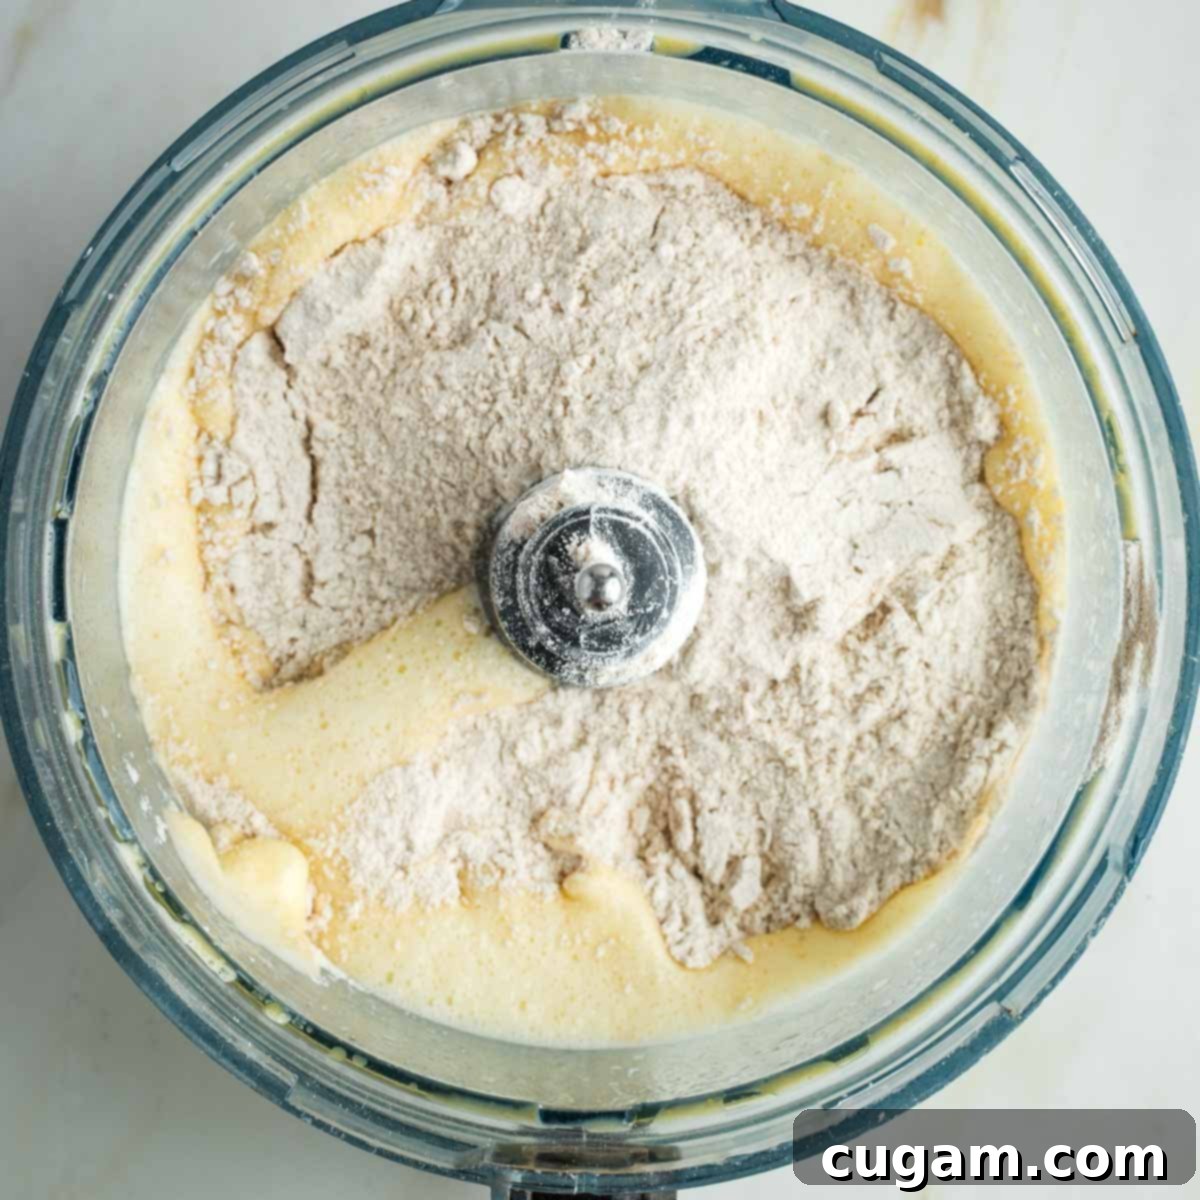
Now, it’s time to introduce the flour. Sprinkle in approximately half of the total flour mixture. For this initial addition, I typically use about 1.5 cups of all-purpose flour and 1 cup of bread flour. Measuring flour accurately is important: spoon it into your dry measuring cup and level it off with a straight edge, or better yet, weigh it with a kitchen scale for precision.
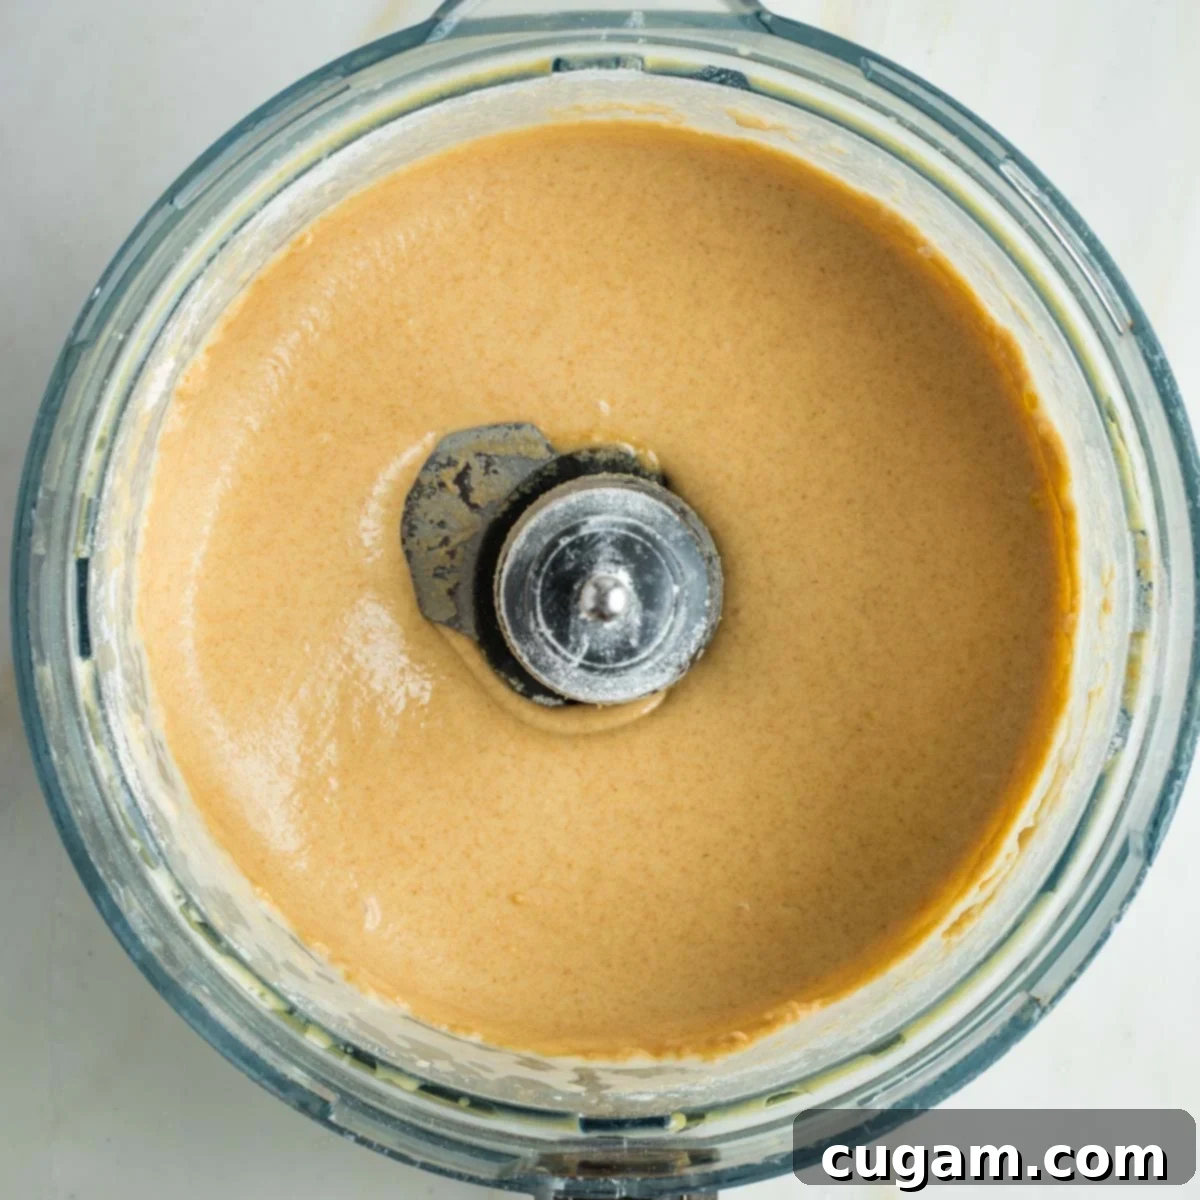
Process or mix this first portion of flour into the wet ingredients until it’s just combined and no dry streaks of flour remain. At this stage, the mixture will be quite creamy and thick, but not yet a cohesive dough. Avoid overmixing at this point; you’re just aiming to integrate the flour.
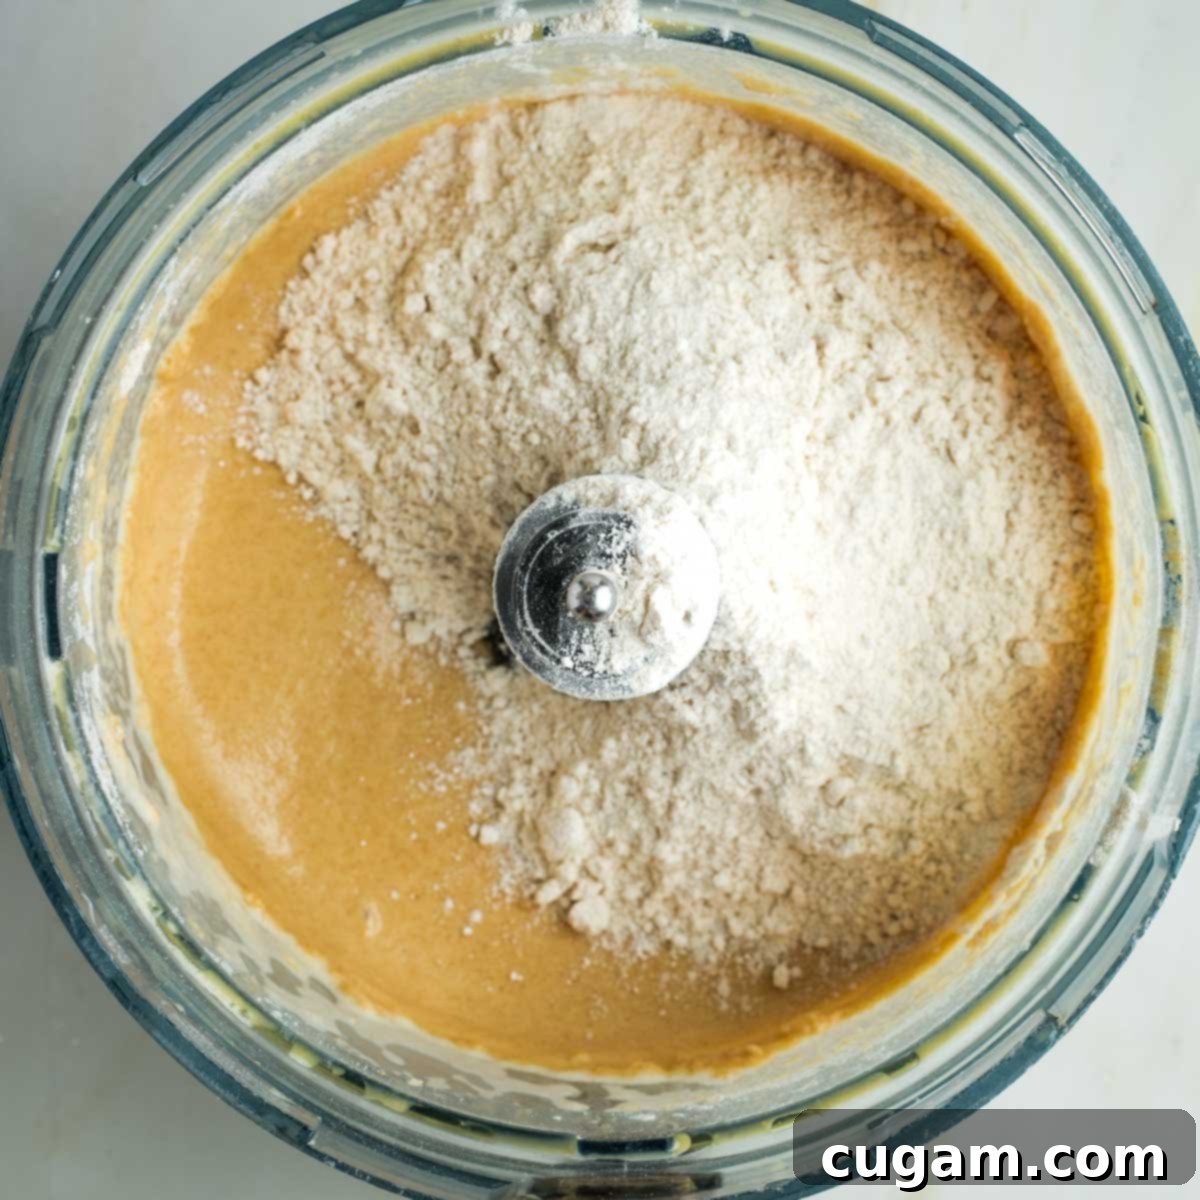
Next, add the remaining 2.5 cups of flour to the mixture. This second addition will transform the creamy batter into a workable dough. Ensure the flour is evenly distributed over the surface before you begin processing or kneading.
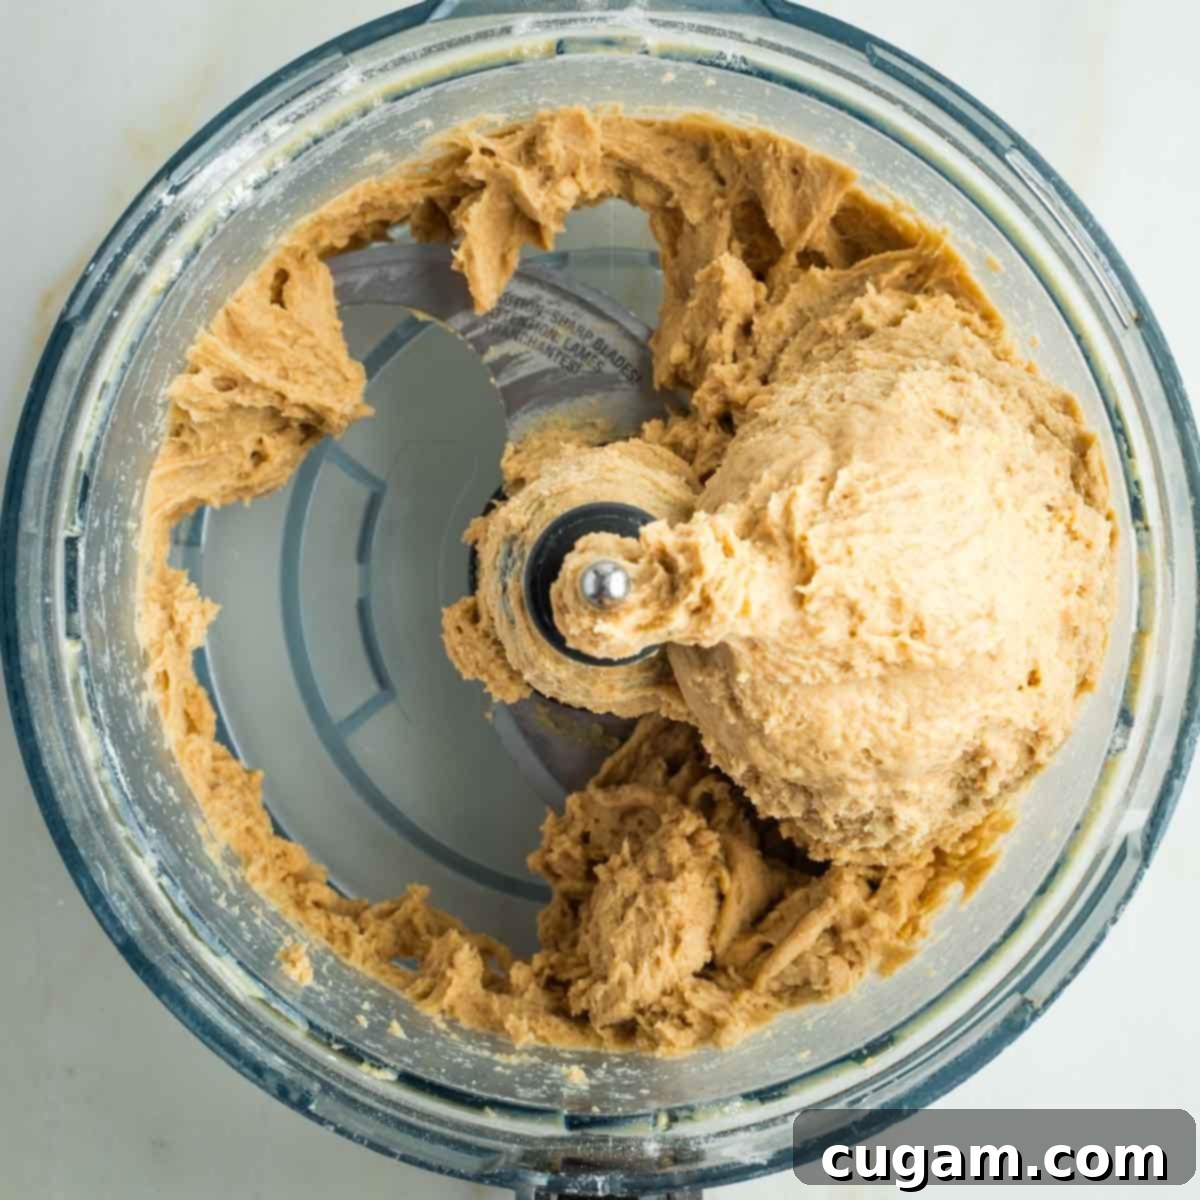
Now, let your machine do the hard work of kneading for you. Run the food processor or stand mixer for about 3 minutes. As it kneads, observe the dough. If it’s still sticking significantly to the sides of the bowl (and often climbing up the blade or hook), it likely needs a tiny bit more flour to reach the perfect consistency.
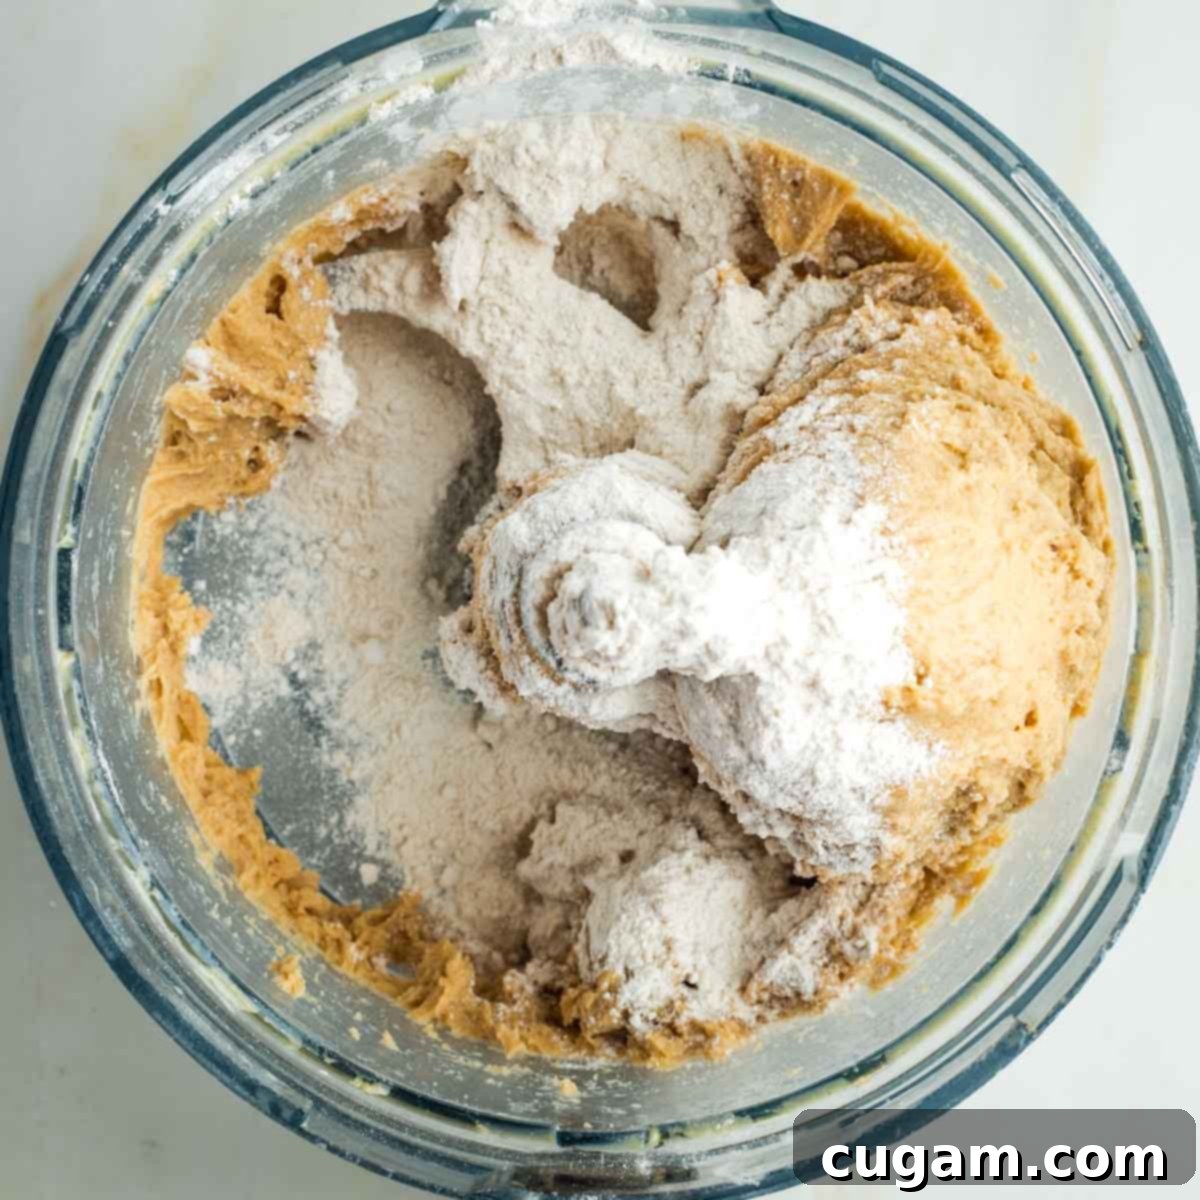
When adding more flour, proceed cautiously. Start slow, sprinkling in just one tablespoon of flour onto the dough. Over-flouring can lead to dry, dense challah, so it’s always better to add too little and adjust than to add too much.
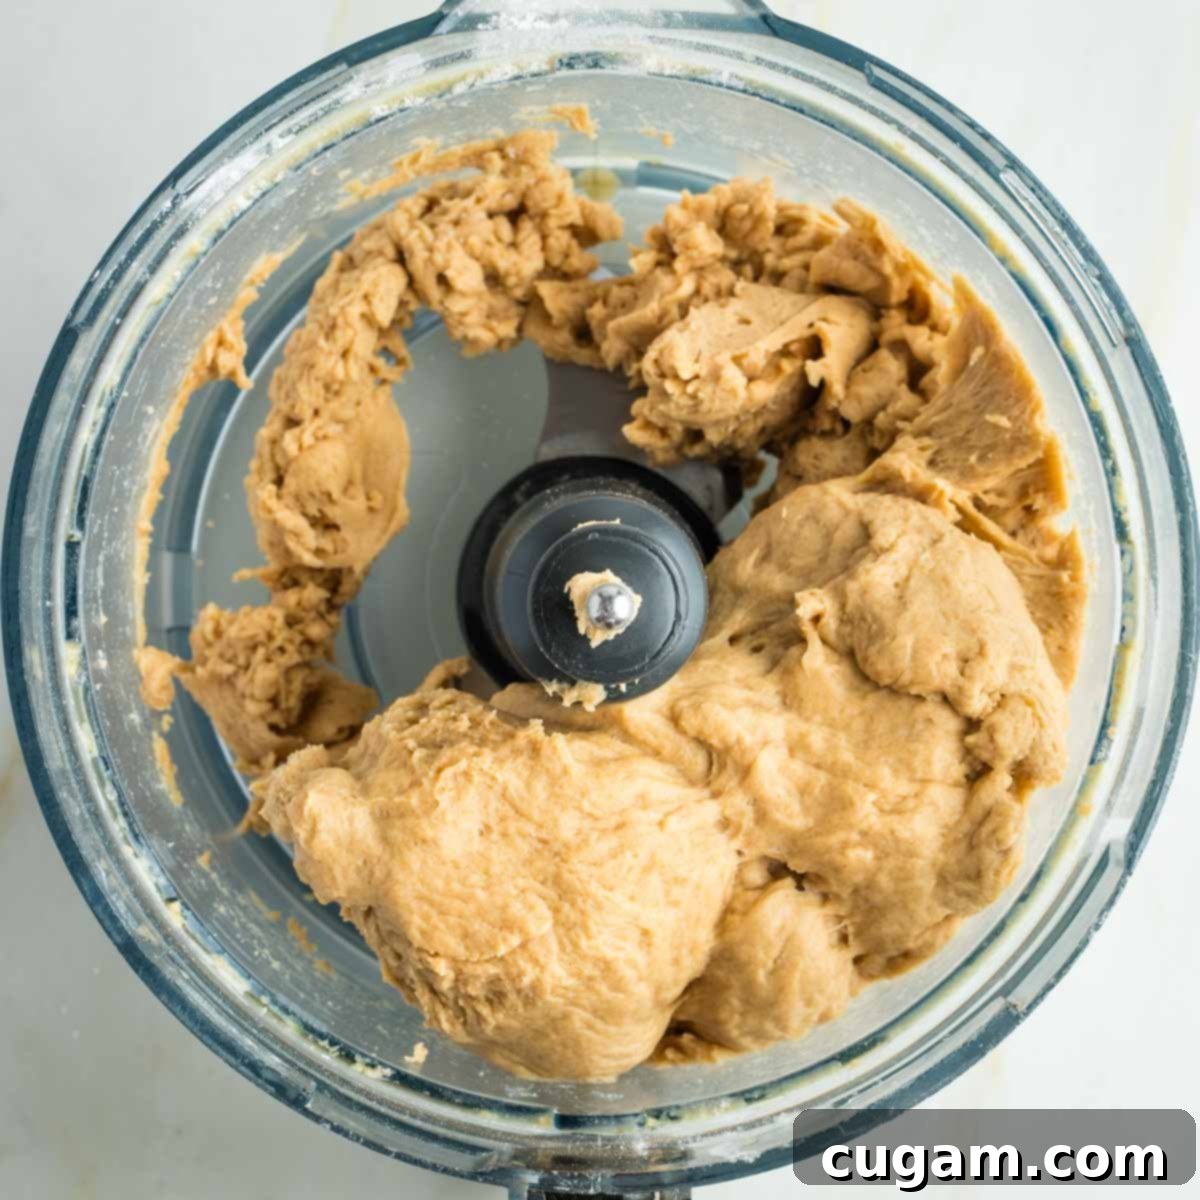
Mix again for another minute or two after adding the flour. At this point, your dough should begin to hold together cohesively and pull away from the sides of the bowl. It should still feel a bit tacky to the touch, but it shouldn’t be overly sticky or cling to your hands. If it’s still too sticky, sprinkle on another tablespoon of flour and mix again. Remember, I caution you against adding too much more flour. A slightly tacky dough is ideal for a soft, airy challah.
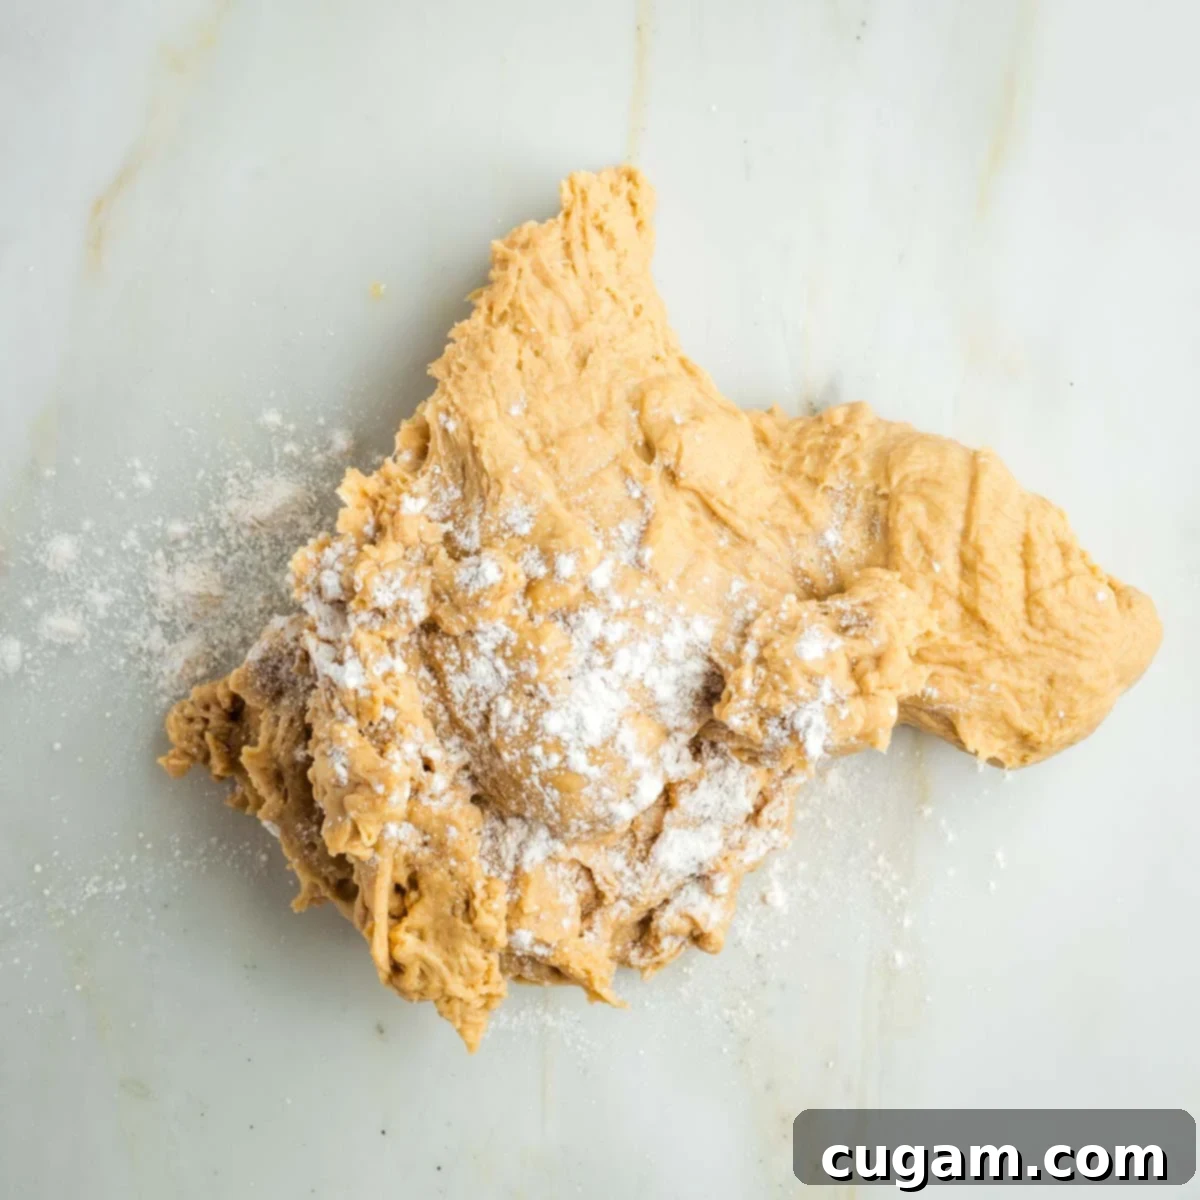
Carefully turn the dough out onto a LIGHTLY floured surface. If it still feels a little too sticky to manage, sprinkle just a teaspoon of extra flour on top. This minimal addition will help prevent sticking without drying out your dough. Lightly dust your hands as well.
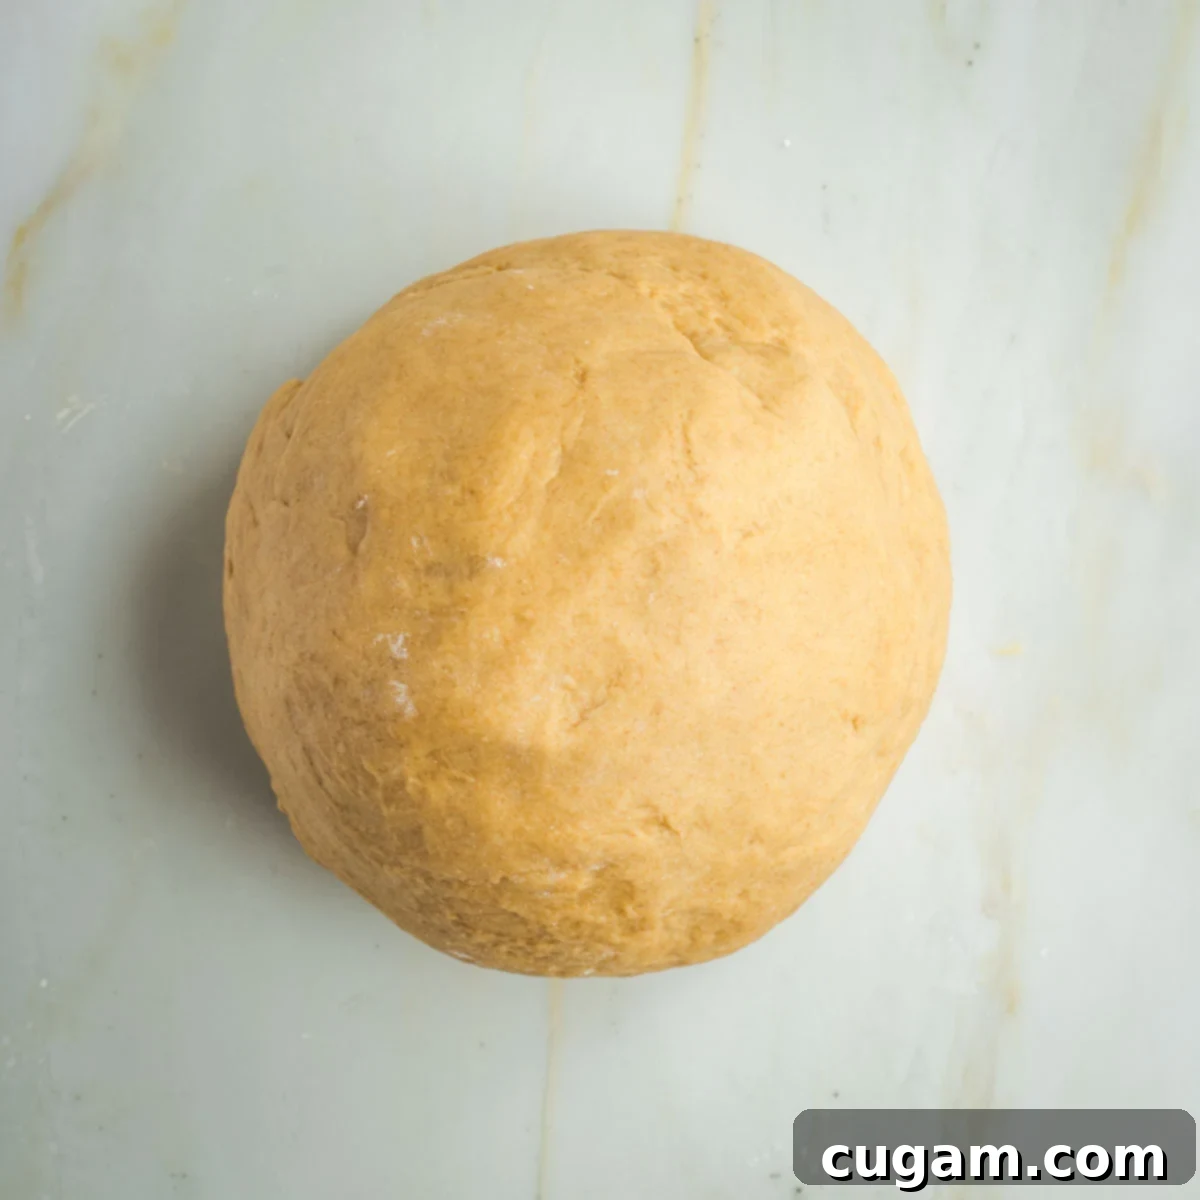
Knead the dough by hand for about a minute. This short kneading session helps to develop the gluten further and ensures a smooth, uniform ball of dough is formed. You’ll feel it become more elastic and supple under your hands.
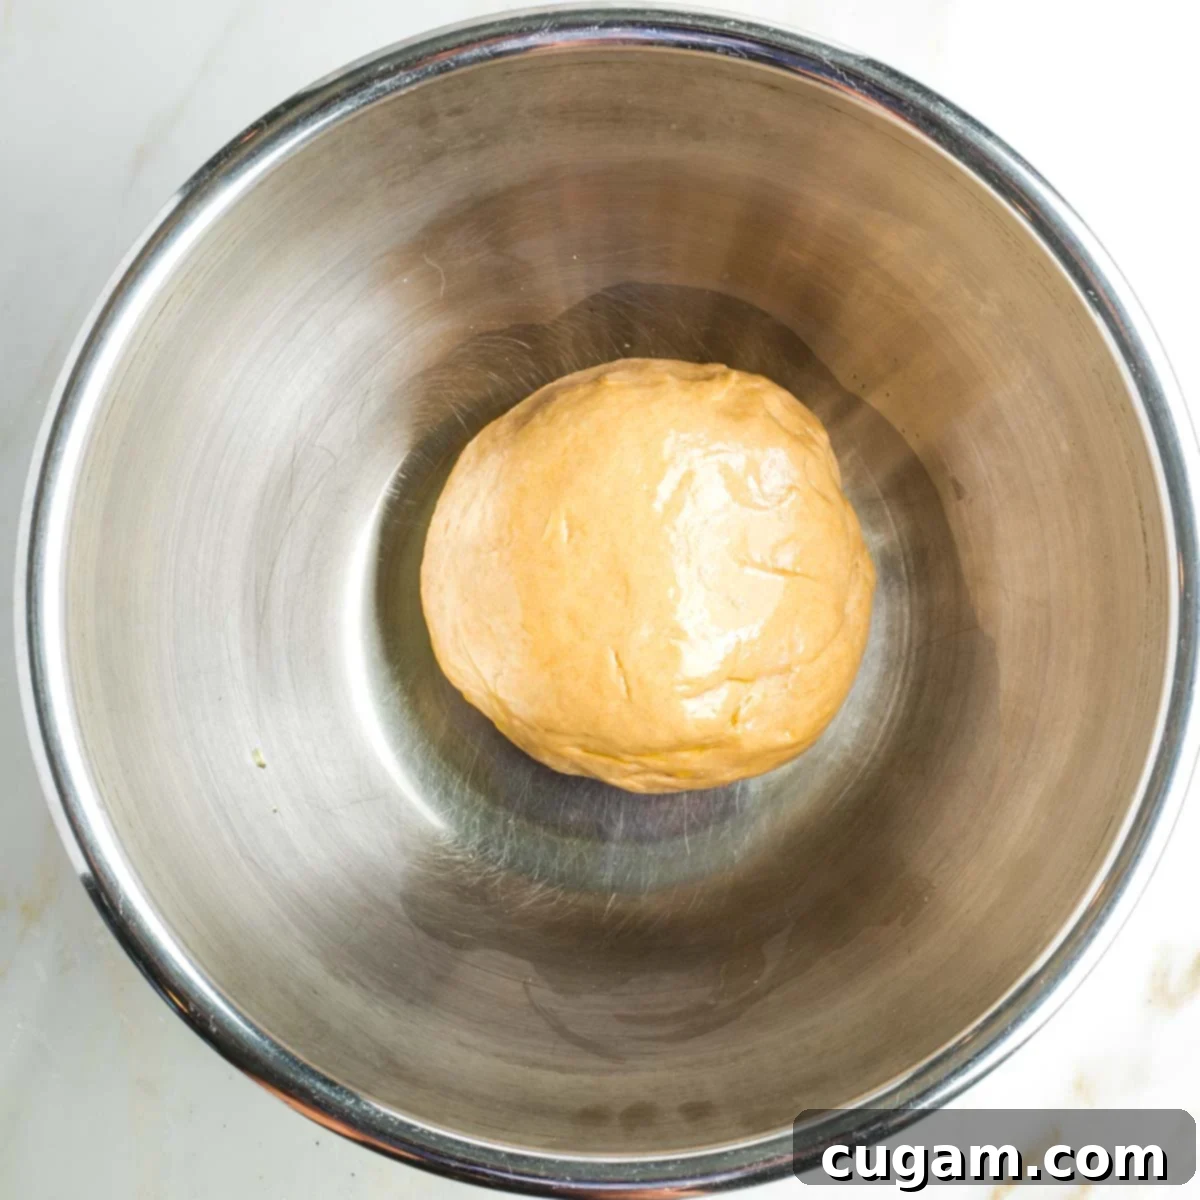
Pour about a tablespoon of olive oil into a large, clean bowl and swirl it around to coat the bottom and sides. Gently place the smooth ball of dough into the oiled bowl, then turn it a few times to ensure it’s fully coated with the oil. This prevents the dough from sticking and helps keep it moist during the rise.
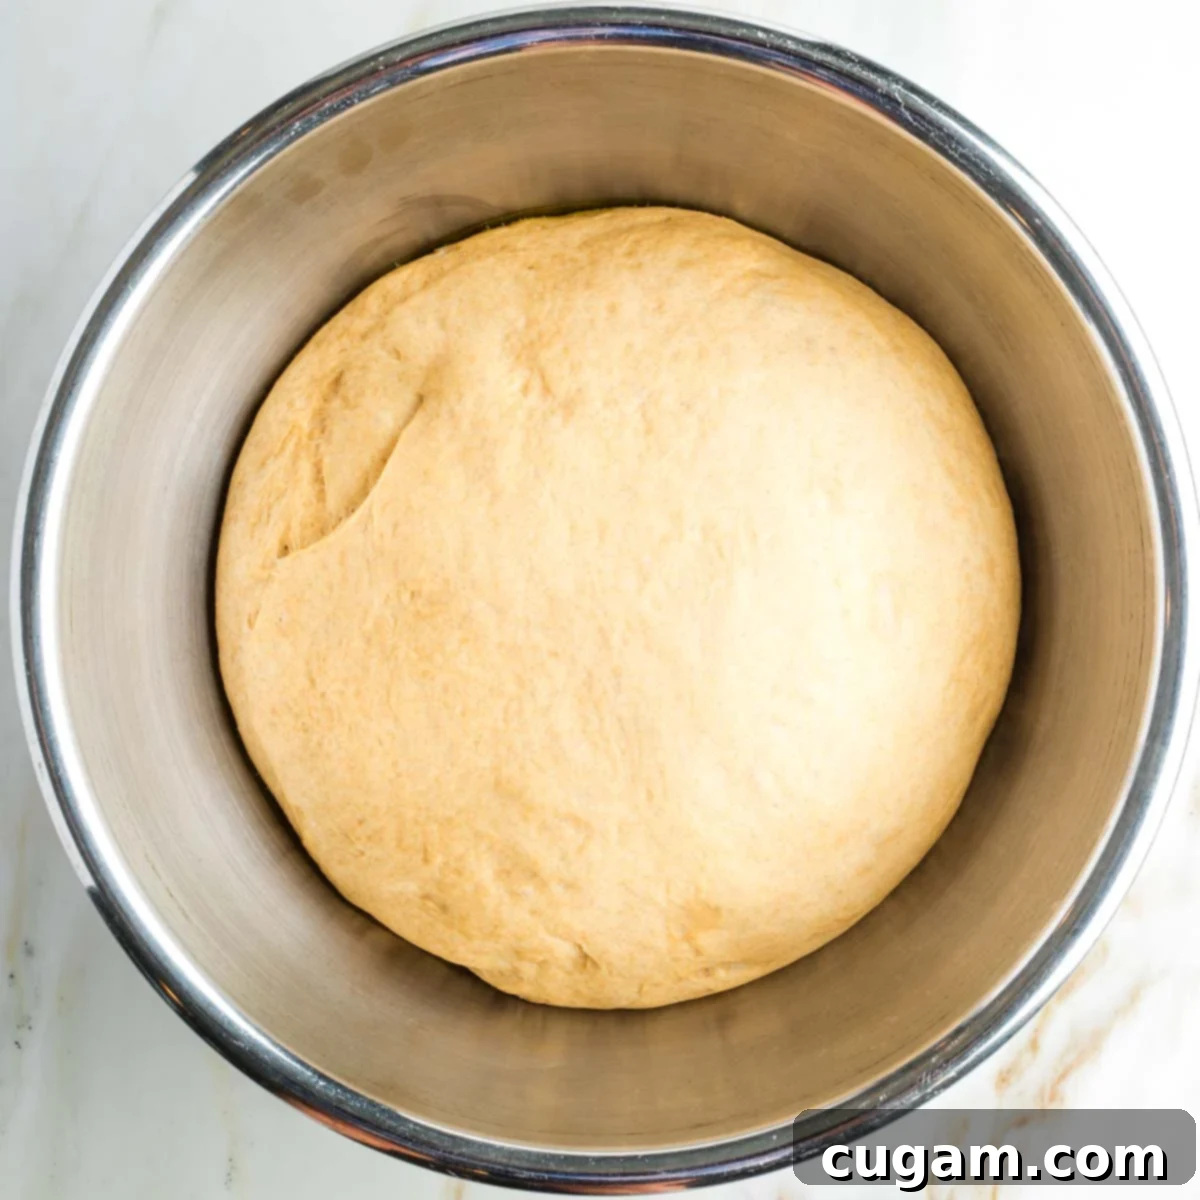
Cover the bowl of dough with a clean kitchen towel or plastic wrap. Find a warm spot in your kitchen – perhaps a sunny window, near a pilot light, or in an oven with a “proof” setting (around 100 degrees F). Allow the dough to rise for at least 2 hours, or until it has more than doubled in size and feels light and airy. The duration of the rise can vary based on room temperature.
Dividing and Braiding: Crafting the Iconic Round Challah
The round shape of challah for Rosh Hashanah is deeply symbolic, representing the cyclical nature of the year and the hope for a year without end, full of blessings. Dividing and braiding the dough into these festive shapes is an enjoyable and creative part of the process. This recipe yields three medium-sized challahs, perfect for sharing or freezing.
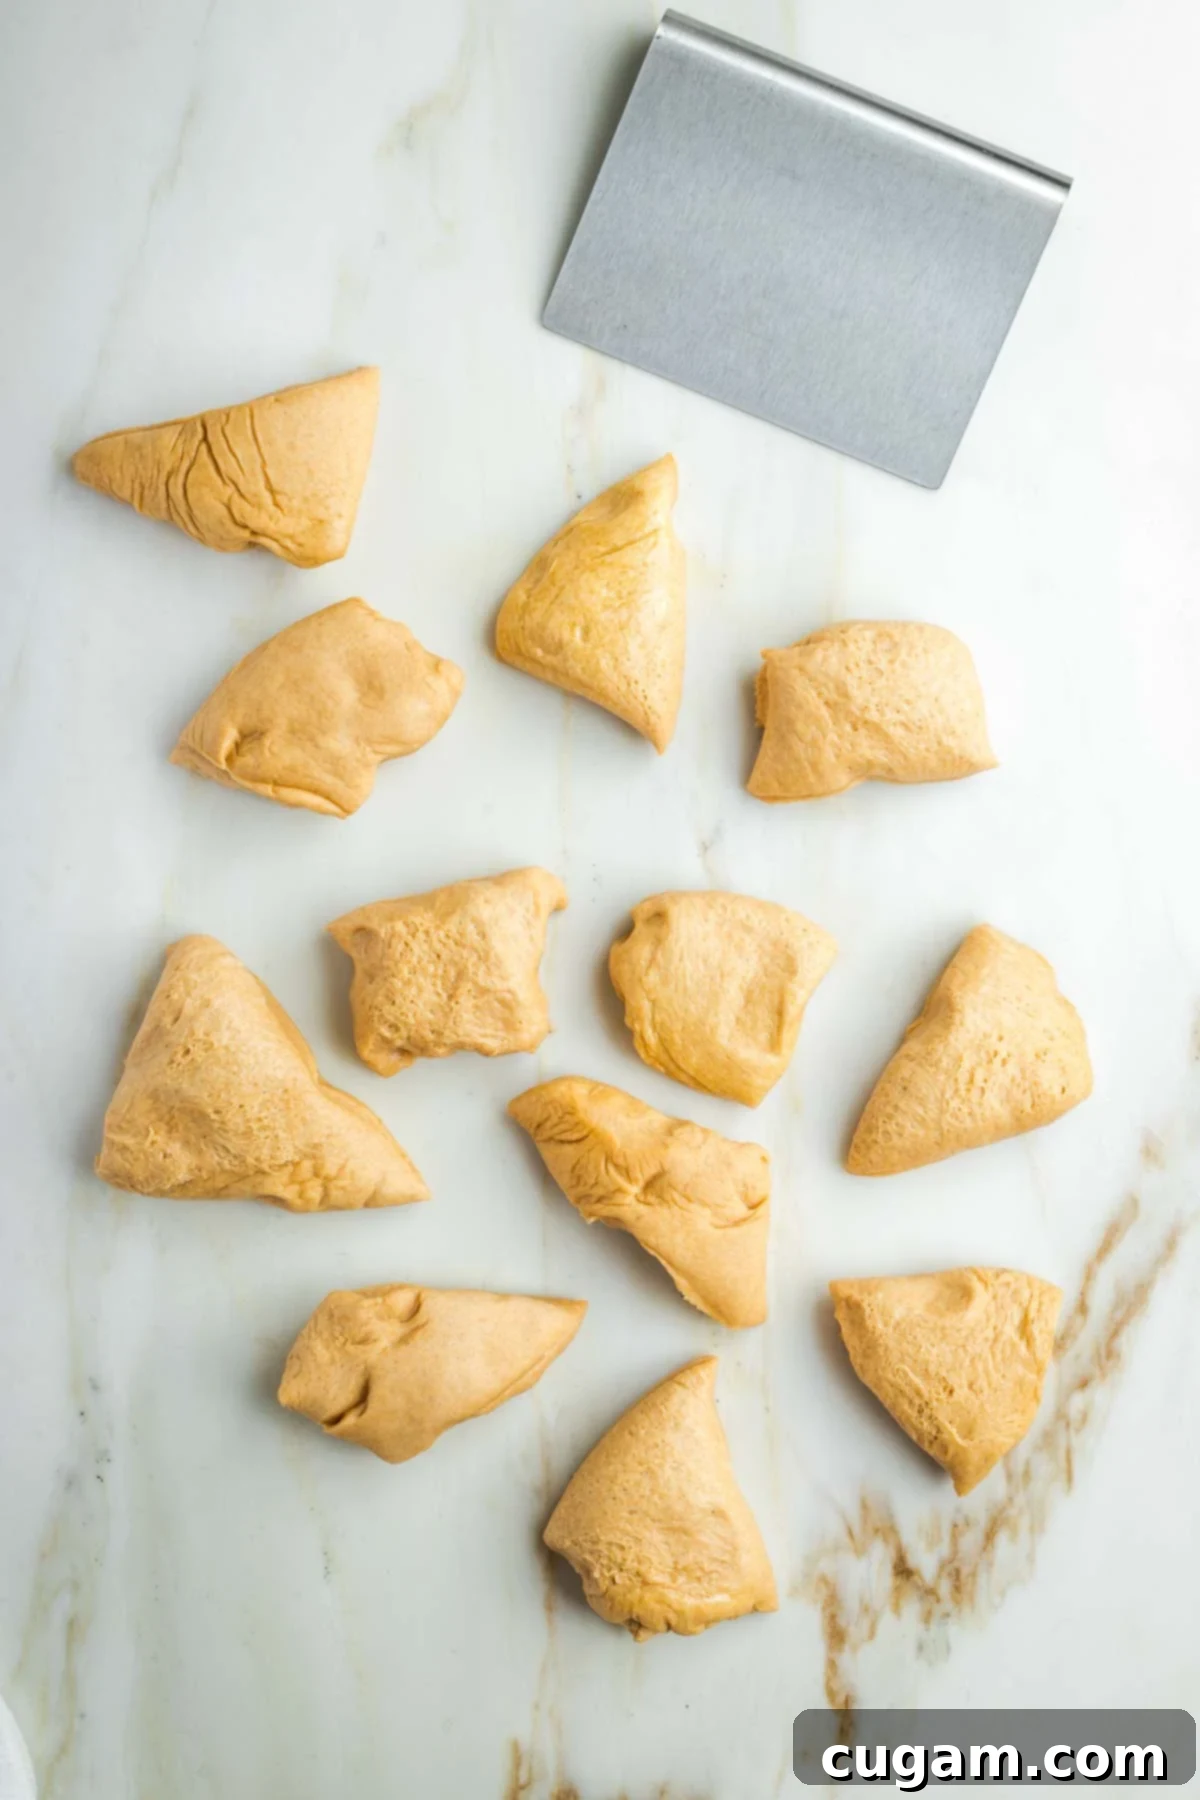
Once your dough has completed its first rise, gently punch it down to release the air. Then, turn it out onto a lightly floured surface. This batch of dough is designed to make three generously sized challah loaves. To achieve this, divide the entire dough into 12 equal pieces. Each piece should weigh approximately 3 ounces. A dough scraper makes this task easy and precise, but you can also simply use your hands. A good method is to divide the dough in half, then each half in half, and continue halving until you have 12 uniform portions.
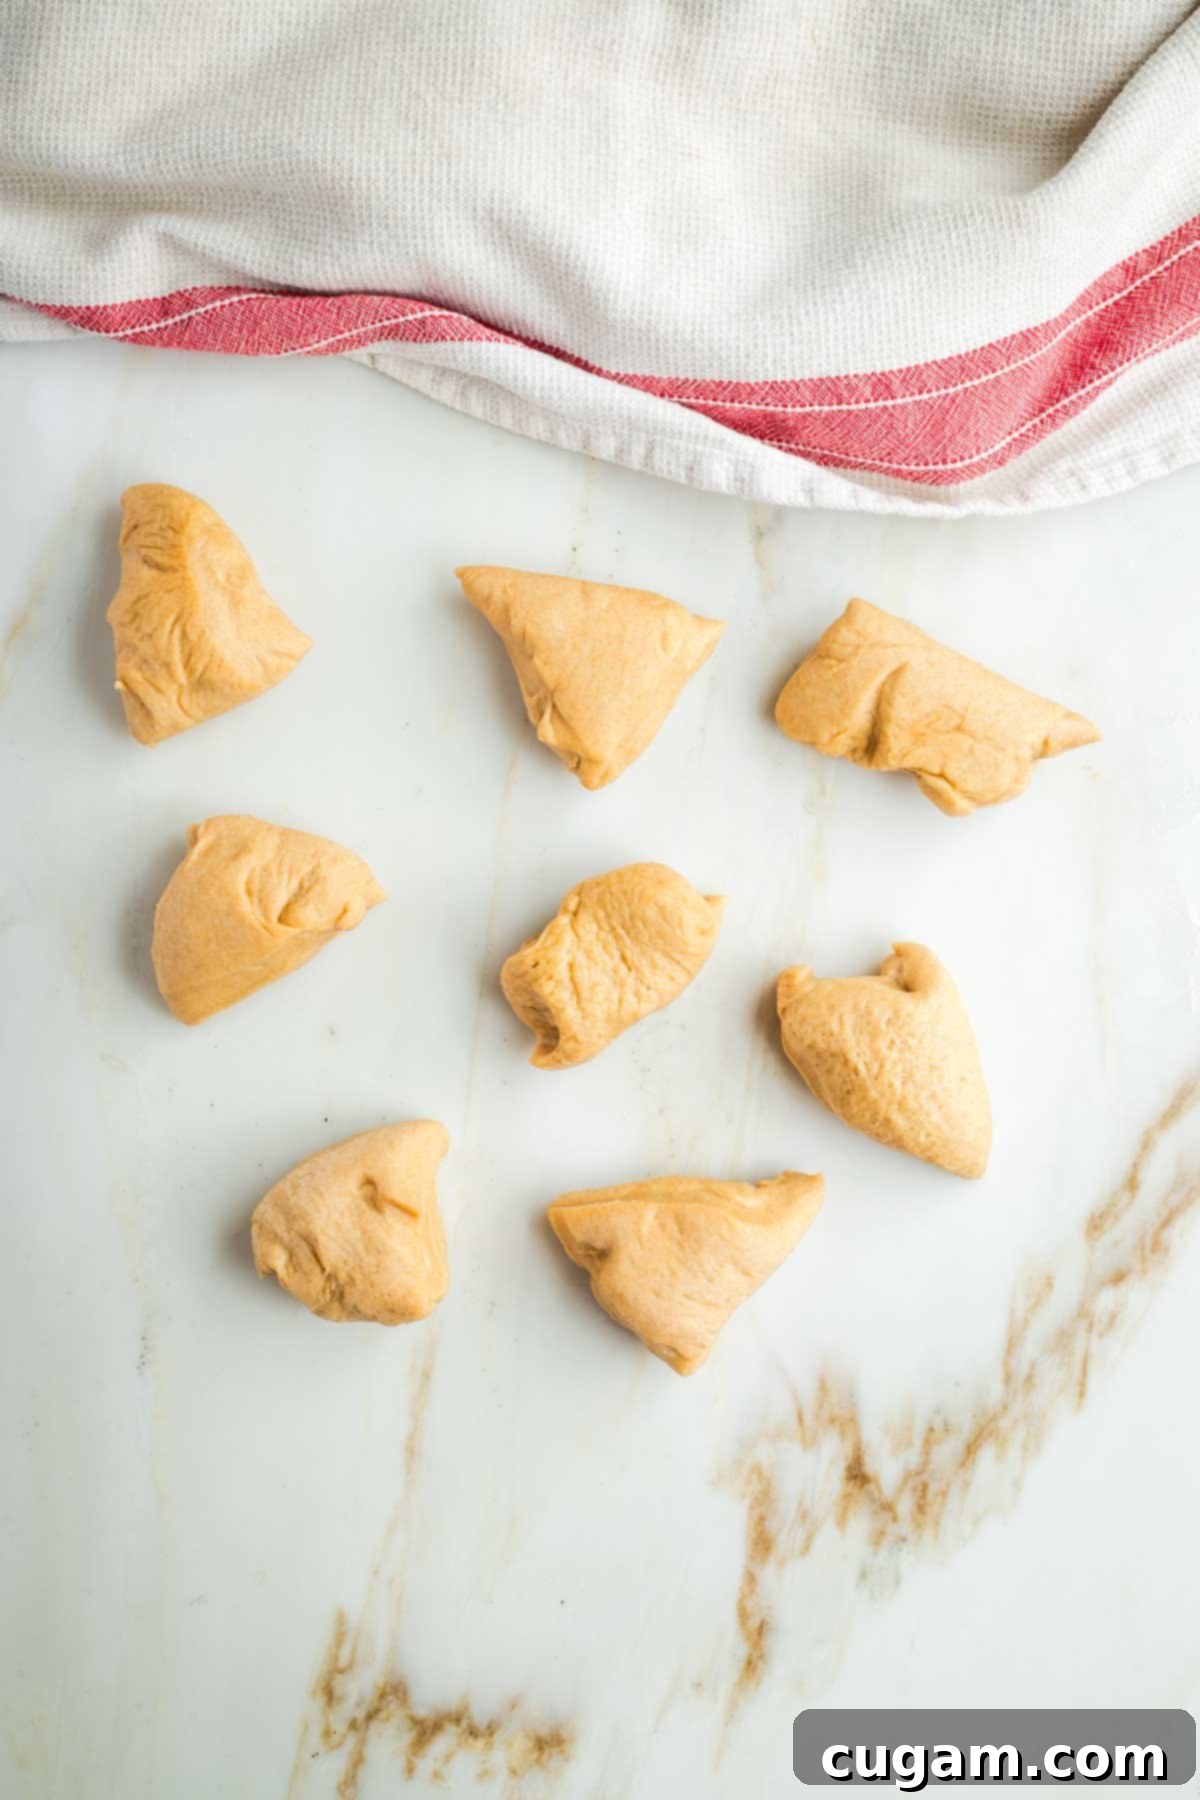
As you work with a few pieces of dough, always keep the remaining portions covered with a kitchen towel. This prevents them from drying out, which can make them difficult to roll and braid. Each challah loaf will require four of these 12 pieces of dough. If you opt for the more intricate 8-strand braid (as detailed below), you’ll need to take each of these four pieces and cut them in half again, resulting in 8 smaller strands per loaf.
Elegant 8-Strand Braids with Seeds: A Step-by-Step Guide
The 8-strand braid creates a truly stunning challah, especially when you incorporate seeds into half of the strands for a beautiful visual contrast. Don’t be intimidated by the number of strands; the technique is simpler than it looks, focusing on an over-and-under pattern.
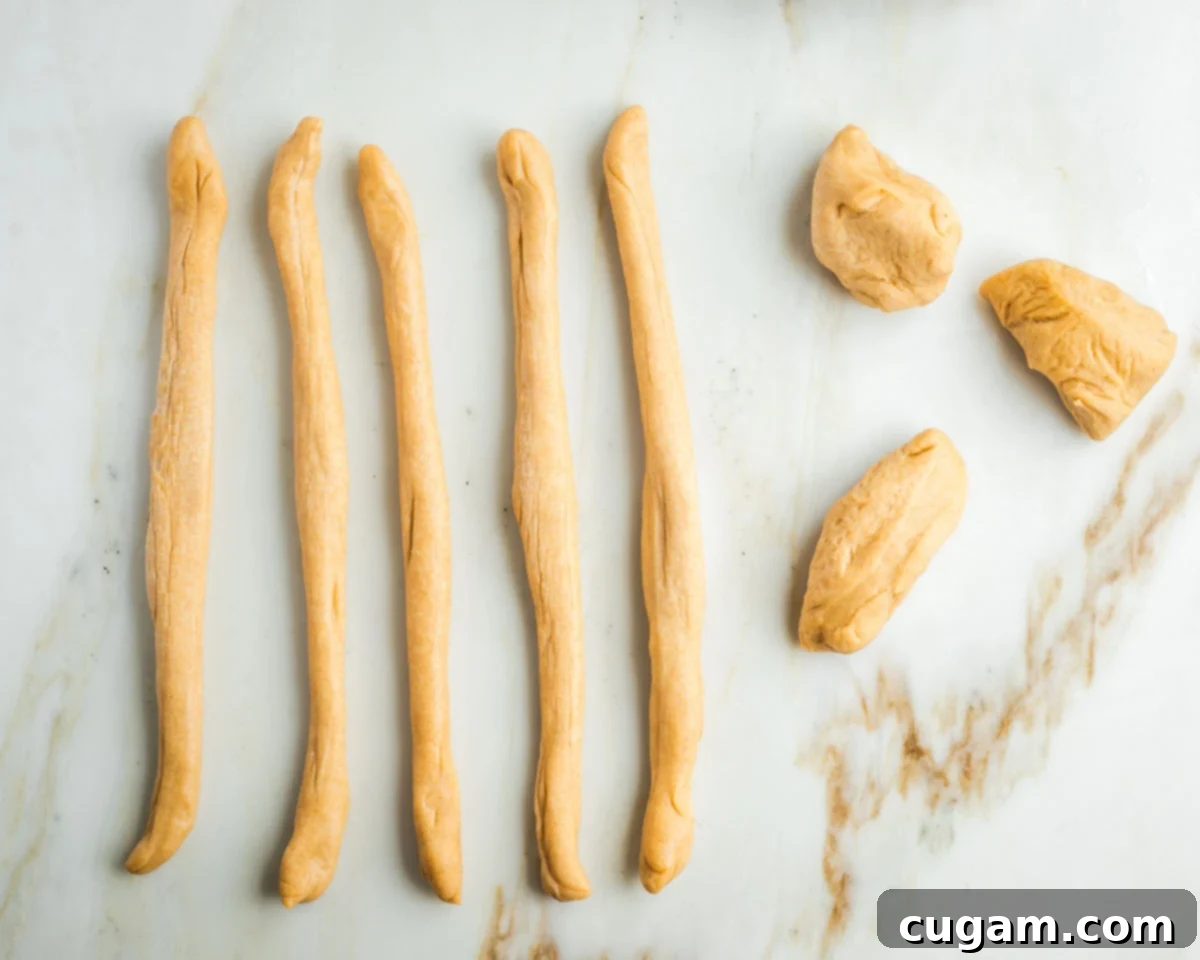
Take your eight smaller pieces of bread dough (each half of the original 4 pieces) and roll each one into a long, uniform rope-like strand. Aim for them to be approximately 12-15 inches long, depending on how large you want your final challah to be. Consistency in thickness will help with an even bake and a neat braid.
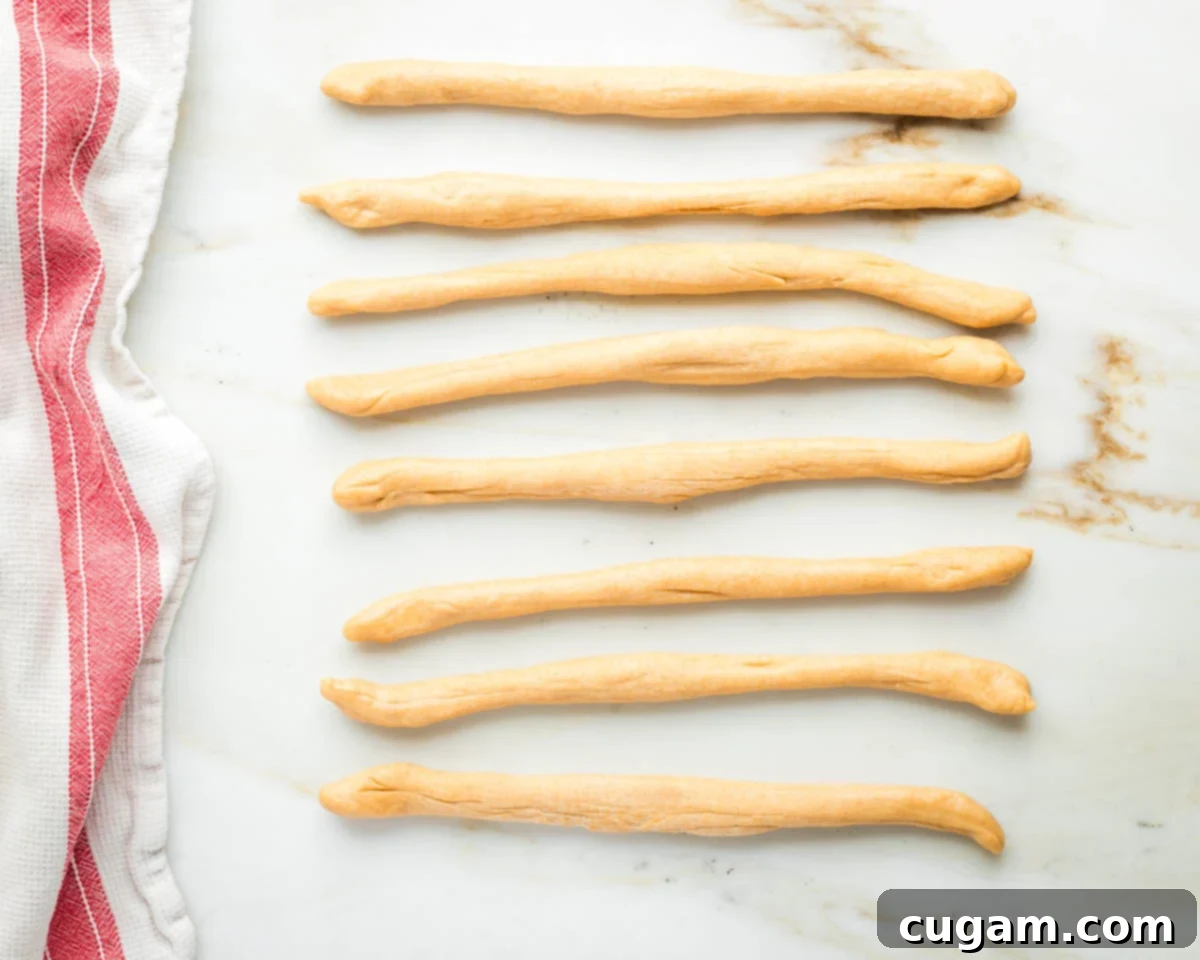
It’s more important that your dough pieces are equal in length, even if some are slightly thinner or thicker. Aim for a consistent length across all eight strands to make the braiding process smoother and to ensure your final loaf is uniform.
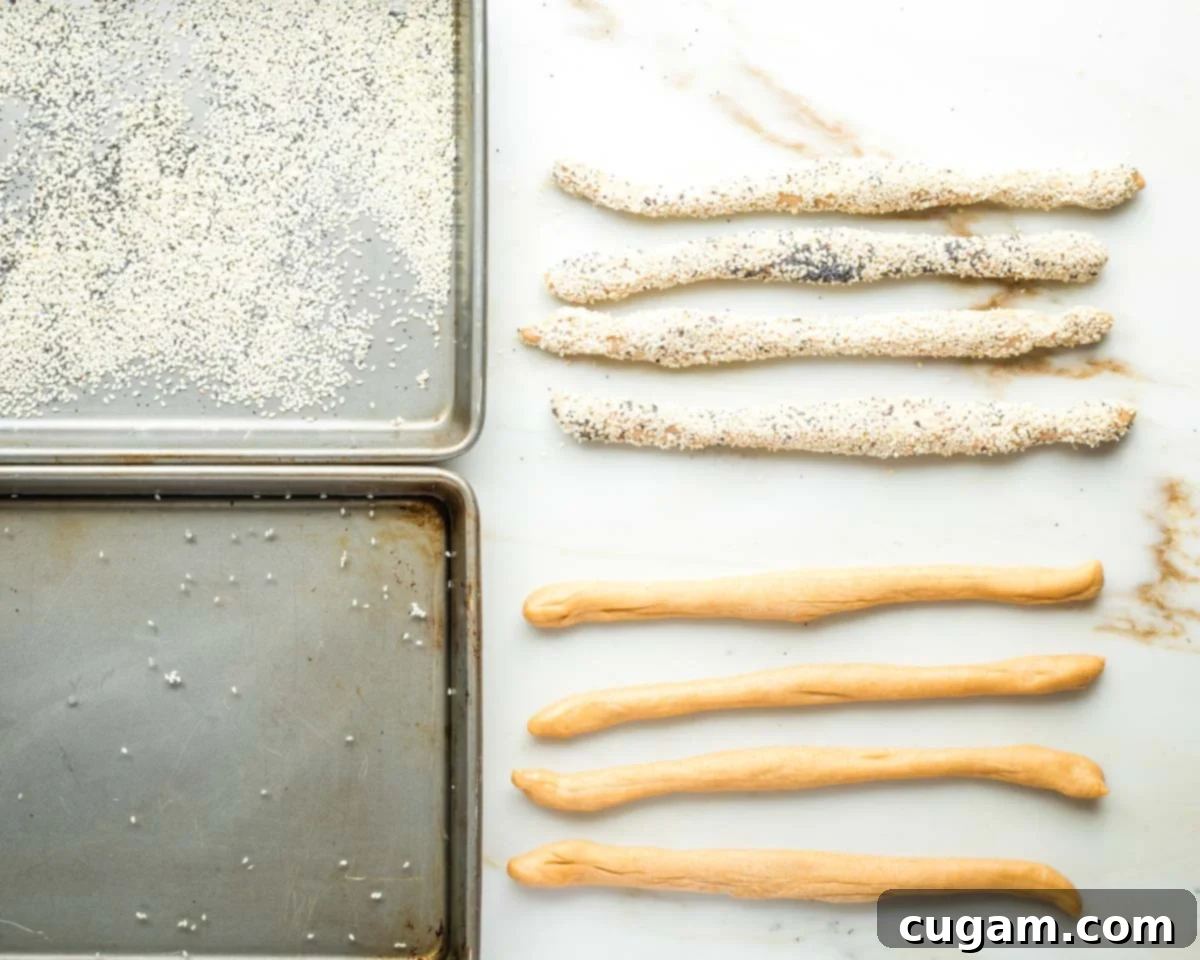
For the seeded effect, prepare two shallow, rimmed trays or plates: one with a small amount of water and the other with a generous mix of sesame and poppy seeds. The water acts as an adhesive for the seeds.
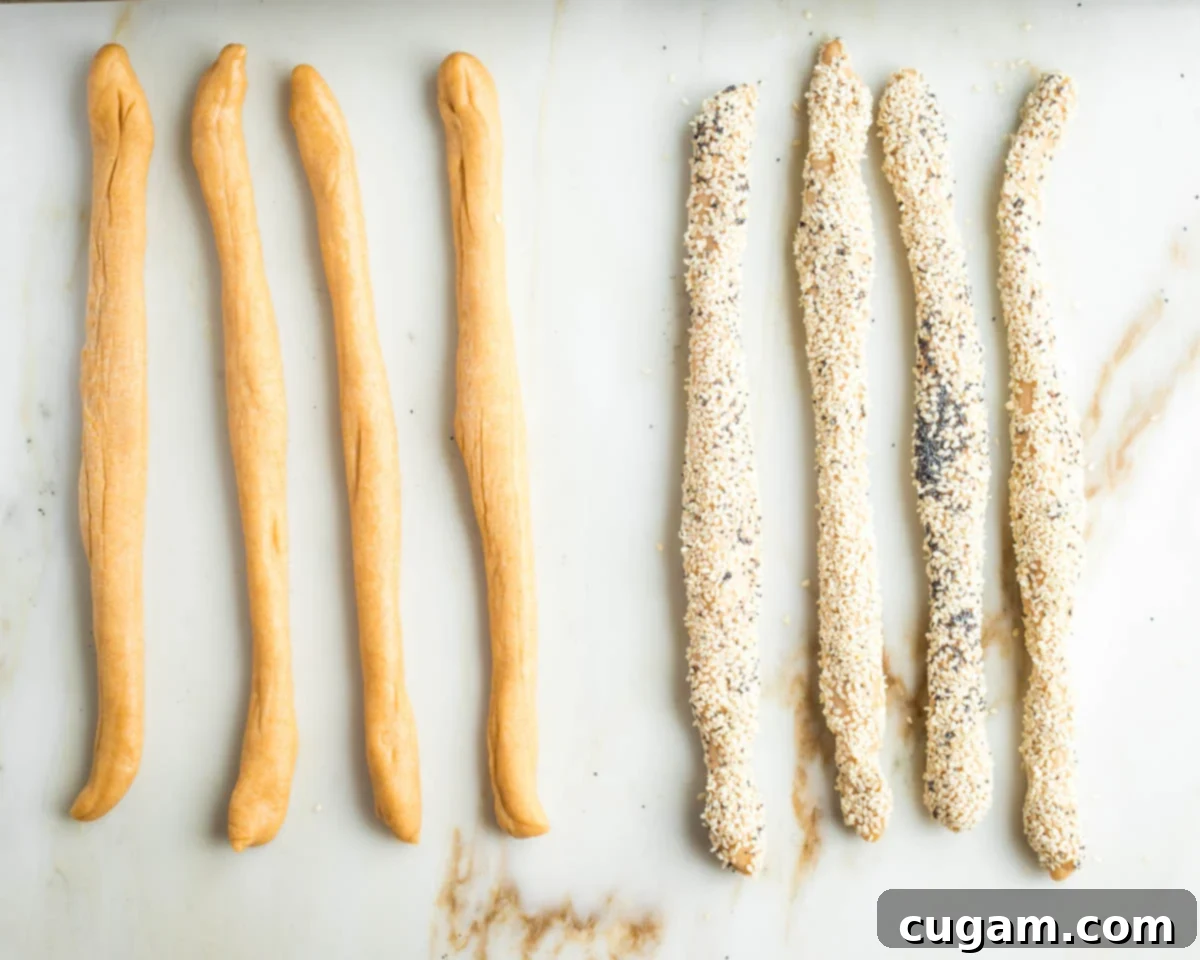
Take half of your dough strands (four of them), lightly wet them in the water tray, then roll them generously in the seed mixture. Do this carefully, ensuring the seeds adhere well. You will now have four plain strands and four seeded strands.
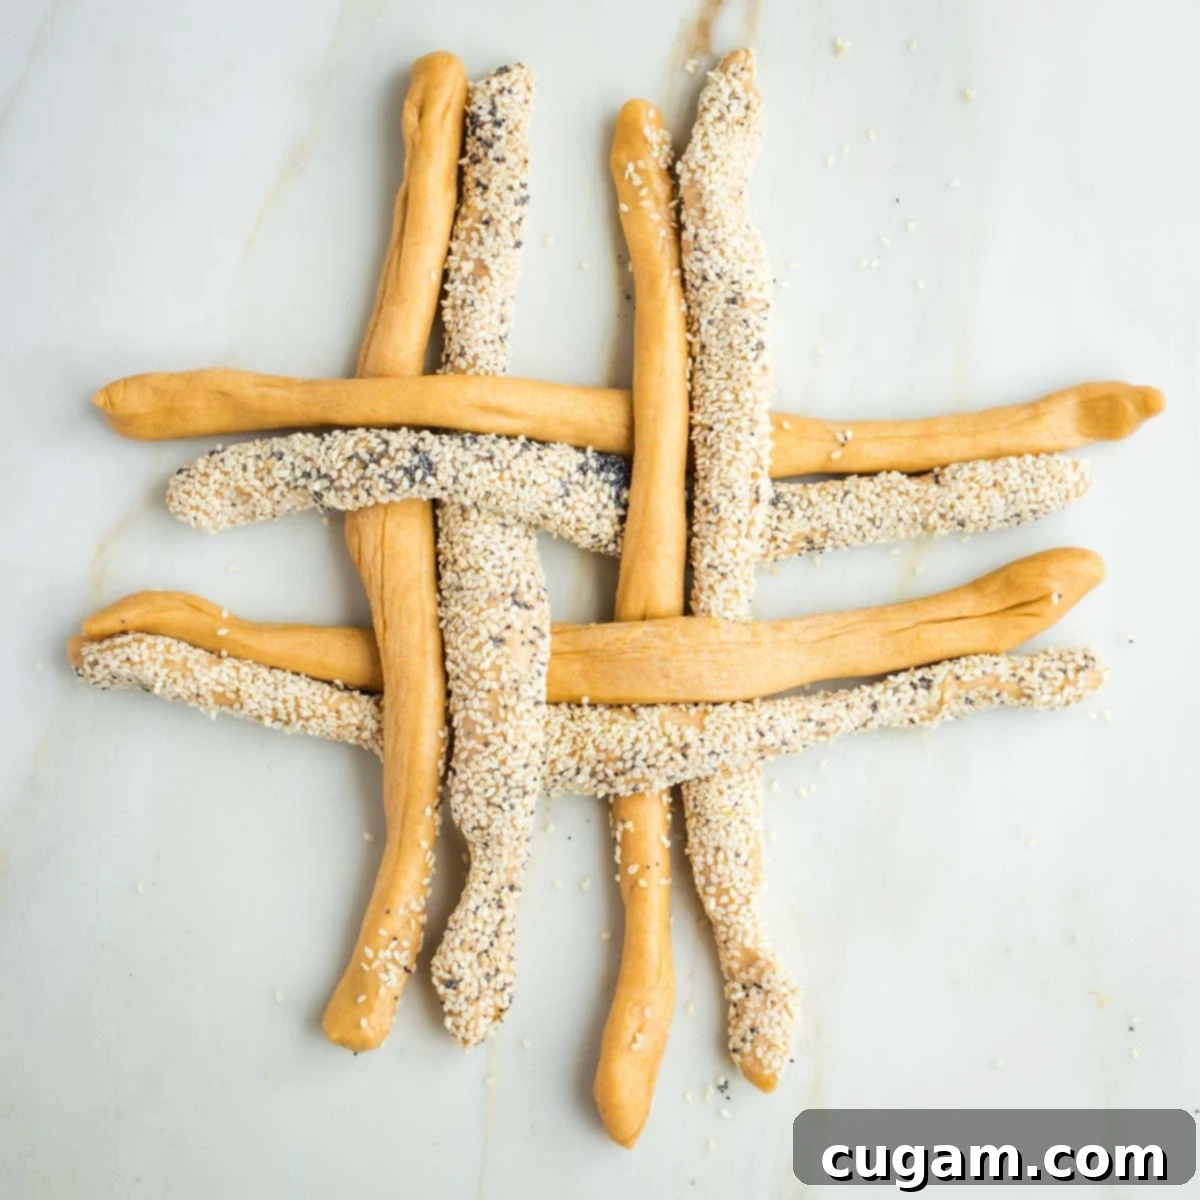
Arrange your eight strands on your work surface. Lay them out in an alternating pattern: one plain strand, one seeded strand, one plain, one seeded, and so on. Then, gently create an “over/under” tic-tac-toe style grid by weaving the horizontal strands through the vertical ones. This forms the foundation of your round braid.
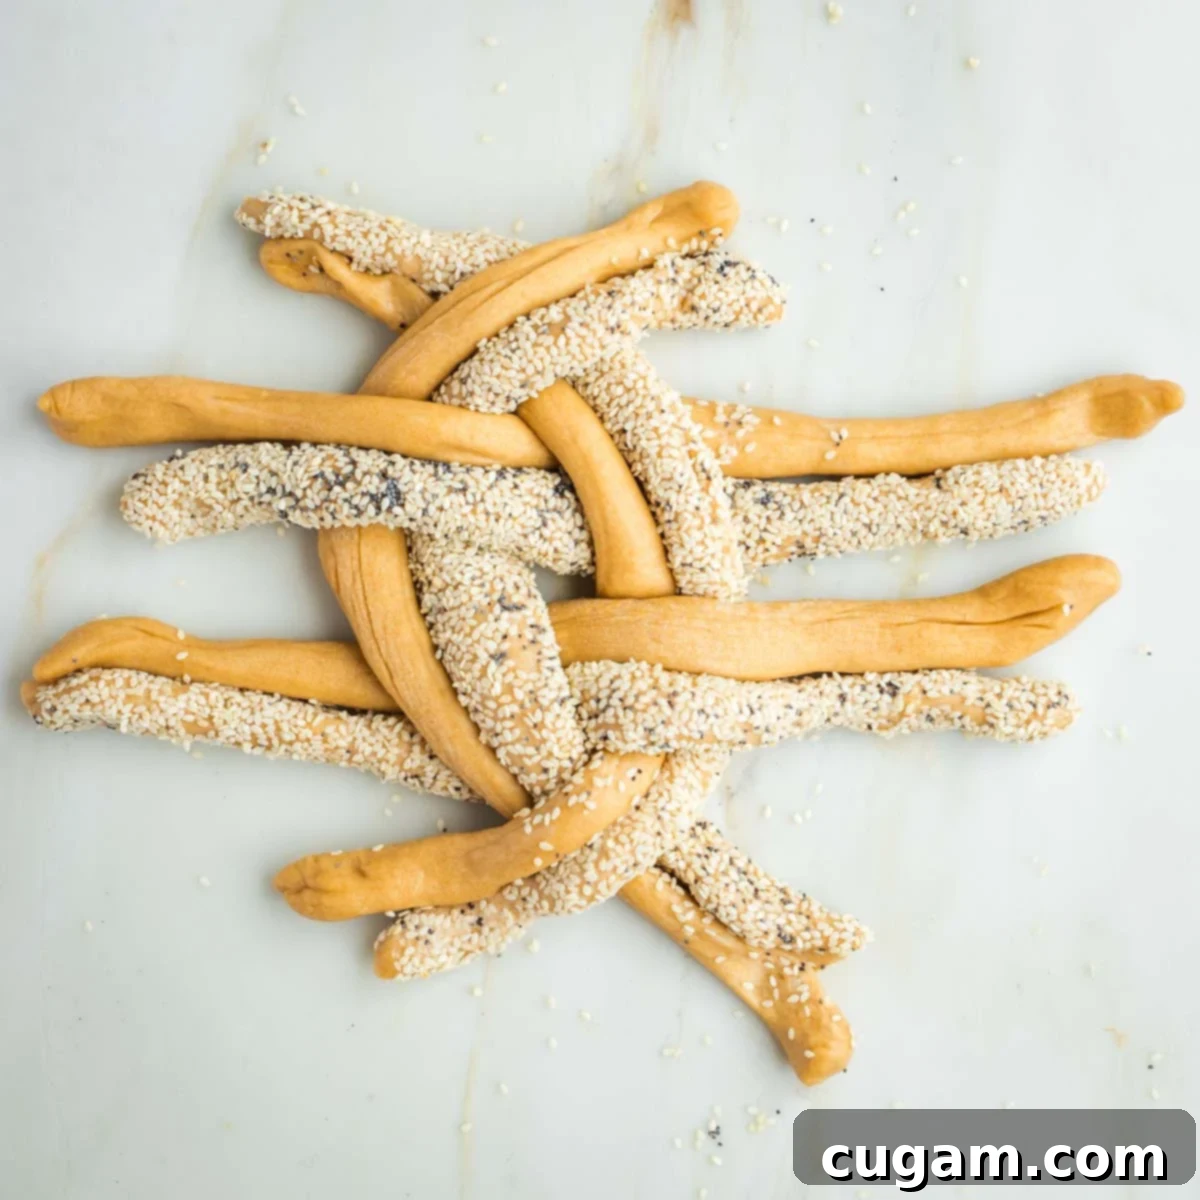
Now, visualize the strands in groups of two (a plain and a seeded one together). Start at one corner. Take the top pair of strands and cross them over the next underlying strand. Then take the bottom pair and cross them over the adjacent underlying strand, always maintaining the seeded/plain pairing.
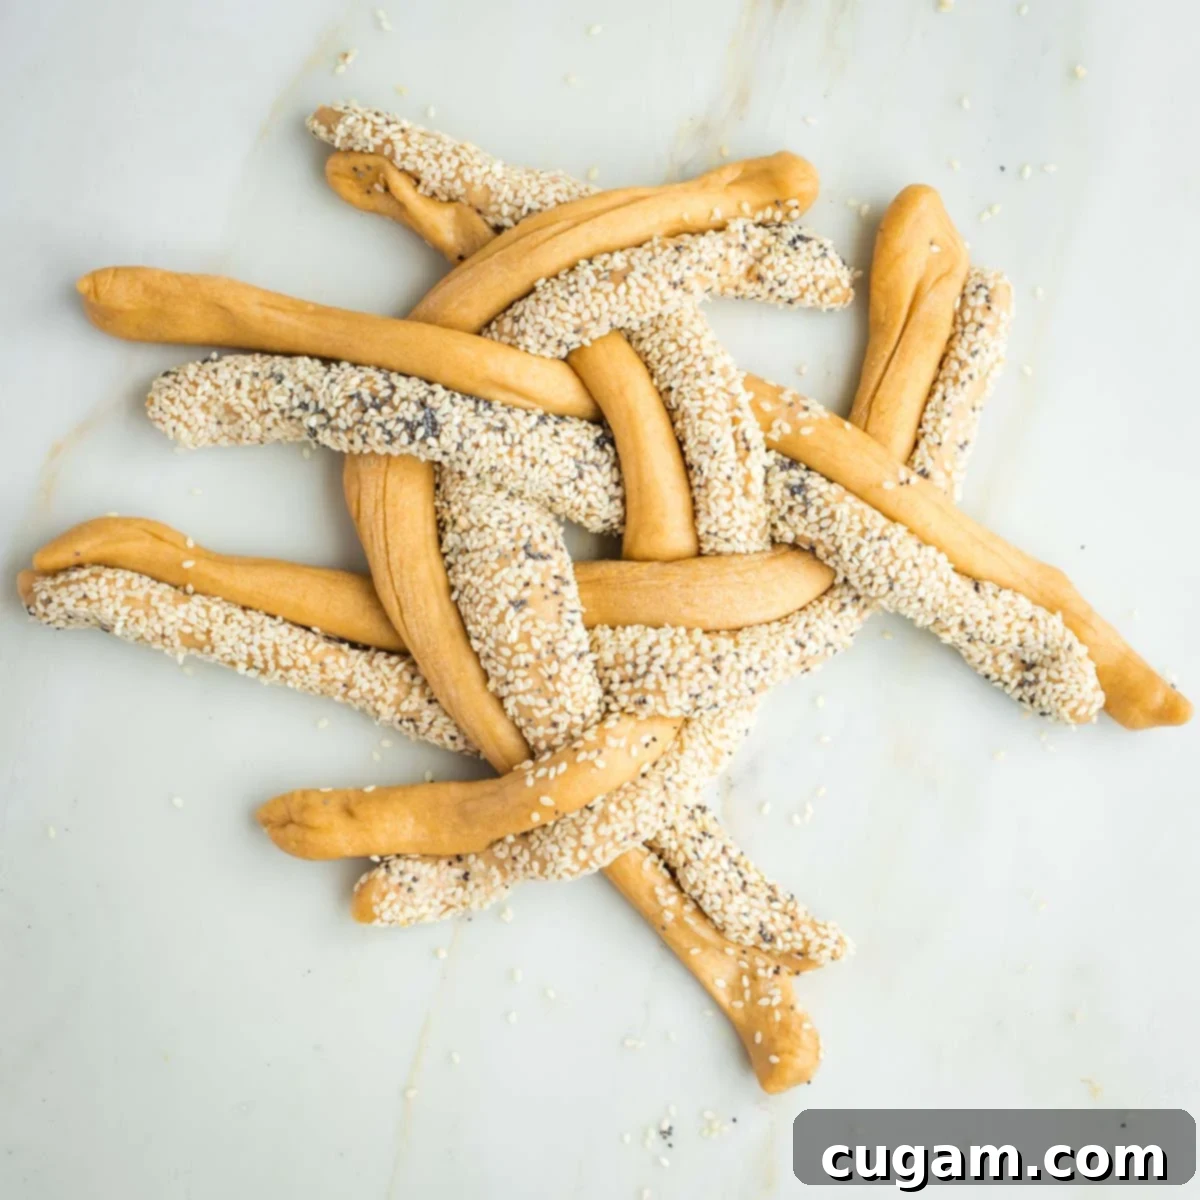
Continue this weaving pattern around the circle, moving from one section to the next. The key is to keep the seeded and plain strands paired together, crossing them over and under their neighbors as you go. Gently pull the strands tight enough to create definition in the braid, but not so tight that they tear.
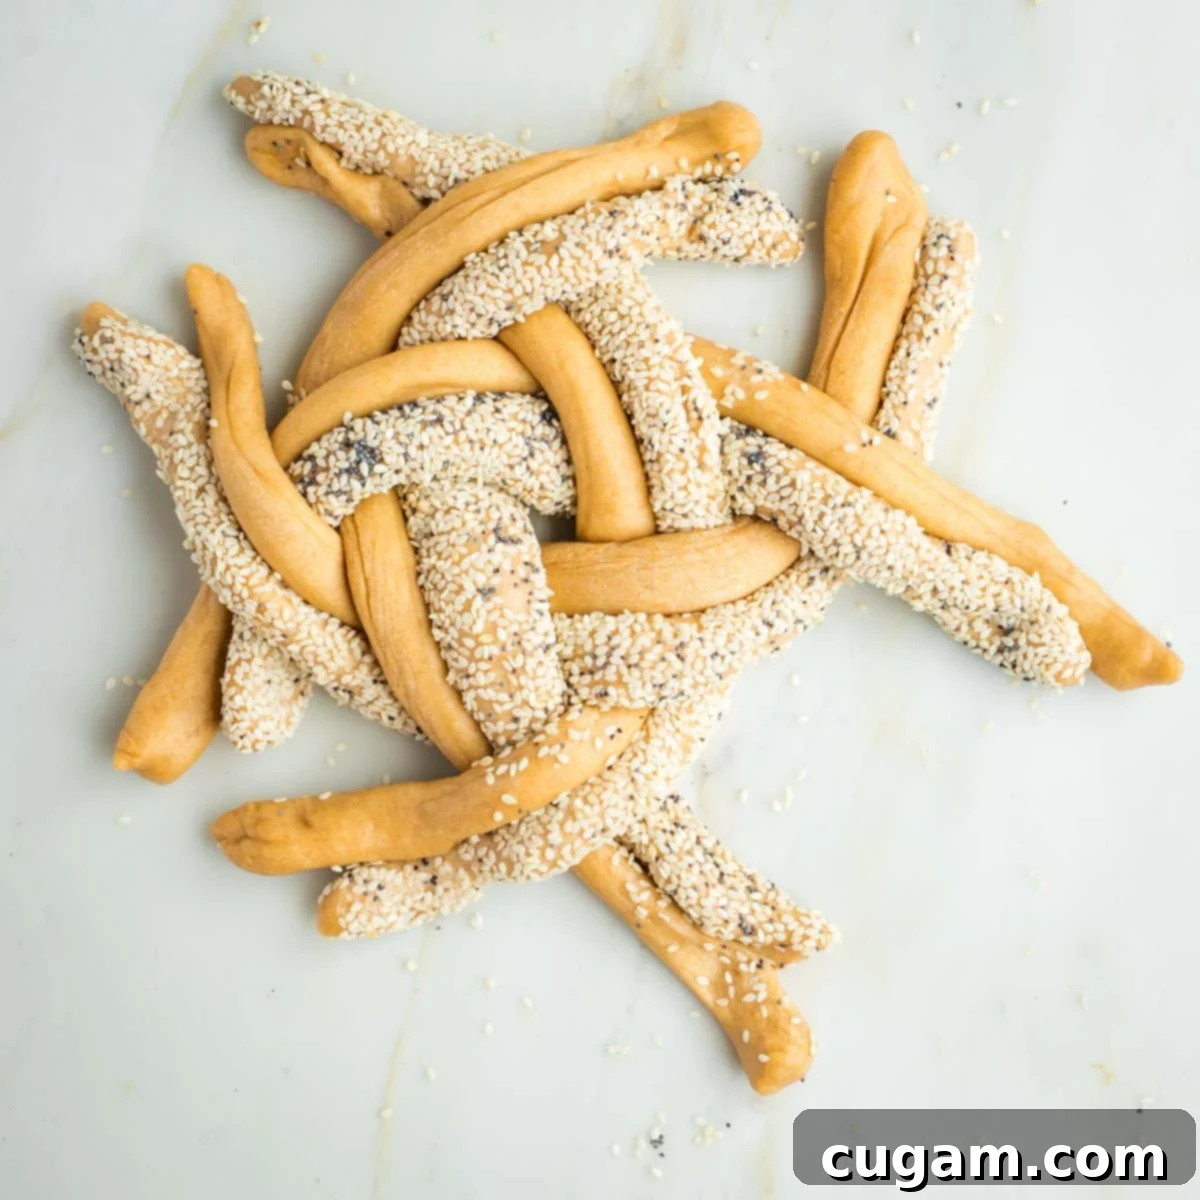
Maintain the over-and-under pattern, continuously working your way around the circular form. The goal is to create a tight, even braid that will hold its round shape during the second rise and baking. Be patient, take your time, and refer to the photos for guidance.
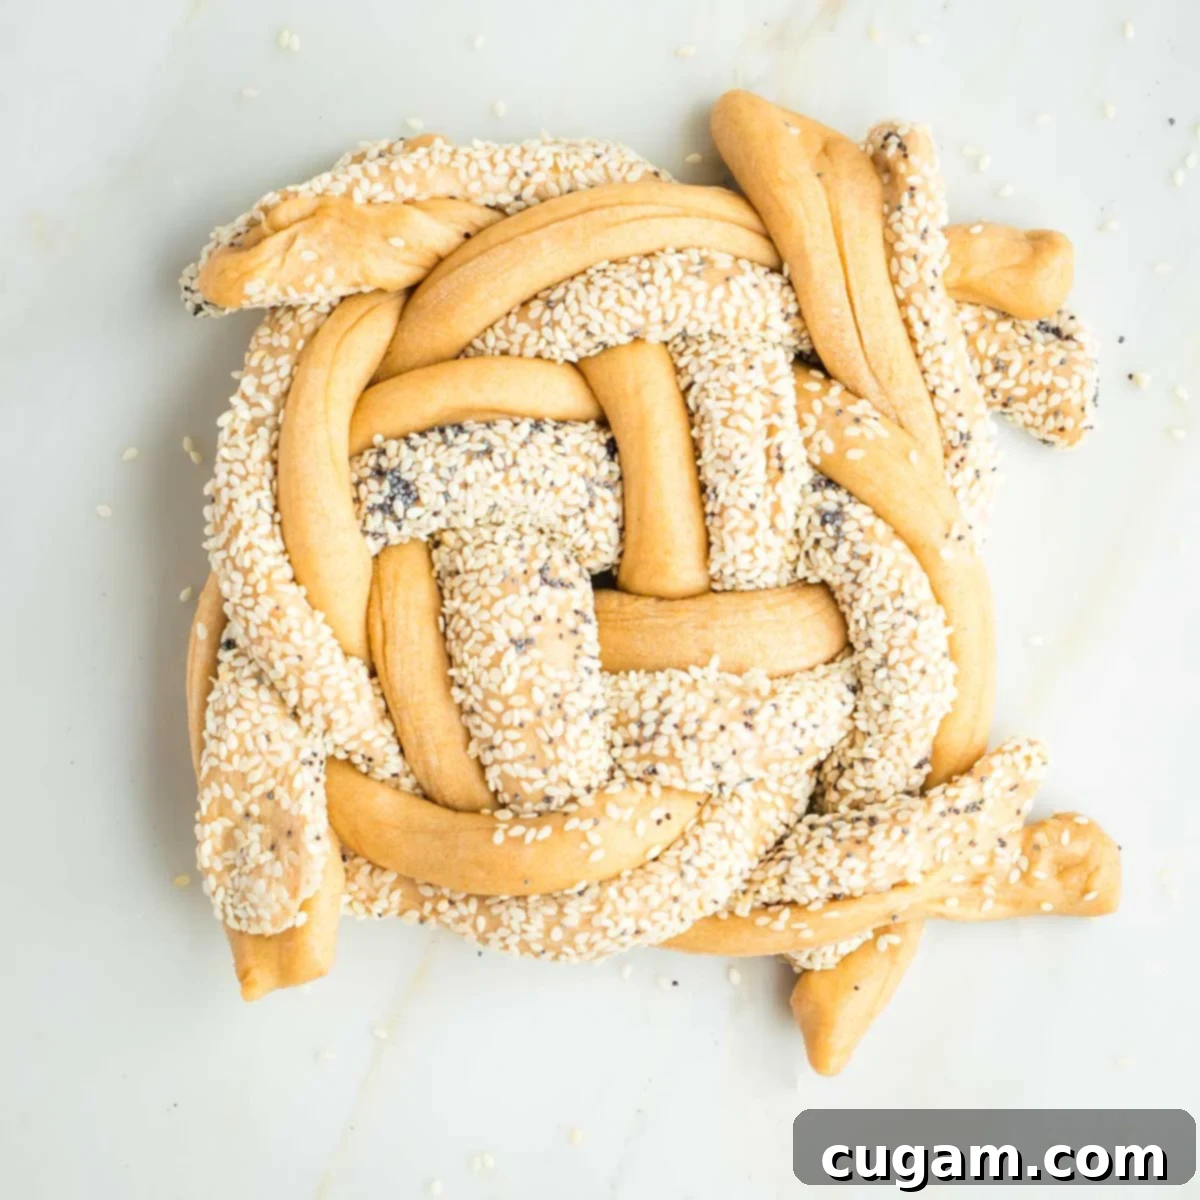
As you near the end of your braiding, the strands will become shorter. When there isn’t enough length to make another full cross, simply pinch the ends of the remaining strands firmly together to seal them. This will prevent the braid from unraveling.
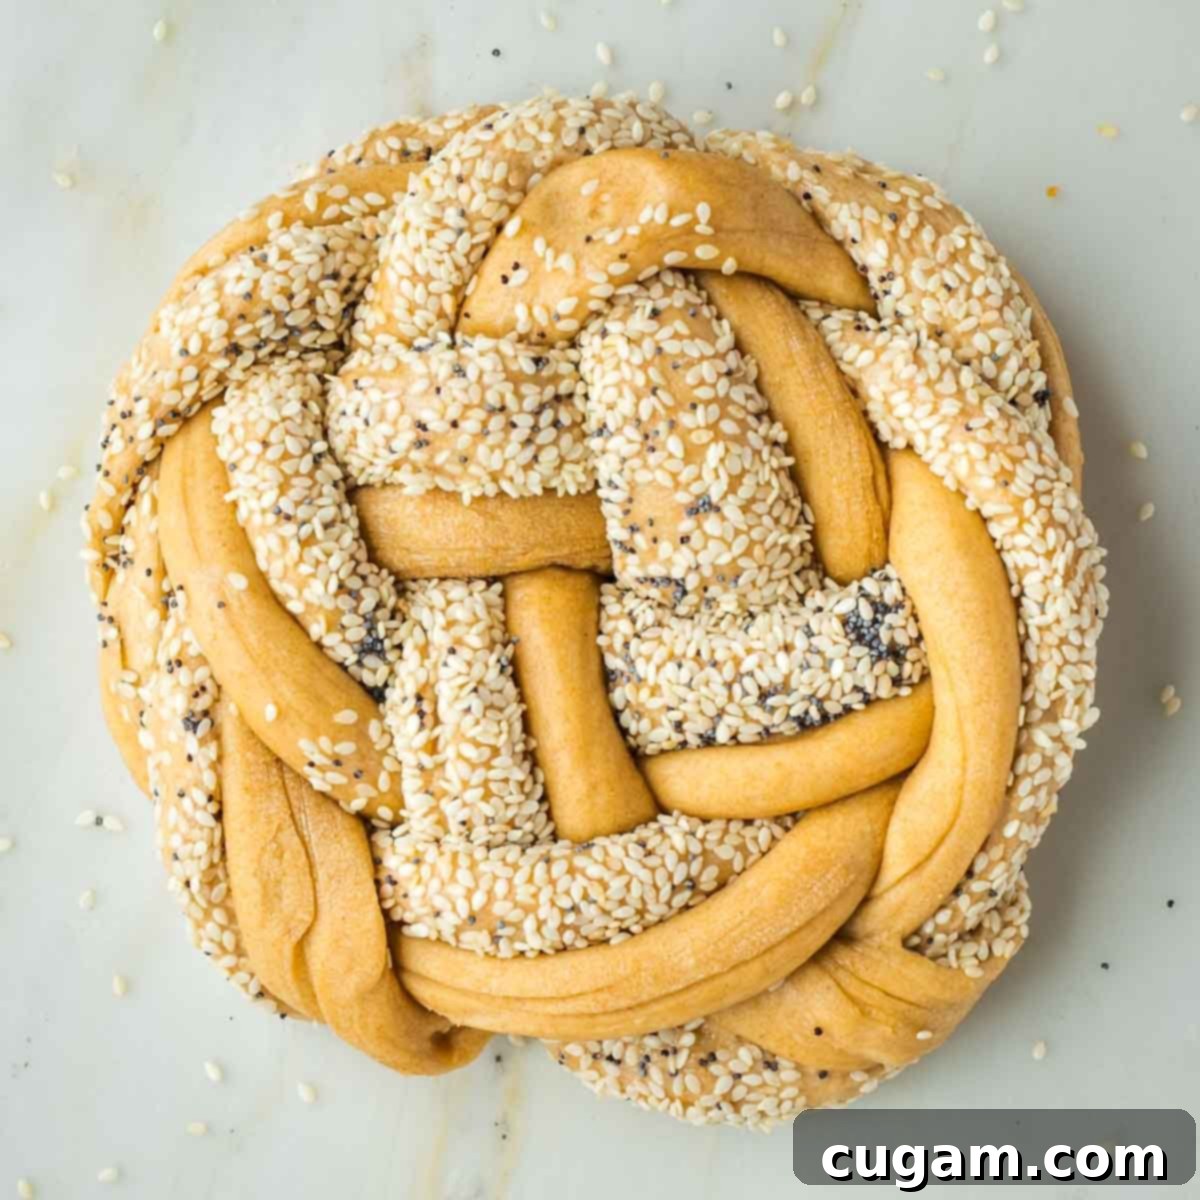
Finally, gently tuck these pinched ends underneath the loaf. This creates a seamless, perfectly round finished product, ready for its second rise. Adjust the shape slightly if needed to ensure a nice, compact round.
Simple & Elegant: The 4-Strand Round Challah Braid
If the 8-strand braid feels a bit too ambitious, the 4-strand round braid is a fantastic alternative that’s equally beautiful and symbolic. It’s an excellent technique for beginners or when you simply want a quicker braiding process without sacrificing visual appeal.
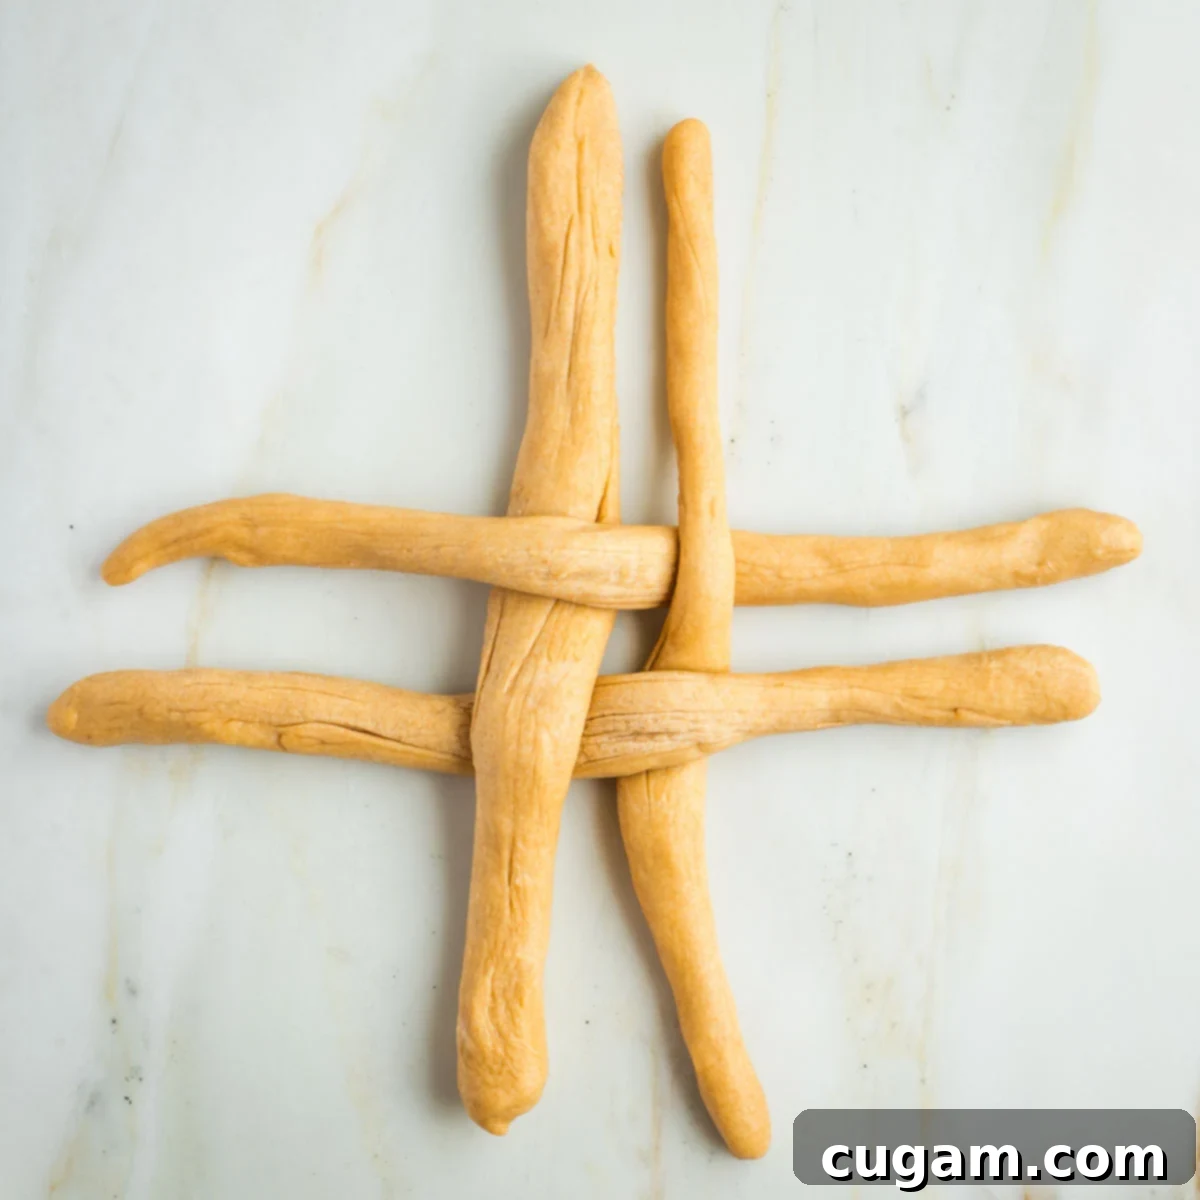
Take four of your equal-sized dough portions and roll them into long, even ropes. While some pieces might naturally be thinner, strive for consistent length across all four. Begin by arranging the four pieces in a grid, alternating an “over and under” pattern as shown in the photo, forming a central weave.
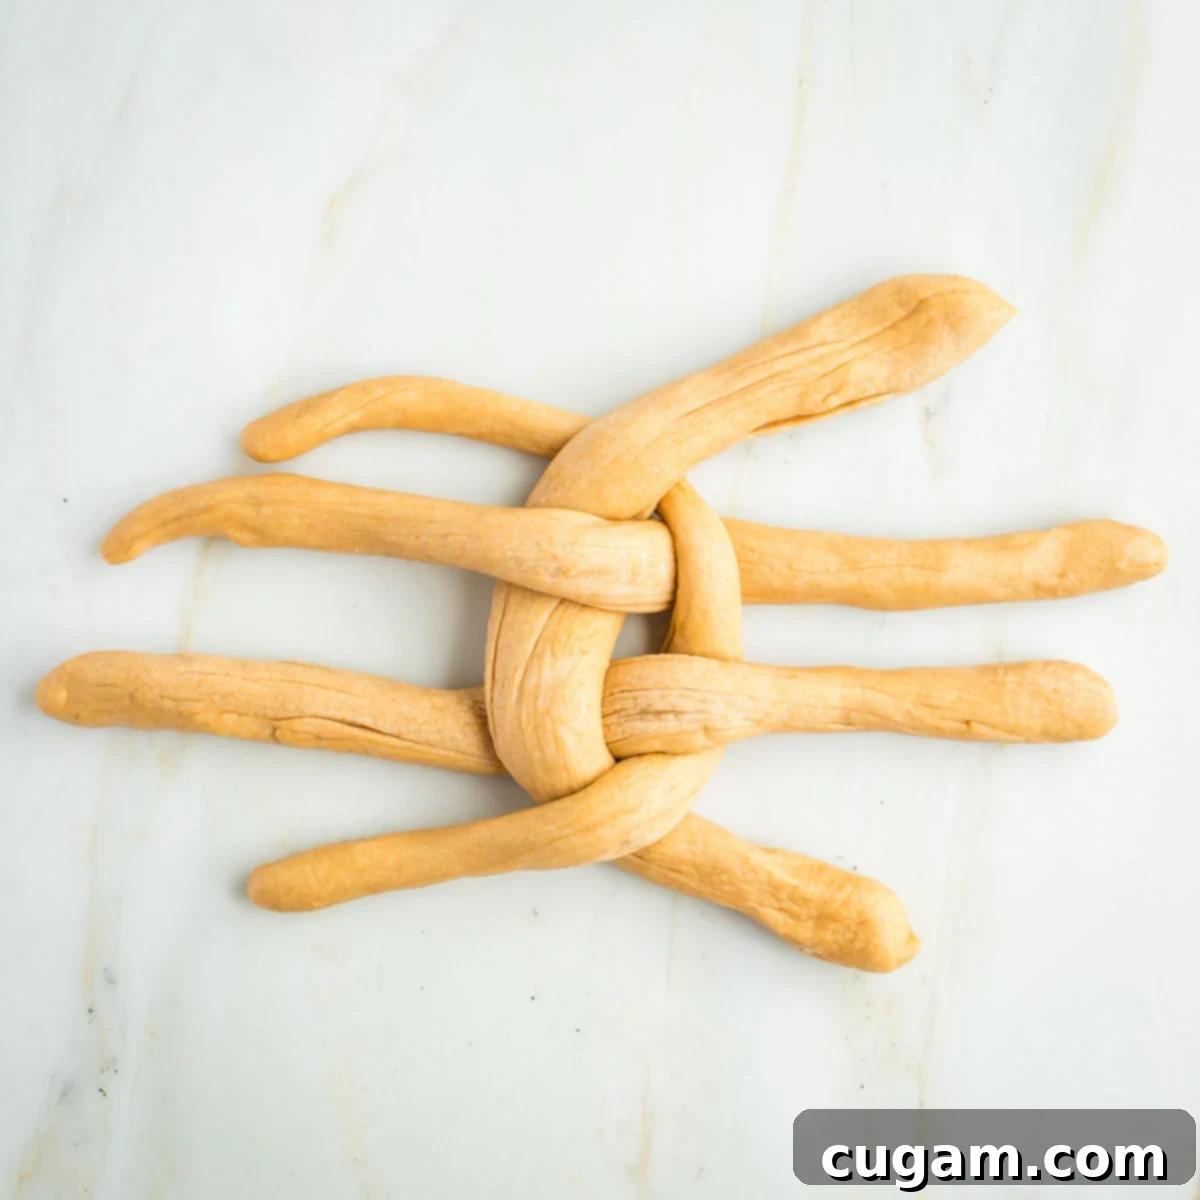
Next, focus on the top two strands. Cross them over each other, ensuring they continue the alternating over and under pattern established in the center. Repeat this exact motion with the bottom two strands, maintaining the symmetry of the weave.
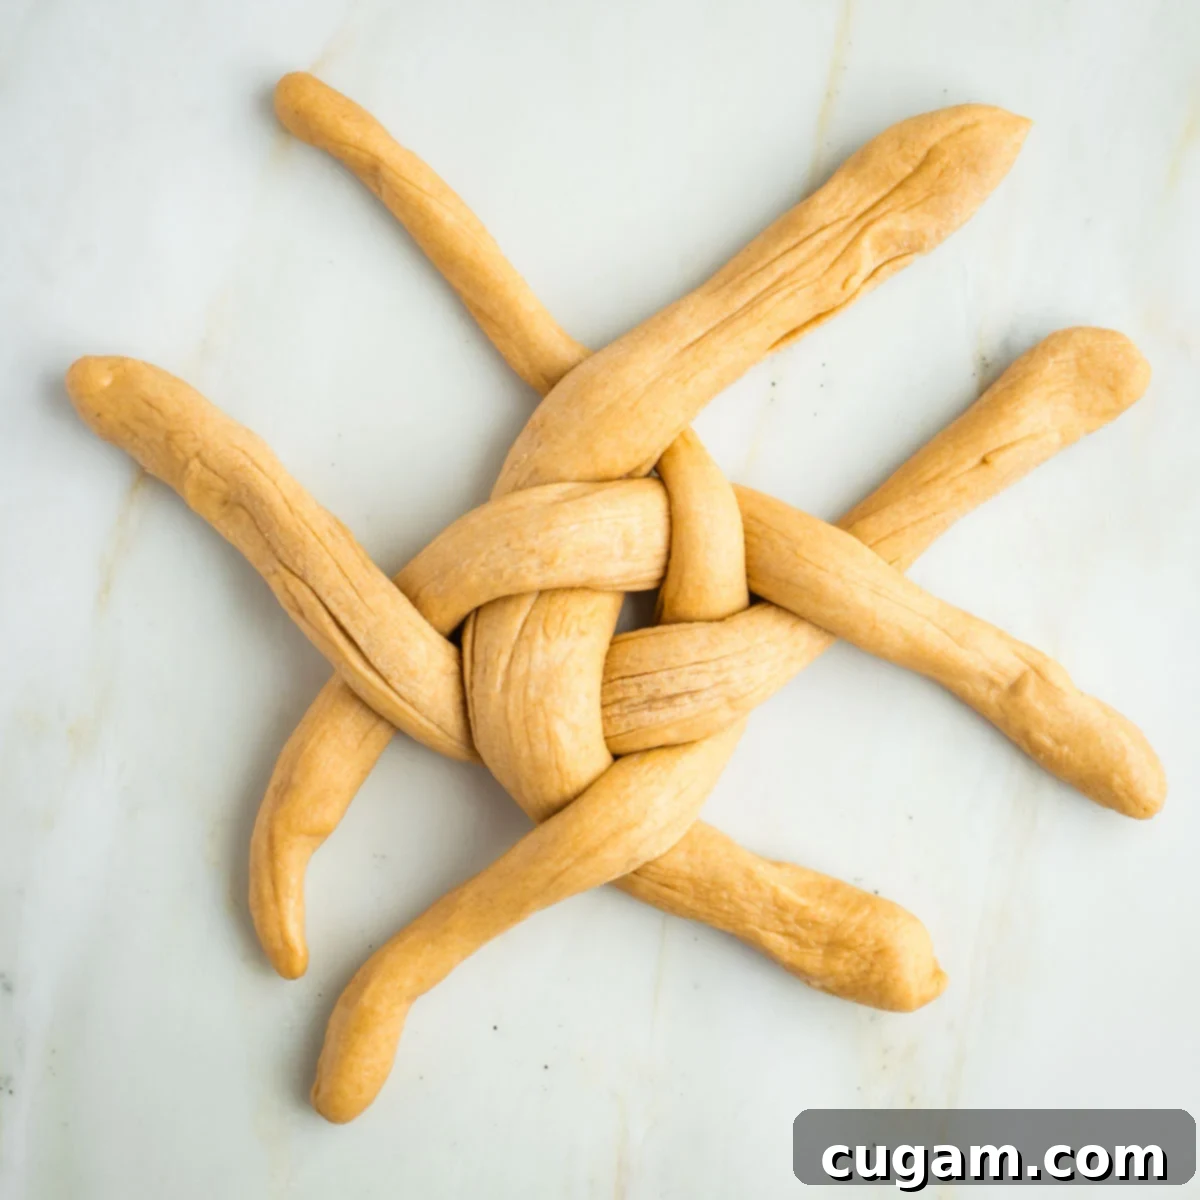
Now, extend this pattern to the sides. Take the outermost strand on the right and weave it over and under its adjacent strands, moving inwards. Do the same for the leftmost strand. The goal is to gradually close the square shape into a circular form.
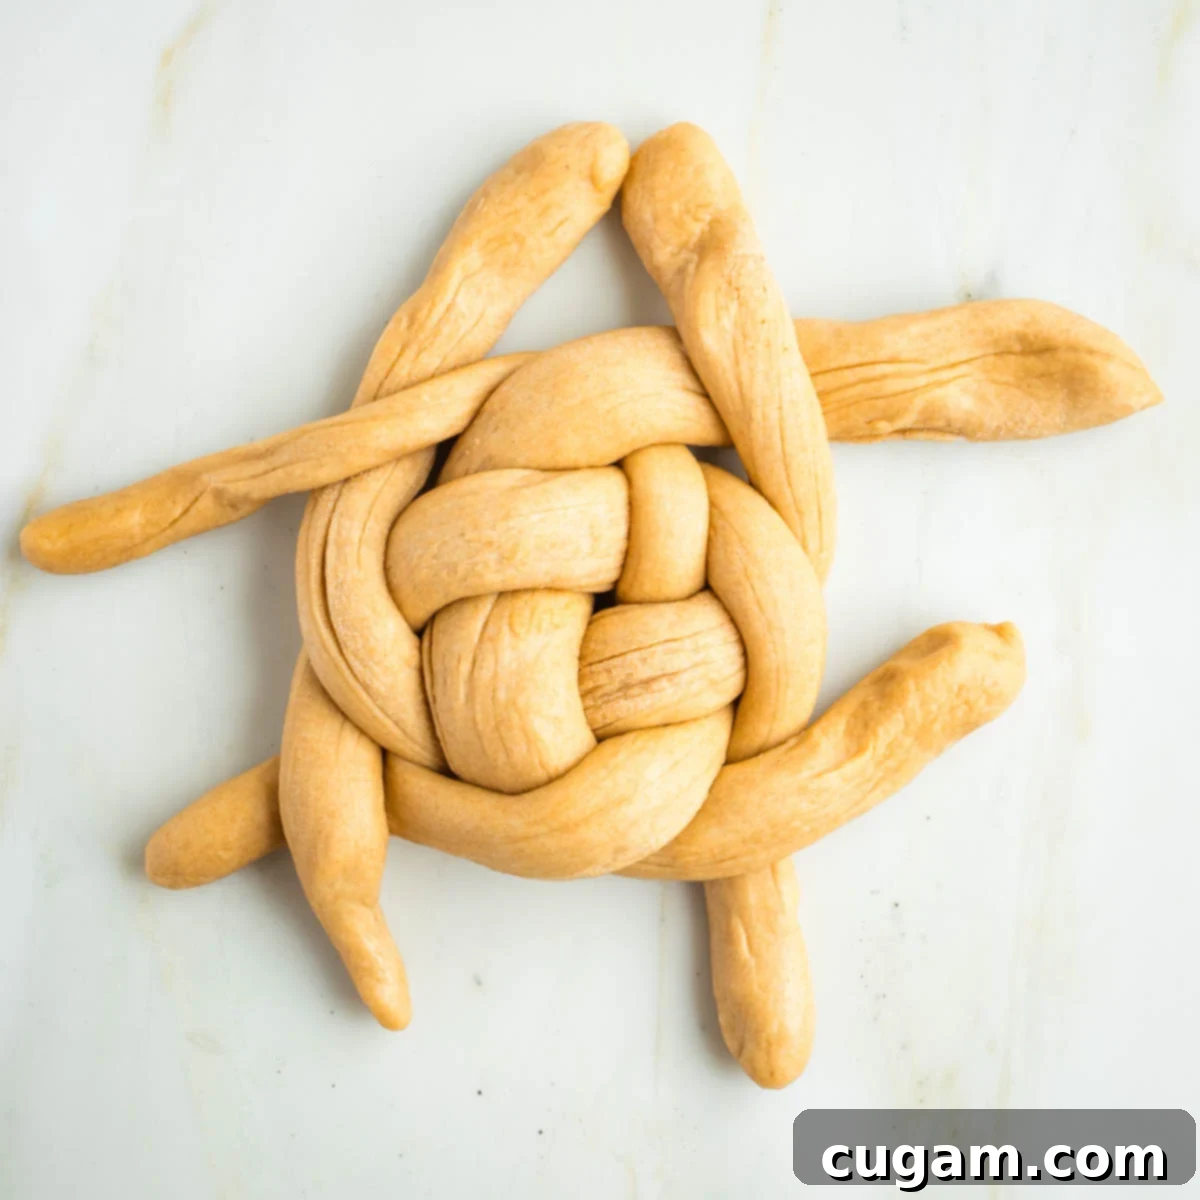
From here, continue working in a circular pattern around the loaf. Identify any open strands and weave them over or under their corresponding partners. The key is to keep the pattern consistent and to gradually bring the outer strands inwards to form a tight, round braid.
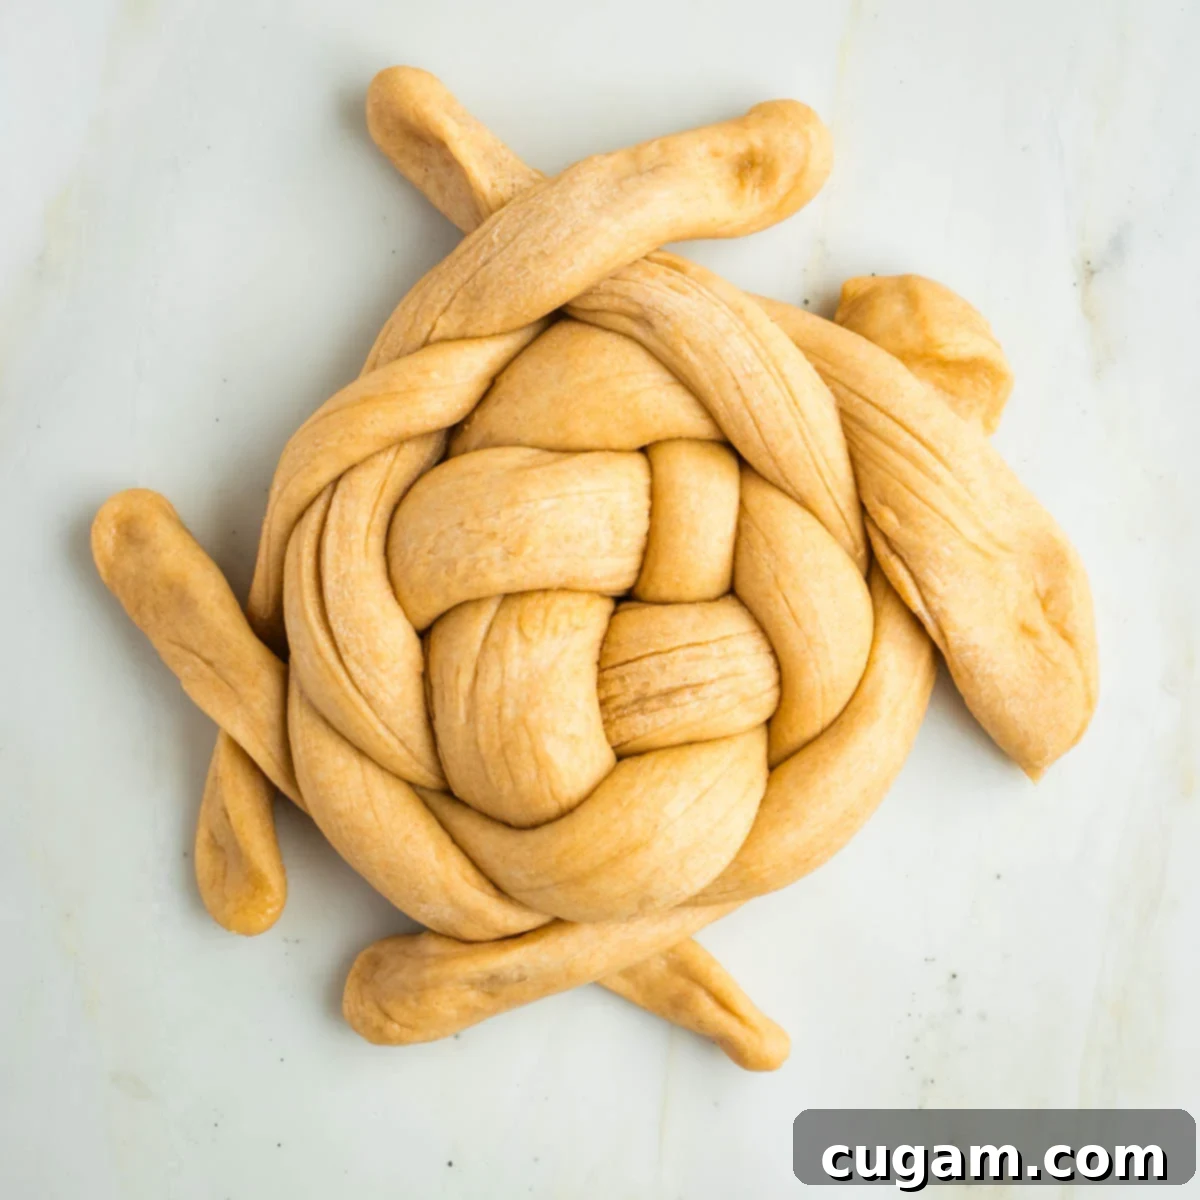
Keep going, patiently weaving the ropes, until the ends of the open strands become too short to reach their matches across the loaf. The center of your challah should now be beautifully woven and secure.
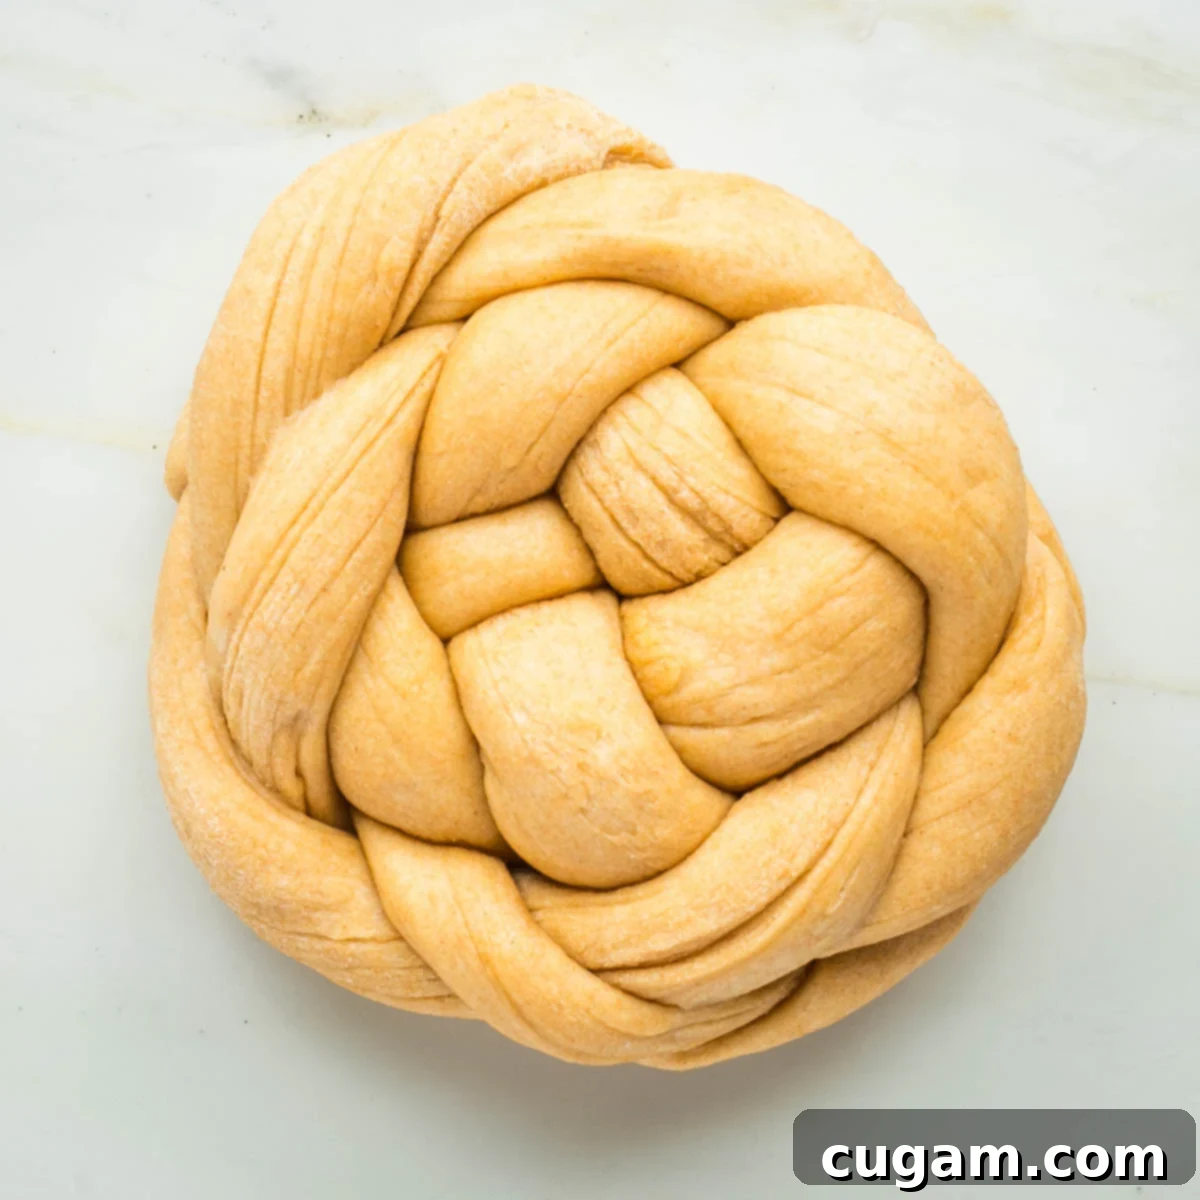
To finish, gather any remaining loose ends. Pinch them firmly together if you can, and then carefully tuck all the strands underneath the loaf. This creates a neat, rounded base and ensures there are no loose edges to burn during baking. Adjust the overall shape to perfect your round challah.
The Final Stages: Second Rise and Golden Bake
With your beautiful challah loaves braided, the excitement builds for the final rise and baking. These last steps are crucial for achieving that characteristic light, airy texture and a stunning golden-brown crust that everyone loves.
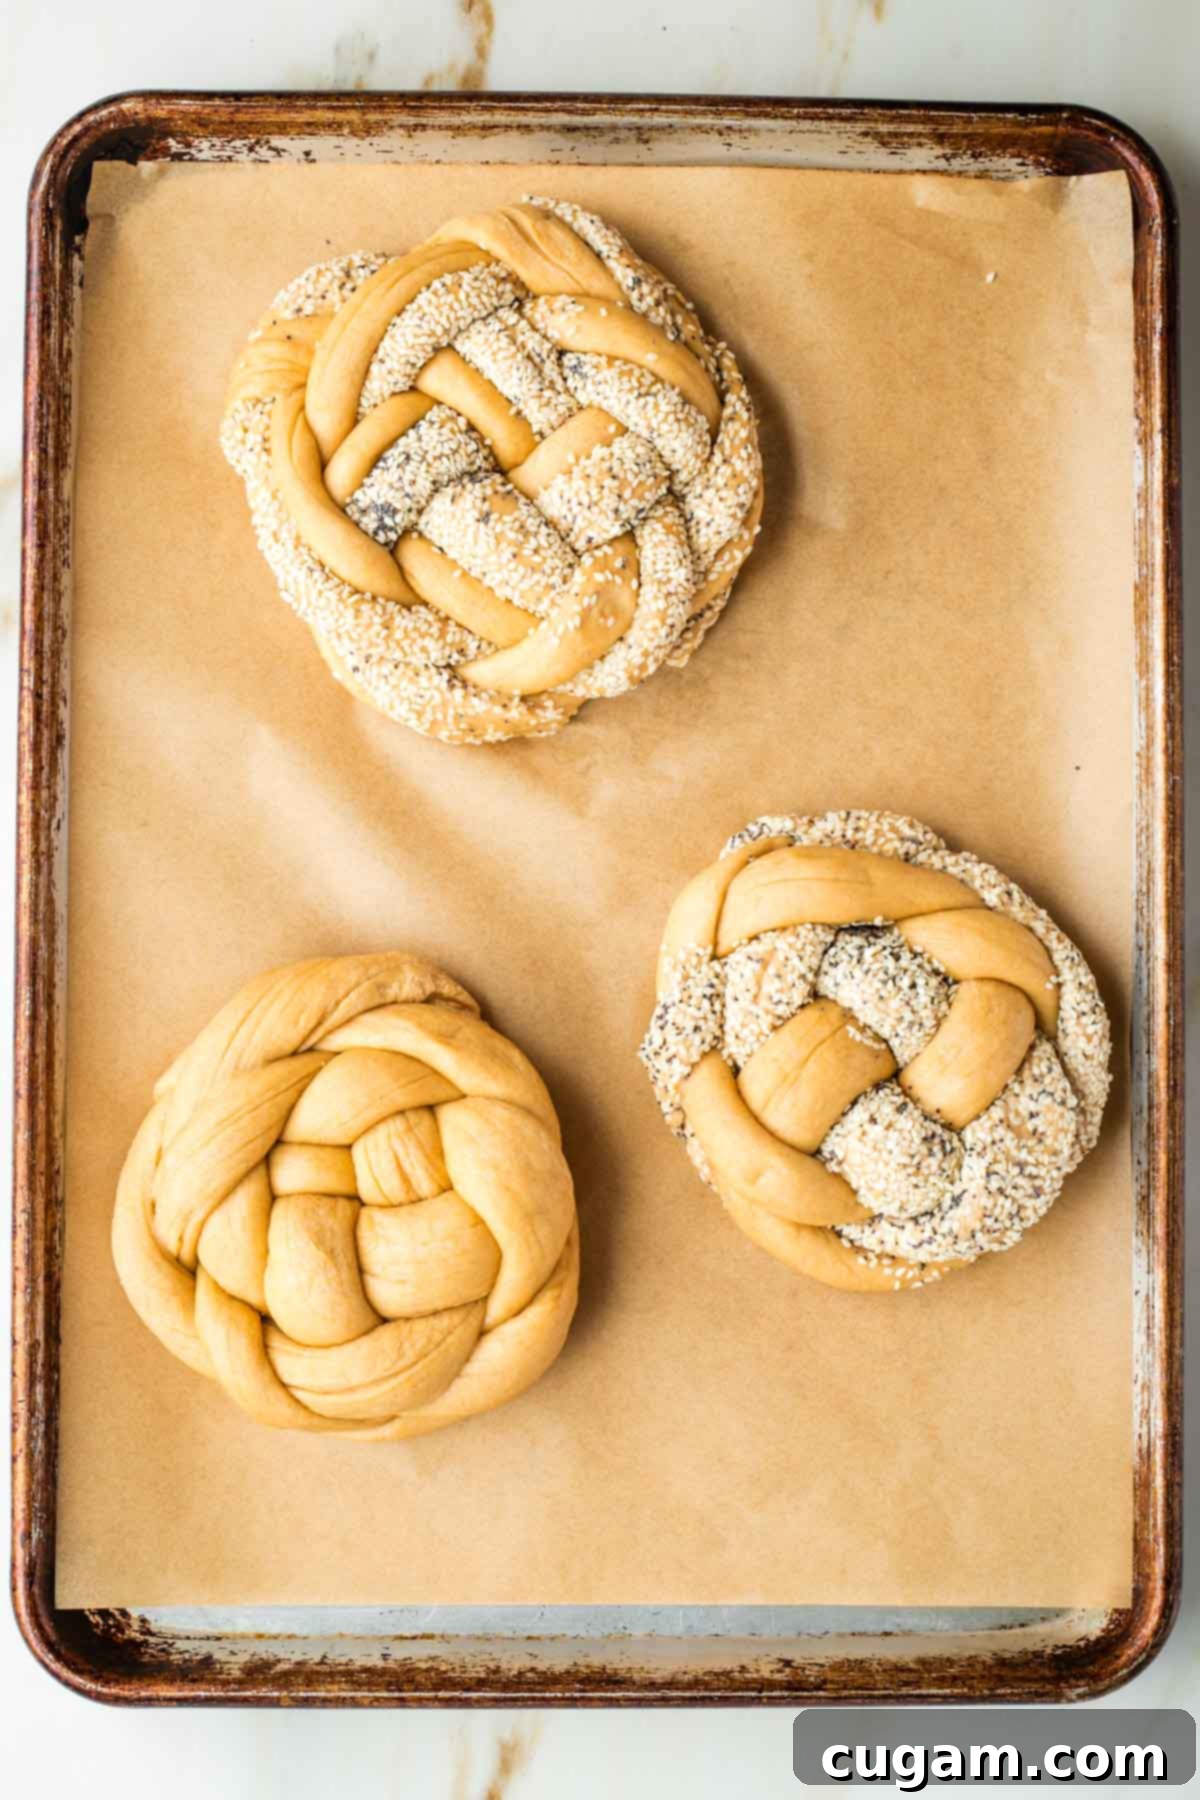
Carefully transfer your freshly braided challah loaves to a large, rimmed baking sheet. Ensure the baking sheet is lined with parchment paper or a silicone baking mat (like a Silpat) to prevent sticking and for easy cleanup. Arrange the loaves with enough space between them, as they will expand during the second rise and baking.
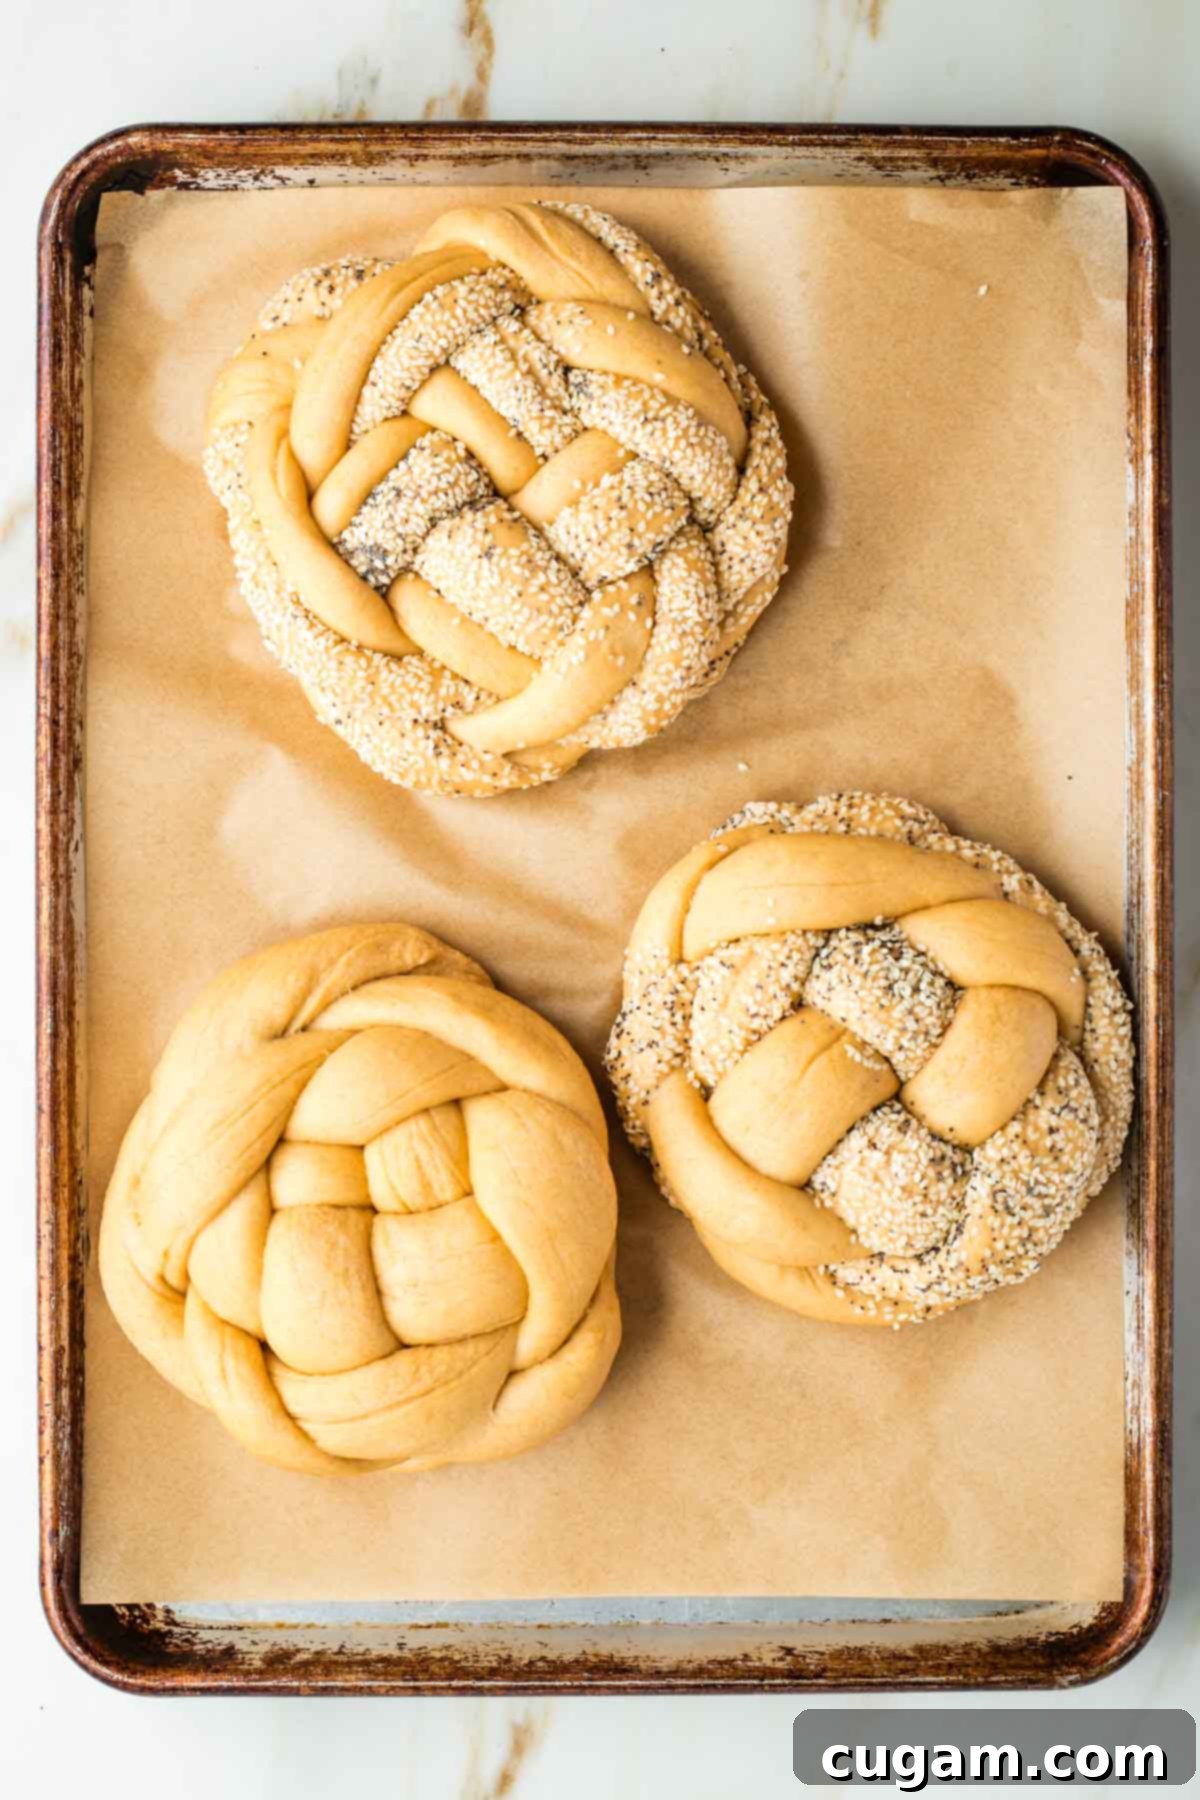
Loosely cover the challahs with a clean kitchen towel and allow them to undergo their second rise for at least an hour in a warm spot. During this period, the loaves will visibly swell and become noticeably plumper and puffier, though they won’t quite double in size like the first rise. This final rise is essential for developing a light interior crumb.
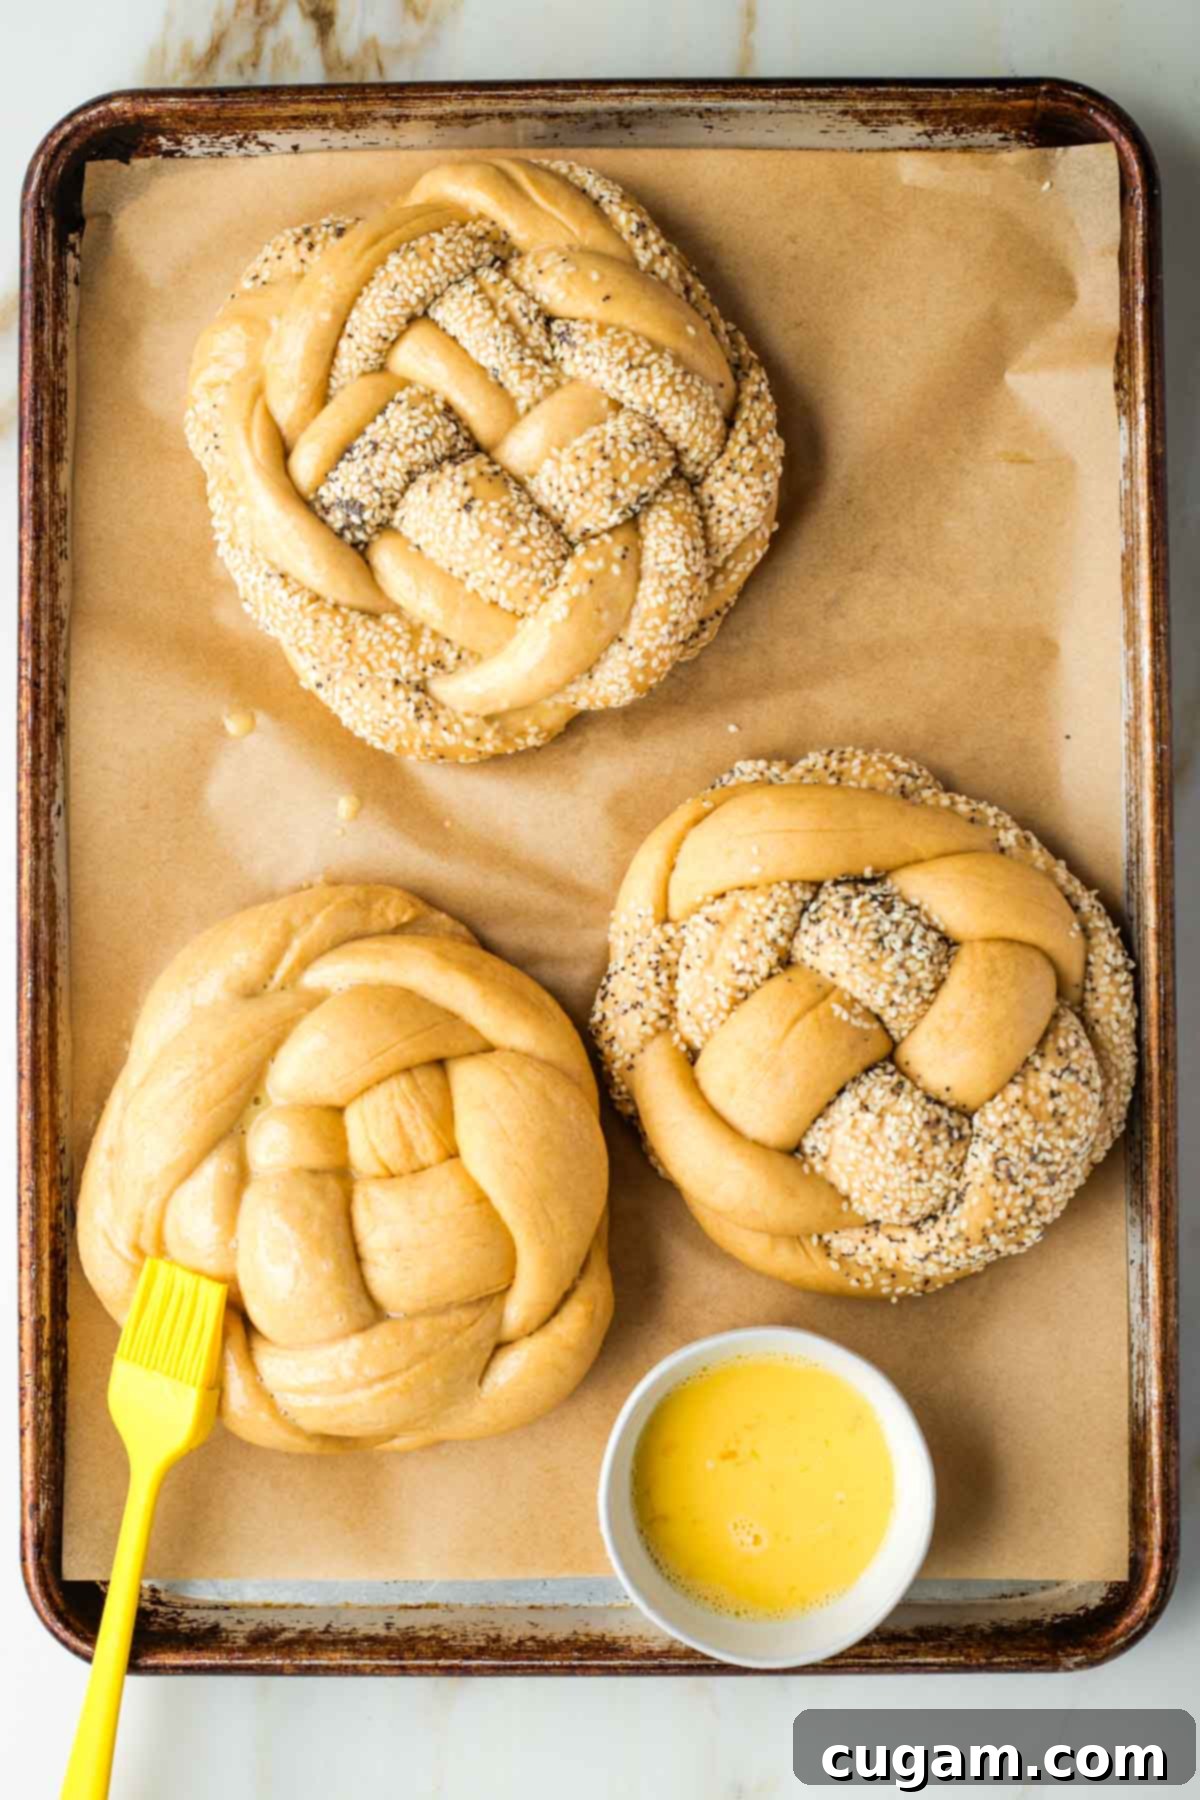
Just before baking, whisk one large egg until it’s frothy and well combined. Using a pastry brush, gently apply this egg wash to all exposed areas of the challah dough. If you incorporated seeds during the braiding process, you can skip brushing those sections. The egg wash provides a beautiful golden sheen and helps any additional seeds adhere to the crust.
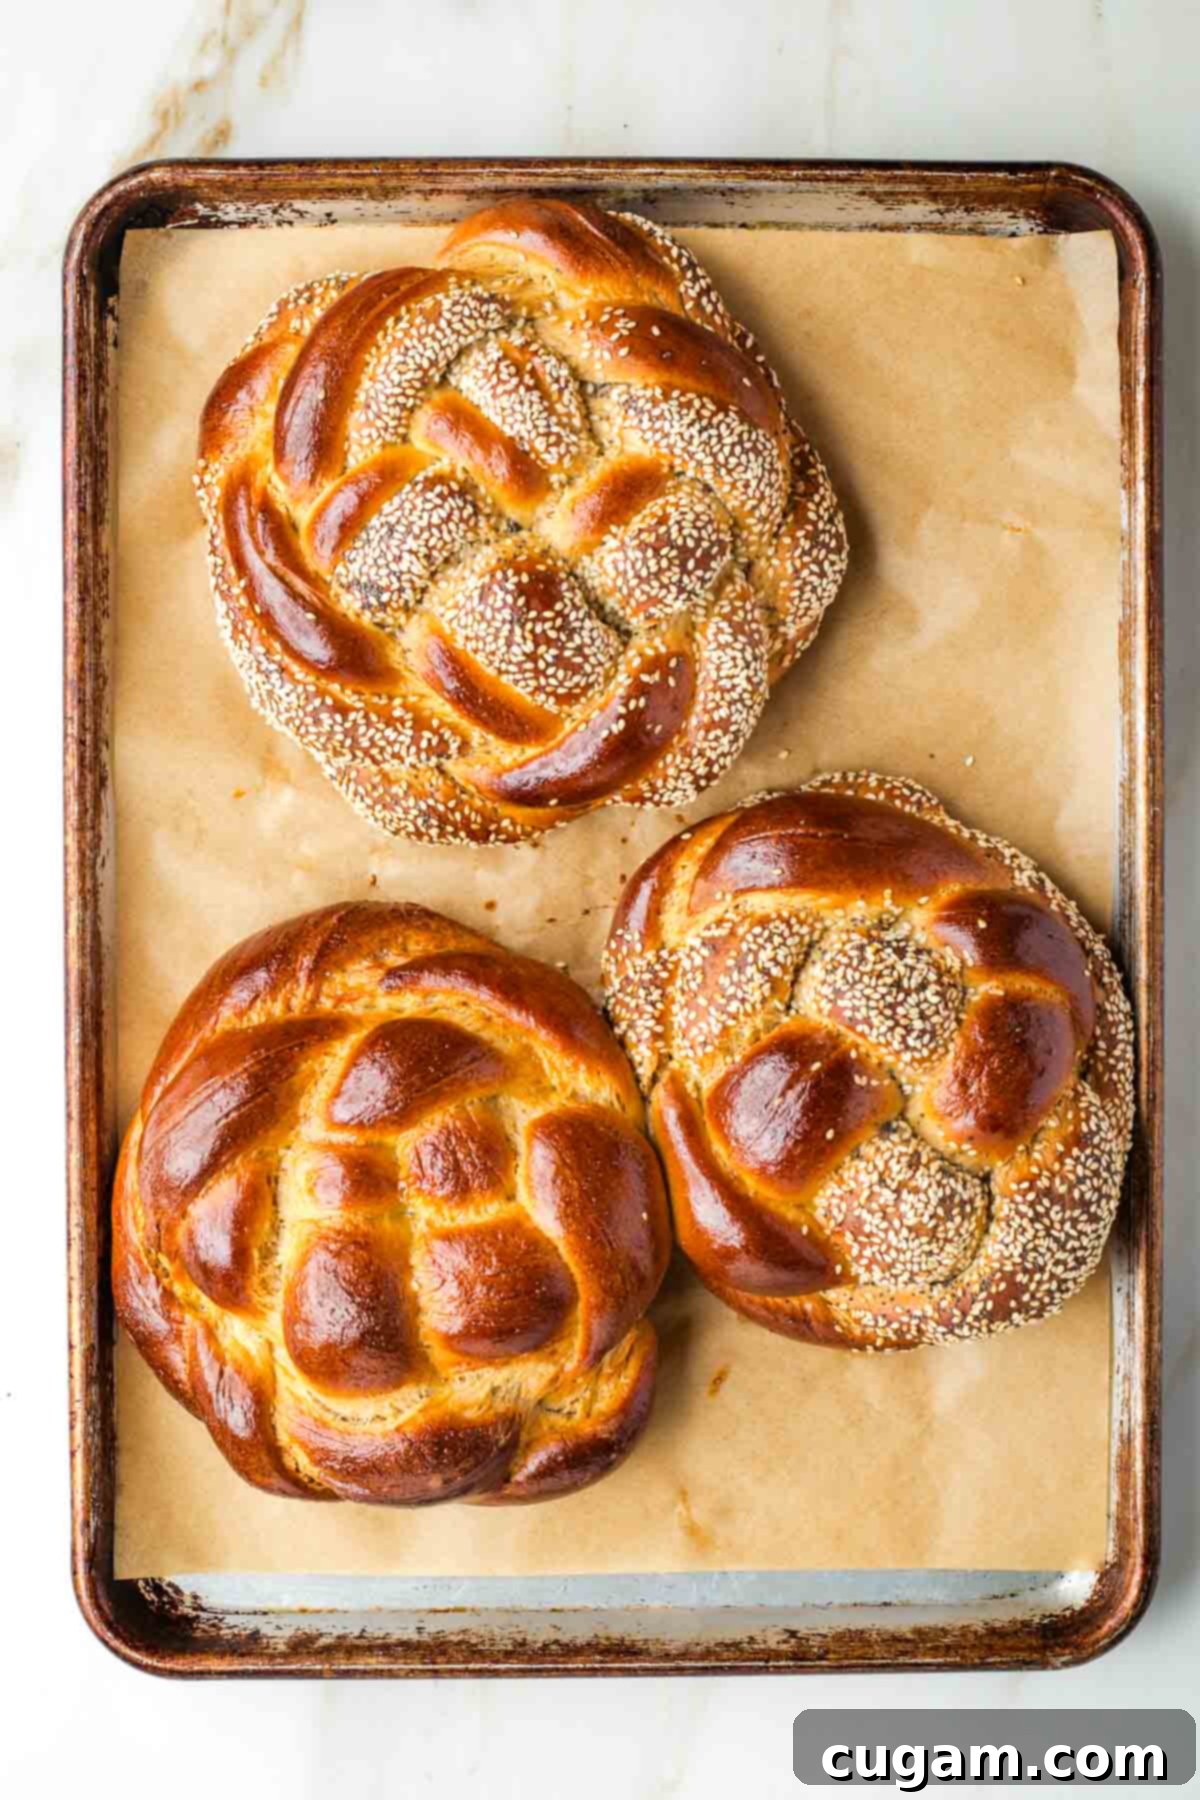
Preheat your oven to 350 degrees Fahrenheit (175 degrees Celsius). Once preheated, bake the challah loaves for approximately 30 minutes, or until they turn a magnificent golden-brown color and sound hollow when tapped on the bottom. An internal temperature of 200-210 degrees F (93-99 degrees C) indicates they are fully baked.
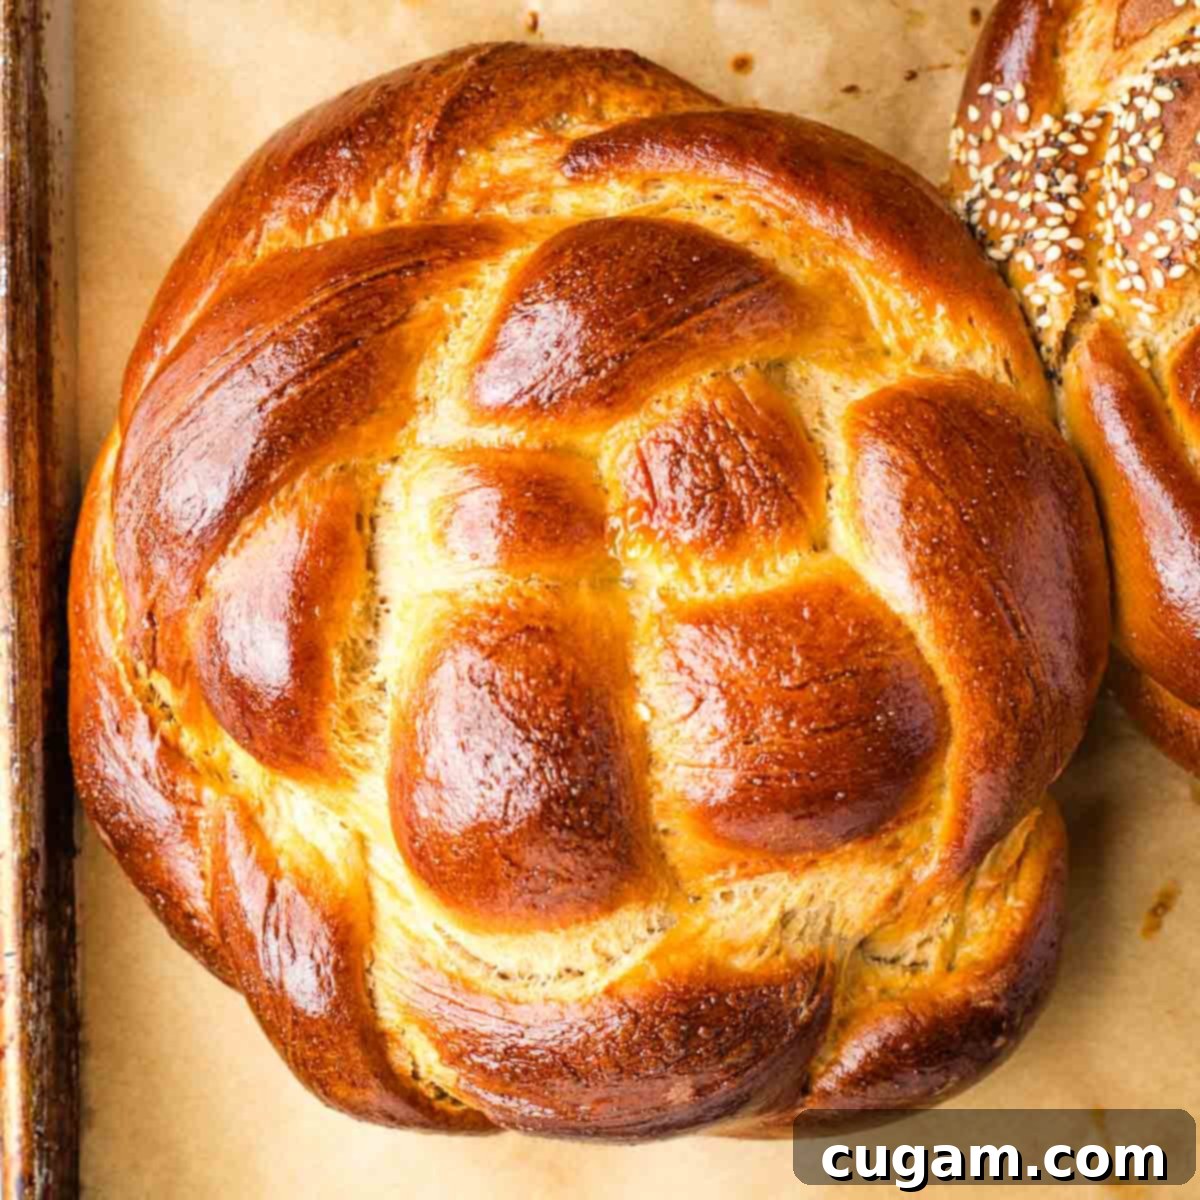
Once baked, immediately transfer the challah loaves to a wire rack to cool completely. This prevents the bottom from becoming soggy. While challah tastes freshest for 3-4 days, it will remain good in an airtight container for up to a week. After that, it’s the perfect time to repurpose any leftovers into delectable French toast, homemade croutons, or savory breadcrumbs!
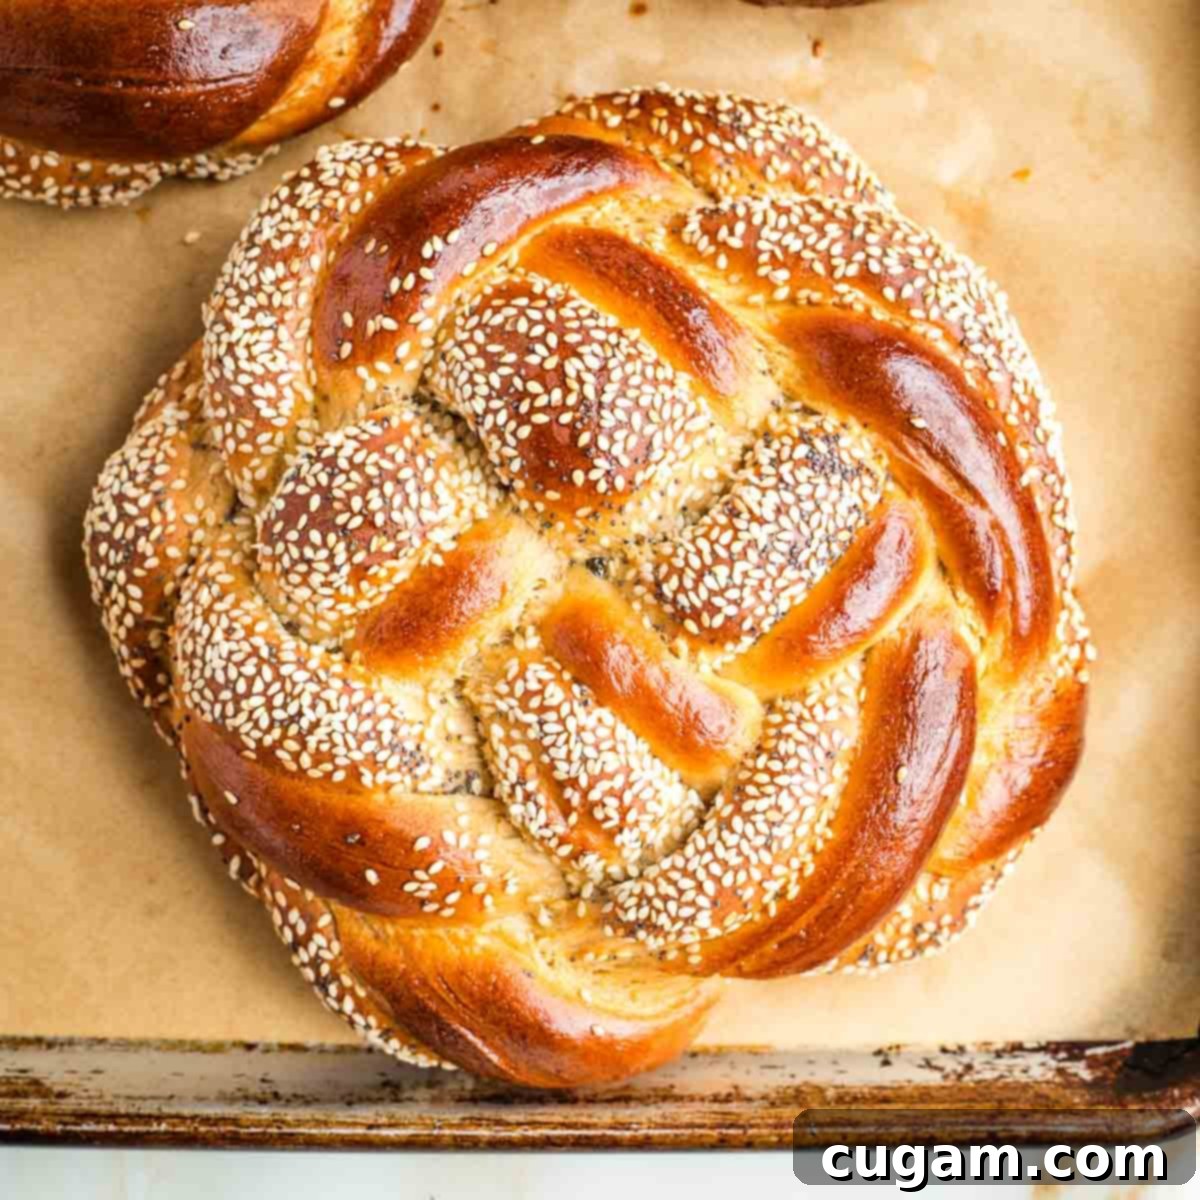
For longer storage, once the challah is completely cooled, wrap it tightly in plastic wrap, then again in aluminum foil, and freeze it. This method helps preserve its freshness. When you’re ready to enjoy it, simply defrost at room temperature for 6-8 hours. If you prefer your challah warm, gently reheat it in a 300-degree Fahrenheit (150 degrees Celsius) oven for about 10 minutes.
Debra’s Expert Tips for Challah Success
- Proofing the Yeast is Non-Negotiable: This is arguably the most critical step. Refer to the photos above to see what successfully proofed yeast should look like—a frothy, bubbly mound. If your yeast doesn’t show these signs after 5-10 minutes, do not proceed. Your challah will not rise. Discard and start over with fresh yeast and properly warmed water. It’s worth the redo!
- Embrace Patience in Rising: Dough baking is an exercise in patience. Allow ample time for both rises. The first rise should be 2-3 hours, potentially longer depending on your kitchen’s temperature and humidity. The second rise, after braiding, typically takes about 1 hour. Rushing these steps will result in a dense challah.
- Choose a Warm Spot for Rising: Yeast thrives in warmth. A sunny window, a slightly warmed oven (with the heat off or on a low “proof” setting around 100 degrees F), or even near a warm appliance are all ideal spots to encourage your dough to rise beautifully. Avoid cold, drafty areas.
- Don’t Stress Over Imperfect Braids: Let go of perfection! Honestly, whether your braiding is perfectly symmetrical, slightly sloppy, or a little uneven, your challah bread will still taste absolutely delicious. The beauty of homemade bread lies in its rustic charm. Plus, it will be undeniably homemade—crafted with love, which is the best addition to any holiday table.
- Practice Makes Perfect (or Pretty Close!): I’ve baked well over 2,500 loaves of challah over the years, and I’ve certainly refined my craft. You will too! Don’t expect perfection on your first attempt. Start where you are, give yourself grace, and simply get in there and try. I’ve facetimed with nieces, friends, and even my kids’ friends who wanted to learn, and it always works out. The joy is in the making!
Did you know commenting on and rating recipes is one of the best ways to support your favorite food bloggers? If you made this recipe, please consider leaving a five-star rating below and a comment sharing your experience. Also, we’d love to see your creations! Please share your photos on Instagram by tagging me @dkhealthcoach and using the hashtag #debraklein. Your support means the world!
📖 Recipe
Sweet Round Challah Bread Recipe
Debra Klein
Rate this Recipe
Pin Recipe
20 minutes
30 minutes
3 hours
Holidays
Jewish Holiday
24
147
kcal
Equipment
-
Food Processor
-
Pyrex Glass Measuring Cup Set
-
Large Rimmed Baking Sheet
-
kitchen scale
-
thermometer
Ingredients
-
1
cup
hot water
105-110 degrees -
½
cup
honey -
2 ¼
teaspoon
active dry yeast -
¼
teaspoon
salt -
¼
cup
olive oil -
2
large
eggs -
2 ½
cups
whole grain bread flour -
2 ½
cups
whole grain all purpose flour -
1
tablespoon
olive oil
Optional Wash and Sprinkle
-
1
large
egg -
2
tablespoon
sesame seeds -
1
tablespoon
poppy seeds
Instructions
Proof Yeast
-
Use a 2 cup glass measuring cup and measure 1 cup hot water. Use a thermometer, if you have one, to register around 110 degrees. Otherwise, make it hot to the touch, but not scalding!
-
Pour the honey straight into the measuring cup, using the measurements on the side. Sprinkle in the salt and the yeast. Mix well. Let that sit for at least 5 minutes. It will get bubbly and rise up a bit.
Make the dough
-
Mix the olive oil and eggs in the bowl of a food processor, fitted with the “S” blade, until frothy.
-
Pour in the yeast mixture once it’s proofed. Process.
-
All at once, add in half the all purpose flour and half the bread flour and process until uniformly mixed. Measure the flour by scooping into a dry measuring cup and leveling it off. If you have a kitchen scale, the 2.5 cups of mixed flour will weigh about 10 ¾ oz.
-
Sprinkle on the remaining combination of flour and let the processor knead it for about 3 minutes.
-
If the dough is holding together and pulling away from the sides of the processor bowl, you’re all set. However, it may be a bit too sticky still. If it’s sticking to the sides or clinging to the blade, then sprinkle on 1 tablespoon additional flour and process again. Continue to add 1 tablespoon flour at a time, mixing well each time before attempting to add more flour. The dough should be a bit tacky, just not sticking to your hands when you touch it.
-
ERR ON THE SIDE OF LESS FLOUR, NOT MORE.
-
Turn it out onto the counter, using 1 tablespoon flour, if needed to prevent sticking. Knead by hand a couple of turns until it resembles a smooth ball of dough.
-
Prepare a large bowl with 1 tablespoon olive oil. Transfer the dough ball to the bowl and roll it around, to coat all sides with the oil. Cover with a clean kitchen towel and leave it in a warm spot to rise for at least 2 hours.
-
If you have a “proof” setting on your oven (the same as setting it to 100 degrees), you can leave it in there. I place mine in a sunny window.
Braid and Prep the Loaves
-
Line a large rimmed baking sheet with unbleached parchment.
-
This recipe will make 3 medium sized challah. Divide the dough into 12 equal pieces. They will weight about 3 oz. each.
-
Take 4 dough balls to work with and cover the remaining dough with kitchen towel, so it doesn’t dry out.
-
Use the photos above as a guide. Roll each ball of dough into a long snake. Make a woven grid with two strands across horizontally, and two vertical, going over and under. You can also cut each ball into half to have 8 strands and dip half the strands into water and then sesame seeds. See photos.
-
Work your way around, crossing the over strand underneath on each side. Continue as shown on the photos until the strands have come to an end and then tuck whatever is remaining underneath. Transfer to prepared baking sheet.
-
Repeat with remaining dough balls until you have 3 challahs on your baking sheet. Cover with the kitchen towel and set the timer for 1 hour.
Baste and Bake
-
Preheat oven to 350 degrees.
-
Whisk together an egg and then brush onto top of dough. If you didn’t dip in seeds before braiding, then sprinkle them onto the challah now, if desired.
-
Bake for 30 minutes, until golden brown.
-
Transfer to wire rack to completely cool. Then, store in airtight bag until ready to serve. These are freezer friendly. Make sure they’re COMPLETELY cool before storing. Wrap in plastic and then in foil for best results. Defrost at room temperature for 6-8 hours. Gently reheat in 300 degree oven for 10 minutes, if warm challah is desired.
Notes
I use whole grain stone milled flour from mighty mill. They sell their organic flour online, in their shops and in many grocery stores. There are local mills in many communities that sell stone ground whole grains. It’s totally worth finding a great source of whole grain flour.
I like to use a combination of whole wheat bread flour and whole wheat all purpose flour. Seems to be the right consistency. All bread flour will result in really dense loaves.
5 cups should be the right amount, if you carefully measured and/or weighed it out. You will possibly need 1-3 tablespoons additional if the dough is too sticky. I usually use the full 5 cups and then dust the counter where I’m going to knead the dough with 1 tablespoon flour so it doesn’t stick.
Nutrition information is based on one recipe making 3 challahs and each challah divided into 8 portions.
Nutrition
Calories:
147
kcal
Carbohydrates:
24
g
Protein:
4
g
Fat:
5
g
Saturated Fat:
1
g
Polyunsaturated Fat:
1
g
Monounsaturated Fat:
3
g
Trans Fat:
0.003
g
Cholesterol:
23
mg
Sodium:
34
mg
Potassium:
112
mg
Fiber:
3
g
Sugar:
6
g
Vitamin A:
36
IU
Vitamin C:
0.04
mg
Calcium:
24
mg
Iron:
1
mg
Note
The nutrition calculations were done using online tools. To obtain the most accurate representation of the nutritional information in any given recipe, you should calculate the nutritional information with the actual ingredients you used. You are ultimately responsible for ensuring that any nutritional information is accurate, complete and useful.
Did you make this recipe?
Please leave a review below, then snap a picture and tag me @dkhealthcoach or use hashtag #dkhealtcoach on Instagram so I can see it!!
