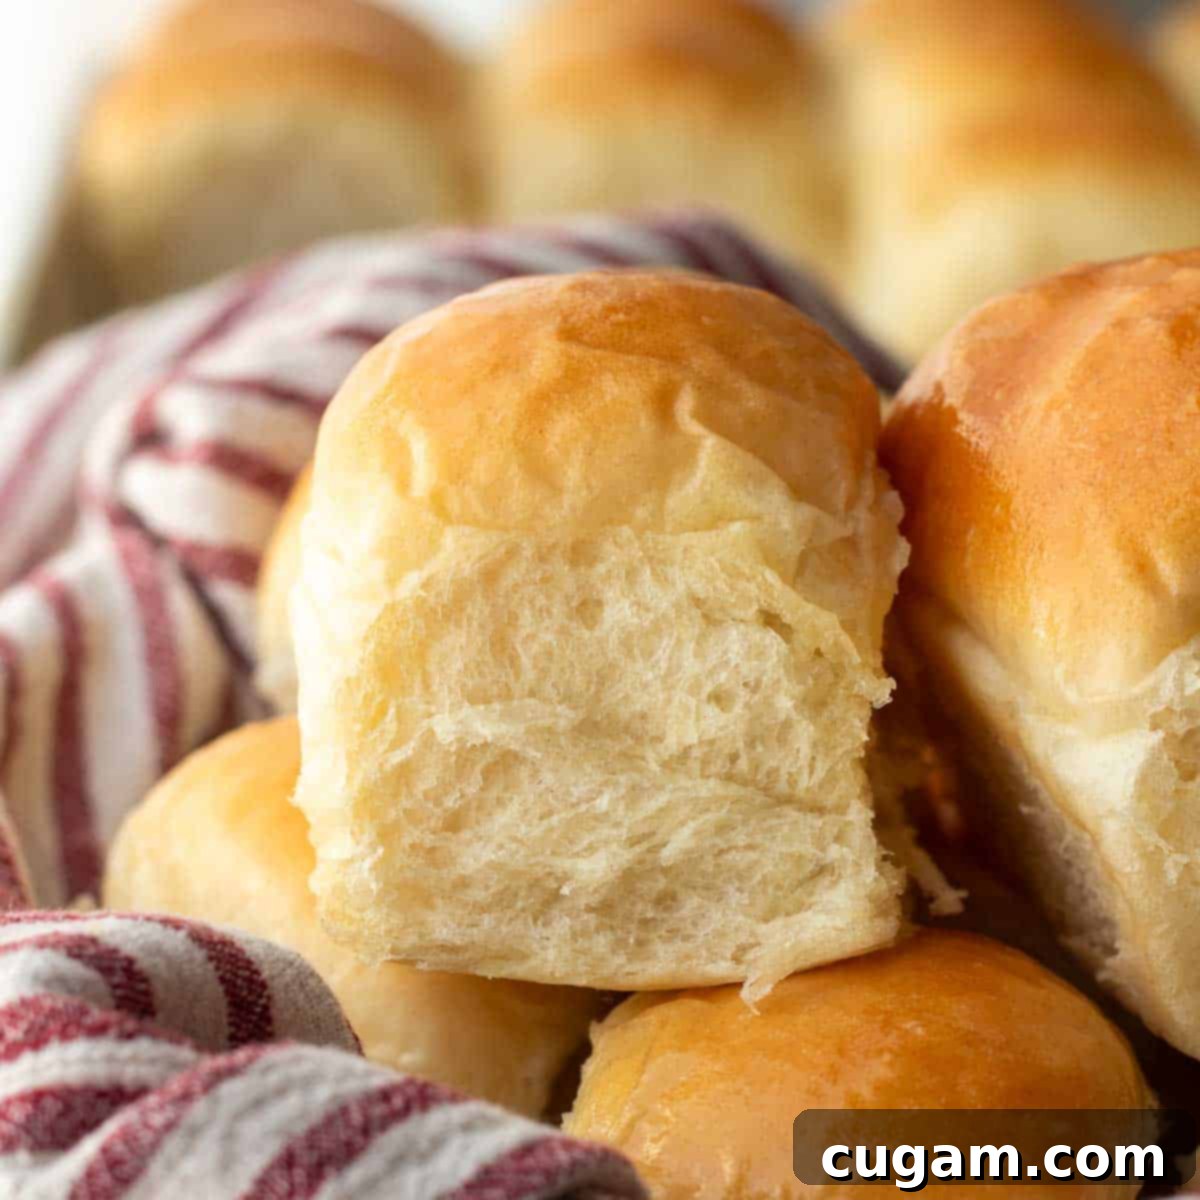
The Best Old-Fashioned Yeast Dinner Rolls: Soft, Fluffy & Buttery Homemade Perfection
Welcome to the ultimate guide for baking the most incredibly soft, buttery, and irresistibly fluffy old-fashioned yeast dinner rolls you’ll ever taste. This time-tested recipe, enriched with sweet honey and luscious butter, promises a culinary experience that will transport you straight to grandma’s kitchen. Bid farewell to dry, dense rolls – these are exquisitely light, airy, and truly melt-in-your-mouth delicious, making them the perfect accompaniment for any meal, from a casual family dinner to a grand holiday celebration.
Just like my highly acclaimed Soft Fluffy French Bread, this recipe consistently delivers an unparalleled level of tenderness and flavor that will impress even the most discerning palates. This easy yeast roll recipe is specifically designed to produce a generous batch, yielding anywhere from 24 to 36 wonderfully soft and fluffy dinner rolls, depending on your preferred size. My personal recommendation is to aim for 30 perfectly proportioned rolls, which consistently turn out flawlessly in a single pan. While this is indeed a large batch dinner roll recipe, it offers incredible flexibility and can be effortlessly halved to produce 12-15 rolls, making it ideal for smaller gatherings. Its generous yield and impressive quality make it the PERFECT Thanksgiving rolls recipe, ensuring you have enough to feed a crowd. Plus, once you master the simple bakery-style rolling technique, these rolls will disappear from the table in record time!
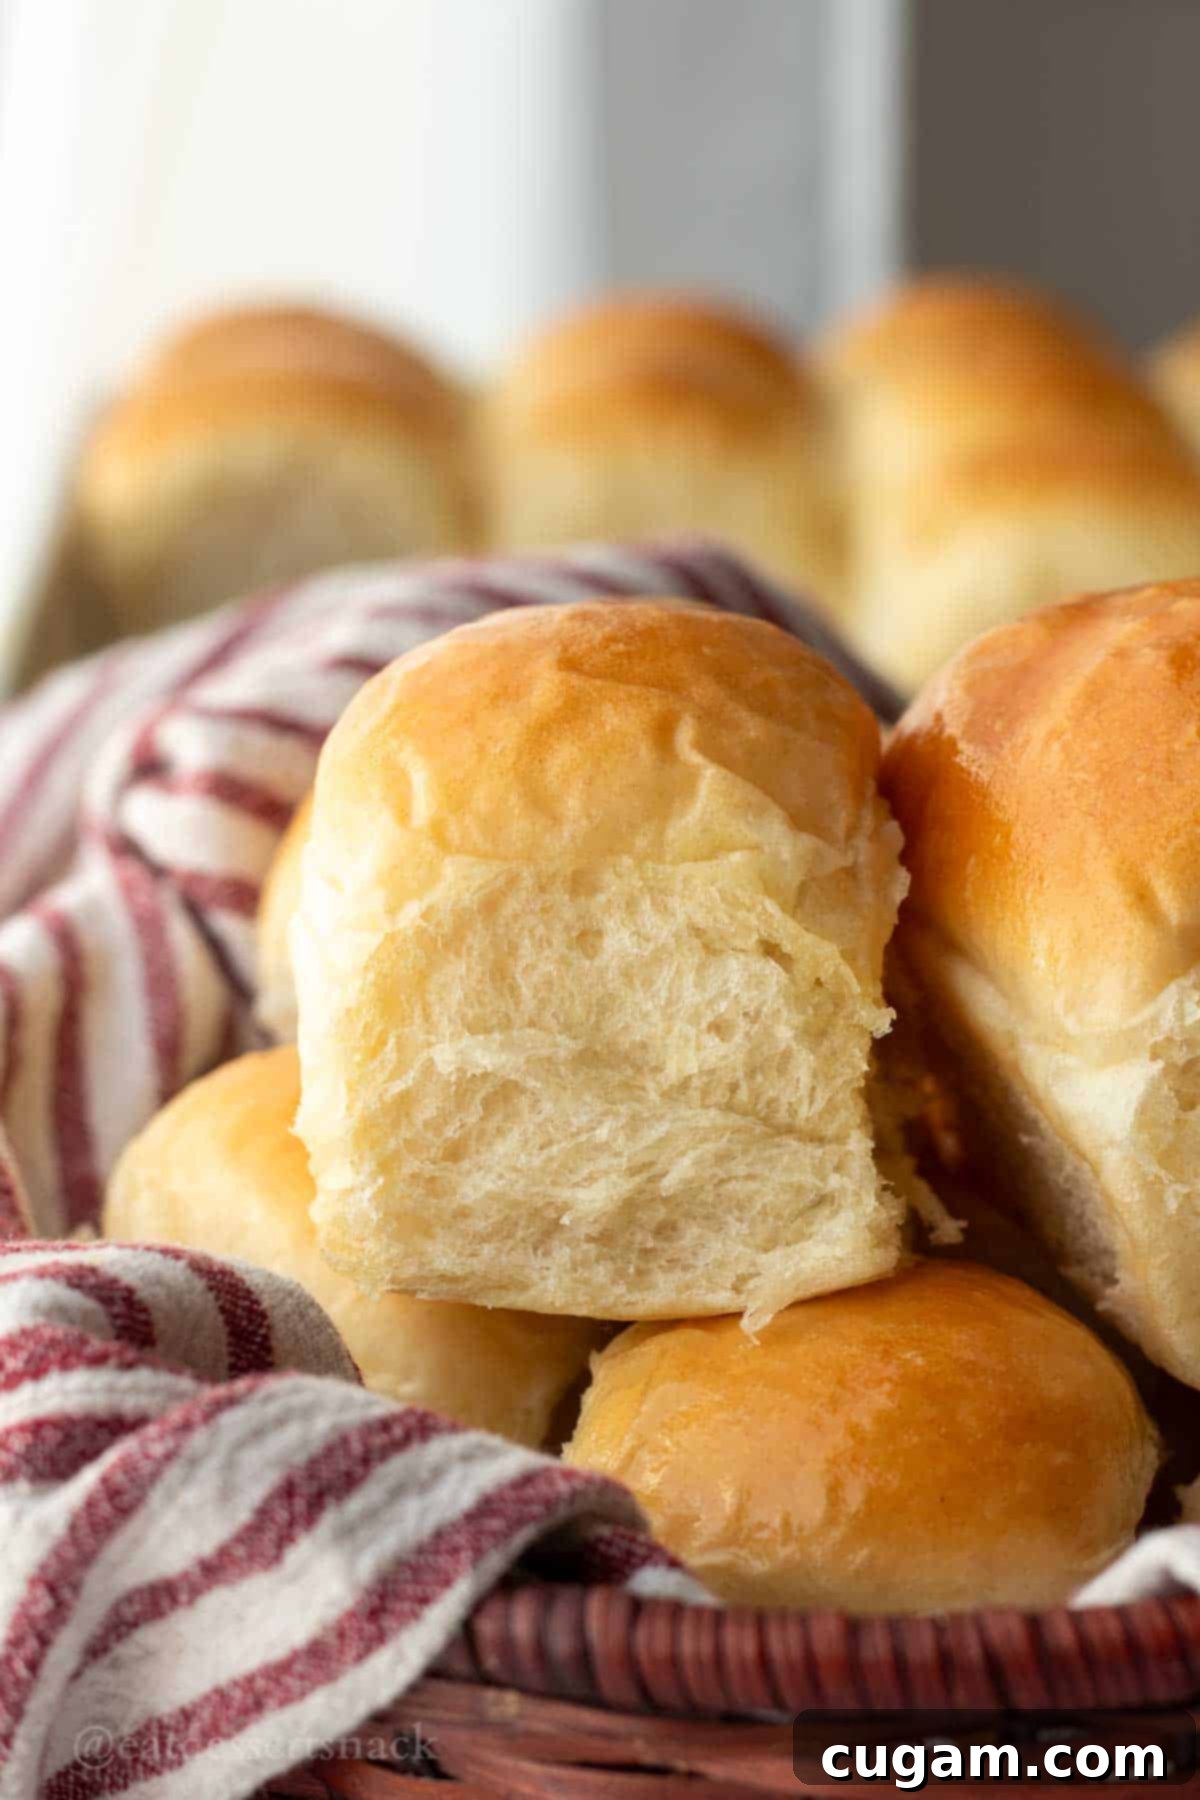
This isn’t merely another dinner roll recipe; it represents the culmination of a decade of dedicated development, meticulous tweaking, and passionate refinement to achieve absolute perfection. This tried-and-true formula has proudly remained unchanged for years, a testament to its consistent excellence. You’ll find no shortening, no processed sugars, and no artificial oils in this recipe. Instead, we embrace the wholesome goodness of authentic, old-fashioned ingredients: natural honey, active yeast, and real, unsalted butter. The result? Rolls that taste genuinely homemade, evoking warm, nostalgic memories of comforting, classic baking. For an even more indulgent experience, serve them warm with a generous dollop of homemade Honey Butter Spread – it’s a pairing that truly elevates the flavor to culinary bliss.
One of the many delightful aspects of this soft bread rolls recipe is its remarkable make-ahead flexibility. You can effortlessly prepare the dough overnight for freshly baked rolls the next morning, or conveniently freeze them for enjoyment at a later date. Whether you choose to freeze the fully baked and cooled rolls or the raw dough balls, the process is straightforward and easy to manage. Freezing raw dough offers the unparalleled convenience of “bake from scratch” rolls at a moment’s notice, with simple instructions for thawing and baking that are quite similar to those for store-bought frozen varieties. This incredible versatility makes these homemade fluffy dinner rolls accessible for even the busiest of schedules, ensuring you can always have a warm, delicious side dish or snack ready to impress.
What to Expect from These Fluffy Dinner Rolls
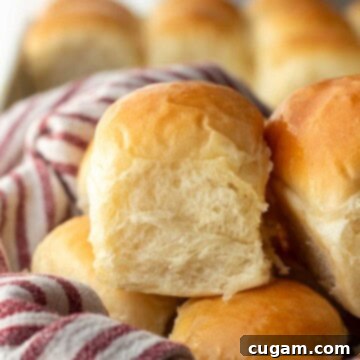
- Taste: Prepare your taste buds for truly exceptional dinner rolls. These are generously sized, boasting a delicate yet perfectly balanced flavor profile. You’ll experience just enough natural sweetness from the honey, complemented by savory notes from the salt and the rich depth of butter. Each bite is incredibly soft, tender, and perfectly baked with a beautiful golden-brown crust. They are designed to be not just delicious, but utterly addictive and wonderfully versatile, making them an ideal complement to any meal.
- Ease: Despite their impressive appearance and gourmet taste, this is a surprisingly easy dinner rolls recipe. The process is straightforward and relies on only 7 essential ingredients, making it highly accessible even for novice bakers. The primary commitment required is patience during the crucial rising times and a little practice to achieve those perfectly round, evenly sized rolls. Don’t be intimidated; the entire baking process is incredibly rewarding and many find the hands-on steps quite therapeutic!
- Time: From the initial mixing of ingredients to pulling the warm, golden rolls out of the oven, you can expect the entire process to take approximately 3 hours. Here’s a typical breakdown:
- Mixing: A quick and efficient 10 minutes to combine all the ingredients into a cohesive dough.
- First Rise: Approximately 1 hour, during which the dough develops its rich flavor and significantly increases in volume. This duration can slightly vary based on your kitchen’s ambient temperature.
- Shaping: 15-20 minutes dedicated to expertly cutting the dough and rolling it into individual, uniform balls.
- Second Rise: Another hour for the rolls to proof, becoming incredibly light and airy as they prepare for baking.
- Baking: Just 15-16 minutes in a hot oven to achieve that coveted golden perfection and tender crumb.
While the rising times constitute a significant portion of the overall process, they are largely hands-off periods. You’ll also find simple tricks to gently speed up the rise time if your kitchen is on the cooler side, ensuring your baking schedule stays on track.
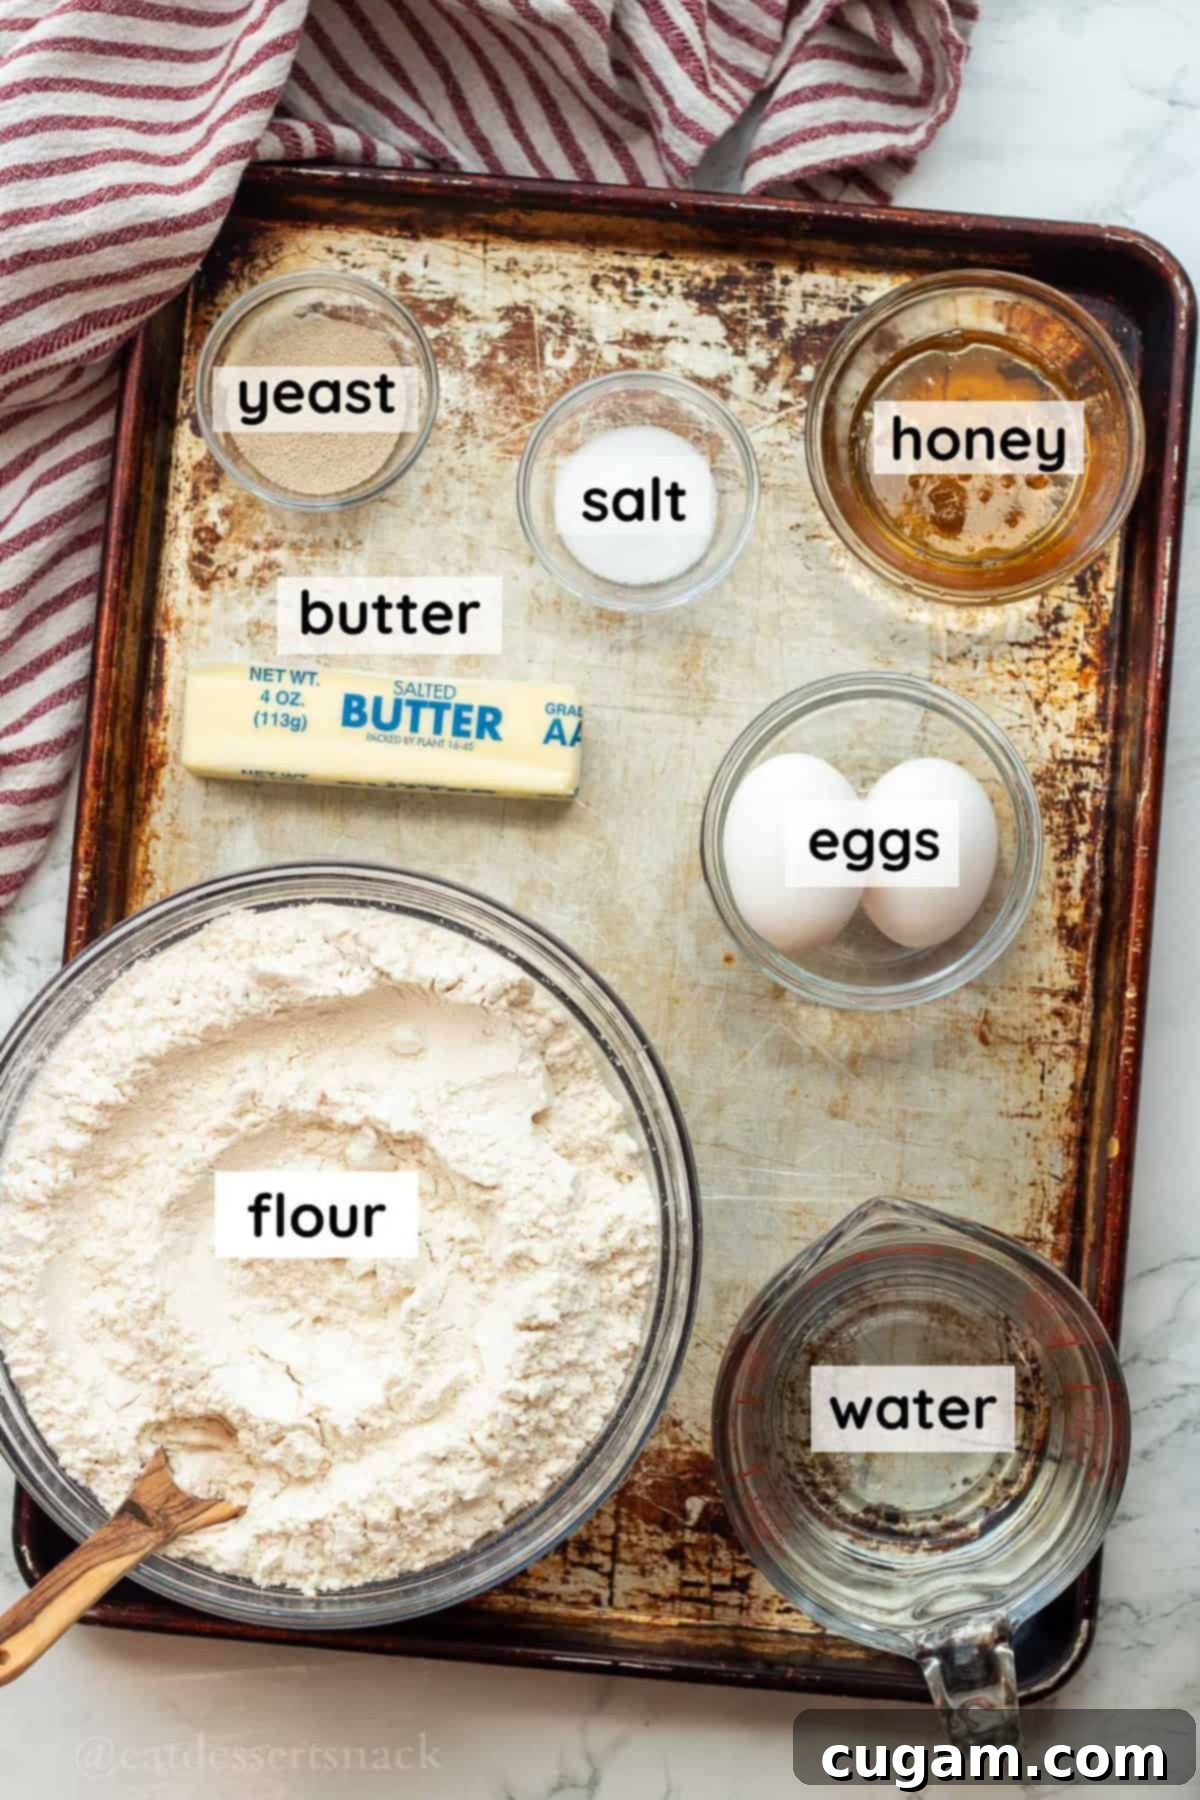
🛒 Key Ingredients for the Best Homemade Rolls
The secret to crafting perfect, fluffy dinner rolls lies in understanding the unique role each ingredient plays in the dough’s structure, flavor, and texture. Here’s a closer look at what makes these particular rolls so exceptionally good:
- All-Purpose Flour: After countless rounds of recipe testing and years of baking experience, all-purpose flour has consistently proven to deliver the optimal texture and rise for these specific dinner rolls. Its balanced protein content is ideal, creating a dough that is both strong enough to develop a good gluten structure and hold its shape, yet tender enough to ensure a wonderfully fluffy, delicate crumb. While other flours can be experimented with, all-purpose flour remains the most reliable choice for achieving this recipe’s signature soft texture.
- Honey: In our quest for wholesome goodness, processed sugars are consciously avoided here! Honey is the star sweetener of choice, valued not only for its delicate, complex flavor profile but also for its superior performance within the dough itself. It imparts a natural, nuanced sweetness and plays a crucial role in keeping the rolls incredibly moist and fresh for longer. Dough made with honey is often more pliable and easier to work with, resulting in a better overall dough consistency, texture, and a subtly enhanced taste compared to recipes using only white sugar.
- Yeast (Active Dry or Instant): This is the biological leavening agent responsible for the spectacular rise and airy texture of your rolls! Both active dry yeast and instant yeast are excellent choices for this recipe. The primary distinction lies in their activation: active dry yeast requires initial proofing in warm water with a touch of sweetener for a few minutes (to “bloom”) before being incorporated into the main ingredients, signaling its viability. Instant yeast, conversely, can be added directly into your dry ingredients without prior activation, streamlining the process slightly. Always ensure your yeast is fresh and active for optimal rising power.
- Water: This seemingly simple ingredient is absolutely fundamental for activating the yeast and establishing the overall structure of the dough. We purposefully choose warm water over milk in this recipe because milk, with its inherent fats and proteins, can sometimes make the dough heavier and slightly inhibit the rolls from achieving their maximum potential fluffiness during the crucial rising periods. Warm water helps to activate the yeast perfectly without introducing unnecessary richness that could inadvertently weigh down the delicate, airy texture we’re aiming for.
- Butter: Butter is undeniably essential for achieving the signature richness and extended freshness that define these rolls. Beyond contributing an incredibly luxurious flavor, butter plays a vital role in creating the rolls’ tender crumb and is key to keeping them wonderfully fluffy for days – typically a remarkable 3-4 days after they’ve been baked! It’s incorporated directly into the dough and then generously brushed on top of the rolls immediately after baking, adding an extra layer of deliciousness, a beautiful golden sheen, and additional moisture.
- Eggs: Far more than just a binder, eggs are crucial for enriching the dough. Their presence contributes significantly to the dough’s overall structure, imparts a beautiful golden hue to the crust, and, most importantly, enhances the rolls’ freshness. The fats and proteins found in eggs help create a wonderfully tender crumb and actively extend the shelf life of the rolls, ensuring they remain soft, moist, and enjoyable for longer periods, rather than drying out quickly.
- Salt: Often underestimated, salt is the unsung hero and arguably the MOST important flavor enhancer in bread making. It doesn’t merely add taste; salt plays a critical role in balancing the sweetness of the honey, strengthening the vital gluten structure within the dough, and precisely controlling the yeast’s activity, preventing it from over-fermenting. Without adequate salt, bread can taste surprisingly bland, flat, and lack the desirable chewy-yet-tender texture. Always measure your salt accurately for best results.
✏️ Substitutions & Variations for Your Homemade Rolls
While the original recipe for these old-fashioned yeast dinner rolls is perfected for classic flavor and texture, here are some thoughtful substitutions and creative variations to tailor them to specific dietary needs, ingredient availability, or simply to explore new flavor profiles:
- Honey: For families with babies under one year old, where honey is typically avoided, or for those who simply prefer an alternative, honey can be easily substituted. Use an equal amount of agave nectar, pure maple syrup, white granulated sugar, light brown sugar, or coconut sugar. These alternative sweeteners will provide the necessary food for the yeast and will not significantly alter the dough’s texture or rise, allowing you to maintain the desired consistency and flavor.
- Butter: To create a dairy-friendly or vegan version of these delightful rolls, you can effectively swap out the butter for an equal amount of solid vegetable shortening. Shortening will still provide the necessary fat content for tenderness and contribute to a good, soft texture. Alternatively, a high-quality plant-based butter substitute (ensure it’s suitable for baking) can also work wonderfully, providing a similar rich flavor profile without dairy.
- Water: While warm water is preferred for achieving maximum fluffiness and an airy crumb, you can certainly experiment with milk if you desire a slightly richer and perhaps more tender (though potentially less airy) crumb. Fat-free skim milk or 1% milk are good options, or you can use any of your favorite plant-based milks, such as almond milk, soy milk, or oat milk. Just be aware that the added fat and proteins in milk might result in a slightly denser texture compared to water, but it will impart a subtle creaminess.
- Flour: If you wish to use bread flour or a portion of whole wheat flour, it’s absolutely possible, but some minor adjustments will be necessary. These types of flours tend to absorb more liquid than standard all-purpose flour. When substituting, start by decreasing the amount of flour by about ½ cup (approximately 70g) and then gradually add more flour, a tablespoon at a time, until the dough reaches the correct consistency during kneading. Whole wheat flour will result in a denser roll with a heartier, nuttier flavor profile, while bread flour can produce a slightly chewier texture due to its higher protein content.
- Herb & Garlic Rolls: For a savory and aromatic twist, consider incorporating fresh herbs and garlic. During the last few minutes of kneading, add 2 tablespoons of finely minced fresh garlic and 1-2 tablespoons of finely chopped fresh herbs such as rosemary, thyme, or chives. After baking, brush the hot rolls with an extra coat of garlic-infused melted butter for an irresistible flavor boost.
- Sweet Cinnamon Rolls: Transform these versatile dinner rolls into a delightful breakfast or dessert treat! After the first rise, gently roll the dough into a large rectangle. Spread the surface evenly with softened butter, then generously sprinkle with a mixture of cinnamon and sugar. Roll the dough up tightly into a log, then slice into individual rolls. Place them in your baking pan and proceed with the second rise and baking steps as usual.
🧑🍳 Baking Instructions for Fluffy Yeast Rolls
Follow these detailed, step-by-step instructions carefully to ensure your homemade dinner rolls turn out perfectly soft, beautifully golden-brown, and utterly delicious. Precision in temperature and timing is a crucial foundation for baking success!
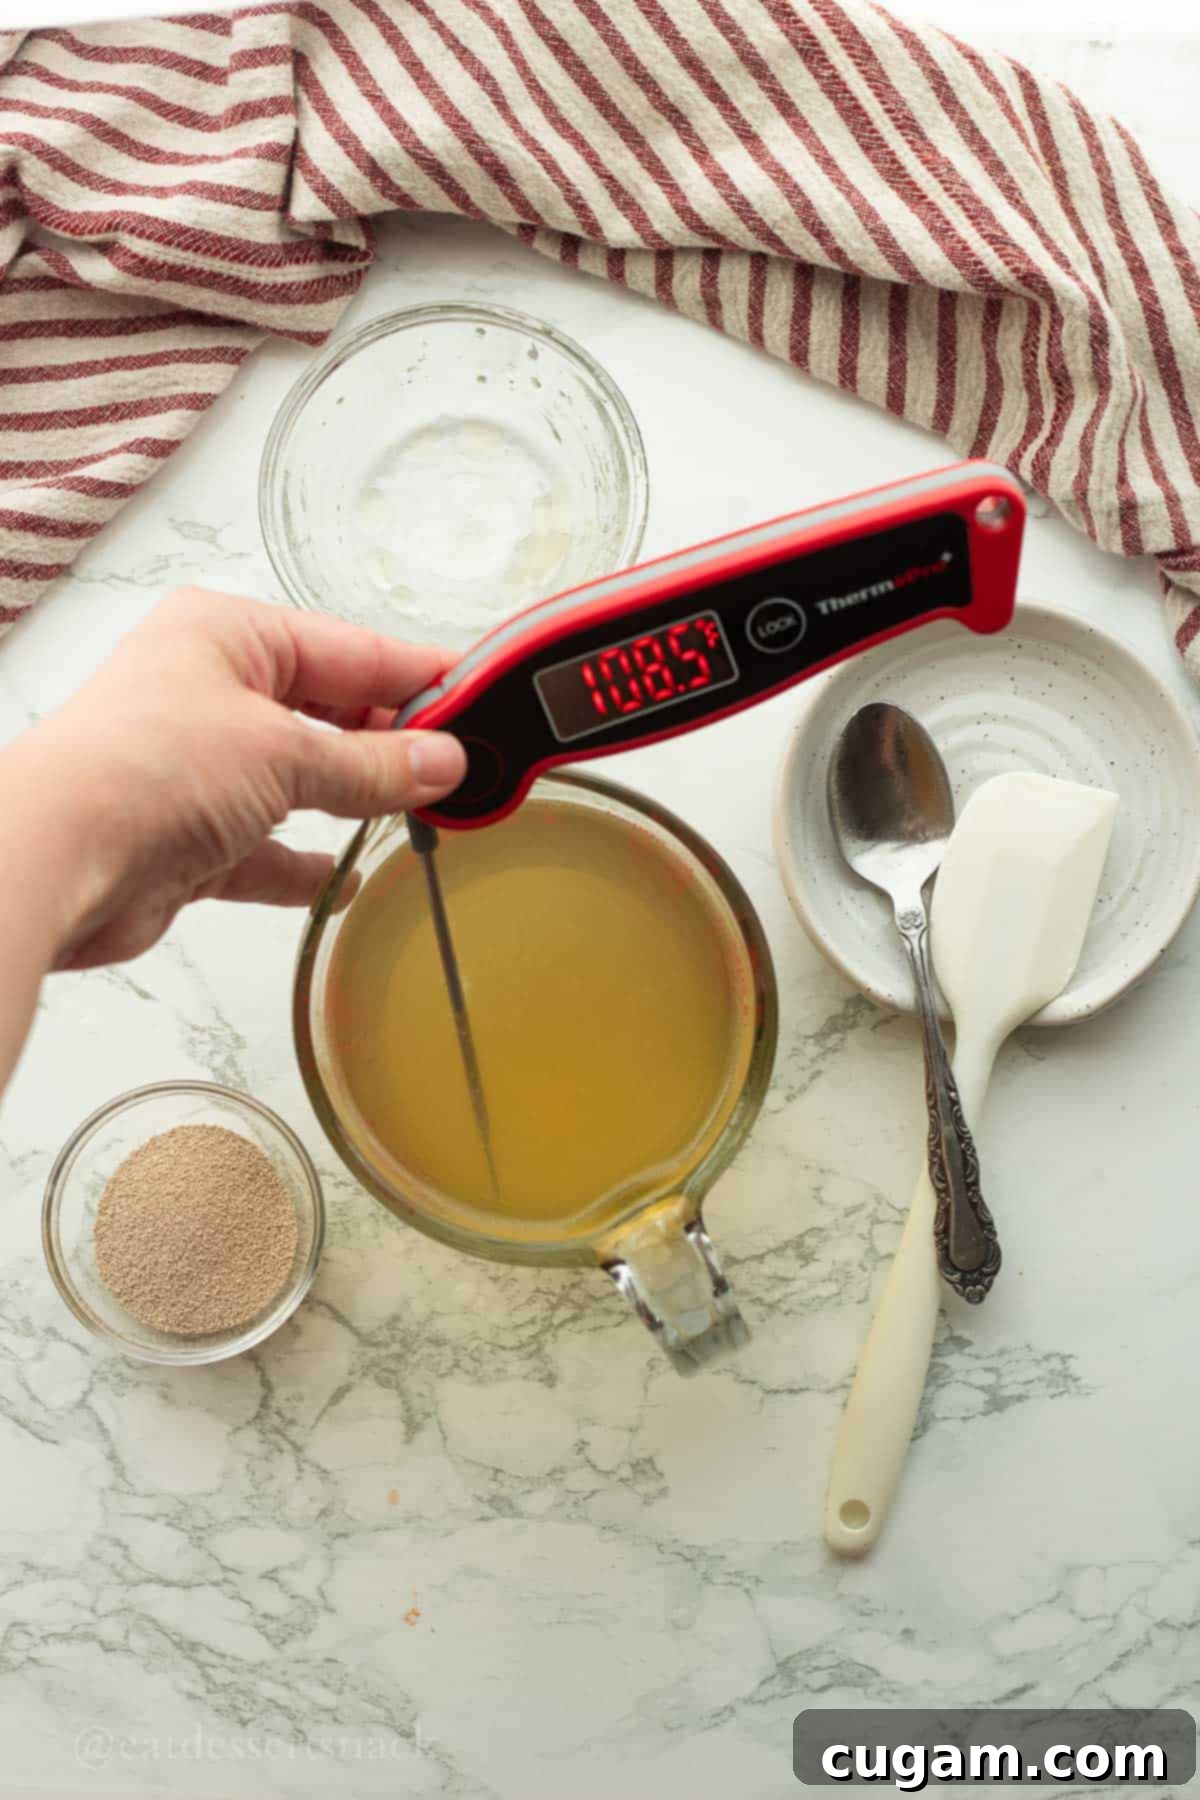
- Step 1: Activate the Yeast. In a glass measuring cup or a small bowl, carefully combine the warm water (ensuring its temperature is precisely between 100-110℉ / 38-43℃), the honey, and the active dry yeast. The water temperature is critically important at this stage. If the water is too hot (above 120℉ / 49℃), it will kill the delicate yeast organisms, rendering them inactive and preventing your rolls from rising. Conversely, if the water is too cold, the yeast will activate very slowly, if at all. Gently stir the mixture, then allow it to rest for 5-10 minutes until a distinct foamy layer appears on the surface. This foam is your visual confirmation that the yeast is active and robust, ready to work its magic.
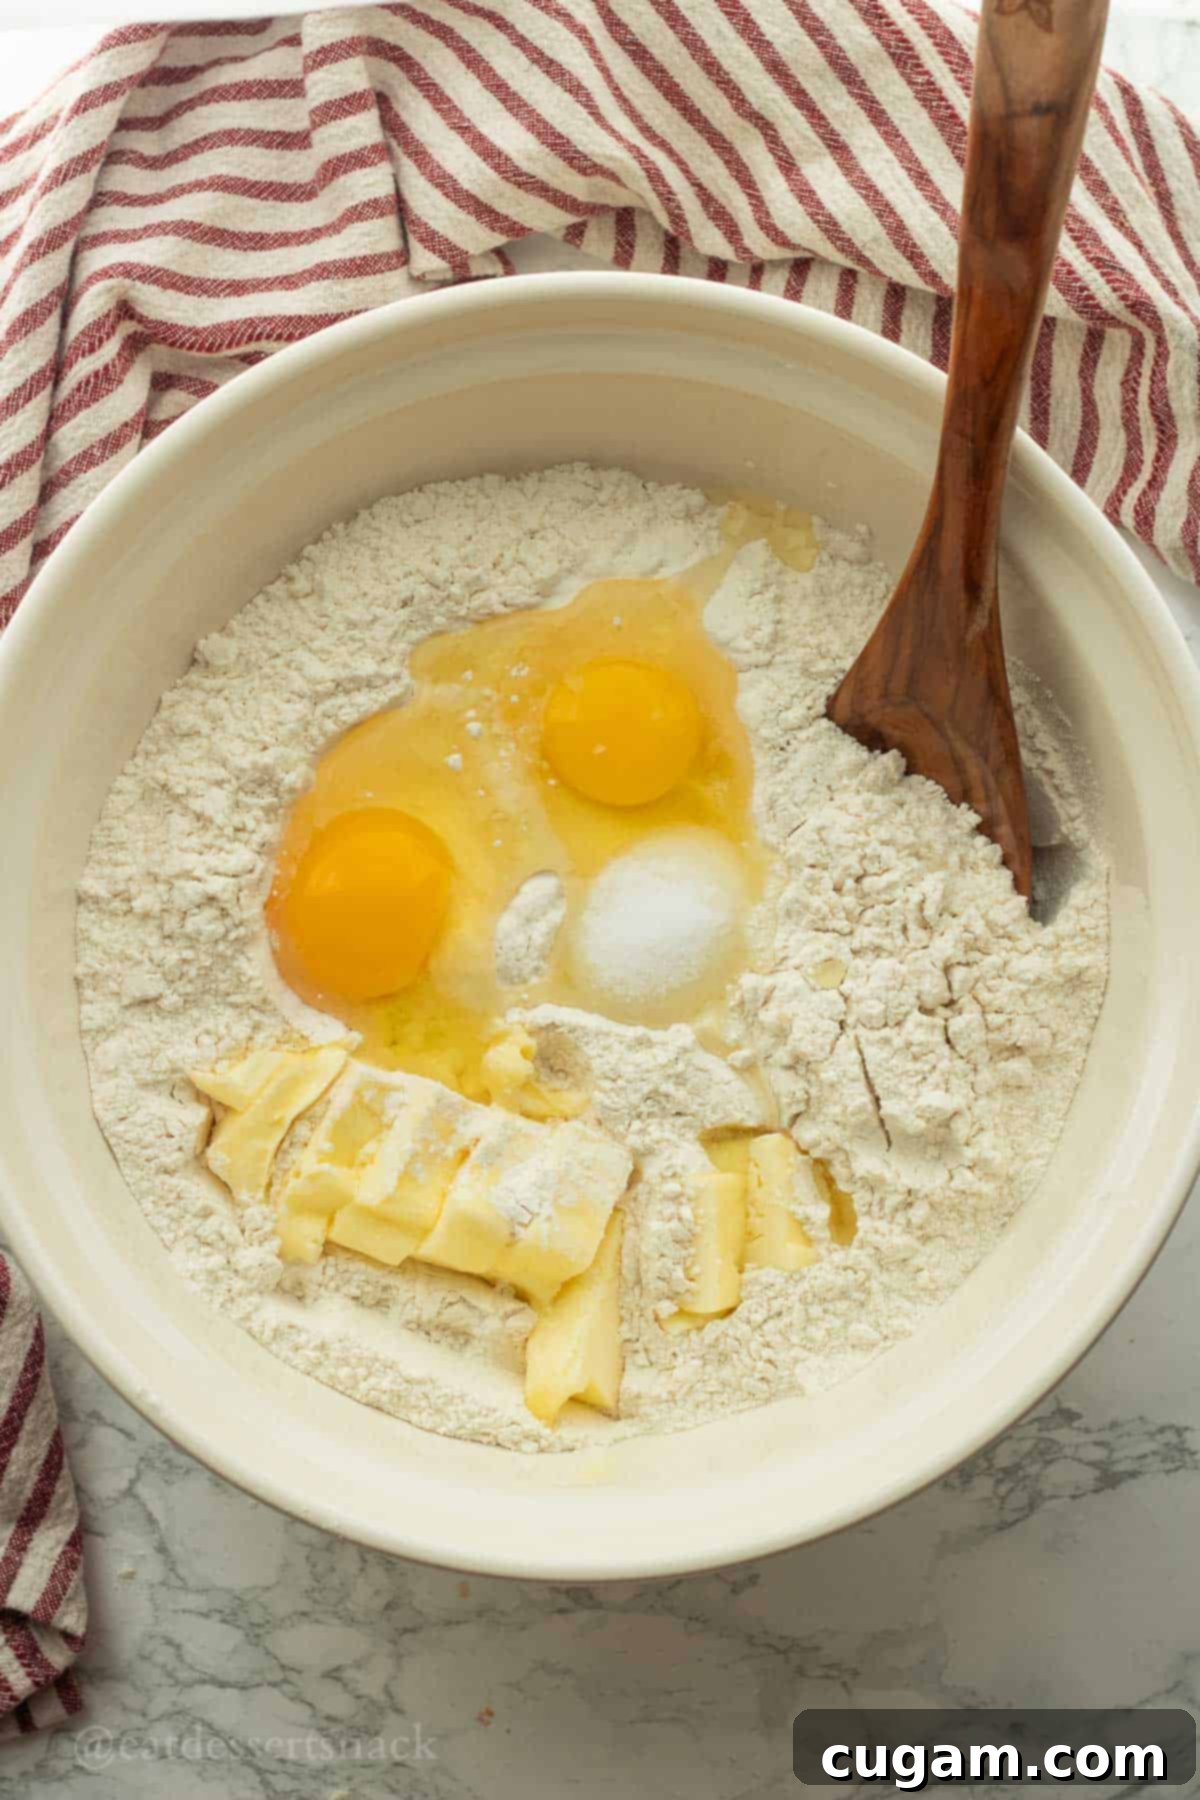
- Step 2: Combine Remaining Ingredients. In a large mixing bowl (ideally the bowl of a stand mixer, which simplifies the kneading process), combine the softened butter, large eggs, salt, and all-purpose flour. For the most consistent and perfectly reproducible results in baking, I highly recommend using a kitchen scale. Place your mixing bowl on the scale, zero out the weight, and then measure the flour by weight (1000g as specified). This method eliminates the common issues and inaccuracies often caused by inconsistent volume measurements of flour, such as scooping and packing differences.
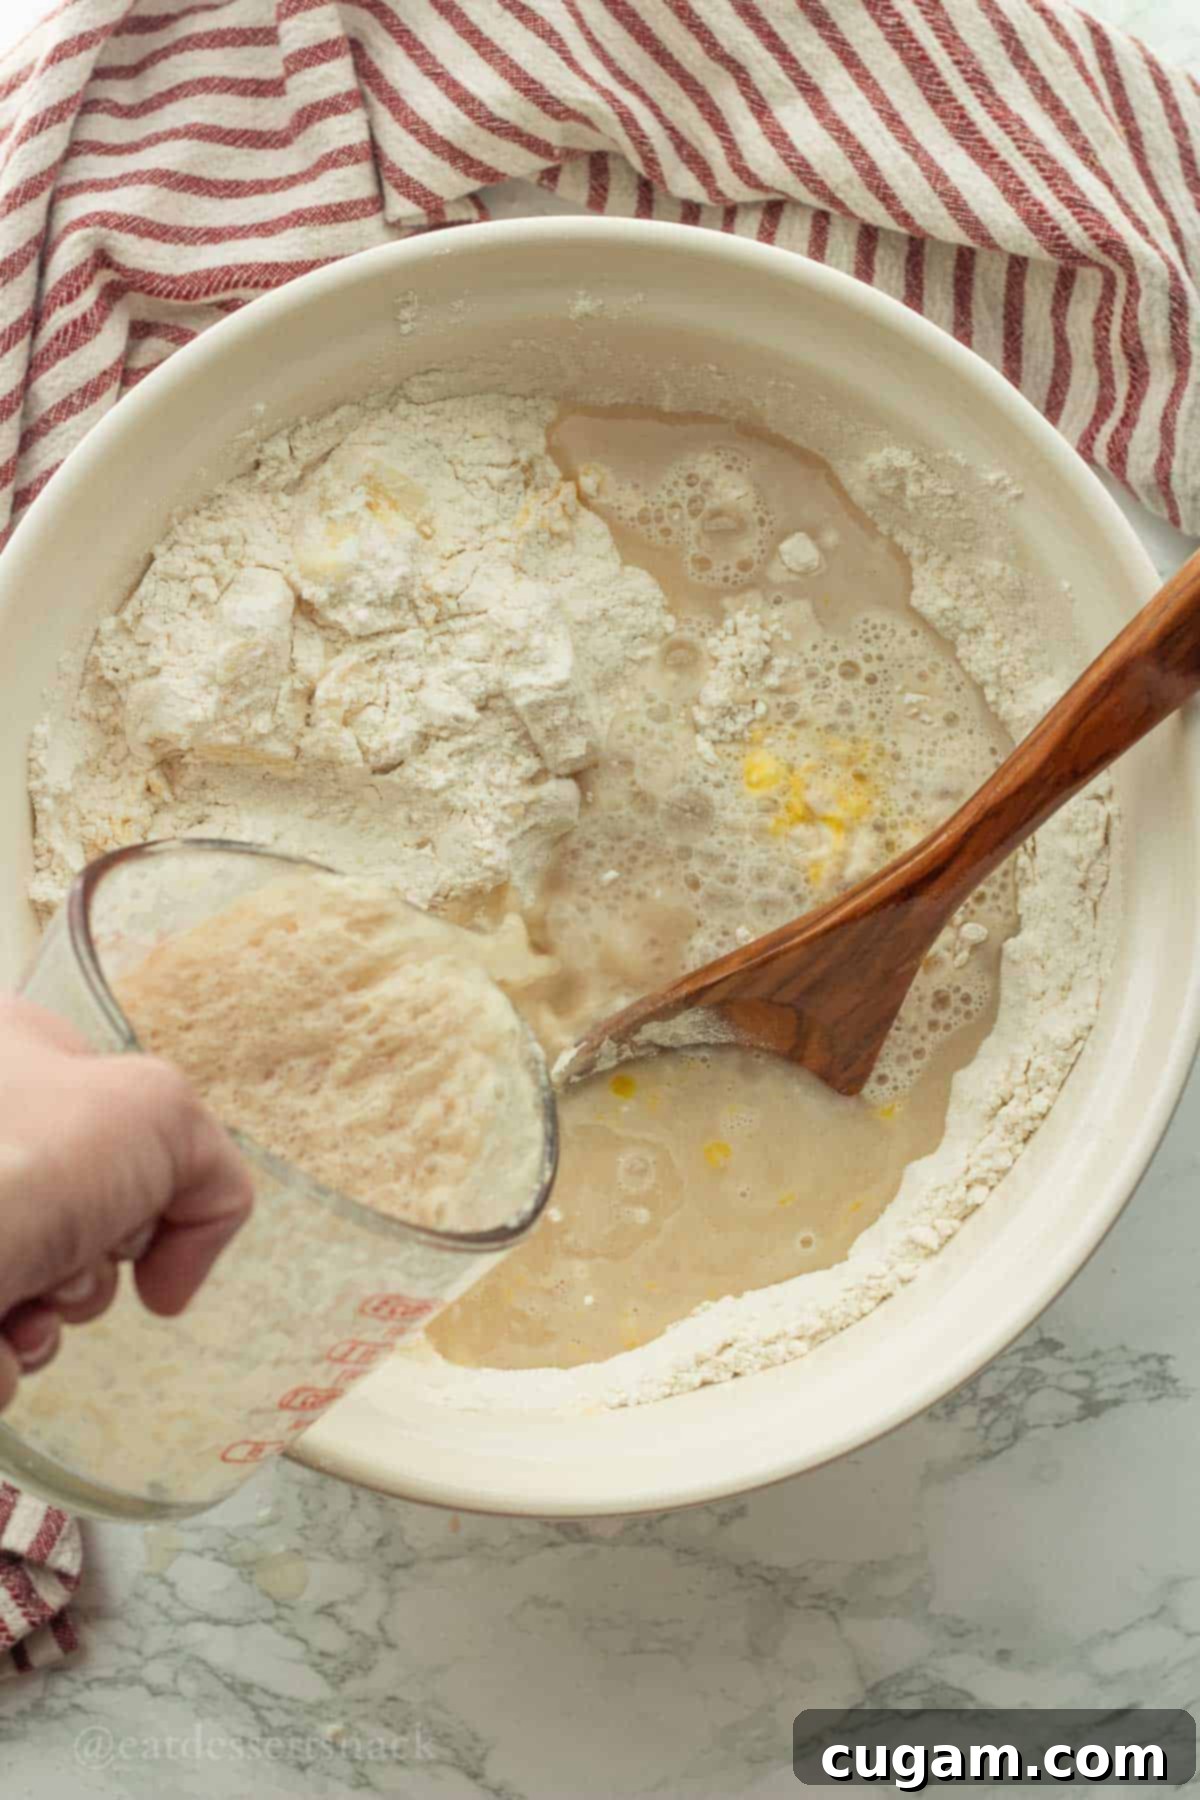
- Step 3: Knead the Dough and First Rise. Pour the activated yeast mixture (from Step 1) into the large mixing bowl with your other prepared ingredients. Now, it’s time for the crucial kneading process! If you are kneading by hand, work the dough vigorously for 7-10 minutes, continually folding and pushing, until it transforms into a smooth, elastic, and slightly tacky but no longer overly sticky mass. If you are fortunate enough to use an electric mixer equipped with a dough hook, knead the dough on medium speed for 5-7 minutes. The dough is perfectly kneaded when it passes the “windowpane test” – you should be able to stretch a small piece of dough thinly enough to see light through it without it tearing. Transfer the well-kneaded dough to a clean, lightly oiled bowl, turning it over once to ensure it’s coated on all sides. Cover the bowl securely with plastic wrap or a clean, damp dish towel. Place the bowl in a warm, draft-free spot and allow it to rise for approximately 1 hour, or until the dough has almost doubled impressively in size.
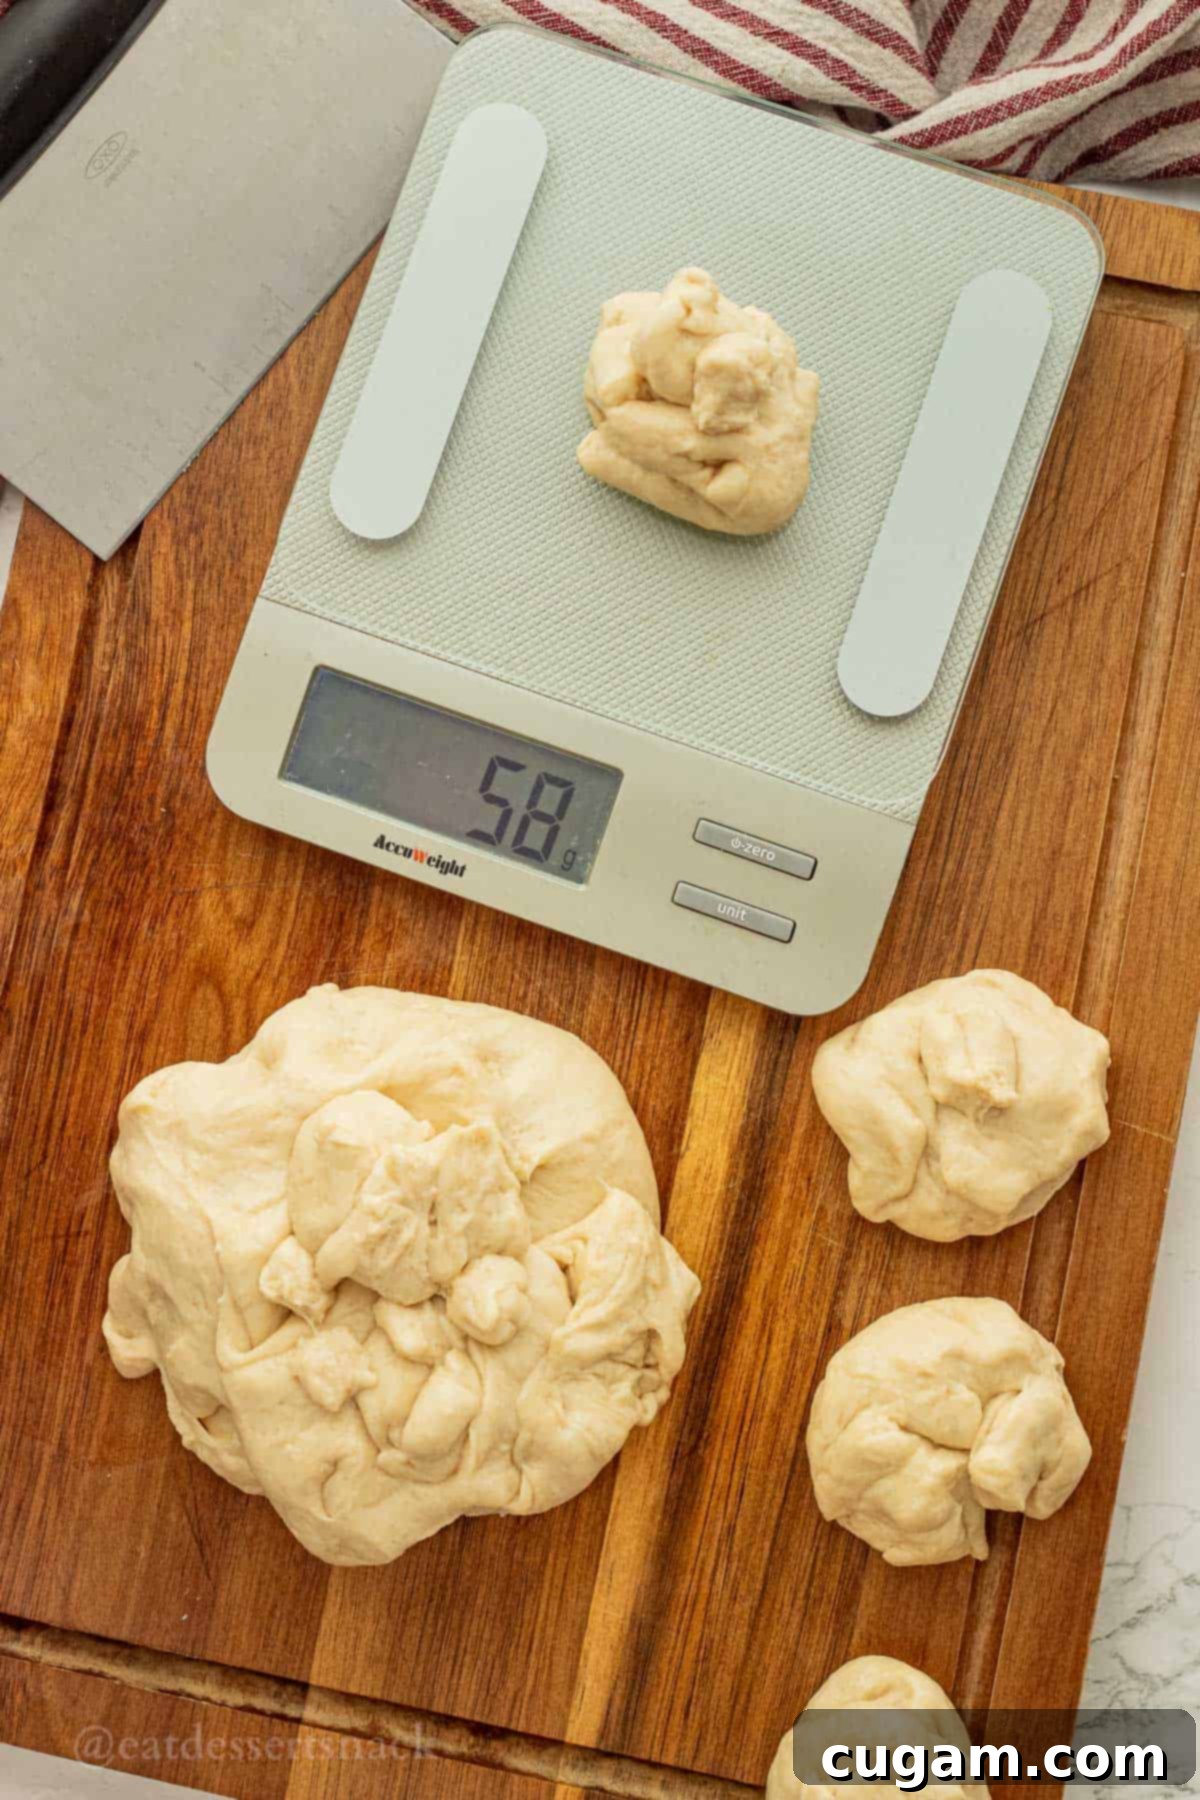
- Step 4: Divide the Dough. Once the dough has successfully completed its first rise and achieved its doubled volume, gently punch it down to release the accumulated air. Transfer the dough mass to a lightly floured work surface. To ensure that every roll bakes up uniformly and looks professionally made, divide the dough into 30 equal portions. For a standard, golf ball-sized roll, each individual portion should ideally weigh approximately 58-60 grams. A smart and efficient trick is to weigh the entire dough mass first, then divide that total weight by your desired number of rolls (e.g., total dough weight / 30 rolls) to calculate the exact target weight for each dough ball. I find it most efficient to cut about half of the rolls, shape them, place them in the baking pan, and then repeat this process with the remaining dough. If you prefer to make 24 slightly larger rolls, aim for about 72-73 grams per roll. For 36 smaller, more petite rolls, target approximately 49-50 grams each.
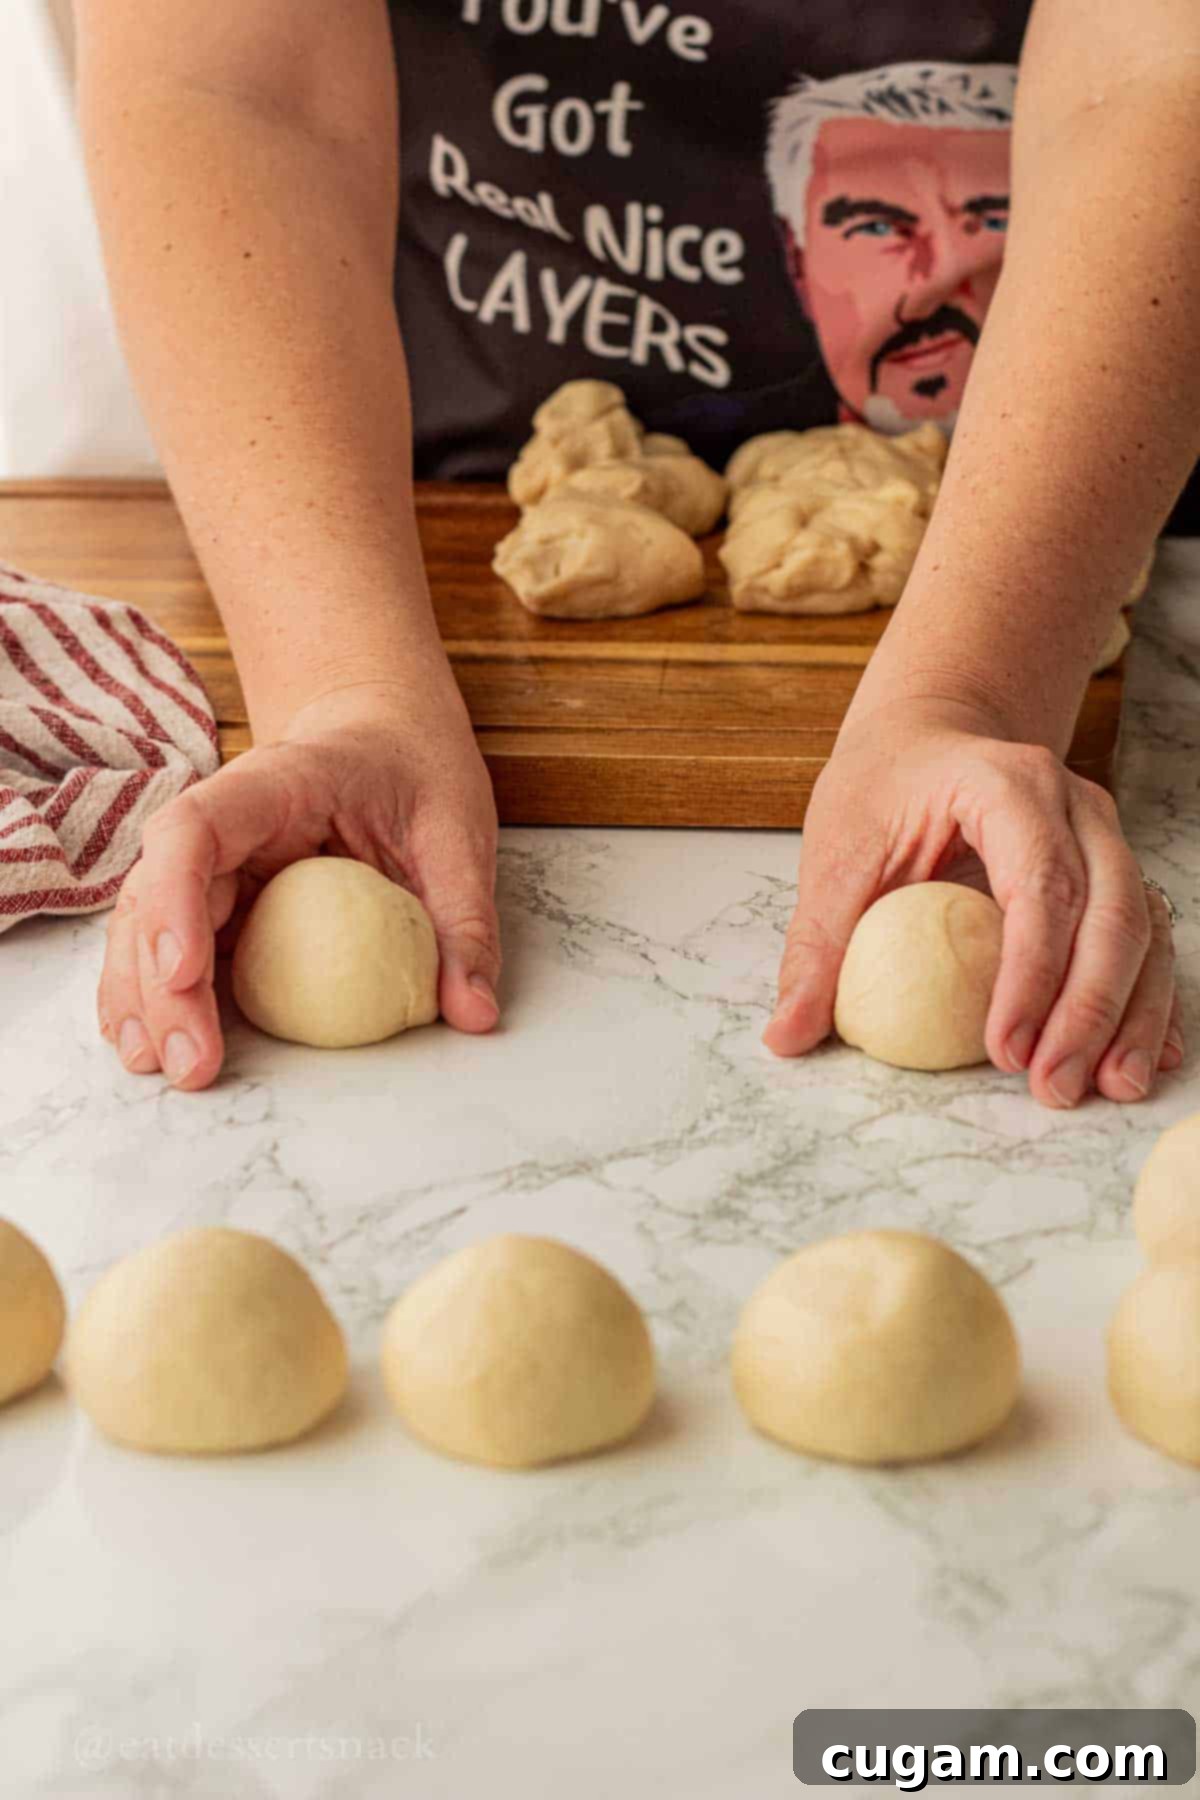
- Step 5: Shape the Rolls (Bakery Style). This step is the key to creating those beautiful, uniform, and professionally-looking dinner rolls. Take each individual dough ball and cup your hand over it in a “C” shape on a clean, flat work surface (avoid adding extra flour here, as it can cause the dough to slip). Begin moving your hand in a small, tight circular motion, applying gentle yet firm downward pressure. This precise technique works by keeping the top surface of the dough smooth and taut, while the circular movement simultaneously drags and tucks the edges of the dough underneath the ball. This stretching action creates a perfectly round, evenly shaped roll with a beautifully smooth top. Don’t hesitate to practice doing this with both hands – developing this ambidexterity will significantly speed up your shaping process and improve consistency! (A helpful video demonstrating this exact technique is provided below Step 6 in the recipe card).
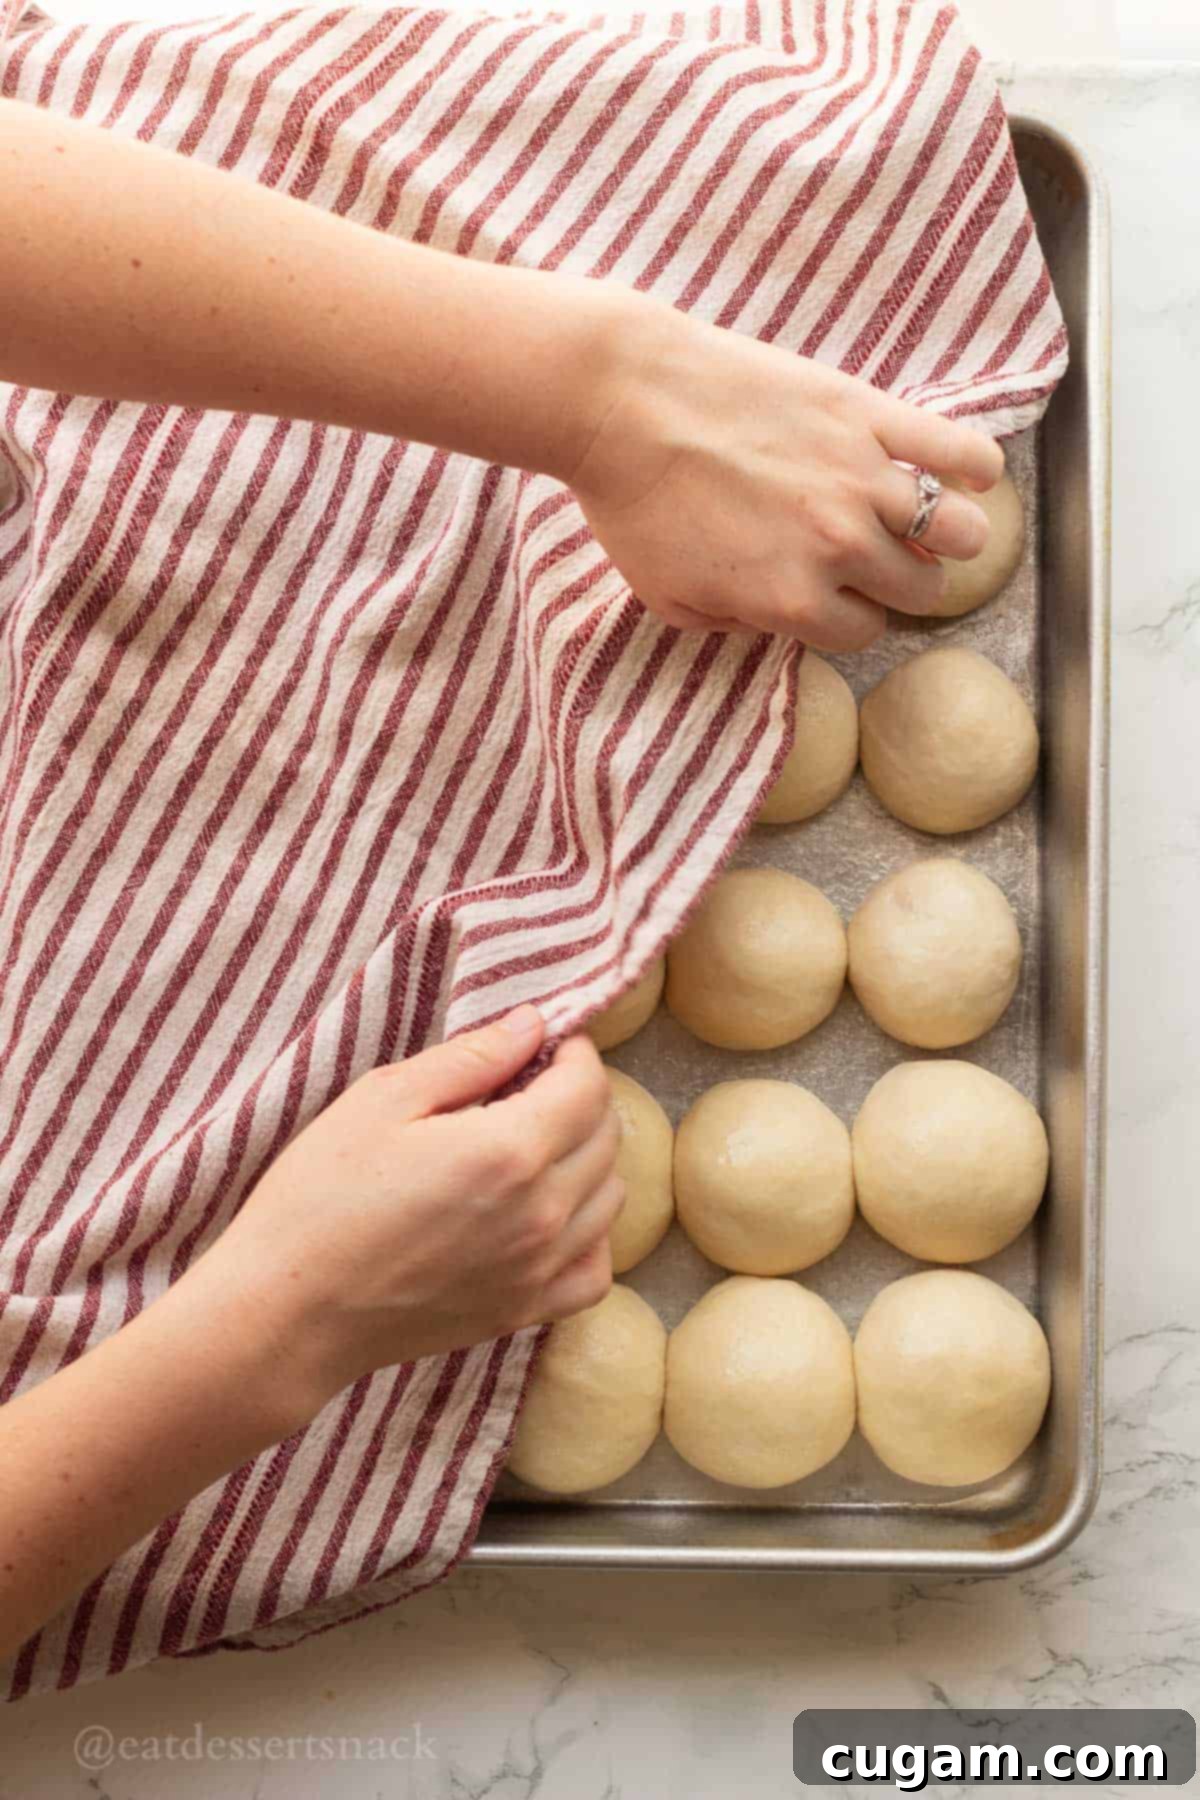
- Step 6: Second Rise (Proofing). Carefully arrange the shaped dough balls into a greased 11 x 18 inch baking pan with rims. For a batch of 30 rolls, aim to arrange them in approximately 6 rows of 5, leaving a small amount of space between each roll to allow for expansion during rising. Lightly spray the tops of the rolls with baking spray or a fine mist of water to prevent them from drying out and forming a crust during this crucial proofing stage. Then, cover the pan loosely with plastic wrap or a clean, damp dish towel. Place the covered pan in a warm, draft-free spot and allow the rolls to rise for about 1 hour, or until they have noticeably doubled in size and the gaps between the rolls are mostly filled in. It’s a good idea to check on them around the 45-minute mark; cooler room temperatures may require a bit longer for optimal rising. Be mindful not to overproof, as this can lead to the gluten structure weakening, potentially causing the rolls to collapse slightly in the oven and resulting in a less fluffy or even slightly sunken texture.
Pro Tip for Seamless Timing: To perfectly synchronize your oven’s preheating with the completion of the rolls’ second rise, set an additional timer for 45 minutes after you place the rolls down for their second proof. When this timer goes off, promptly turn your oven on to 375℉ (190℃). This strategic timing ensures the oven will be fully preheated and at the ideal temperature during the remaining 15-20 minutes of the rising time, allowing your perfectly proofed rolls to go straight into a hot oven when they are ready, which is crucial for a beautiful rise and golden crust.
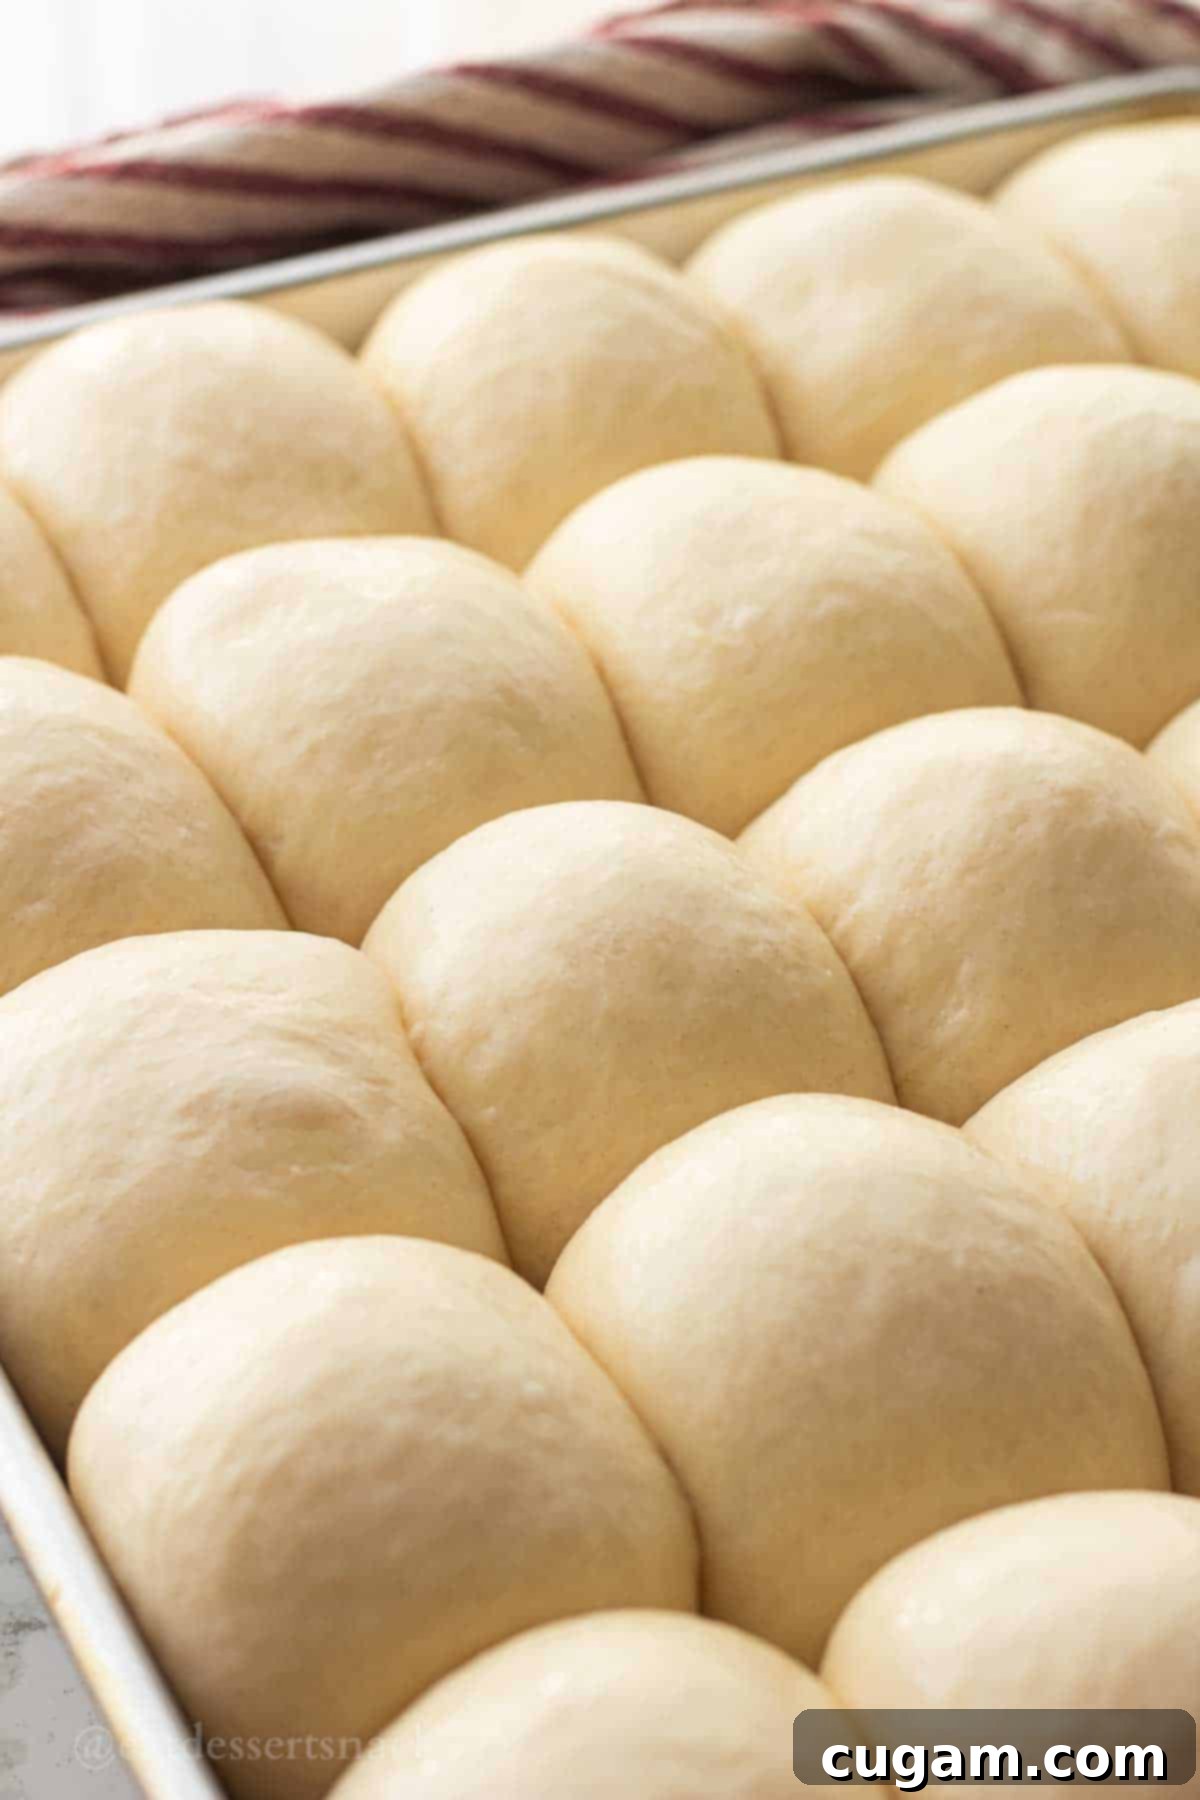
- Step 7: Bake to Golden Perfection. Once your rolls have beautifully risen and filled the pan, gently transfer the baking pan into your preheated 375℉ (190℃) oven. For the absolute best results, including wonderfully browned bottoms and an evenly golden crust, place the baking pan on the bottom or middle shelf of the oven. Bake for approximately 15-16 minutes. Keep a close eye on them during the final few minutes of baking; they should achieve a rich golden-brown color on top and be thoroughly cooked through, feeling light and springy to the touch.
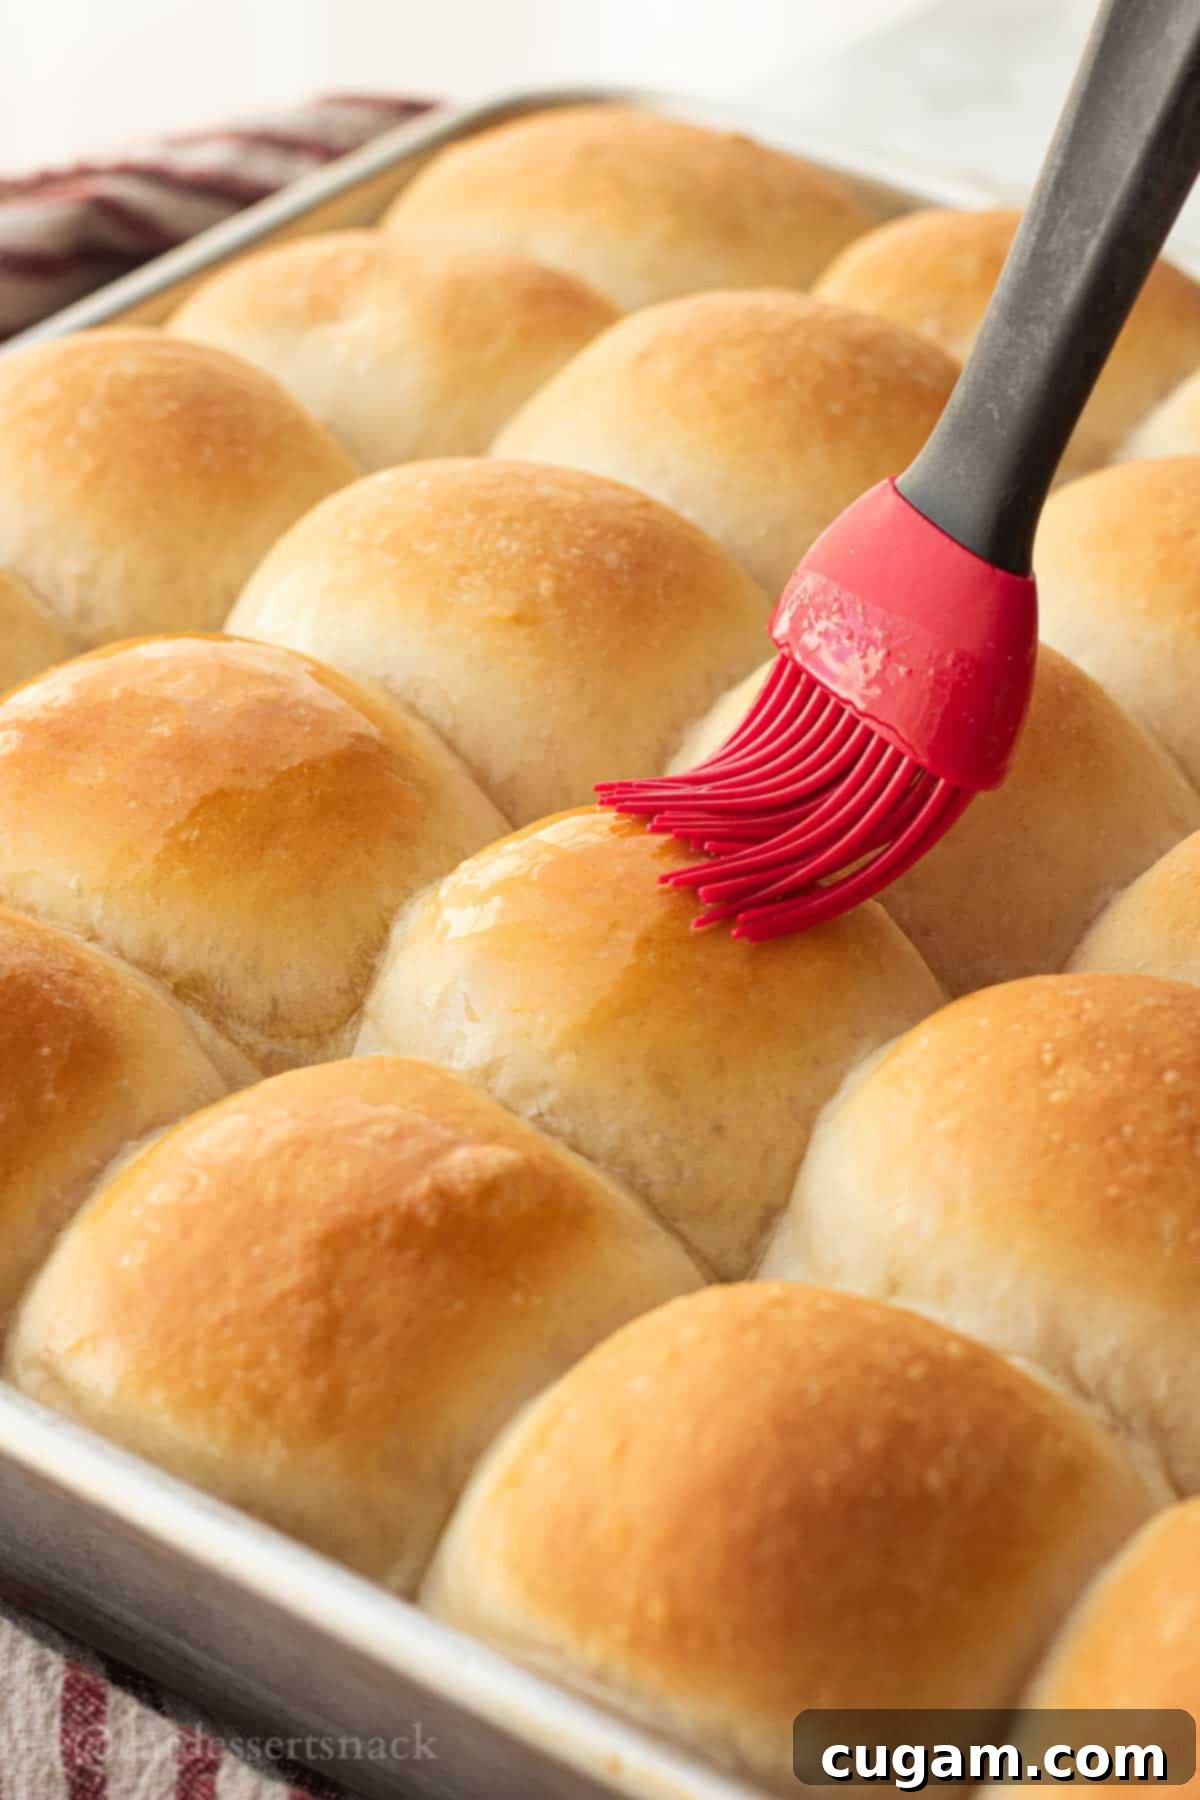
- Step 8: Butter and Serve. Immediately after carefully removing the piping hot, golden-brown rolls from the oven, melt 2-3 Tablespoons of butter. Using a pastry brush, generously brush the warm, glistening melted butter over the tops of the rolls while they are still hot. This crucial step is essential for imparting incredible flavor, creating a beautiful shiny finish, and, most importantly, for keeping the crust incredibly soft and tender. If you prefer a simpler method, you can also rub a stick of cold butter directly onto the hot rolls – the residual heat will melt it perfectly. Serve your warm, fluffy, old-fashioned yeast dinner rolls immediately and savor every delicious bite!
📌 Top Tips & Hacks for Perfect Yeast Rolls
Achieving consistently perfect, wonderfully fluffy dinner rolls is an attainable goal with these expert tips, clever hacks, and common-sense advice:
- Always Weigh Your Flour for Accuracy! This might be the single most crucial tip for achieving consistent and reliable baking results. Volume measurements (using cups) for flour can vary wildly depending on how it’s scooped, settled, or packed, leading to significant differences in dough hydration and texture. Weighing your flour (using 1000g for 7 cups in this recipe) ensures you have the precise amount every single time, leading to dough with the correct consistency and optimal structure. I’ve personally relied on this precise kitchen scale for years, and it truly is a game-changer for all baking endeavors.
- Calibrate Your Scale Regularly: If you ever have any doubt about the accuracy of your kitchen scale, a quick and simple test can instantly put your mind at ease. A standard stick of butter consistently weighs 113 grams (or 4 ounces). Simply zero out your scale, place an unopened stick of butter on it, and confirm that it reads 113g. This straightforward calibration check ensures all your future measurements will be spot on.
- Master the Bakery-Style Rolling Technique: The secret to achieving those beautifully uniform, perfectly round, and professional-looking bakery-style rolls lies entirely in the shaping technique. I highly recommend watching my detailed video (conveniently found in the recipe card notes) to see exactly how this expert method is executed. While you can certainly learn to roll with one hand, dedicating time to practice with both hands will dramatically improve your speed, efficiency, and consistency, allowing you to quickly shape dozens of rolls with ease.
- Practice Makes Perfect – Embrace the Process: Don’t feel discouraged if your first few attempts at shaping aren’t perfectly round. My own skills were honed working at a busy bakery, where I rolled out hundreds of rolls daily. It’s truly all about developing muscle memory! The more you practice this technique, the quicker and more natural the motion will become. You will be amazed at how effortlessly and rapidly you can shape rolls once you truly get the hang of it.
- The Transformative Power of Post-Bake Buttering: This step is non-negotiable for truly exceptional rolls! Generously brushing the piping hot rolls with melted butter (or gently rubbing a stick of butter directly onto them) immediately after they emerge from the oven is transformational. It creates a gorgeous, glossy, golden finish, adds an extra layer of rich, irresistible flavor, and, most importantly, helps to soften the crust, ensuring the rolls remain wonderfully tender and delicious. A high-quality pastry brush is ideal for an even and thorough coat.
- Create an Ideal Warm Environment for Rising: If your kitchen is on the cooler side, you’ll notice your dough takes significantly longer to rise. To help speed things along and create an optimal environment, you can place the covered dough in a slightly warm (but never hot!) oven that has been preheated for just 2-3 minutes and then promptly turned off. Alternatively, a warm, draft-free spot near a sunny window, or above a warm appliance (like a refrigerator or dishwasher during its cycle), can also work wonders in encouraging a good rise.
- Don’t Over-Flour Your Work Surface: When kneading or shaping your dough, resist the urge to use too much extra flour on your work surface. Excess flour can be absorbed into the dough, altering its hydration level and potentially making the rolls dry or tough. Use just enough flour to prevent sticking, and rely more on good kneading technique and a bench scraper if the dough is a bit sticky.
❓ Frequently Asked Questions About Homemade Yeast Rolls
The most common culprit for dense, heavy, or non-fluffy rolls is directly related to yeast activity and proofing. Several factors can impact this:
- Incorrect Water Temperature: If your water was too hot (exceeding 120°F/49°C), it most likely killed the yeast, preventing any rise. Conversely, if the water was too cold, the yeast wouldn’t activate properly or quickly enough, resulting in a sluggish or incomplete rise.
- Underproofing: If the rolls are not allowed to rise for a sufficient amount of time during either their first or second proofing, they won’t develop enough internal air pockets and gluten structure. This leads to a dense, heavy, and doughy texture when baked. Rolls should almost double in size before baking.
- Overproofing: On the flip side, if the rolls rise too much and go past their peak, the delicate gluten structure can weaken significantly. This often causes them to collapse in the oven or during the initial stages of baking, resulting in a less fluffy or even sunken texture. It’s a delicate balance to find the sweet spot!
- Inactive or Old Yeast: Always ensure your yeast is fresh and active. If it doesn’t foam up after being bloomed in warm water with sugar (as in Step 1), it may be expired and won’t work.
The ideal temperature range for yeast dough to rise efficiently is commonly referred to as “room temperature,” which typically falls between 70℉-77℉ (21-25℃). Within this comfortable range, the yeast is most active and thrives, allowing the dough to rise effectively and develop its characteristic flavor without developing any off-flavors. If your room or kitchen is colder than this, the rising time will be significantly prolonged. If it’s excessively warm, the yeast might become overactive, causing the dough to rise too quickly and potentially negatively affecting its final flavor or internal structure. Always aim for a warm, draft-free spot for optimal proofing.
Absolutely! These delightful old-fashioned yeast rolls freeze beautifully, offering excellent flexibility for meal planning. You can successfully freeze them whether they are fully baked or in their raw dough state, and they will maintain their quality for up to 3 months.
To freeze raw dough: Follow the recipe diligently until the completion of Step 3 (kneading and the first rise). After the first rise, gently punch down the dough, then divide and roll it into individual balls as instructed in Steps 4 and 5. Place these raw dough balls onto a baking sheet lined with parchment paper, ensuring they don’t touch, and freeze them until they are completely solid. Once frozen solid, transfer them to a freezer-safe, airtight bag or container for long-term storage.
To bake from frozen: When you’re ready to enjoy fresh rolls, remove the desired number of frozen dough balls from the freezer and place them onto a greased baking sheet, leaving some space for expansion. Cover them loosely with plastic wrap or a clean, damp dish towel. Allow them to thaw and complete their second rise for approximately 4-5 hours in a warm, draft-free environment. To expedite this thawing and rising process, you can place the covered dough in an oven that has been briefly preheated for just 2-3 minutes and then immediately turned off. Crucially, remember to remove the rolls from the oven before you fully preheat it for baking! Once the rolls are fully thawed and have visibly doubled in size, proceed to bake them as directed in the recipe (Steps 7 and 8).
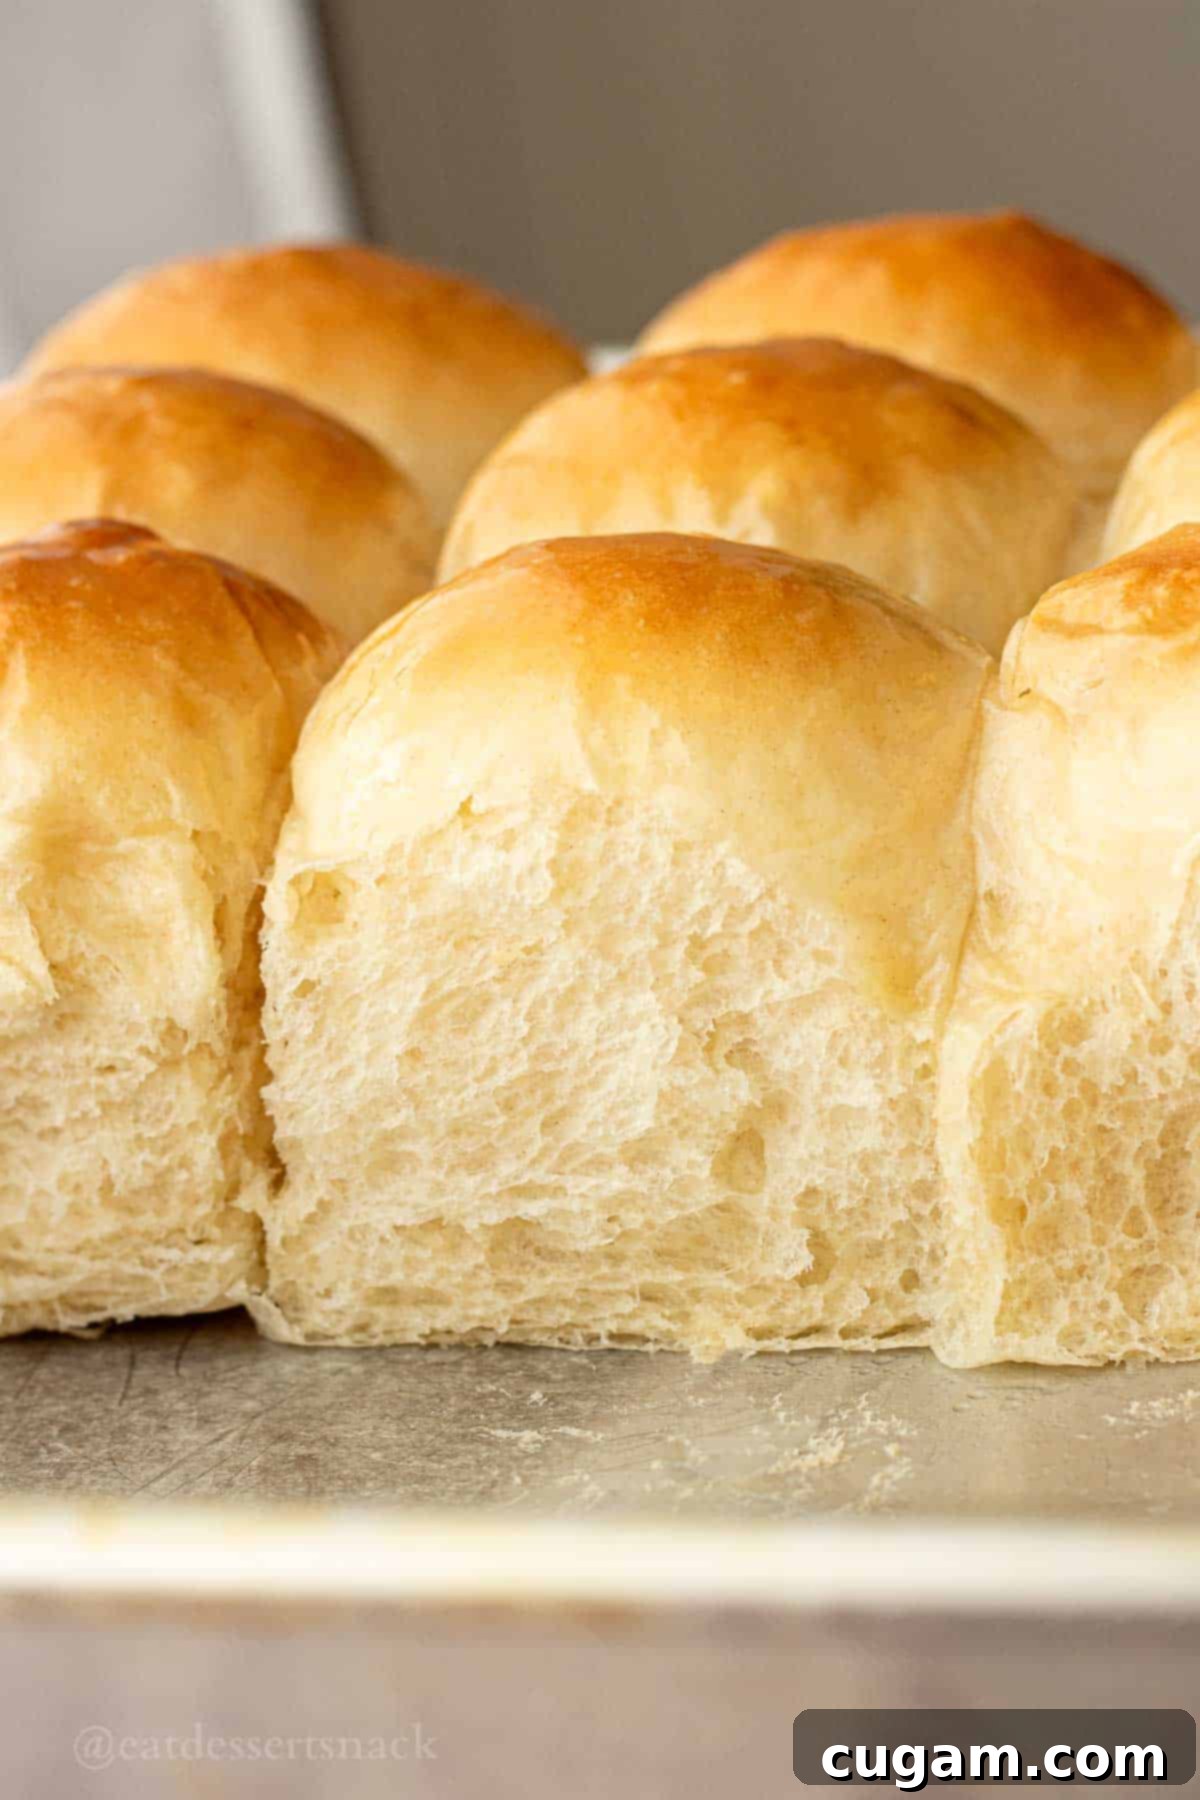
Keeping homemade rolls wonderfully soft and fresh involves a synergistic combination of key ingredients and careful technique throughout the baking process. The generous amounts of rich butter and eggs used in this particular recipe play a vital role in enriching the dough. This enrichment naturally helps the rolls retain their moisture and stay incredibly tender and fresh for several days after baking. Furthermore, ensuring proper kneading (to develop a strong yet elastic gluten network) and allowing the dough to undergo two distinct rises are absolutely crucial for achieving that characteristic soft, airy, and fluffy crumb. Finally, an important finishing touch: brushing the tops of the rolls with melted butter immediately after they come out of the oven adds valuable moisture and creates a beautifully soft, golden crust that helps to seal in their freshness.
To effectively prevent your delicious fresh rolls from hardening and losing their delightful texture, proper storage is paramount. Always store them in an airtight container at room temperature, away from any direct heat sources or harsh sunlight, which can rapidly dry them out. If you find that your rolls have already started to dry out a bit and become firm, don’t despair! You can often revive them by placing a few slices of soft, fresh bread (like regular sandwich bread) into the airtight container with the rolls. Leave them overnight; the moisture from the fresh bread will gradually transfer to your rolls, helping to soften them back up considerably.
With careful and proper storage, your delectable homemade dinner rolls can maintain their optimal freshness for various durations:
Room Temperature: They will stay fresh and soft for up to 3 days when stored in an airtight container.
Frozen (after baking): If properly wrapped and stored in a freezer-safe bag or container, baked rolls can last remarkably well for up to 3 months.
Reheating dinner rolls to restore their fresh-baked warmth and delightful softness is quite simple, whether you’re heating a few or a larger batch:
- Microwave: For just a few rolls, place them on a microwave-safe plate and heat for a very short duration, typically 5-10 seconds. Be extremely careful not to overheat, as microwaving for too long can quickly make them tough and chewy.
- Oven: For a larger batch (6 or more rolls), the oven is often the best method. Wrap the rolls loosely in aluminum foil to trap moisture and prevent drying. Place the foil-wrapped rolls in a preheated oven at 350℉ (175℃) for about 10 minutes, or until they are heated through and feel soft again.
🥖 More Delicious Bread Recipes to Try
If you’ve thoroughly enjoyed the process of making these incredibly fluffy yeast dinner rolls and are eager to expand your baking skills, you’ll surely love exploring other delightful homemade bread recipes from my kitchen. Broaden your baking repertoire and discover new favorites with these fantastic options:
- Soft Fluffy French Bread
- Garlic Cheddar Drop Biscuits
- Sourdough Discard Banana Bread
- Lemon Poppy Seed Zucchini Bread
Did you try this recipe? I would absolutely love to hear about your baking experience! Make sure to leave a ⭐️ star rating and a thoughtful comment below the recipe card. Your valuable feedback is incredibly helpful to me and to other enthusiastic readers in our growing baking community!
📲 FOLLOW Sara on Social Media! 👋 Join our community on Facebook, Instagram, or Pinterest to discover the very latest delicious creations, helpful baking tips, and behind-the-scenes glimpses from my kitchen!
📝 Printable Recipe Card
Old-Fashioned Yeast Rolls Recipe
Pin Recipe
Ingredients
- 2 cups warm water (100-110℉) 475 mL
- ¼ cup honey 50 g
- 4 teaspoons active dry yeast 14 g
- ½ cup salted butter, softened 113 g
- 2 large eggs
- 2½ teaspoons fine sea salt
- 7 cups all-purpose flour 1000 g
- 3-4 Tablespoons melted butter for brushing tops of rolls
Instructions
-
In a medium bowl or glass measuring cup, combine the warm water (ensure its temperature is precisely between 100-110℉ / 38-43℃), the honey, and the active dry yeast. Stir gently to combine. Set this mixture aside and allow it to rest for 5-10 minutes until the yeast becomes visibly foamy and bubbly on top. This crucial step confirms that your yeast is active and robust, ready to make your rolls rise beautifully.
-
In a large mixing bowl (or the bowl of a stand mixer fitted with a dough hook), add the softened butter, large eggs, salt, and all-purpose flour.
For the most precise and consistent baking results, I highly recommend using a kitchen scale. Place your mixing bowl on the scale, zero it out, and then add the flour by weight (1000g). This method helps eliminate common inaccuracies often caused by inconsistent volume measurements of flour.
-
Pour the activated yeast mixture (from Step 1) into the large mixing bowl with the other prepared ingredients. Now, it’s time to knead! If kneading by hand, work the dough vigorously for 7-10 minutes, continually folding and pushing, until it transforms into a smooth, elastic, and slightly tacky but no longer overly sticky mass. If using an electric mixer with a dough hook, knead on medium speed for 5-7 minutes. The dough is perfectly kneaded when it passes the “windowpane test” – you should be able to stretch a small piece of dough thinly enough to see light through it without tearing. Transfer the well-kneaded dough to a clean, lightly oiled bowl, turning it over once to ensure it’s coated on all sides. Cover the bowl securely with plastic wrap or a clean, damp dish towel. Place the bowl in a warm, draft-free spot and allow it to rise for approximately 1 hour, or until the dough has almost doubled impressively in size.
-
Once the dough has successfully completed its first rise and achieved its doubled volume, gently punch it down to release the accumulated air. Transfer the dough mass to a lightly floured work surface. To ensure uniformly sized rolls, divide the dough into 30 equal portions. For a standard, golf ball-sized roll, each individual portion should ideally weigh between 58-60 grams. A smart and efficient trick is to weigh the entire dough mass first, then divide that total weight by your desired number of rolls (e.g., total dough weight / 30 rolls) to calculate the exact target weight for each dough ball. I find it most efficient to cut about half of the rolls, shape them, place them in the baking pan, and then repeat this process with the remaining dough.
(For 24 rolls, aim for 72-73 grams each. For 36 rolls, target 49-50 grams each.)
-
To shape each dough ball into a smooth, round roll, cup your hand over the dough portion in a “C” shape on a clean, flat work surface. Gently move your hand in a small, tight circular motion.
Apply slight downward pressure with your palm, which helps to keep the top of the roll smooth while the circular movement drags and tucks the edges of the dough underneath, creating a taut, even surface.
Challenge yourself to practice this technique with both hands! It will significantly improve your efficiency.
-
Place the shaped rolls into a greased 11 x 18 inch baking pan with rims. For 30 rolls, arrange them in approximately 6 rows of 5, leaving a small amount of space between each roll (they will expand). Lightly spray the tops of the rolls with baking spray or a fine mist of water to prevent them from drying out during proofing, then cover the pan loosely with plastic wrap or a clean, damp dish towel. Allow them to rise for about 1 hour in a warm place, or until they have noticeably doubled in size and fill the gaps in the pan. Check on them around the 45-minute mark; if your kitchen is cool, they might need a little longer. Crucially, preheat your oven to 375℉ (190℃) when the rolls are at the 45-50 minute mark of their second rise.
-
Bake the risen rolls in the preheated 375℉ (190℃) oven for 15-16 minutes. For best results and perfectly golden-brown bottoms, place the baking pan on the middle or bottom shelf of the oven. Keep a close eye on them during the final few minutes of baking; they should achieve a rich golden-brown color on top and be thoroughly cooked through, feeling light and springy to the touch.
-
Immediately after carefully removing the piping hot, golden-brown rolls from the oven, melt 3-4 Tablespoons of butter. Using a pastry brush, generously brush the warm, glistening melted butter over the tops of the rolls while they are still hot. This step is essential for imparting incredible flavor, creating a beautiful shiny finish, and, most importantly, for keeping the crust wonderfully soft and tender. As an alternative, you can also rub a stick of cold butter directly over the hot rolls – the residual heat will melt it perfectly. Serve these irresistible rolls warm and savor every delicious bite!
Notes
Dough Weight for Even Rolls:
If making 24 rolls: aim for about 72-73 grams per roll.
If making 30 rolls (recommended for optimal size and fit in a standard pan): aim for 58-60 grams per roll.
If making 36 rolls: aim for about 49-50 grams per roll.
Freezing Instructions: These rolls can be frozen for up to 3 months, both baked and raw, making them ideal for meal prep.
- For freezing raw dough balls: Follow the recipe through Step 3 (kneading and first rise). After the first rise, gently punch down the dough, divide it, and roll it into individual balls as per Step 4 and 5. Place these raw dough balls on a baking sheet lined with parchment paper and freeze until solid (this prevents them from sticking together). Once frozen, transfer them to a freezer-safe bag or airtight container for long-term storage.
How to Bake from Frozen Dough: When ready to bake, remove the frozen dough balls and place them onto a greased baking sheet. Cover them loosely with plastic wrap or a clean, damp dish towel. Allow them to thaw and complete their second rise for 4-5 hours in a warm, draft-free area. To expedite this process, you can place the covered dough in an oven that has been briefly preheated for just 2-3 minutes and then immediately turned off. Ensure you remove the rolls from the oven before you fully preheat it for actual baking. Once fully thawed and visibly doubled in size, bake as directed in the recipe (Step 7 and 8).
