Homemade Almond Milk: The Ultimate Guide to Creamy, Dairy-Free Goodness & Zero Waste Tips
In my ongoing quest to live the most vibrant and healthy life possible, I’ve made a significant dietary shift: I’ve given up dairy. While this change is generally effortless and aligned with my wellness goals, there are times when a rich, creamy milk alternative is simply indispensable. Whether it’s to transform a simple bowl of oatmeal into a luxurious breakfast or to lend a silky texture to my morning smoothies, having a high-quality plant-based milk on hand makes all the difference. That’s where homemade almond milk shines, offering a delightful substitute for traditional dairy in countless recipes. Similarly, I’ve found cashew milk to be an excellent, decadent stand-in for crème in various culinary applications, proving that dairy-free living doesn’t mean sacrificing flavor or texture.
The world of store-bought plant milks can be a minefield of added sugars, thickeners, and preservatives. This is precisely why I’ve committed to making my own almond milk at home. Over time, I’ve refined my technique to a point where, with a little foresight (an overnight almond soak is key!), I can whip up a fresh batch in less than five minutes, including cleanup. This simple act not only ensures I have the freshest, most wholesome almond milk available but also gives me complete control over the ingredients, avoiding any unwanted additives found in many commercial varieties.
Why Choose Homemade Almond Milk Over Store-Bought Options?
The appeal of homemade almond milk goes far beyond just dietary preferences; it’s about quality, taste, and taking control of what goes into your body. While store shelves are brimming with almond milk options, many contain a surprisingly small percentage of actual almonds, often diluted with water, thickeners like carrageenan or gellan gum, and various stabilizers and emulsifiers to create a uniform texture. They frequently include added sugars, flavorings, and even vitamins and minerals that can be better sourced from a balanced diet.
Making your own almond milk, on the other hand, means you’re working with just two primary ingredients: raw organic almonds and filtered water. The result is a milk that is pure, fresh, and tastes incomparably better than its commercial counterparts. It has a cleaner, more authentic almond flavor that truly enhances your dishes and drinks without any distracting aftertastes. Furthermore, by making it yourself, you avoid all the unnecessary additives, ensuring a cleaner product that supports your health and well-being. It’s a simple luxury that elevates everyday eating experiences, from a creamy latte to a rich soup base.
The Secret to Easy Homemade Almond Milk and a No-Waste Approach
One of the initial concerns I had about making my own almond milk was the leftover almond pulp. The thought of wasting such a nutrient-rich byproduct simply didn’t sit right with my commitment to mindful eating and minimizing food waste. Driven by this aversion to waste, I embarked on a journey of experimentation, discovering a myriad of creative and delicious ways to repurpose the almond pulp. These discoveries not only add fantastic texture and flavor to various dishes but also significantly boost their nutritional value, transforming what might be considered waste into a valuable ingredient.
Preparing this homemade delight is genuinely straightforward. If you don’t already own one, I highly recommend investing in a good quality nut milk bag. It’s a game-changer for achieving a smooth, pulp-free milk. However, if you’re eager to get started and your nut milk bag hasn’t arrived yet, a fine mesh sieve or even a few layers of cheesecloth can work as a temporary solution to strain the almond pulp from your freshly blended milk.
How to Make the Best Homemade Almond Milk: Step-by-Step
Step 1: Soak Almonds and Then Blend with Water
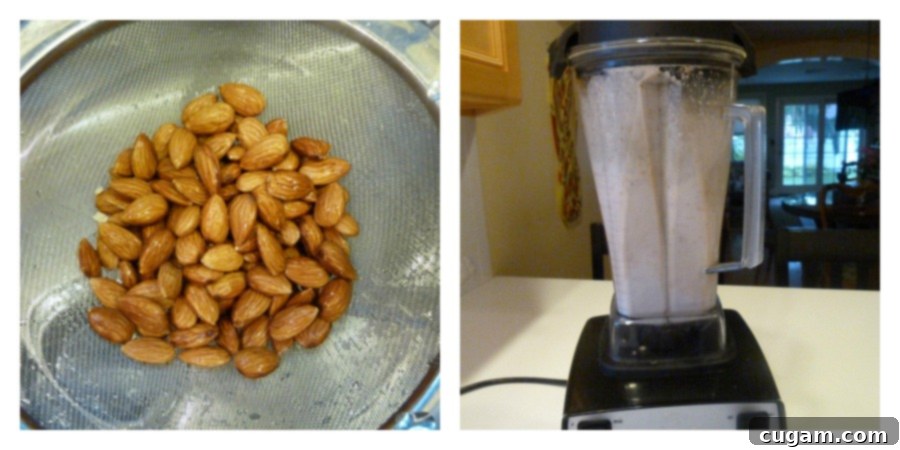
The soaking process is crucial for unlocking the full nutritional potential of almonds and aiding digestion. Plan ahead and soak your raw organic almonds in cold, filtered water overnight (8-12 hours). This simple step softens the almonds, making them easier to blend into a smooth, creamy milk. If you’re short on time, a quick soak in boiling water for 30-60 minutes can also work wonders. Once soaked, drain and rinse them thoroughly before combining with fresh filtered water in a high-speed blender.

Step 2: Strain for Silky Smoothness
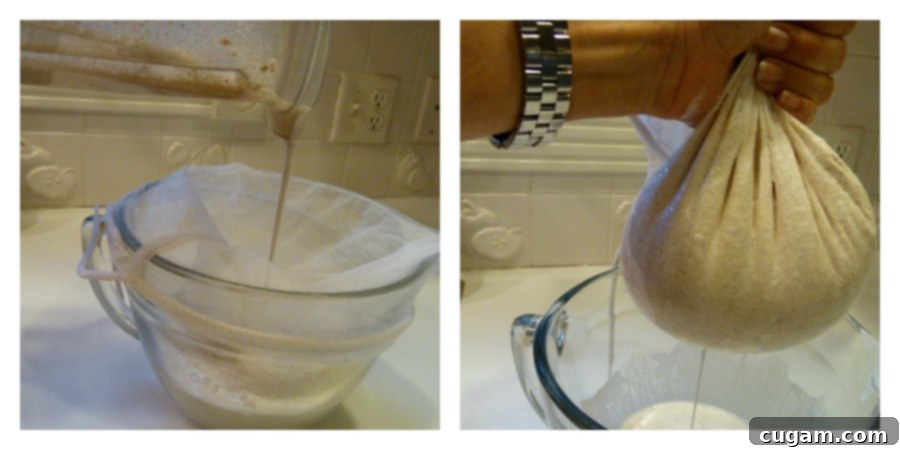
Once blended, the mixture will be a milky liquid with fine almond pulp. To achieve that coveted silky-smooth consistency, you’ll need to strain it. Place your nut milk bag over a large bowl and slowly pour the blended almond mixture into the bag. Gently lift the bag and allow the milk to filter through into the bowl. Squeeze the bag firmly but carefully to extract every last drop of delicious almond milk. The more you squeeze, the more milk you’ll yield and the drier your pulp will be, making it ideal for future uses.

Step 3: Preserve the Pulp – A Treasure, Not Waste!
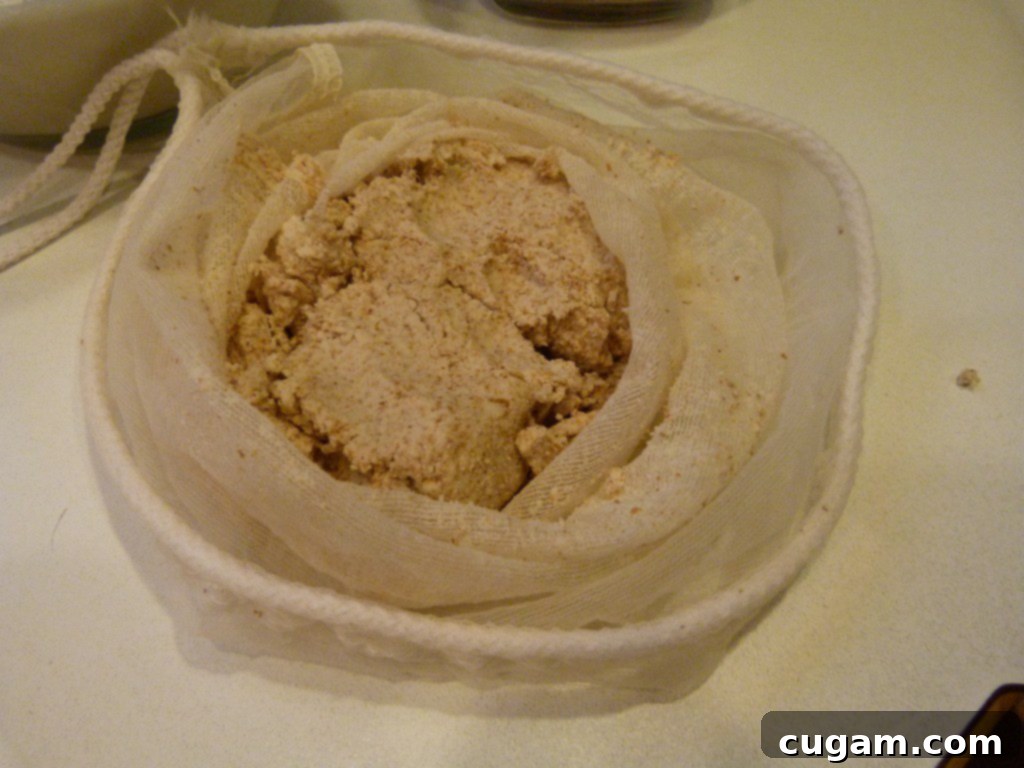
Resist the urge to discard the leftover almond pulp! This is a valuable ingredient brimming with fiber and nutrients. Store it properly for future culinary adventures. You can keep it in an airtight container in the fridge for up to a week, or freeze it for longer storage. I’ve found it to be an incredible addition to many recipes, like this wholesome banana bread recipe, where it adds both moisture and a subtle nutty flavor. Explore the “Uses for Almond Pulp” section below for more inspiring ideas!

Step 4: Savor Your Homemade Creation
Now comes the best part: enjoying your freshly made almond milk! Pour it into a clean glass jar with a tight-fitting lid and store it in the refrigerator. It will stay fresh for up to four days. Remember, natural separation is common with homemade almond milk, so always give it a good shake before each use. For longer storage, you can even freeze portions in ice cube trays, perfect for adding to smoothies later. Once you taste the fresh, unadulterated flavor of homemade almond milk, you’ll wonder why you ever bought it from the store.
📖 Recipe

Homemade Almond Milk
Rate this Recipe
Pin Recipe
Equipment
-
Nut milk bag
-
13-oz. glass bottles
-
Vitamix Blender
Ingredients
- 1 cup raw organic almonds soaked*
- 3 cups filtered water
Optional flavor enhancers:
- 2-4 pitted dates 1 teaspoon pure vanilla extract, 2 teaspoons raw cacao powder, 5 large strawberries, 2 teaspoons maple syrup, 1 teaspoon ground cinnamon, pinch of sea salt
Instructions
-
1. Drain, rinse, and drain again the almonds that have been soaking (see notes below* for soaking instructions).
-
2. Combine the soaked and rinsed almonds and 3 cups of filtered water in a high-speed blender. Blend on high for approximately 1 minute until a smooth, milky consistency is achieved.
-
3. Place a nut milk bag (or several layers of cheesecloth, or a fine-mesh sieve) over a large bowl. Slowly pour the entire contents of the blender into the bag. Lift the bag, allowing the almond milk to stream into the bowl, then gently squeeze the bag to extract the remaining milk. Continue squeezing until all the liquid has been released and only dry almond pulp** remains in the bag. Do not discard the almond pulp; refer to the notes below for creative usage suggestions.
-
4. Store your freshly made almond milk in a glass jar with a tight-fitting lid in the refrigerator for up to 4 days. For longer storage, freeze any unused almond milk in ice cube trays for future use in smoothies or other recipes.
-
5. Homemade nut milk tends to separate naturally, so be sure to shake the jar well before each use to reintegrate the solids and liquids for a consistent texture.
-
6. If you desire to enhance the flavor with any of the optional ingredients listed above, follow steps 1 and 2. After straining the almond milk, rinse the blender jar thoroughly. Return the strained almond milk to the clean blender, add your chosen flavor enhancer(s), and blend on high for 30 seconds until fully incorporated. Store in a glass jar as instructed above.
Notes
Ingenious Uses for Almond Pulp: Don’t Waste a Drop!
**Almond pulp is a fantastic byproduct, rich in fiber and protein, and incredibly versatile in the kitchen. Here’s how to store it and some creative ways to put it to good use:
Storage: If you plan to use the almond pulp within a week, store it in a glass container with a tight-fitting lid in the refrigerator. For longer preservation, store it in an airtight container in the freezer, where it will keep for several months until you’re ready to use it.
Thicken Smoothies: Add a tablespoon or two of almond pulp to your next smoothie for an extra boost of fiber and a thicker, more satisfying texture. It’s an easy way to enhance the nutritional profile of your drinks.
Make Homemade Almond Flour/Meal: Spread the almond pulp thinly on a baking sheet and dehydrate it. You can do this by baking it on a low temperature (around 200°F or 95°C) for approximately 30 minutes, or until it is completely dried out and crumbly. Once dry, grind it in a food processor until it reaches a fine, flour-like consistency. This homemade almond flour can then be substituted for commercial almond meal or flour in your favorite baked goods, such as cookies, cakes, or muffins, adding a subtle nutty flavor and wholesome goodness.
Boost Dips and Spreads: Incorporate some almond pulp into your hummus, pesto, or other favorite dips and spreads. It adds a lovely texture and an undeniable nutritional upgrade, making your snacks even healthier.
Enhance Your Breakfast Oatmeal: Stir almond pulp into your morning oatmeal along with fresh berries, a sprinkle of hemp seeds, and a splash of maple syrup. It adds a delightful chewiness and a fiber-rich kick to start your day.
Upgrade Baked Goods (Quick Breads/Muffins): For an easy nutritional boost in your baked goods, replace up to half of the flour in your favorite quick bread or muffin recipe with an equal amount of almond pulp. It will add moisture and a richer texture.
DIY Facial Scrub: For a delightful self-care treat, mix almond pulp with a little fresh aloe vera gel or a few drops of your favorite facial oil. This creates a natural, exfoliating facial scrub that’s gentle yet effective, leaving your skin feeling smooth and refreshed. It’s truly a dynamite way to use up every last bit!
Note
The nutrition calculations were done using online tools. To obtain the most accurate representation of the nutritional information in any given recipe, you should calculate the nutritional information with the actual ingredients you used. You are ultimately responsible for ensuring that any nutritional information is accurate, complete and useful.