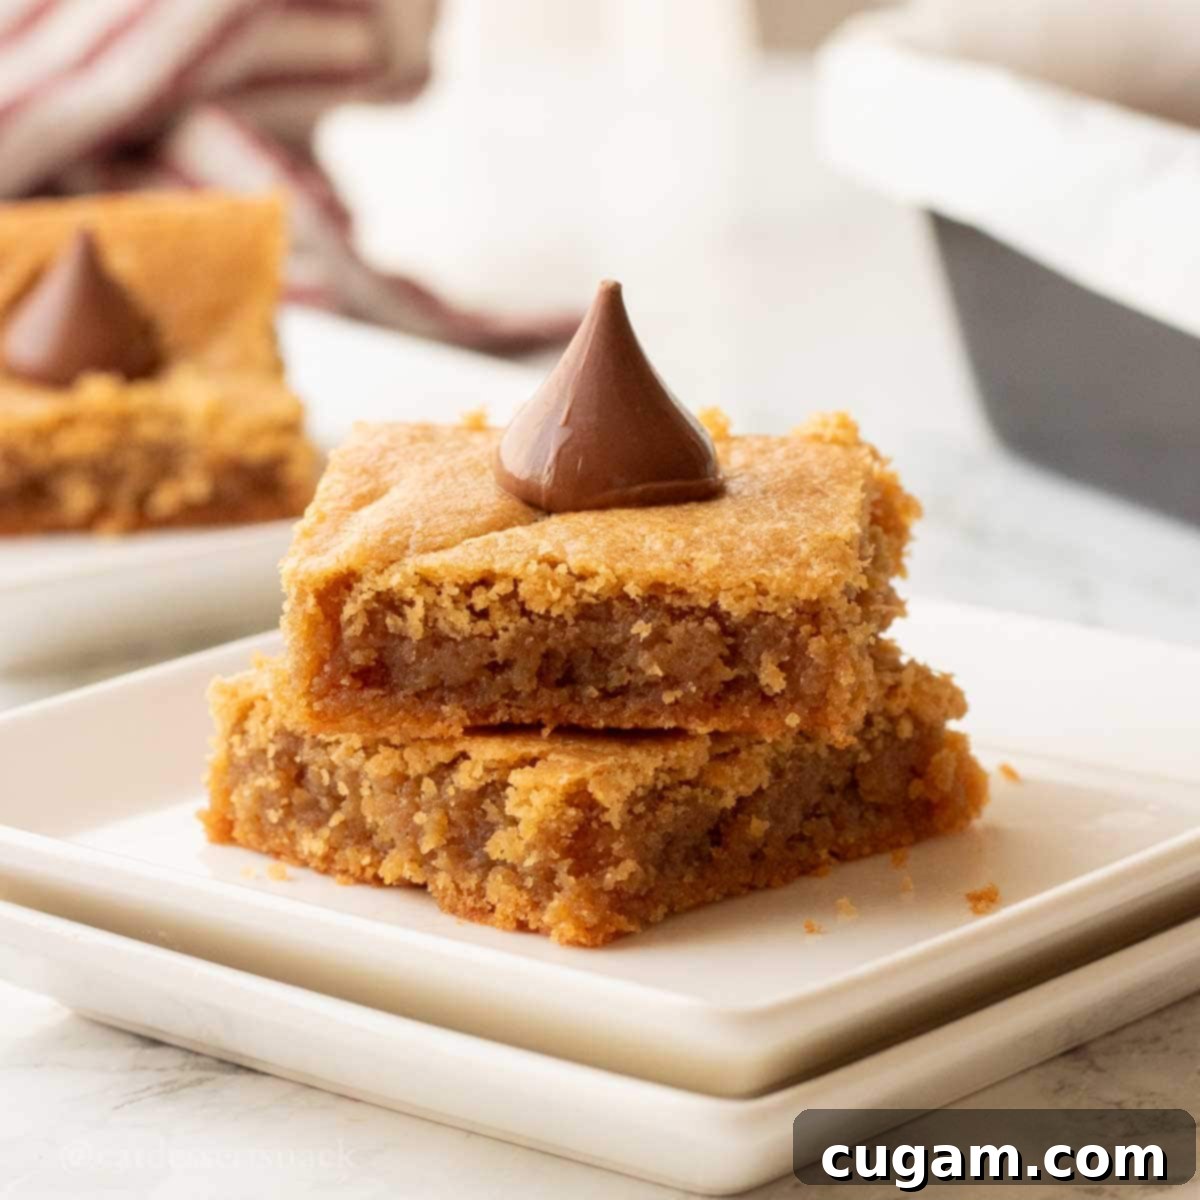
Easy Peanut Butter Blossom Bars: The Ultimate No-Roll Recipe for Any Occasion
Say goodbye to endless scooping and rolling! These Peanut Butter Blossom Bars are a revolutionary twist on the beloved classic peanut butter kiss cookie, designed for maximum flavor with minimal effort. Imagine all the soft, chewy, peanut butter goodness, crowned with a perfect chocolate kiss, but in a convenient, easy-to-make bar form. This recipe is your new go-to for batch baking, holiday gatherings, or simply satisfying that irresistible sweet tooth. No more sticky hands from rolling individual cookies in sugar; just press the dough into a pan, bake, and enjoy!
If you’ve ever wished for an easier way to make your favorite peanut butter cookies, your wish has been granted. This method drastically cuts down on prep time, making it much faster than traditional scooping methods, similar to the efficiency you’d find with our Double Chocolate Chip Cookie Bars. You’ll be amazed at how quickly you can whip up a large batch, perfect for sharing (or not!).
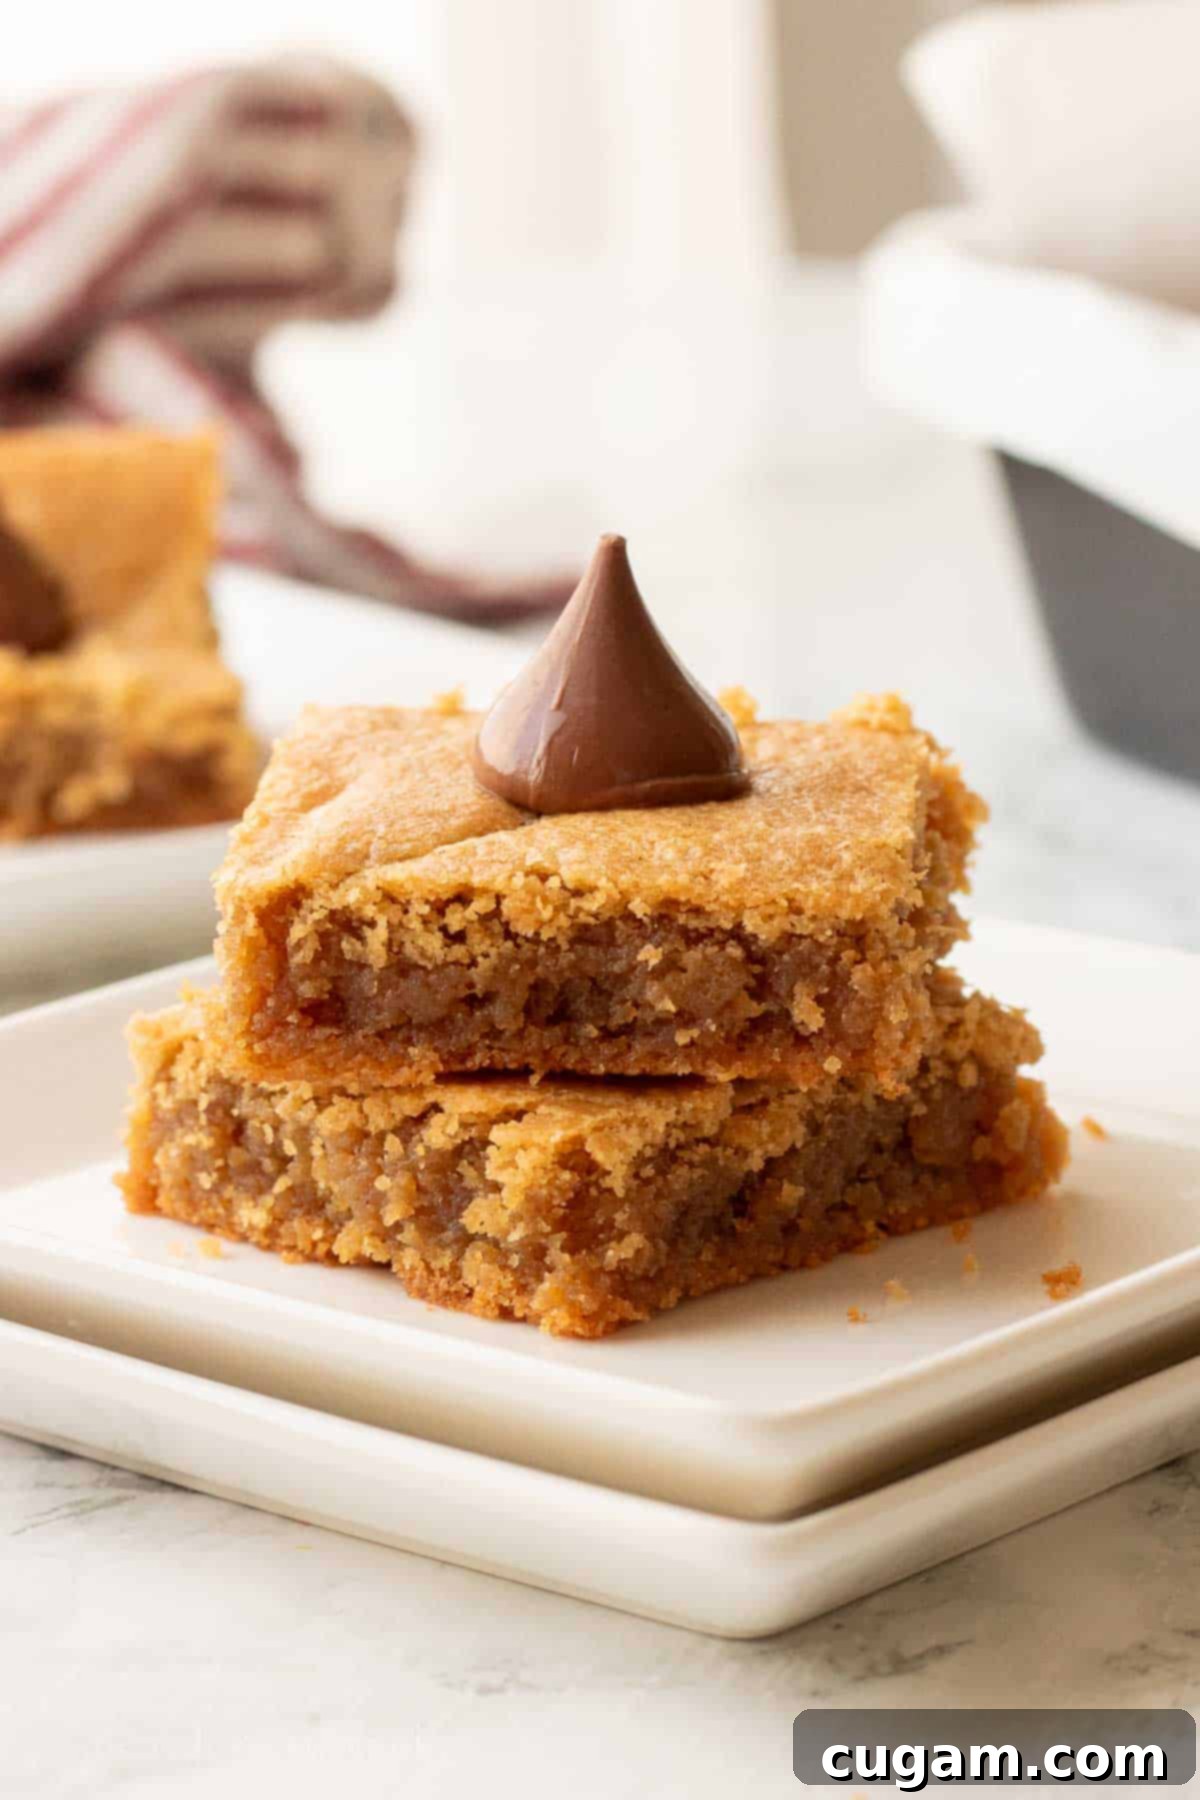
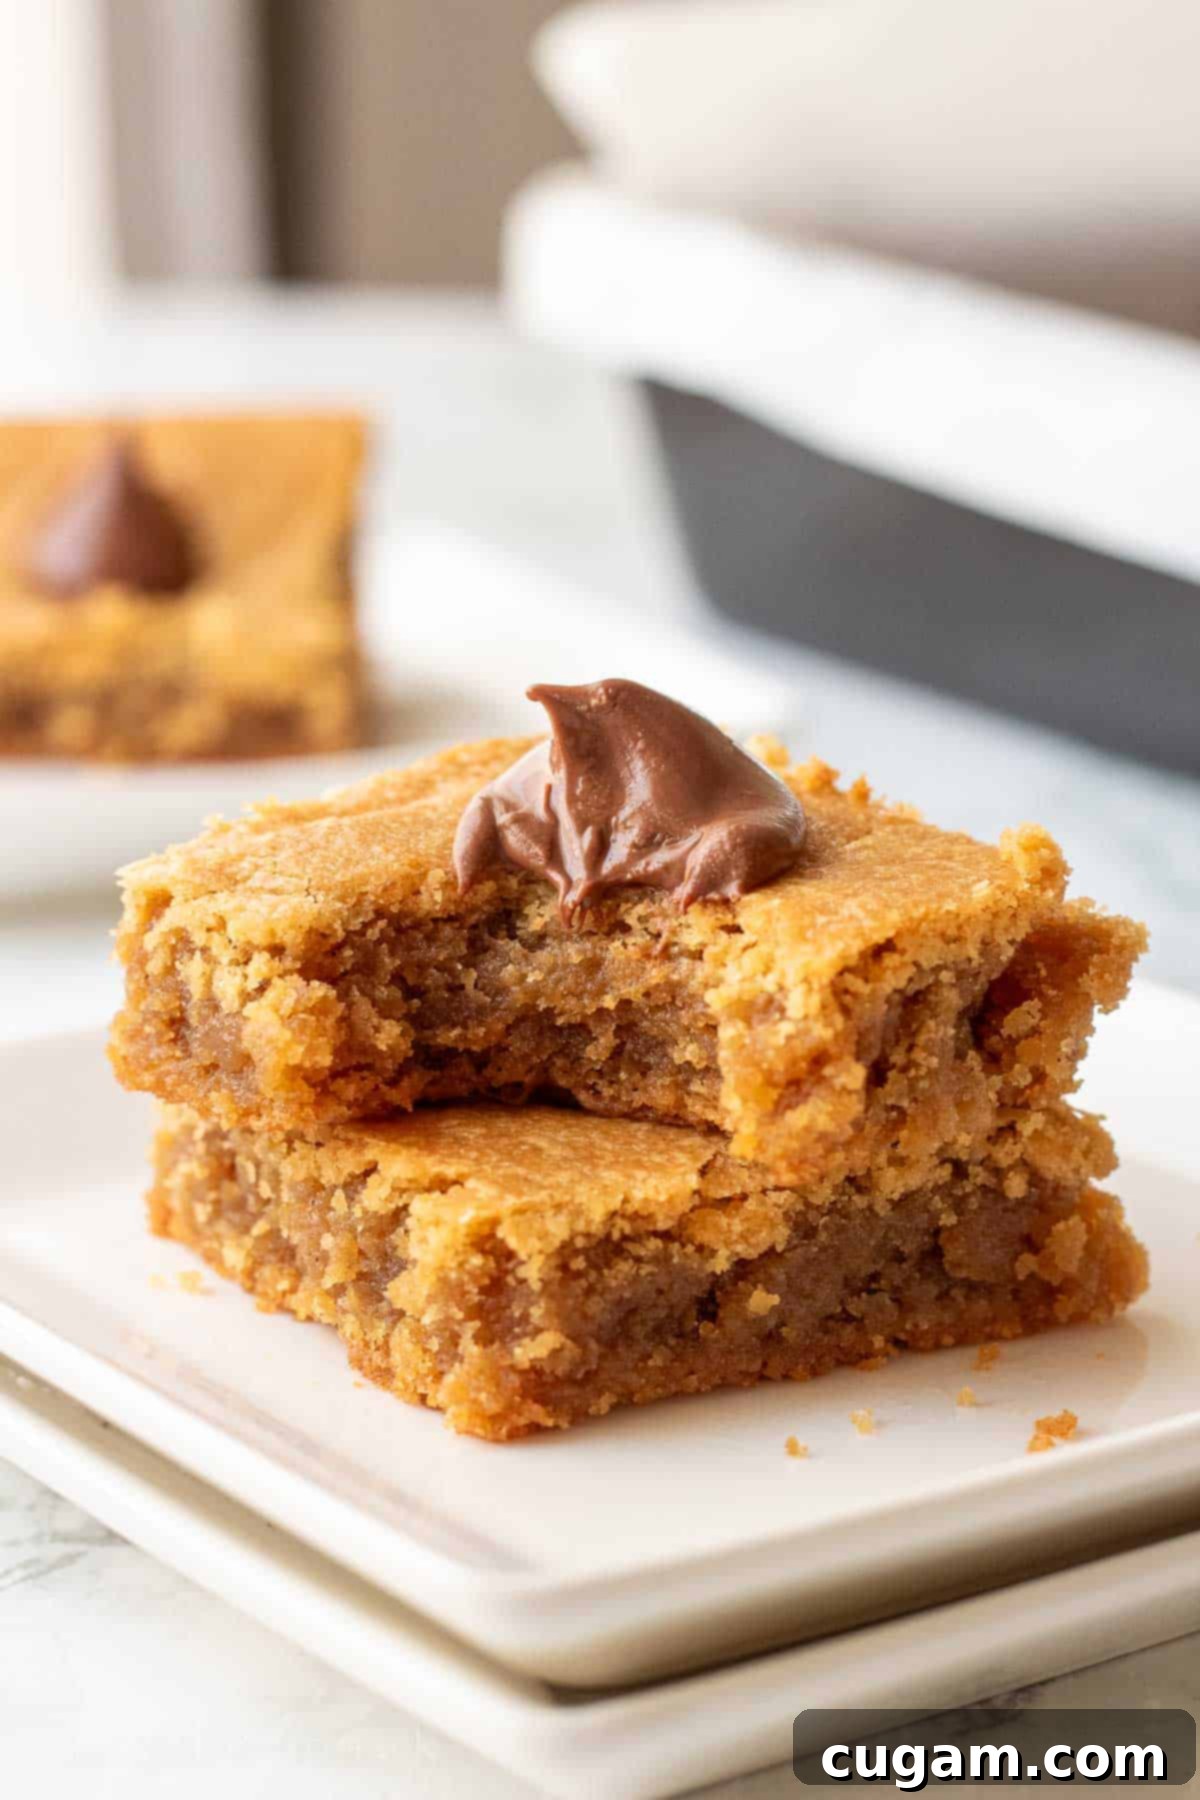
These peanut butter blossom bars offer an incredibly soft and chewy texture that melts in your mouth, perfectly balanced by the rich chocolate center. Beyond their delightful taste and texture, they are incredibly easy to customize. While classic Hershey’s Kisses are always a hit, don’t hesitate to get creative! I love experimenting with different types of Hershey’s Kisses – think caramel-filled, dark chocolate, or even seasonal varieties – to make them fun and unique for various events and holidays. As long as the flavor complements peanut butter, you’re good to go!
This comprehensive guide to making irresistible peanut butter kiss bars will walk you through every step of the process. You’ll find detailed, easy-to-follow instructions, inspiring variations to personalize your batch, practical storage tips to keep them fresh, and a helpful FAQ section to answer all your baking questions. Get ready to impress with this effortless yet spectacular dessert!
Before we dive into the delicious details, here’s a quick navigation to help you find exactly what you’re looking for:
[feast_advanced_jump_to]
Why You’ll Love This Easy Peanut Butter Blossom Bar Recipe
These Peanut Butter Blossom Bars aren’t just a dessert; they’re a revelation for any baker looking for a simple, delicious, and impressive treat. Here’s why this recipe is destined to become a beloved staple in your kitchen:
- Time-saving & convenient baking method
- Forget the tedious process of scooping individual cookie dough balls and rolling them in sugar, which can be time-consuming and messy. With this bar recipe, you simply press the entire batch of dough into a single pan, eliminating those extra steps. This streamlined approach means less hands-on time in the kitchen and more time enjoying your delicious creations, making it perfect for busy schedules or when you need a large quantity quickly.
- Perfect for sharing and any occasion
- Once baked, these bars are incredibly easy to slice into uniform pieces, ensuring a neat and professional presentation every time. Their convenient bar shape makes them ideal for a wide array of occasions – from casual family desserts and school lunchboxes to elegant dinner parties, bustling bake sales, or thoughtful homemade gifts for loved ones. They travel well and are always a crowd-pleaser, guaranteeing happy faces all around.
- Classic flavor, reimagined in a neat bar form
- This recipe masterfully preserves the nostalgic and irresistible flavor combination of rich peanut butter and creamy chocolate that we all adore from the classic peanut butter blossom cookies. However, it presents it in a more convenient, easy-to-handle bar format. This new look doesn’t just simplify the baking process; it also makes for a cleaner eating experience, perfect for grab-and-go enjoyment without the crumbly mess often associated with traditional cookies.
Pro Tip for Holiday Baking: Make your holiday events and special occasions extra memorable by using seasonal Hershey’s Kisses! Think festive flavors like caramel, brownie batter, or even birthday cake-themed kisses to add a unique and delightful touch that truly stands out. It’s a simple way to customize your bars for any celebration!
🛒 Key Ingredients for Perfect Peanut Butter Blossom Bars
Crafting these delectable Peanut Butter Blossom Bars starts with a selection of common pantry staples that come together to create a truly irresistible treat. Here’s a closer look at the essential ingredients and why they’re important:
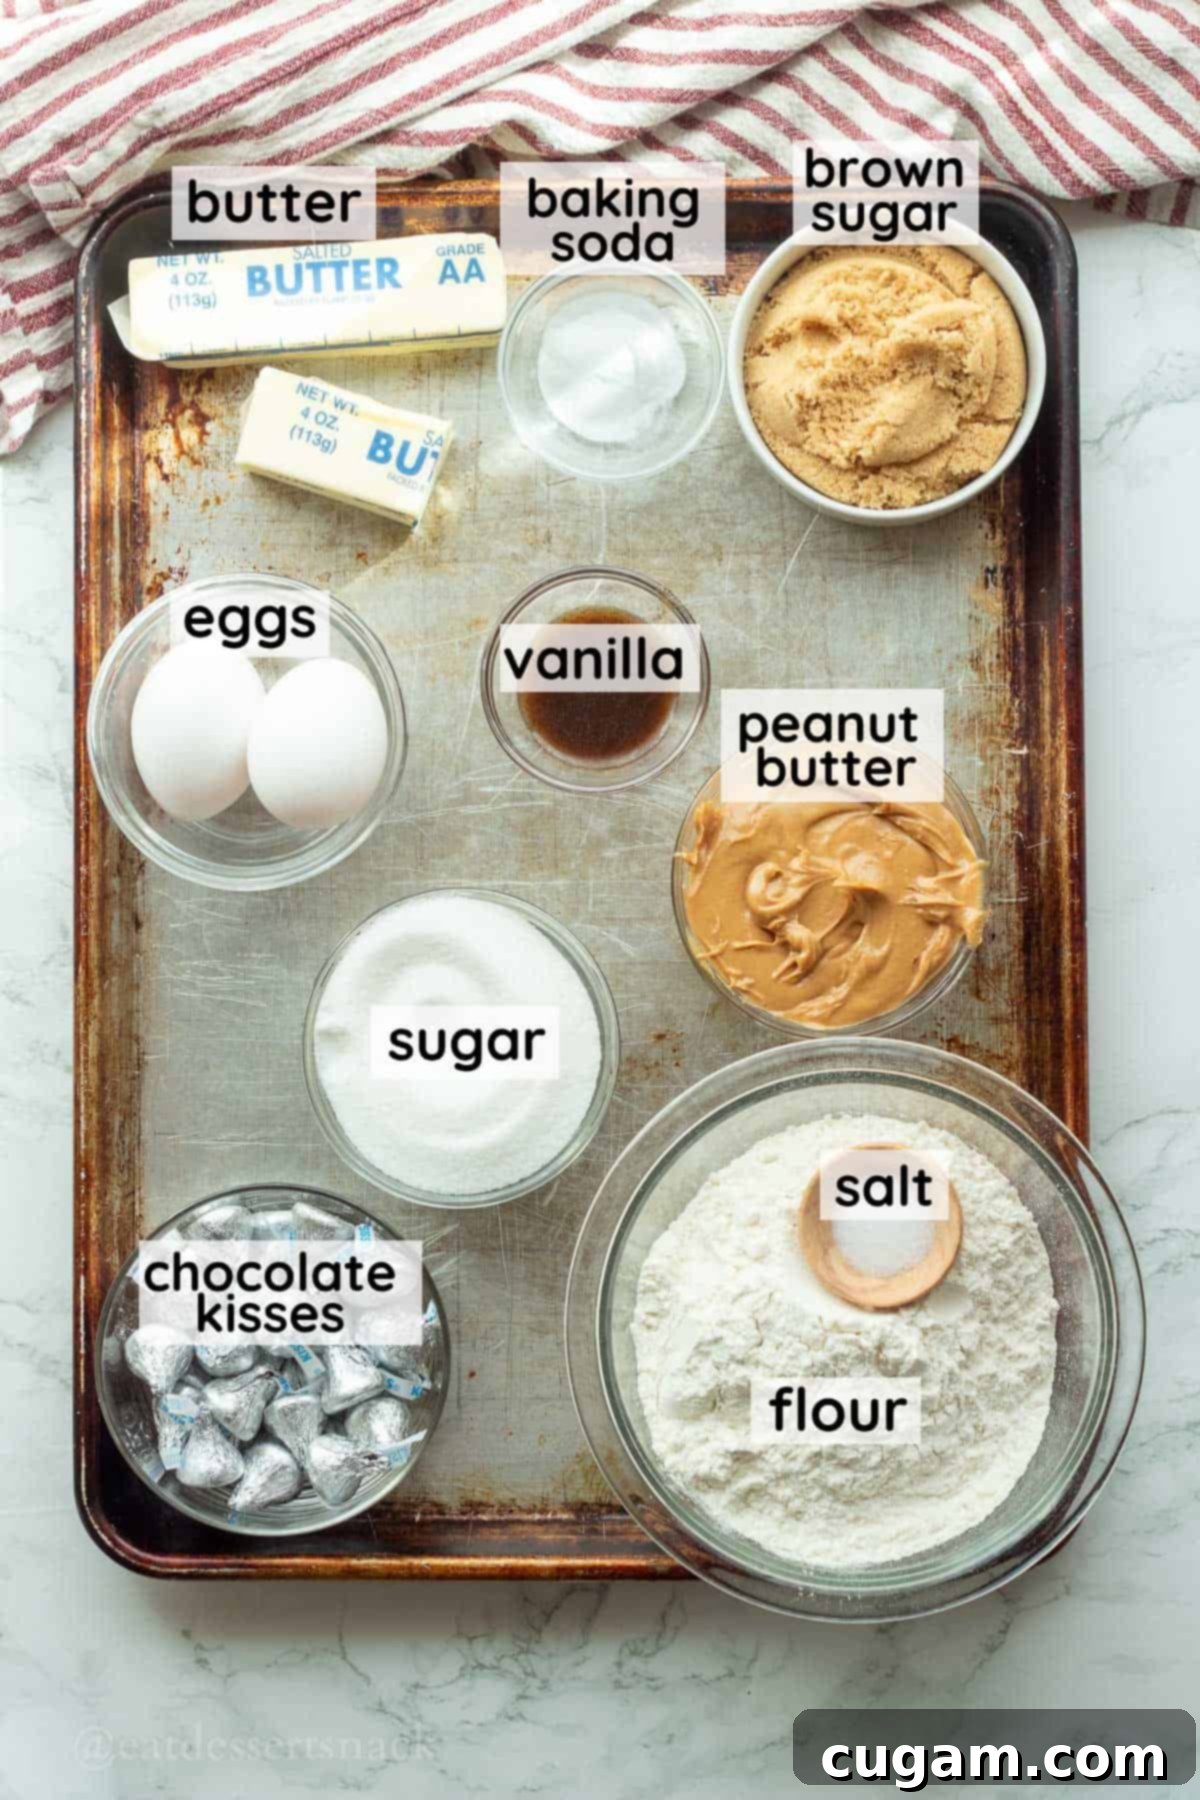
- Peanut Butter: The star of the show! I typically use regular creamy peanut butter (like Jif or Skippy) because its consistent texture and sweetness provide reliable results and a smooth, rich flavor. However, you can certainly experiment with other types. If using crunchy peanut butter, expect a delightful added texture. For natural peanut butter, ensure it’s thoroughly mixed to recombine any separated oils before measuring, as this can affect the dough’s consistency and moisture levels.
- Hershey’s Kisses: These iconic chocolate candies are what transform simple peanut butter bars into “blossom” bars. While the original milk chocolate Kisses are a classic choice and my go-to for most batches, don’t be afraid to get creative! Switching up the flavors for different occasions is incredibly fun and easy. Consider dark chocolate Kisses for a richer flavor, white chocolate for a creamier touch, or explore seasonal varieties like caramel-filled, mint, or even limited-edition flavors to match your holiday theme or personal preference.
- Sugar (White & Brown): The combination of both granulated white sugar and light brown sugar is crucial for achieving the perfect balance of sweetness and texture in these bars. White sugar contributes to the crispness and spread, while brown sugar adds moisture, chewiness, and a subtle molasses flavor that beautifully complements the peanut butter. This blend ensures your bars are soft, chewy, and irresistibly moist.
- Salted Butter: Using softened salted butter adds richness and depth to the dough. The salt in the butter also helps to balance the sweetness and enhance all the other flavors. Ensure your butter is at room temperature for optimal creaming with the sugars and peanut butter, leading to a smooth, uniform dough.
- Eggs: Eggs act as a binder, helping to hold the dough together and providing structure. They also contribute to the richness and moisture of the bars, making them tender and soft. Make sure your eggs are at room temperature for better incorporation into the batter.
- Vanilla Extract: A touch of pure vanilla extract enhances the overall flavor profile, adding a warm, aromatic note that complements both the peanut butter and chocolate beautifully. Don’t skip this ingredient, as it truly elevates the taste.
- Baking Soda: This leavening agent reacts with the acidic components in the dough (like brown sugar) to create carbon dioxide, which helps the bars rise slightly and contributes to their soft, tender texture. It ensures your bars aren’t too dense.
- All-Purpose Flour: The primary dry ingredient, all-purpose flour provides the necessary structure for the bars. Proper measurement is key; spoon and level your flour to avoid over-measuring, which can result in dry, crumbly bars.
For precise measurements and quantities, please refer to the complete recipe card located at the bottom of this post.
✏️ Creative Substitutions & Delightful Variations for Your Peanut Butter Blossom Bars
One of the best things about these Peanut Butter Blossom Bars is how adaptable they are. Whether you’re accommodating dietary restrictions or simply craving a new flavor experience, these suggestions will help you customize your batch to perfection:
- Chocolate Lovers’ Delight:
- For those who believe there’s no such thing as too much chocolate, stir in a generous cup of chocolate chips (milk, semi-sweet, or dark) into the dough before pressing it into the pan. This adds an extra layer of chocolatey richness throughout the bar, making each bite an even more decadent journey to heaven. You can also drizzle melted chocolate over the cooled bars for an elegant finish.
- Nutty Crunch Sensation:
- If you appreciate an extra textural dimension, consider folding in ½ to 1 cup of chopped nuts into the batter. Roasted peanuts will amplify the peanut butter flavor, while pecans or walnuts can add a different kind of nutty depth. This variation provides a delightful crunch that contrasts beautifully with the soft, chewy bar.
- Gluten-Free Option:
- To cater to gluten-free dietary needs, simply substitute the all-purpose flour with a high-quality 1:1 gluten-free flour blend. Brands like Cup for Cup or Bob’s Red Mill 1-to-1 Baking Flour work wonderfully in this recipe, ensuring your bars maintain their delicious texture without the gluten. Always check the blend’s recommendations, as some may require slight adjustments in liquid.
- Dairy-Free Alternative:
- For a dairy-free version, swap out the salted butter for a plant-based butter alternative (like Miyoko’s Kitchen or Earth Balance sticks). Ensure your chocolate kisses are also dairy-free to make the entire bar suitable for those with dairy sensitivities.
- Alternative Chocolate Toppings:
- Beyond Hershey’s Kisses, the possibilities for toppings are endless! Experiment with mini peanut butter cups for an intense peanut butter and chocolate experience, Rolo candies for a gooey caramel surprise, or even mini candy bar pieces for a fun, mixed-up flavor. Press these into the warm bars after baking, just as you would with Kisses.
Pro Tip for Customization: Unleash your inner pastry chef by experimenting with a variety of chocolate candies or even other small confections (like peppermint patties or caramel squares) to top your bars. This is a fantastic way to tailor the flavor profile to specific tastes or holiday themes, making each batch uniquely yours!
🧑🍳 Step-by-Step Instructions: How to Bake Perfect Peanut Butter Blossom Bars
Follow these detailed steps to create your irresistibly soft and chewy Peanut Butter Blossom Bars. Precision and patience are key for the best results!
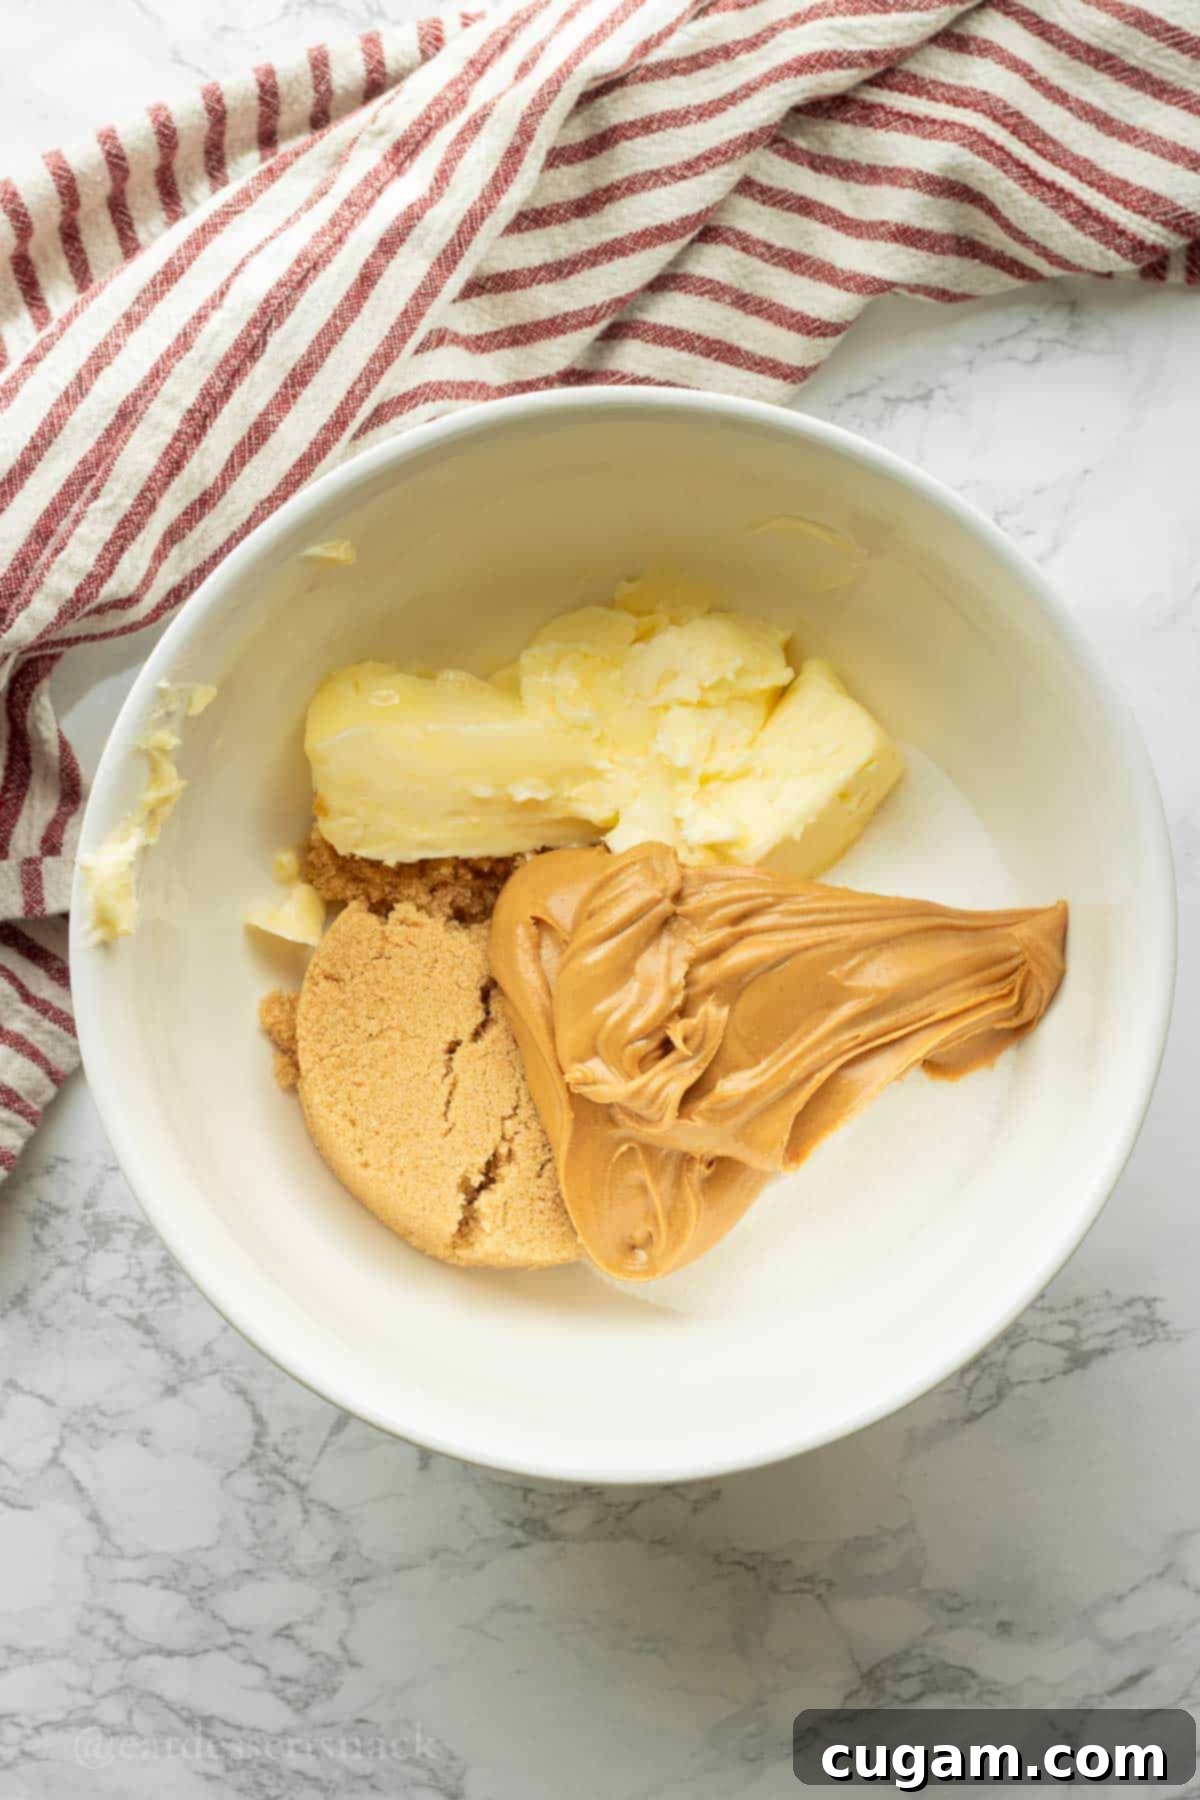
- Step 1. Cream Wet Ingredients: Begin by preheating your oven to 350°F (175°C). In a large mixing bowl, combine the creamy peanut butter, both granulated white sugar and light brown sugar, and the softened salted butter. It’s crucial that your butter is truly softened (but not melted) to achieve the right consistency. Using an electric mixer (either a stand mixer with a paddle attachment or a handheld mixer), cream these ingredients together on medium-high speed for approximately 3 minutes. Continue mixing until the mixture becomes wonderfully creamy, light in color, and visibly fluffy. This creaming process incorporates air, which is essential for the bars’ tender texture.
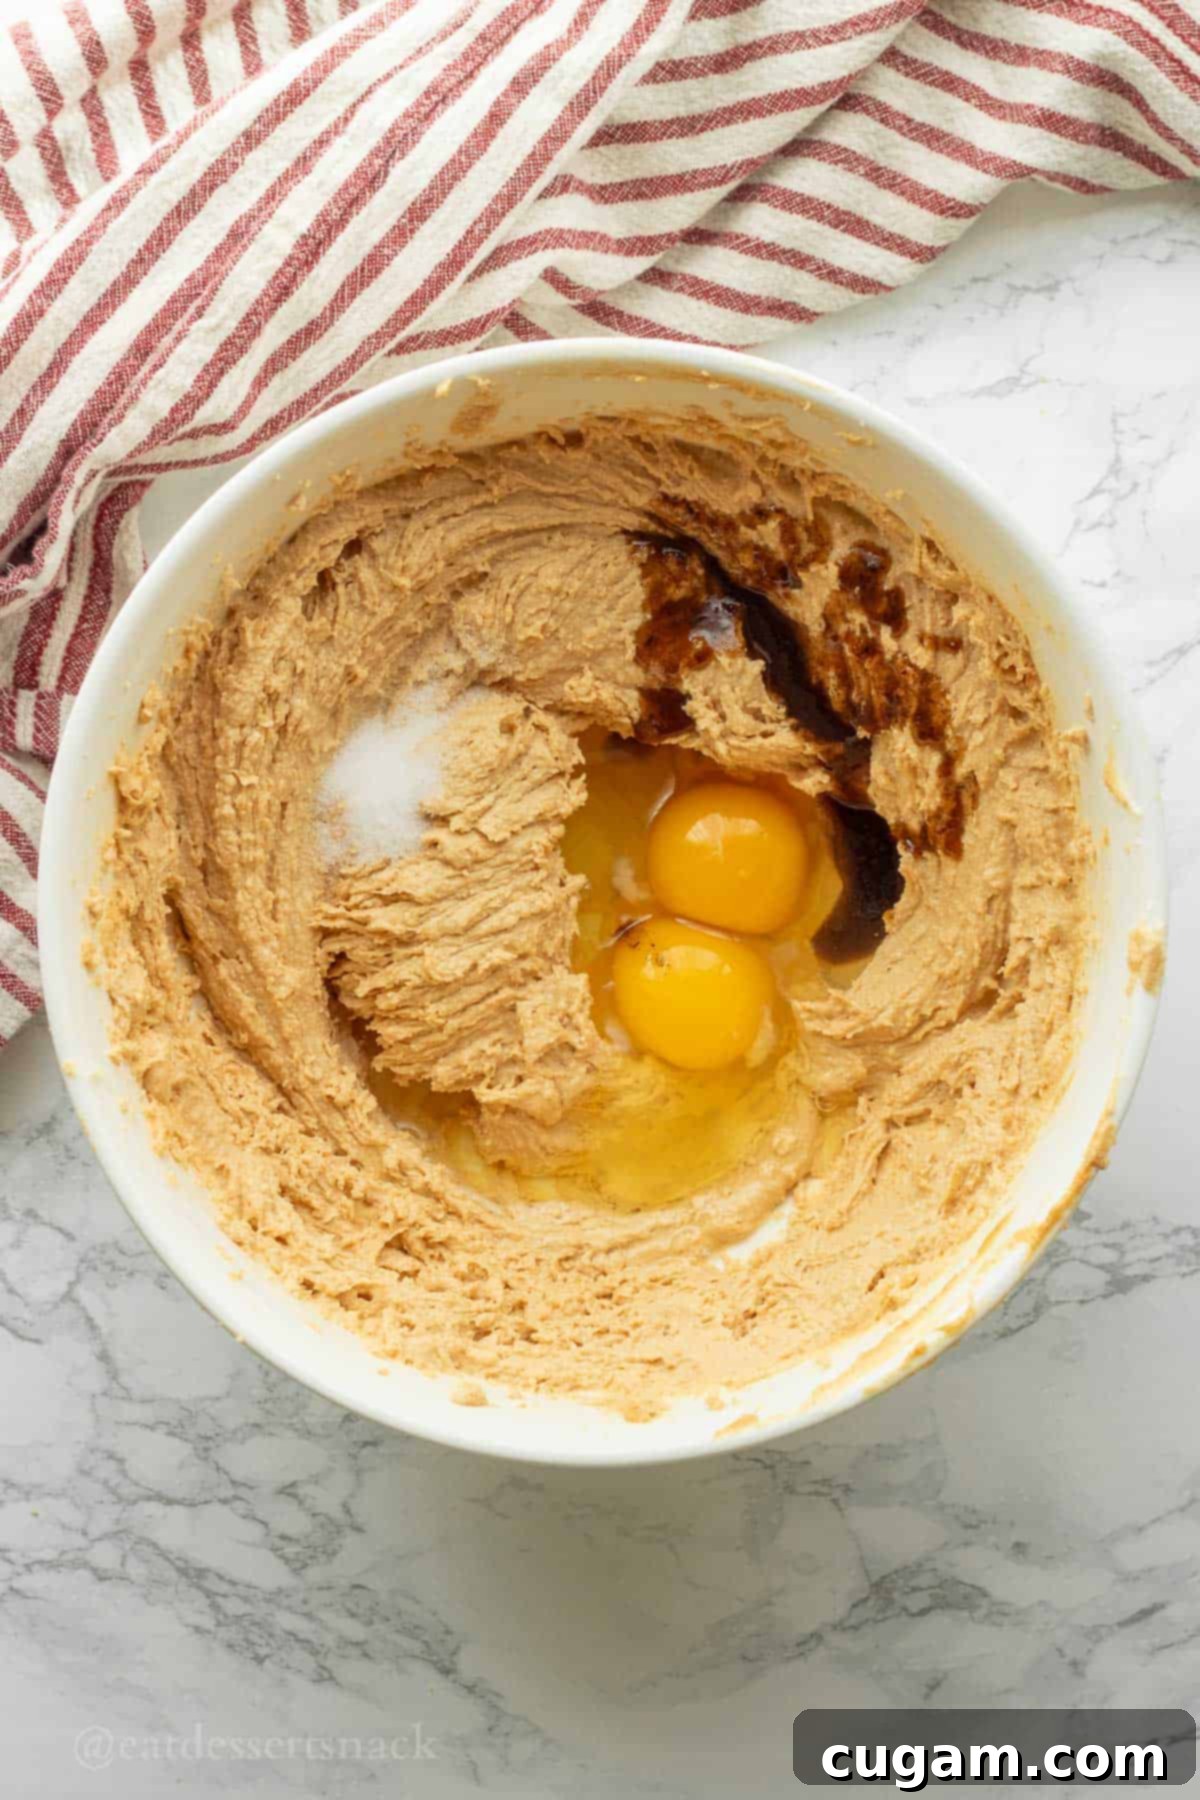
- Step 2. Add Eggs and Flavorings: Once your base mixture is light and fluffy, crack in the eggs one at a time, mixing well after each addition to ensure full incorporation. Then, add the vanilla extract and salt. Continue to mix on medium speed for about 1 minute until all these ingredients are thoroughly combined and the mixture is smooth. Scrape down the sides of the bowl as needed to ensure everything is evenly mixed.
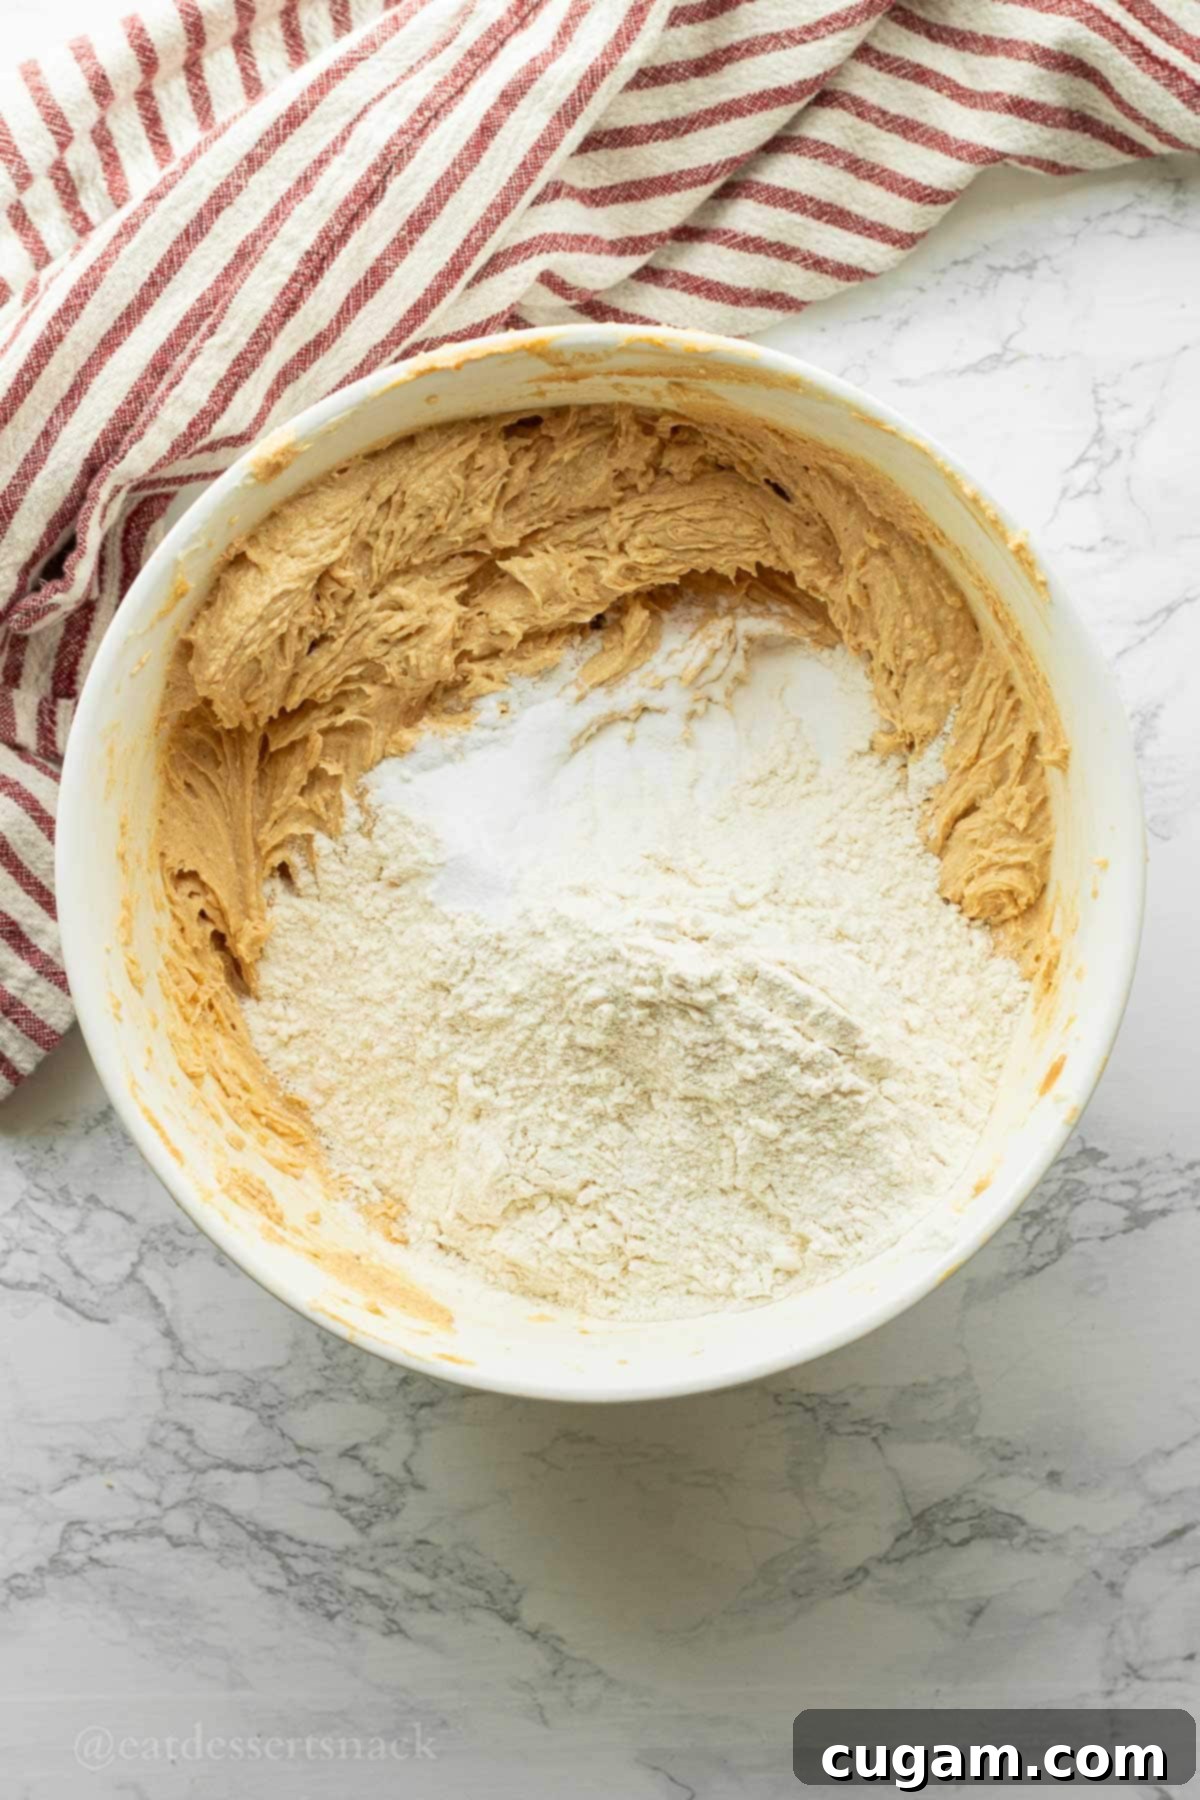
- Step 3. Incorporate Dry Ingredients: This is where the magic truly comes together. Add the all-purpose flour and baking soda to the wet mixture. Mix slowly at first to prevent the flour from creating a cloud in your kitchen! Gradually increase the speed and mix until the flour is just incorporated, forming a soft, cohesive dough. Be careful not to overmix, as this can lead to tough bars. The dough should resemble soft play dough in texture – not crumbly, but easily moldable. If your dough feels too dry or crumbly, add a tablespoon or two of milk (dairy or non-dairy) until it reaches the desired consistency.
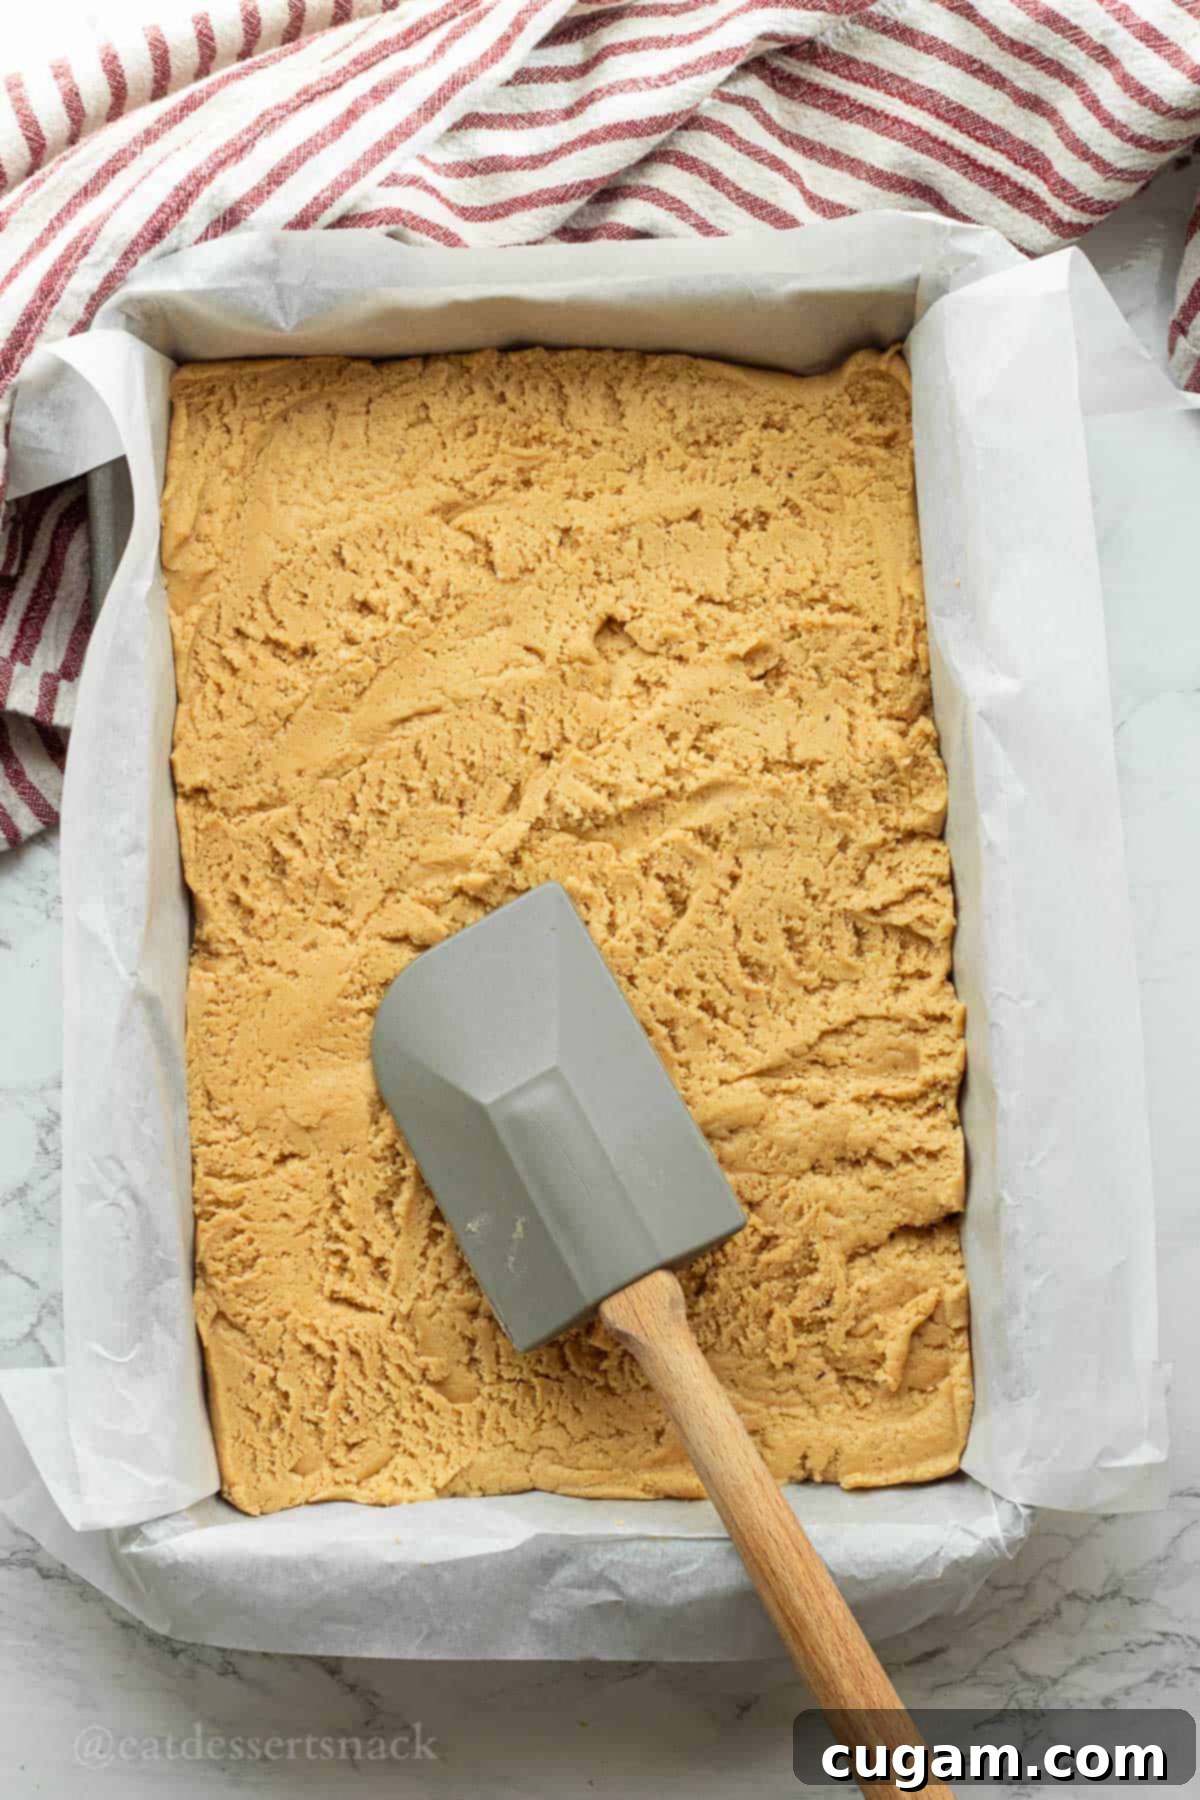
- Step 4. Press into Pan: Lightly grease and flour a 9×13 inch baking pan, or line it with parchment paper for easy removal. Transfer the entire dough into the prepared pan. Using a spatula, your hands, or the bottom of a glass, gently and evenly spread the dough across the bottom of the pan. Make sure it reaches all corners and forms a uniform layer for even baking.
Pro Tip for Presentation: For a visually appealing and professional-looking batch of Peanut Butter Blossom Bars, use a ruler or a small guide to help you evenly space the chocolate kisses on top. This ensures each bar slice gets a perfectly centered chocolate topping, making them even more enticing for guests!
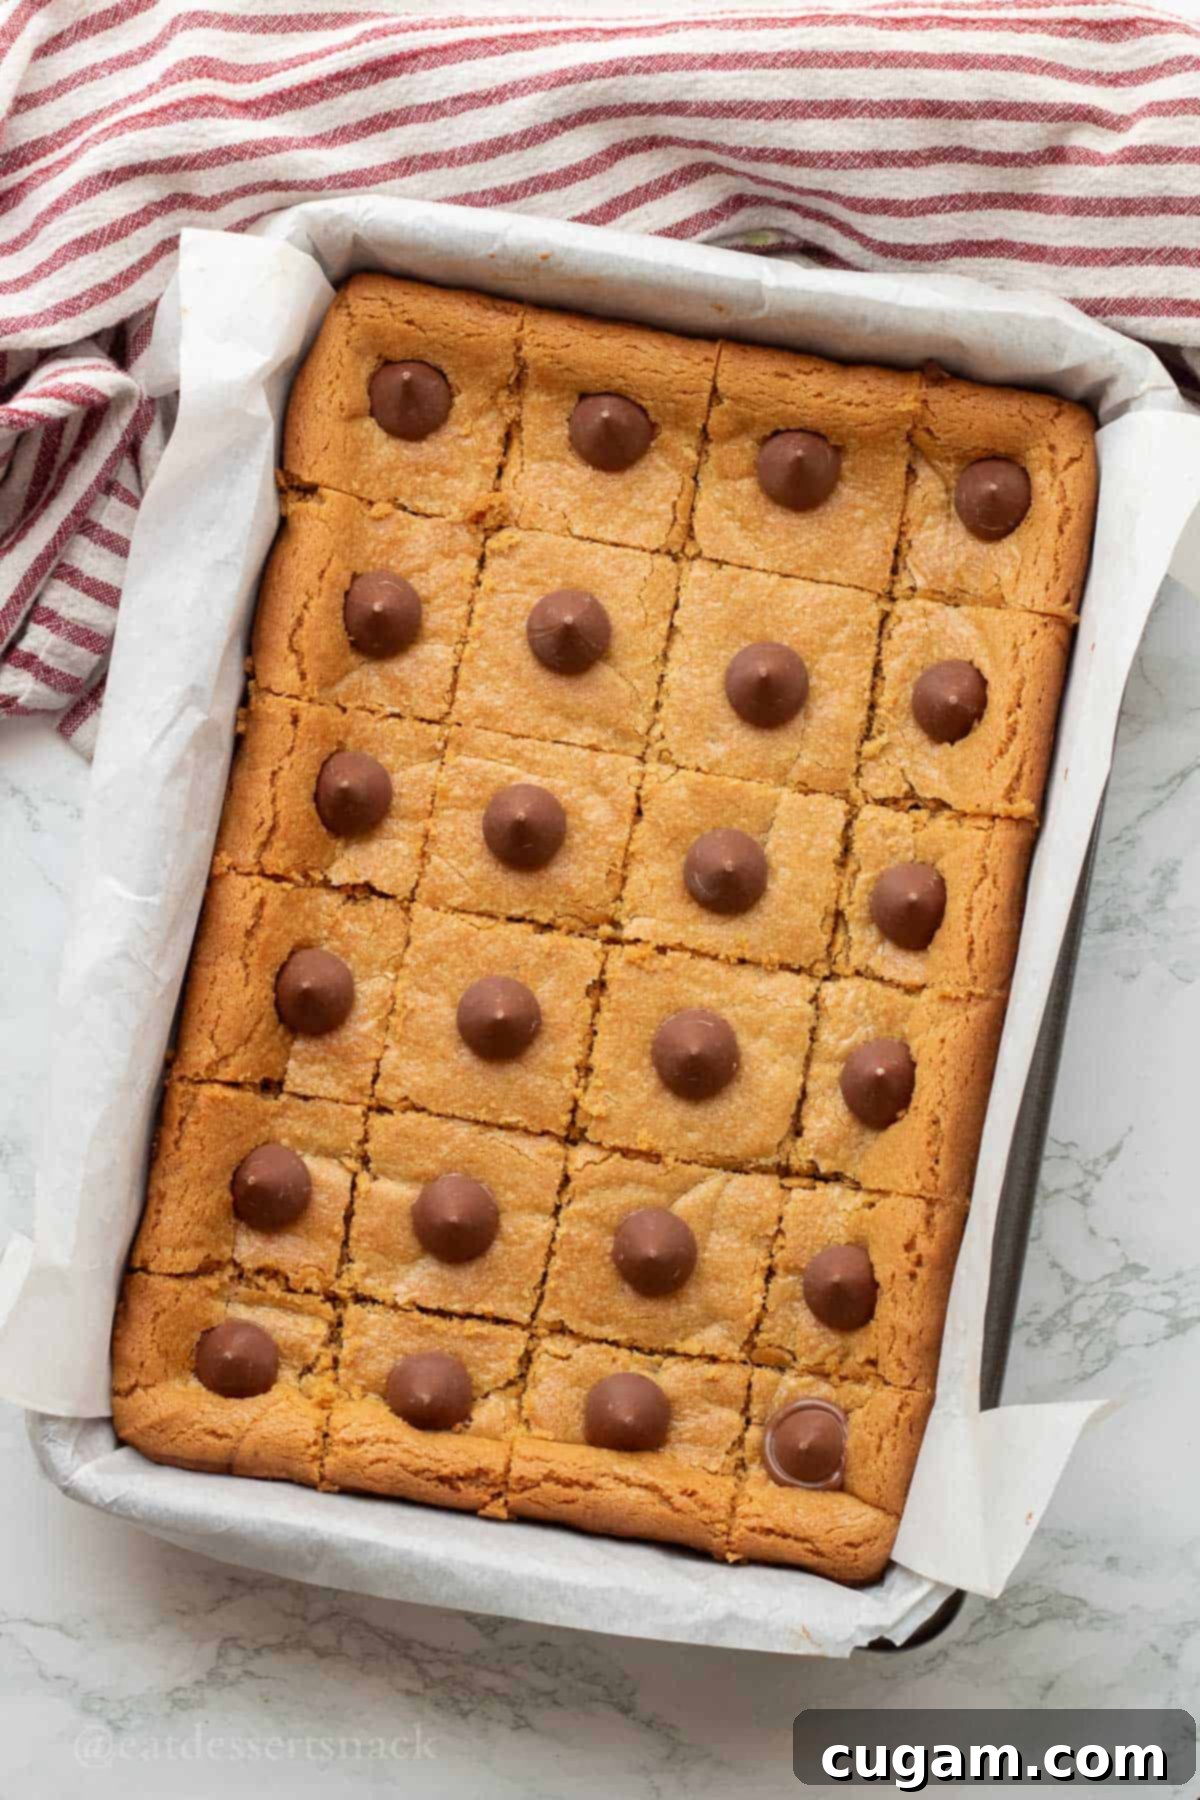
- Step 5. Bake and Cool: Place the pan in your preheated 350°F (175°C) oven and bake for 20-25 minutes. The bars are done when the edges are lightly golden brown and the center appears set. A toothpick inserted into the center should come out with moist crumbs, not wet batter. Crucially, remove the pan from the oven and let the bars cool in the pan for a minimum of 20-30 minutes before adding the chocolate kisses. This cooling period is vital; if you add the Kisses too soon, the residual heat from the bars will cause them to melt into a puddle, rather than holding their iconic shape.
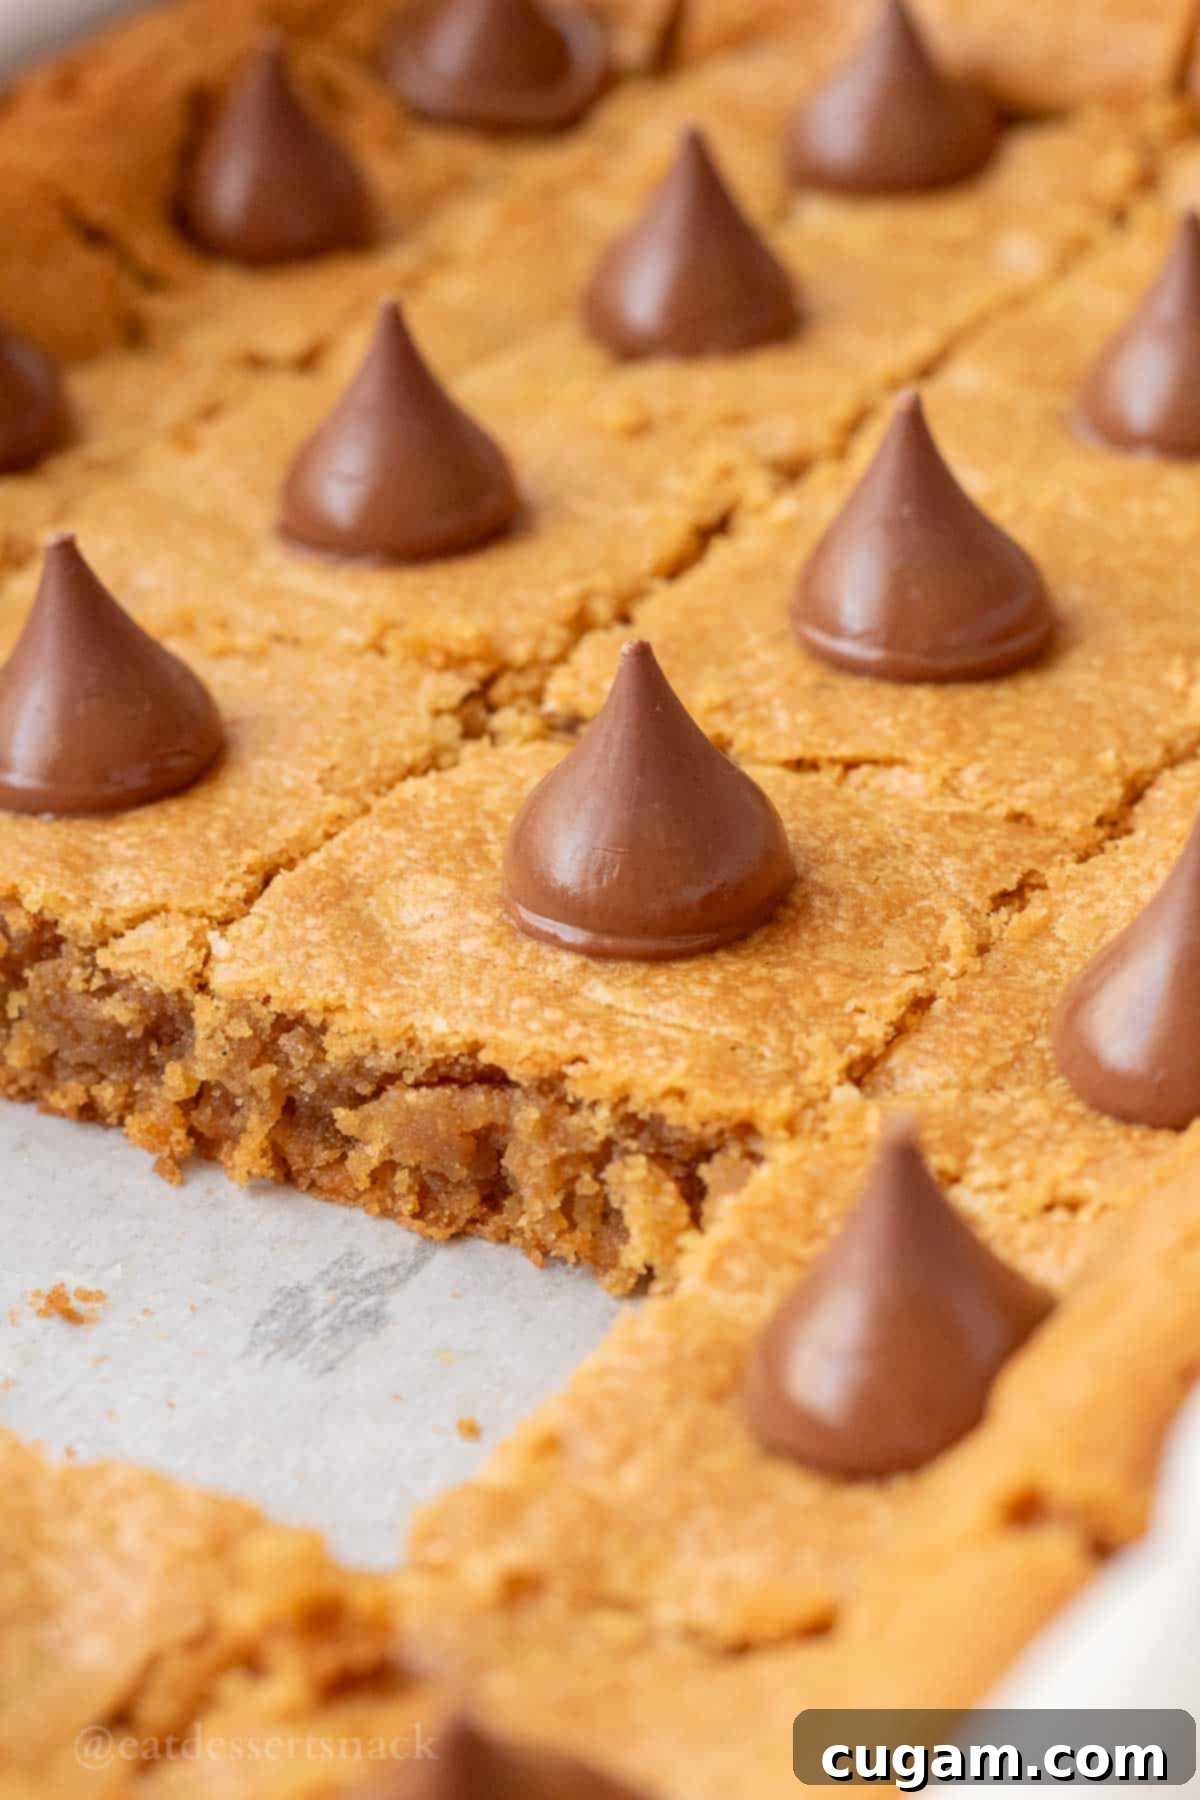
- Step 6. Add Kisses and Slice: Once the bars have cooled sufficiently (they should still be warm to the touch, but not hot), gently press a Hershey’s Kiss into the center of each designated bar section. The slight warmth will help the chocolate adhere without melting completely. To slice, I typically aim for 4 rows of 6, yielding 24 generous servings. However, if you prefer smaller portions, you can do 5 rows of 6 for 30 slices. Use a sharp knife for clean cuts. Allow the bars to cool completely before serving for the best texture and to prevent the chocolate from smearing.
📌 Common Mistakes & Troubleshooting for Peanut Butter Blossom Bars
Even seasoned bakers encounter challenges. Here are some common issues you might face when making Peanut Butter Blossom Bars and how to prevent or fix them:
- Overbaking: Dry or Crumbly Bars
- Issue: If your bars turn out dry, tough, or excessively crumbly, it’s highly likely they were overbaked. Peanut butter cookies and bars are meant to be soft and tender.
- Solution: To achieve that perfect chewy texture, begin checking for doneness at the minimum baking time (around 20 minutes). The edges should be lightly golden, but the center might still look slightly soft or underbaked. This is perfectly normal! Remember, the bars will continue to set as they cool in the pan. A good rule of thumb is to remove them from the oven just when the top looks set, and a toothpick inserted into the center comes out with moist crumbs, not wet batter. Trust the process and don’t wait for them to look “fully baked” like a cake.
- Issue: You’ve baked beautiful bars, but when you add the Hershey’s Kisses, they completely melt into a flat, unappealing chocolate smear.
- Solution: This common issue occurs when the bars are still too hot. The residual heat will quickly melt the chocolate. It’s crucial to allow the baked bars to cool significantly, for at least 20-30 minutes, before gently pressing the chocolate kisses onto their surface. The bars should still be warm enough to slightly adhere to the chocolate, but not so hot that it instantly liquefies. For extra insurance, especially on a warm day, you can even refrigerate your Hershey’s Kisses for 10-15 minutes before unwrapping and placing them on the cooled bars.
- Issue: If your dough is too dry, it will be hard to press evenly into the pan, resulting in a crumbly texture that doesn’t hold together well. This usually happens from over-measuring flour or if your peanut butter is very thick.
- Solution: The dough for these bars should be soft and pliable, akin to play dough. If you find your dough is too dry and crumbly after mixing, don’t fret! Simply add a tablespoon or two of milk (dairy or non-dairy, depending on your preference) at a time, mixing until the dough reaches the correct, soft consistency. Avoid adding too much at once; gradually incorporate until it’s easily pressed without breaking apart.
- Issue: Some parts of your bars are perfectly baked, while others are still doughy or overcooked.
- Solution: Ensure your oven is preheated to the correct temperature by using an oven thermometer. Also, make sure your dough is spread evenly in the pan, with no thick or thin spots. Rotate the pan halfway through baking if your oven tends to have hot spots, to promote uniform cooking.
❓Frequently Asked Questions About Peanut Butter Blossom Bars
Got questions about making these delicious bars? Here are answers to some common inquiries to help you achieve perfect results every time:
Yes, you absolutely can use natural peanut butter! However, be aware that natural peanut butter often has a different consistency due to oil separation. It’s crucial to stir it very well before measuring to ensure the oils are fully re-incorporated. Also, because natural peanut butter can be oilier, you might need to slightly reduce the amount of added butter in the recipe (start with 1-2 tablespoons less) to maintain the desired dough texture. Keep an eye on the dough consistency and add a touch of milk if it still feels too dry.
This is a key step! The most important trick is patience. Allow the baked bars to cool for a significant amount of time—at least 20-30 minutes—after removing them from the oven before you place the Kisses. The bars should still be warm enough for the chocolate to slightly soften and adhere, but not hot enough to melt into puddles. For an extra safeguard, especially if your kitchen is warm, you can chill the Hershey’s Kisses in the refrigerator for about 15 minutes before unwrapping and adding them to the bars. This helps them hold their shape better.
Absolutely! These Peanut Butter Blossom Bars are a fantastic make-ahead dessert, which is one of their many advantages. You can bake the entire batch of bars a day or even two in advance. Once they are completely cooled and the chocolate kisses are set, store them in an airtight container at room temperature. They remain wonderfully fresh and delicious for up to 3 days. For longer storage, see the freezing tips below.
To maintain their freshness and chewiness, store the cooled bars in an airtight container at room temperature for up to 3 days. If you want to extend their shelf life, you can refrigerate them for up to a week. For longer storage, these bars freeze beautifully! Wrap individual slices tightly in plastic wrap, then place them in a freezer-safe bag or container for up to 3 months. Thaw at room temperature or gently warm in the microwave for a few seconds before serving.
Yes, this recipe is perfect for doubling, especially if you’re baking for a large crowd or a big event. You’ll need to use two 9×13 inch pans or bake in batches if you only have one. Make sure your mixing bowl is large enough to handle the increased volume of dough, and allow for slightly longer baking times, watching for the golden edges and set center. Doubling is a great way to ensure you have plenty of these delightful bars on hand!
🧁 More Delicious Dessert Bar Recipes You’ll Love
We absolutely adore making dessert bars for all sorts of gatherings – potlucks, parties, book clubs, girls’ nights, you name it! They’re so easy to transport, serve, and always a huge hit. If you enjoyed these Peanut Butter Blossom Bars, you’re sure to love these other go-to cookie bar recipes from our kitchen. They offer a delightful variety of flavors and textures, perfect for any sweet craving:
- Strawberries and Cream Bars
- Banana Cream Pie Bars
- Cheesecake Brownie Bars
- Easy Raspberry Cream Cheese Bars
Did you try this recipe? If you absolutely loved making and tasting these easy Peanut Butter Blossom Bars, we’d be thrilled to hear from you! Please make sure to leave a ⭐️ star rating and a comment below the recipe card. Your feedback is incredibly valuable, not only do I love hearing your experiences, but it’s also super helpful to other readers who are looking to try this delicious recipe. Your ratings and comments help our community grow and discover new favorites!
📲 FOLLOW Sara on Social! 👋 Stay connected and be the first to know about new recipes, baking tips, and behind-the-scenes fun from my kitchen. Find me on Facebook, Instagram, or Pinterest to see the latest and greatest dessert creations!
📝 Printable Recipe: Easy Peanut Butter Blossom Bars
Easy Peanut Butter Blossom Bars
Pin Recipe
Equipment
-
1 Electric Mixer (stand or handheld)
-
1 9×13 inch Baking Pan
-
Mixing Bowls
-
Spatula
Ingredients
- ¾ cup creamy peanut butter 195 g (e.g., Jif, Skippy)
- ¾ cup light brown sugar 165 g (packed)
- ¾ cup granulated white sugar 165 g
- ¾ cup salted butter 170 g (softened, room temperature)
- 2 large eggs (room temperature)
- 2 teaspoons pure vanilla extract 10 g
- ½ teaspoon fine sea salt 6 g
- 1½ teaspoons baking soda 11 g
- 2½ cups all purpose flour 340 g (spooned & leveled)
- 24 Hershey’s Kisses (unwrapped, any flavor)
Instructions
-
Prep Oven & Cream Butter: Preheat your oven to 350℉ (175°C). In a large mixing bowl, combine the creamy peanut butter, packed light brown sugar, granulated white sugar, and softened salted butter. Using an electric mixer (either stand or handheld), cream these ingredients together for about 3 minutes on medium/high speed. Beat until the mixture is visibly creamy, light in color, and fluffy. This step is crucial for incorporating air and creating a tender bar.
-
Add Wet Ingredients: Add the large eggs (one at a time, mixing well after each), pure vanilla extract, and fine sea salt to the creamed mixture. Mix well on medium speed for about 1 minute until all ingredients are fully incorporated and the mixture is smooth. Scrape down the sides of the bowl as needed.
-
Mix in Dry Ingredients: Lastly, add the baking soda and all-purpose flour to the bowl. Mix slowly at first to prevent flour from scattering, then gradually increase speed. Mix for 1-2 minutes, just until a soft, cohesive dough forms and there are no visible pockets of dry flour. Be careful not to overmix. The dough should have a texture similar to soft play dough, not be crumbly. If it seems too dry, you can add an additional tablespoon or two of milk until the desired consistency is reached.
-
Prepare Pan & Press Dough: Lightly grease and flour a 9×13 inch baking pan, or line it with parchment paper leaving an overhang for easy lifting. Spread the prepared dough evenly into the bottom of the pan, pressing it firmly into all corners to create a uniform layer.
-
Bake & Cool: Bake the bars in the preheated oven for 20-25 minutes, or until the edges are lightly golden and the center appears set. A toothpick inserted into the center should come out with moist crumbs. Once baked, remove the pan from the oven and set a timer to allow the bars to cool in the pan for a crucial 20-30 minutes. This cooling period is essential to prevent the chocolate kisses from melting into puddles when added.
-
Add Kisses & Slice: After the cooling period, unwrap your Hershey’s Kisses. Gently press one chocolate kiss into the center of each designated bar section. For even servings, I recommend arranging them in 4 rows of 6, which yields 24 slices. If you prefer slightly smaller portions, you can arrange them in 5 rows of 6 for a total of 30 slices. Once the Kisses are placed, allow the bars to cool completely before slicing and serving. This ensures clean cuts and firm chocolate tops.
Notes
Troubleshooting Tips:
- Overbaking: To avoid dry, tough bars, start checking for doneness at the minimum baking time (20 minutes). The edges should be lightly golden, and the center set, but a toothpick should come out with moist crumbs, not wet batter.
- Chocolate Melted: The most critical step is to allow the bars to cool for at least 20-30 minutes before placing the Hershey’s Kisses. This prevents the residual heat from melting the chocolate into puddles. Chilling the Kisses beforehand can also help.
- Crumbly Dough: If your dough is too dry to spread easily, incorporate an extra Tablespoon or two of milk (dairy or non-dairy) until it achieves a soft, pliable, play-dough-like consistency. Avoid over-measuring flour.
- Uneven Baking: Ensure your dough is spread evenly in the pan. If your oven has hot spots, rotate the pan halfway through baking for more consistent results.
