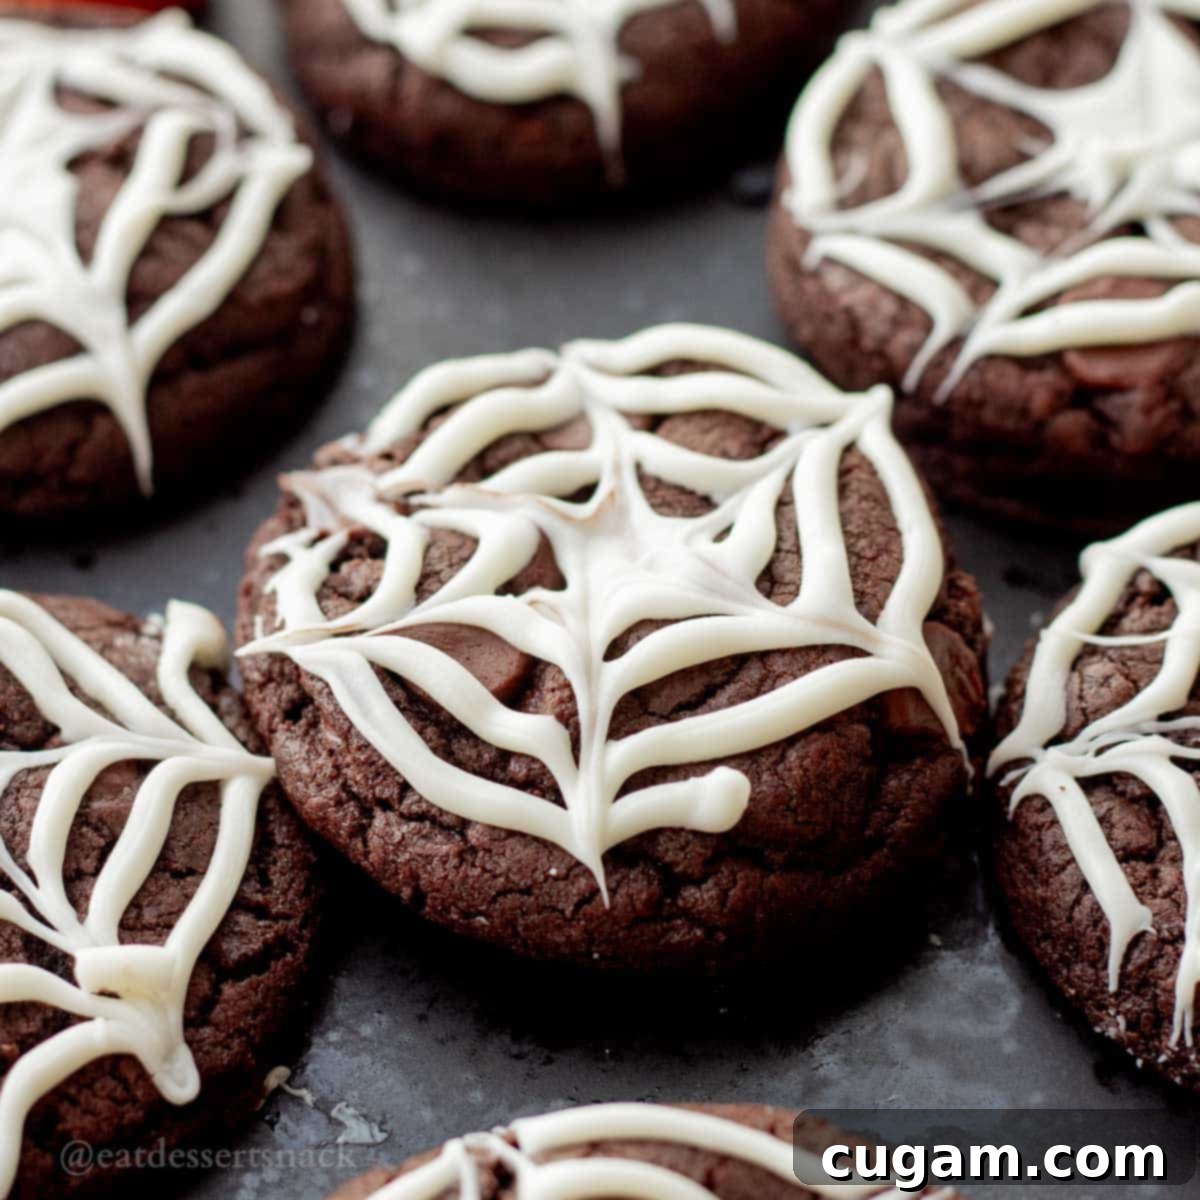
Spooktacularly Delicious: Easy Fudgy Chocolate Spider Web Cookies for Halloween
Get ready to cast a delicious spell this Halloween with our incredible recipe for Chocolate Spider Web Cookies! These aren’t just any ordinary Halloween cookies; they are exceptionally fudgy, packed with rich chocolate chips, and adorned with captivating white chocolate spider web designs. Forget the mess and fuss often associated with elaborate holiday treats. This recipe offers a simple yet impressively fun way to celebrate the spooky season, making it perfect for bakers of all skill levels, from beginners to seasoned pros.
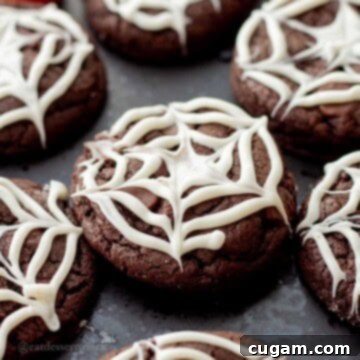
We’ve all dreamt of creating those iconic spider web treats without the sticky hassle of marshmallows or the intricate piping of royal icing. This recipe is the ultimate solution, combining the delightful texture of a double chocolate chip cookie with an ingenious, easy method for crafting beautiful webs. We use a generous blend of semi-sweet chocolate chips folded into the deep, dark chocolate dough, while melted white chocolate chips are expertly applied and then ‘feathered’ on top with a simple toothpick to create those signature, eye-catching webs. The striking contrast between the dark, rich cookie and the stark white chocolate truly brings the spooky theme to life in a way that’s both delicious and visually stunning.
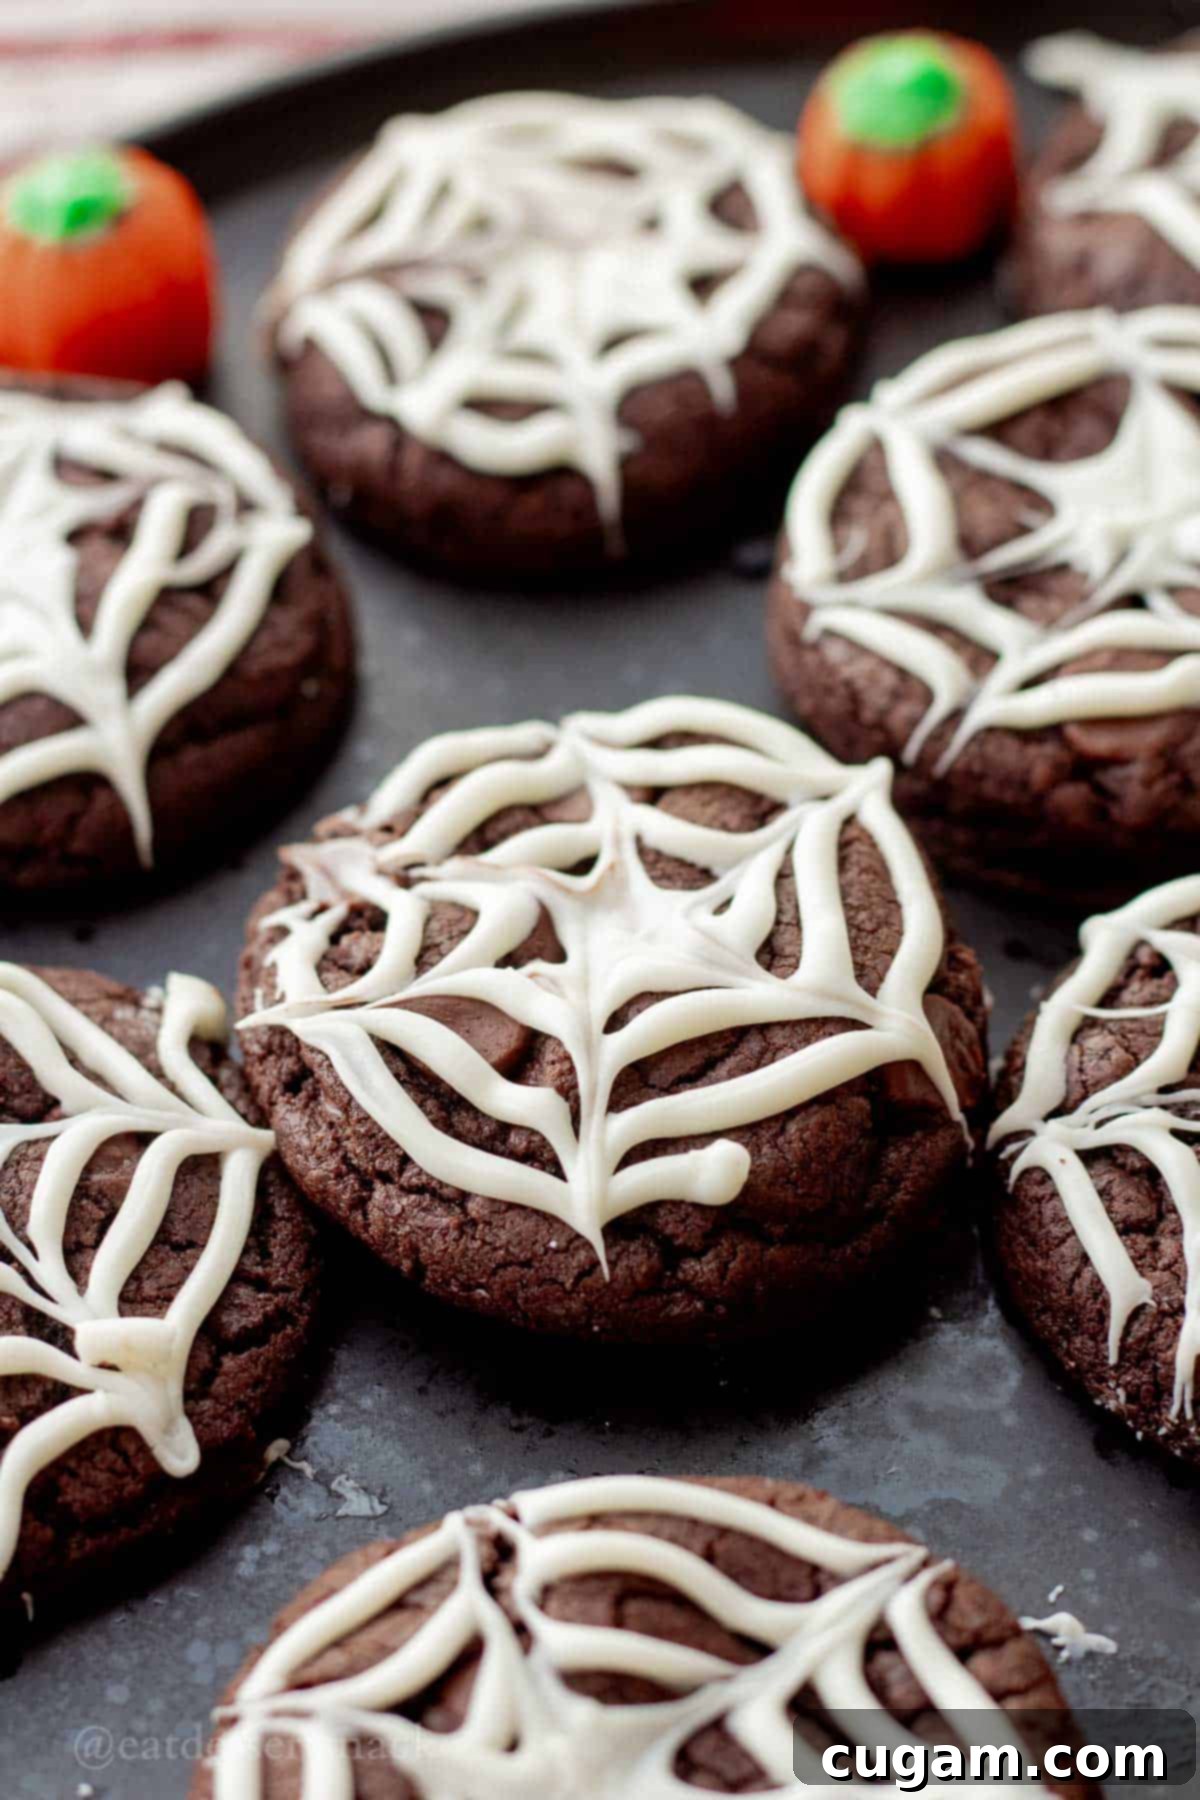
These spooky spider web cookies are an absolute blast to make and even more fun to share! Whether you’re hosting a ghoulish gathering, attending a festive Halloween party, or simply looking for a delightful activity to do with family, this recipe is guaranteed to be a hit. Expect to yield approximately two dozen cookies, or even more if you opt for slightly smaller sizes. For an extra touch of Halloween magic, consider making them a little larger and topping them with vibrant Halloween sprinkles or adorable candy pumpkins, much like our popular Halloween Pudding Cups. Their irresistible flavor, coupled with their charmingly spooky appearance, makes them an instant crowd-pleaser and a memorable addition to any spooky celebration.
What To Expect From These Delightful Cookies
Before diving into the full recipe, here’s a quick overview of what makes these Halloween Spider Web Cookies an absolute must-try for your holiday baking:
- Taste: Prepare your taste buds for a truly decadent experience. These cookies boast a super chewy texture and a profound, rich double chocolate flavor, thanks to the generous use of dark cocoa powder and plenty of chocolate chips. Each bite is a delightful balance of deep cocoa notes and semi-sweet chocolate, perfectly complemented by the subtle sweetness and creamy texture of the white chocolate webs. They’re not just a visual treat, but a culinary delight too!
- Ease: While the final result looks impressively intricate, the process itself is surprisingly straightforward, placing this recipe in the beginner to intermediate baker category. The fudgy chocolate cookie dough comes together with ease, requiring standard mixing techniques. While applying the white chocolate webs might require a tiny bit of practice to get that perfect spiral and drag, it’s a very simple technique to master. With a few cookies, you’ll quickly gain confidence and be creating picture-perfect spider webs in no time.
- Time: From start to finish, including active prep and baking, these delicious cookies can be ready in approximately 30-45 minutes. This quick turnaround makes them an ideal choice for last-minute Halloween party preparations, a fun after-school baking project, or whenever a craving for spooky sweets strikes. Remember to factor in a little extra time for the cookies to cool sufficiently and for the white chocolate spider webs to set properly, ensuring they hold their charming design before serving.
🛒 Key Ingredients for Your Spooky Spider Web Cookies
Crafting these amazing Chocolate Spider Web Cookies requires a few essential ingredients. Each plays a crucial role in achieving that perfect fudgy texture, rich chocolate flavor, and stunning web design. Here’s what you’ll need to gather:
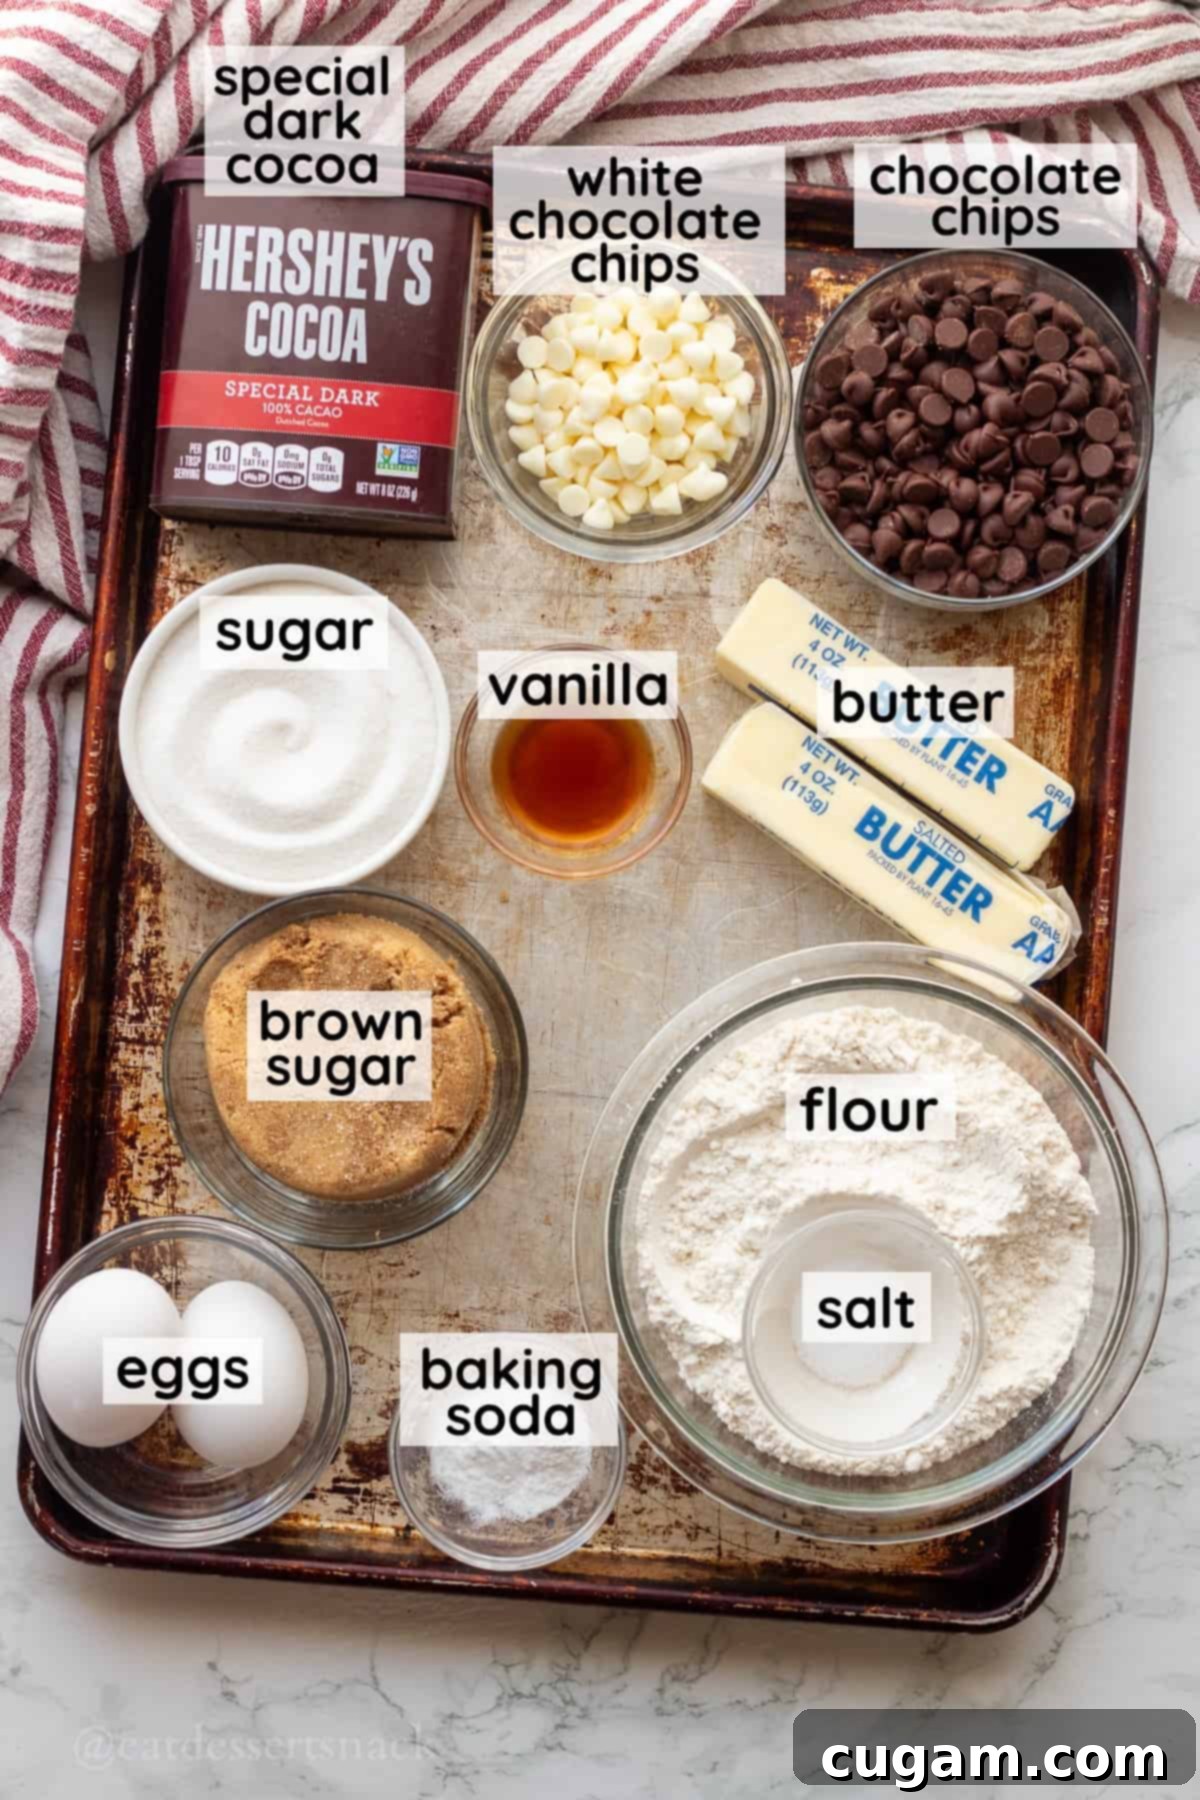
- Flour: Standard all-purpose flour is ideal for this recipe, providing the perfect structure and tenderness for our chewy cookies. Make sure to measure it correctly, either by weight or by spooning it into a measuring cup and leveling it off.
- Eggs: Eggs act as the primary binder in our cookie dough, contributing significantly to their desired chewy and slightly fluffy texture. For best results, ensure your eggs are at room temperature; this allows them to emulsify better with the butter and sugar, creating a smoother dough.
- Cocoa Powder: For that deep, dark, and utterly delicious chocolate base, I highly recommend using Hershey’s Special Dark Cocoa Powder. Its intense color and rich flavor truly make the white chocolate webs pop. However, if you prefer, regular unsweetened cocoa powder will also yield fantastic results, just with a slightly lighter color.
- Chocolate Chips: You’ll need two types of chocolate chips to bring these cookies to life:
- Semi-Sweet Chocolate Chips: These are mixed directly into the cookie dough, adding delightful bursts of melty chocolate in every bite. Choose your favorite brand for the best flavor.
- White Chocolate Chips: These are crucial for creating the iconic spider webs on top. Opt for a good quality brand that melts smoothly without seizing, as this will make the decorating process much easier.
- Butter: I always opt for salted butter in my cookie recipes. The hint of salt helps to balance the sweetness and enhances the overall flavor profile of the chocolate. If you only have unsalted butter, simply add an extra pinch (about ¼ teaspoon) of salt to the dry ingredients. Make sure your butter is softened to room temperature for optimal creaming with the sugars.
- Sugar: A perfect cookie texture often comes from a blend of sugars. This recipe uses a combination of brown sugar, which adds wonderful moisture and chewiness, and white granulated sugar, which contributes to spread and helps achieve those slightly crispy edges, creating the ultimate balanced cookie experience.
- Vanilla Extract: A staple in most cookie recipes, vanilla extract deepens and rounds out the rich chocolate flavor, adding a warm, aromatic note that enhances the overall taste.
- Baking Soda: This leavening agent is essential for helping the cookies rise slightly and contributes to their soft, tender, and chewy interior.
- Salt: A small amount of salt is crucial for balancing the sweetness in the cookies and bringing out the depth of the chocolate flavor.
✏️ Substitutions & Creative Variations for Your Spider Web Cookies
One of the joys of baking is being able to adapt recipes to suit your pantry, dietary preferences, or creative whims. Here are some fantastic substitutions and creative variations to make these Halloween Spider Web Cookies uniquely yours:
- Sugar Swaps: If you’re looking for an alternative to traditional granulated or brown sugar, coconut sugar can be an excellent swap. It offers a slightly nutty, caramel-like flavor and a similar sweetness level, though it might affect the cookie’s texture slightly, potentially making them a bit denser. Adjusting the amount might be necessary to achieve desired sweetness and texture.
- Cocoa Powder Alternatives: While Hershey’s Special Dark Cocoa Powder is highly recommended for its intense color and flavor, you can certainly use regular unsweetened cocoa powder for a slightly milder chocolate taste and a lighter brown cookie. For an even more dramatic, almost black cookie that makes those white webs truly pop, consider using black cocoa powder. This can sometimes be a bit drier, so you might need a tiny splash of milk to adjust dough consistency.
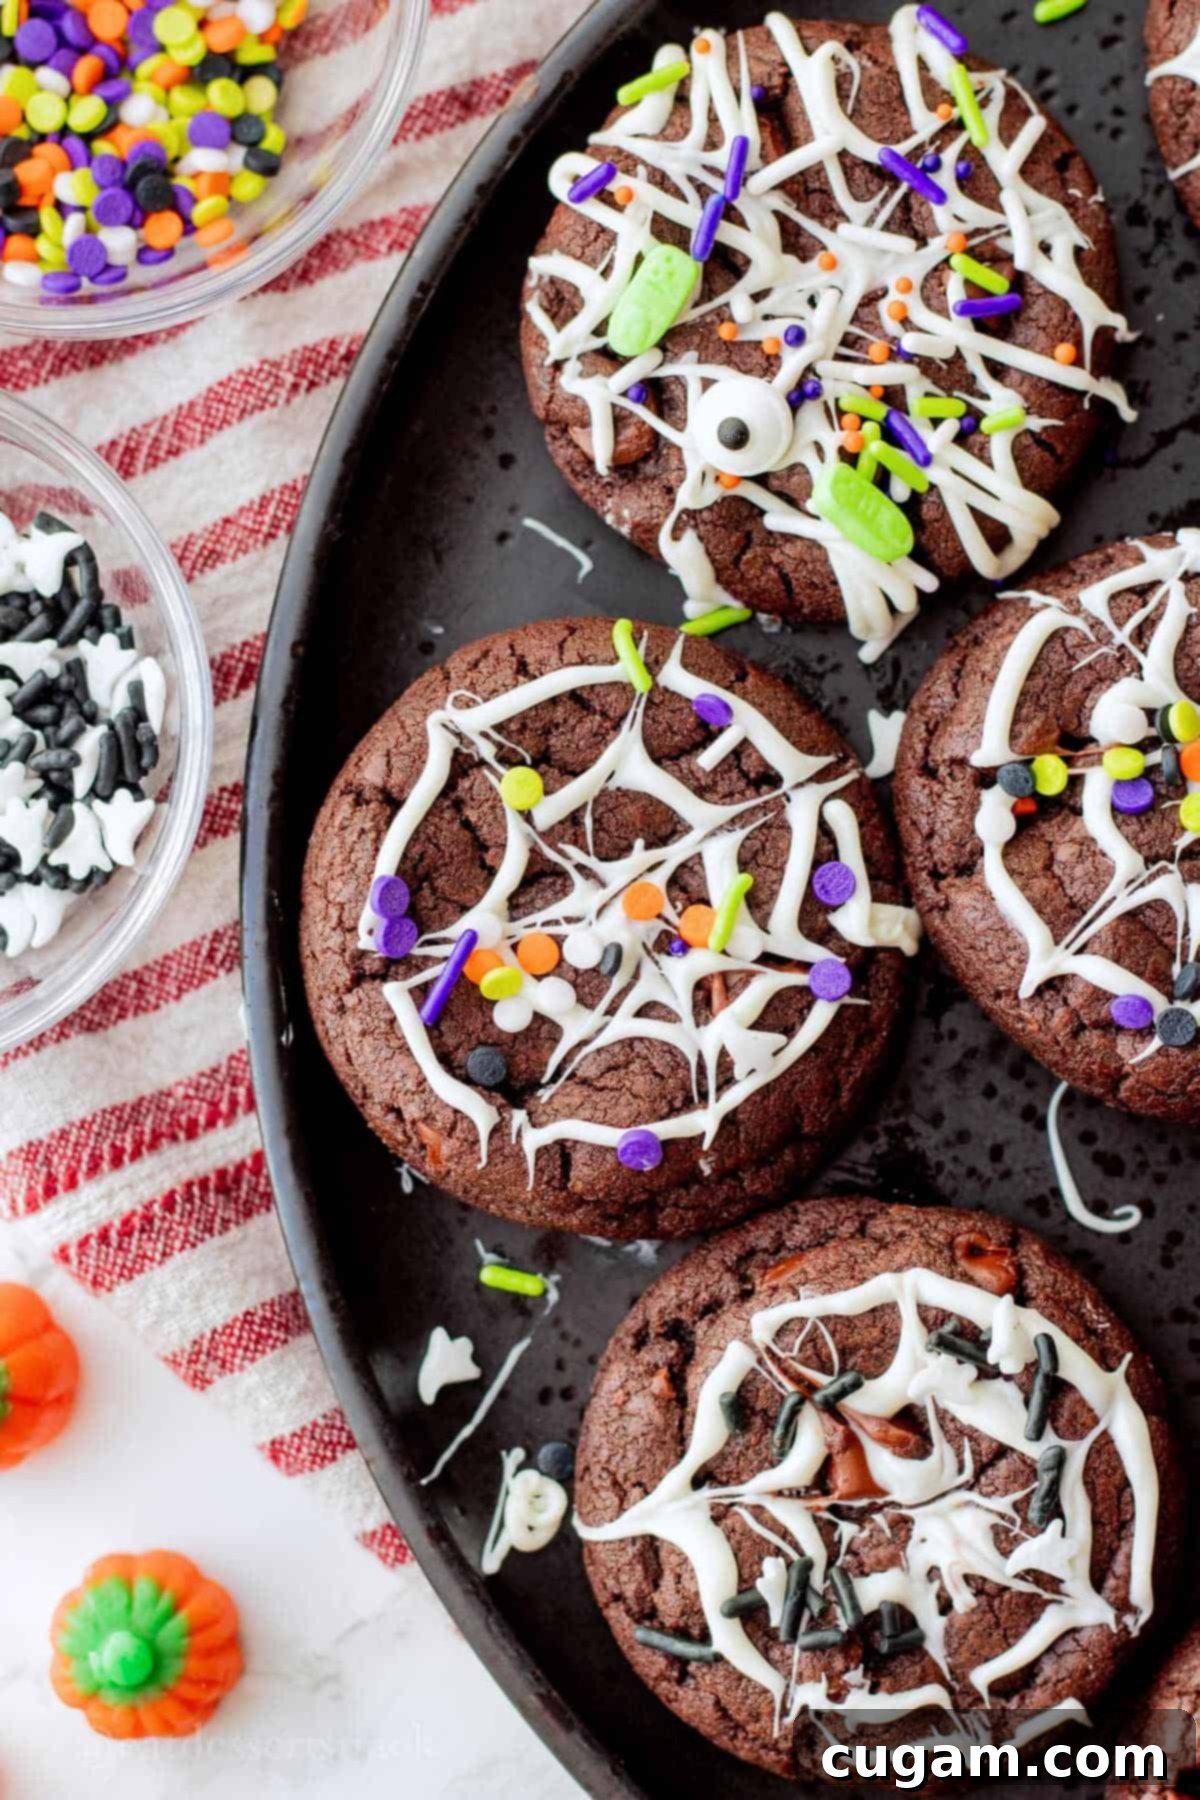
- Fun Toppings and Decor: Elevate your spooky cookies with additional decorations beyond the webs! Before the white chocolate webs fully set, you can sprinkle them with fun Halloween sprinkles in various shapes and colors (think ghosts, bats, pumpkins, or glittery orange and black mixes). For a truly creepy yet charming effect, carefully place small, clean fake plastic spiders directly onto the wet white chocolate. Just remember to remove these non-edible decorations before serving!
- Cookie Base Options: While the double chocolate cookie base provides a stunning, high-contrast canvas for the white webs, you can absolutely use a classic chewy chocolate chip cookie recipe as your foundation. The white chocolate webs will still look amazing on a lighter cookie, offering a different visual appeal that is equally festive.
- Flavor Boosters: For an even deeper chocolate flavor without making the cookies taste like coffee, consider adding 1 teaspoon of instant espresso powder to your dry ingredients. A tiny pinch of cayenne pepper (¼ teaspoon) can also add a subtle, unexpected warmth for a “spicy” chocolate twist, perfect for adventurous palates.
- Nutty Additions: For those who love a bit of crunch, gently fold in about ½ cup of chopped walnuts, pecans, or almonds along with the chocolate chips. These additions will add a delightful texture and nutty flavor dimension to your fudgy cookies.
- Extract Variations: Instead of or in addition to vanilla extract, try a hint of almond extract for a different flavor profile, or a few drops of peppermint extract for a festive holiday twist, especially if you’re making these for a non-Halloween fall event.
🧑🍳 Step-by-Step Instructions for Spooky Spider Web Cookies
Follow these detailed steps to create your own batch of fudgy, delicious, and perfectly spooky Halloween Spider Web Cookies. Precision in baking leads to the best results, so take your time and enjoy the process of bringing these festive treats to life!
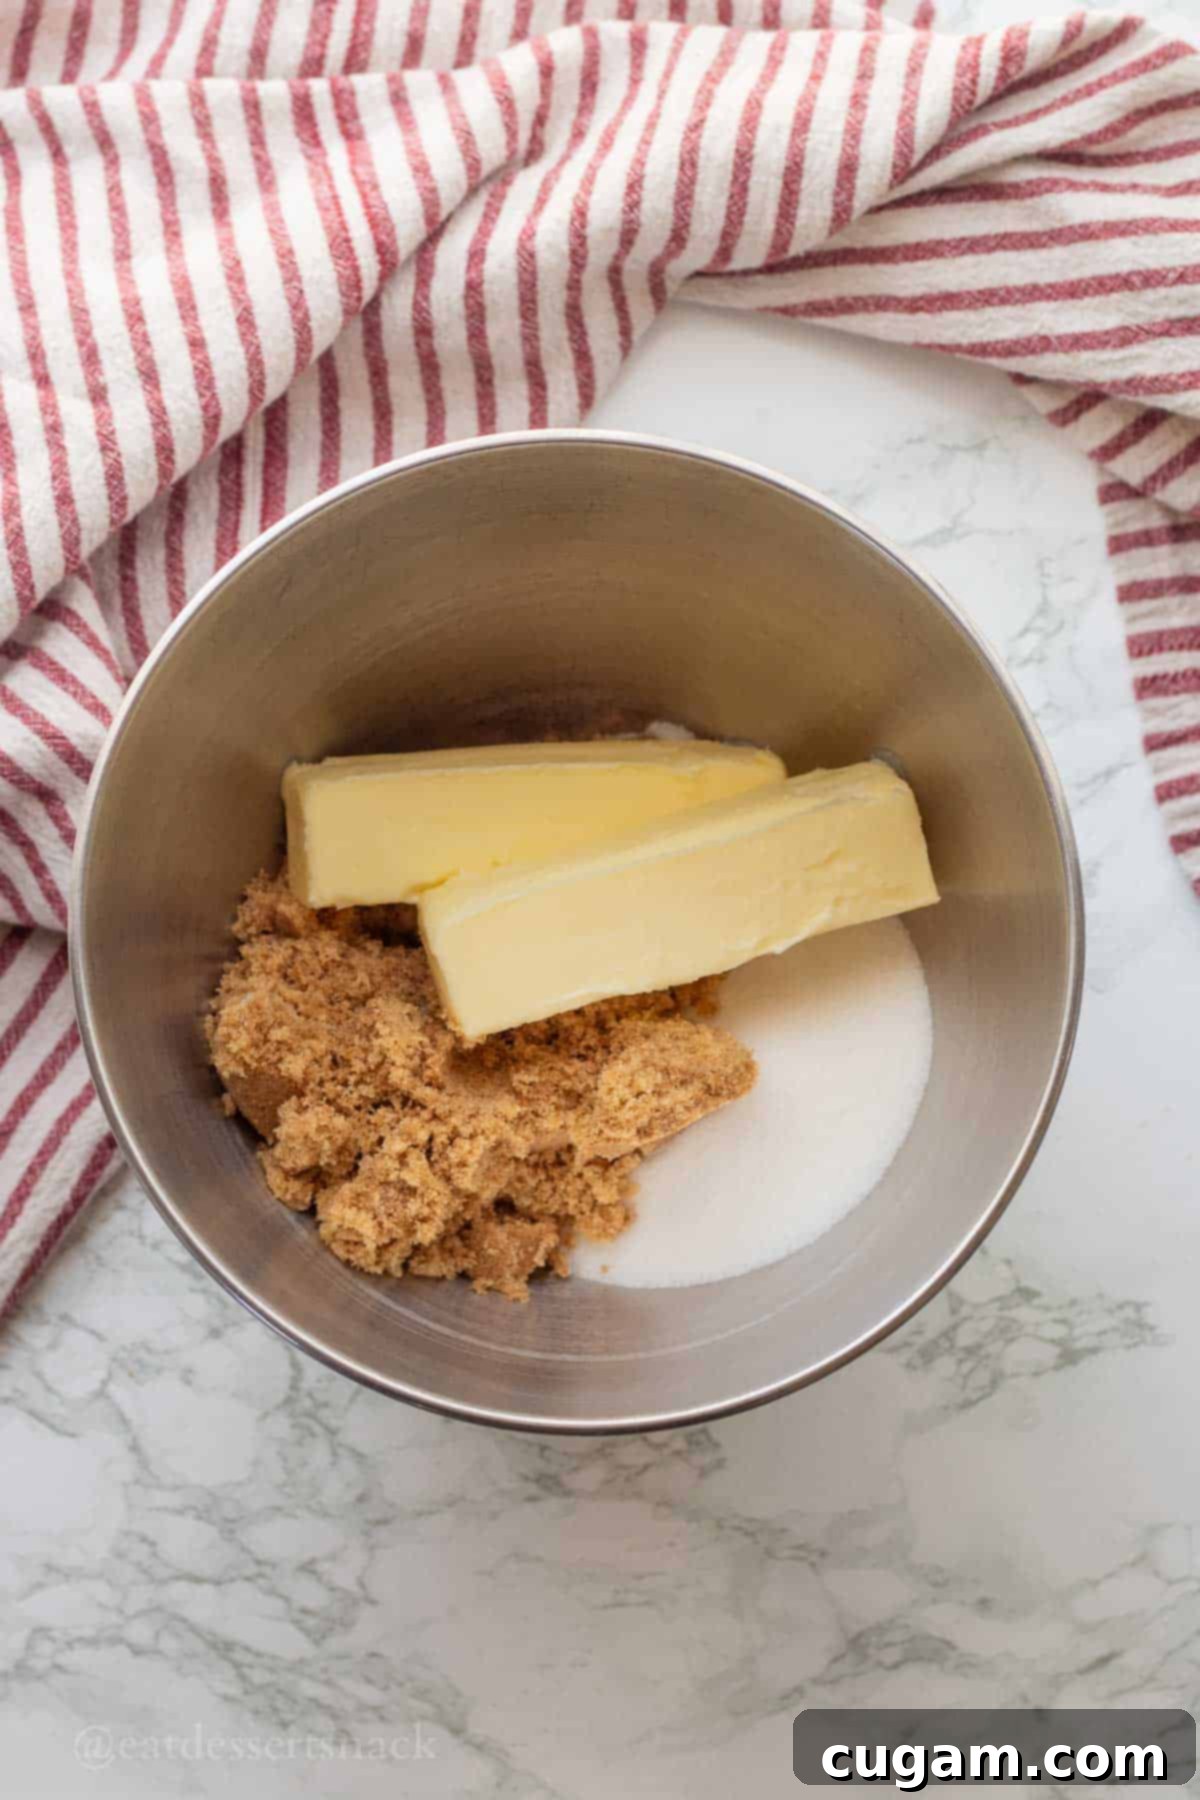
- Step 1: Cream Butter and Sugars. In a large mixing bowl, combine the softened salted butter, light brown sugar, and white granulated sugar. Using an electric mixer (or the paddle attachment on a stand mixer), cream these ingredients together on medium to high speed for approximately 3 minutes. Continue mixing until the mixture becomes notably lighter in color and develops a fluffy, airy consistency. This step is crucial for incorporating air, which contributes significantly to the cookies’ light and chewy final texture.
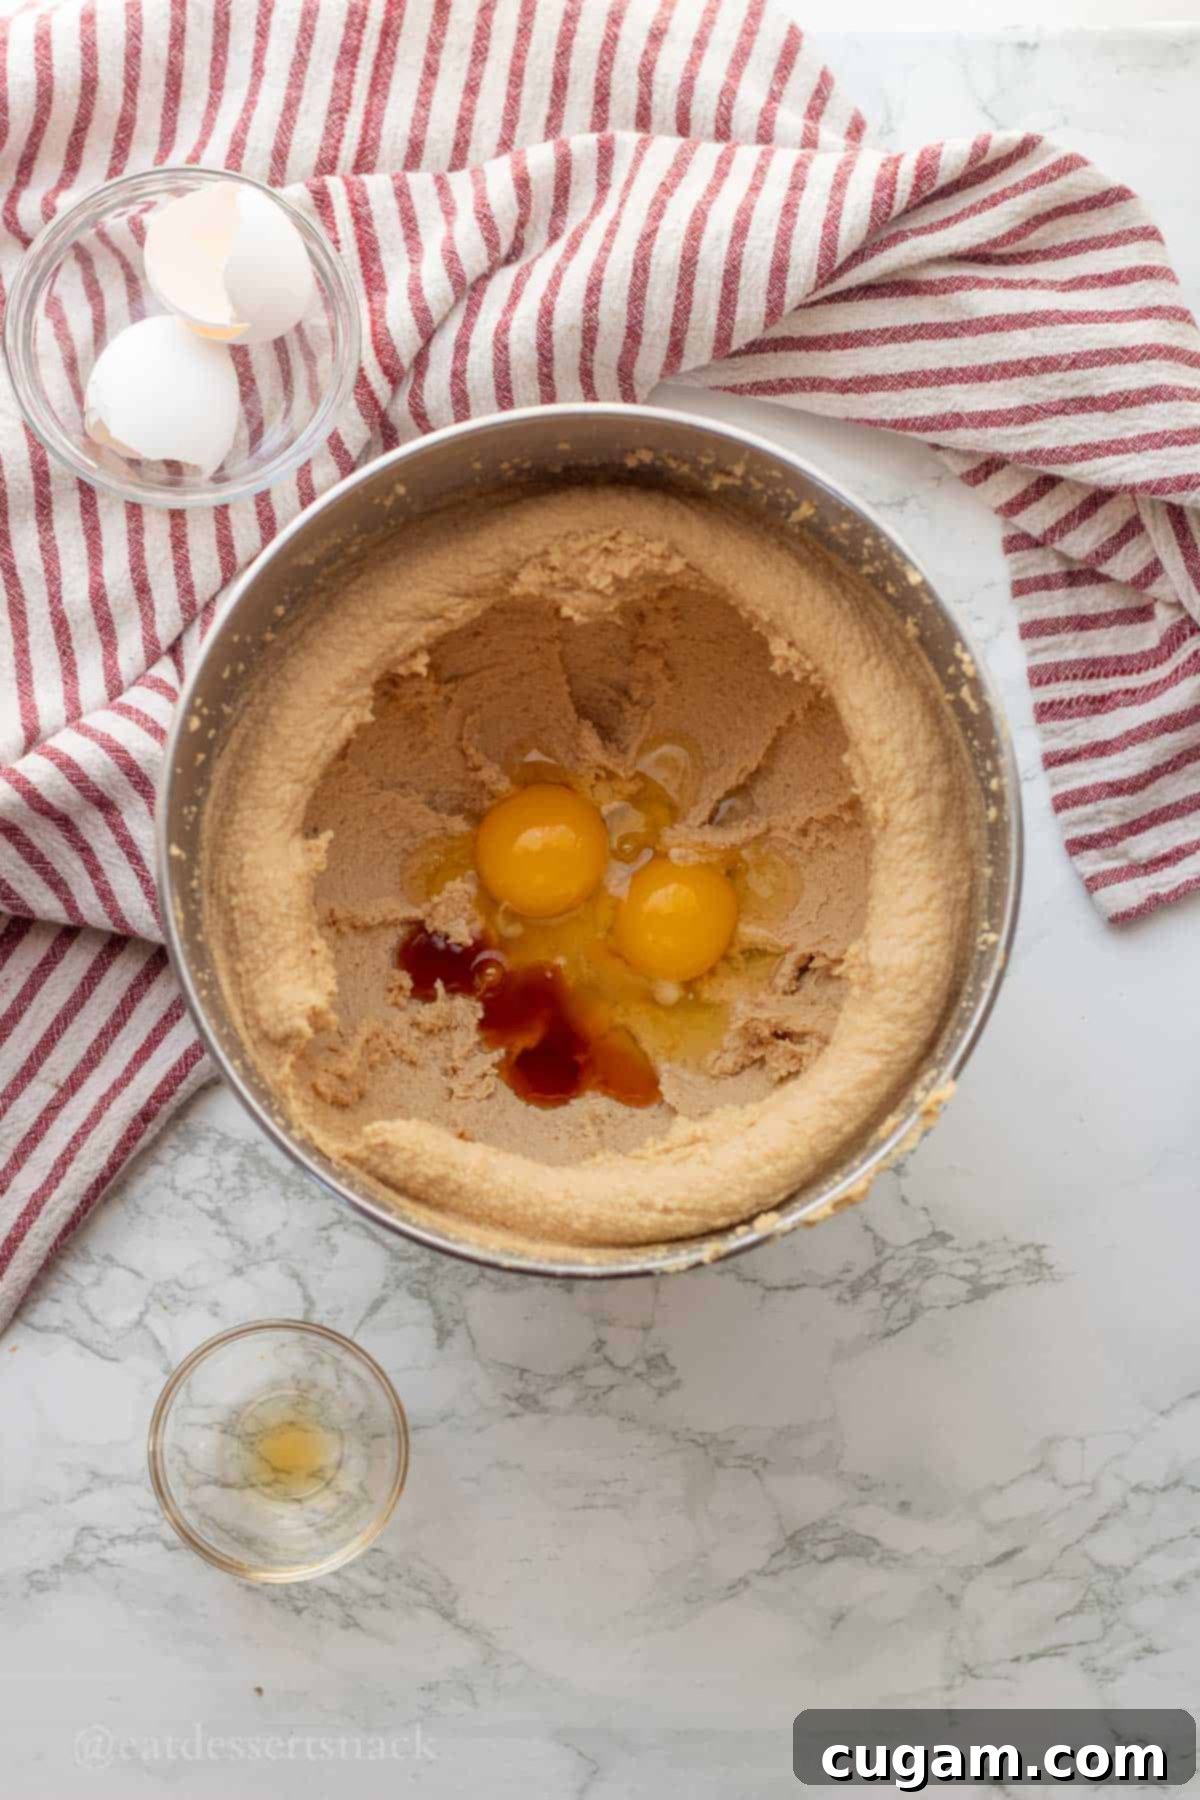
- Step 2: Incorporate Eggs and Vanilla. Crack in the two room temperature eggs, adding them one at a time and mixing well after each addition until fully incorporated. Then, pour in the vanilla extract. Mix on medium speed for about 1-2 minutes, ensuring the eggs are thoroughly combined into the butter-sugar mixture. The mixture should return to a fluffy consistency, indicating it’s well emulsified. Don’t forget to scrape down the sides of the bowl as needed to ensure everything is evenly combined.
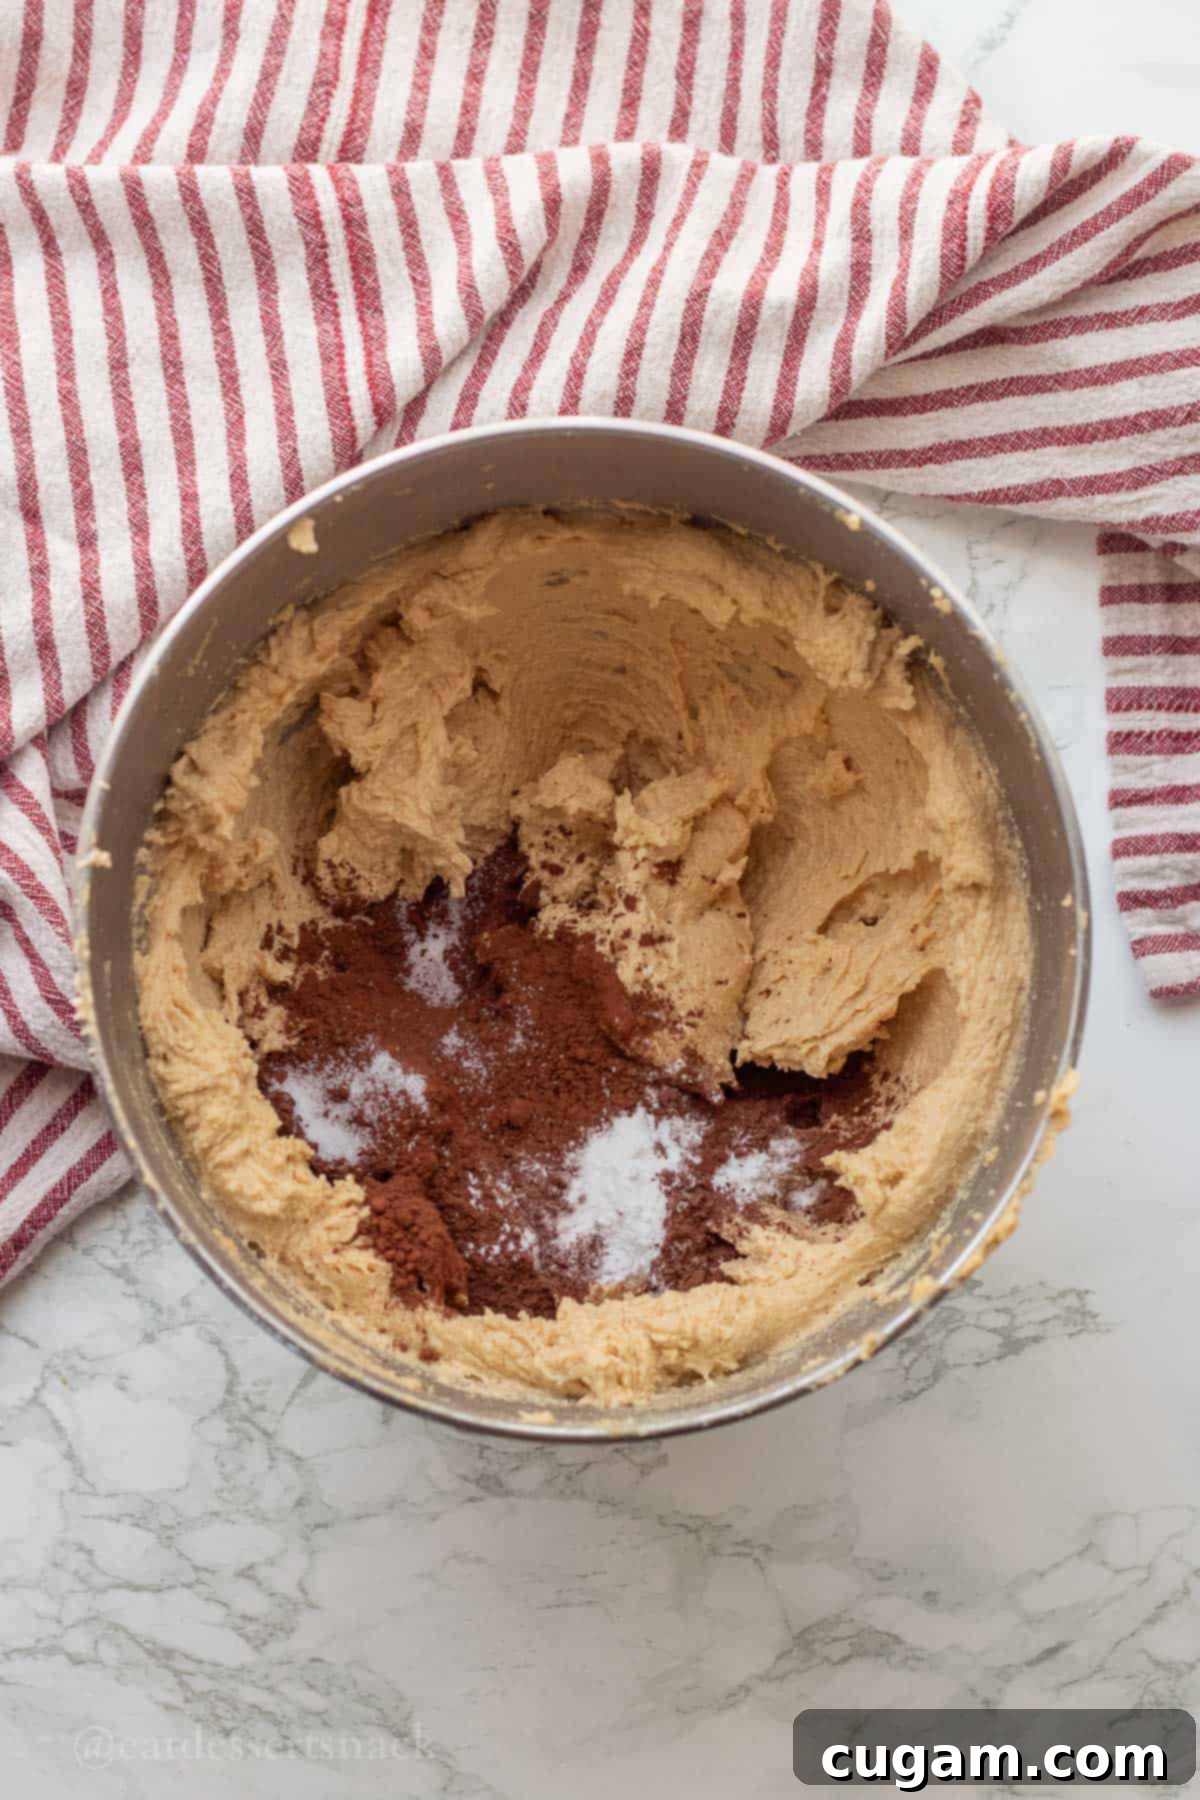
- Step 3: Add Dry Ingredients (Cocoa, Baking Soda, Salt). To the wet mixture, add the dark cocoa powder, baking soda, and salt. Mix on low speed just until these dry ingredients are fully incorporated and no streaks of powder remain. Be careful not to overmix at this stage, as this can start to develop gluten prematurely.
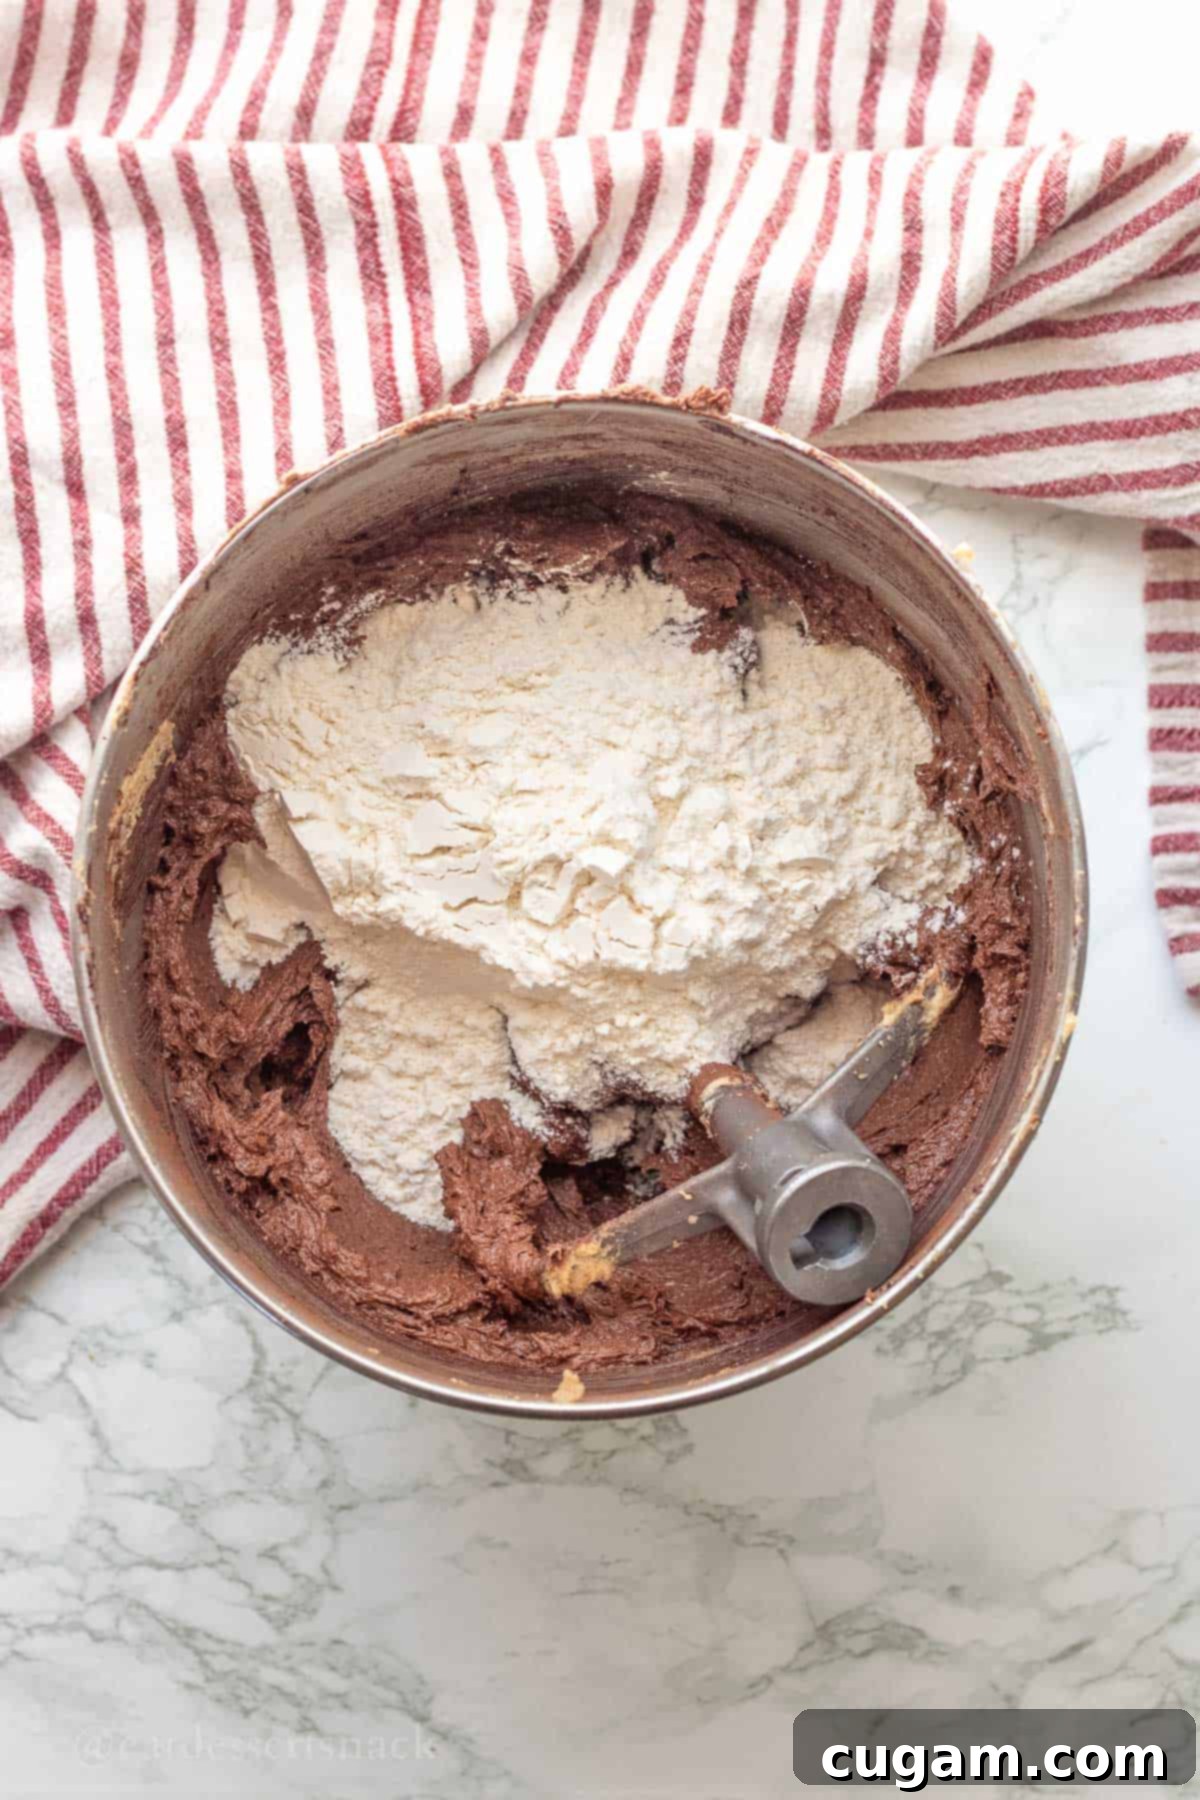
- Step 4: Gradually Add Flour. Begin adding the all-purpose flour to the bowl, mixing slowly on low speed. Mix for only 1-2 minutes, or just until all the flour has combined into the dough and there are no visible dry flour pockets left. Overmixing the flour can develop gluten, which leads to tough, less tender cookies, so mix just enough until combined.
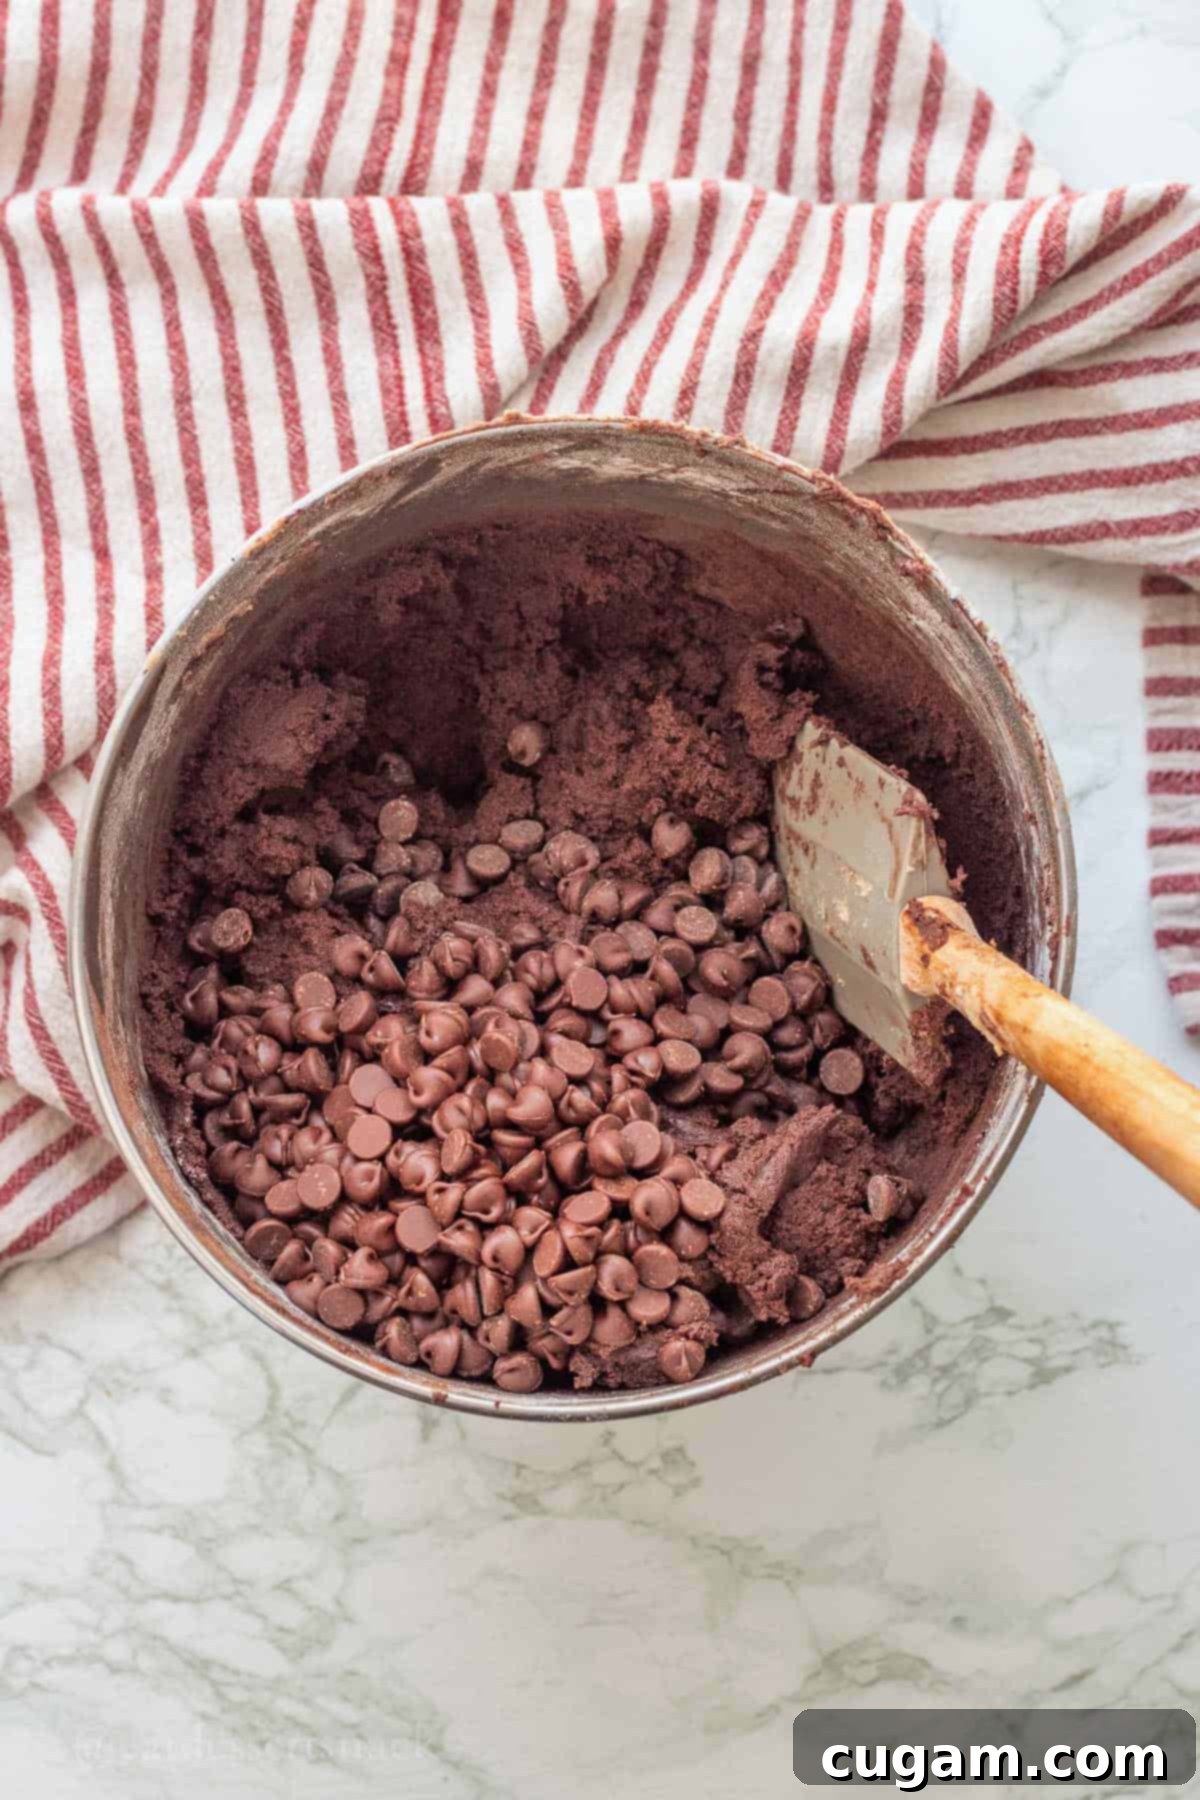
- Step 5: Fold in Chocolate Chips. Finally, add the semi-sweet chocolate chips to the cookie dough. Mix on the lowest speed possible, or even better, gently fold them in by hand with a sturdy spatula, until they are evenly distributed throughout the dough. You want to avoid breaking them up too much during this step.
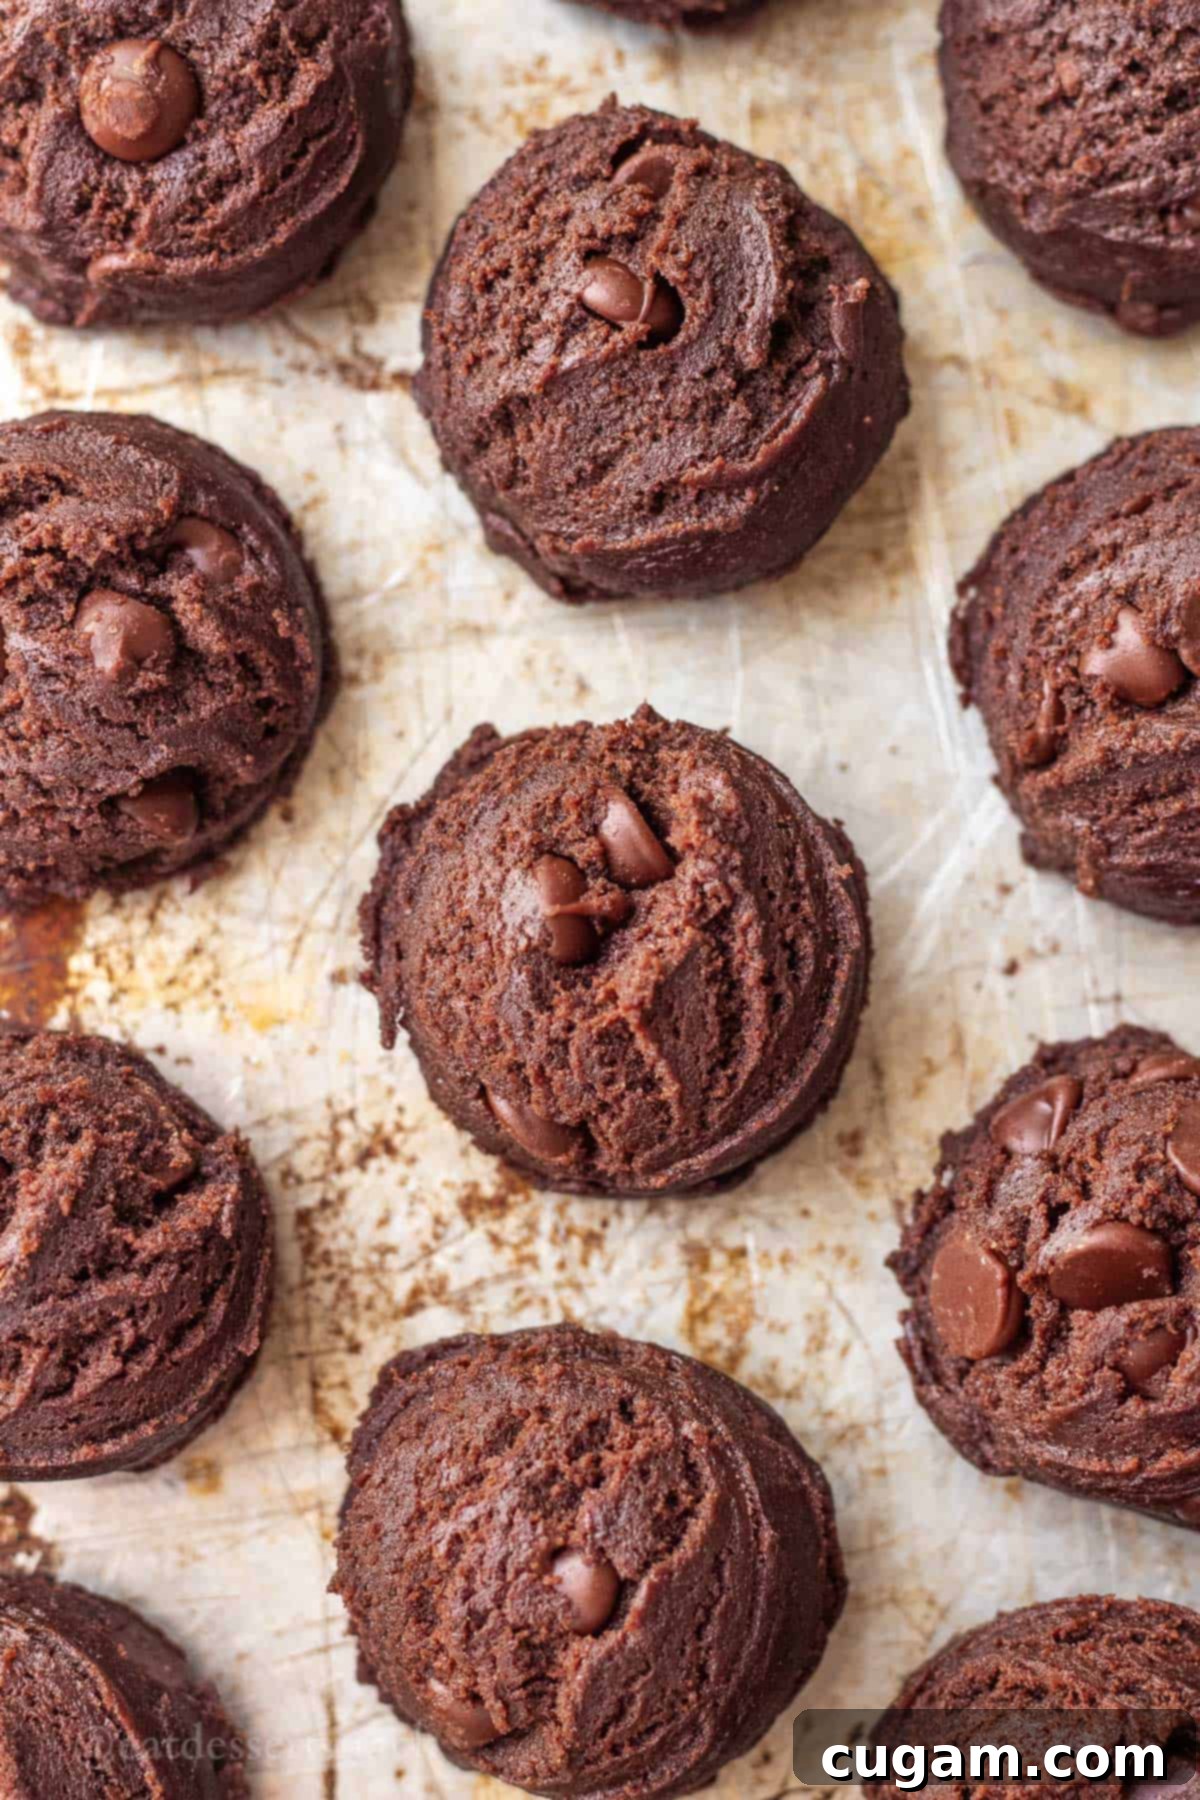
- Step 6: Scoop and Bake. Preheat your oven to 350℉ (175°C). Prepare two baking sheets by lining them with parchment paper or spraying lightly with baking spray. Scoop uniform balls of cookie dough onto the prepared sheets, leaving enough space between them for spreading – typically about 12 cookies per pan. A 1.5 Tablespoon cookie scoop works perfectly for making 24-30 consistently sized cookies. Bake for 8-10 minutes. Remember, underbaking is always preferable to overbaking for a fudgy, chewy center! The edges should be set, but the centers still look slightly soft.
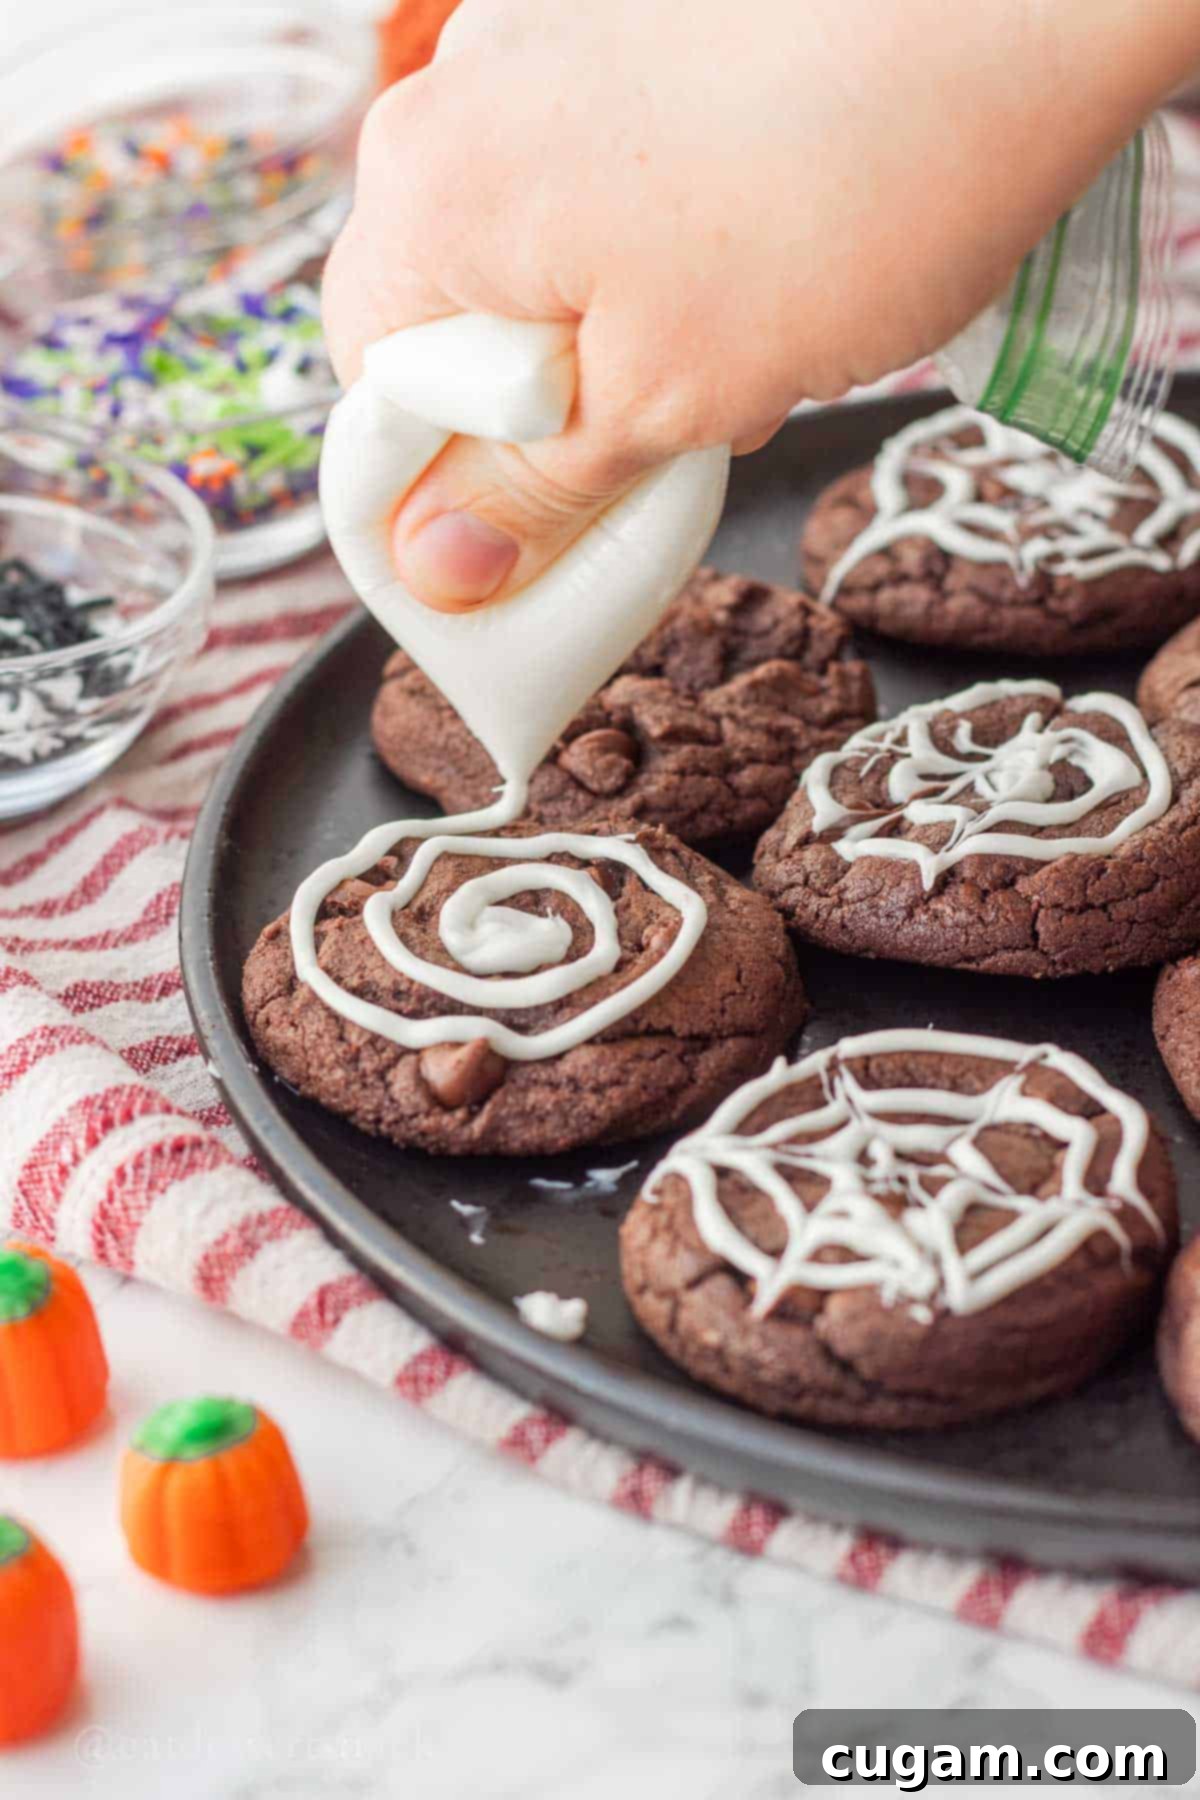
- Step 7: Prepare White Chocolate Webs. Allow the baked cookies to cool on the baking sheets for at least 10 minutes. While they are cooling, prepare your white chocolate. Place ¾ cup white chocolate chips into a small plastic zip-top bag or a disposable piping bag. Microwave for 15-30 seconds, then knead the bag to melt the chocolate evenly. Continue microwaving in 5-10 second intervals and kneading until completely smooth with no lumps. Cut a very small hole in one corner of the bag. Working in batches of about 5 cookies at a time (this is important so the chocolate doesn’t set too quickly), pipe a spiral shape onto each cookie, starting from the center and working outwards. It’s perfectly fine if the cookies are still a bit warm; this helps the white chocolate spread slightly. Remember to make a small dollop of chocolate in the very center before spiraling; this ensures enough chocolate for the center of your web!
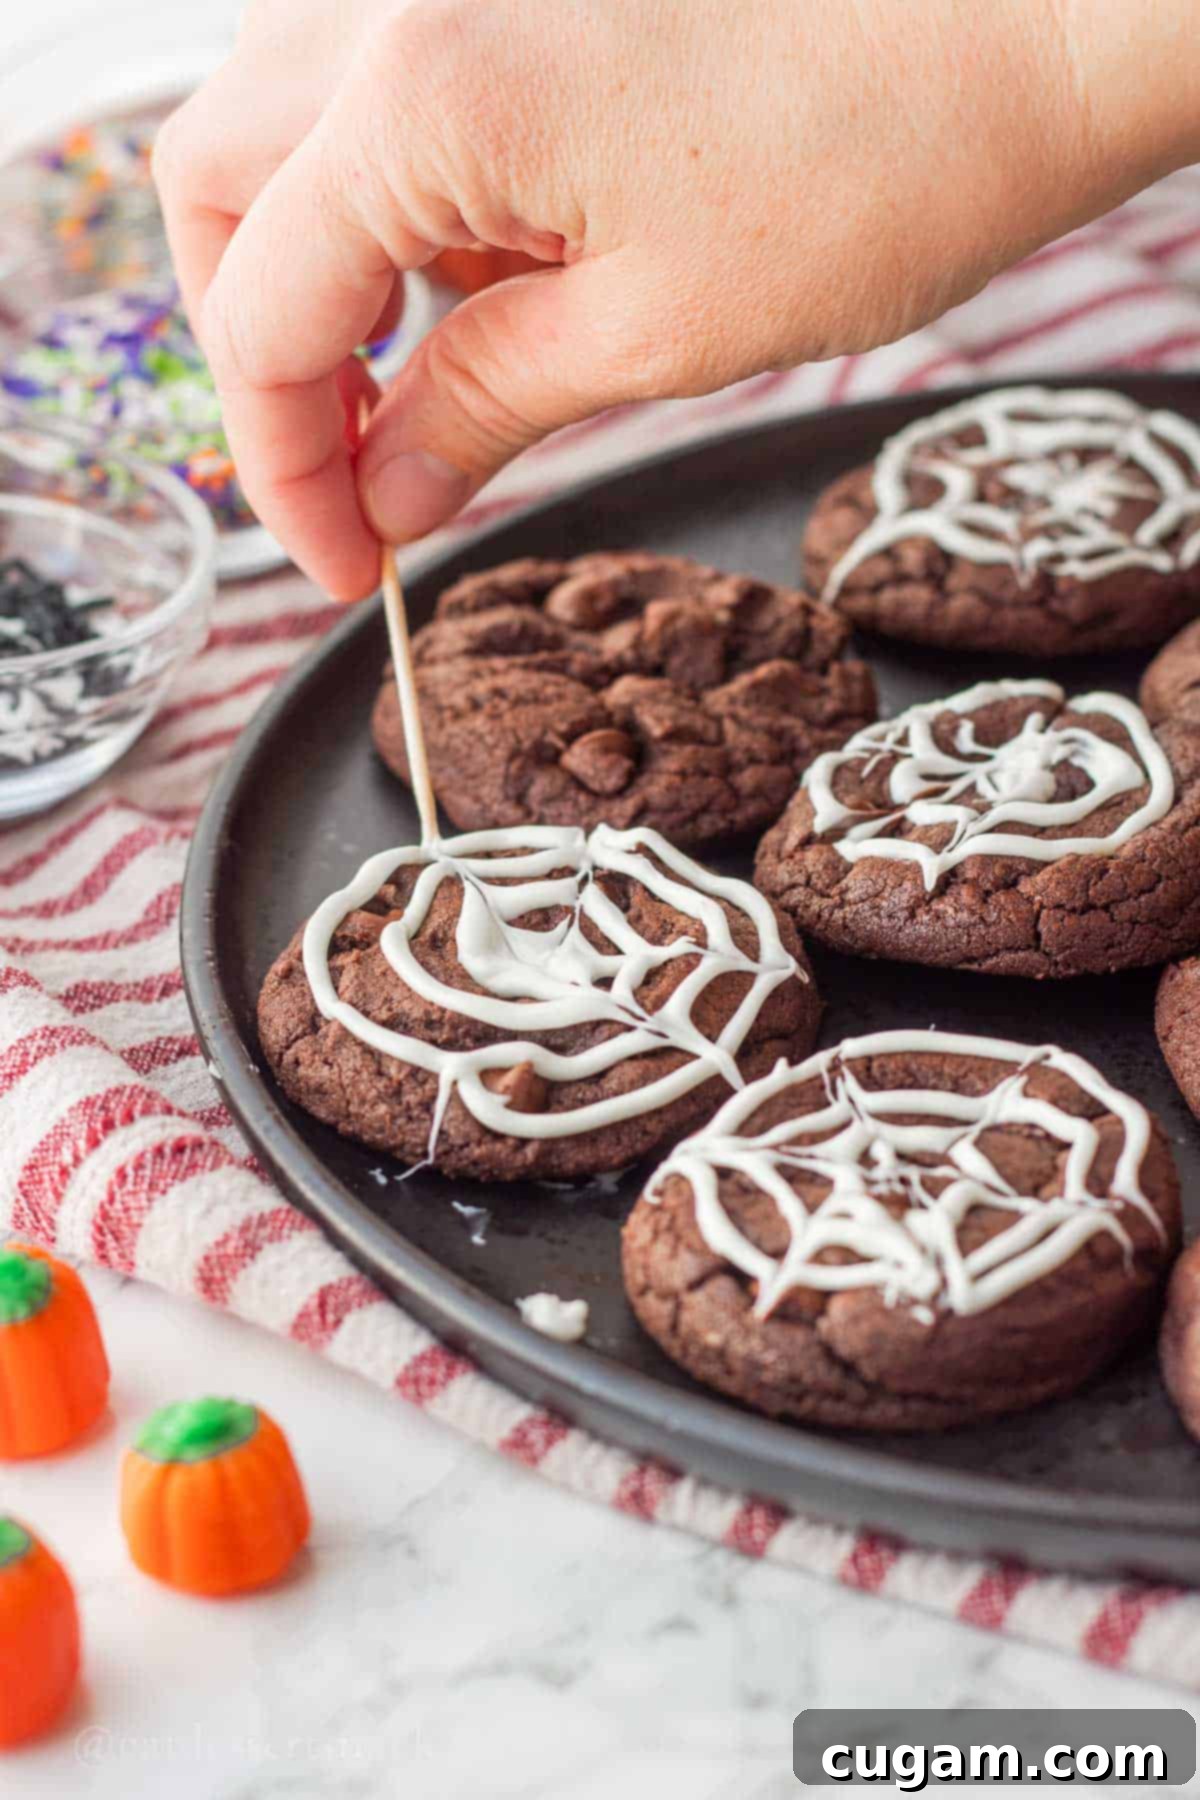
- Step 8: Create the Spider Web Design. Immediately after piping the spiral on a batch of 5-6 cookies, grab a toothpick or the tip of a small knife. Starting from the very center of each cookie, gently drag a line of white chocolate outwards towards the edge of the cookie. Repeat this about 6 times per cookie, evenly spacing your drags, to create the classic spider web pattern. Work quickly but carefully to ensure the chocolate is still wet enough to feather and blend smoothly. Once you’ve completed a batch, move on to the next set of cookies.
For an extra festive and spooky touch, before the white chocolate fully hardens, you can press fun Halloween sprinkles onto the webs or carefully place small, clean plastic spiders (ensure they are non-edible and remove them before eating!) for a truly eerie yet charming effect. These optional additions are a wonderful final flourish!
Allow the decorated cookies to rest at room temperature for 15-20 minutes, or until the white chocolate has fully hardened and set. Once set, your delightful and spooky Halloween Spider Web Cookies are ready to be enjoyed, shared, and admired by all your trick-or-treaters and party guests!
📌 Top Tips & Expert Hacks for Perfect Cookies
Achieving perfect Chocolate Spider Web Cookies is easy with a few insider tips and clever hacks. Keep these in mind to ensure your baking experience is smooth and your cookies are show-stoppingly delicious and beautiful!
- Melt White Chocolate Carefully: This is arguably the most crucial step for perfect webs. White chocolate is notoriously sensitive to heat. Avoid overheating it in the microwave at all costs. Start with short bursts (15-30 seconds initially) and then microwave in very short 5-10 second intervals, kneading the bag constantly in between. If white chocolate gets too hot, it will ‘seize’ – becoming thick, crumbly, and completely unusable for piping. Should this happen, unfortunately, you’ll need to discard it and start over with a fresh batch of white chocolate chips.
- The Essential Central Dollop: When piping your spiral shape onto the cookie, don’t just start with a thin line. Begin by making a slightly larger dollop of white chocolate directly in the center of each cookie. This ensures you have ample chocolate in the middle, which is essential for creating a full, well-defined web when you drag your toothpick outwards. It prevents the center of your web from looking sparse or incomplete.
- Smooth Cookie Tops for Best Webs: The smoother the surface of your baked cookies, the cleaner, sharper, and more impressive your white chocolate webs will look. To achieve this desired smooth finish, after scooping the dough, gently roll the cookie dough balls between your palms for a few seconds before placing them on the baking sheet. This simple trick helps to smooth out any rough edges and results in beautifully uniform cookies after baking.
- Room Temperature Ingredients are Key: Always ensure your butter and eggs are at proper room temperature (this usually takes about 30-60 minutes on the counter). This allows them to cream together more effectively with the sugars, creating a well-emulsified mixture that traps air. This trapped air is what contributes to lighter, fluffier, and more evenly textured cookies. Cold ingredients won’t combine properly.
- Avoid Overmixing the Flour: Once you add the all-purpose flour to the wet ingredients, mix only until the flour is just combined and no dry streaks remain. Overmixing develops the gluten in the flour, which can lead to tough, dense, and dry cookies instead of the desired fudgy, chewy texture.
- Bake in Batches for Evenness: If your oven tends to have hot spots, it’s a good idea to rotate your baking sheets halfway through the baking time. This ensures all cookies bake evenly and have a consistent texture. Additionally, avoid overcrowding the baking sheets, as this can impede proper airflow and prevent the cookies from spreading and baking correctly.
❄️ Storage and Make-Ahead Tips for Halloween Cookie Fun
These delicious Chocolate Spider Web Cookies are perfect for preparing in advance or storing to enjoy later. Here’s how to keep them fresh and delicious, or how to get a head start on your Halloween baking:
Room Temperature: Once fully cooled and the white chocolate has completely set, store your decorated cookies in an airtight container at room temperature. They will maintain their delicious fudgy texture and fresh taste for up to 3 days. To keep them at their peak, you can place a slice of bread in the container to help retain moisture.
Frozen: For longer storage, these festive cookies can be frozen for up to 3 months. To freeze, first place the cooled, decorated cookies in a single layer on a baking sheet and freeze until solid (about 1-2 hours). Once firm, transfer them to an airtight freezer-safe container or a heavy-duty freezer bag, separating layers with parchment paper to prevent sticking. Thaw them at room temperature for a few hours or overnight before serving.
Yes, absolutely! Preparing these cookies in advance is a fantastic way to manage your holiday baking and reduce stress. You have a couple of great options for making these cookies ahead:
- Freeze the Dough: Prepare the cookie dough as instructed, then scoop it into individual balls using your cookie scoop. Place the dough balls on a baking sheet lined with parchment paper and freeze until solid. Once frozen, transfer them to a freezer-safe bag or container, where they can be stored for up to 3 months. When you’re ready to bake, you can bake them directly from frozen; just add an extra 2-4 minutes to the baking time (totaling 10-12 minutes).
- Freeze Baked Cookies (Without Webs): Bake and cool the chocolate cookies completely without adding the white chocolate webs. Once cooled, freeze them in an airtight container for up to 3 months, again separating layers with parchment paper. When you’re ready to serve, thaw the cookies at room temperature, then melt and pipe the white chocolate webs fresh. This ensures the webs look their absolute best and don’t get smudged during storage. You can also bake and cool them a day or two before your event and add the webs closer to serving time.
Yes! While white chocolate offers a distinct flavor and creamy texture, royal icing or a simple powdered sugar glaze can absolutely be used for the spider webs if preferred, especially if you have a white chocolate aversion or want to experiment with different tastes. To make a quick powdered sugar glaze, combine 1.5 cups of powdered sugar with ½ teaspoon of vanilla extract and 1 Tablespoon of milk. Whisk these ingredients together until completely smooth, adding a tiny bit more milk (a teaspoon at a time) if needed to reach a pipeable consistency similar to melted chocolate. This glaze will harden similarly to white chocolate, creating a lovely and well-defined web effect on your cookies.
🍁 More Delicious Fall & Halloween Treats to Explore
If you’re looking for more festive recipes to complement your Chocolate Spider Web Cookies, celebrate the autumn season, or simply get further into the Halloween spirit, be sure to explore these other delightful treats. They’re perfect for any fall gathering or spooky celebration:
- Halloween Pudding Cups
- Pumpkin Cream Cheese Dip
- Apple Cider Baked Donuts
- Butterscotch Pumpkin Cake
Did you try this amazing recipe? We would absolutely love to hear from you! Please make sure to leave a ⭐️ star rating and a comment below the recipe card. Your feedback is incredibly valuable to us and immensely helpful to other readers looking for delicious new treats.
📲 STAY CONNECTED WITH SARA! 👋 Follow Facebook, Instagram, or Pinterest to get the latest updates, behind-the-scenes glimpses, and new delicious recipes straight from our kitchen!
📝 Printable Recipe Card: Fudgy Chocolate Spider Web Cookies
Spider Web Cookies
Sara Smith | Eat Dessert Snack
Pin Recipe
Ingredients
- 1 cup salted butter (226 g), softened
- 1 cup light brown sugar (225 g), packed
- 1 cup granulated white sugar (225 g)
- 2 large eggs , room temperature
- 2 teaspoons vanilla extract
- ¾ cup dark cocoa powder (68 g, e.g., Hershey’s Special Dark)
- 1½ teaspoons baking soda
- ½ teaspoon salt
- 3 cups all purpose flour (420 g)
- 1½ cups semi-sweet chocolate chips (250 g)
- ¾ cup white chocolate chips (135 g)
Instructions
-
Preheat your oven to 350℉ (175°C). Prepare two baking sheets by lining them with parchment paper or lightly greasing them with baking spray. This step is essential to prevent the cookies from sticking and ensures easy removal after baking.
-
In a large mixing bowl, combine the softened salted butter, light brown sugar, and white granulated sugar. Using an electric mixer (or the paddle attachment on a stand mixer), cream these ingredients together on medium to high speed for approximately 3 minutes. Beat until the mixture becomes notably lighter in color and develops a fluffy, airy consistency. This thorough creaming is crucial for incorporating air, which contributes significantly to the cookies’ light and chewy final texture.
-
Add in the room temperature eggs one at a time, mixing well after each addition until fully incorporated. Then, pour in the vanilla extract. Continue to mix on medium speed for about 1-2 minutes until the eggs are thoroughly combined and the mixture is fluffy once more. Remember to stop and scrape down the sides of the bowl with a spatula to ensure all ingredients are well combined and there are no unmixed pockets.
-
In a separate medium-sized bowl, whisk together the dark cocoa powder, baking soda, and salt. Add these dry ingredients to the wet mixture in the large bowl and mix on low speed just until they are fully incorporated and no streaks of powder remain. Be careful not to overmix at this stage, as excessive mixing can start to develop the gluten in the flour prematurely, leading to a tougher cookie.
-
Gradually add the all-purpose flour to the bowl, mixing slowly on low speed for 1-2 minutes. Mix only until all the flour has just combined into the dough and there are no visible dry flour pockets left. It’s important to avoid overmixing the flour, as this will develop gluten and can result in tough, dense, and dry cookies instead of the desired fudgy, chewy texture.
-
Gently fold in the semi-sweet chocolate chips. You can do this on the lowest speed of your mixer for a very short period, or for best results, fold them in by hand with a sturdy rubber spatula until they are evenly distributed throughout the dough. The goal is to incorporate them without overworking the dough or breaking the chips into tiny pieces.
-
Scoop uniform balls of cookie dough onto your prepared baking sheets, ensuring adequate spacing between each cookie (approximately 2 inches apart, or 12 cookies per pan). For consistent sizing, a 1.5 Tablespoon cookie scoop is ideal, typically yielding 24-30 cookies. Before baking, you can gently roll the scooped dough balls between your palms to smooth them out for neater webs later.
Bake in the preheated oven at 350 ℉ (175°C) for 8-10 minutes. The cookies should have set edges but still appear slightly soft and puffy in the center for that perfect fudgy and chewy texture. Remember, underbaking slightly is key for soft, chewy cookies; they will continue to set as they cool.
-
Once baked, let the cookies cool on the baking sheets for at least 10 minutes before decorating. This allows them to firm up slightly. While they cool, melt the white chocolate. Place ¾ cup white chocolate chips in a small plastic zip-top bag or a disposable piping bag. Microwave for 15-30 seconds initially, then knead the bag to melt the chocolate. Continue microwaving in very short 5-10 second intervals, kneading thoroughly after each, until the chocolate is completely smooth with no lumps. Cut a very small hole (about ⅛ inch) in one corner of the bag. Working in batches of 5-6 cookies at a time (this is crucial to prevent the chocolate from setting too quickly), pipe a spiral shape onto each cookie, starting from a central dollop and working outwards. It’s okay if the cookies are still a little warm, as this helps the chocolate spread smoothly and adhere to the cookie.
* When making the spiral shape, make a slightly larger dollop of chocolate in the center of each cookie before starting the spiral to the rest of the cookie. This helps to ensure there’s enough chocolate for a full, well-defined web design!
-
Immediately after piping the spiral on a batch of 5-6 cookies, take a clean toothpick or the tip of a small, sharp knife. Starting from the very center of each cookie, gently drag a line of white chocolate outwards towards the edge of the cookie. Repeat this motion about 6 times per cookie, evenly spacing the drags around the spiral, to create the distinctive spider web pattern. Work quickly but carefully before the chocolate hardens.
Once all cookies are decorated, let them rest at room temperature for 15-20 minutes, or until the white chocolate has fully hardened and set. Then, they are ready to serve, share, and enjoy your spooky masterpiece!
Notes
Storage: Store cooled cookies in an airtight container at room temperature for up to 3 days, or freeze for up to 3 months.
IMPORTANT TIP: Be very cautious when melting white chocolate. Do not warm it up for too long (more than 20-30 seconds initially, then very short bursts) in the microwave. Overheating will cause it to seize and become thick, clumpy, and unusable. If it hardens or becomes clumpy, you will need to discard it and start over with fresh white chocolate chips.
Nutrition
