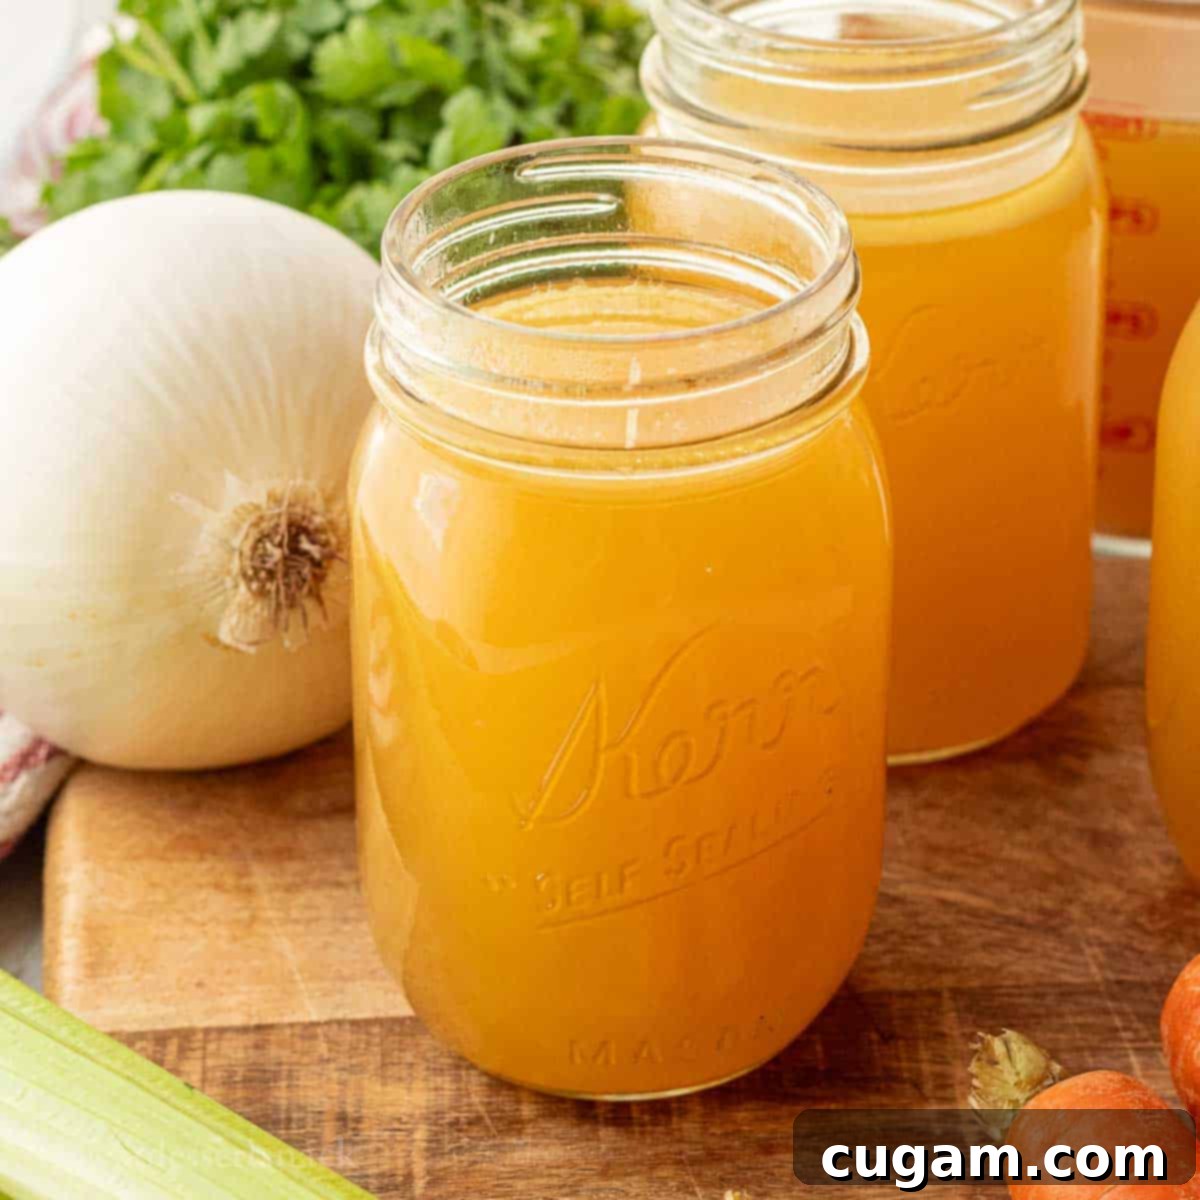
Instant Pot Chicken Bone Broth: Your Ultimate Guide to Nutrient-Rich, Easy Homemade Broth
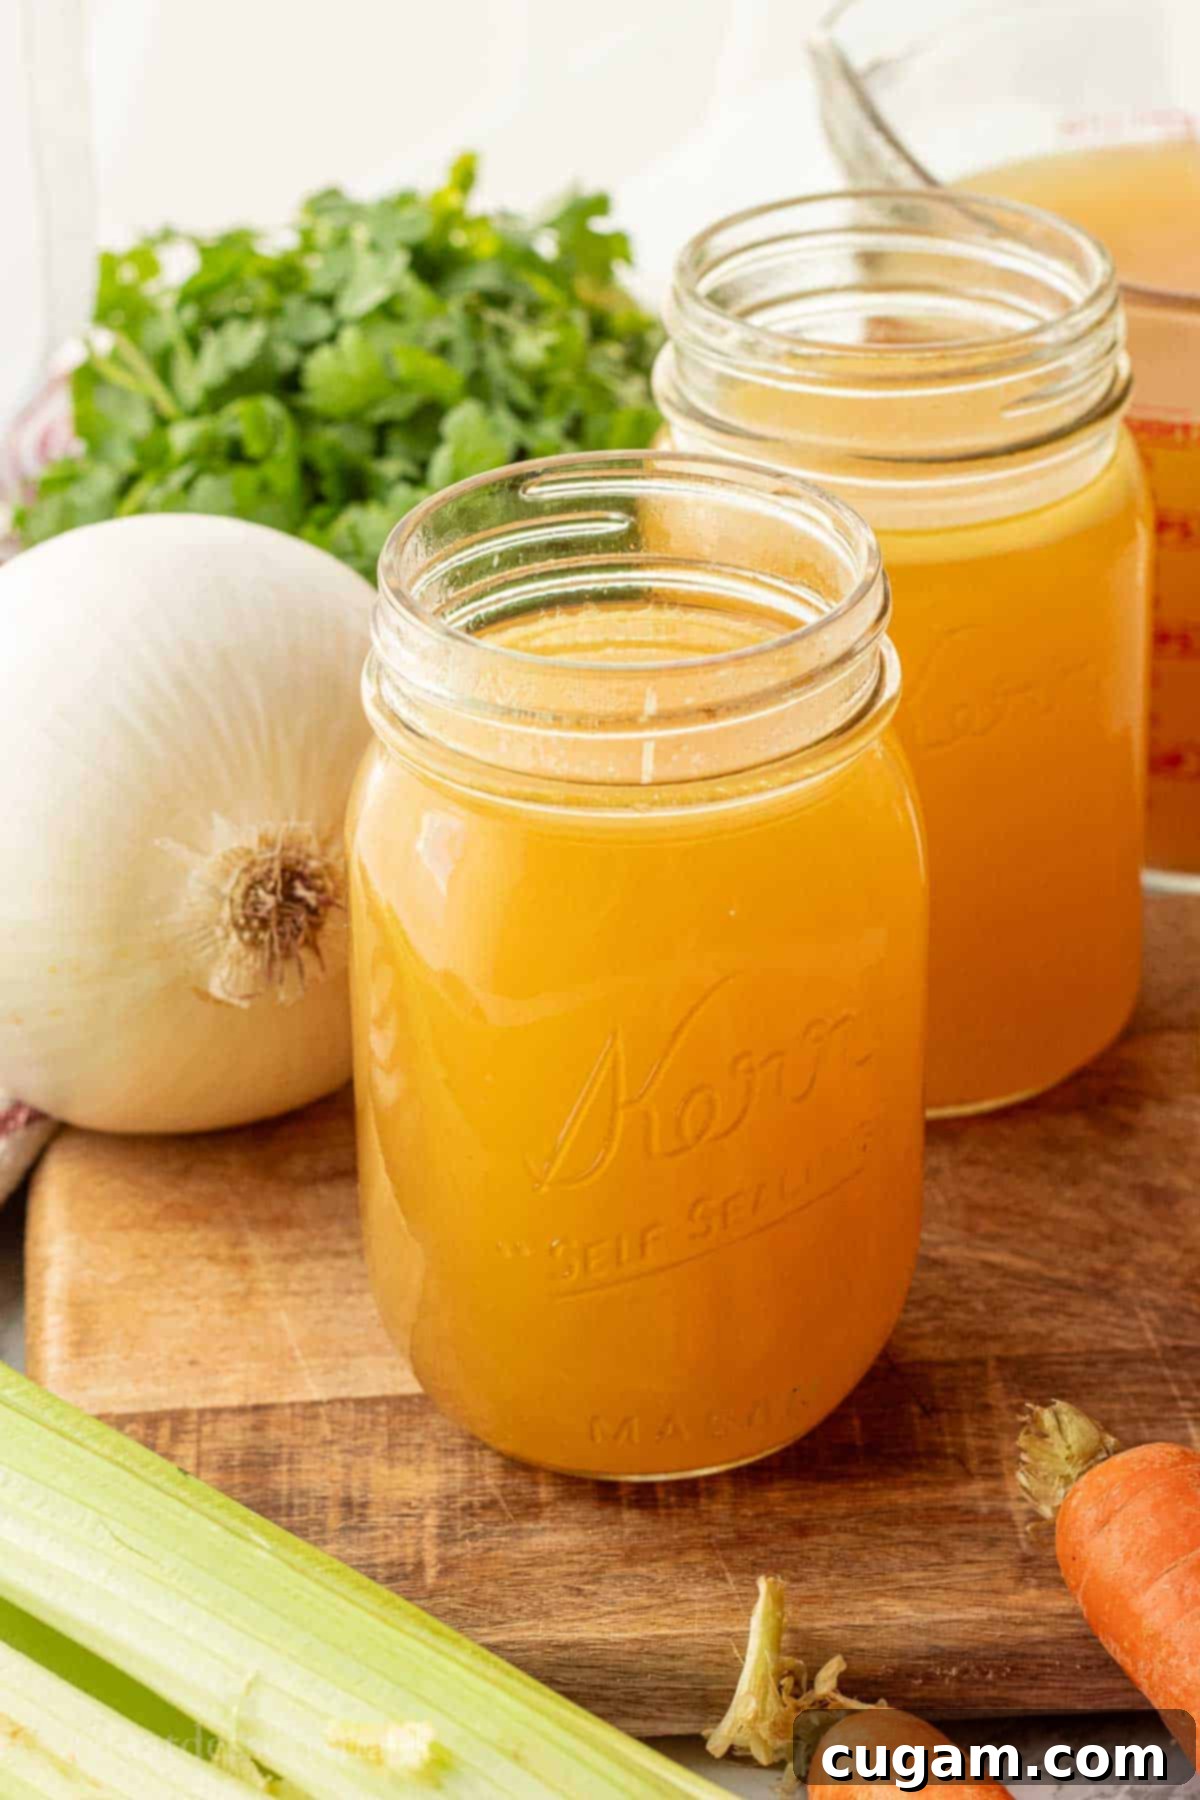
Homemade chicken bone broth in the Instant Pot is a game-changer for any kitchen. Not only is it packed with incredible nutrients and boasts a rich, savory flavor, but it also shaves off hours from the traditional stovetop method! This guide will show you how to effortlessly create a delicious, collagen-rich broth that’s perfect for sipping or as a versatile base for countless recipes.
Mastering how to make chicken broth in the Instant Pot is truly worth the small effort. It significantly speeds up meal preparation, especially for comforting dishes like Bone Broth Chicken Noodle Soup, and its culinary applications are endless. This quick and straightforward Instant Pot chicken bone broth recipe ensures you’ll always have a supply of this golden elixir on hand, elevating your everyday cooking.
[feast_advanced_jump_to]
Understanding Chicken Bone Broth and the Instant Pot Advantage
Before diving into the recipe, let’s clarify the differences between broth, stock, and bone broth, and explore why the Instant Pot is the ideal tool for making the latter.
- Broth: Typically made with meat, vegetables (or scraps), herbs, and spices, and sometimes a small amount of bones. It’s simmered for a relatively short period, usually 30 minutes to two hours, resulting in a lighter flavor and texture.
- Stock: Primarily made with animal bones (often with some meat attached) and vegetables. It’s cooked for a longer duration, generally four to six hours, which helps extract more collagen from the bones, giving it a richer body than broth.
- Bone Broth: Distinct from both broth and stock due to its extended cooking time and focus on bones, often roasted for deeper flavor. Bone broth is simmered for up to 24 hours (or much less in a pressure cooker) to extract maximum nutrients, including collagen, amino acids, and minerals, resulting in a gelatinous and deeply flavorful liquid.
Benefits of Using the Instant Pot for Bone Broth: Traditional bone broth can take an entire day on the stovetop, demanding constant supervision. The Instant Pot dramatically simplifies this process, making it accessible for busy home cooks.
- Time-Saving: The most significant advantage! The Instant Pot cuts cooking time down from 4-12 hours on the stovetop to a mere fraction, typically around 2 hours of active pressure cooking, plus pressure building and releasing time. This speed is achieved by the high-pressure environment, which extracts flavors and nutrients much faster.
- Less Heat in the Kitchen: Especially during warmer months, running a pot on the stove for hours can heat up your kitchen. The Instant Pot is a sealed unit, minimizing heat release and keeping your kitchen cooler.
- Retains More Nutrients: The sealed, high-pressure environment of the Instant Pot helps to preserve volatile nutrients that might otherwise evaporate or degrade during long, open-pot simmering.
- Hands-Off Cooking: Once you set the Instant Pot, you can walk away and let it do its magic without worrying about evaporation, simmering levels, or scorching.
Health Benefits of Chicken Bone Broth: While bone broth has gained immense popularity, it’s essential to approach health claims with a balanced perspective. It is undoubtedly hydrating and provides essential electrolytes. Bone broth is said to contain some anti-inflammatory properties and may support gut health due to its gelatin and amino acid content. It also contains various minerals that support bone health. However, it’s important to note that rigorous scientific data is still developing, and there isn’t enough conclusive evidence to fully back broader claims regarding anti-aging, significant joint support, or curing serious illnesses. Nonetheless, incorporating nutrient-dense bone broth into your diet is a wonderful way to nourish your body and enhance your meals.
Why You’ll Adore This Instant Pot Bone Broth Recipe
This Instant Pot chicken bone broth recipe stands out for several reasons, making it a staple in your culinary repertoire:
- Incredible Taste: Experience a savory, deeply comforting chicken stock with a subtle, aromatic herby undertone. Its mild and balanced flavor profile makes it an ideal canvas, ready to be enhanced or used as a versatile base for an array of dishes. I purposely avoid adding salt during the cooking process, granting you ultimate control over the final salt content when you incorporate it into other recipes.
- Effortless Ease: Preparing this broth is as straightforward as it gets. Simply gather your ingredients, place them into the Instant Pot, set the cooking cycle, and let the appliance do the heavy lifting. It’s a truly hands-off process, making homemade bone broth accessible even on busy weekdays.
- Remarkable Time Efficiency: While stovetop bone broth can take an entire day, this Instant Pot version dramatically cuts down the cooking time. It typically requires about 30 minutes for the Instant Pot to come to pressure, 2 hours of high-pressure cooking, and then at least 30 minutes for a natural pressure release. This brings the total active time to approximately 3 hours, though it might extend slightly if your ingredients are initially very cold. This efficiency is what makes it a practical choice for regular use.
🛒 Essential Ingredients & Tools for Your Bone Broth
Crafting exceptional chicken bone broth begins with high-quality ingredients and the right equipment. Here’s what you’ll need to create a rich and flavorful brew:
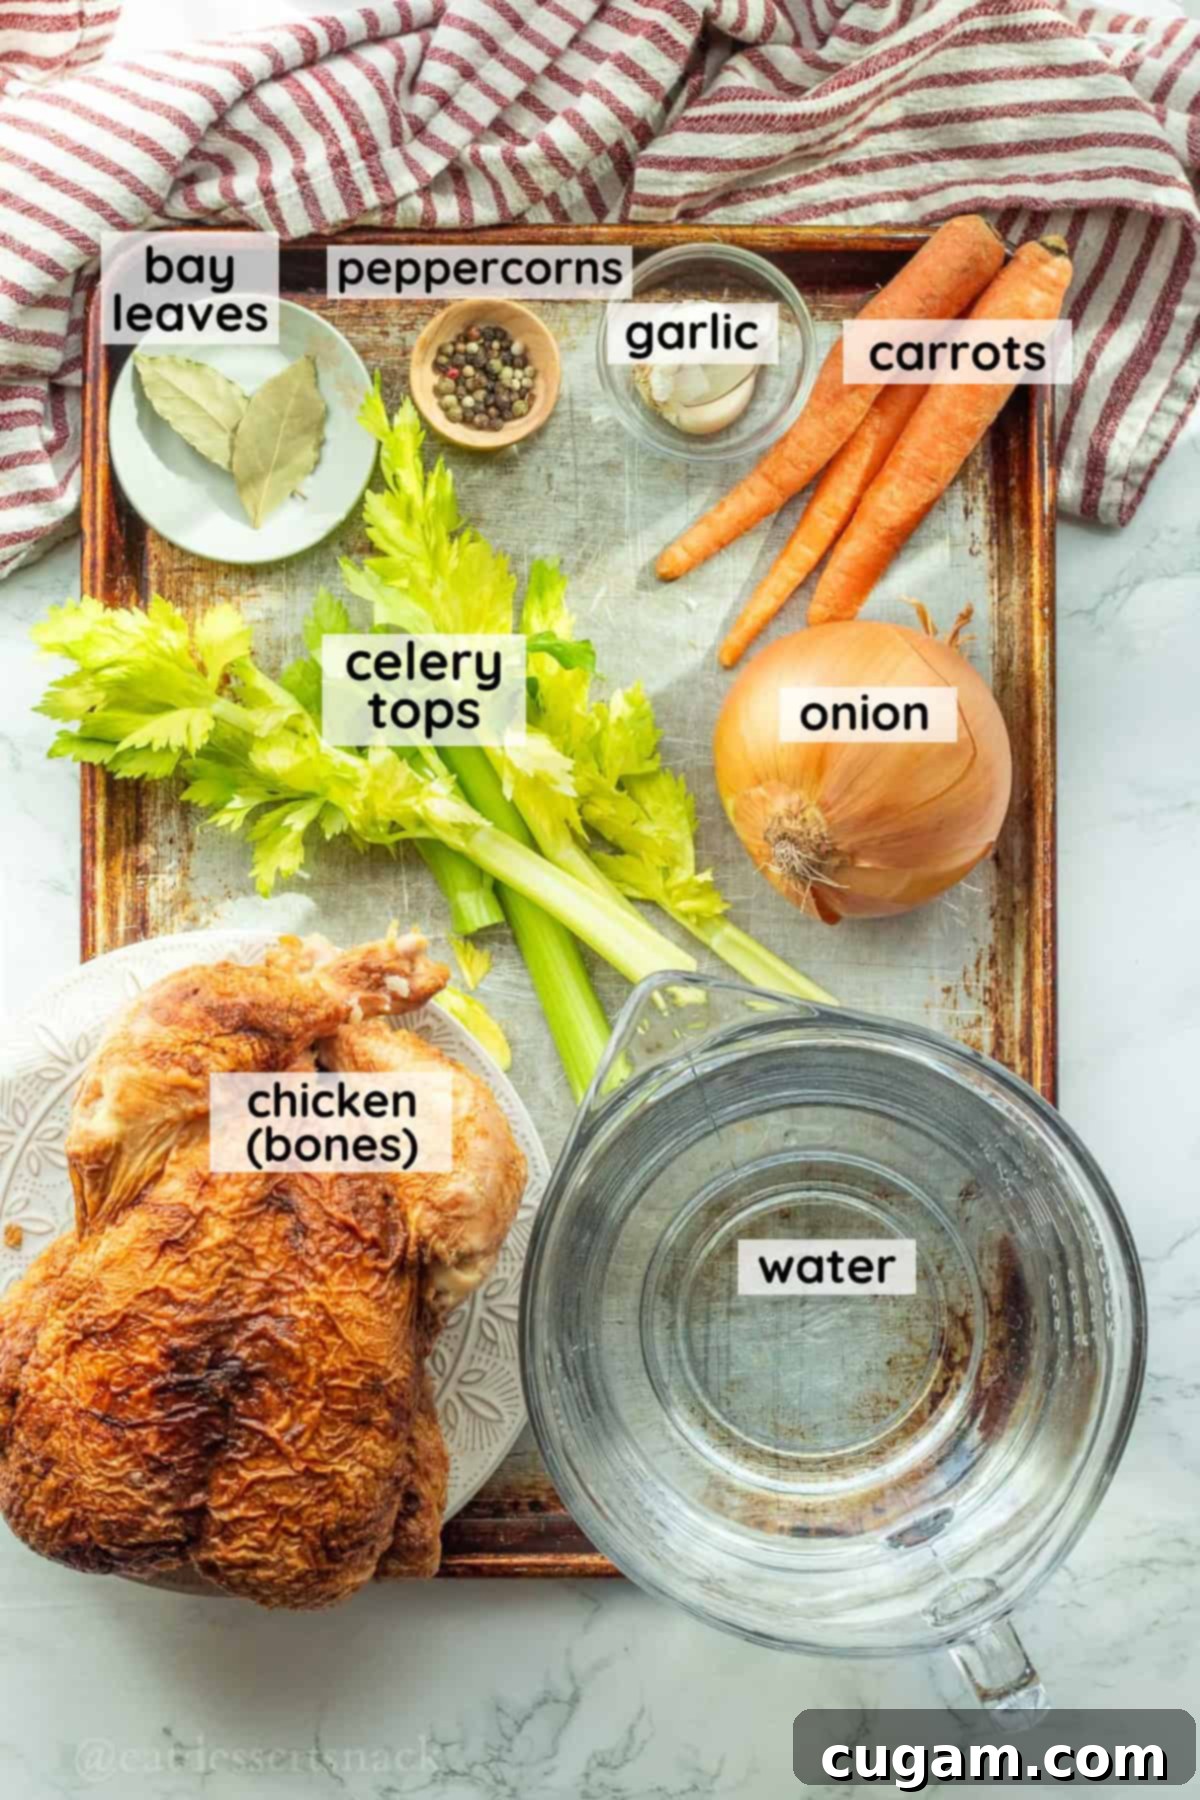
- Chicken Bones: The foundation of your bone broth! For a deeply flavored broth, I highly recommend using the bones from a pre-cooked roasted chicken (like those readily available at grocery stores) or a chicken roasted at home. These bones already carry a rich, savory depth. For an even more collagen-rich and gelatinous broth, consider adding chicken neck bones, feet, or backs, which are particularly high in connective tissue. The entire carcass of a chicken works wonderfully.
- Vegetable Scraps (or Mirepoix): These add crucial depth, aroma, and a beautiful golden hue to your broth. To minimize waste and maximize flavor, I frequently use celery tops, carrot ends (skin on is fine, just scrubbed clean), and onions (with or without the skin – the skin can add color). These aromatic vegetables – onion, celery, and carrots – form the classic “mirepoix” base. This recipe is incredibly flexible, so feel free to adjust the quantities or types of vegetables based on your preferences or what you have on hand. Don’t discard those onion peels and carrot tops – they’re perfect here!
- Spices and Herbs (or Bouquet Garni): A few simple additions can elevate your broth’s flavor profile. Whole black peppercorns, bay leaves, and garlic cloves are my go-to choices. For additional aromatic complexity, you can experiment with other herbs like fresh or dried sage, rosemary, or thyme. A “bouquet garni” is a bundle of herbs (often tied with kitchen twine) that can be easily removed after cooking.
- Water: Essential for extracting all those wonderful flavors and nutrients. Using filtered water can sometimes yield a cleaner-tasting broth.
- Essential Tools:
- Instant Pot (6 or 8 quart): A pressure cooker is non-negotiable for this quick method. A 6-quart is standard, but an 8-quart allows for a larger batch, which is always a good idea for bone broth!
- Fine Mesh Strainer: Crucial for separating the liquid gold from the cooked bones and vegetables, ensuring a smooth, clear broth.
- Large Heatproof Bowl: To collect your strained broth.
- Jars or Freezer-Safe Containers: For proper storage of your finished broth. Mason jars are popular, but always leave headspace if freezing.
Pro Tip: Implement a “freezer scrap bag” strategy! Keep a gallon-sized freezer bag in your freezer and toss in clean vegetable scraps (onion ends, garlic peels, carrot tops, celery trimmings) as you cook throughout the week. You can also freeze leftover chicken bones from roasted birds. When the bag is full, you’re ready to make a batch of nutrient-dense bone broth without any extra waste!
For precise measurements and quantities of each ingredient, please refer to the detailed recipe card provided below.
✏️ Customizing Your Instant Pot Bone Broth: Substitutions & Variations
This Instant Pot chicken bone broth recipe is wonderfully adaptable, allowing you to tailor it to your dietary needs and flavor preferences. Feel free to experiment and make it truly your own!
- Dietary Adjustments:
- Keto/Paleo: This recipe is naturally compliant with most keto and paleo diets. If you’re strictly avoiding carbohydrates, you can easily skip the vegetable scraps or use only low-carb vegetables.
- Whole30: The basic recipe is already Whole30 compliant. Be mindful if adding acidic ingredients like apple cider vinegar, which some Whole30 followers might prefer to omit, although it’s often used to help extract minerals.
- Low FODMAP: To make this Low FODMAP friendly, omit onions and garlic. You can still achieve a flavorful broth using carrots, celery, and suitable herbs.
- Flavor Enhancements:
- Spicy Kick: For a warming, slightly spicy broth, add a few slices of fresh ginger or a pinch of turmeric powder. These also contribute additional health benefits.
- Herb Variety: Beyond bay leaves and peppercorns, experiment with fresh or dried herbs like rosemary, thyme, parsley, or a touch of marjoram. Consider creating a “bouquet garni” with your chosen herbs for easy removal.
- Umami Boost: A small piece of dried kombu (seaweed) can add a subtle umami depth without a strong “sea” flavor. Just be careful not to overdo it, as it can become overpowering.
- Smoky Notes: If you enjoy a smoky undertone, a charred onion (as detailed in the instructions) is excellent, or consider adding a pinch of smoked paprika.
- Vinegar (Optional): A tablespoon of apple cider vinegar (ACV) is sometimes added to bone broth to help draw more minerals from the bones. While some swear by it, others find it unnecessary or prefer not to use it. It’s an optional addition you can test to see if you notice a difference.
For best results, keep the flavor profile relatively simple. Choose 2-3 of your favorite aromatic additions to avoid overwhelming the natural chicken flavor.
🧑🍳 Step-by-Step Instructions for Perfect Instant Pot Chicken Bone Broth
Follow these easy steps to create a nutrient-packed, flavorful chicken bone broth with minimal effort using your Instant Pot.
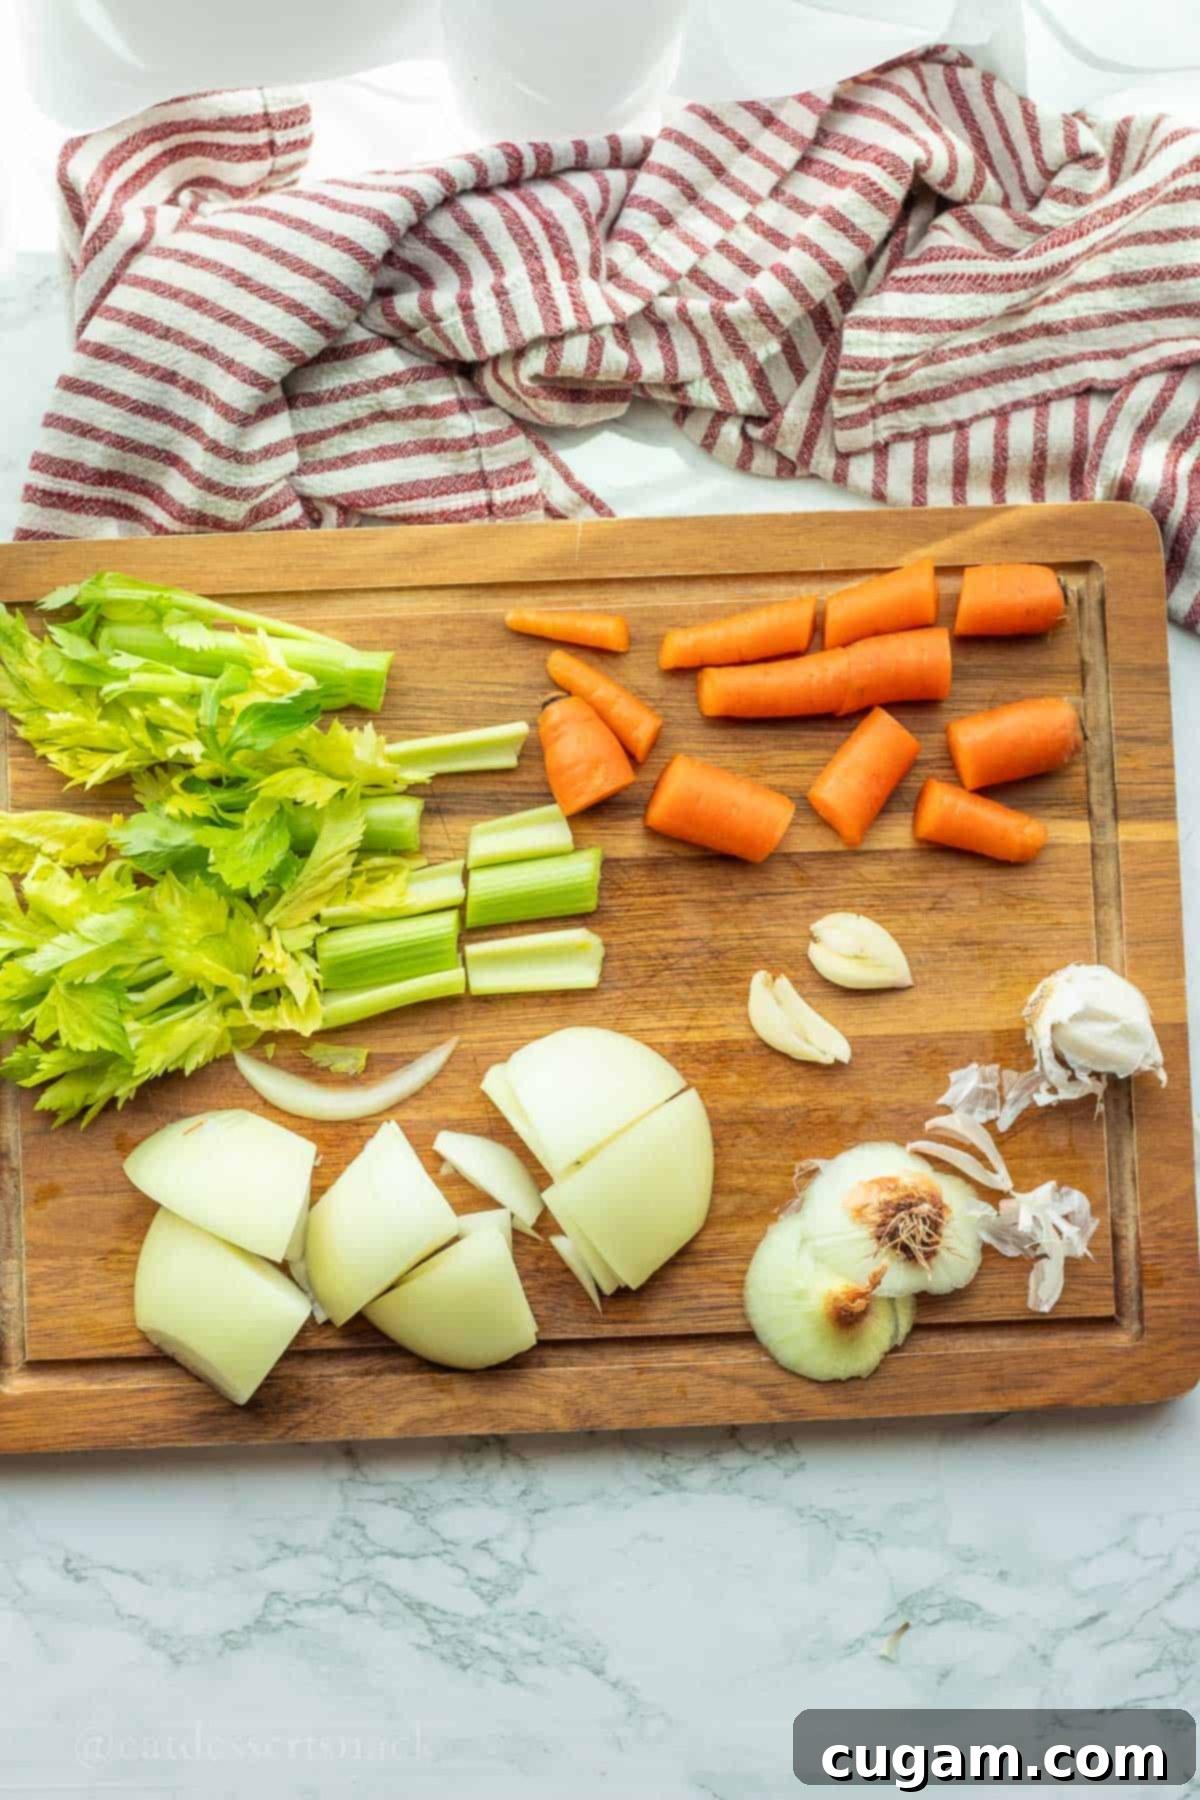
- Step 1: Prepare Your Vegetables. Begin by thoroughly washing all your vegetables. If using whole carrots and celery, roughly chop them into 3-4 inch sections; there’s no need for precise cuts as they will be strained out later. For onions, you can simply quarter them. Smash the garlic cloves with the side of your knife; peeling isn’t strictly necessary as the flavor will infuse. Remember, clean carrot ends and celery tops with skin on are perfect for this recipe – it’s a great way to reduce food waste!
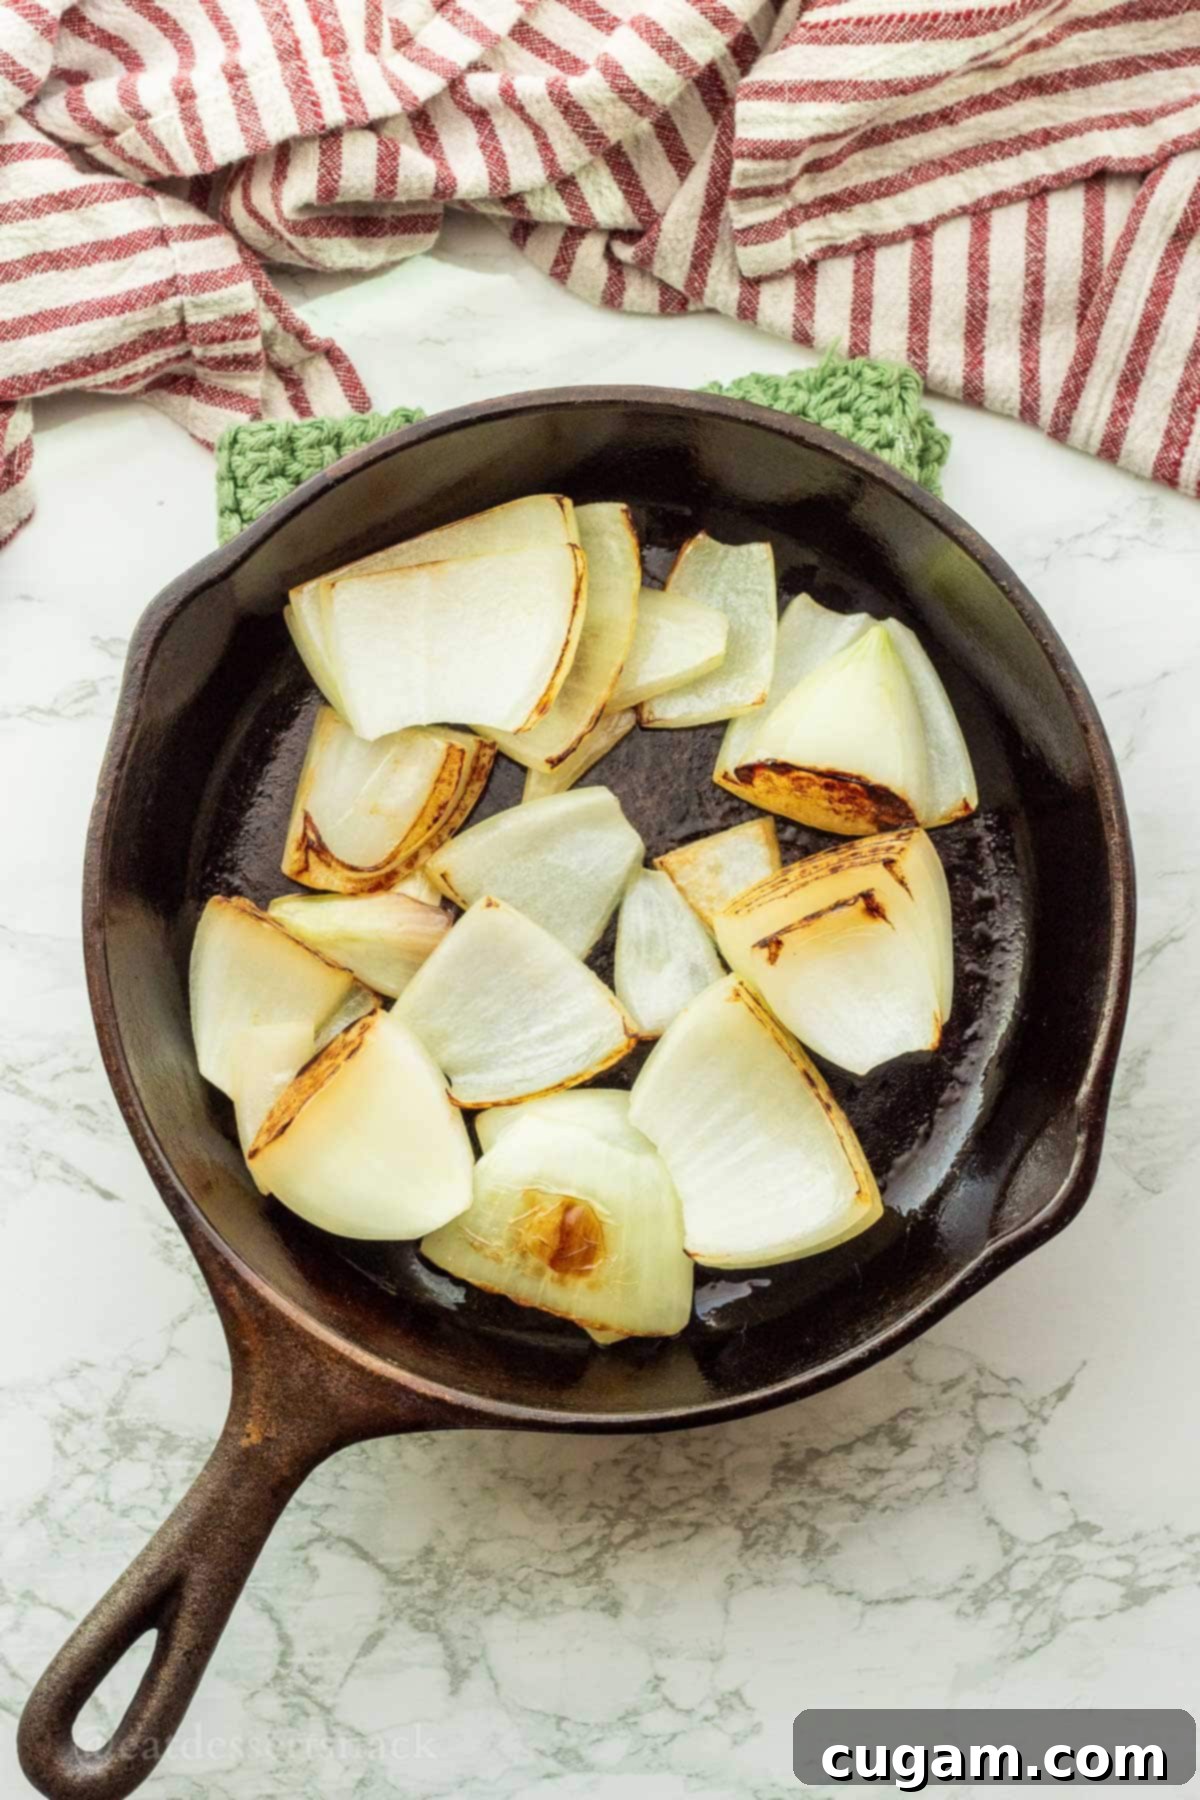
- Step 2: (Optional) Char the Onion for Deeper Flavor. This step adds a beautiful depth of flavor and a lovely color to your finished broth, though it is optional. Heat a frying pan over high heat and add a very small amount of oil. Place a halved onion cut-side down on the hot pan and char one side for 2-3 minutes. You want it to look nicely caramelized and slightly burned. The Maillard reaction here creates complex flavors that will greatly enhance your bone broth.
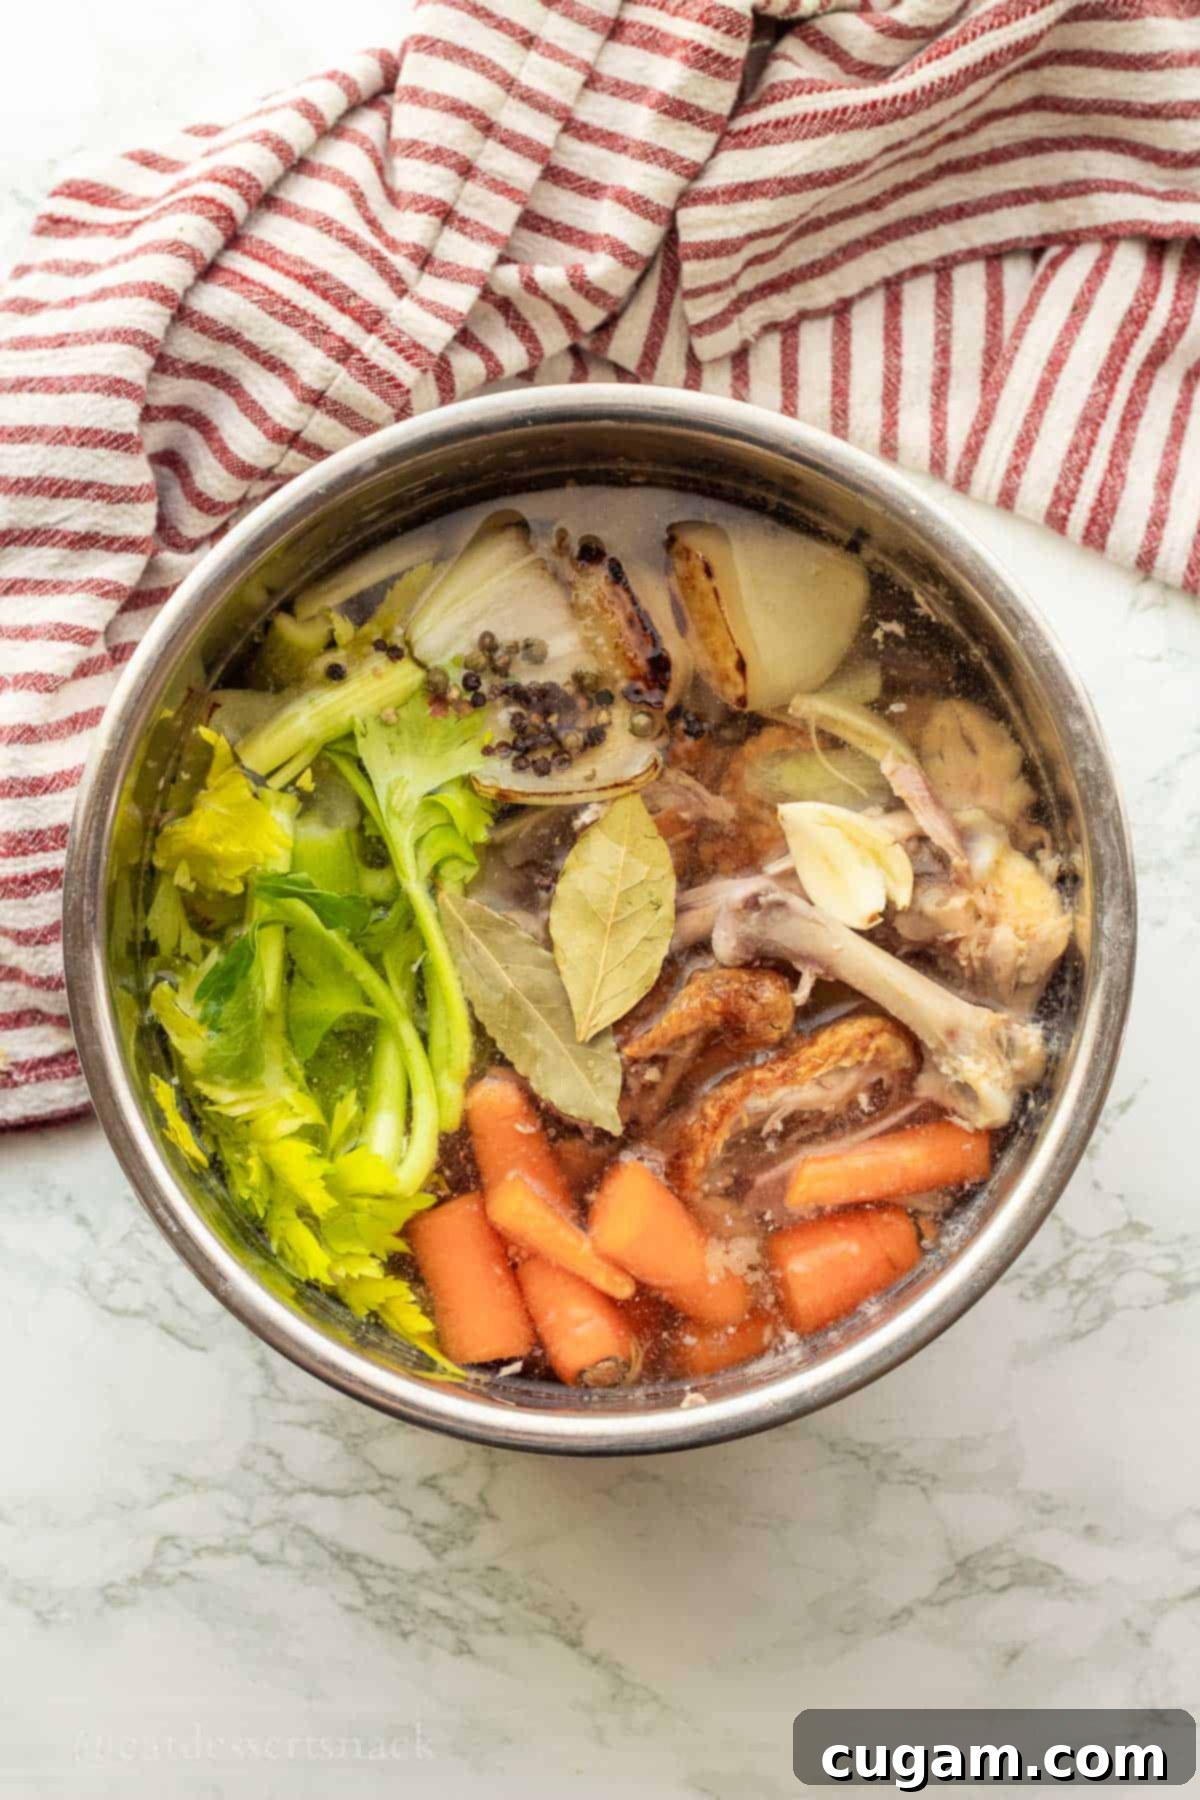
- Step 3: Load the Instant Pot. Place all your prepared ingredients – chicken bones, vegetables, garlic, peppercorns, and bay leaves – into the inner pot of your Instant Pot. Make sure you are using an Instant Pot that is at least a 6-quart capacity. Then, carefully pour in 3 liters of water, ensuring that the liquid does not exceed the “MAX fill” line of your Instant Pot.
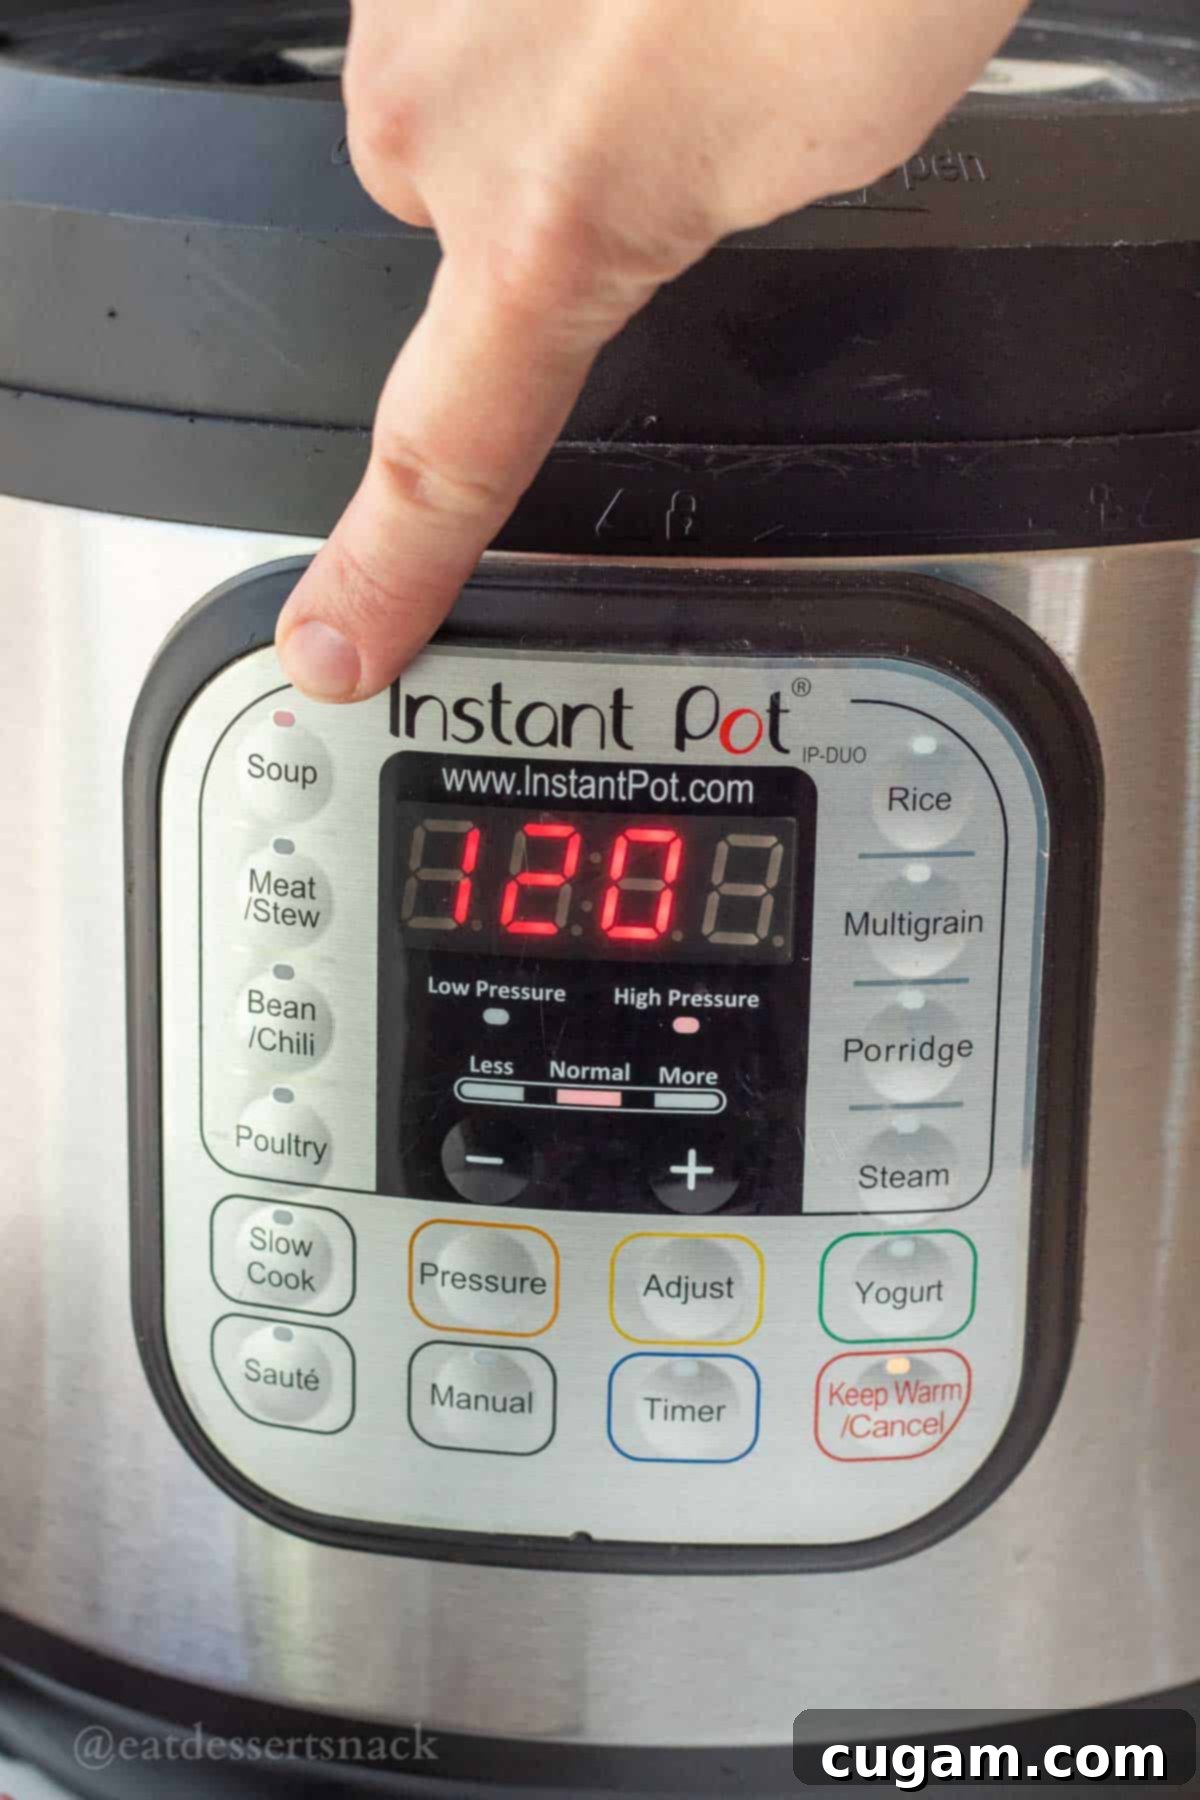
- Step 4: Set the Instant Pot for Pressure Cooking. Secure the lid onto the Instant Pot, making sure the sealing gasket is properly inserted and the lid is fully locked. Crucially, rotate the steam release handle to the “sealing” position. Next, set your Instant Pot manually to cook on high pressure for 120 minutes (2 hours). Alternatively, you can use the “Soup/Broth” function, which typically defaults to similar high-pressure settings and cook times.
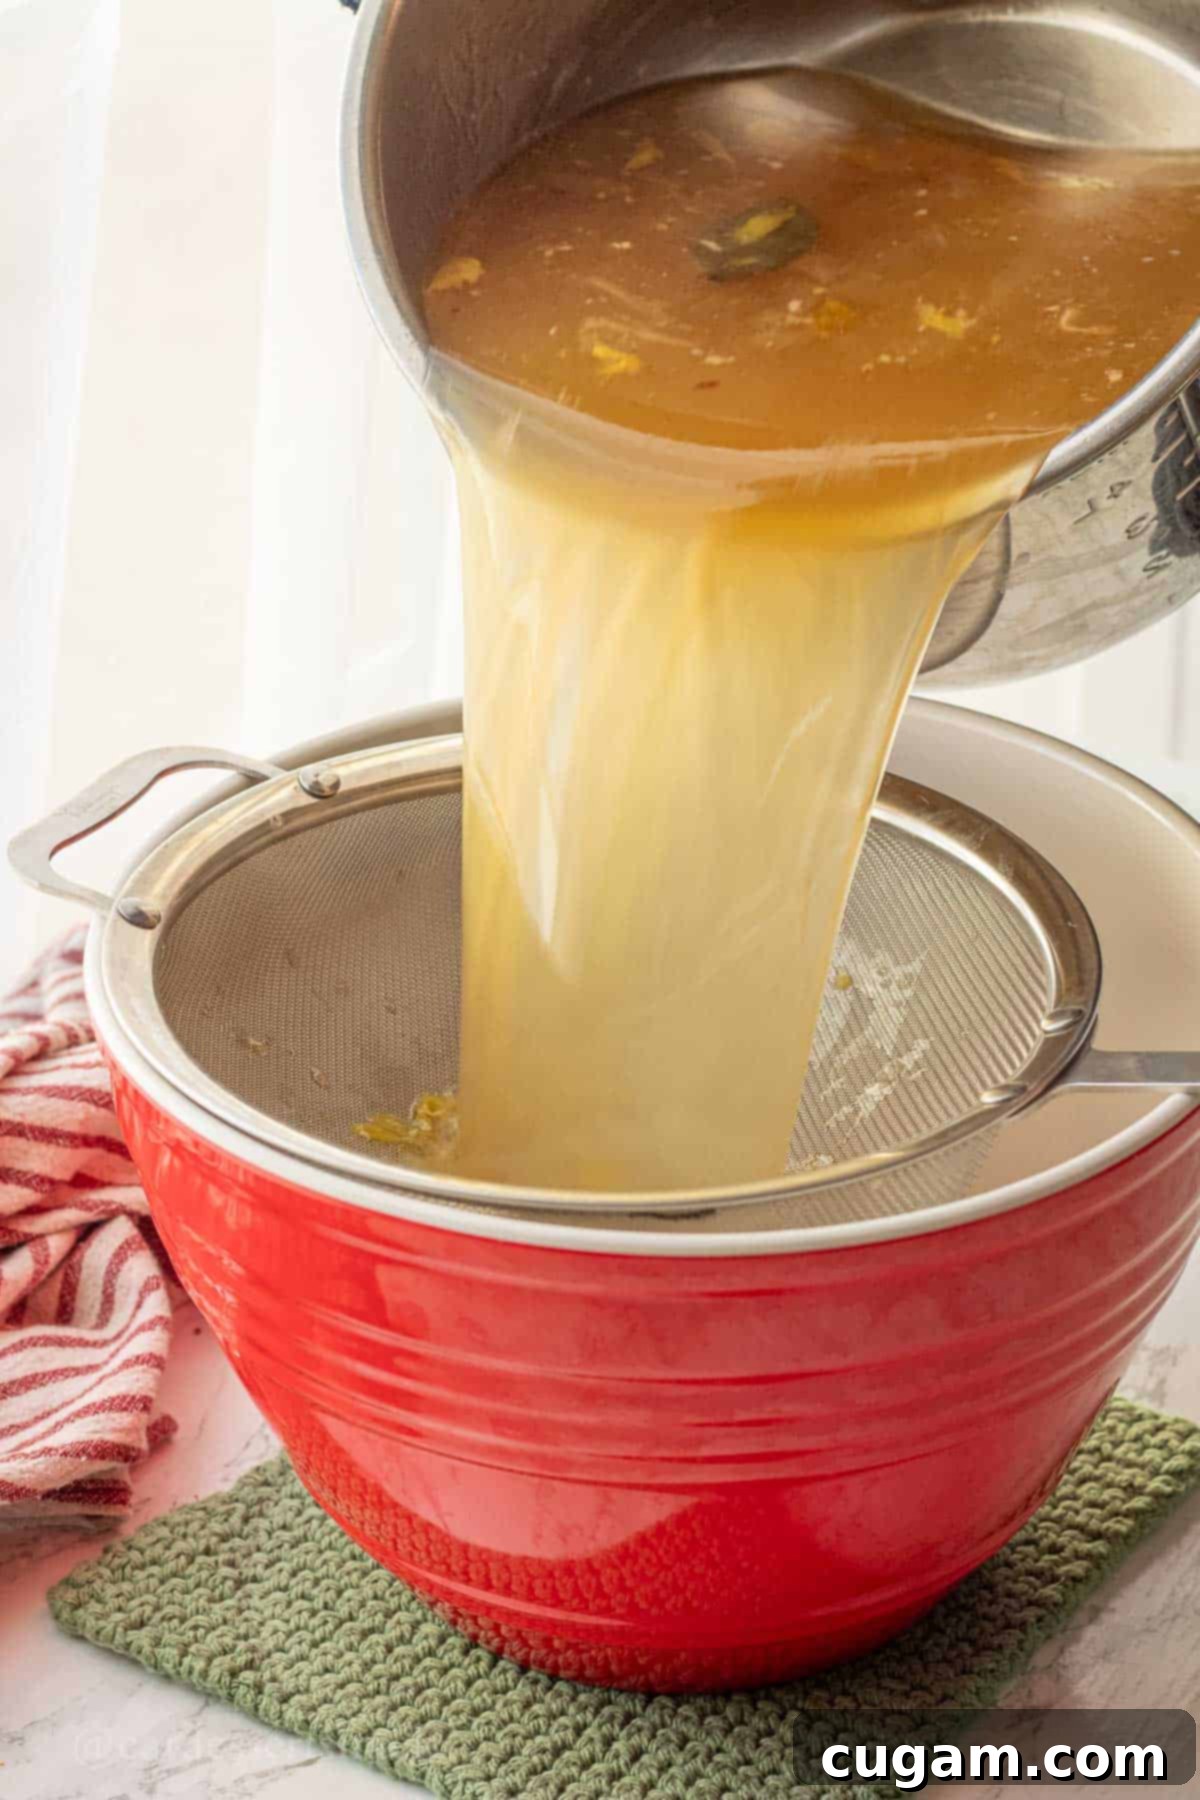
- Step 5: Natural Pressure Release and Strain. Once the cooking cycle is complete, allow the Instant Pot to perform a natural pressure release for at least 30 minutes, or even longer until the float valve drops completely. This slow release is important to prevent rapid bubbling that can agitate denatured proteins (scum) back into the broth, which can make it cloudy. While harmless, it’s aesthetically less appealing. After the pressure has fully released, carefully remove the lid. Use a slotted spoon or tongs to remove the largest pieces of bones and vegetables from the pot. Then, place your fine mesh strainer over a large, heatproof bowl and carefully pour the entire contents of the Instant Pot through the strainer to separate the liquid broth from any remaining solids.
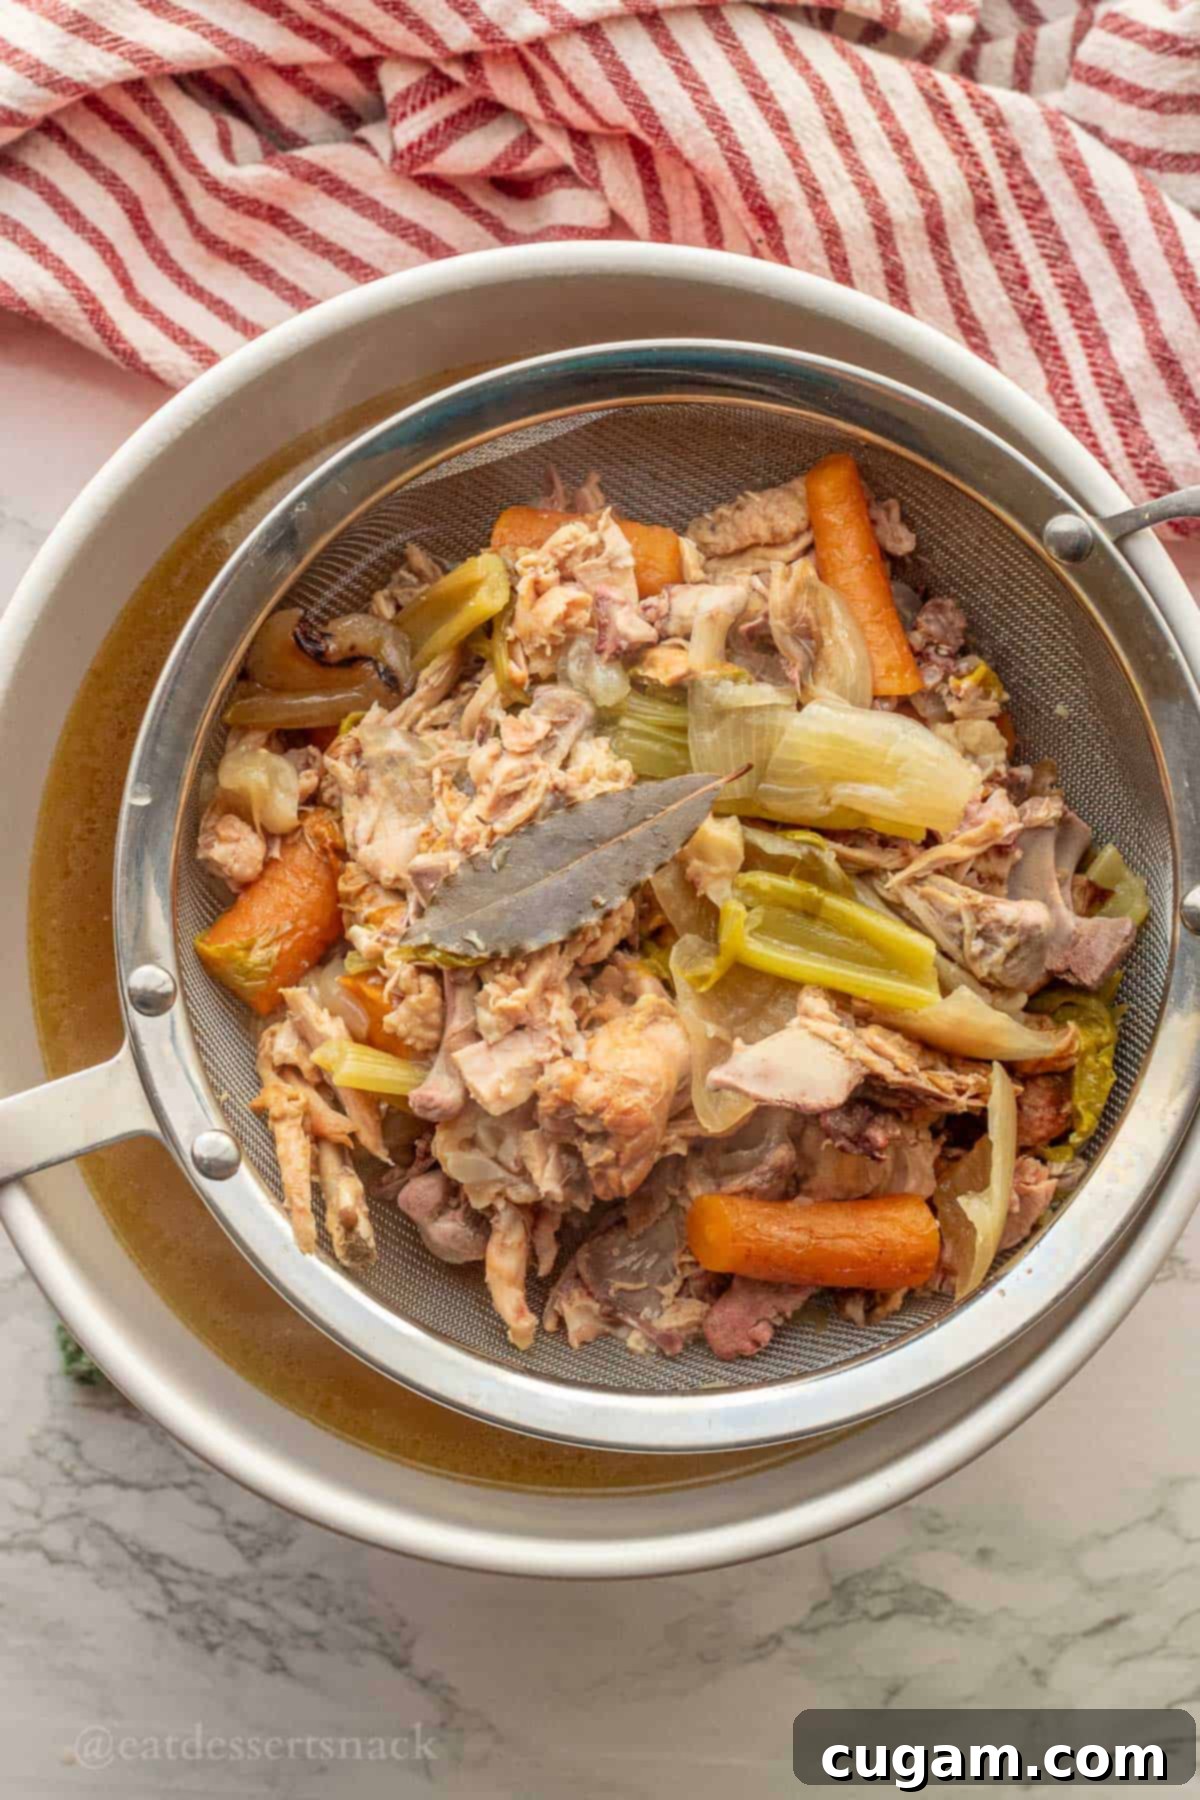
- Step 6: Discard Solids. The remaining bones and vegetable scraps in the strainer have served their purpose. You can either discard them into your regular waste or, if you maintain a compost pile, these organic materials make excellent additions to enrich your soil.

- Step 7: Store Your Broth. Allow the freshly strained broth to cool down significantly before transferring it to your chosen storage containers. You can use glass jars, freezer-safe plastic containers, or even ice cube trays for smaller portions. Once cooled, you can either store it in the refrigerator for immediate use or freeze it for long-term enjoyment. Remember to add salt to taste only when you are ready to use the broth in a specific recipe, allowing for greater control over the final flavor profile.
📌 Troubleshooting Common Instant Pot Bone Broth Problems
Even with the convenience of an Instant Pot, you might encounter a few common issues. Here’s how to address them:
- Cloudy Broth: A cloudy broth is primarily caused by agitated denatured proteins (often referred to as “scum” or foam) that get dispersed throughout the liquid. While these proteins are harmless and flavorless, they do make the broth less clear and visually appealing. In a traditional stovetop method, you would skim this foam off the top. In an Instant Pot, rapid depressurization (quick release) can churn these proteins back into the broth. Therefore, always using a natural pressure release is the best way to prevent this. The slow, gentle release allows the proteins to settle at the bottom, resulting in a clearer broth.
- Broth Not Gelatinous Enough: The hallmark of a good bone broth is its gelatinous texture when chilled, indicating a high collagen content. If your broth isn’t gelling, it’s usually due to too much water relative to the bones, or not enough collagen-rich bones.
- Reduce Water: Try reducing the initial water amount by 250 mL (approximately 1 cup) in your next batch. This concentrates the collagen.
- Add Collagen-Rich Parts: Incorporate more chicken parts that are high in collagen, such as chicken feet, neck bones, or wing tips. These parts are excellent sources of the gelatin-forming protein.
- Extend Cooking Time or Re-cook: While the Instant Pot is efficient, sometimes a longer cook can help. Ensure you’re pressure cooking for the full 120 minutes. For a second attempt with a non-gelling batch, you can transfer it back to the Instant Pot and run another cooking cycle at low pressure for 30-60 minutes to extract more.
PRO TIP for Reheating: When it’s time to enjoy your bone broth, reheat it gently. Use a low to medium simmer on the stovetop rather than a rapid, aggressive boil. Boiling rapidly for an extended period can actually break down and deteriorate the delicate collagen and gelatin structure, reducing its beneficial properties and making it less thick.
❓Frequently Asked Questions About Instant Pot Chicken Bone Broth
Proper storage is key to enjoying your homemade bone broth for longer.
Refrigerator: It can be safely stored in the refrigerator for 3-5 days. If a solid “fat cap” forms on top after chilling, it acts as a natural seal and can extend shelf life slightly (up to 5 days if undisturbed). If the cap is broken or removed, consume within 3-4 days.
Freezing Strategies: For long-term storage, freezing is your best bet. You can use freezer-safe glass jars (remember to leave at least ½ inch headspace to account for liquid expansion), heavy-duty freezer bags (lay flat to freeze, then store upright), or even ice cube trays for convenient, single-serving portions. Once frozen, you can transfer the cubes to a freezer bag.
Achieving a good gel indicates a high concentration of collagen, a sign of a nutrient-dense broth. Here are the best ways to encourage gelling:
• Reduce Water: Use less water in your recipe. A good starting point is to reduce the suggested amount by at least 1 cup (250 mL) or more, depending on the quantity of bones. This concentrates the collagen during cooking.
• Incorporate Collagen-Rich Parts: Maximize the use of chicken parts known for their high collagen content. Chicken feet, neck bones, and wing tips are excellent for this, as they contain a lot of connective tissue.
• Longer Low-Pressure Cycle: If your initial batch doesn’t gel, or for an extra boost, try a second cooking cycle at low pressure for an additional 30-60 minutes after the first cook. This can help extract any remaining collagen.
Yes, absolutely! Freezing bone broth in mason jars is a popular and safe method, provided you follow a couple of key guidelines. First and most importantly, ensure you leave adequate headspace – at least ½ inch from the top of the jar – as liquids expand when they freeze, preventing the glass from cracking. Secondly, use a reputable freezer-safe brand of mason jar with a leak-proof lid, designed to withstand temperature changes. Avoid using jars with shoulders, opting for straight-sided jars for better results.
Occasionally, bone broth can develop an off-putting smell, which is usually due to the quality of the bones or certain vegetables. Old or freezer-burned bones can contribute to an undesirable odor. To fix this in future batches, or to prevent it:
• Roast the Bones: Before adding them to the Instant Pot, roast your chicken bones in the oven at 450℉ (230°C) for 30-40 minutes, until they are nicely browned. This not only eliminates potential off-smells but also deepens the flavor of the broth considerably.
• Fresh Ingredients: Ensure all your vegetable scraps and herbs are fresh and free from spoilage.
• Skim Foam: Although harder in an Instant Pot, if you see excessive foam during the initial pressure-building phase (if you peek), you might try a quick manual release and skim before re-sealing. A natural release usually mitigates this concern.
🥣 Endless Culinary Possibilities: How to Use Your Chicken Bone Broth
Once you’ve made a batch of this golden elixir, you’ll find countless ways to incorporate it into your cooking. Chicken bone broth is a versatile ingredient that can enhance the flavor and nutritional value of almost any savory dish. Think of it as liquid gold that elevates your everyday meals!
You can confidently use chicken bone broth in place of water in nearly any recipe for stews, soups, cooking pasta, creating rich sauces, or even to make flavorful grains like Cilantro Lime Brown Rice or risotto. Its rich umami flavor adds a depth that water simply can’t provide. Here are some of my favorite and most common ways to utilize homemade bone broth:
- Soup Base: This is its most obvious and perhaps most comforting use. From simple chicken noodle soup to creamy vegetable purees or hearty lentil stews, bone broth provides an unparalleled foundation.
- Sauces and Gravies: Use it to deglaze pans, create pan sauces, or as the liquid component in rich gravies. It adds body and savory notes.
- Cooking Grains: Replace water with bone broth when cooking rice, quinoa, couscous, or pasta for an instant flavor upgrade.
- Braising Meats: Perfect for slow-cooking tough cuts of meat, helping them become tender and infusing them with incredible flavor.
- Stews and Chilis: It provides a richer, more substantial liquid base for all types of stews and chilis.
- Sipping: Many enjoy sipping warm bone broth on its own, especially during colder months or when feeling under the weather, for its comforting and hydrating properties.
- Roasting Vegetables: A splash of broth can add moisture and flavor when roasting vegetables in the oven.
Here are some specific recipes where this homemade Instant Pot chicken bone broth truly shines:
- Healthy Chicken Gnocchi Soup
- Chicken Rice and Veggies Casserole
- Creamy Lemon Chicken Orzo
- White Chicken Chili with Corn
Did you try this recipe? Make sure to leave a ⭐️ star rating and a comment below the recipe card! I truly love hearing from you and seeing your creations, and your feedback is incredibly helpful to other readers searching for delicious recipes.
📲 FOLLOW Sara on Social! 👋 Facebook, Instagram, or Pinterest to stay updated with the latest from my kitchen, including new recipes, cooking tips, and behind-the-scenes glimpses!
📝 Printable Recipe: Instant Pot Chicken Bone Broth

Instant Pot Chicken Bone Broth
Pin Recipe
Equipment
-
1 Instant Pot (at least 6 quart for best results)
-
1 fine mesh strainer
-
1 large heatproof bowl
Ingredients
- 1 medium yellow or white onion (quartered, with or without skin)
- 2-3 large carrots(roughly chopped, no need to peel if scrubbed clean)
- 3-4 celery tops (about 1 cup) (or stalks, roughly chopped)
- 2 cloves of garlic(smashed, no need to peel)
- 1 teaspoon whole black peppercorns
- 2 bay leaves
- bones of a 3lb chicken, skin optional (carcass, neck, feet, or roasted chicken bones work best for collagen)
- 3 Liters cold filtered water (about 12.5 cups, or up to max fill line)
Instructions
-
Prepare your vegetables: Wash all vegetables thoroughly. If using whole carrots, scrub them clean and roughly chop them into 3-4 inch sections; there’s no need to peel. Roughly chop celery stalks or tops. Quarter the onion. Smash the garlic cloves with the side of your knife; peeling is optional.
-
Optional step for deeper flavor: For a richer color and more complex flavor, heat a frying pan over high heat with a little oil. Place the onion halves cut-side down on the pan and char one side for 2-3 minutes until nicely caramelized and slightly browned. This caramelization adds a wonderful depth that truly enhances the broth.
-
Load the Instant Pot: Carefully place all prepared ingredients – chicken bones, chopped vegetables, smashed garlic, whole peppercorns, and bay leaves – into the inner pot of your Instant Pot (ensure it’s at least a six-quart capacity). Pour in the 3 liters (approximately 12.5 cups) of cold water, making sure the liquid does not exceed the “MAX fill” line indicated on your pot.
-
Set the Instant Pot: Secure the lid onto the Instant Pot, ensuring that the sealing gasket is correctly inserted and the lid is properly locked into place. Turn the steam release handle to the “sealing” position. Set the Instant Pot manually to cook on high pressure for 120 minutes (2 hours). Alternatively, you can select the “Soup/Broth” function, which typically defaults to similar high-pressure settings and cook duration, for a hassle-free cooking experience.
-
Natural Pressure Release and Strain: Once the cooking cycle is complete, allow the Instant Pot to perform a natural pressure release for a minimum of 30 minutes, or until the float valve drops entirely. This gradual release is crucial as it prevents rapid boiling, which can stir up denatured proteins and lead to cloudy broth. Once pressure is fully released, carefully remove the lid. Use a slotted spoon or tongs to remove and discard the largest pieces of bones and cooked vegetables from the pot. Place a fine mesh strainer over a large, heatproof bowl, and carefully pour the remaining broth through the strainer to separate any smaller solids and ensure a clear, smooth liquid.
-
Store your golden broth: Allow the broth to cool down significantly to room temperature before transferring it into your chosen storage containers. You can use airtight freezer-safe containers, glass jars (leaving ½ inch headspace for freezing), or even ice cube trays for convenient small portions. Your homemade chicken bone broth is now ready to be used immediately or stored for future culinary adventures. Remember to add salt to taste when you’re ready to use it in a specific recipe, giving you greater control over the final seasoning.
Notes
Refrigerator – Your Instant Pot chicken bone broth will keep well in an airtight container for 3–5 days. If a fat cap forms on top and remains unbroken, it can act as a natural seal and extend freshness slightly longer, up to 5 days. Once the fat cap is disturbed or removed, consume within 3-4 days.
Freezing – For longer storage, freeze your broth. Use freezer-safe glass jars (remembering to leave at least ½ inch headspace for expansion), or sturdy freezer-safe containers. For smaller portions, pour into ice cube trays and once frozen, transfer the cubes to a large freezer bag. Frozen broth can last for several months.
Reheating Tips: When you’re ready to enjoy your broth, reheat it gently on the stovetop over low to medium heat. Avoid boiling it rapidly for extended periods, as this can degrade the delicate collagen and gelatin, potentially reducing its beneficial properties and desired texture. A gentle simmer is ideal.
Nutrition

Hi, I’m Sara!
A Registered Nurse by day, I transform into a passionate food blogger on weekends. I’m on a perpetual quest for the perfect snack and the most delightful dips. When I’m not in the kitchen, you can find me enjoying short, peaceful walks on the beach and indulging in long, well-deserved naps. Join me as I share my love for food, one delicious bite at a time!
