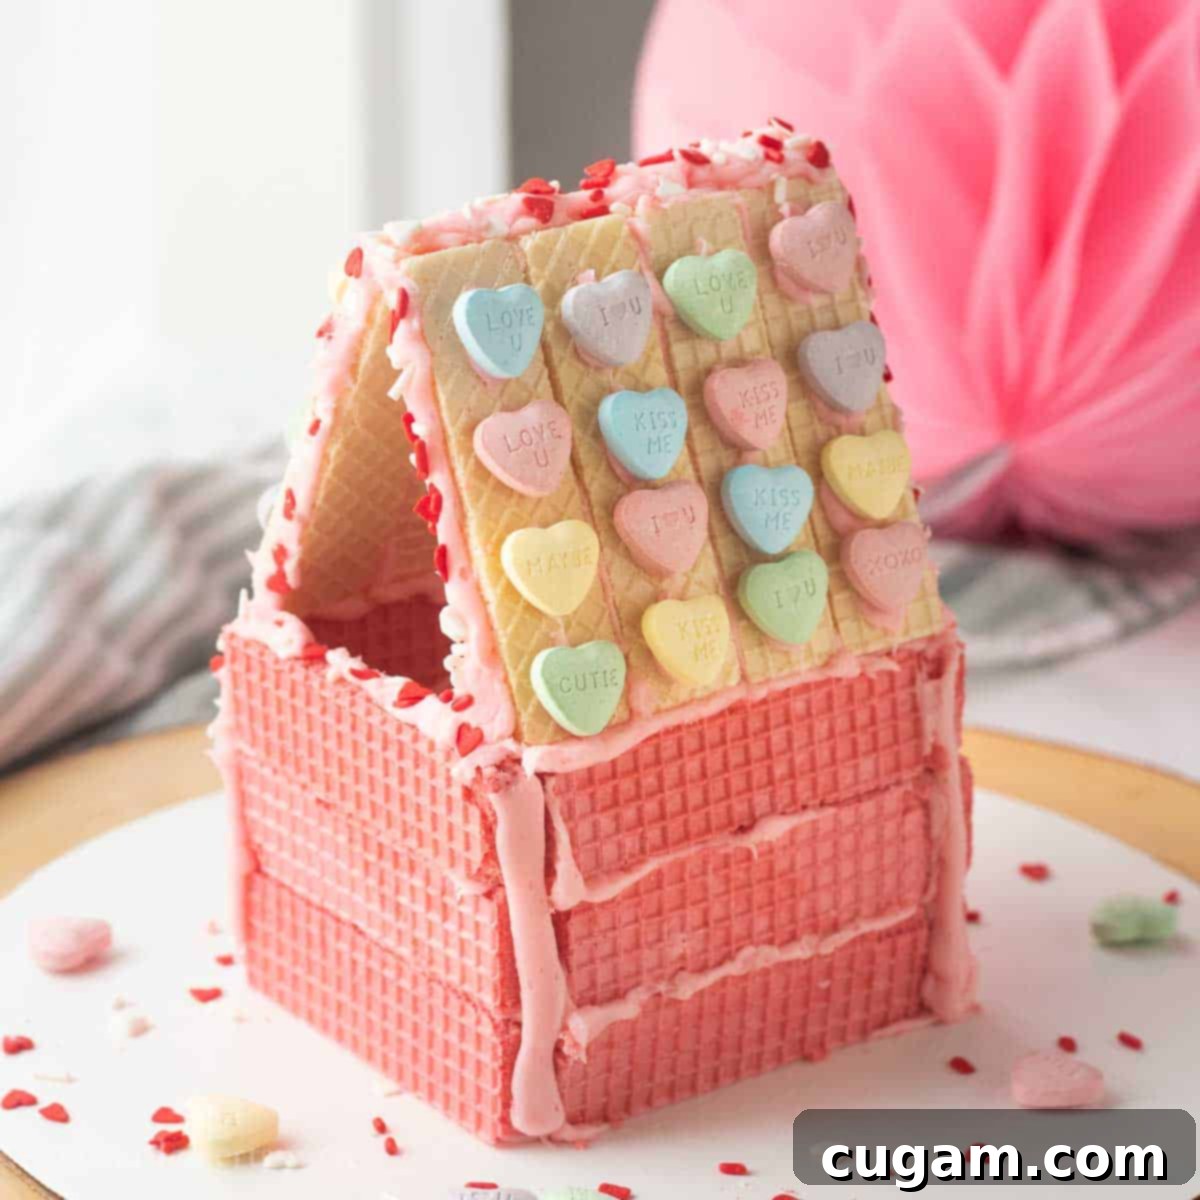
Build Sweet Memories: Easy & Fun Valentine’s Day Wafer Cookie Houses for Kids
Creating Valentine’s Day cookie houses is an incredibly joyful and engaging activity that the whole family can enjoy. Far simpler than traditional gingerbread houses, these delightful edible crafts are made with readily available wafer cookies, a generous amount of frosting, and an assortment of your favorite festive Valentine’s candies. The beauty of this activity lies in its simplicity and the boundless creativity it inspires, making it a perfect project for little hands and budding imaginations.
While we often enjoy making a big batch of Valentine’s Trail Mix for snacking and sharing, these cookie houses offer a unique, hands-on experience, particularly for younger children. Will they be architecturally perfect? Probably not. Will they be impeccably neat? Most likely not! But that’s part of the charm and the fun. This craft is designed for enjoyment and creative expression, not precision. It’s also remarkably affordable; typically, materials for 2-3 houses can be purchased for under $10, making it an excellent budget-friendly Valentine’s craft to do with kids, fostering precious memories without breaking the bank.
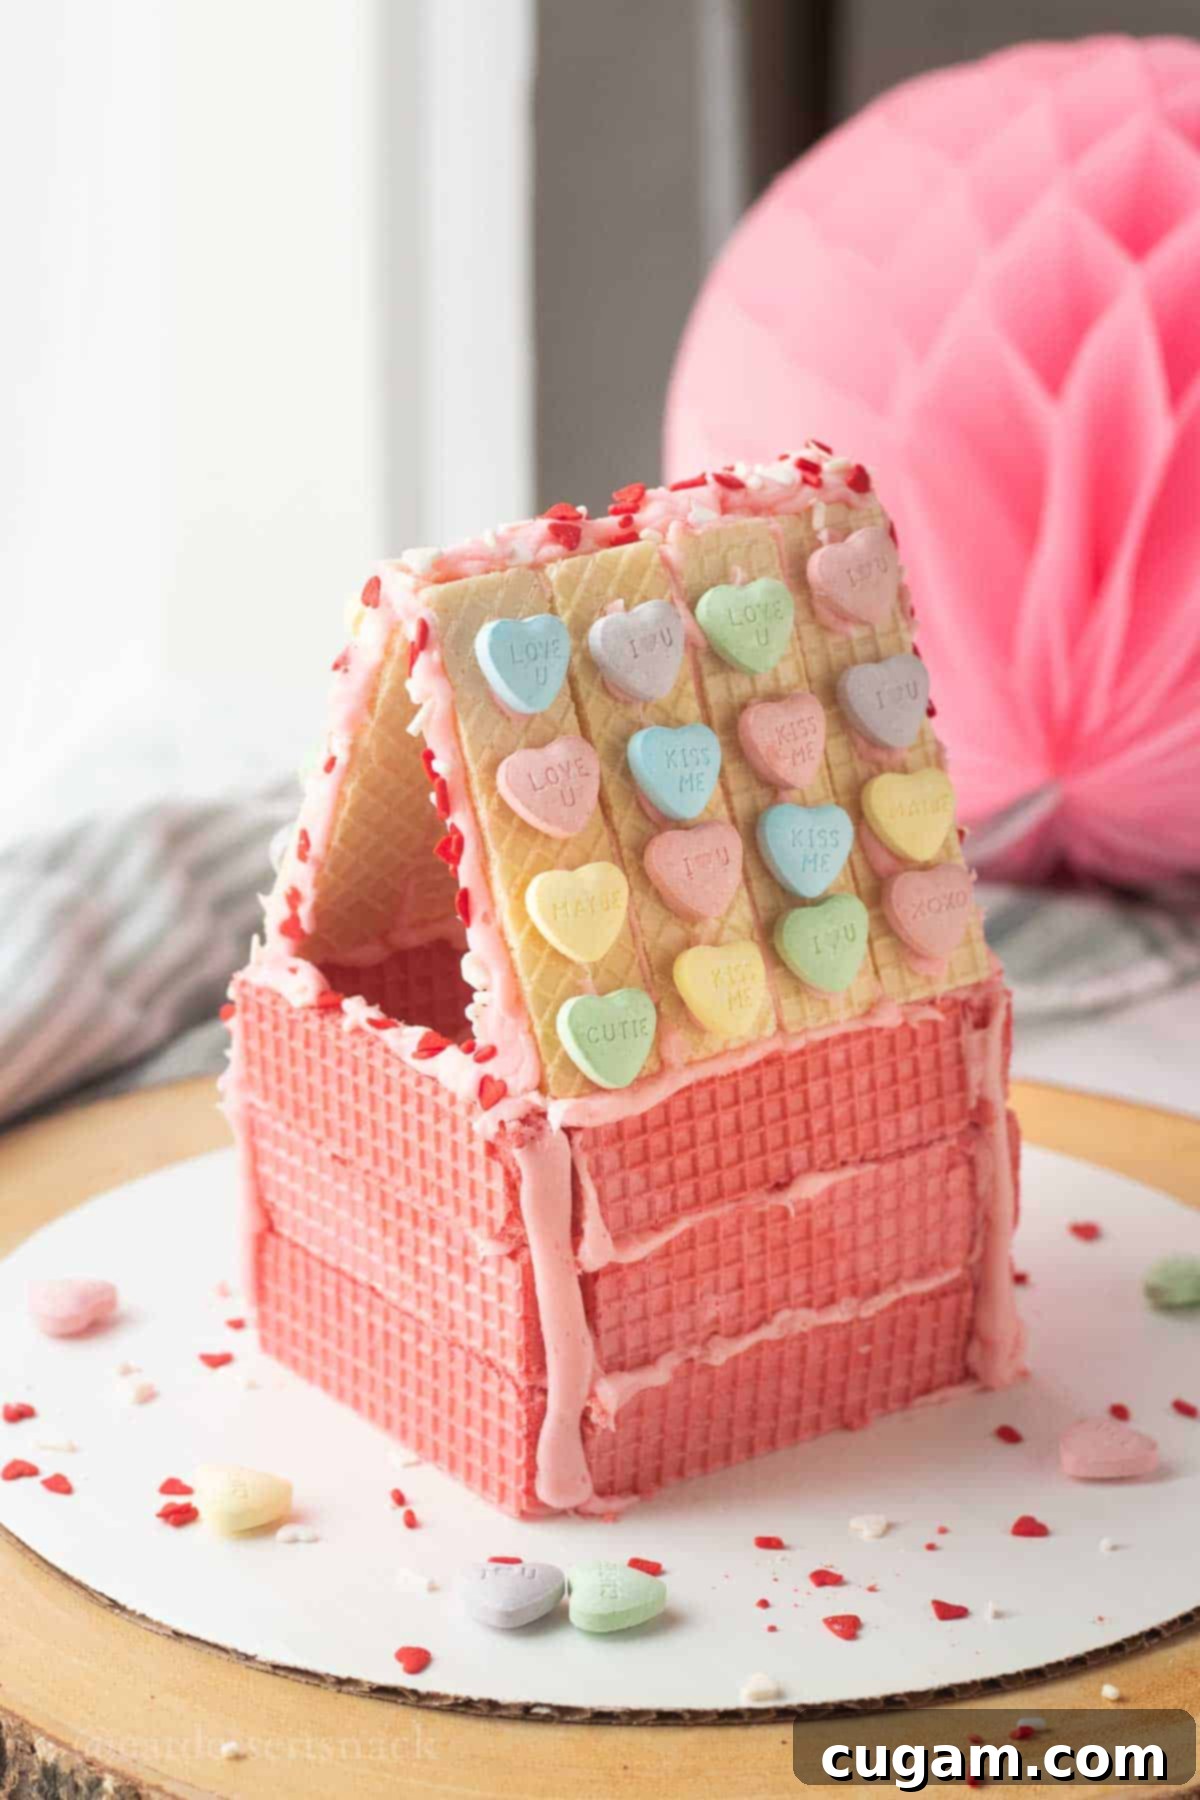
The possibilities for these Valentine’s “gingerbread” houses are truly endless, allowing for personalized creations that reflect each child’s unique style. You can opt for an all-pink wafer cookie structure, a classic all-white look, or even mix and match for a charming striped effect. The choice of frosting opens up another layer of customization: chocolate, vanilla, or a vibrant strawberry pink frosting all work wonderfully. And when it comes to candies, any Valentine-themed treats you desire will do, transforming simple wafer cookies into miniature edible masterpieces. This flexibility ensures that every cookie house is a one-of-a-kind creation, full of character and deliciousness.
[feast_advanced_jump_to]
What To Expect When Making Cookie Houses
- Taste: Generally, the pink wafer cookies offer a sweet strawberry flavor, while white ones are vanilla-flavored. For our houses, we chose a delightful strawberry frosting, which perfectly complemented the cookies. The candies, of course, add their own distinct flavors, so selecting your family’s favorites will make the houses even more enjoyable to eat. This combination of wafer cookies, creamy frosting, and assorted candies creates a pleasant medley of textures and tastes, making the building process as delicious as the finished product.
- Ease: This activity is remarkably simple, designed for all skill levels. Children between the ages of 2-4 might need a little extra assistance, especially with the frosting application, as it can be a bit tricky to get the hang of piping. However, older children, typically those aged 5 and up, will likely manage most of the steps independently with minimal supervision. It’s a great way to build their fine motor skills and confidence in the kitchen. Even adults will find it a relaxing and fun way to express their creativity.
- Time: The duration of this craft is entirely up to you and the children’s engagement levels. On average, kids tend to spend about 20-30 minutes constructing and decorating their Valentine houses. This makes it an ideal activity for a quick afternoon project or a fun weekend diversion. You can easily set up a few stations, allowing multiple children to work simultaneously, or extend the session for more elaborate decorating if desired. The quick turnaround means instant gratification and less time waiting for things to set.
- Mess Level: Be prepared for a delightful mess! Frosting can get sticky, and sprinkles have a tendency to find their way everywhere. We recommend covering your workspace with newspaper, a plastic tablecloth, or even a large baking sheet for easier cleanup. Embrace the chaos, as it’s often a sign of true creative engagement. Having wet wipes or a damp cloth on hand for quick cleanups will also be a lifesaver.
- Fun Factor: High! This isn’t just a recipe; it’s an experience. Watching children’s faces light up as they build their own edible homes and decorate them with colorful candies is priceless. It’s a wonderful opportunity for family bonding, encouraging imagination, and celebrating the spirit of Valentine’s Day.
🛒 Key Ingredients for Your Valentine Wafer Cookie Houses
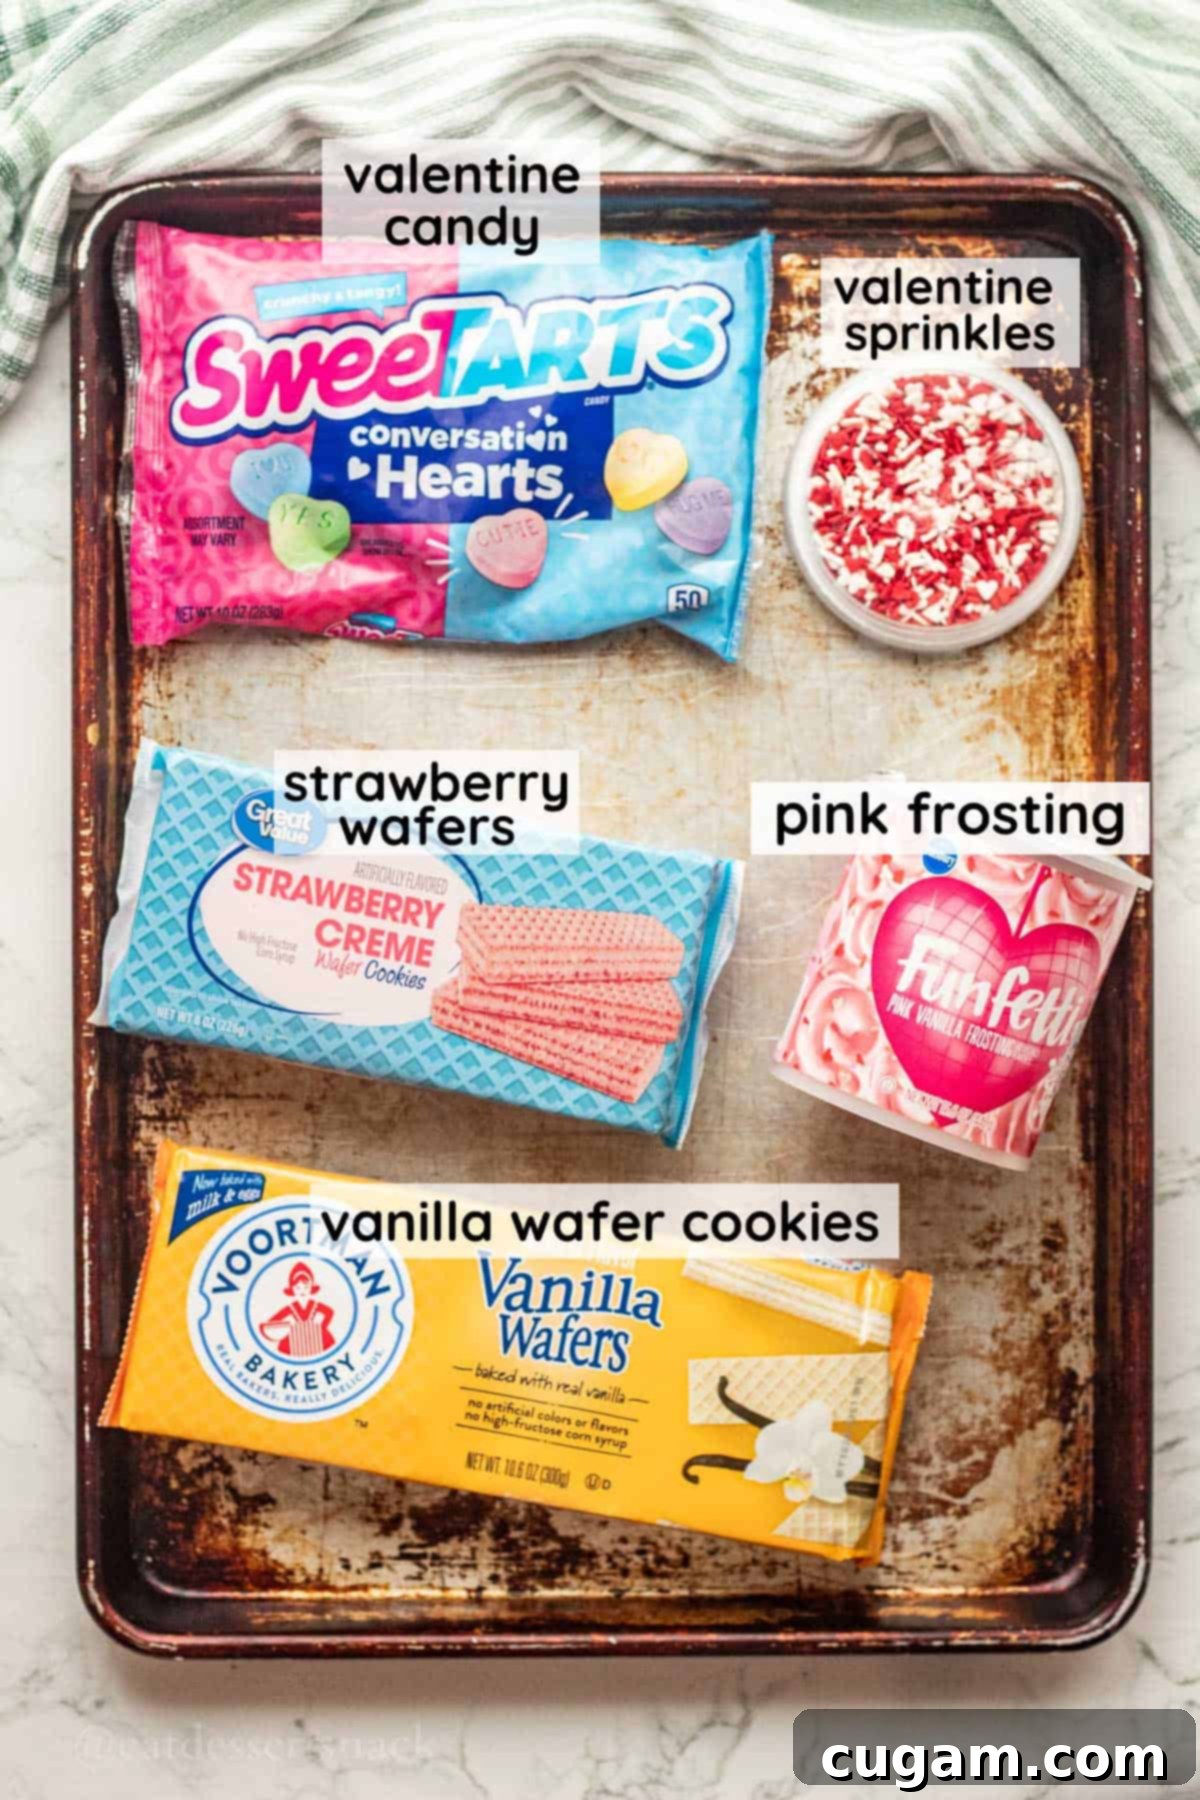
Gathering your ingredients is the first step to a successful and enjoyable cookie house building session. The beauty of this recipe is its minimal list of core components, all easily found at your local grocery store. Here’s a closer look at what you’ll need:
- Wafer Cookies: These are the structural foundation of your houses. We specifically chose strawberry (pink) and vanilla (white) wafer cookies for their delightful colors, which are perfect for a Valentine’s theme. Their rectangular shape makes them ideal for building walls and roofs, and their crisp texture provides a satisfying contrast to the soft frosting and candies. You can find them in the cookie aisle, often in multi-packs if you plan on building several houses.
- Frosting: This acts as both the “glue” that holds your house together and a delicious decorative element. Pink (strawberry) or white (vanilla) frostings are excellent choices for Valentine’s Day, providing a sweet base. However, don’t limit yourself – a rich chocolate frosting would also be incredibly delicious and offer a different aesthetic. Store-bought frosting is highly recommended for its convenience and consistent texture, making the process smooth and hassle-free.
- Candy: This is where the real fun begins! We opted for classic conversation hearts and various Valentine’s sprinkles, which add a burst of color and a whimsical touch. However, your imagination is the limit. You can go as fancy or as simple as you want with your candy selections. Think gummy bears, mini marshmallows, small chocolate candies, or any other sweet treats that catch your eye in the Valentine’s candy aisle. The more variety, the more unique each cookie house will be!
For precise measurements and quantities, please refer to the detailed recipe card provided below.
✏️ Creative Substitutions & Variations for Your Cookie Houses
One of the best aspects of making Valentine’s cookie houses is the freedom to customize and experiment. If you can’t find specific ingredients or simply want to try something new, here are some fantastic substitutions and variations to inspire your edible architecture:
- Candy Options:
- Valentine M&M’s: These colorful chocolate candies are always a hit and will add a lovely crunch.
- Hershey heart-shaped chocolates: These would be super cute as decorative accents, perhaps lining the roof or adorning the sides of the house.
- Pink yogurt melts (for babies): If you’re making these for very young children or as a baby-friendly version, yogurt melts are a great, soft alternative to harder candies.
- Gummy Candies: Gummy bears, worms, or other soft, chewy candies can add a fun texture and pop of color.
- Mini Marshmallows: Perfect for creating snowy effects on the roof or adding a soft, puffy look to the house.
- Pretzel Sticks: These can be used to create fences, window frames, or other structural details.
- Edible Glitter or Food Coloring Sprays: For an extra magical touch, a little edible glitter or a light spray of food coloring can elevate the decorations.
- Frosting Flavors & Colors: While pink is a classic for Valentine’s Day, you’re not limited!
- Any Flavor You Wish: Vanilla, chocolate, cream cheese, or even lemon frosting would be delicious. The key is that it’s thick enough to hold the cookies together.
- Food Coloring: If you have white frosting, you can easily tint it with food coloring to create any shade you desire – purple, light blue, or even a mix of colors for a rainbow house!
- Cookie Varieties:
- Other Wafer Cookie Flavors: Lemon or chocolate wafer cookies can also be used, offering different flavor profiles and colors.
- Graham Crackers: If you prefer a more traditional “gingerbread house” feel but still want simplicity, graham crackers can be easily broken into squares for building.
- Animal Crackers or Small Biscuits: These can be used for smaller, more intricate details or to add texture to the walls.
- Themes Beyond Valentine’s Day: While designed for Valentine’s, this concept can be adapted for any holiday or occasion.
- Spring/Easter Houses: Use pastel candies and green frosting.
- Birthday Houses: Decorate with birthday sprinkles and candles.
- Christmas Houses: Red and green candies, white frosting for snow.
Don’t be afraid to get creative and make these cookie houses truly your own!
🧑🍳 Step-by-Step Instructions to Build Your Sweet Retreat
Building your Valentine’s Day cookie house is a delightful and straightforward process. Follow these steps to construct your edible masterpiece:
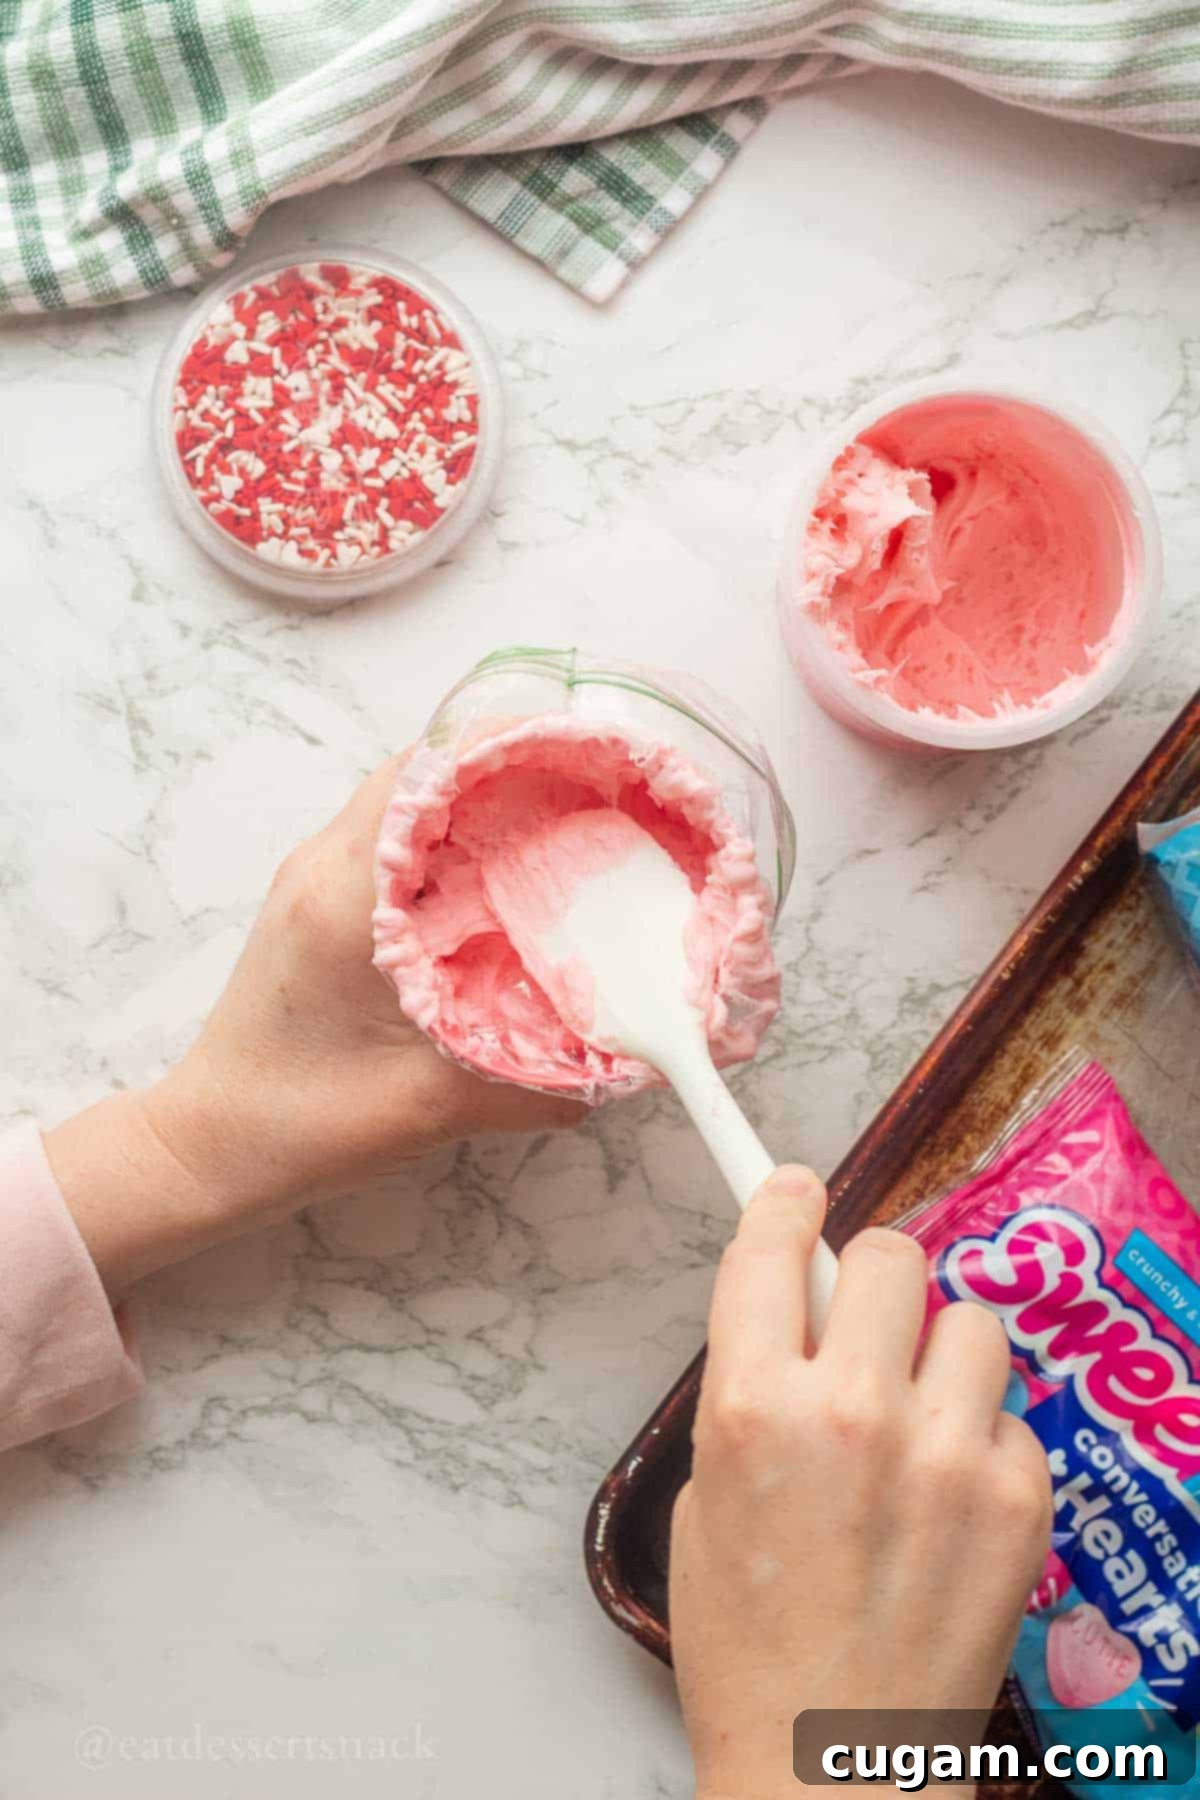
- Step 1: Prepare Your Frosting for Easy Application. For mess-free and precise frosting application, place an empty sealable sandwich bag or a dedicated piping bag into a tall cup. Fold the edges of the bag over the top of the cup to create a wide opening. Use a spatula to spoon your chosen frosting into the bag. Once filled, seal the bag securely, pushing out any excess air. Finally, snip a small tip off one of the bottom corners of the bag to create an opening for piping the frosting. A smaller snip allows for more detailed work, while a slightly larger one is good for broader lines.
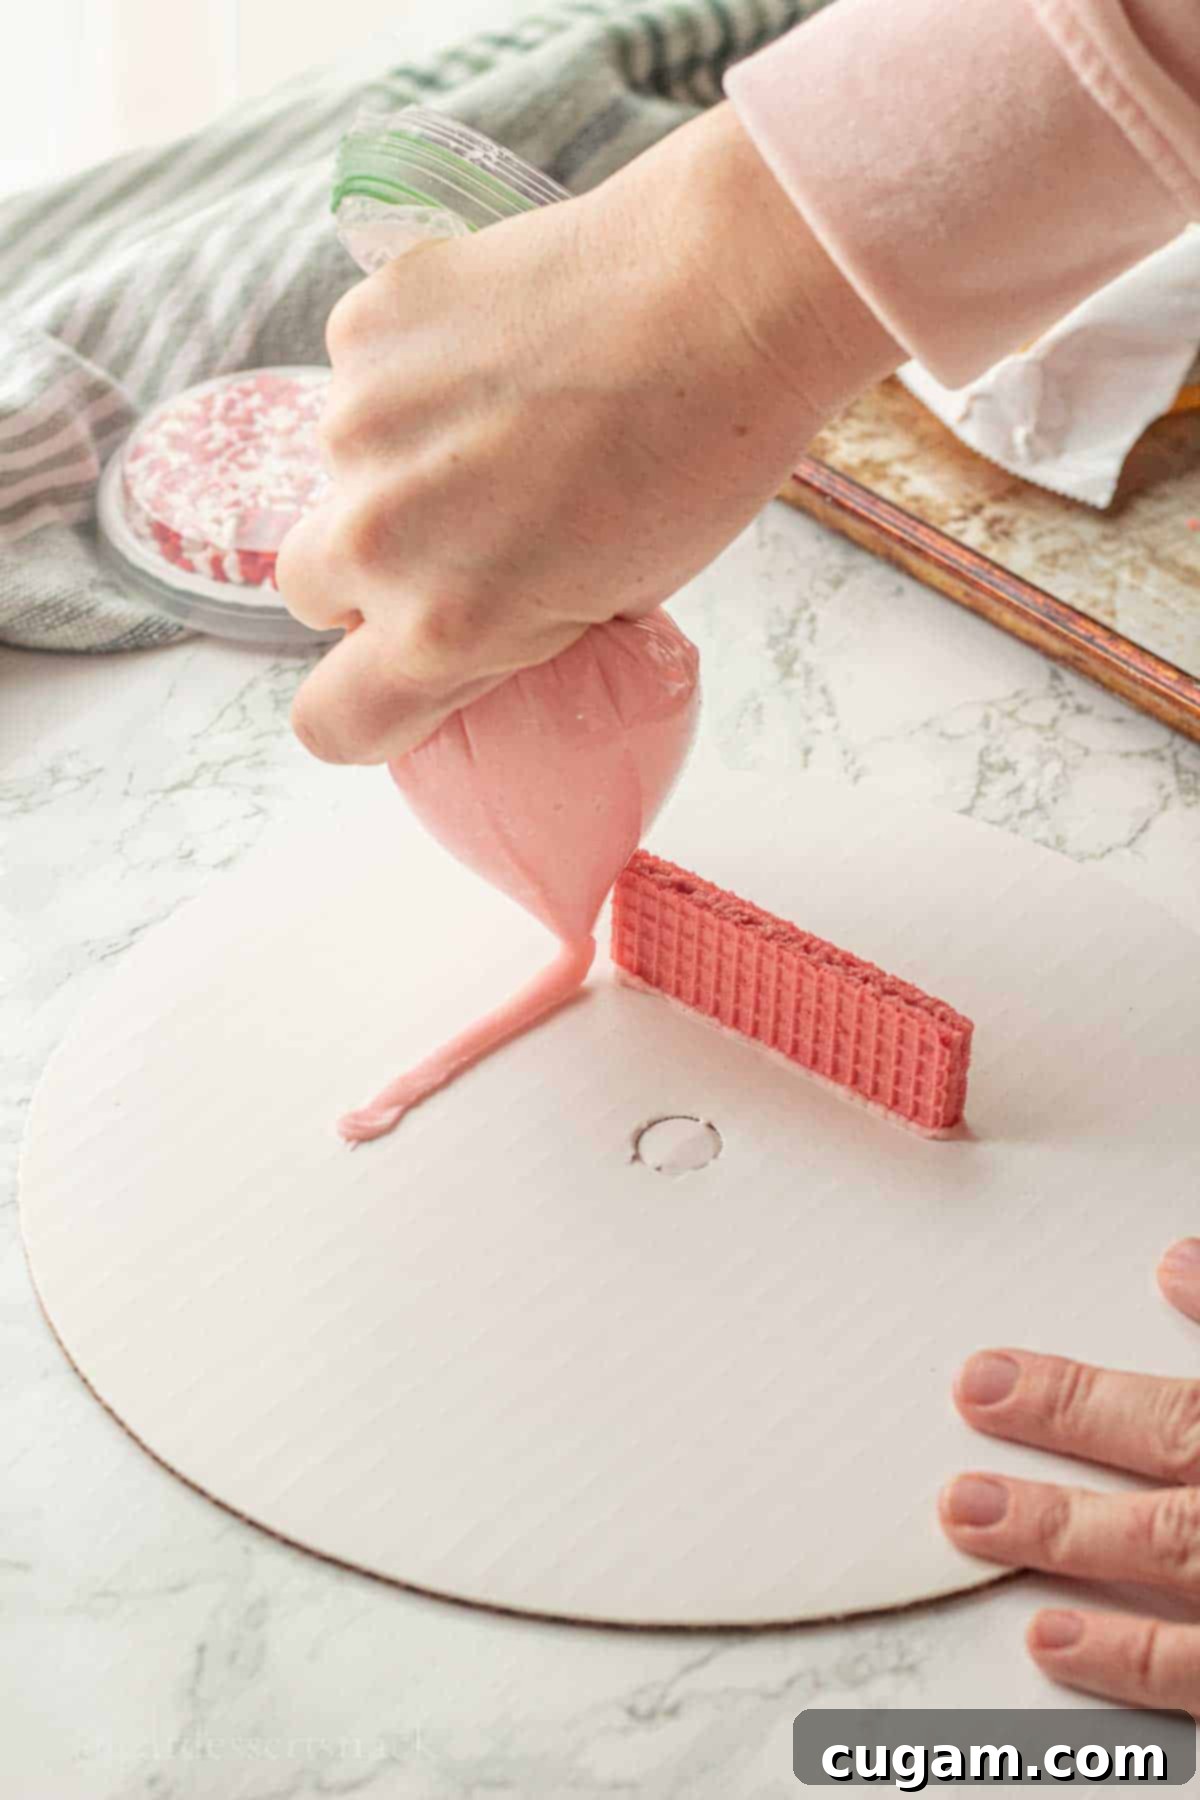
- Step 2: Construct the Base Walls of Your House. Begin by piping lines of frosting in a square or rectangular shape onto your chosen base—a paper plate, a sturdy piece of cardboard, or a cake disk. This will serve as the foundation for your cookie house. Alternatively, you can pipe a generous line of frosting along one long edge of your first wafer cookie, then place it upright on the plate. Repeat this process, carefully attaching subsequent wafer cookies side-by-side to form the initial perimeter of your house. Ensure the cookies stand firmly, using enough frosting to secure them in place.
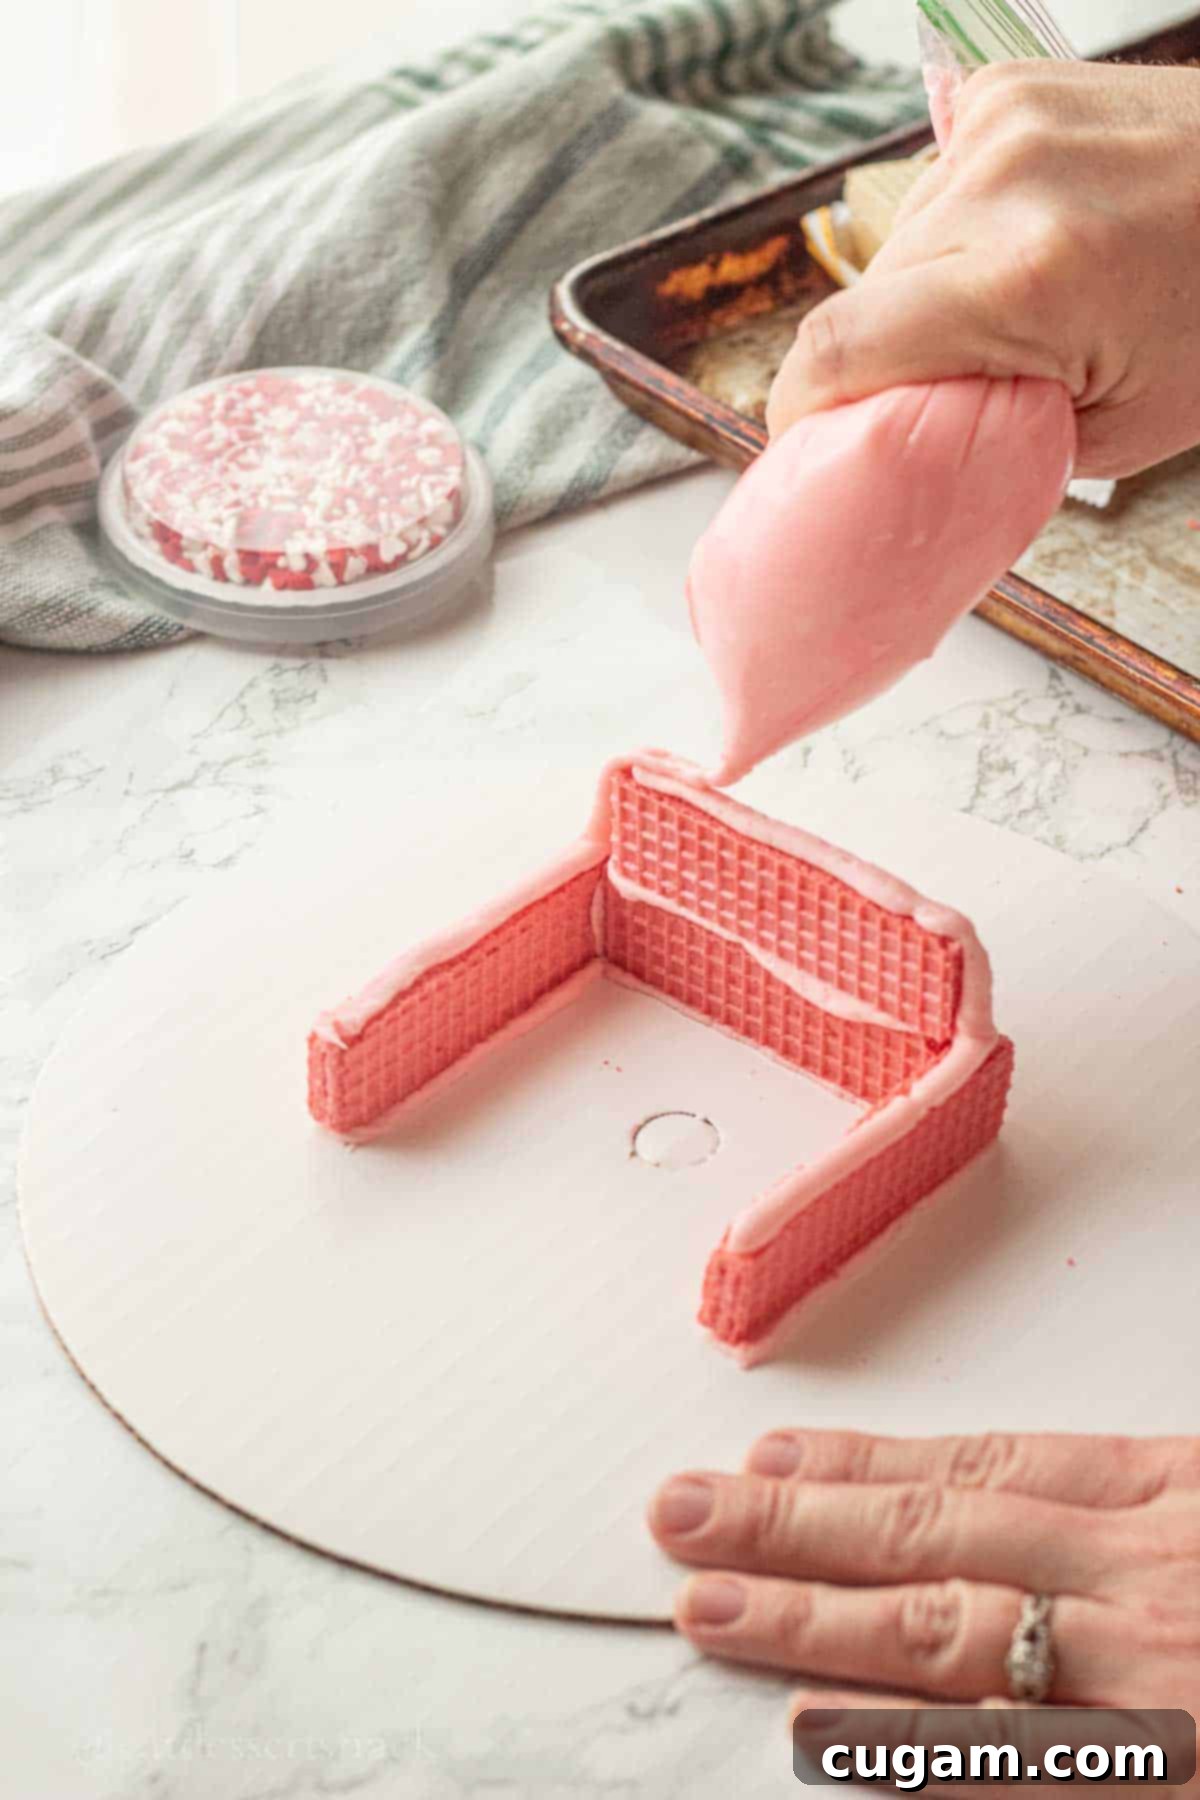
- Step 3: Build Up the Walls for Desired Height. Once your first level of walls is stable, pipe a line of frosting along the top edges of each cookie. Then, carefully place another layer of wafer cookies on top, ensuring they align with the cookies below to maintain structural integrity. You can go as tall as you’d like, but for optimal stability, we recommend stacking no more than 2 or 3 cookies high for the walls. Taller structures tend to become wobbly and may collapse under the weight of the roof and decorations.
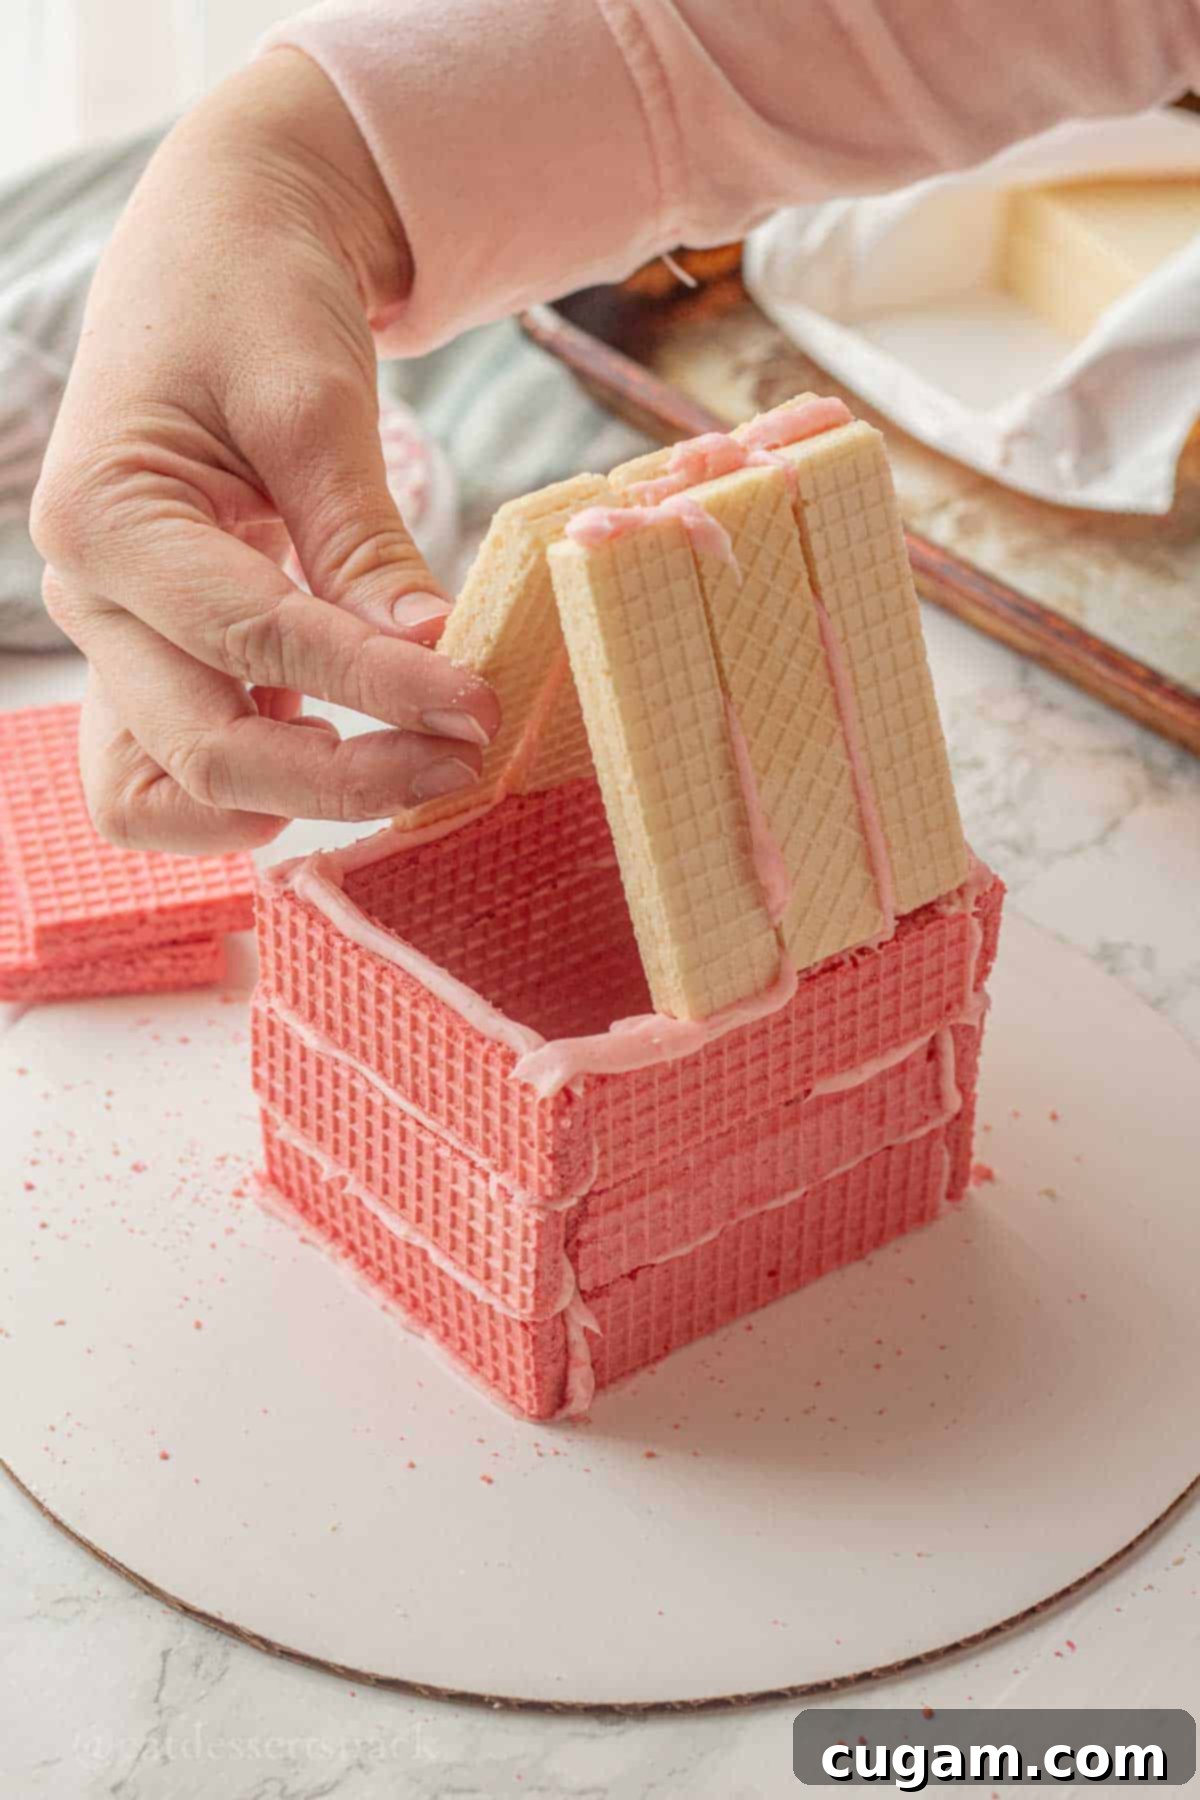
- Step 4: Create the Roof Structure. To begin constructing the roof, pipe a line of frosting along the inside edges and ends of two wafer cookies. Carefully place these two cookies side-by-side, leaning them against each other at an angle, forming an inverted “V” shape or A-frame over the top of your cookie walls. The frosting should create a strong bond where they meet at the peak and where they rest on the walls. Hold them gently in place for a few seconds to allow the frosting to start setting.
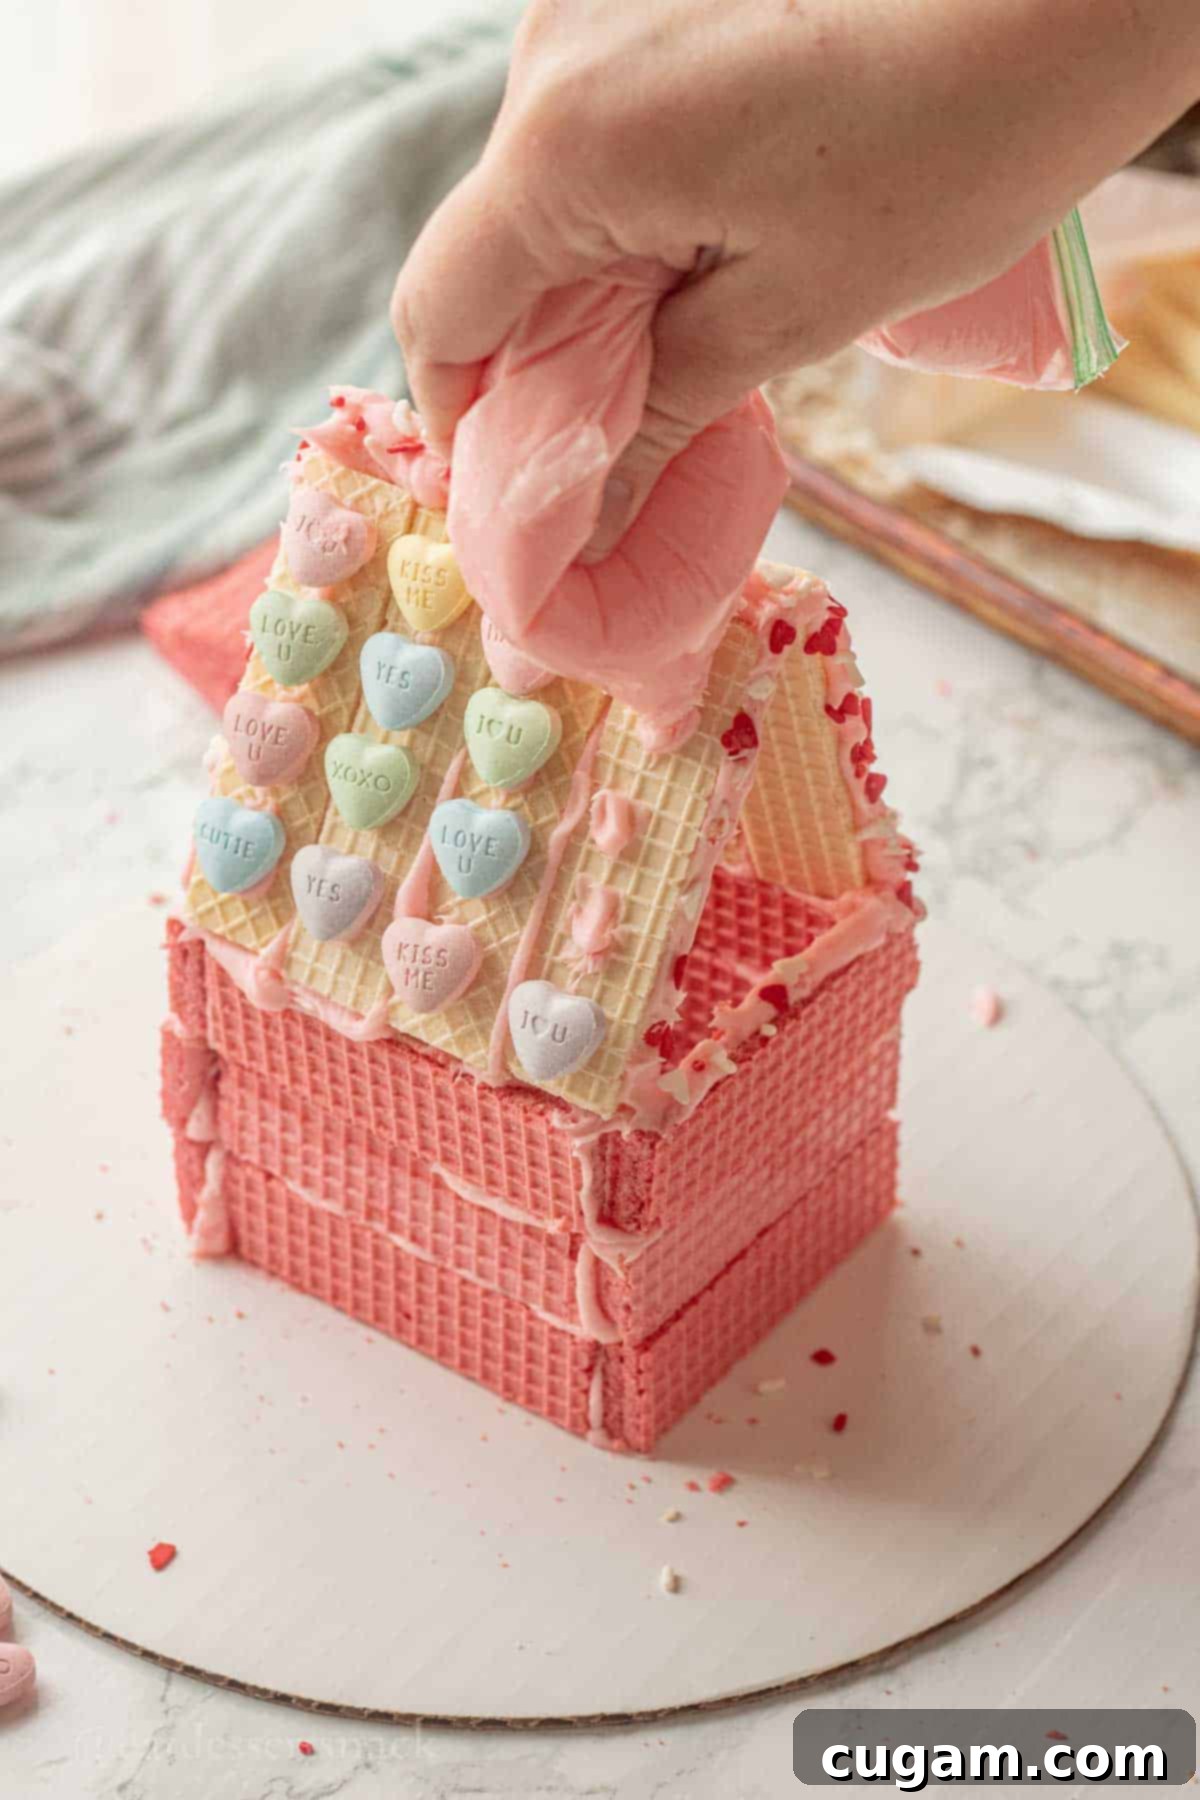
- Step 5: Prepare for Candy Decorations. Now that the basic structure of your house is complete, it’s time to add the sweet details. Using your piping bag, pipe small dots or lines of frosting onto the roof and walls where you plan to place each piece of candy. These frosting spots will act as anchors, ensuring your decorations stay firmly in place. You can create patterns, lines, or random clusters – whatever your creative heart desires!
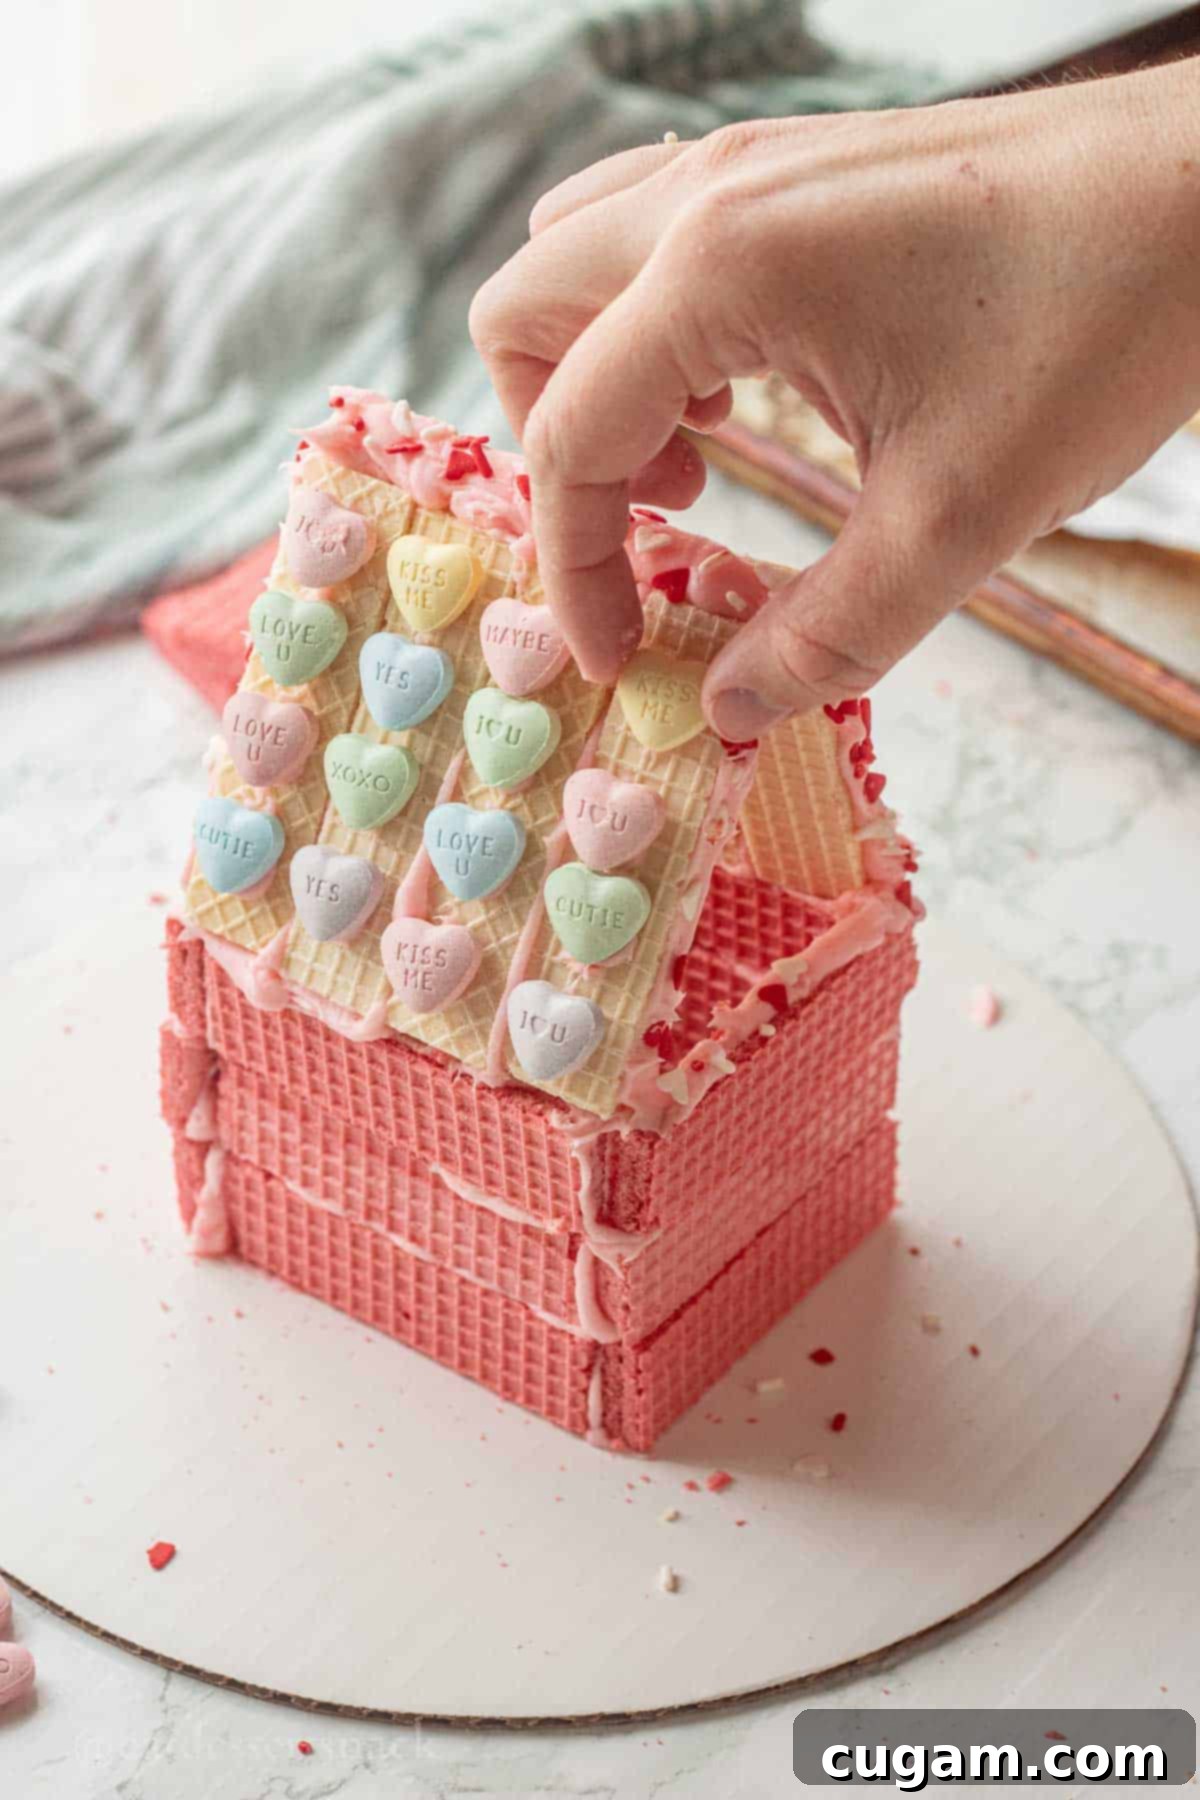
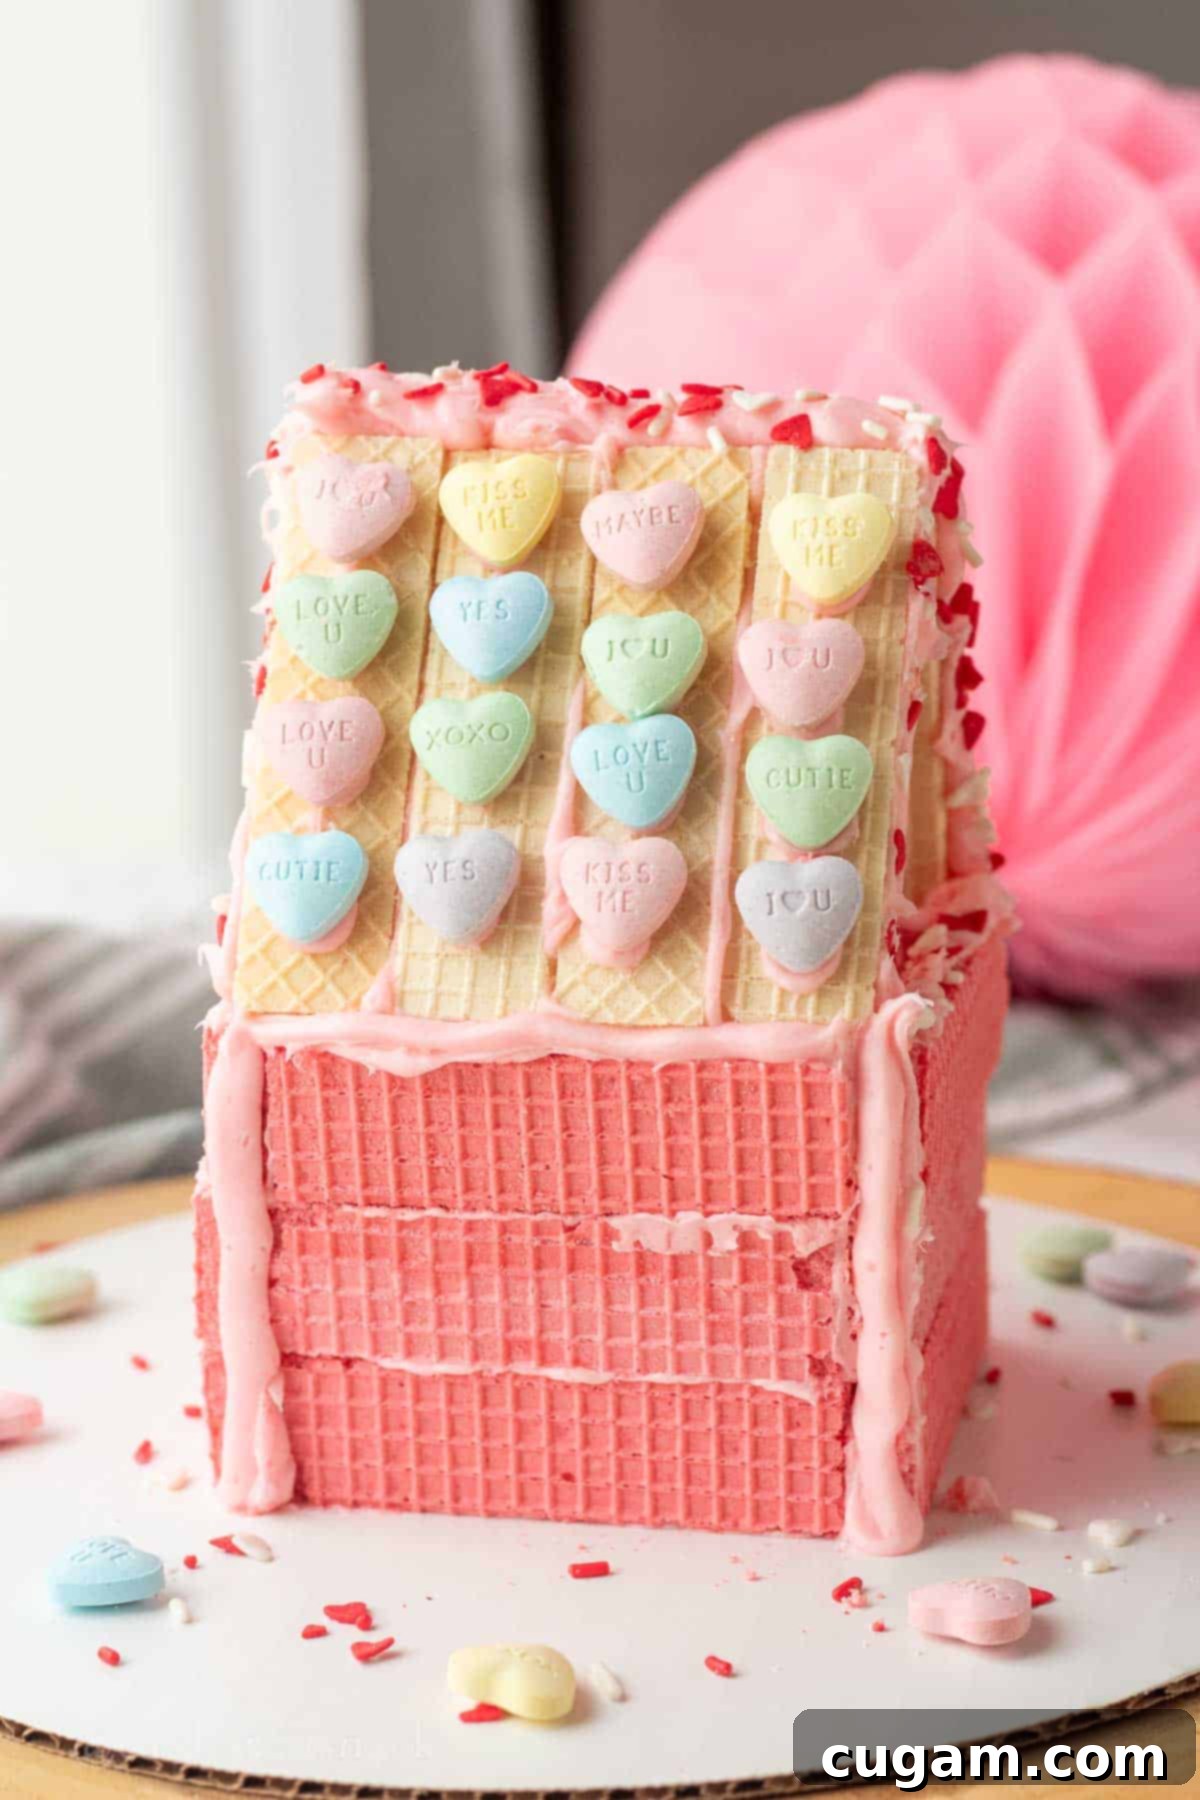
- Step 6: Decorate with Candies and Sprinkles. Carefully place your chosen candies onto the frosting dots on the roof and walls. Arrange them at various intervals to create a visually appealing design. For the roof, it’s often best to choose lighter candies to avoid weighing it down, which could compromise the structure’s stability. Once your candies are in place, sprinkle Valentine’s sprinkles generously over any remaining frosting or directly onto the roof and walls for an extra festive touch. Enjoy the creative process and watch your cookie house come to life!
📌 Top Tips & Hacks for Perfect Valentine Cookie Houses
To ensure your cookie house building experience is as enjoyable and successful as possible, keep these handy tips and hacks in mind:
- Go Simple with Decorations: While it’s tempting to use all the candy you can find, remember that too many heavy candies, especially on the roof, can weigh down the structure and cause it to collapse. Aim for a balanced and visually appealing design rather than an overloaded one. A few well-placed larger candies combined with sprinkles often look more charming and are more stable.
- Easy Sprinkle Application: For quick and even sprinkle coverage, try frosting the edge of a cookie (or a section of the roof/wall) and then immediately dipping it into a bowl of sprinkles. This method is much easier and less messy than trying to sprinkle them individually, especially for small hands.
- Maintain Wall Stability: When building the walls, stick to stacking 2-3 cookies (horizontally) high. Any taller, and the structure becomes significantly less stable and prone to tipping over. If you want a taller house, consider making a wider base to improve stability.
- Allow Frosting to Set: For stronger structures, allow the frosting to set slightly (5-10 minutes) after building the main walls and before adding the roof. This allows the “glue” to harden, providing a more stable foundation for the next steps.
- Prepare Your Workspace: Cover your work surface with newspaper, wax paper, or a plastic tablecloth. This will make cleanup a breeze, as frosting and sprinkles inevitably end up everywhere.
- Pre-Sort Candies: Before starting, sort your candies into small bowls or ramekins. This makes it easier for kids to pick and choose their decorations without rummaging through a large bag, reducing mess and speeding up the decorating process.
- Use a Sturdy Base: A strong paper plate, a thin cardboard cake circle, or even a small cutting board makes for a great base. This allows you to easily move the finished cookie house without damaging it.
- Embrace Imperfection: Remember, this is a fun, creative activity, especially when done with children. The houses don’t need to be perfect. Crooked walls and abundant frosting are part of their charm! Focus on the process and the joy it brings, rather than achieving a flawless result.
❓Frequently Asked Questions About Valentine Cookie Houses
You can purchase all the necessary ingredients like wafer cookies and frosting well in advance, as long as you pay attention to their expiration dates. They have a good shelf life, so buying them a few days or even a week before Valentine’s Day is perfectly fine. This allows you to be prepared for a spontaneous crafting session whenever the mood strikes!
These delightful cookie houses typically last up to 3 days when stored at room temperature. However, it’s important to note that the wafer cookies may gradually soften a bit due to moisture from the frosting over time. For the best taste and texture, we recommend making and enjoying them within a day or two of assembly. If you live in a humid climate, they might soften faster.
The magic ingredient that binds these charming structures together is frosting! For maximum ease and convenience, we recommend using a good quality store-bought frosting. Its thick consistency acts like a strong adhesive, ensuring your cookie walls and roof stay put. While you certainly could make your own royal icing or buttercream, store-bought frosting simplifies the process, making it more accessible for a quick and fun craft.
Absolutely! If you prefer a homemade touch, you can use a thick royal icing or a stiff buttercream. Just make sure the consistency is firm enough to act as a strong adhesive. A runnier frosting might not hold the cookies together effectively, so you may need to adjust the liquid content to achieve a good piping consistency.
Don’t get discouraged! This is a common challenge, especially with enthusiastic little builders. The most likely culprits are not enough frosting, too much weight (especially on the roof), or not allowing the frosting to set slightly. Make sure to apply generous lines of frosting on all connecting edges. You can also try holding the walls in place for 10-15 seconds until the frosting starts to firm up. For the roof, consider using lighter candies or letting the wall frosting set for 5-10 minutes before placing the roof pieces.
🩷 More Easy Valentine’s Recipes & Crafts
If you loved making these Valentine’s Day cookie houses, you’ll be thrilled to discover more simple and sweet ideas to celebrate the holiday. From delicious treats to other engaging activities, here are a few more easy Valentine’s recipes that are perfect for sharing with loved ones:
- Valentines Trail Mix
- Cherry Cheesecake Brownies
- Easy Raspberry Cream Cheese Bars
- Cherry Chocolate Cheesecake Cookies
Did you try this recipe? If you and your family built these adorable Valentine Cookie Houses, we’d love to hear about it! Make sure to leave a ⭐️ star rating and a comment below the recipe card. Your feedback is incredibly helpful to other readers and we love hearing about your sweet creations.
📲 FOLLOW Sara on Social! 👋 Facebook, Instagram, or Pinterest to see the latest fun recipes, snack ideas, and dessert adventures from the kitchen!
📝 Printable Recipe: Valentine Cookie House
Valentine Cookie House
Pin Recipe
Equipment
-
1 paper plate or cake cardboard disk
-
1 sandwich bag or frosting piping bag
Ingredients
- 1 (16oz) can frosting of choice
- 1 (8 oz) package strawberry wafer cookies
- 1 (8 oz) package vanilla wafer cookies
- 1 package conversation hearts
- optional: Valentine’s sprinkles
Instructions
-
Place an empty sealable sandwich bag or piping bag into a cup and spread the edges over the top of the cup. Spoon frosting into the bag and seal. Snip a small tip off the corner to pipe the frosting.
-
Pipe lines of frosting in a square on a paper plate (or desired base) or frost one long edge of the wafer cookies and begin placing them in a square shape on the plate to form the first layer of walls.
-
Pipe frosting along the top edges of each cookie to begin a second level of walls. You can go as tall as you’d like, but beyond 2 or 3 cookies high isn’t very stable.
-
Begin the roof by piping frosting along the inside edges and ends of two wafer cookies. Place them side by side lengthwise, leaning against each other to form an A-frame roof. Hold gently until the frosting begins to set.
-
Pipe dots of frosting on the roof and walls where you want to place each piece of candy or sprinkle.
-
Place candies on the frosting dots at intervals. For the roof, it’s best to avoid heavier candies to prevent it from weighing down. Sprinkle optional Valentine’s sprinkles generously over any remaining frosting as desired.
Notes
Freezing these cookie houses is generally not recommended, as the cookies may become soggy upon thawing.
Nutrition

Hi, I’m Sara!
Registered Nurse by day, food blogger by weekend. Perfect dip tester & snack quester. I love short walks on the beach and long naps. Sharing my love for food, one bite at a time.
