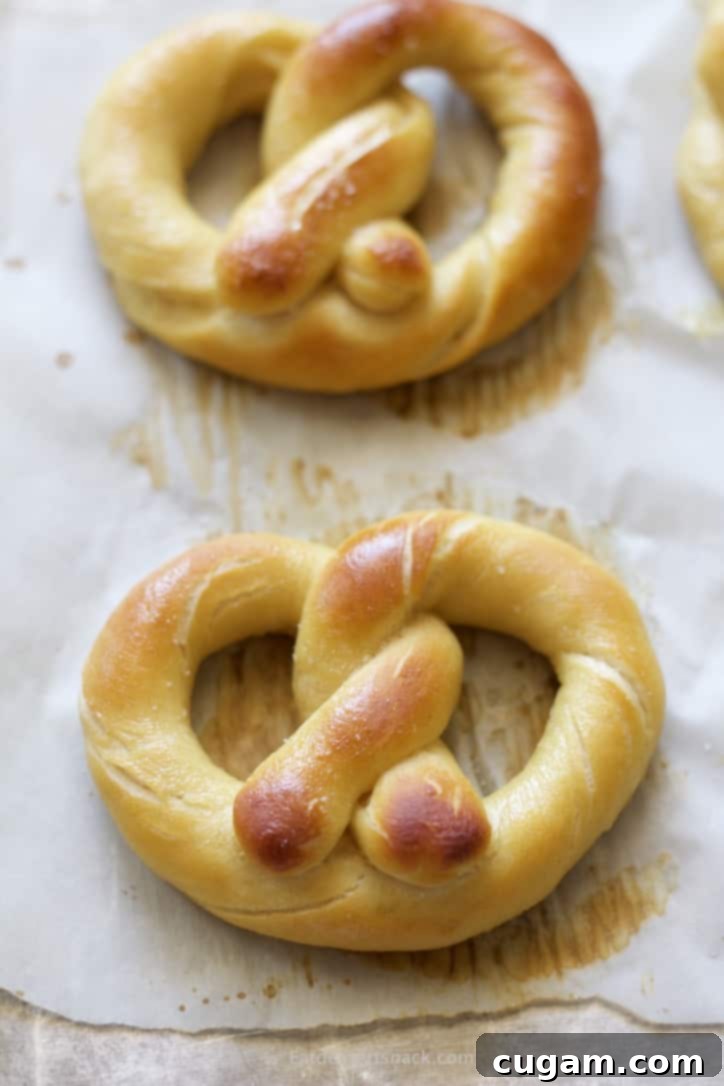
Irresistible Homemade Soft Pretzels: The Ultimate Make-Ahead Recipe for Any Occasion
Jump to Recipe
Homemade Soft Pretzels are truly the ultimate versatile snack, perfect whether you prefer them deliciously salty or sweet. Imagine the joy of having a batch ready in your freezer, simply needing a quick reheat to bring back that amazing freshly baked taste. This incredibly easy make-ahead recipe is designed for convenience without compromising on flavor or texture.
While most pretzels are at their peak when eaten the day they’re baked, I’ve perfected this recipe specifically so you can prepare them in advance. This means you won’t have to spend precious time baking on the day of your event – whether it’s a wedding reception, a big game, or just a casual get-together. This recipe has truly become a favorite for its ease and fantastic results.
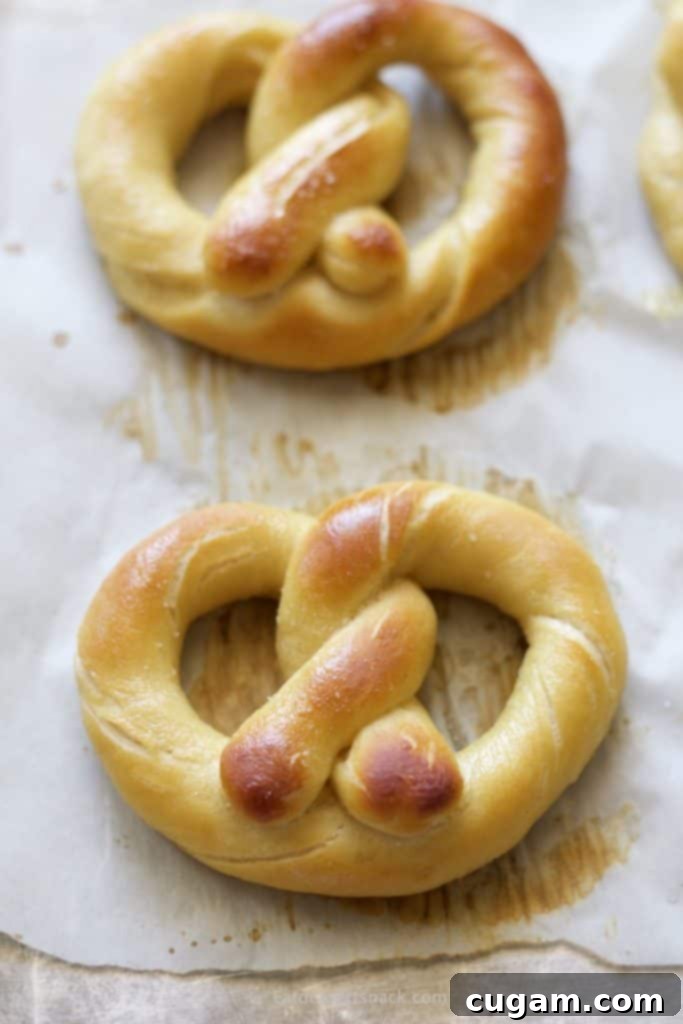
Crafting the Perfect Homemade Soft Pretzel Dough
Many soft pretzel recipes rely on a very basic dough, typically made with just water. While traditional German cookbooks often specify water, certain Bavarian and Swabian variations incorporate higher fat content with butter and milk, leading to a richer dough. My experience in a bakery during college taught me that enriched doughs—those made with milk, eggs, or butter—tend to remain softer and fresher for longer, resisting the common issue of turning hard the very next day. This insight was crucial in developing my ultimate soft pretzel recipe.
The Secret: Milk and Oil for Unmatched Softness
For this recipe, I’ve opted for milk instead of water. This is a personal preference that, in my opinion, significantly enhances the pretzels’ freshness and soft texture over time. Furthermore, I choose oil over butter. While butter can be delicious, I find that oil truly improves the dough’s texture, resulting in a noticeably softer baked pretzel. This combination creates a dough that is not only pliable and easy to work with but also yields exceptionally tender pretzels every single time.
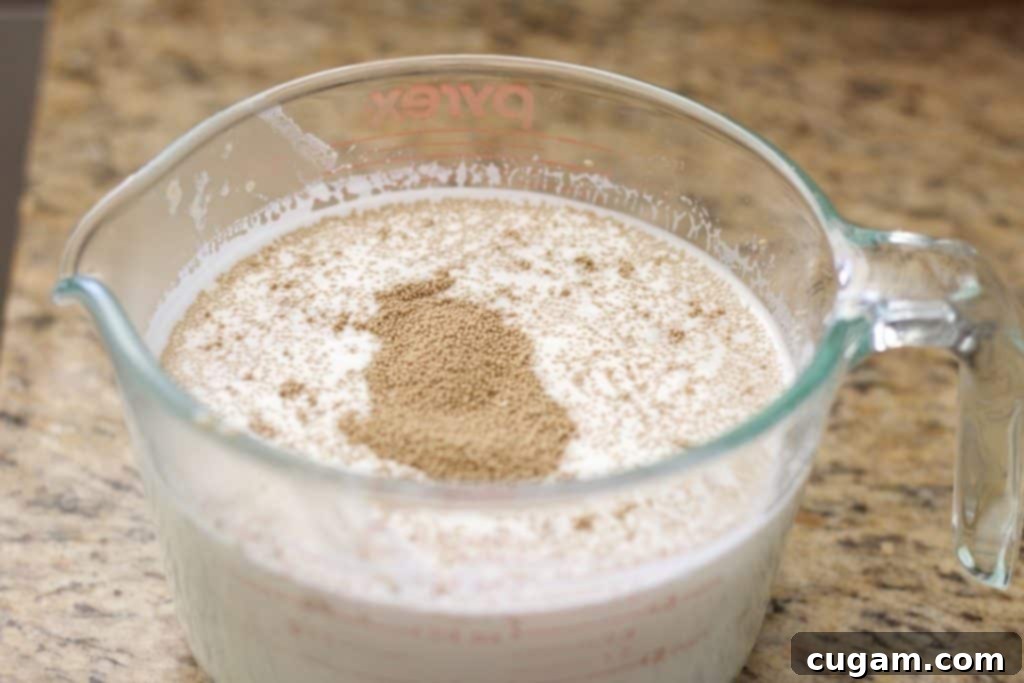
Activating the Yeast: The “Sponge” Method
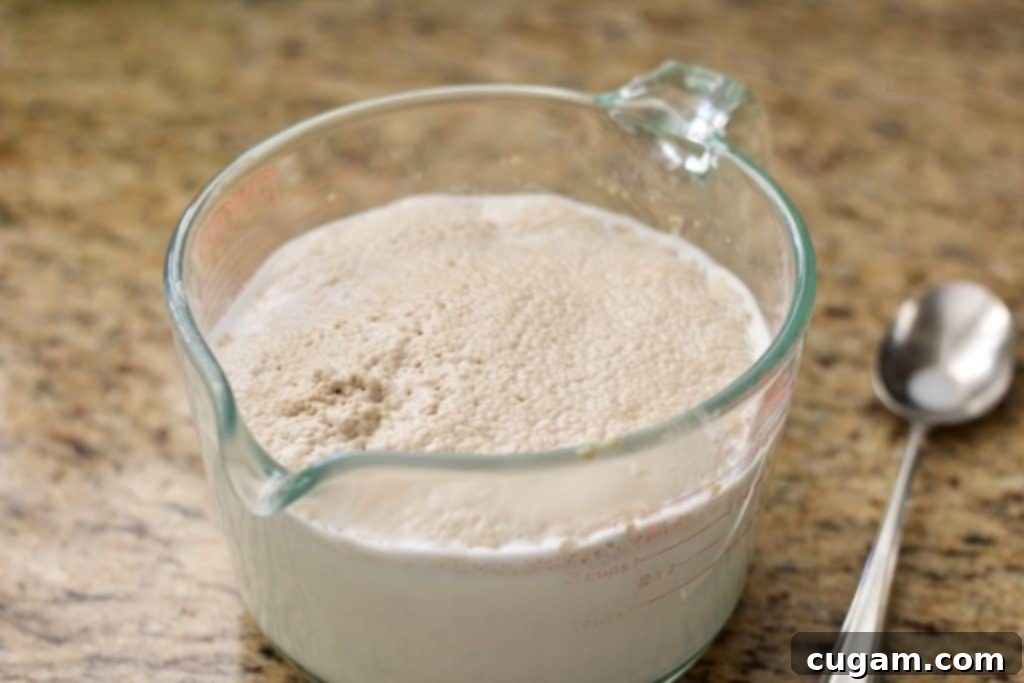
The best approach to kickstart active dry yeast for any yeasted bread, including our soft pretzels, is by creating a “sponge.” This involves mixing your warm liquid of choice (in this case, milk around 110 degrees Fahrenheit) with sugar, then stirring in the yeast. Let this mixture sit for approximately 5 minutes until it becomes visibly foamy. This bubbling indicates that your yeast is alive and active, ready to work its magic on the dough.
For those who, like me, are obsessed with “The Great British Baking Show,” you might recall Paul Hollywood mentioning in a masterclass that he uses room temperature liquids to activate yeast. He posits that a longer, slower rise at a lower temperature helps retain more flavor in the dough. While I don’t use room temperature milk for this specific recipe’s initial proofing, it was a delightful discovery to learn he also favors milk in his own pretzel recipes – making me feel like I’m on the right track!
Flour Selection and Dough Consistency
I’ve experimented with both all-purpose flour and strong white bread flour (which has a higher protein and gluten ratio) for this recipe, and both yield excellent results. The key, however, lies in achieving the correct dough consistency. Pretzel dough should absolutely NOT be sticky. A sticky dough is incredibly difficult to work with; it won’t hold its distinct twisted shape well during the crucial baking soda bath or throughout the baking process, often resulting in a shapeless “mush.”
If your dough feels sticky after initial mixing, gradually add a tablespoon or two of extra flour until it pulls away cleanly from the sides of the bowl and feels smooth and elastic. Remember, the less sticky the dough, the easier it is to roll, shape, and handle. One important note: avoid overworking or excessively rolling the dough, as this can develop too much gluten and make the pretzels tough rather than soft and chewy. Handle it just enough to form its beautiful twists.
The Essential Baking Soda Bath: Why it Matters
The baking soda bath is a non-negotiable step for achieving the authentic pretzel crust and flavor. Briefly boiling the raw pretzel dough in a solution of water and baking soda causes a chemical reaction that helps create that signature dark, glossy, and slightly chewy exterior, as well as the distinctive “pretzel” flavor. Without this bath, your pretzels would simply be soft bread sticks.
Pro Tip: Boost Flavor with Salt in the Bath! Just like boiling pasta in salted water enhances its taste, I like to add a teaspoon of salt to my baking soda bath. This simple addition significantly improves the overall flavor of the pretzels. I also believe it helps to better bond the starches in the dough, preventing them from becoming gummy or dissolving during the quick boil. It’s a small step that makes a big difference.
Parchment Paper: Your Best Friend for Baking Pretzels
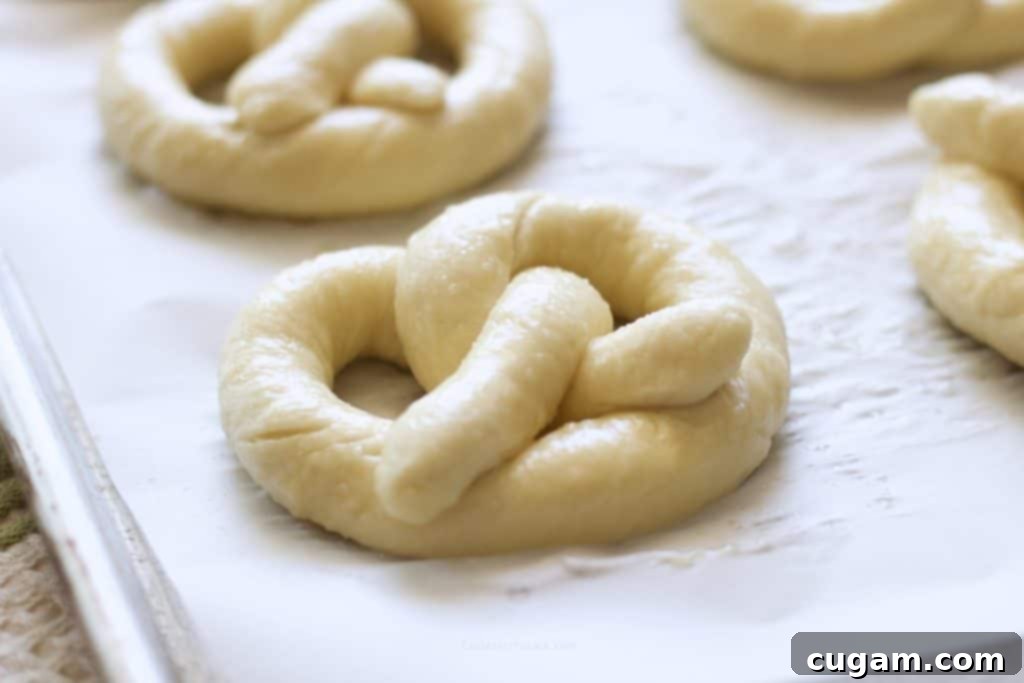
When baking these soft pretzels, it is absolutely crucial to use parchment paper. Trust me on this! I’ve tried baking them on rubber baking mats and even tinfoil in the past, and the results were always disappointing. They ended up with a strange, unappetizing residue baked onto their bottoms, and often stuck to the surface. Parchment paper not only prevents sticking but also helps to soak up any excess water from the baking soda boil, ensuring a perfectly crispy bottom and a clean finish. Don’t skip this essential tool!
Serving Suggestions and Make-Ahead Magic
These homemade soft pretzels are fantastic on their own, but they’re even better with a delicious dip! For the wedding reception I mentioned, I prepared both a savory cheese dip and a sweet cream cheese dip to go alongside them. I promise to share those delightful dip recipes with you very soon. Whether you prefer a classic mustard, a sweet cinnamon sugar topping, or a decadent dip, these pretzels are the perfect vehicle.
Freezing and Reheating for Convenience
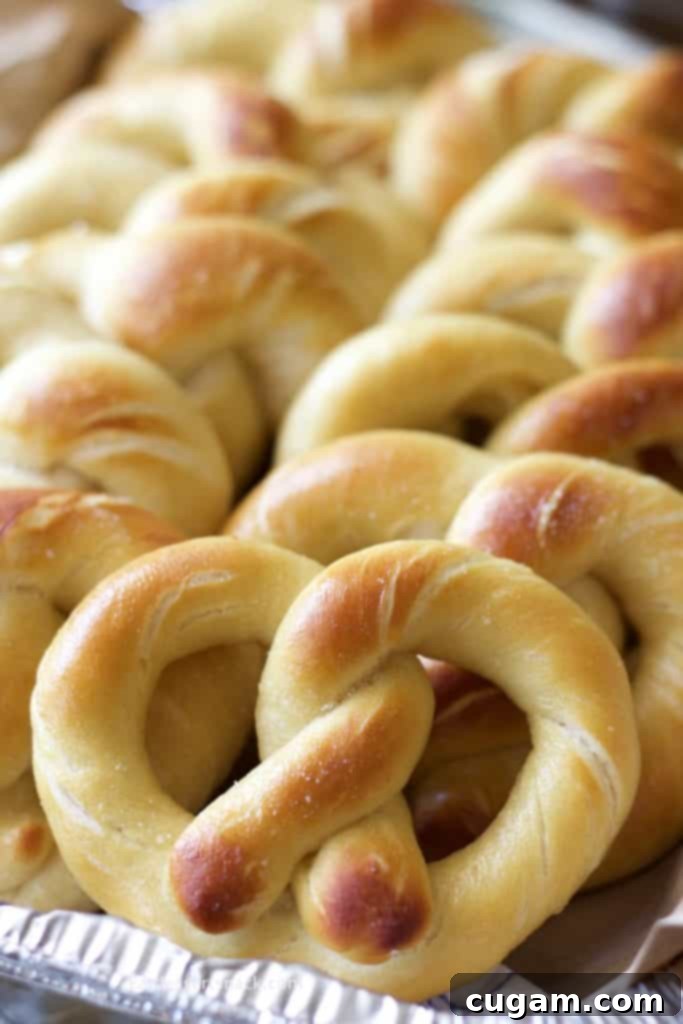
The make-ahead aspect of this recipe is what truly sets it apart. Once your pretzels are baked and cooled completely, they can be easily frozen. Simply place them in an airtight container or a gallon-sized resealable bag. When you’re ready to enjoy them, preheat your oven to 350°F (175°C) and bake for about 10 minutes. They’ll emerge perfectly warm, soft, and tasting as if they were just pulled from the oven. This makes them ideal for busy schedules, impromptu gatherings, or simply having a delicious snack on hand whenever a craving strikes.
Essential Tips for the Best Homemade Soft Pretzels:
- Use Milk, Not Water: Enriched dough with milk helps pretzels stay softer and fresher for longer.
- Achieve Non-Sticky Dough: If your dough is sticky, gradually add more flour (1-2 tablespoons at a time) until it’s smooth and pulls away easily from the bowl. This ensures better shape retention.
- Salt the Baking Soda Bath: Adding a teaspoon of salt to the boiling bath water significantly improves the pretzels’ flavor and helps prevent gumminess.
- Always Use Parchment Paper: This prevents sticking and absorbs excess water, ensuring a perfectly baked bottom without any residue.
- Don’t Overwork the Dough: Too much rolling can make your pretzels tough. Handle just enough to shape them.
- Proper Yeast Activation: Ensure your yeast mixture is foamy before adding it to the flour, indicating active yeast.
More Delicious Bread Recipes to Try:
- Soft Fluffy French Bread
- Cheddar Garlic Biscuits
- Strawberry Banana Bread
📝 Printable Recipe
Homemade Soft Pretzels
Pin Recipe
30 mins
8 mins
45 mins
1 hr 23 mins
Snack
German
12
87 kcal
Ingredients
-
1-½ cups warm milk (can use 1%, 2%, or whole) -
1 Tablespoon brown sugar -
1 Tablespoon active dry yeast -
2 teaspoons salt -
¼ cup vegetable or olive oil -
4-½ to 5 cups all purpose flour -
10 cups water -
½ cup baking soda -
1 teaspoon salt -
1 egg, beaten for brushing onto pretzels
Instructions
-
In a large measuring cup, combine warm milk and sugar and mix well. Add yeast and let sit for 5 minutes, until foamy. Meanwhile, in a large mixing bowl combine salt, oil, and 4-½ cups flour. Once the milk and yeast have proofed for 5 minutes, pour into flour mixture.
-
Mix in a stand mixer with a dough hook or by hand for 5 to 8 minutes, until dough becomes smooth. Dough should not be sticky and should pull away from the sides of the bowl easily. (If it is sticky, add flour 1 or 2 Tablespoons at a time and mix until smooth and pulls away from the sides of the bowl easily.)
-
Place dough in an oiled bowl and cover with plastic wrap for 45 minutes, or until dough has doubled in size. While dough is rising, prepare 2-3 baking sheets with parchment paper, prepare the baking soda bath by combining water, baking soda, and salt in a large pot and bring to a slow boil, and preheat the oven to 450 degrees F.
-
When dough is ready, use a ⅓ cup measuring cup to divide dough into 12-14 equal pieces. I don’t divide all at once; I prefer to roll out one pretzel at a time so the dough doesn’t dry out too fast.
-
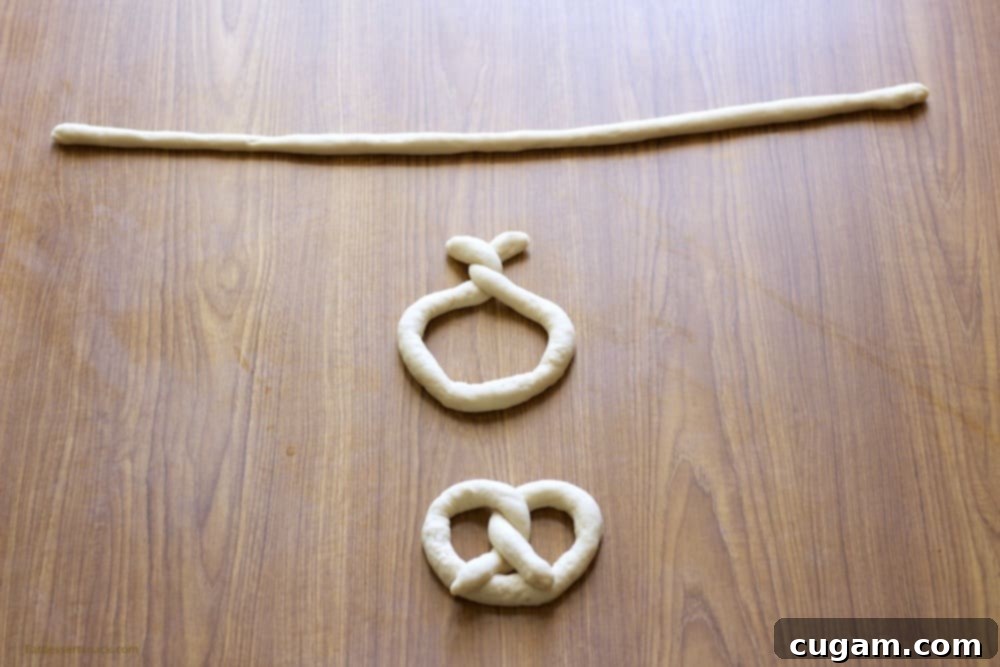
Roll pieces into a 24-inch rope. Form into a U shape, then twist the ends over each other and press them to the bottom of the pretzel to make the classic three-hole shape. Sometimes a dab of water on the ends helps them stick together better.
-
Gently lower the pretzels one by one into the baking soda bath and boil for 20-30 seconds. Lift them out with a flat spatula and place on the parchment paper prepared baking sheets.
-
Brush with beaten egg, sprinkle with extra salt if preferred, and bake for 8 minutes (no longer than 10) at 450 degrees F until golden brown. Enjoy!
Notes
To prepare from frozen, preheat the oven to 350 F. and bake for 10 minutes.
Nutrition
Carbohydrates: 17g
Protein: 3g
Fat: 1g
Saturated Fat: 0.2g
Polyunsaturated Fat: 0.1g
Monounsaturated Fat: 0.1g
Cholesterol: 1mg
Sodium: 1964mg
Potassium: 42mg
Fiber: 1g
Sugar: 2g
Vitamin A: 16IU
Vitamin C: 0.001mg
Calcium: 23mg
Iron: 1mg
Tried this recipe?
Tag me @eatdessertsnack or tag #eatdessertsnack
