Homemade Peach Pie Filling: The Best Recipe for Fresh or Frozen Peaches (No More Soggy Bottoms!)
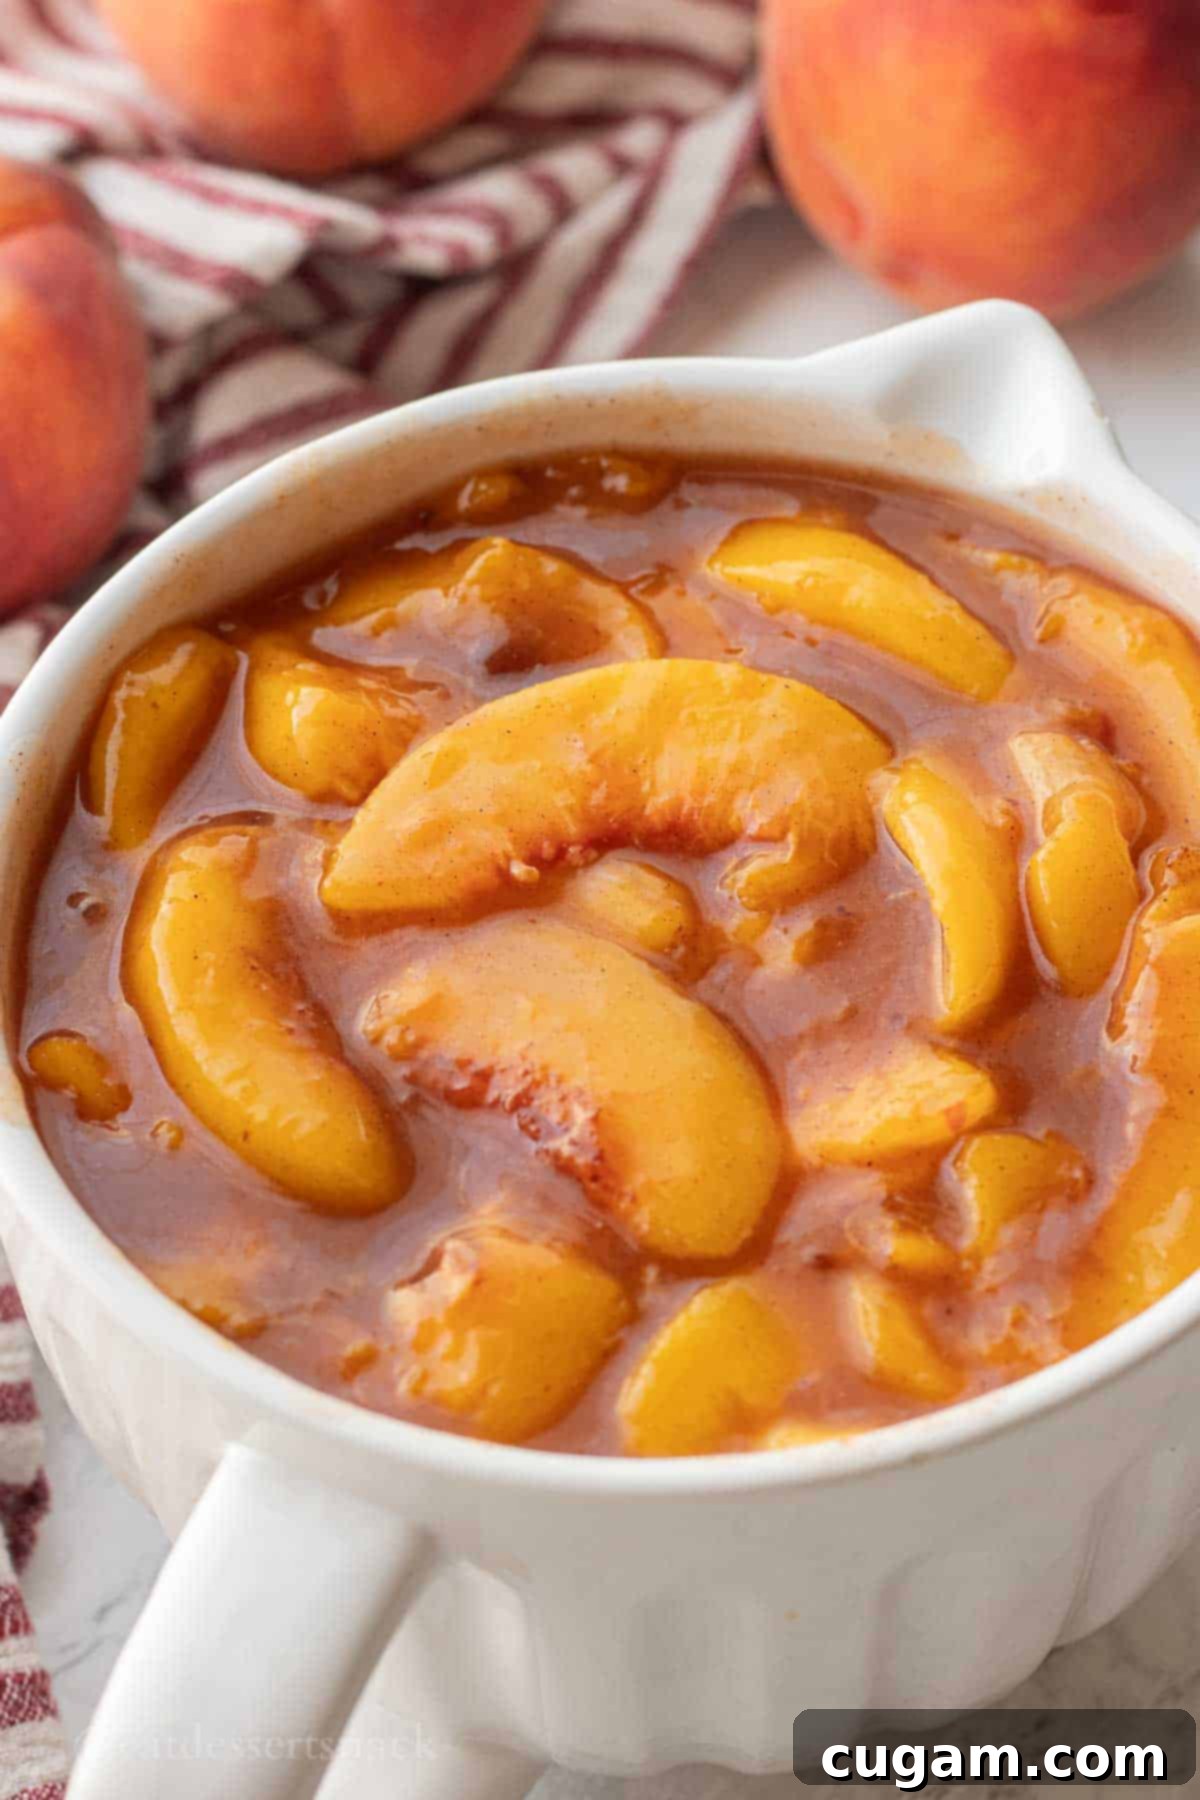
Discover the ultimate recipe for **homemade peach pie filling** that guarantees a perfect texture and vibrant flavor every time. Whether you have an abundance of fresh summer peaches or rely on the convenience of frozen fruit, this easy-to-follow recipe, infused with warm cinnamon and a hint of spice, is your secret weapon for sensational pies, delightful crisps, and countless other desserts. It’s not just simple and incredibly delicious; it’s also freezer-friendly, allowing you to capture the taste of summer any time of year.
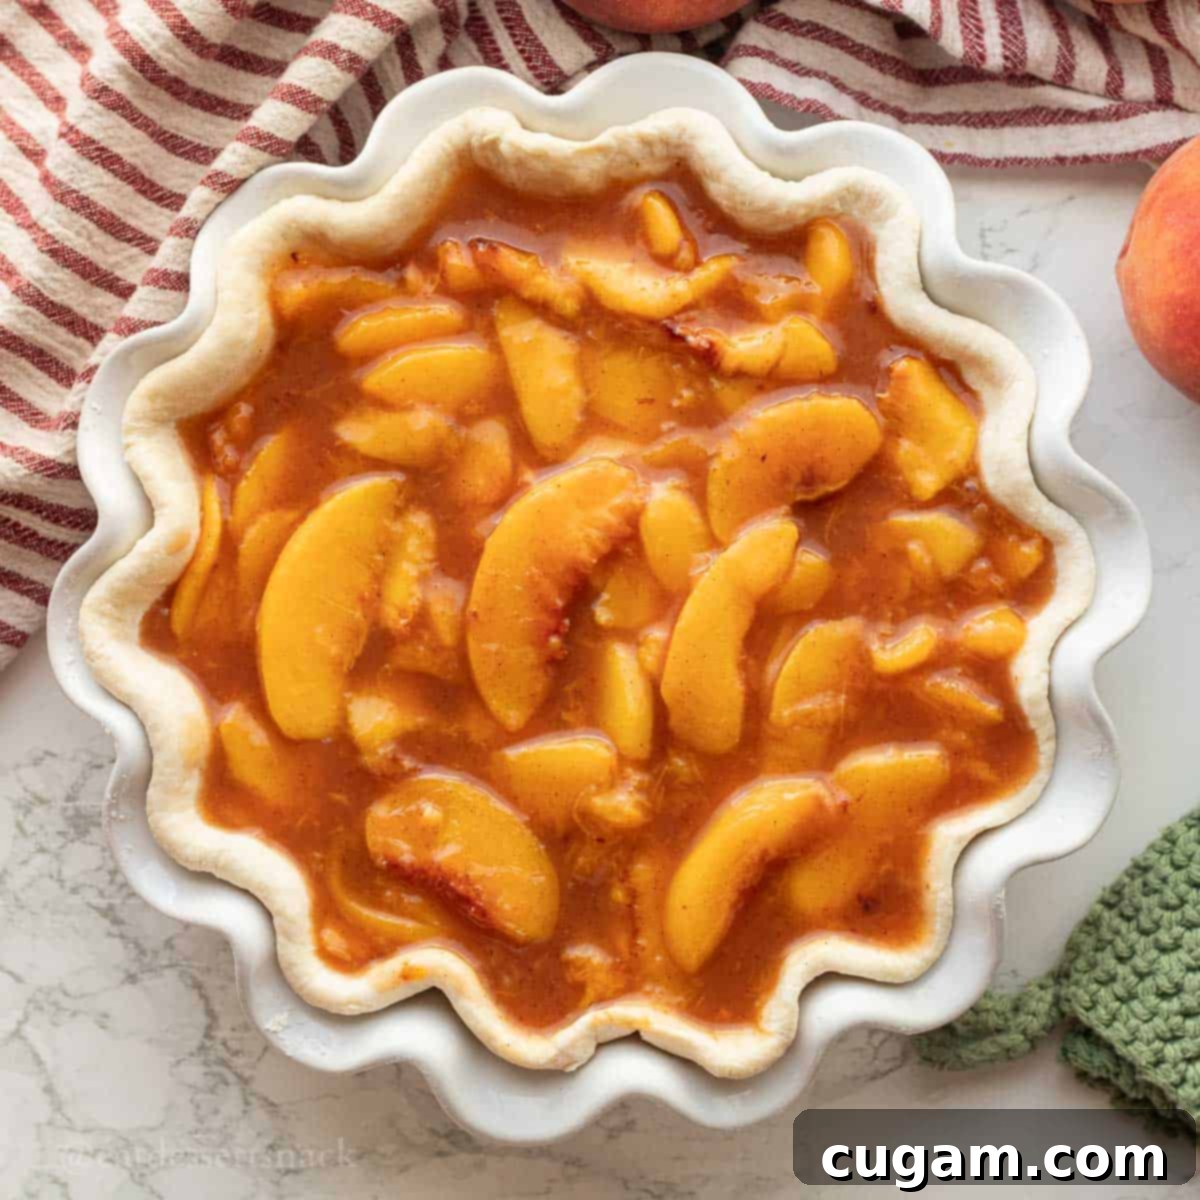
Every baker cherishes their go-to pie filling recipes (and yes, we adore our homemade cherry pie filling too!), but there’s something truly special about the peak season for fresh peaches. This recipe ensures you make the most of those juicy summer gems before they vanish. What sets this peach pie filling apart is that it’s pre-cooked. This crucial step eliminates the common baking woes, ensuring a much more predictable outcome with **absolutely NO dreaded soggy pie bottoms** – a game-changer for any pie enthusiast. By cooking the filling first, you achieve a stable, perfectly thickened consistency that holds up beautifully during baking, delivering a slice of pure peach perfection.
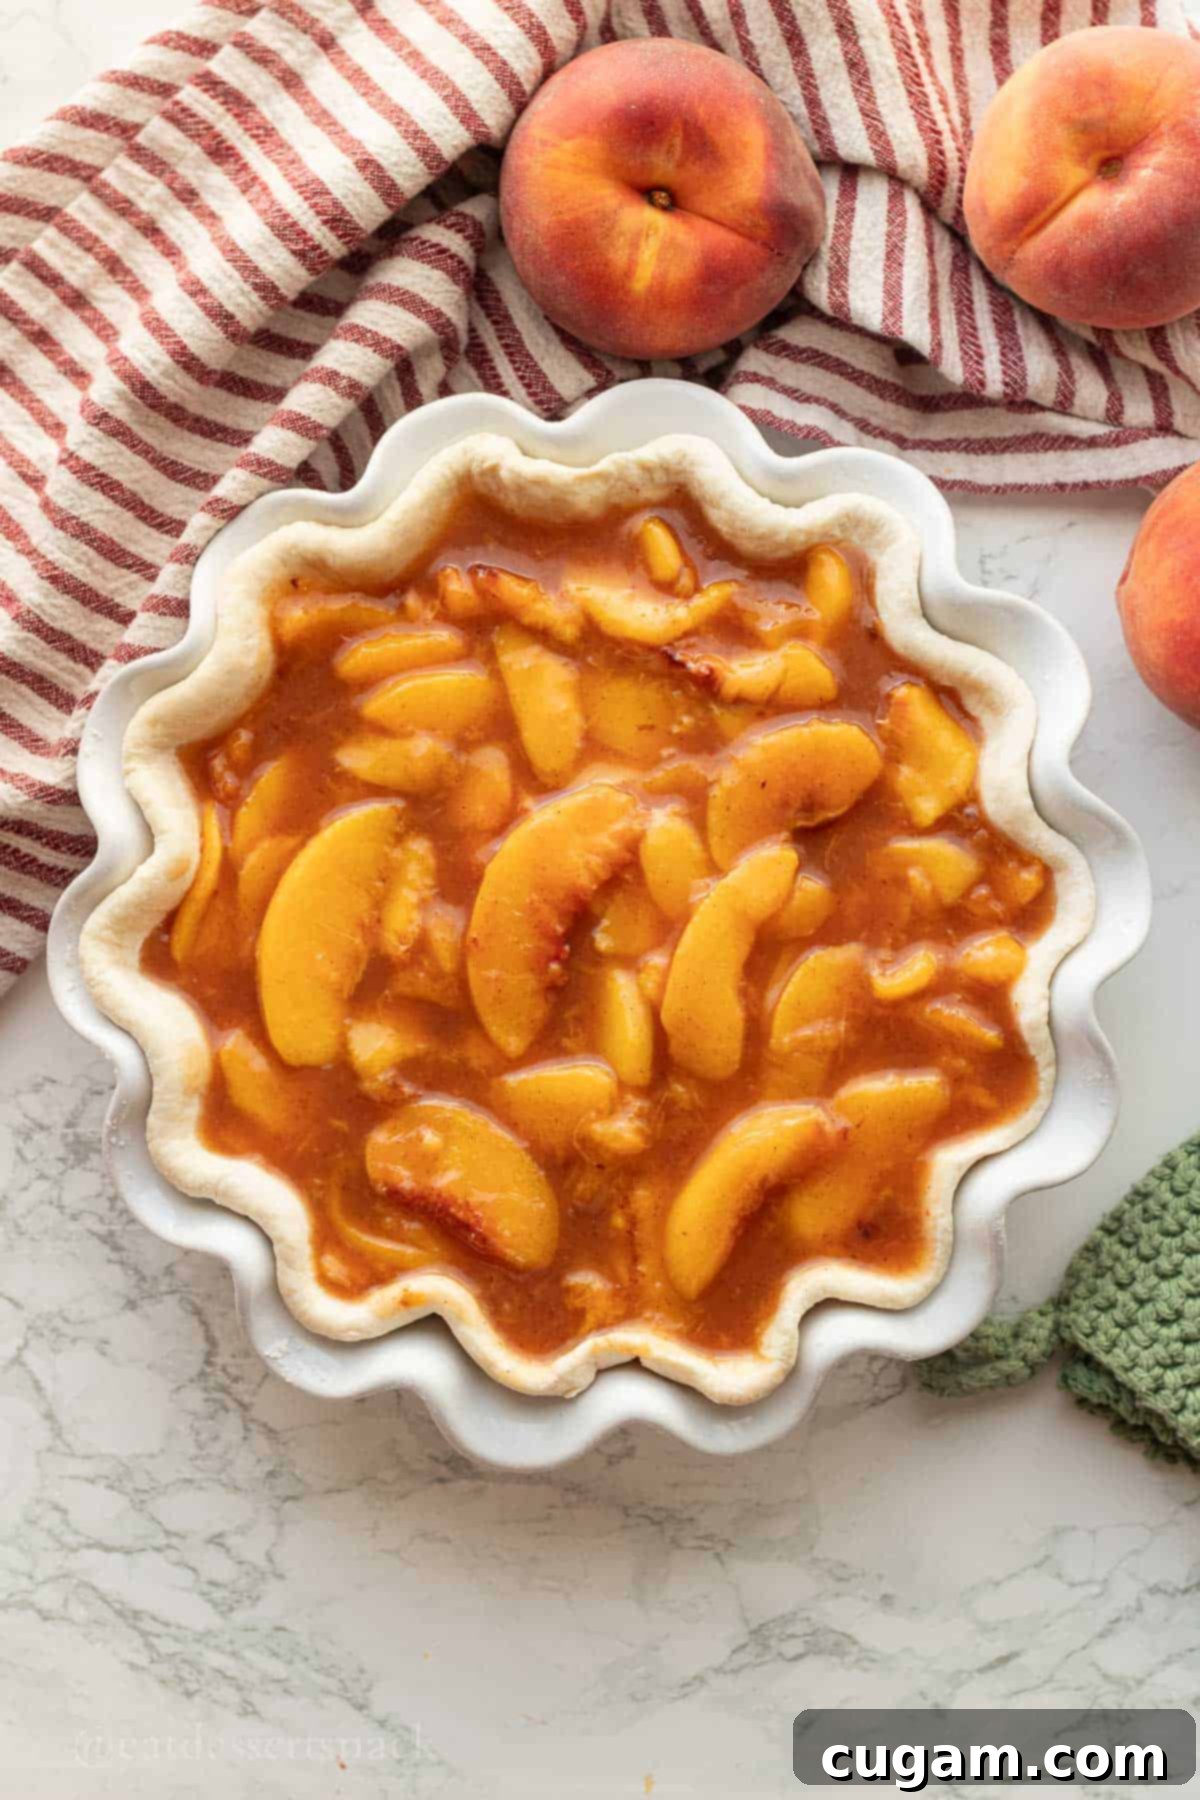
One of the many reasons to adore this peach pie filling recipe is its incredible versatility: you can effortlessly make it with either **fresh or frozen peaches**. This adaptability means you don’t have to wait for peach season to enjoy a delicious homemade pie. While adapting this from my beloved Homemade Apple Pie Filling, I made several adjustments. Peaches, being much juicier than apples, release a significant amount of liquid during cooking, necessitating different spice ratios and thickener quantities. The resulting balance perfectly highlights the natural sweetness and aroma of the peaches without overwhelming them.
Why is pre-cooking the filling so important before baking? This step is paramount for several reasons, primarily to prevent those frustrating soggy pie bottoms and runny fillings that can ruin an otherwise perfect dessert. By cooking the peaches with the sugar and spices, the fruit softens, and its juices are released and then thickened with cornstarch. This process ensures the starches are fully activated, creating a stable, set filling even before it enters the oven. I typically time my baking so that I **prepare the peach pie filling first** and allow it to cool completely while I focus on making a perfectly flaky pie crust. This allows the filling to firm up properly, reducing the moisture in the pie shell during baking and guaranteeing a crisp, golden crust beneath your luscious peach filling.
🍑 What Makes a Great Peach Pie Filling?
Crafting a truly exceptional peach pie filling involves more than just combining ingredients; it’s about achieving the perfect balance of texture, flavor, and stability. Here are the key characteristics that define a superior peach pie filling:
- Perfect Set: The filling should be firm enough to hold its shape beautifully when sliced, yet remain tender and never gummy. It needs to provide a satisfying, cohesive bite that complements the pie crust, rather than flowing out or being overly stiff.
- Balanced Taste: The star of the show should always be the peaches. A great filling allows the natural sweetness and delicate aroma of the peaches to shine through, with the spices acting as a supporting chorus rather than overpowering the fruit. A subtle hint of cinnamon, nutmeg, or allspice can enhance the peach flavor without masking it.
- Thoroughly Cooked Peaches: Pre-cooking the filling is essential for proper setting and to achieve the desired texture in the final baked pie. This process breaks down the peaches’ cell walls, releasing their juices and allowing the thickener to do its job effectively. This also minimizes the risk of a raw-tasting fruit and ensures the pie sets properly upon cooling, which is vital for preventing a dreaded soggy bottom.
- Optimal Peach Selection & Preparation: Choose peaches that are ripe but not overly soft or mushy, as overripe fruit can break down too much during cooking. Slicing the peaches on the thicker side (about ¼ to ½ inch) helps them maintain their structural integrity throughout the cooking and baking process, ensuring delightful chunks of fruit in every bite.
Pro Tip: This recipe emphasizes a pre-cooked filling to ensure that the starches are fully activated and the peaches soften perfectly before baking. This method creates a stable filling that performs exceptionally well in a pie. As long as your peaches are sliced thick enough to withstand the cooking process, they will maintain their delicious texture and shape when baked into a classic pie crust or a rustic cobbler.
🛒 Key Ingredients for Your Perfect Peach Pie Filling
Crafting the perfect peach pie filling starts with selecting high-quality ingredients. Each component plays a crucial role in achieving the desired flavor, texture, and consistency for a truly remarkable dessert. Here’s a closer look at the key players in this delicious recipe:
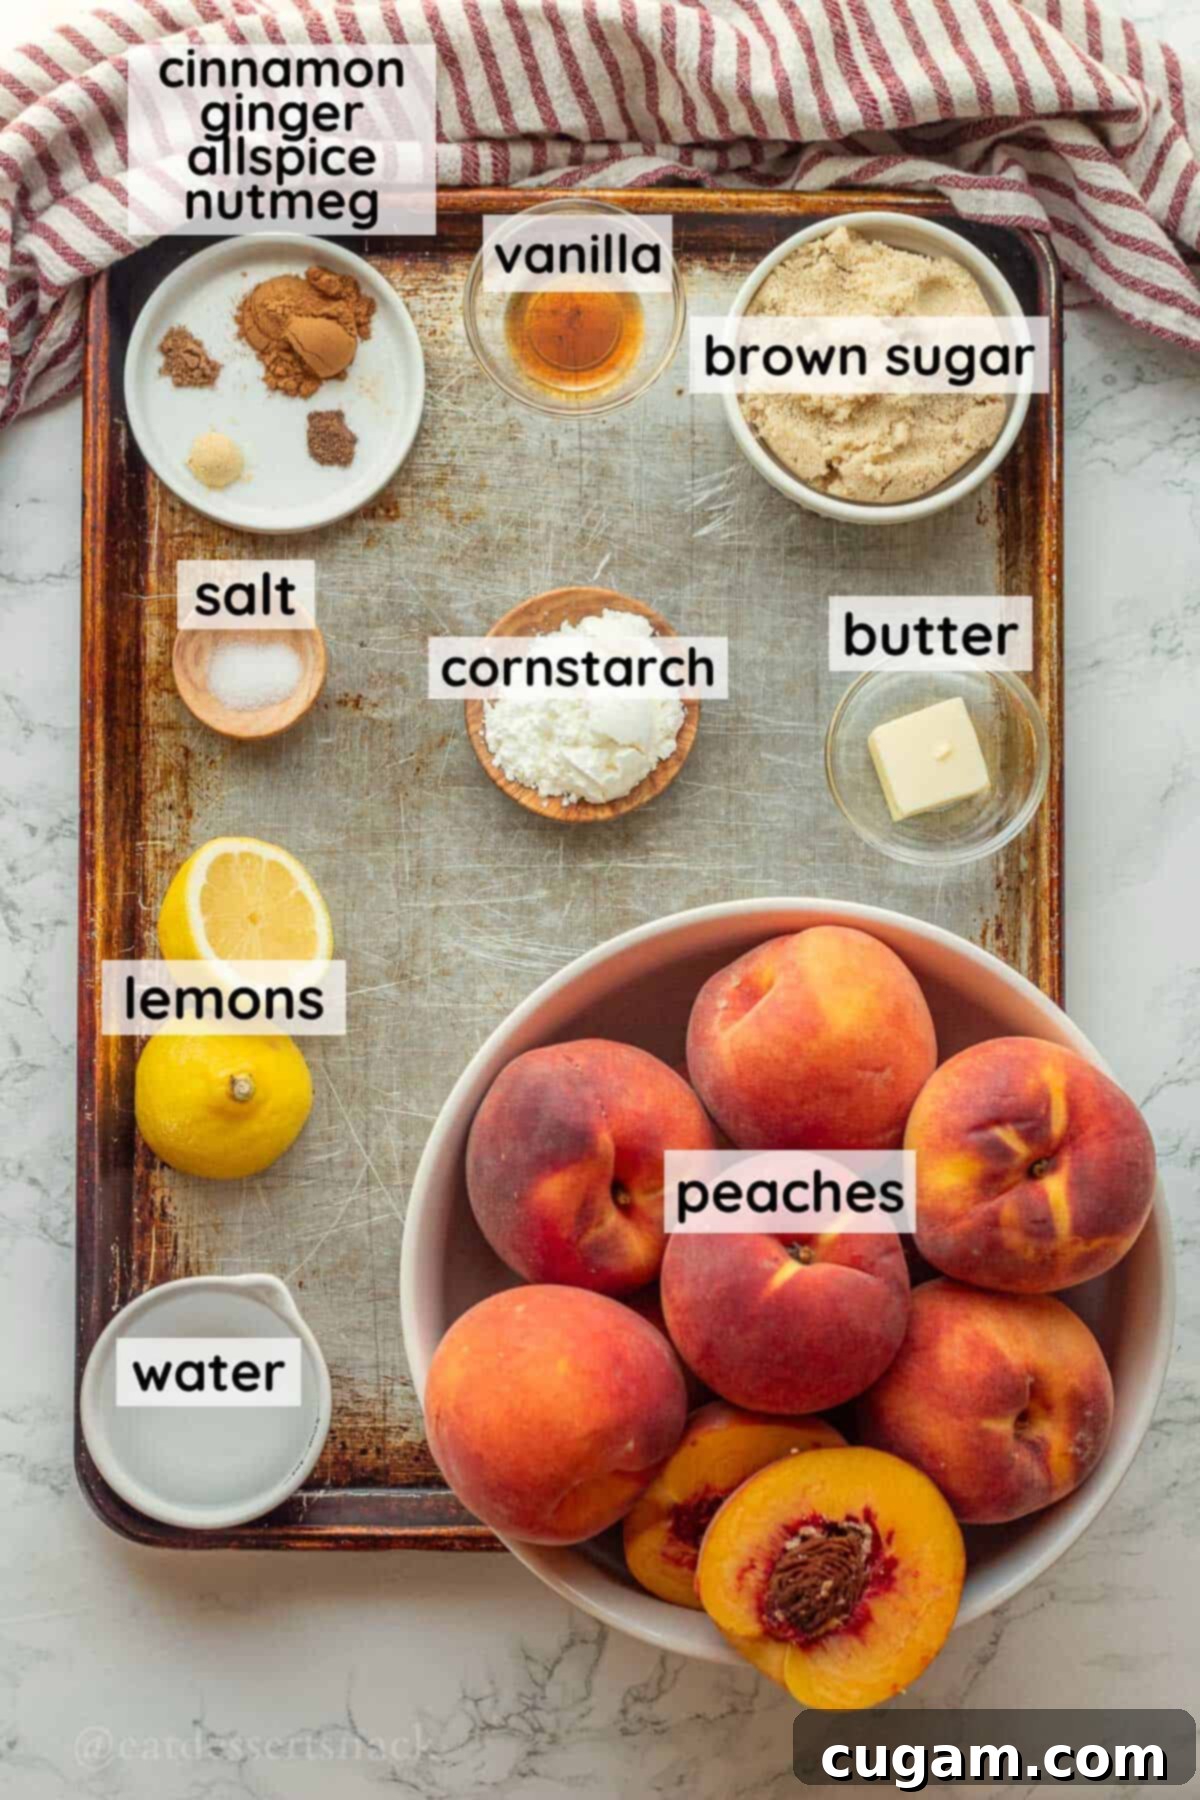
- Peaches: The heart of our filling! I typically opt for **yellow-flesh peaches** due to their classic peach flavor and beautiful color, but **white-flesh peaches** or even **nectarines** (which are essentially fuzz-less peaches) are equally delightful and can be used interchangeably. For the best texture, choose peaches that are ripe but still slightly firm. Slightly underripe peaches will release less juice, which can be an advantage, but they still work well. Frozen peaches are a fantastic year-round option; however, be aware that their texture might be slightly softer once cooked, as they are often harvested when a little underripe for freezing. Ensure frozen peaches are thawed and drained before use to manage excess moisture.
- Brown Sugar: This isn’t just a sweetener; brown sugar adds wonderful caramel notes and a depth of flavor that complements the peaches beautifully, contributing to a richer, more complex taste profile compared to granulated sugar alone.
- Lemon Juice: A splash of fresh lemon juice is essential. It brightens the overall flavor of the pie filling, preventing it from tasting overly sweet and truly enhancing the natural tang and sweetness of the peaches. It also helps to prevent browning of the fruit.
- Cornstarch: My preferred thickener for this recipe. Why cornstarch? Unlike flour, cornstarch creates a clearer, glossier gel that doesn’t dilute the delicate peach flavor or make the filling opaque. It also avoids the grainy texture that tapioca can sometimes leave if not fully dissolved or ground. Important for canning: If you’re considering canning this filling for long-term storage, it is crucial to use ClearJel, as it’s the only thickener approved by the USDA for safe home canning of fruit fillings due to its stability under high heat and acidity.
- Spices (Cinnamon, Ginger, Allspice, Nutmeg): A carefully selected blend of warm spices elevates the peach flavor without overpowering it. Cinnamon is a must-have for its comforting aroma, while a touch of ginger adds a subtle warmth. Allspice and nutmeg contribute complex, earthy undertones. If you’re not a fan of nutmeg or allspice, feel free to omit them, or experiment with a pinch of cloves for a different warm note. When adding spices, it’s always best to start with a small amount and taste, adding more if desired, to suit your personal preference. A little salt also enhances the sweetness and fruit flavor.
For precise measurements and quantities, please refer to the detailed recipe card below.
🥣 Choose Your Thickener for Peach Pie Filling
The choice of thickener is critical for achieving the perfect consistency in your peach pie filling, impacting its texture, clarity, and suitability for various applications, including canning. Here’s a breakdown of common thickeners:
- Cornstarch Peach Pie Filling:
Known for its clear set and quick thickening ability, cornstarch is a popular choice for pie fillings.
- Pros: It’s a common pantry staple, easily accessible, and results in a beautifully clear, glossy gel that showcases the fruit. It thickens rapidly once heated.
- Cons: Can become slightly cloudy if not cooked long enough or if overcooked. It is **not approved for canning** by the USDA because its thickening properties can prevent proper heat penetration, posing a safety risk.
- Tapioca (Minute/Quick) Peach Pie Filling:
Another excellent option that also provides a clear set, similar to cornstarch, but with slightly different properties.
- Pros: Tapioca is very stable with acidic fruits like peaches and holds its shape well even at room temperature, making it ideal for pies that need to sit for a while. It gives a slightly “chewier” fruit texture.
- Cons: Unless finely ground or soaked, quick tapioca can sometimes leave small, visible bits or a slightly crunchy texture if not fully cooked.
- Flour-Thickened Filling:
A more traditional, rustic approach to thickening pie fillings.
- Pros: Flour is a forgiving thickener and a universal pantry item.
- Cons: You need about twice as much flour as cornstarch to achieve the same thickening power. It tends to make the filling opaque and can impart a slight “floury” taste, which can dilute the fresh peach flavor.
- Instant ClearJel (for canning or ultra-clean set):
A modified cornstarch specifically designed for fruit pie fillings, particularly for canning.
- Pros: Offers the best clarity and stability among thickeners, even after freezing and thawing or intense heat. Crucially, it is the **only thickener approved by the USDA for safe home canning** of fruit pie fillings, as it ensures proper heat distribution and prevents separation.
- Cons: It’s a specialty purchase, not always found in standard grocery stores, and can be more expensive than cornstarch or flour.
Quick Summary: If you plan to bake your peach pie immediately or freeze the filling for later baking, cornstarch or tapioca are excellent choices. However, if your intention is to can the filling for long-term shelf-stable storage, **ClearJel is the only safe and recommended thickener.**
🧑🍳 Step-by-Step Instructions: Making Your Peach Pie Filling
Follow these detailed steps to create a luscious, perfectly thickened peach pie filling that will elevate any dessert. Precision in preparation and cooking will ensure the best results.
-
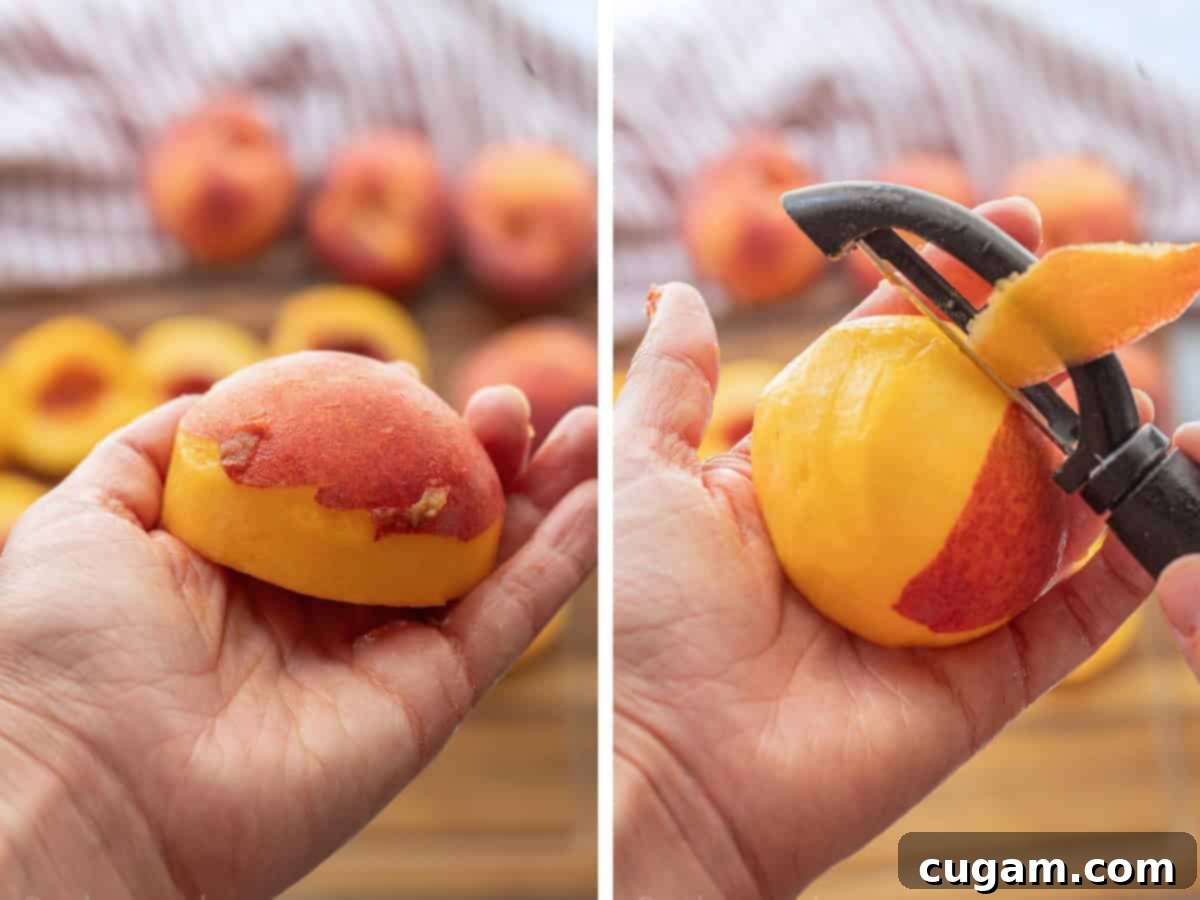
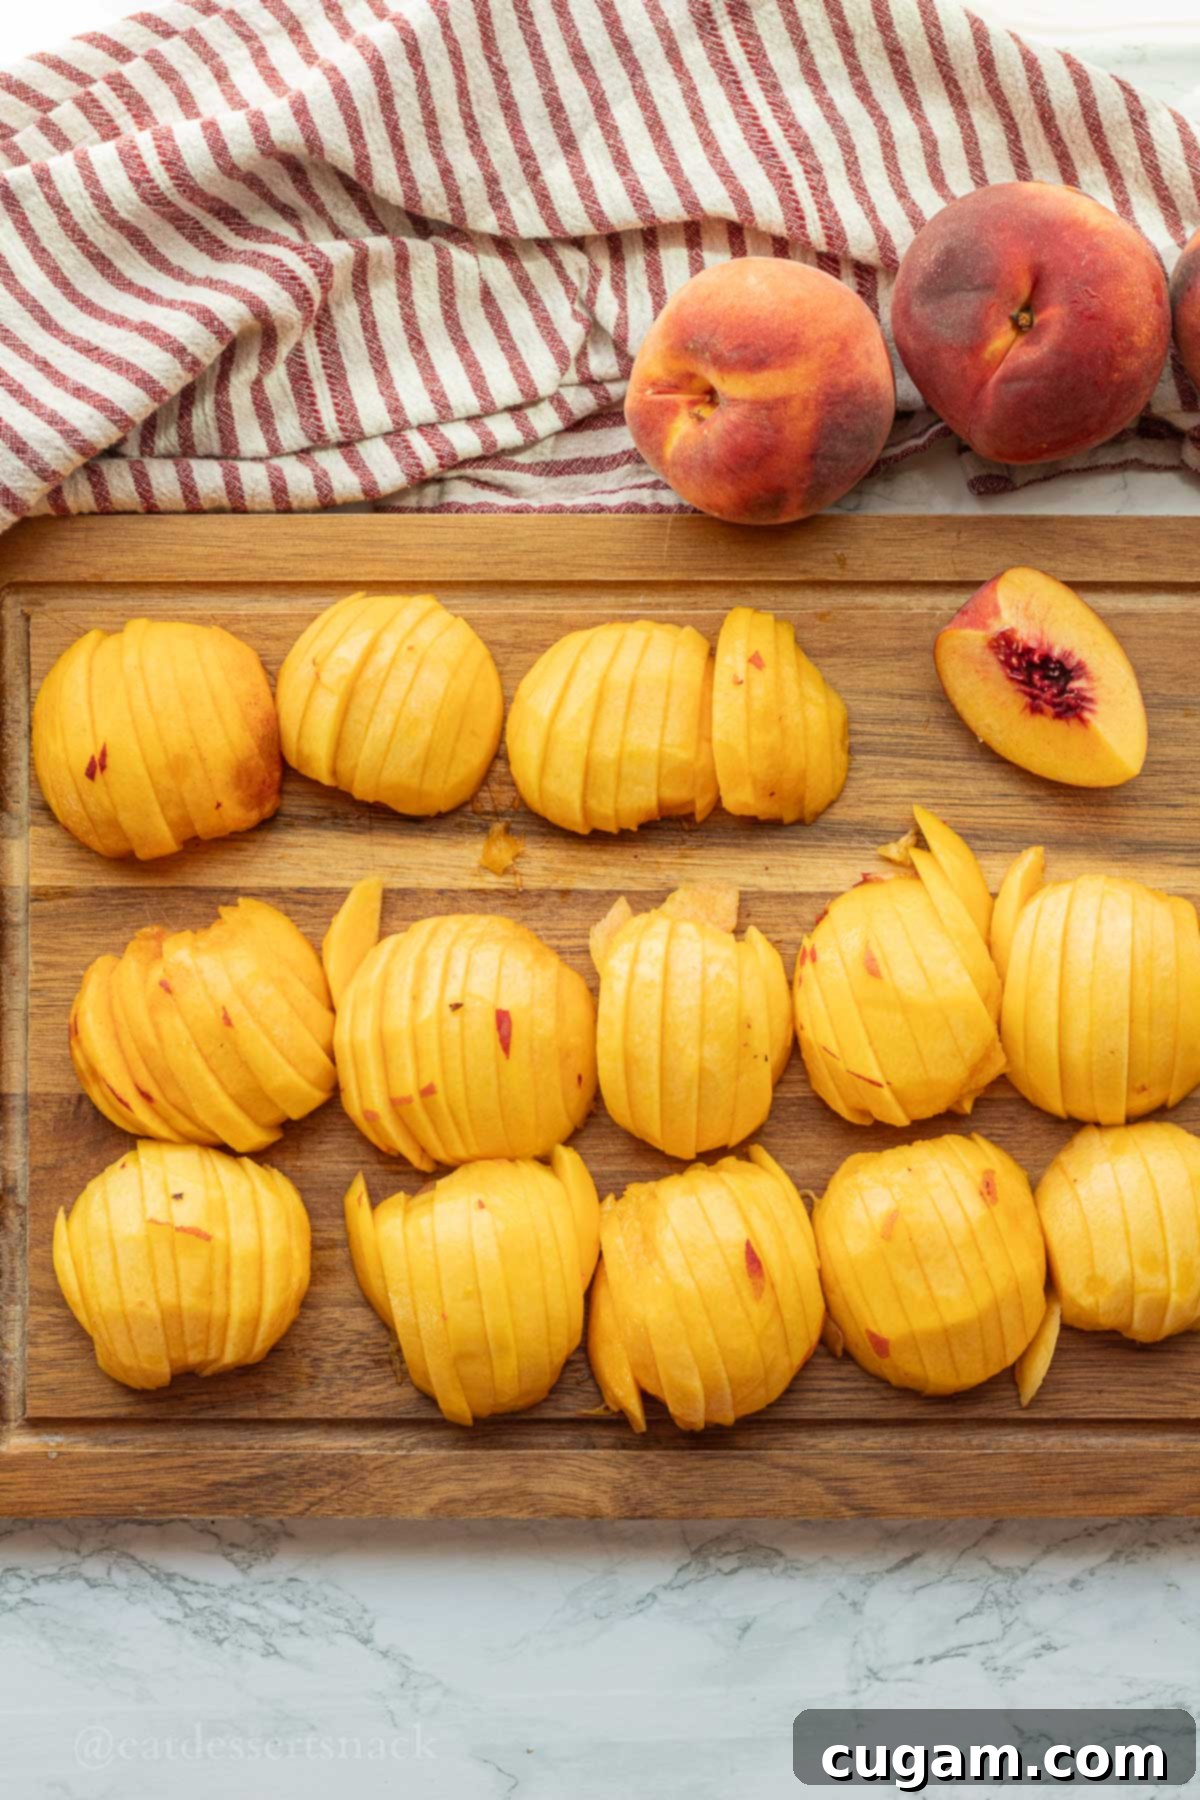
Step 1. Prepare Your Peaches: If using fresh peaches, start by thoroughly washing them. For perfectly smooth filling, you’ll need to peel them. Skip ahead to Step 3 if you’re using pre-peeled, pre-sliced frozen peaches. PRO TIP: The quickest and easiest method I’ve found for peeling peaches is to first slice each peach in half, carefully remove the pit, and then use a sharp vegetable peeler to remove the skin. Start by peeling around the curved bottom half (as shown in the top left image), then continue to peel the top half (as shown in the top right image). This method minimizes waste and makes the process incredibly efficient.
-
Step 2. Slice the Peaches: Once peeled (if necessary) and pitted, slice your peaches into uniform pieces, approximately ¼ inch (0.5 cm) thick. Uniformity ensures even cooking and a consistent texture in your finished filling. Aim for about 2.5 pounds of peaches after they’ve been peeled and pitted, which typically yields a little over 6 cups of sliced fruit. Thicker slices are generally preferred as they hold their shape better during cooking, preventing the peaches from turning into mush.
-
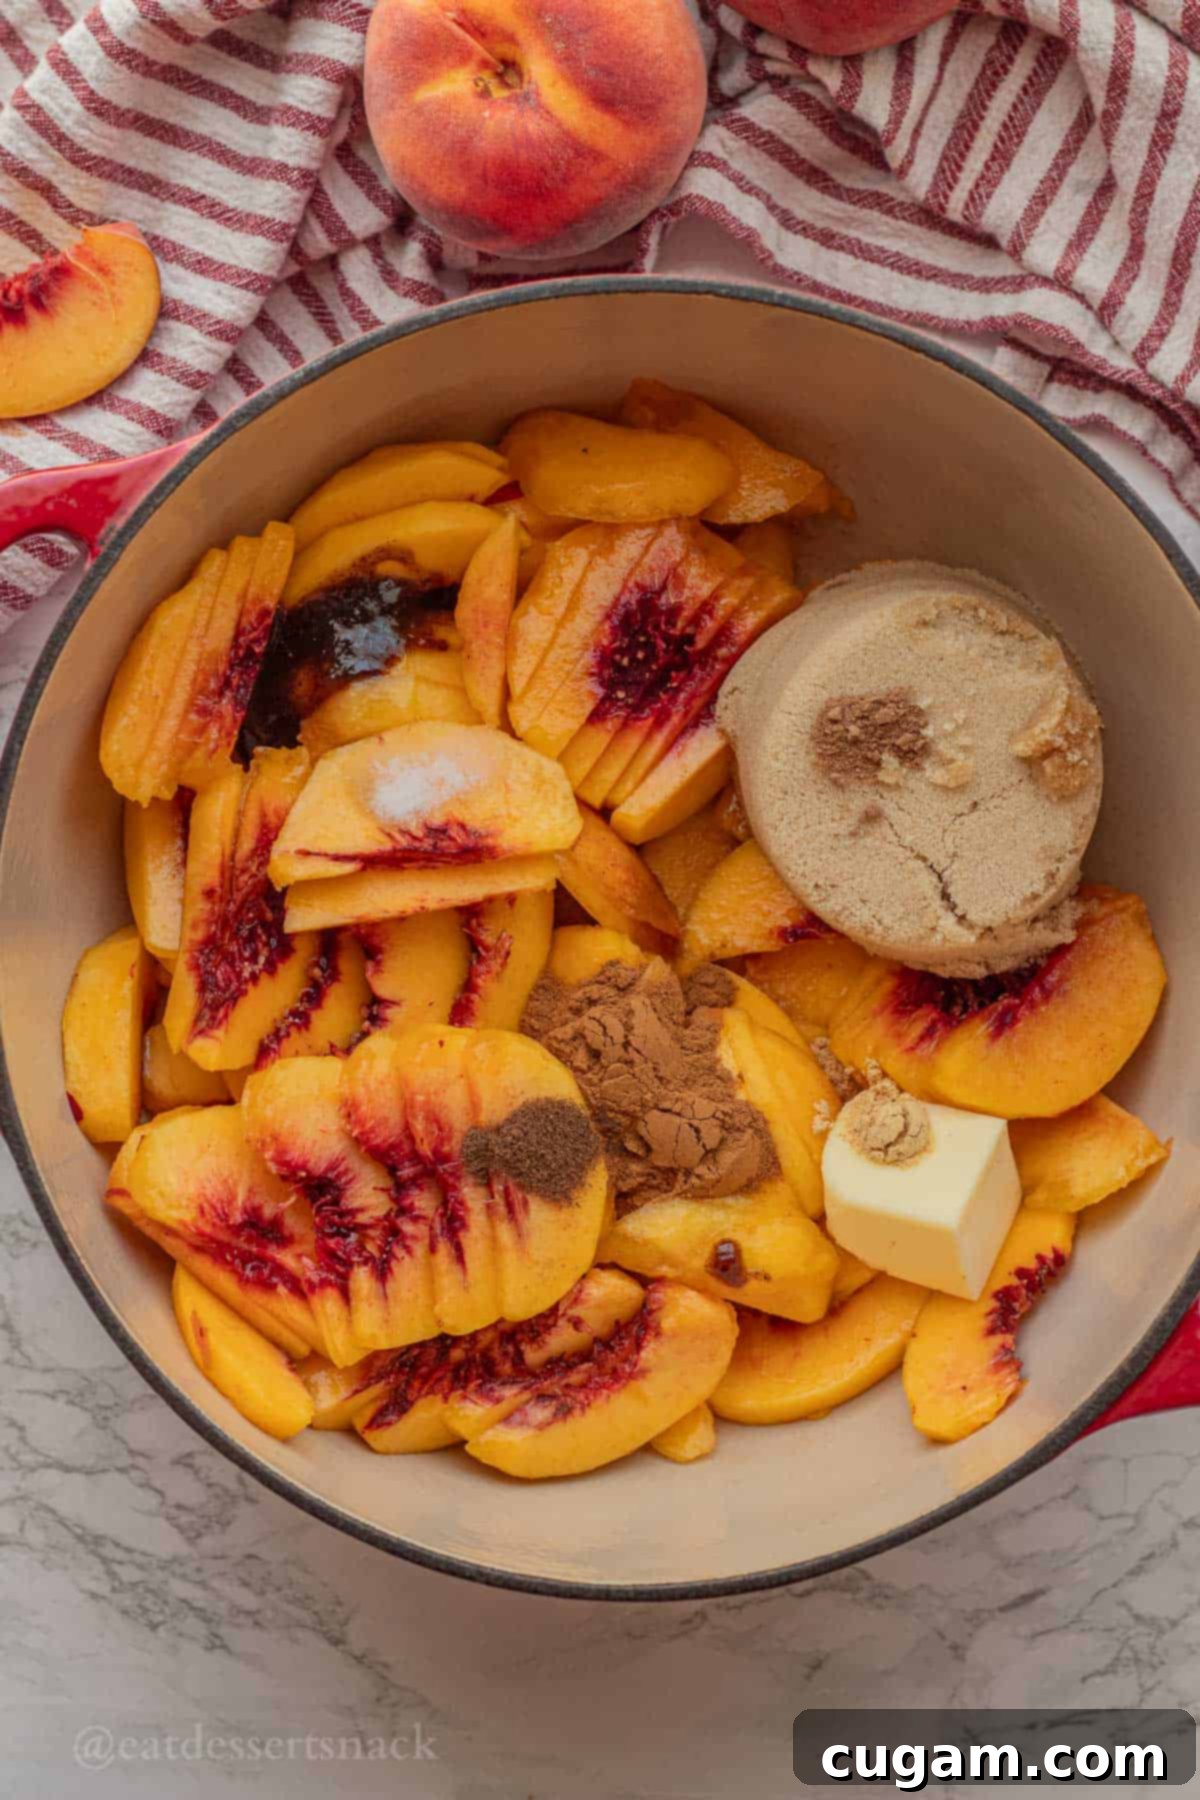
Step 3. Cook the Peaches and Spices: In a large, heavy-bottomed pot, combine your sliced peaches with the brown sugar, melted salted butter, ground cinnamon, a pinch of salt, ground ginger, allspice, and nutmeg. Stir these ingredients together gently to ensure the peaches are evenly coated with the sugar and spices. Place the pot over medium heat and bring the mixture to a gentle simmer. Continue to cook, stirring occasionally, for about 10 minutes. During this time, the peaches will soften considerably and release a significant amount of their delicious juices, creating a wonderfully fragrant base for your filling.
-
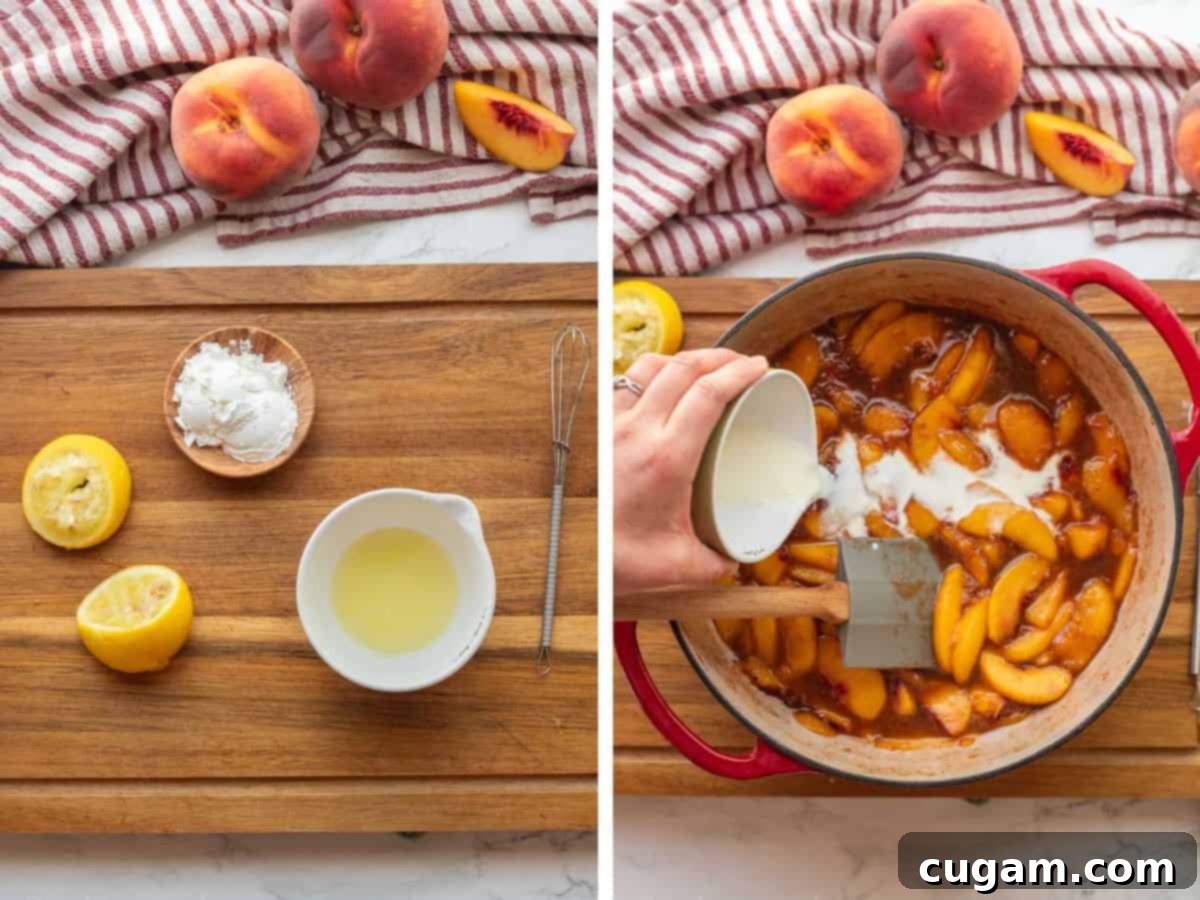
Step 4. Thicken the Filling: In a separate small bowl, whisk together the fresh lemon juice and cornstarch until a smooth slurry forms. The amount of cornstarch needed can vary slightly depending on the ripeness and juiciness of your peaches: use **3 Tablespoons** of cornstarch if your peaches are slightly underripe and less juicy, or **4 Tablespoons** if they are very ripe and producing a lot of liquid. The mixture will be quite thick; if it’s too difficult to whisk, you can remove a tablespoon or two of the hot peach juice from the pot and mix it into your cornstarch slurry to thin it out slightly. Once smooth, pour this cornstarch mixture directly into the simmering peach pie filling in the pot. Stir continuously at a gentle simmer for another minute or two. You will notice the filling rapidly thicken to a glossy, desirable consistency. Ensure it reaches a full boil to activate the cornstarch fully and prevent a starchy taste.
-
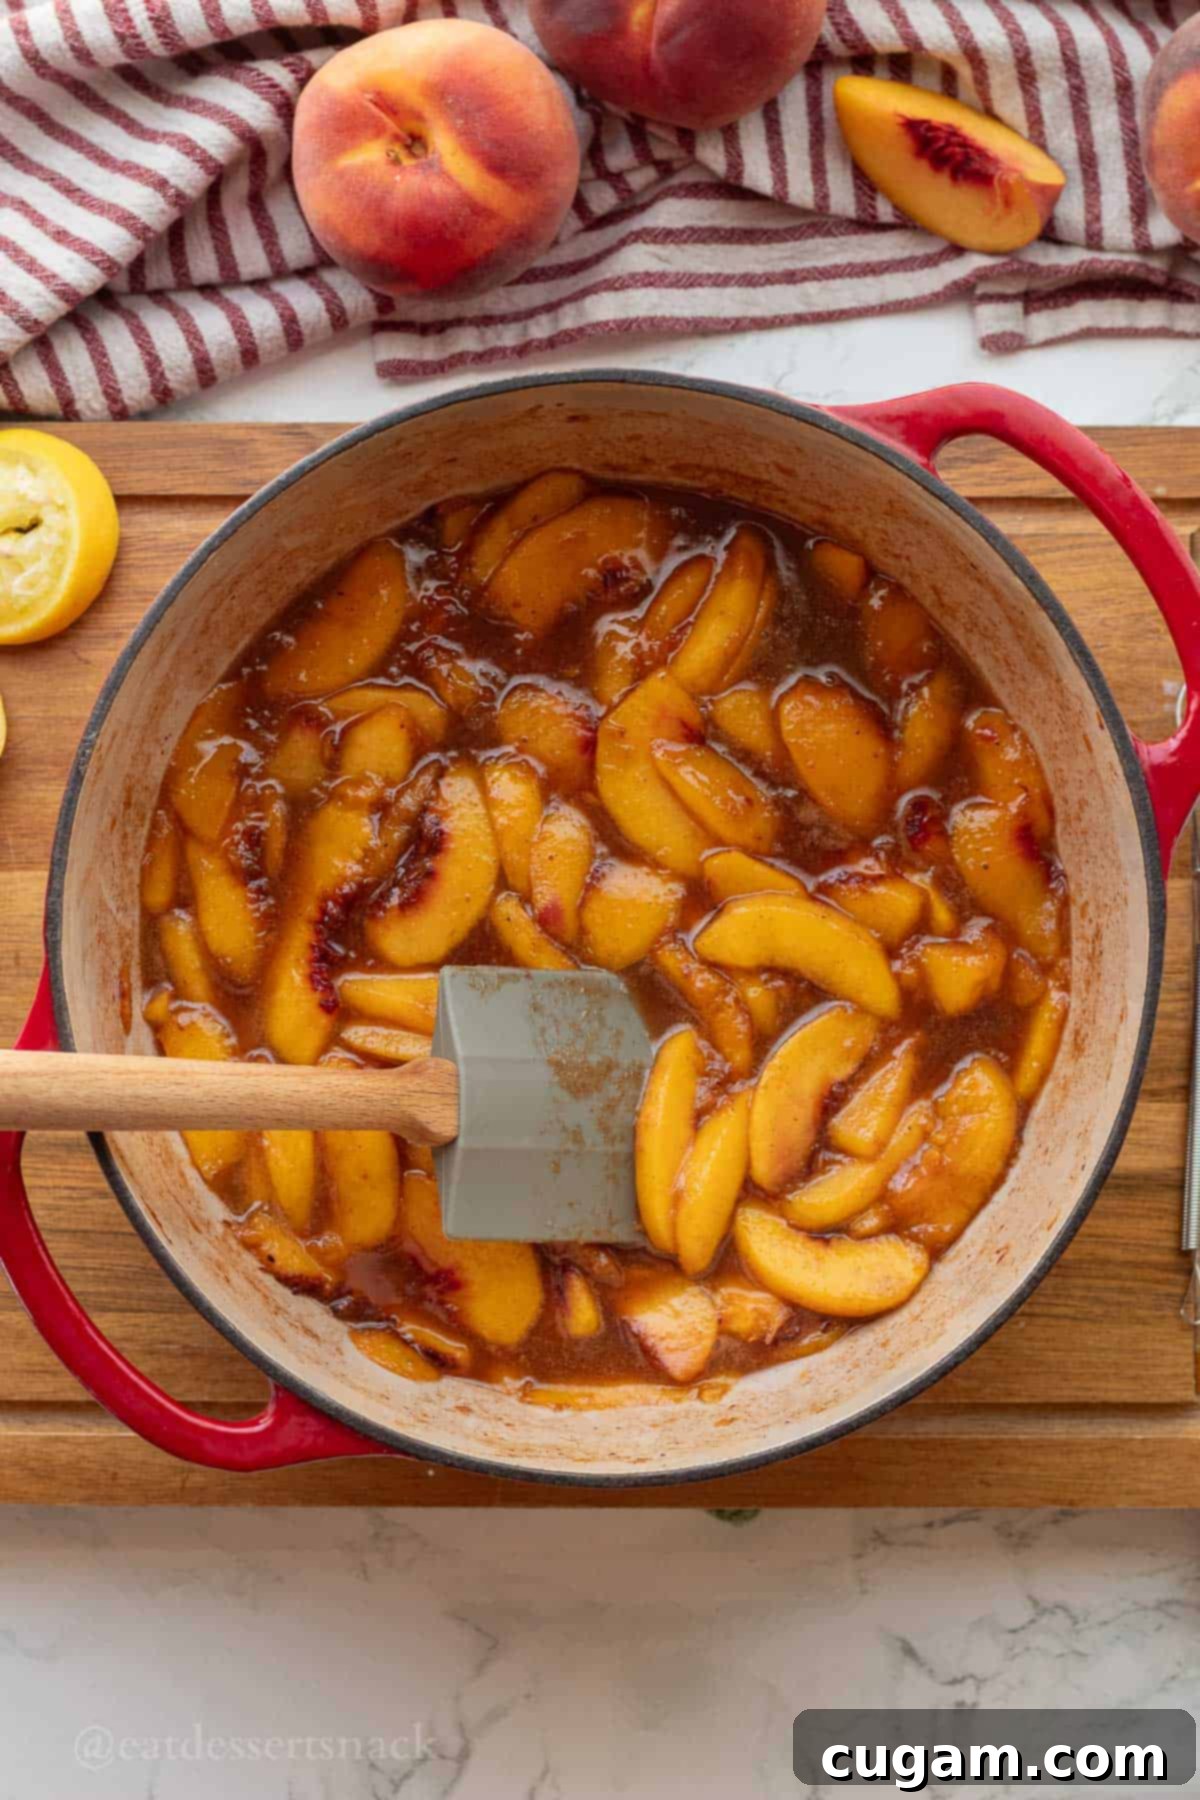
Step 5. Finish with Vanilla: Once the filling has thickened to your liking, remove the pot from the heat. Stir in the vanilla extract, which adds a beautiful aromatic finish that complements the peaches and spices perfectly. The residual heat will warm the vanilla without cooking out its delicate flavor.
-
Step 6. Cool Completely: This step is critical for a perfect pie! Allow the peach pie filling to cool completely to room temperature before you transfer it into a raw pie shell for baking or prepare it for freezing. Cooling prevents the hot filling from melting the butter in your pie crust prematurely, which is a common cause of soggy bottoms. A fully cooled filling helps maintain the flakiness of your crust.
📌 Troubleshooting Your Peach Pie Filling
Even with the best recipes, sometimes things don’t go exactly as planned. Here are solutions to common issues you might encounter with your peach pie filling:
- Runny after baking: If your pie filling remains runny even after baking, it typically means the thickener wasn’t fully activated or there wasn’t enough of it. One common reason is that the center of the pie didn’t bubble sufficiently during baking. To fix this, you can return the pie to the oven and continue baking until the center visibly bubbles. Ensure it **cools fully to set**; many pies appear runny when hot but firm up completely once cooled. For future batches, consider increasing the cornstarch by 10-15% to ensure a firmer set.
- Gummy or opaque texture: A gummy filling usually indicates that too much thickener was used (over-starched) or that flour, if used, was under-cooked, leaving a raw flour taste and cloudy appearance. If using cornstarch, ensure it comes to a full boil to properly activate. For a clearer set, always opt for cornstarch or ClearJel over flour.
- Too sweet or too tart: Taste is subjective, and peaches vary in sweetness. If your filling is too sweet, you can balance it by adding a little more lemon juice at the end. If it’s too tart, stir in a touch more brown sugar, a tablespoon at a time, until the desired sweetness is achieved. Remember, a small pinch of salt can significantly heighten the natural flavor of the peaches and balance both sweetness and tartness, making the fruit taste even more “peachy.”
❄️ Make Ahead, Store, and Freezing Tips for Peach Pie Filling
This homemade peach pie filling is incredibly versatile and perfect for making ahead, storing, and freezing, allowing you to enjoy the taste of summer peaches all year long. Here are some smart tips for storage:
- Freezer Container/Bag Method: Once the filling is completely cooled, portion it into airtight freezer-safe containers or heavy-duty freezer bags. I recommend freezing in 5-cup portions, which is typically enough for one standard 9-inch pie. Label with the date. When you’re ready to bake, simply thaw the filling in the refrigerator overnight before using.
- “Freeze-in-Pie-Pan” Method: For ultimate convenience, line a 9-inch pie pan with aluminum foil, making sure there’s enough overhang to later wrap. Pour the cooled peach pie filling into the foil-lined pan and freeze solid. Once frozen, you can lift the solid block of filling out of the pan using the foil, peel off the foil, and transfer the frozen filling to a freezer-safe bag. When it’s time to bake, simply pop the frozen filling directly into your raw pie crust, simplifying the assembly process.
Pro Tip: When freezing your peach pie filling in containers, always remember to leave a little headspace. Starch gels, like our cornstarch-thickened filling, tend to expand slightly as they freeze, so leaving room prevents containers from cracking or overflowing.
❓Frequently Asked Questions About Peach Pie Filling
Here are answers to some common questions about making and using homemade peach pie filling:
No, for safety reasons, it is not recommended to can peach pie filling thickened with regular cornstarch or flour. The heat distribution during the canning process can be uneven with these thickeners, potentially preventing the killing of all bacteria. For safe home canning, you must use instant ClearJel, which is specifically formulated for high-acid fruit fillings and approved by the USDA.
While this recipe recommends pre-cooking for optimal texture in a baked pie, you actually don’t *have* to cook the filling before freezing. You can mix all the ingredients—peaches, sugar, spices, lemon juice, and cornstarch—together and then freeze the raw mixture. If you choose this method, be sure to thaw the filling in the refrigerator, cook it on the stovetop until thickened, and then cool it completely before assembling and baking your pie.
For a classic peach pie, peeling the peaches is highly recommended for the best results. Peach skins can become tough and chewy during baking, detracting from the smooth, tender texture of the filling. However, for more rustic desserts like a tart or galette, leaving the skins on can add visual appeal and a slight textural contrast, so it’s a matter of preference for those applications.
Yes, you can absolutely use canned peaches. Just make sure they are completely drained of their syrup to avoid an overly sweet or watery filling. Also, reduce the amount of brown sugar in the recipe by half initially, then taste and adjust as needed, since canned peaches are often packed in sugary syrup and are already quite sweet.
Yes, you can prepare a “raw” peach pie filling. To do this, simply toss the sliced peaches with the sugar, spices, lemon juice, and cornstarch (omitting the butter at this stage). Immediately fill your raw pie crust with this mixture and bake. The key is to bake until the **center of the pie visibly bubbles**, which ensures the thickener activates and the peaches soften. This typically takes around 50-60 minutes at 375°F (190°C).
Once your pre-cooked peach pie filling is assembled in a raw pie shell (with a top crust or crumble topping), bake it at 375℉ (190°C) for approximately 45-55 minutes, or until the crust is golden brown and the filling is bubbly. If using a raw filling (not pre-cooked), it will likely take closer to 60 minutes to ensure the peaches are tender and the thickener is fully activated.
🍴 Delightful Serving Ideas for Peach Pie Filling
While peach pie is a classic, this versatile filling can be incorporated into a myriad of other desserts. Get creative with these serving suggestions:
- Cheesecake Topping: Spoon warm or chilled peach filling over a creamy cheesecake for an instant upgrade. It also works wonders swirled into cheesecake brownies for a fruity twist.
- Ice Cream Swirl: Fold the cooled filling into homemade vanilla ice cream, or use it in place of cherry filling for a refreshing no-churn peach cheesecake ice cream.
- Classic Peach Cobbler or Crisp: The filling is perfectly suited for a rustic peach cobbler with a biscuit topping or a crumble-style crisp, baked until golden and bubbly.
- Breakfast Boost: Stir a generous dollop into your morning Peaches and Cream Oatmeal or Greek yogurt for a wholesome and flavorful start to your day.
- Hand Pies and Galettes: Use the filling for individual hand pies, perfect for picnics, or spread it onto a free-form galette for an elegant yet easy dessert.
- Dessert Bars: Replace strawberries with this vibrant peach filling in recipes like Strawberries and Cream Bars for a seasonal variation, or layer it into parfaits with whipped cream and granola.
- Pancakes or Waffles: Warm the filling slightly and serve it over fluffy pancakes, golden waffles, or French toast for a decadent brunch.
- Scones or Muffins: Swirl a small amount into scone or muffin batter before baking for bursts of peachy flavor.
🥧 More Delicious Pie Recipes to Try
If you’ve enjoyed making this peach pie filling, you’ll love exploring these other delightful pie recipes perfect for any occasion:
- Caramel Apple Pie
- Baked Banana Pie
- Pistachio Custard Pie
- Cream Cheese Pumpkin Pie
Did you try this recipe? Make sure to leave a ⭐️ star rating and a comment below the recipe card! Your feedback is invaluable, helping me connect with fellow bakers and assisting other readers in their culinary adventures.
📲 FOLLOW Sara on Social! 👋 Facebook, Instagram, or Pinterest to see the latest from the kitchen!
📝 Printable Recipe
Homemade Peach Pie Filling (Fresh or Frozen)
Ingredients
- 3 lb peaches (2.5 lb once peeled/pitted)
- 1 cup brown sugar
- 2 Tablespoons salted butter
- 2 teaspoons cinnamon
- ¼ teaspoon ground ginger
- ¼ teaspoon salt
- ⅛ teaspoon allspice
- ⅛ teaspoon nutmeg
- 2 Tablespoons lemon juice
- 3-4 Tablespoons cornstarch
- 1½ teaspoons vanilla extract
Instructions
-
Wash and prep 3 lb peaches if using fresh. Skip to Step 4 if using pre-peeled, sliced frozen peaches. TIP: The easiest way for me to peel them is to slice them in half, peel around the bottom, then peel the top.
-
Slice peaches into about ¼ inch (0.5 cm) slices. See note 1. They should equal about 2.5 pounds once peeled and pitted, a little over 6 cups sliced.
-
Combine the sliced peaches with 1 cup brown sugar, 2 Tablespoons salted butter, 2 teaspoons cinnamon, ¼ teaspoon ground ginger, ¼ teaspoon salt, ⅛ teaspoon allspice, ⅛ teaspoon nutmeg, and 1½ teaspoons vanilla extract in a pot. Bring to a simmer and cook for about 10 minutes until the peaches are super juicy and softened.
-
In a small bowl combine the 2 Tablespoons lemon juice and 3-4 Tablespoons cornstarch. (Use 3 Tablespoons of cornstarch if the peaches are underripe and not very juicy, use 4 Tablespoons if the peaches are ripe and juicy.). It will be pretty thick, you can remove a Tablespoon or two of peach juice from the pot to mix into it to thin it out. Pour into the pan with the peach pie filling and stir at a simmer for another minute or two, stirring until thickened.
-
Remove from heat and stir in 1½ teaspoons vanilla extract.
-
Cool completely to room temp before putting into a raw pie shell or freezing. See note 2 & note 3.
Notes
-
- Freezer container/bag: freeze 5-cup portions; thaw in fridge before use
-
- Freeze-in-pie-pan method: line a 9″ pan with foil, pour filling, freeze solid; pop out and bag-drops right into crust later.
Nutrition

Hi, I’m Sara!
Registered Nurse by day, food blogger by weekend. Perfect dip tester & snack quester. I love short walks on the beach and long naps. Sharing my love for food, one bite at a time.
